
I tried setting up an Alphanumeric Sender ID in Twilio's Messaging Service and sending a message

This page has been translated by machine translation. View original
Hi, I'm Subaru.
This time, I used Twilio's Messaging Service to set an Alphanumeric Sender ID as the SMS sender and actually sent an SMS to verify the result.
Introduction
When sending SMS to Japan with Twilio, the sender is basically an international number (such as +1). From the recipient's perspective, they receive an SMS from an unfamiliar foreign number, so for use cases like notification services, "how the sender appears" is actually an important consideration. A common scenario is sending a test message only to find that the sender appears as an overseas number, causing recipients to be suspicious and not open it, or mistaking it for spam SMS.
This is where Alphanumeric Sender ID (Alpha Sender ID) comes in handy. Instead of a phone number, it allows you to display an alphanumeric string like "MyService" as the sender, with the advantage of showing your service name or company name directly as the sender. This time, I'll register one in the Messaging Service's Sender Pool and verify the display in the sender field after actually sending an SMS.
Prerequisites & Verification Environment
To proceed with the steps in this article, the following environment and permissions are required.
- A Twilio account must already be set up
- Account permissions must be Developer or higher (Support/Billing Manager roles cannot perform creation operations)
- For comparison purposes, at least one phone number capable of sending SMS (international number) must already be purchased
Alpha Sender ID availability and pre-registration requirements vary by country. According to Twilio's country support table, Japan is included among countries where it is "available (no pre-registration required)," so you can proceed with the setup without waiting for review, as in this case.
Setup
Enable Alphanumeric Sender ID
Before adding an Alpha Sender, confirm that the Alphanumeric Sender ID feature itself is enabled on the account side. Navigate to Messaging > Settings > General in the Twilio Console and verify that "Alphanumeric Sender ID" is set to Enabled on the Messaging Settings page. If it is Disabled, enable it.

Create a Messaging Service
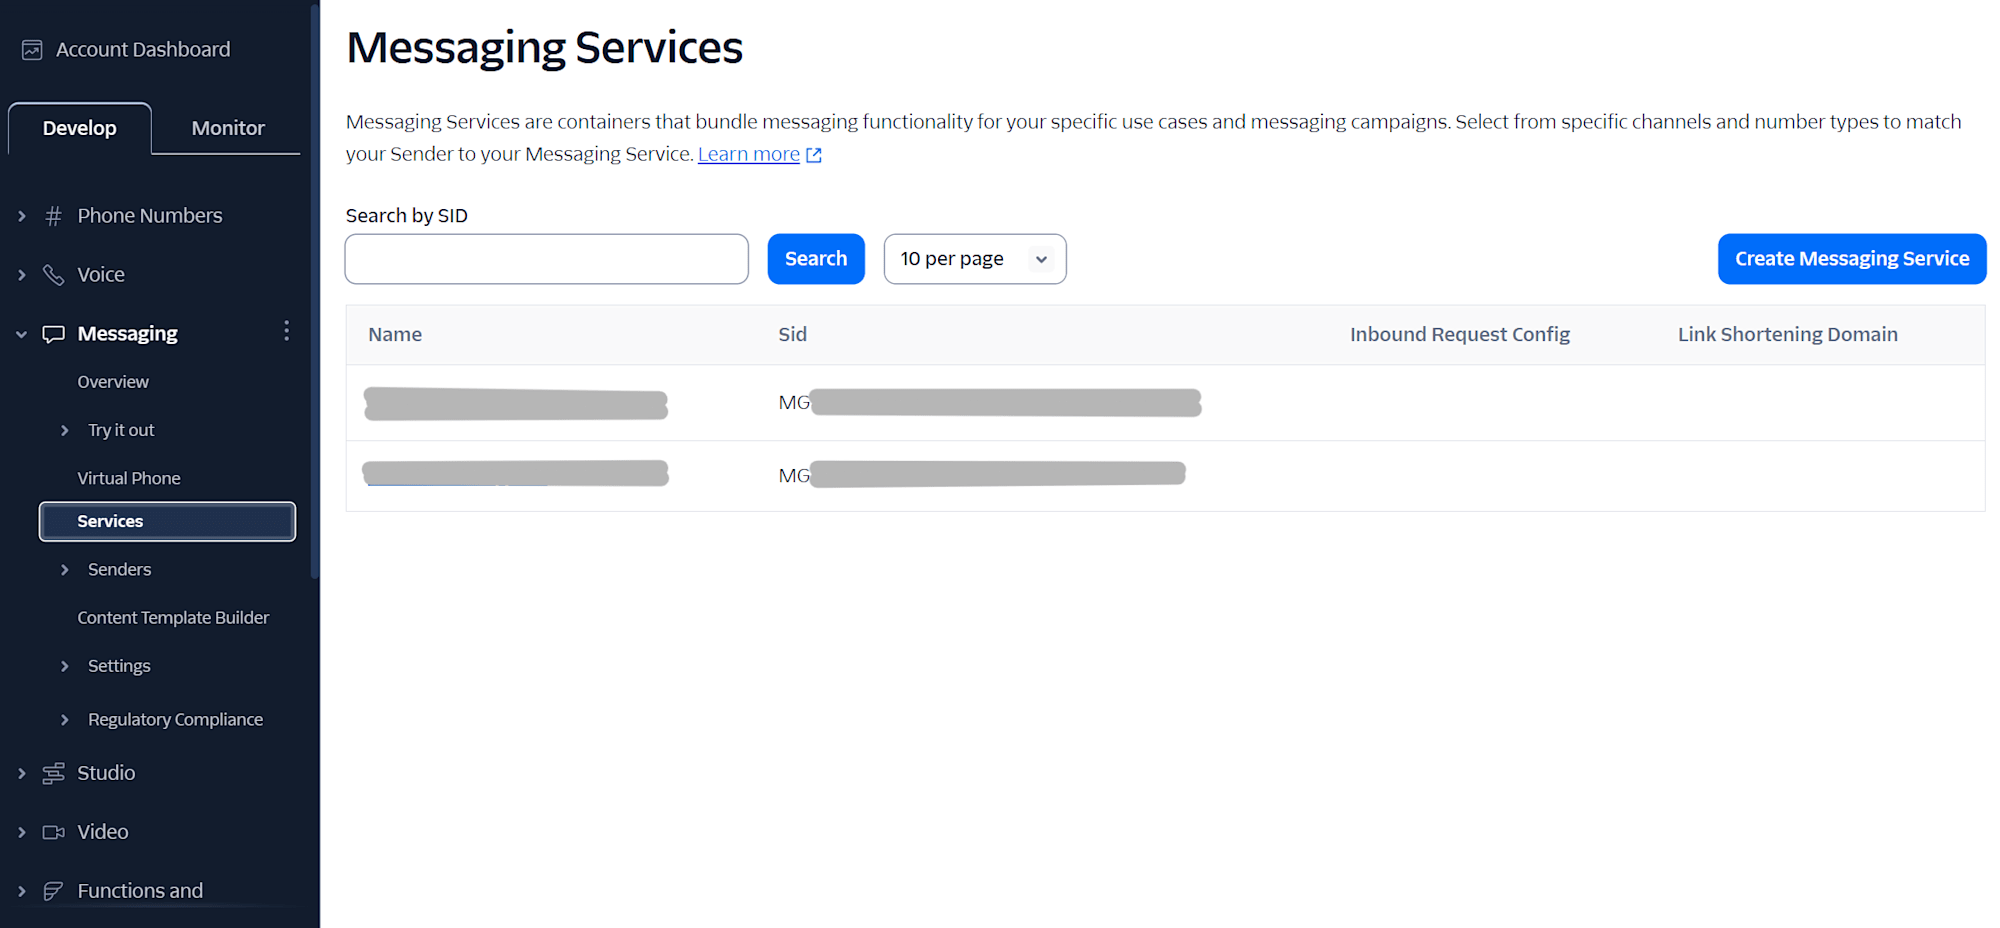
Navigate to Messaging > Services from the Twilio Console sidebar and click the "Create Messaging Service" button.
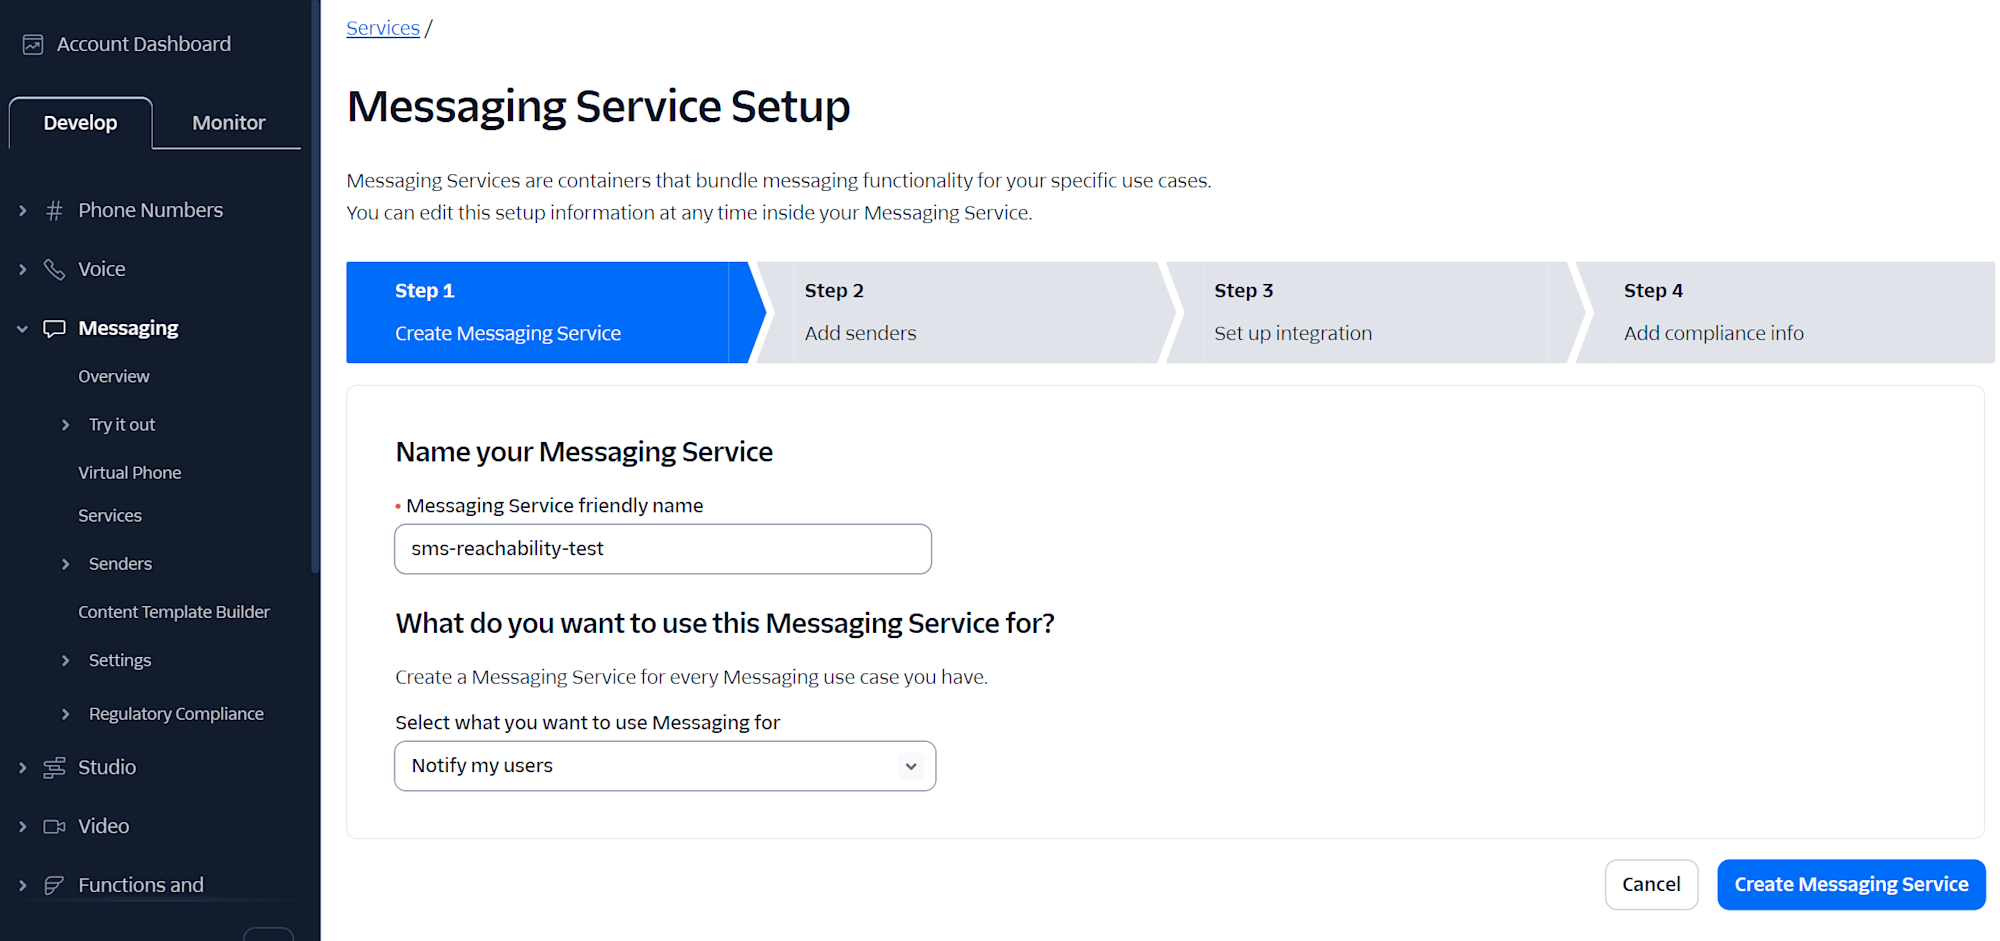
Enter any name in the Messaging Service friendly name field (e.g., sms-reachability-test), select an appropriate option for the use case (What do you want to use this Messaging Service for?), and click "Create Messaging Service."
Register an Alphanumeric Sender ID in the Sender Pool
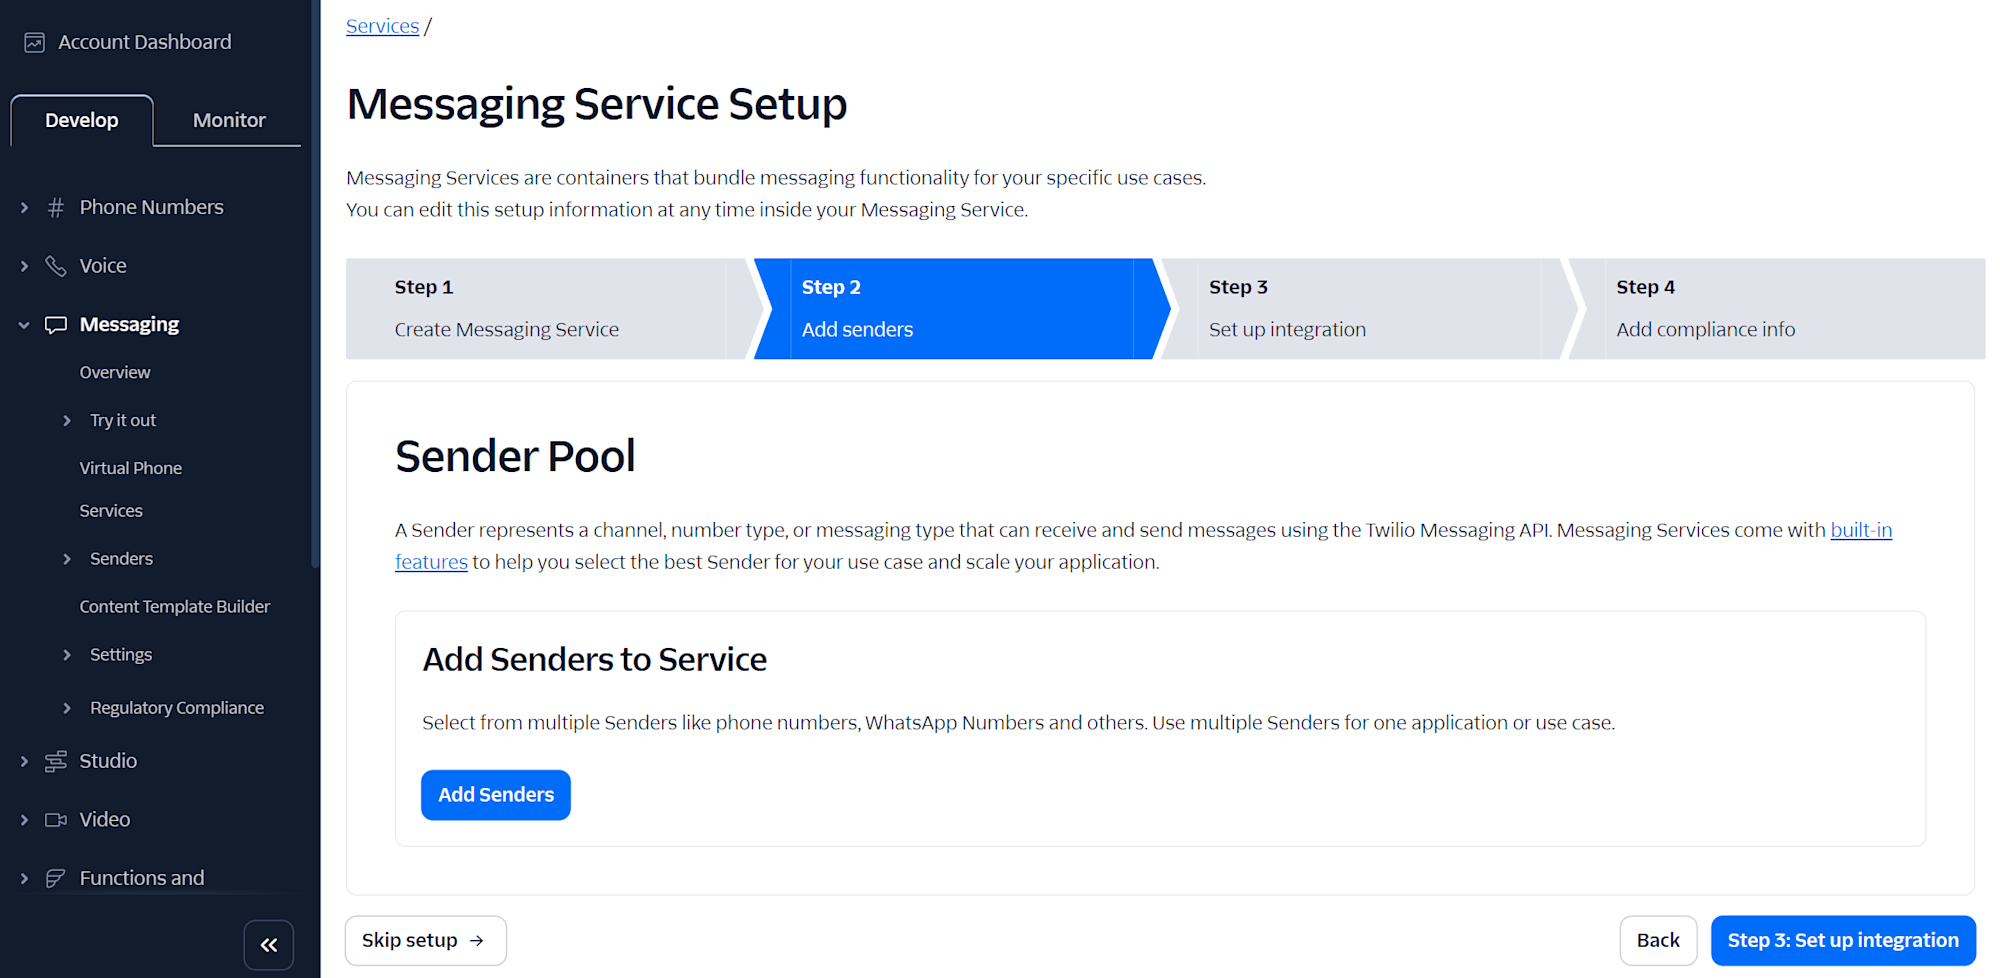
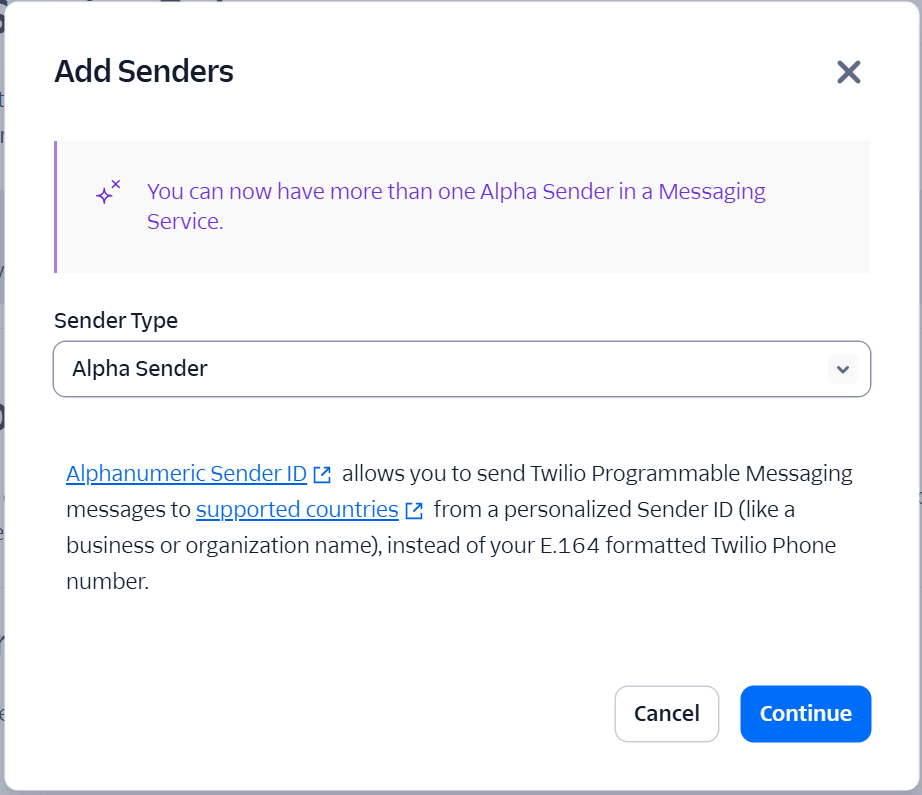
Next is the Sender Pool configuration. Click "Add Senders" and select "Alpha Sender" as the Sender Type. After selecting, click Continue to proceed.
Enter the string you want to use as the sender (e.g., MyService) and click "Add Alpha Sender" to add it.
Alpha Sender IDs have constraints: up to 11 characters, uppercase and lowercase letters, numbers, and some symbols are allowed (refer to this Twilio support article for detailed format requirements).
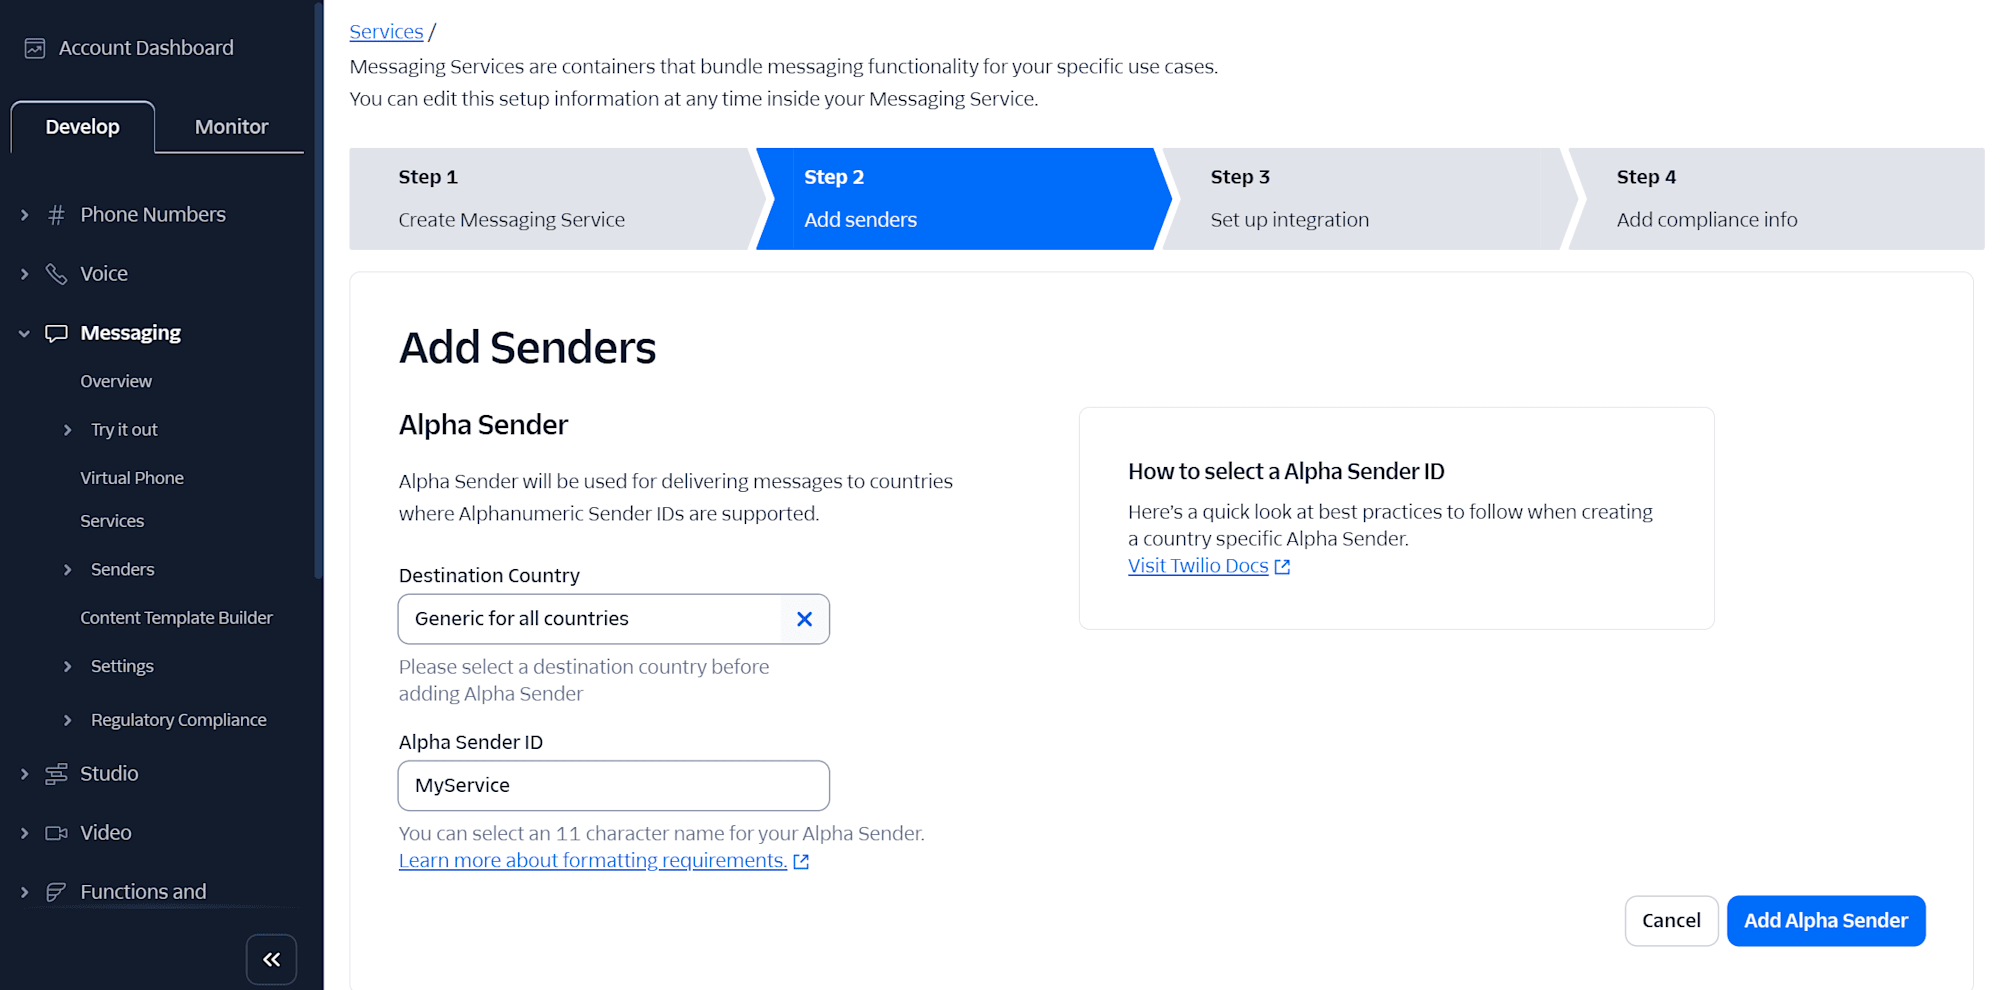
Once the Alpha Sender ID has been added, since we won't be configuring Step 3 "Set up integration" or Step 4 "Add compliance info" this time, click "Skip setup" at the bottom of the screen to finish the configuration.
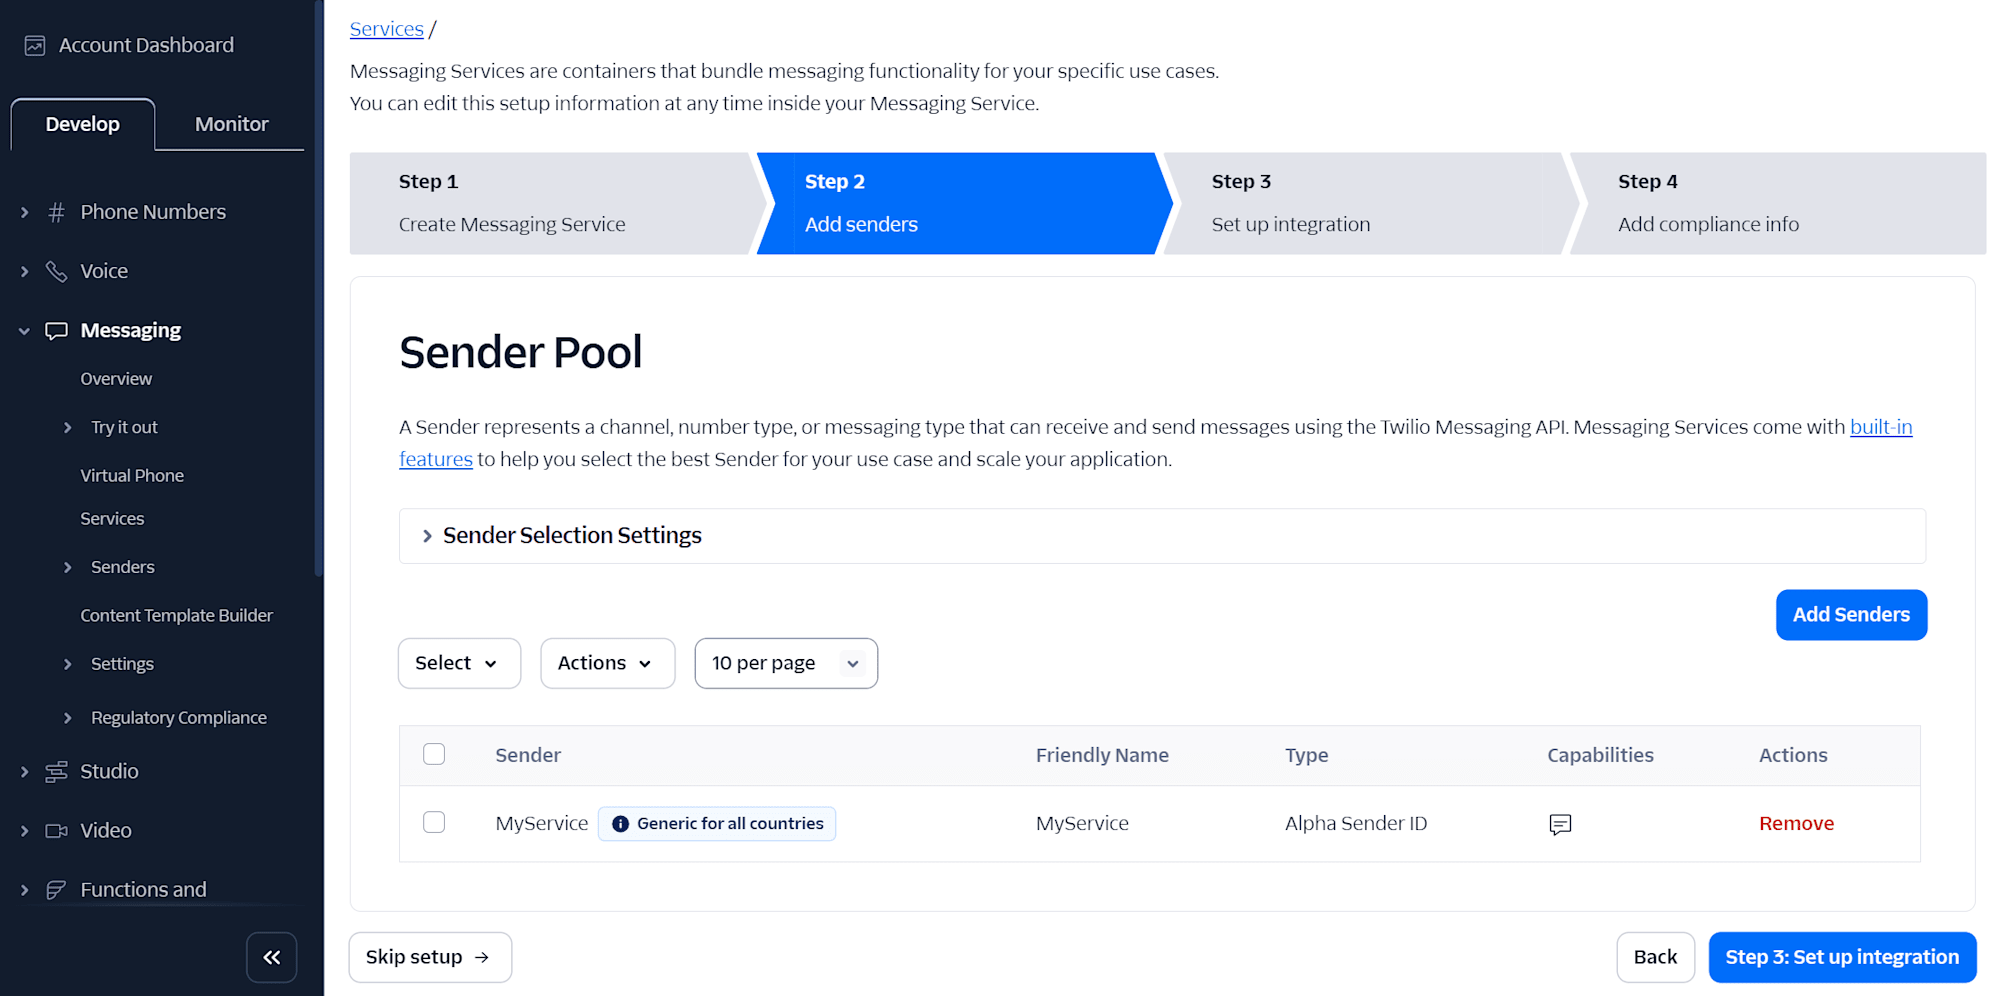
Check the Messaging Service SID
Once creation is complete, you can find the SID starting with MG (Messaging Service SID) on the Messaging Service's "Properties" screen. Using this SID allows automatic selection from the Sender Pool instead of specifying a From number individually at send time.
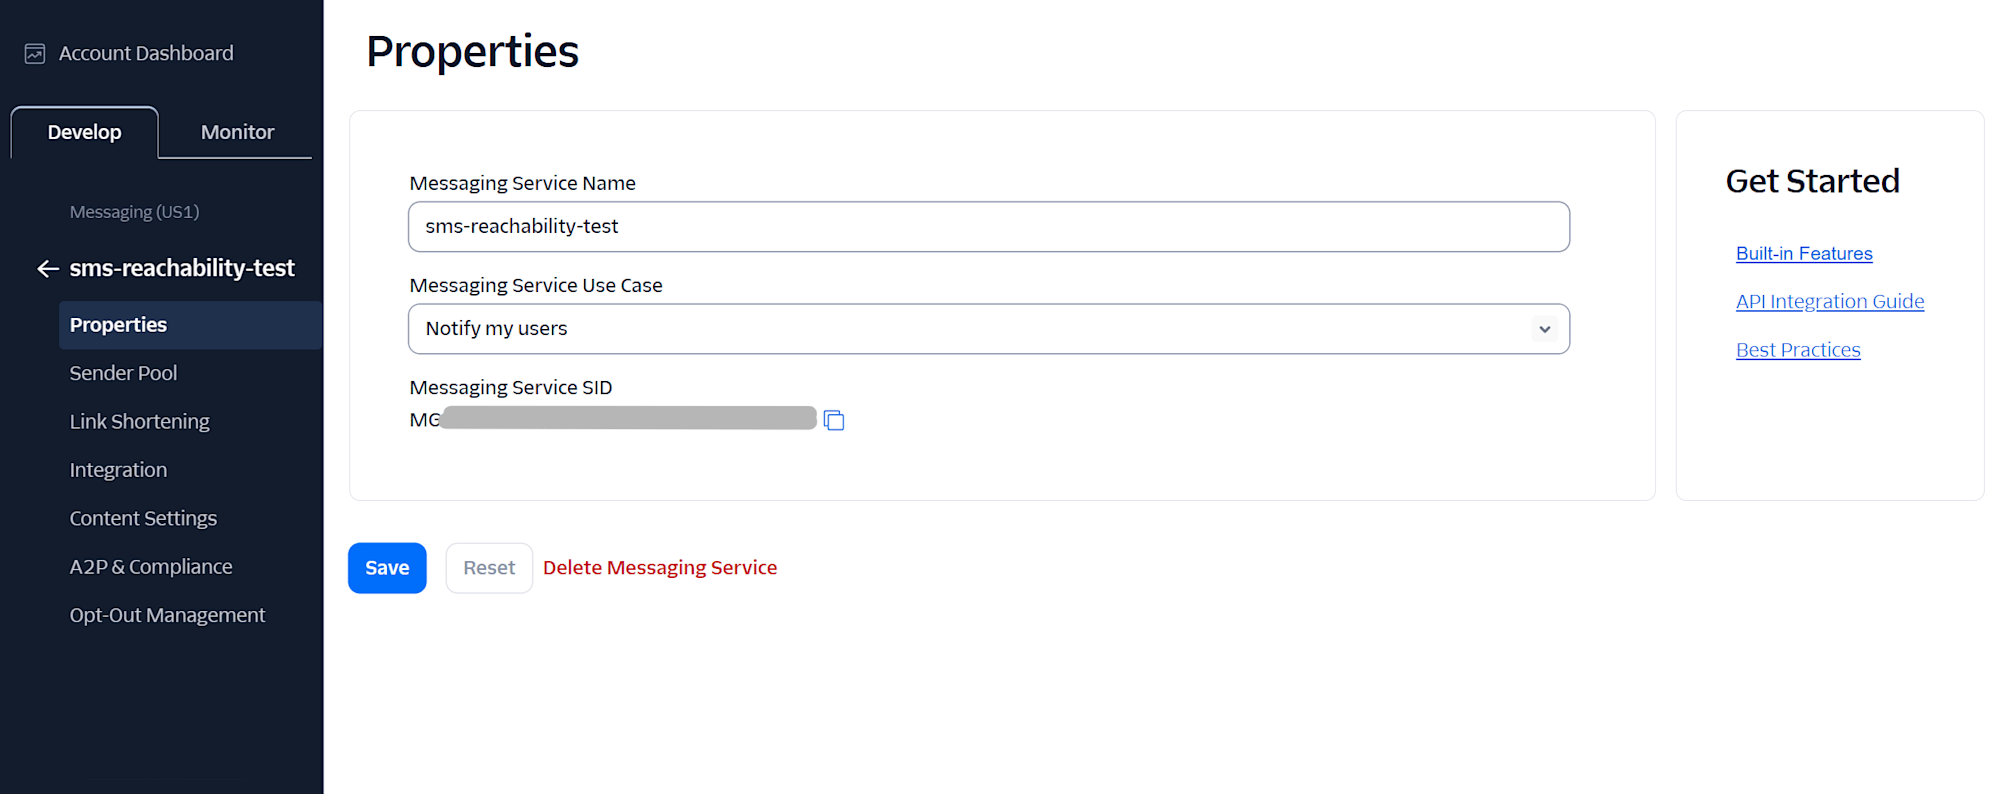
Note that "Set up integration" (Status Callback URL), which automatically notifies delivery results via Webhook, is not configured this time. Since the purpose is simply to verify how the SMS is delivered and displayed, it is not required, and delivery results can be checked afterward in the Console's Message Logs.
Verification
Now let's actually send a message and verify. When you specify the Messaging Service SID to send, the message will be sent from one of the senders registered in the Sender Pool (either an Alphanumeric Sender ID or a phone number).
To call the API with curl, you need the Account SID and Auth Token. Open the "Account Dashboard" in the upper left of the Twilio Console and find the Account SID (a string starting with AC) from the "Account Info" section on the right side of the screen. The Auth Token is masked by default, so click "View" or the eye icon to display and copy it.
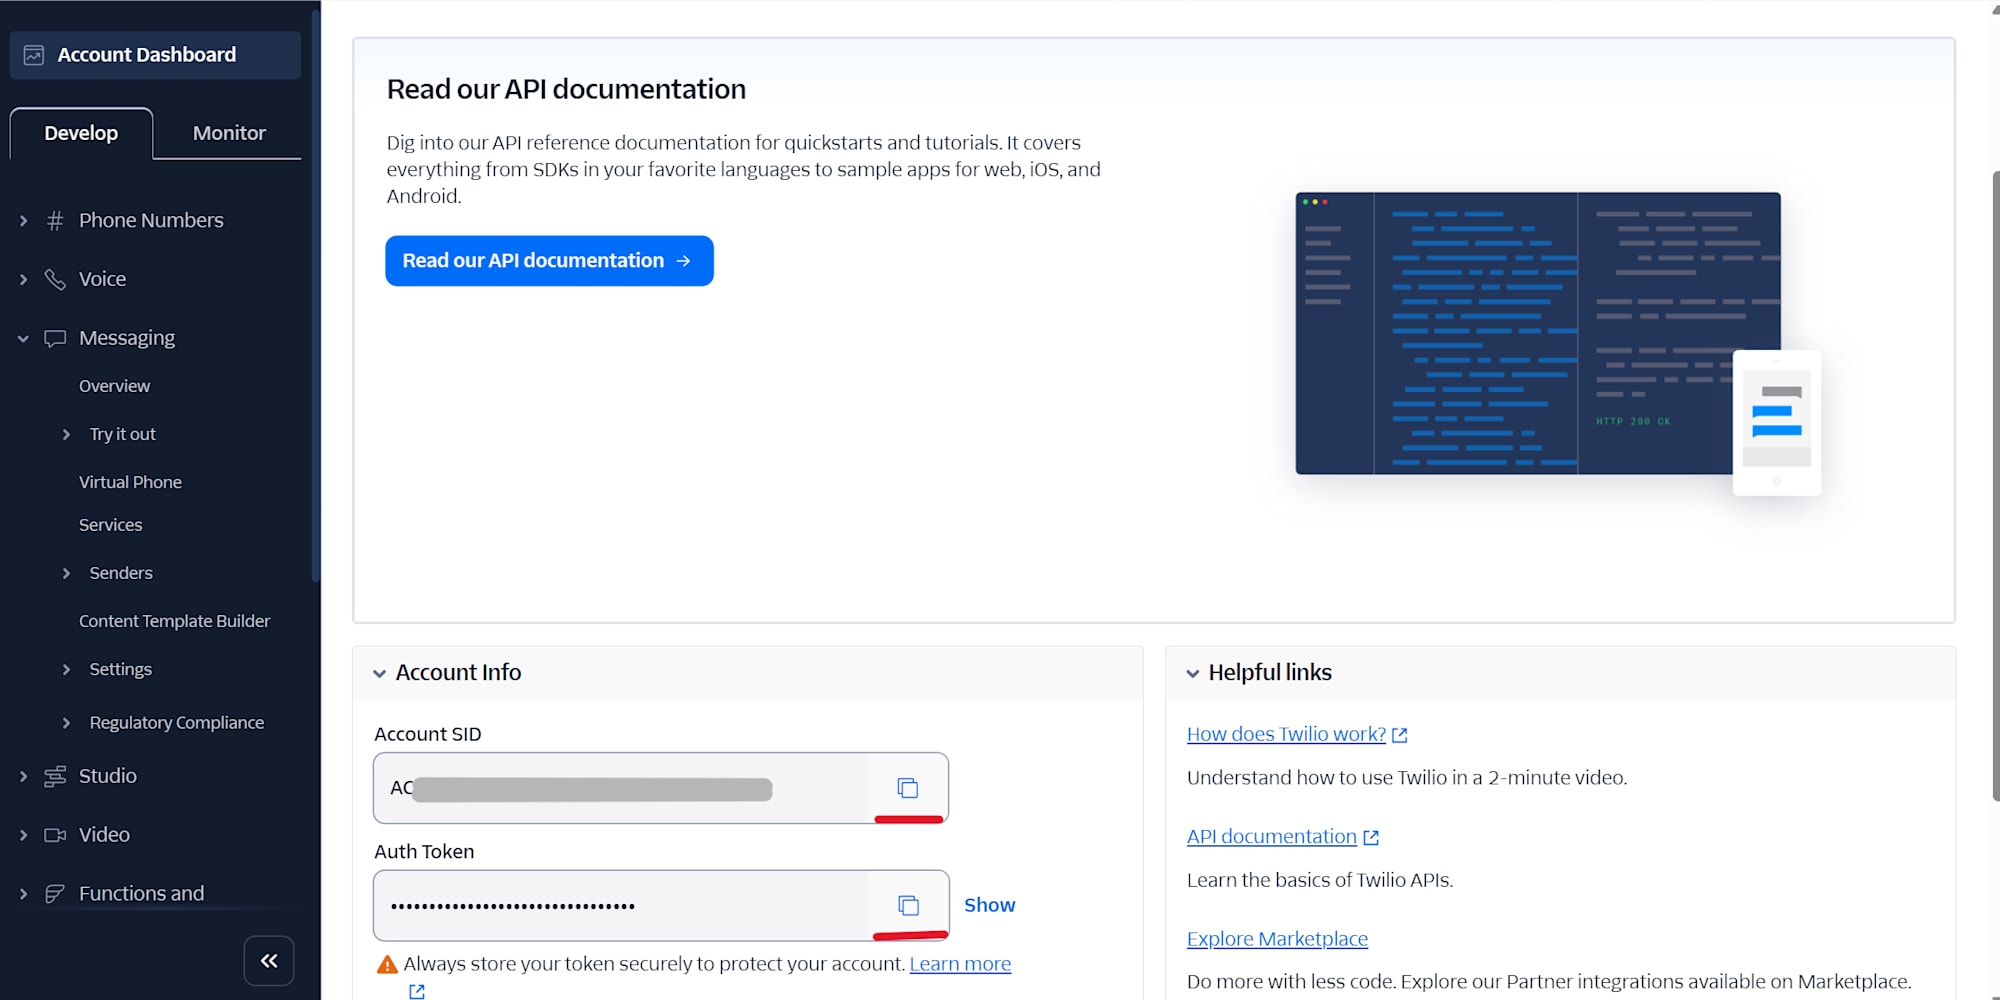
Once confirmed, setting them as environment variables keeps your commands clean.
For Mac/Linux (Terminal):
export TWILIO_ACCOUNT_SID="ACxxxxxxxxxxxxxxxxxxxxxxxxxxxxxxxx"
export TWILIO_AUTH_TOKEN="your_auth_token_here"
For Windows (PowerShell):
$env:TWILIO_ACCOUNT_SID = "ACxxxxxxxxxxxxxxxxxxxxxxxxxxxxxxxx"
$env:TWILIO_AUTH_TOKEN = "your_auth_token_here"
Once set, run the following command. Replace the phone number in the To field with the actual phone number where you want to receive the SMS (in international format). For Japanese mobile numbers, the format is 090-1234-5678 → +819012345678 (remove the leading 0 and add +81). Also replace the MessagingServiceSid portion with the SID starting with MG that you confirmed earlier.
curl -X POST "https://api.twilio.com/2010-04-01/Accounts/${TWILIO_ACCOUNT_SID}/Messages.json" \
  --data-urlencode "To=+819012345678" \
  --data-urlencode "MessagingServiceSid=MGxxxxxxxxxxxxxxxxxxxxxxxxxxxxxxxx" \
  --data-urlencode "Body=【テスト】これはSMS到達性確認のテストメッセージです。" \
  -u "${TWILIO_ACCOUNT_SID}:${TWILIO_AUTH_TOKEN}"
For Windows (PowerShell), it looks like this:
curl.exe -X POST "https://api.twilio.com/2010-04-01/Accounts/$env:TWILIO_ACCOUNT_SID/Messages.json" --data-urlencode "To=+819012345678" --data-urlencode "MessagingServiceSid=MGxxxxxxxxxxxxxxxxxxxxxxxxxxxxxxxx" --data-urlencode "Body=【テスト】これはSMS到達性確認のテストメッセージです。" -u "$($env:TWILIO_ACCOUNT_SID):$($env:TWILIO_AUTH_TOKEN)"
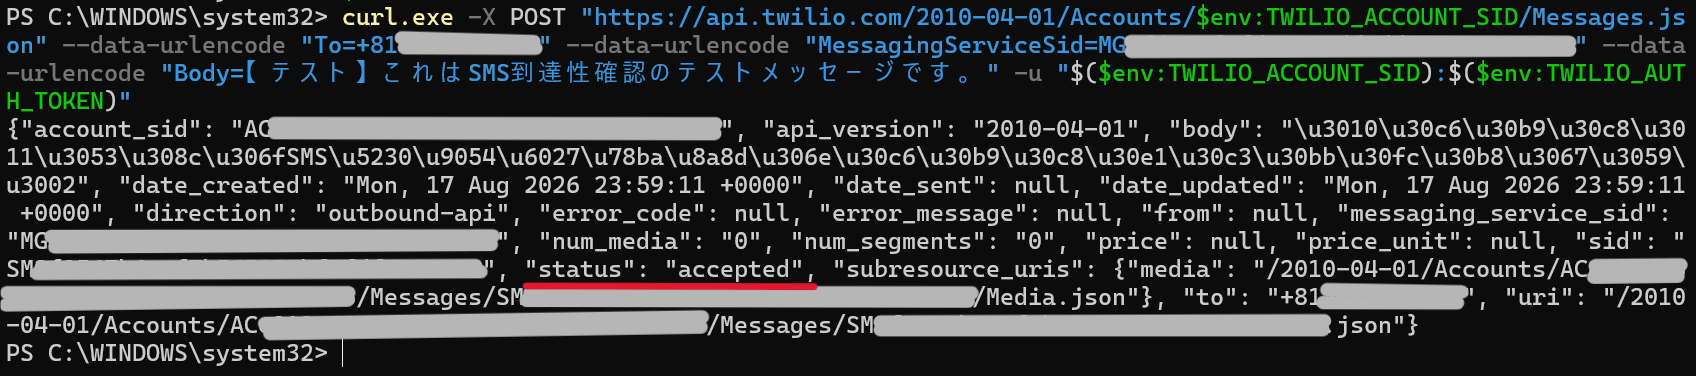
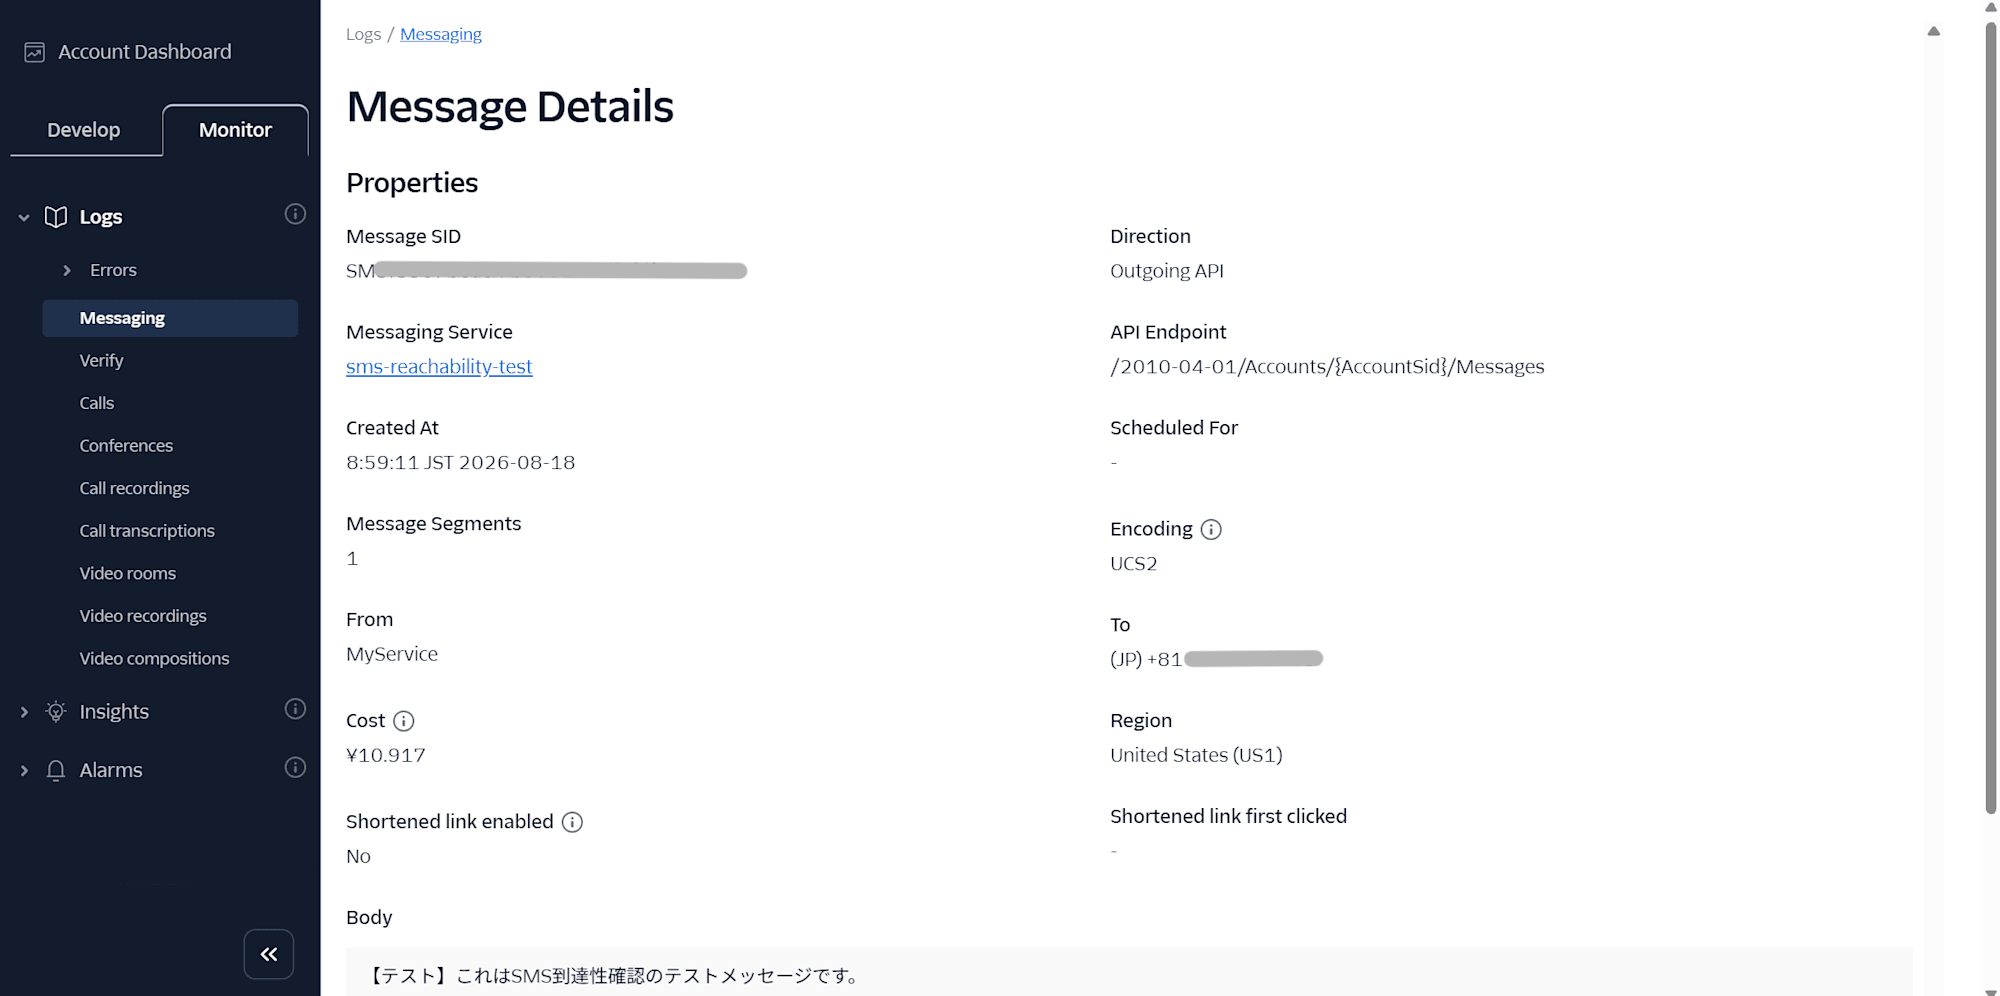
After sending, you can check the actual sender used, status (delivered, etc.), segment count, and cost from Console's Monitor > Logs > Messaging (Message Logs).
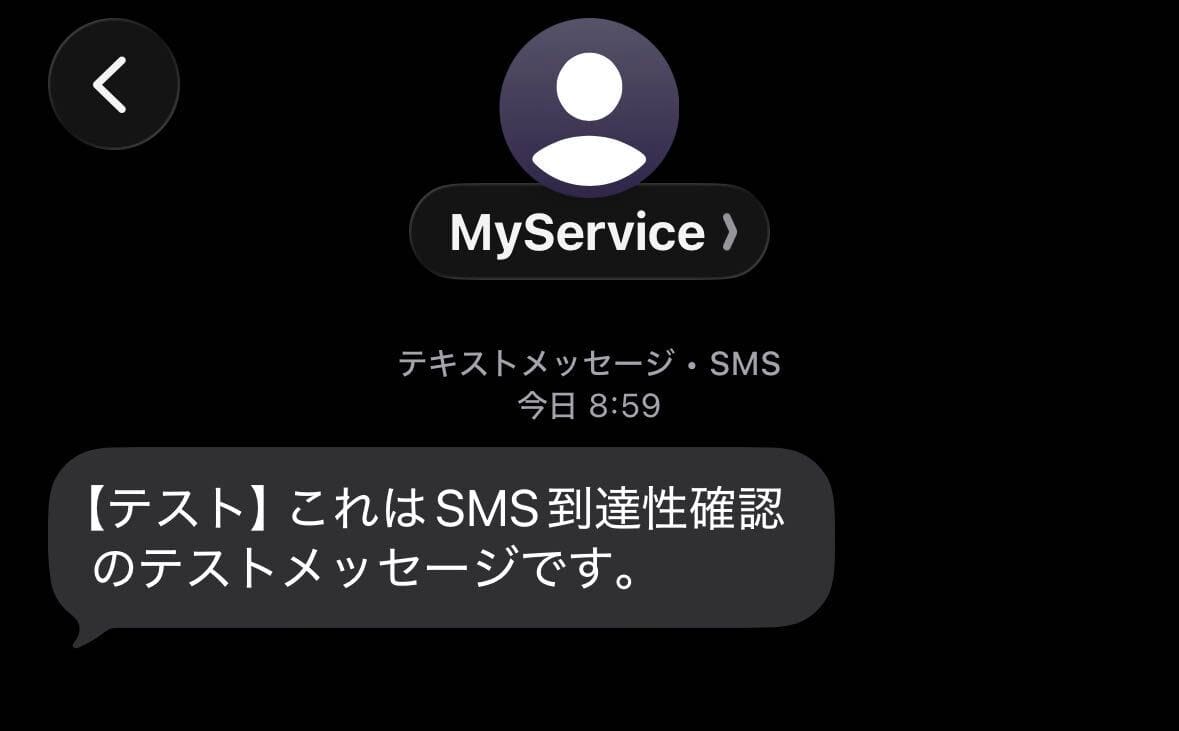
When checking the actual receiving device, the sender field displayed the string registered in the Sender Pool directly, rather than a phone number.
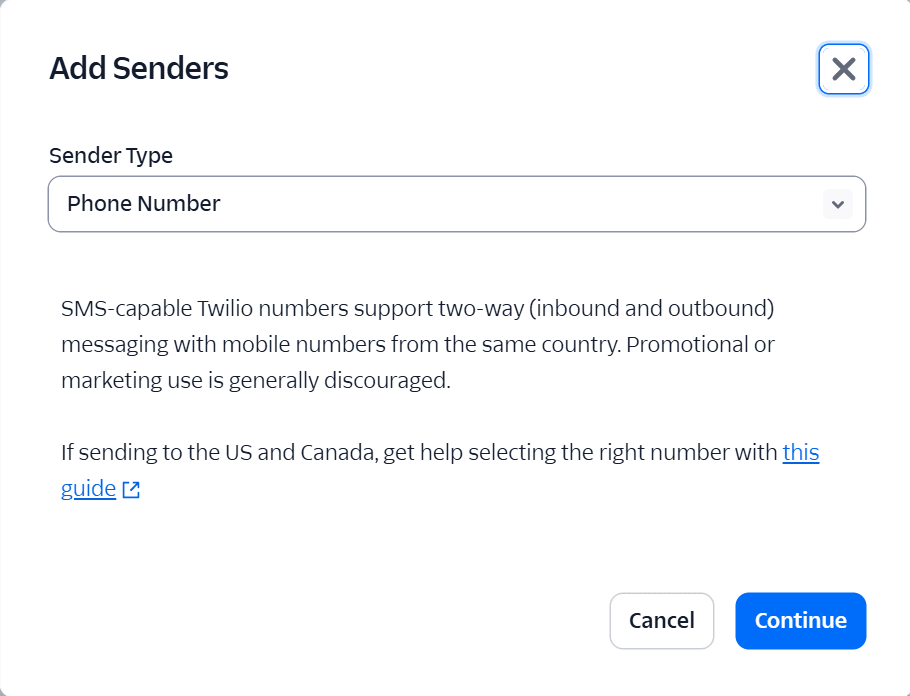
Note: Phone numbers can also be added to the same Sender Pool
This time only an Alphanumeric Sender ID was registered, but by switching the Sender Type to "Phone Number" on the same "Add Senders" screen, you can also add existing phone numbers to the same Sender Pool. It is possible to mix multiple sender types in a single Messaging Service.
However, there is a caveat. Even if multiple sender types are in the Sender Pool, Twilio selects them in the priority order of "RCS sender > Short code > Alphanumeric Sender ID > Regular phone number," and as long as the higher-priority type can be used, it will always be used. This means that even if you put an Alphanumeric Sender ID and a phone number in the same pool, the phone number will only be used as a fallback when the Alphanumeric Sender ID cannot be used, and you cannot deliberately use both selectively. If you want to explicitly specify the sender for A/B comparison, you need to separate the Messaging Services (create a separate pool dedicated to Alpha and a pool dedicated to phone numbers), or specify the sender directly with the From parameter without going through a Messaging Service.
Summary
This time, I registered an Alphanumeric Sender ID in a Twilio Messaging Service, actually sent an SMS, and confirmed that the configured string was displayed in the sender field. Phone numbers can also be added to the same Sender Pool, but due to priority order, you cannot deliberately use them interchangeably, so if you want to properly compare senders, you need to work around it by separating the Messaging Services.
I hope this blog post is helpful in some way.
Announcements
We hold Twilio/SendGrid seminars every month
Classmethod holds monthly seminars on Twilio/SendGrid.
Classmethod holds Twilio/SendGrid seminars every month. All seminars explain the basics for those who are not very familiar with Twilio or SendGrid, so if you are considering introducing Twilio/SendGrid in the future, or if you have already introduced them and want to study the basics again, please feel free to join us.