
I tried email verification (OTP) with Twilio's Verify API

This page has been translated by machine translation. View original
Hi, I'm Subaru.
This time, I'll try "email authentication" — sending an authentication code (OTP) to an email address using Twilio's Verify API.
Introduction
Twilio is a cloud-based API platform for embedding communication features such as phone calls, SMS, and chat. By using Twilio's API, you can freely customize and build communication solutions. In a previous article, I tried SMS two-factor authentication without any code using Twilio Verify's Try it out (https://dev.classmethod.jp/articles/twilio-verify-sms-2fa-nocode/), where I experienced sending and receiving authentication codes via SMS without writing any code. Twilio Verify can also send authentication codes through multiple channels, including "voice call," "WhatsApp," and "email." This time, I'll focus on the "email" channel and try email OTP authentication by calling the API with curl. SendGrid, which Twilio integrates with, will be used for email delivery.
Here is the general flow for this time:
- Prepare on the SendGrid side (create a Dynamic Template, create an API key, confirm sender address authentication)
- Create a Verify Service on Twilio with the Email channel enabled
- Register SendGrid's Email integration with Twilio Verify
- Send and verify an OTP via API
Prerequisites / Test Environment
The following environment and permissions are required to follow the steps in this article.
- A Twilio account must already be set up
- A SendGrid account must already be set up (free plan is fine)
- A SendGrid Single Sender-verified email address must be available
- An environment where curl can be used (Mac/Linux terminal, or Windows WSL/Git Bash)
- An email address capable of receiving OTPs
Practice
Preparing on the SendGrid Side
Creating a Dynamic Template
When Twilio sends an OTP via email, it uses SendGrid's Dynamic Template to compose the email body. By using the Handlebars variable {{twilio_code}} in the template, Twilio will automatically replace it with the OTP code at send time.
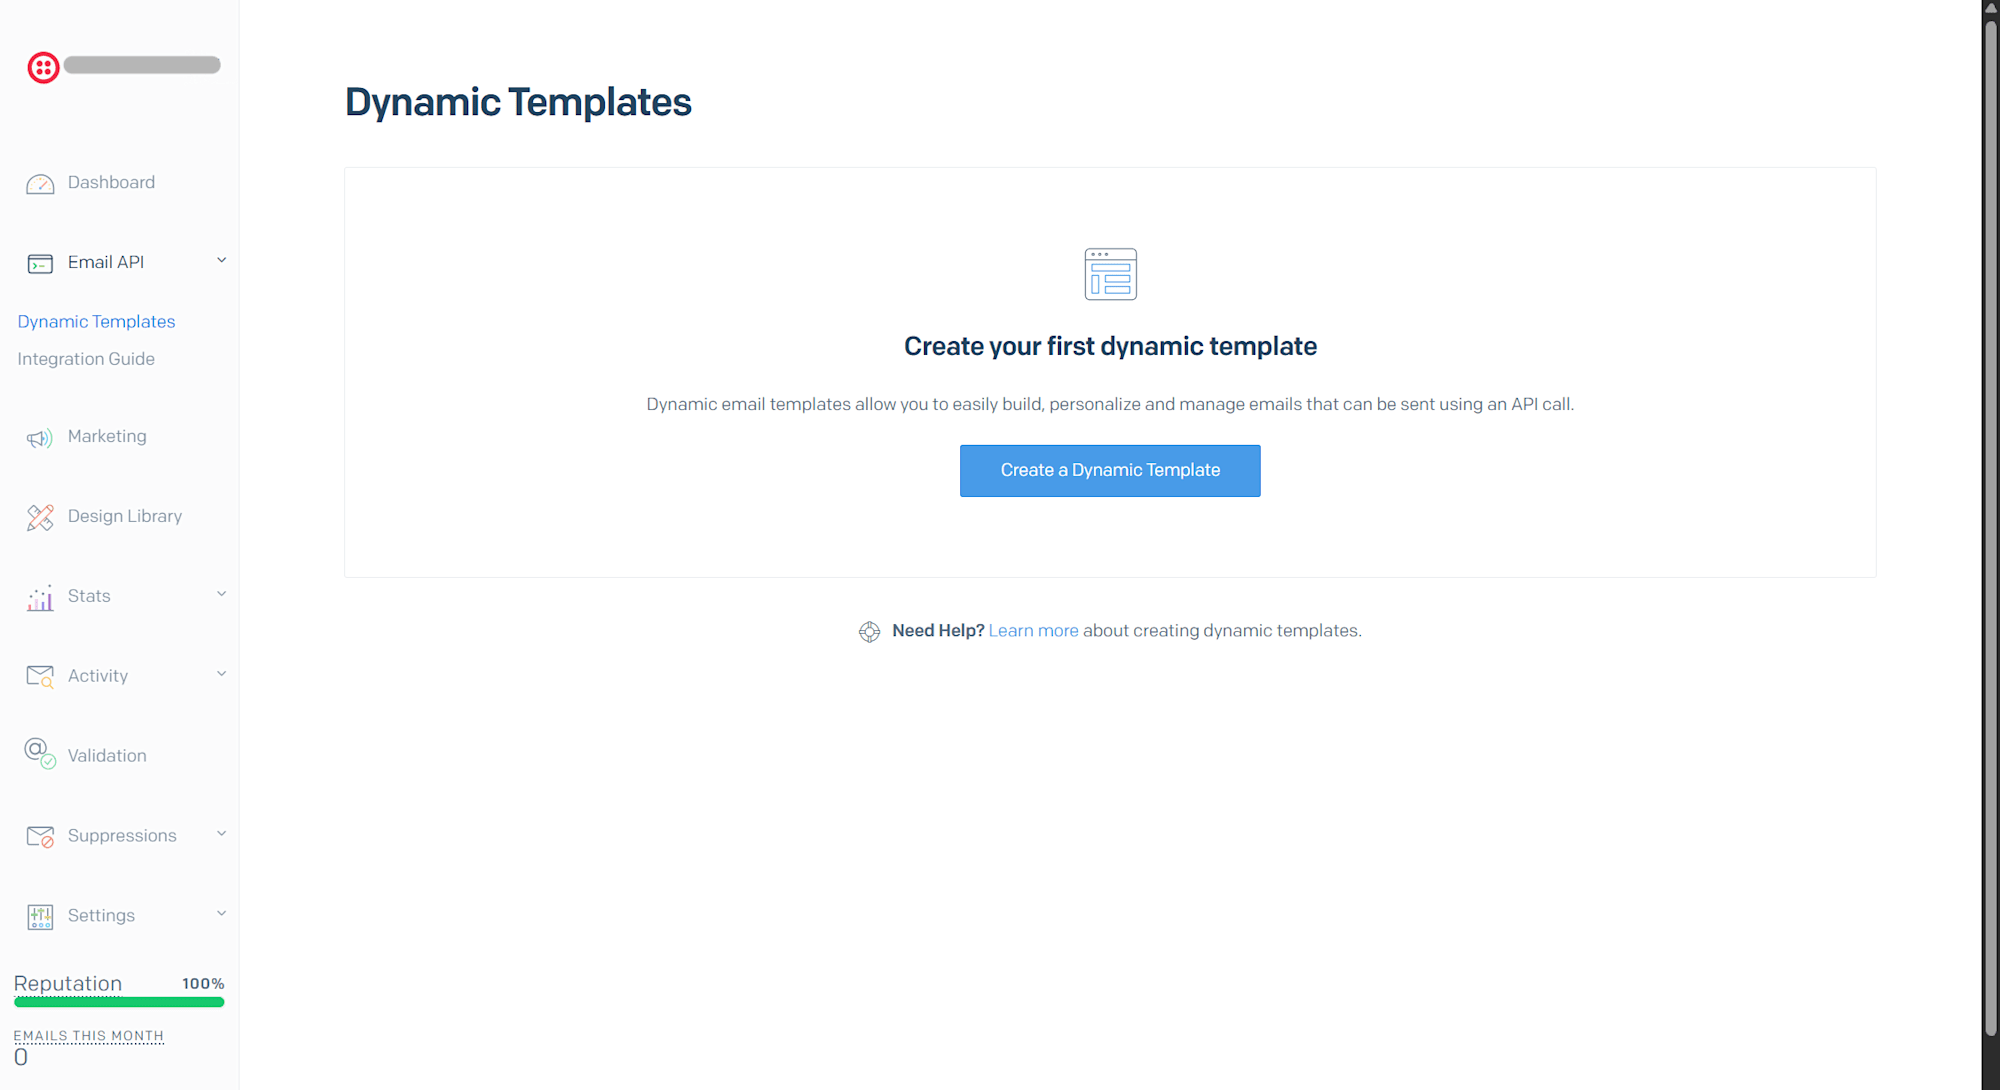
Log in to the SendGrid console (app.sendgrid.com) and open Email API > Dynamic Templates from the left menu.
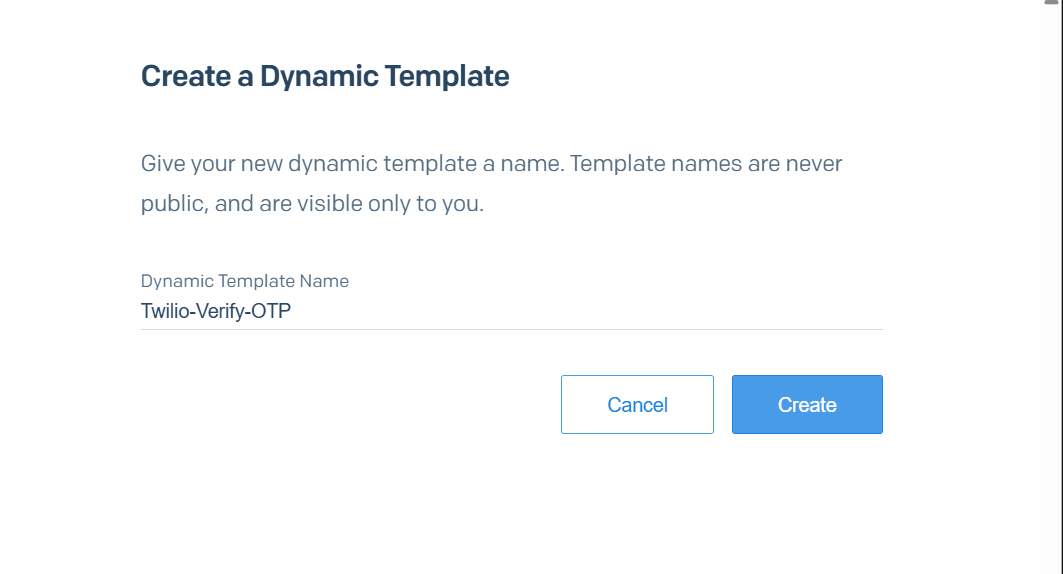
Click "Create a Dynamic Template" and a dialog for entering the template name will appear. This time, enter Twilio-Verify-OTP and click "Create."
The template will be created and displayed in the list. Click on the template to expand it and you can confirm the Template ID (a string starting with d-). Note this ID, as it will be used in the Twilio configuration later.
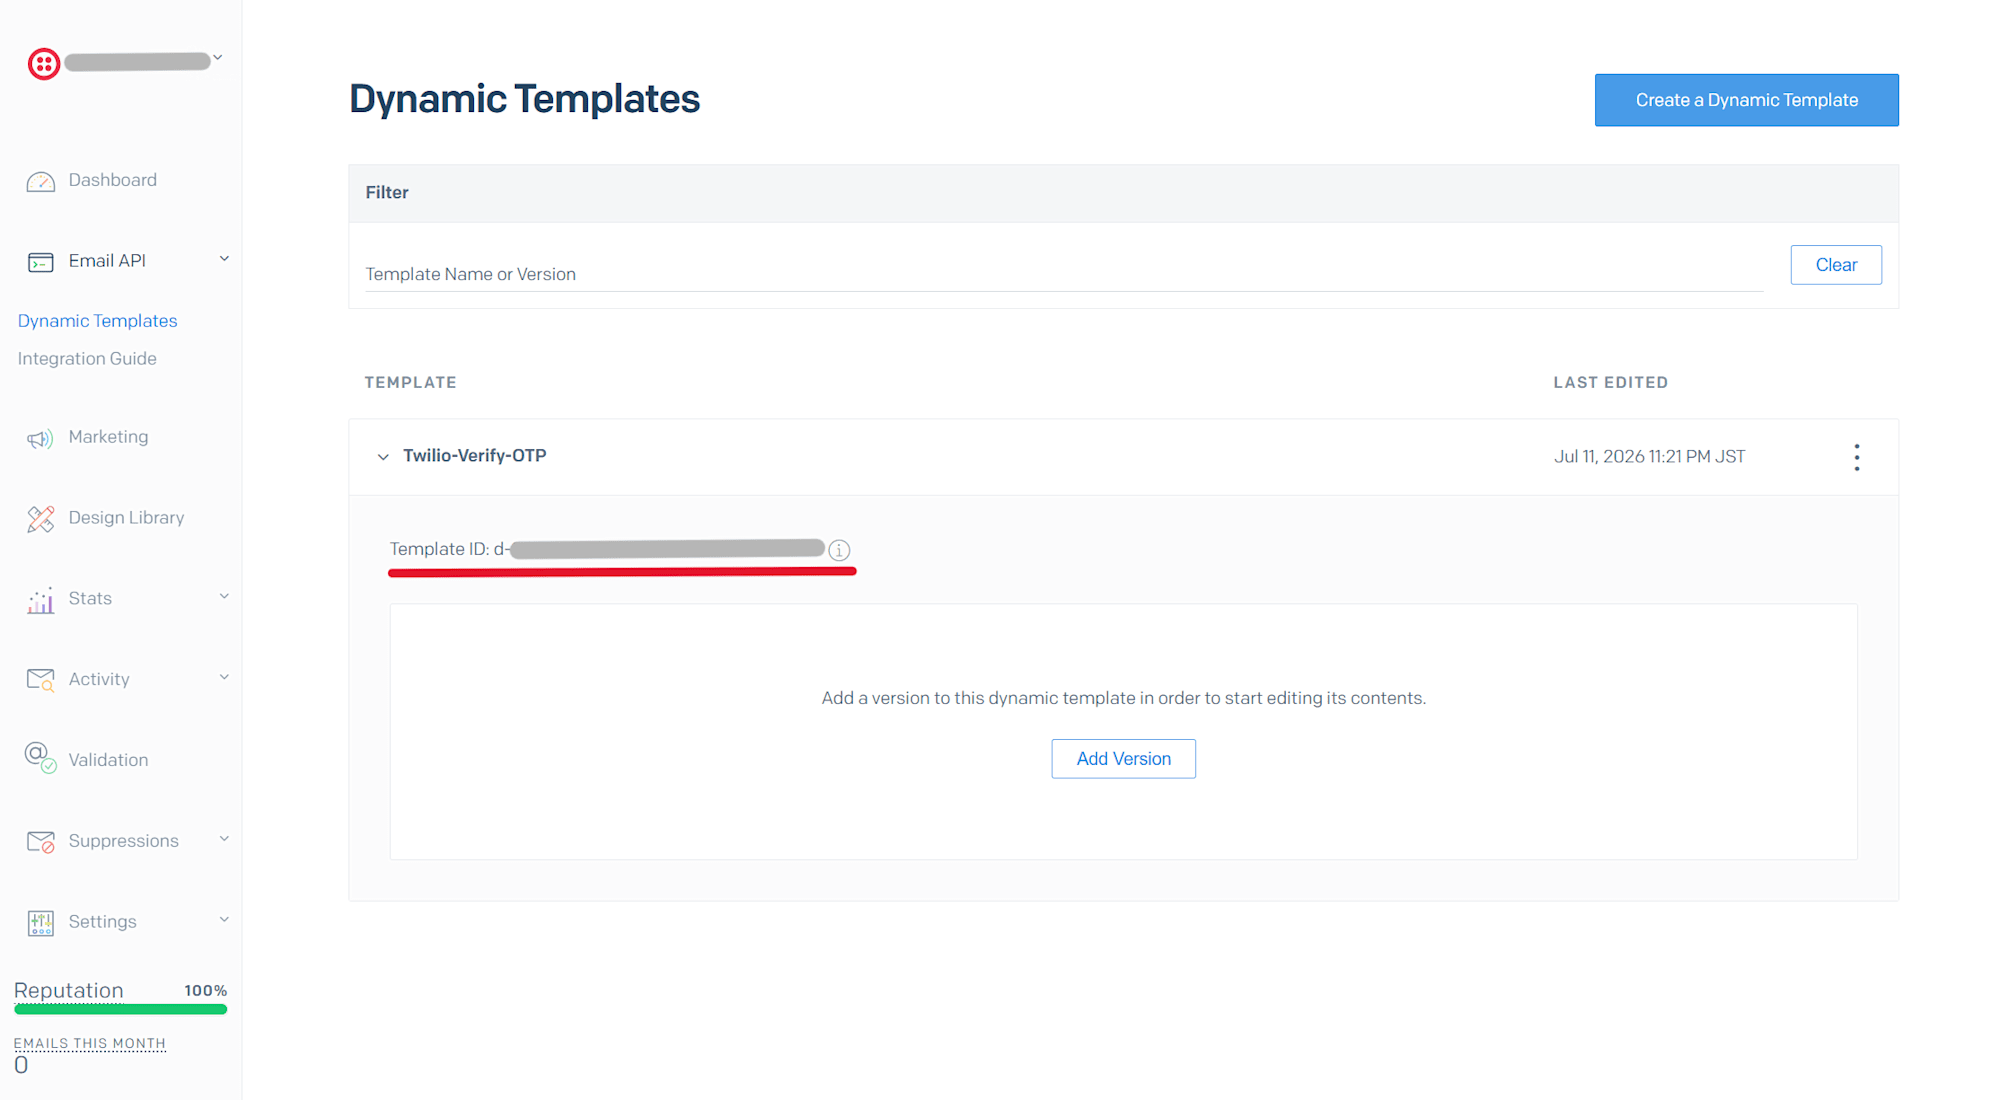
With the template expanded, click "Add Version," then on the editor selection screen, choose Blank Template and then select Code Editor.
The HTML editor will open, so paste the following HTML into the code area on the left. The {{twilio_code}} portion will be automatically replaced with the OTP code by Twilio.
<!DOCTYPE html>
<html>
<head>
  <title>Authentication Code</title>
</head>
<body style="font-family: sans-serif; padding: 24px;">
  <p>Please enter the following authentication code.</p>
  <h2 style="letter-spacing: 4px;">{{twilio_code}}</h2>
  <p style="color: #888; font-size: 12px;">This code is valid for 10 minutes.</p>
</body>
</html>
Also, in the Subject field at the top, enter "Authentication Code:". Twilio will automatically append the code to the end at send time, so the subject will be delivered in a format like "Authentication Code: XXXXXX."
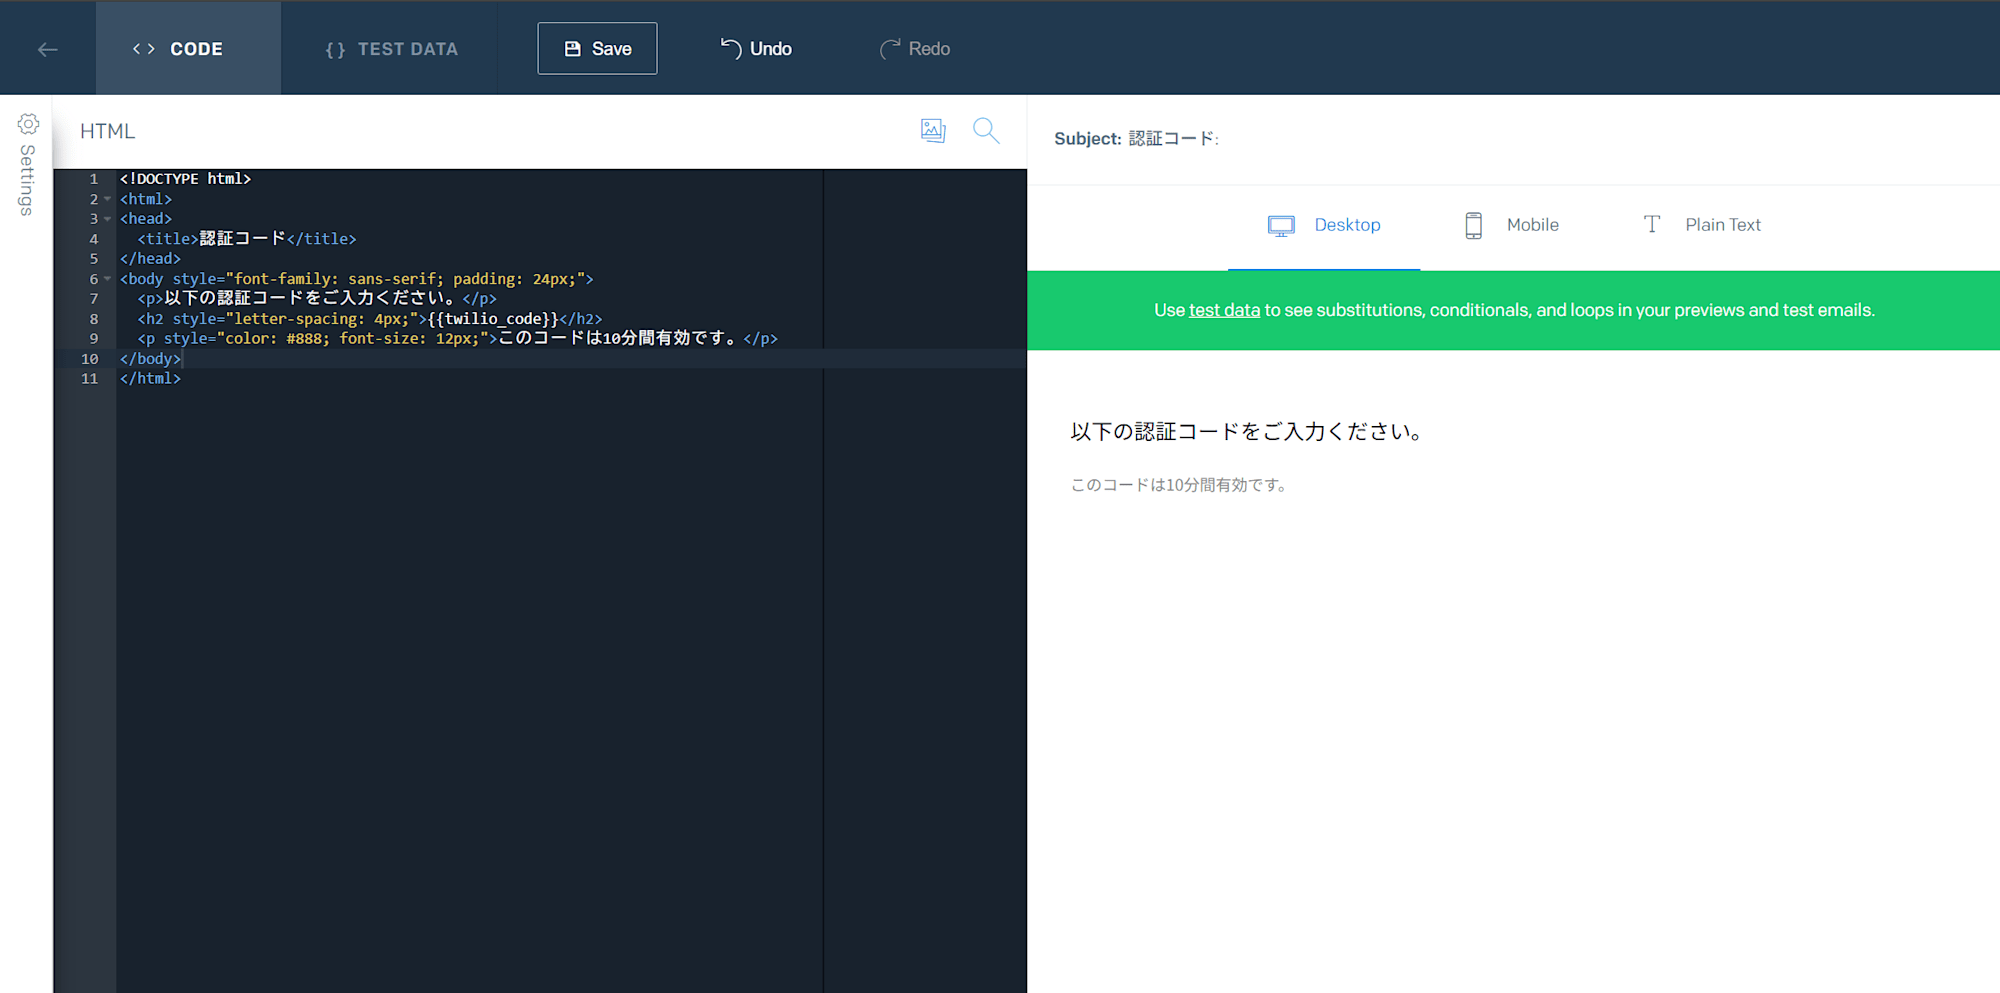
After entering, click "Save" in the upper right to save the template.
Creating an API Key
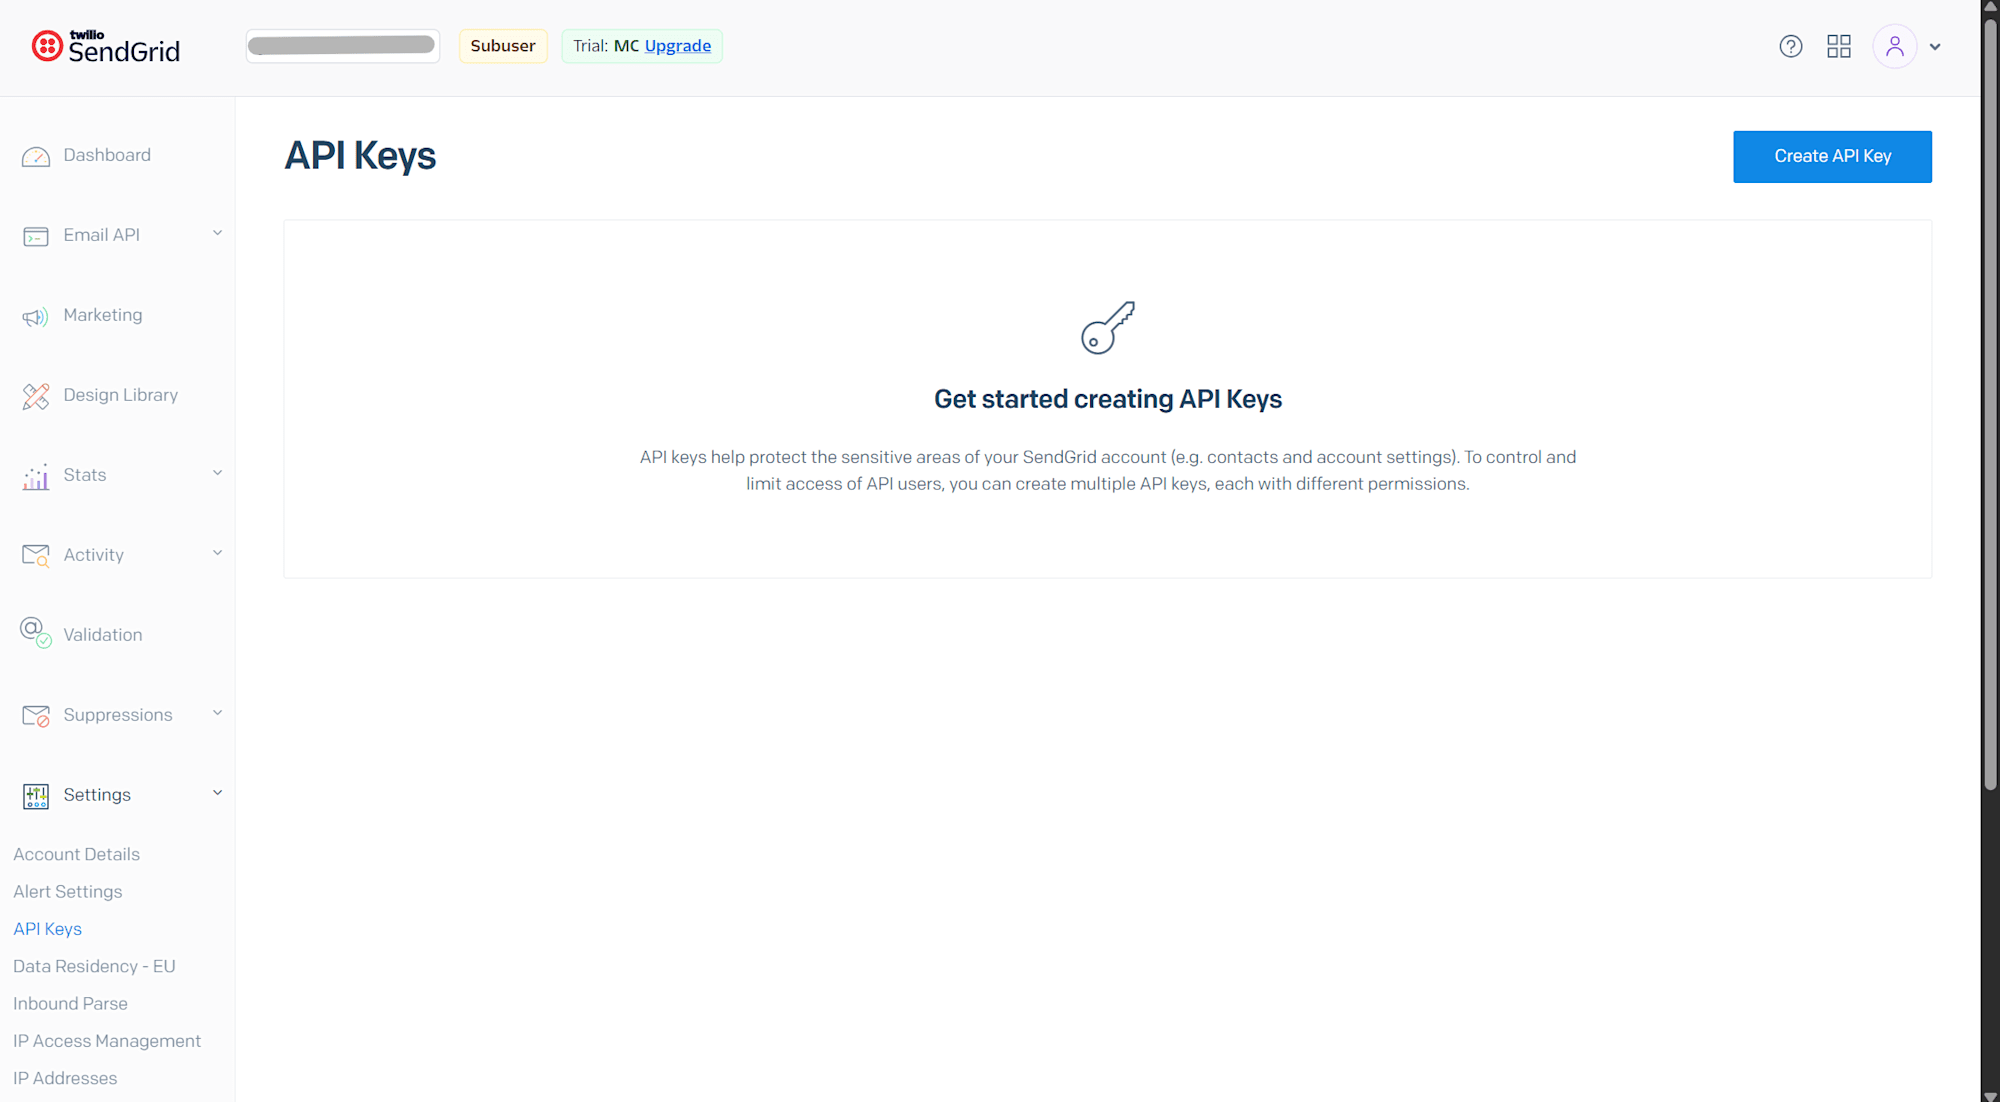
Open Settings > API Keys from the left menu. On first use, no keys exist. Click "Create API Key."
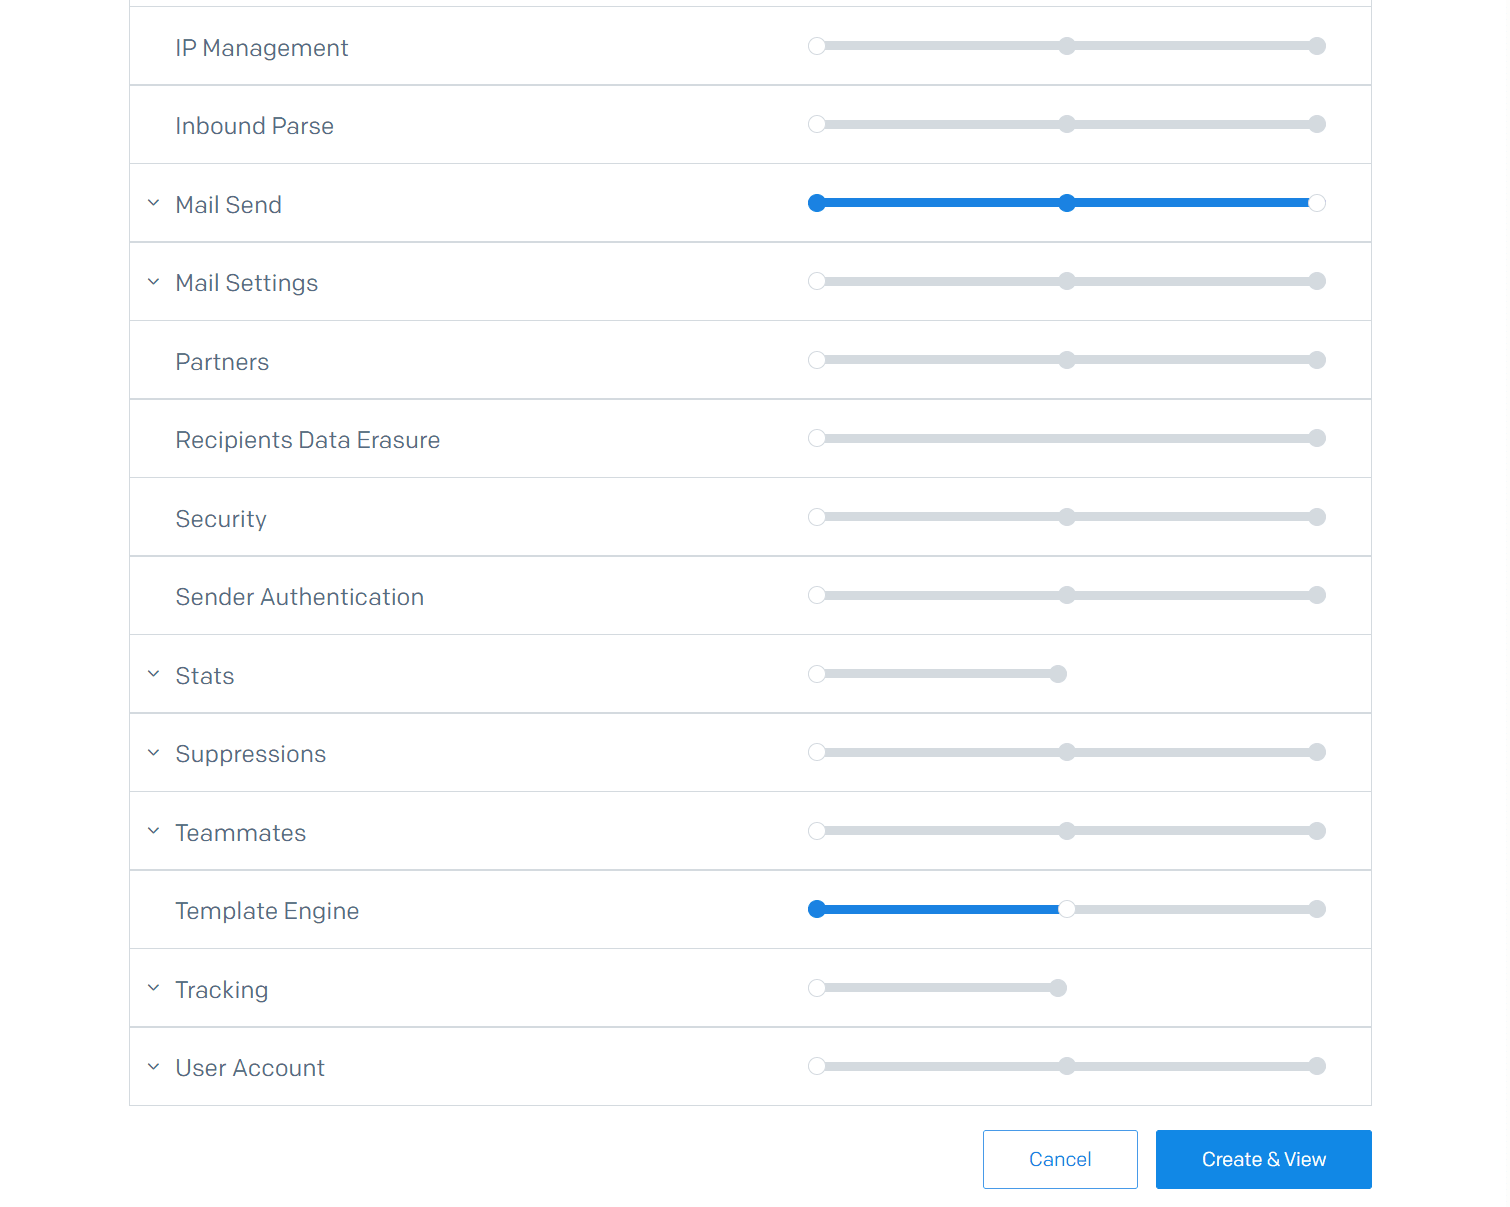
Enter a key name (e.g., twilio-verify-key) and select Custom Access for permissions. The permissions required for Twilio Verify email sending are clearly stated in the official Twilio documentation, and only the following two need to be set.
- Mail Send: Full Access
- Template Engine: Read Access
All other permissions can remain as No Access. Since this key will be used in a security-related service, do not grant unnecessary permissions.
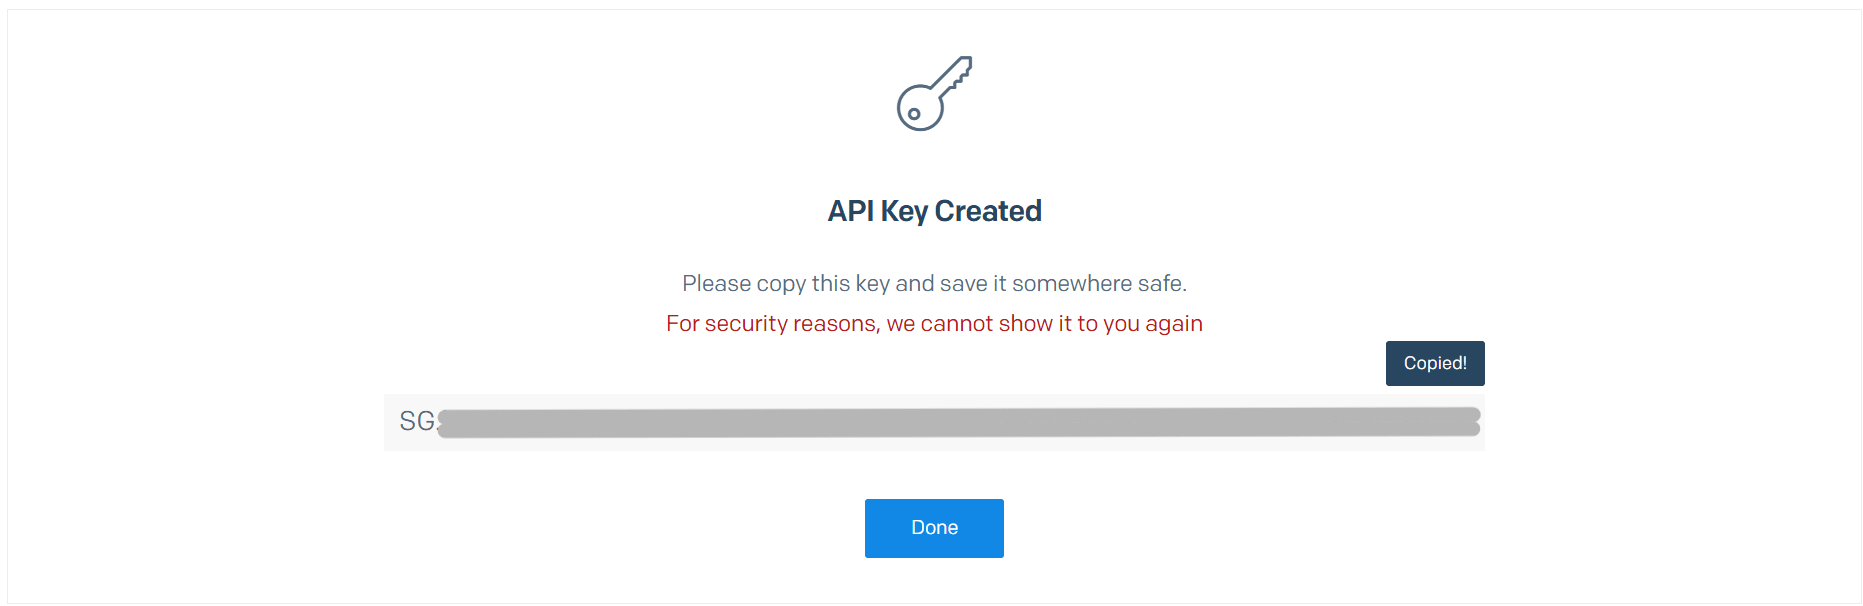
Click "Create & View" and the API key starting with SG. will be displayed. This key can only be viewed on this screen. Be sure to copy it and store it in a safe place.
Checking Sender Authentication
To send email with SendGrid, you need to authenticate the sender email address on the SendGrid side. Open Settings > Sender Authentication and confirm that the sender address you plan to use shows as "Verified."
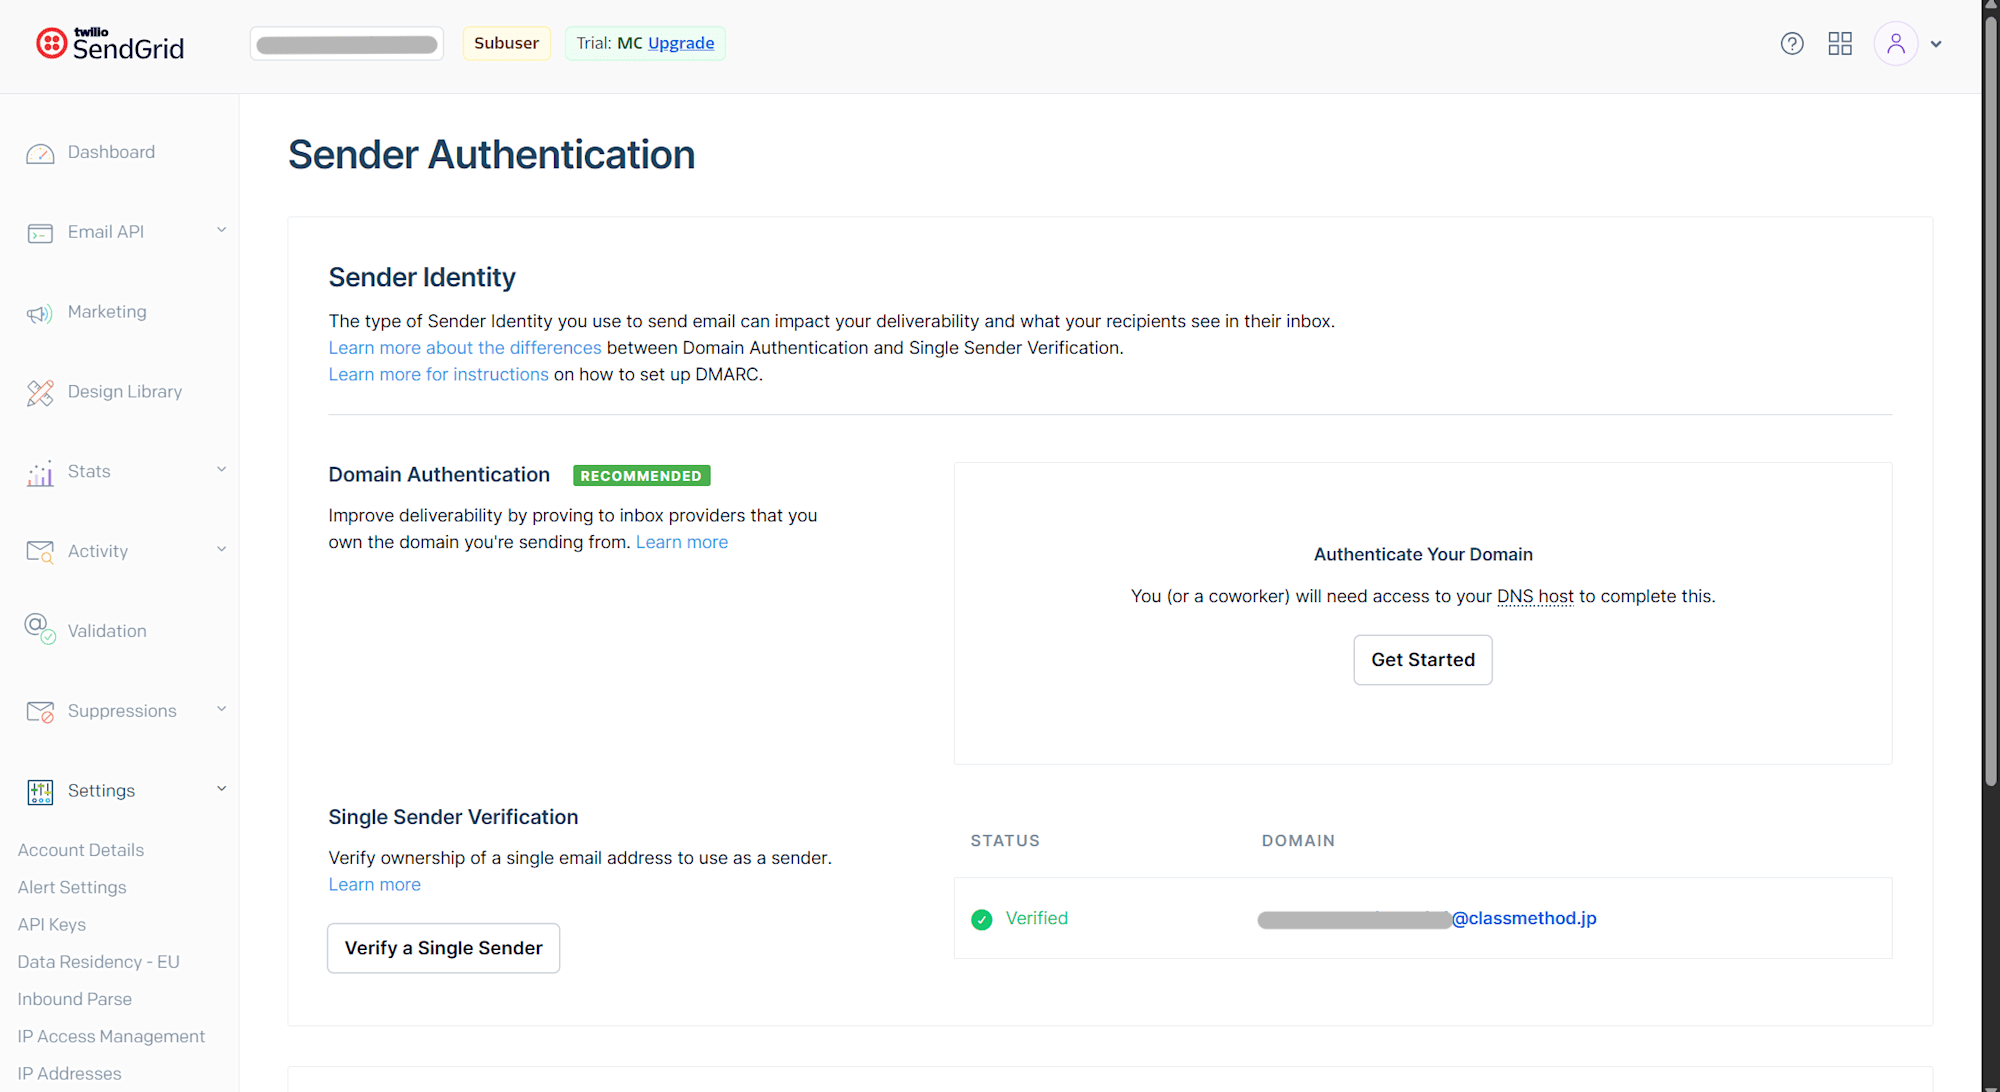
If it is not yet verified, please authenticate via "Verify a Single Sender." This completes the preparation on the SendGrid side.
Twilio Configuration
Creating a Twilio Verify Service
Create a new Verify Service with the Email channel enabled in the Twilio console. Open Verify > Services from the left menu.
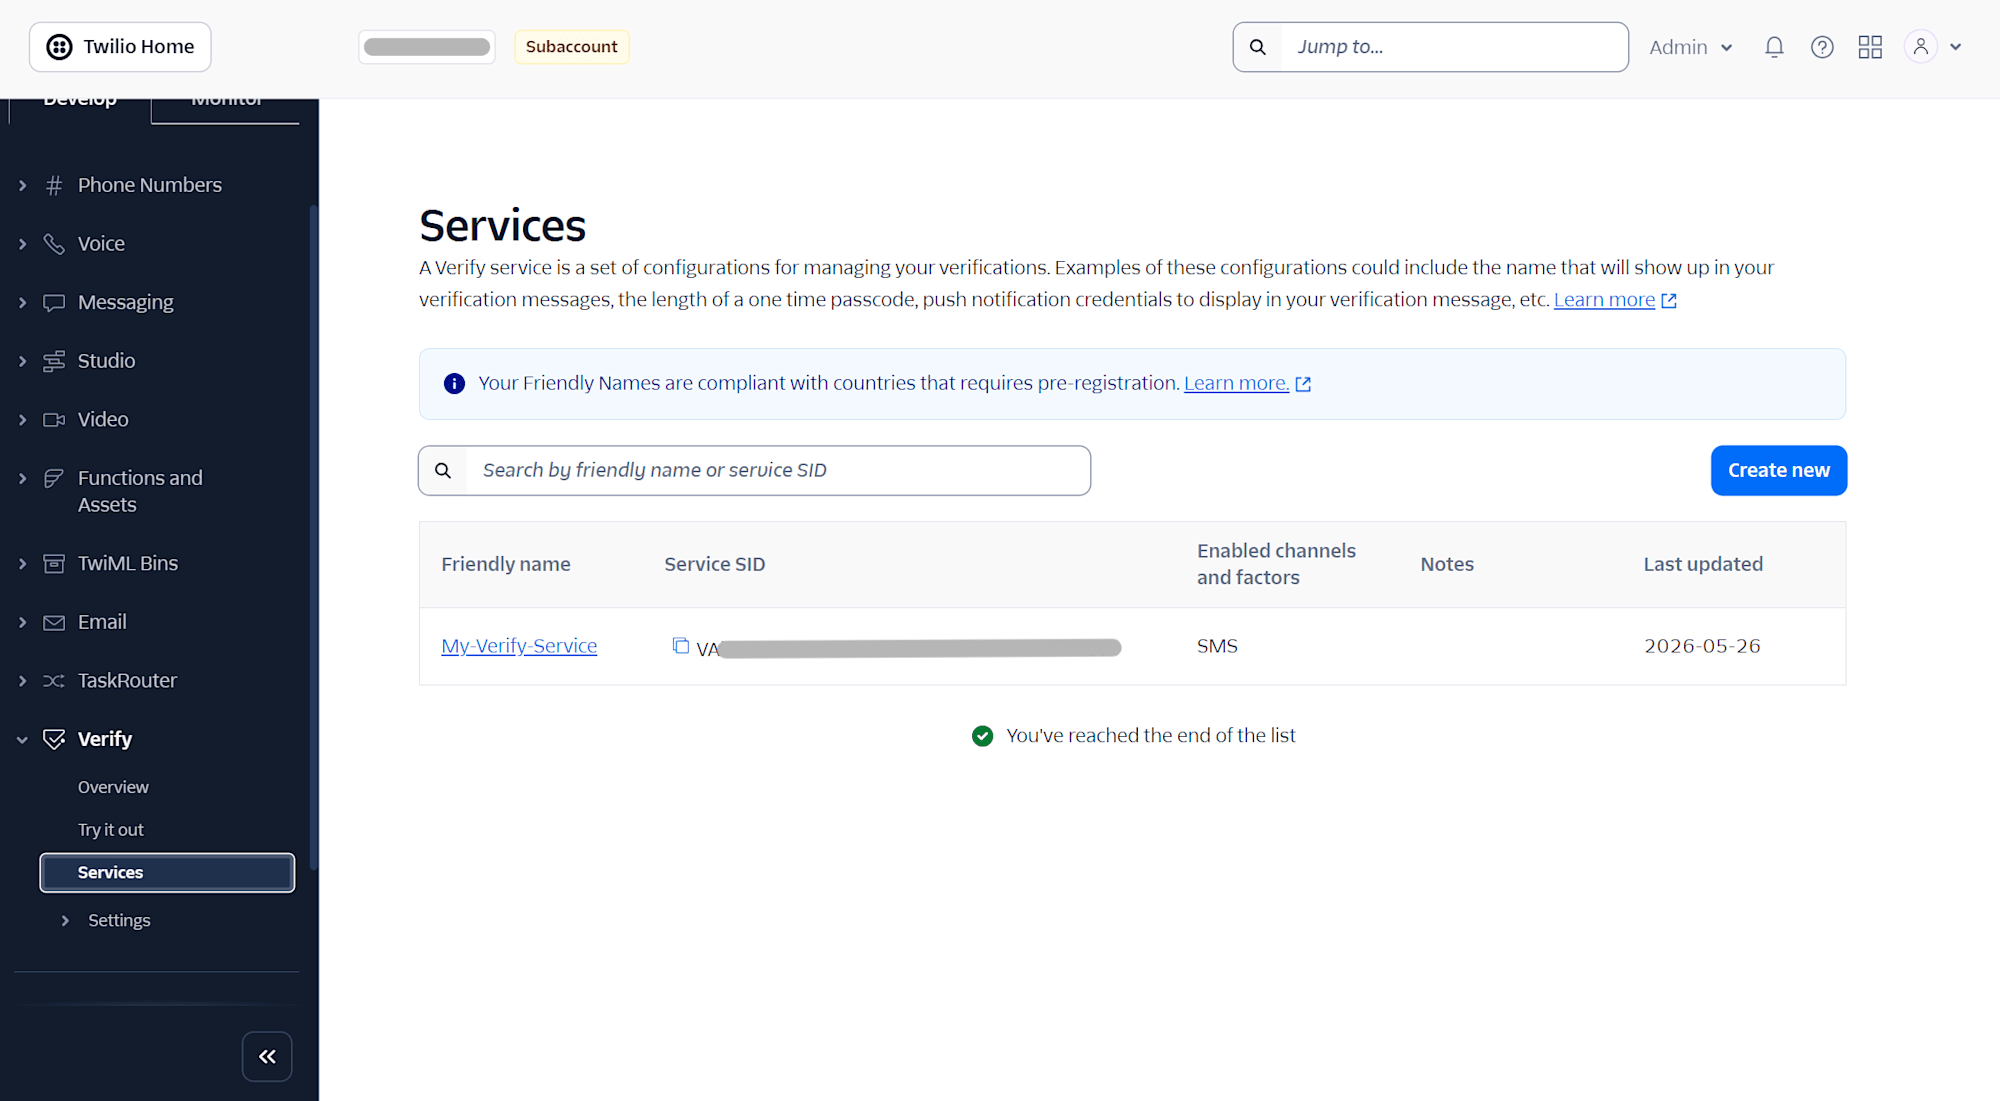
Click "Create new" and enter the following in the dialog.
- Friendly name: My-Email-Verify-Service (any name you like)
- Verification channels: Enable Email only (SMS, WhatsApp, and Voice can be turned off)
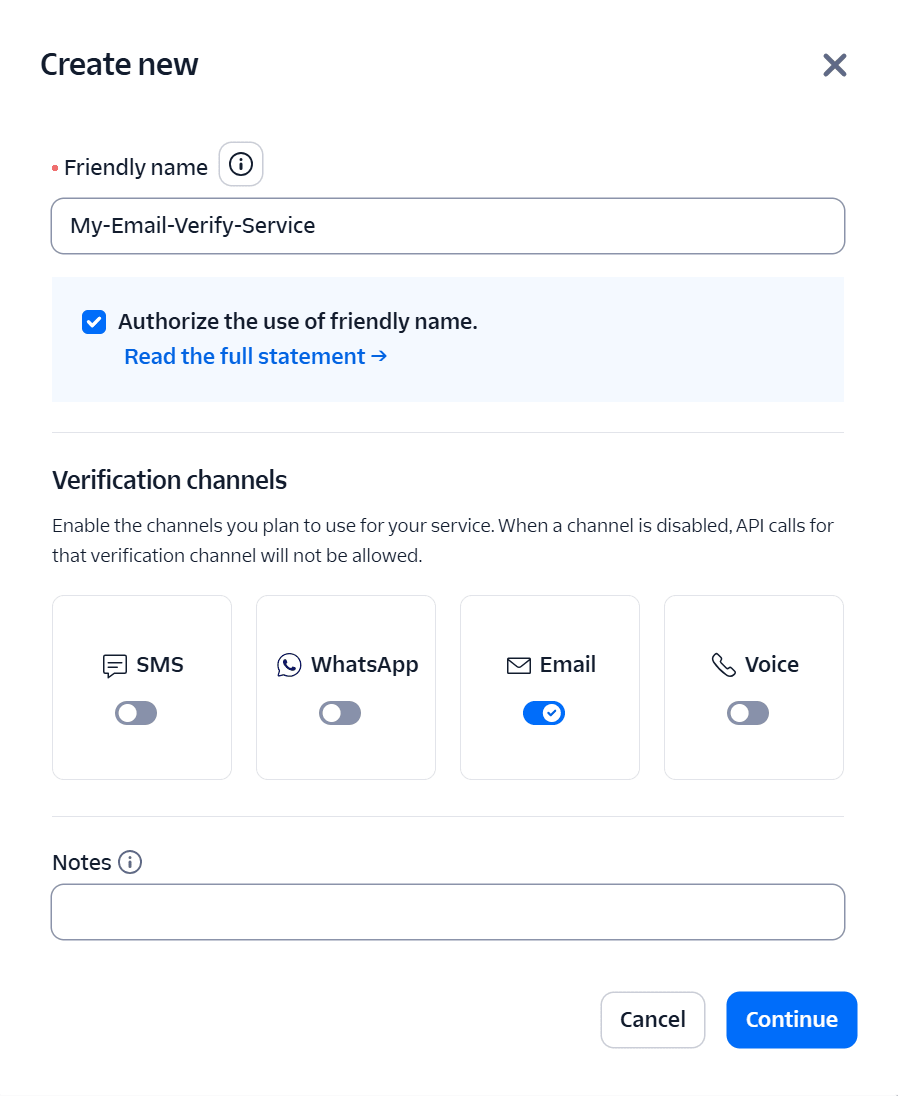
Click "Continue" to create the service and proceed to the Email integration settings screen.
Registering the SendGrid Email Integration
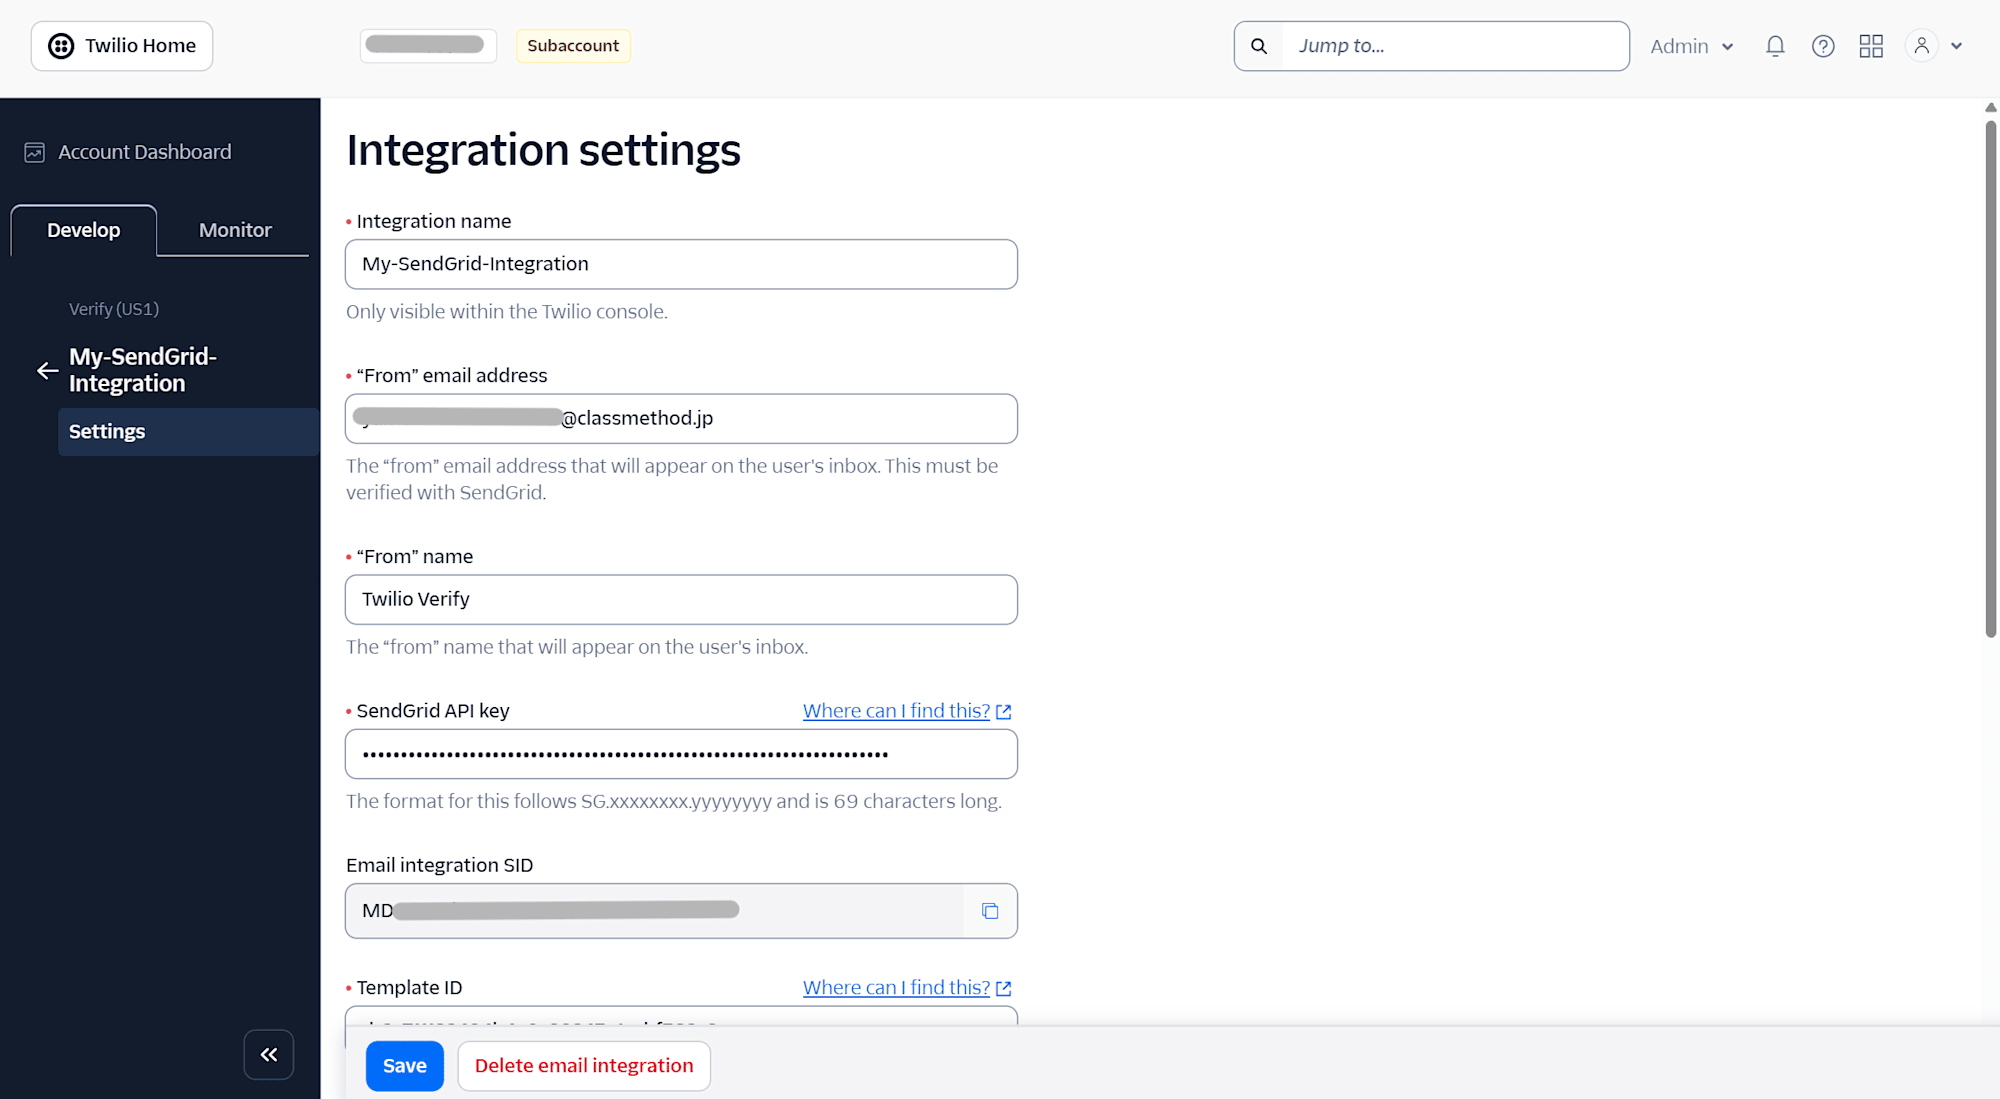
After creating the service, configure the integration with SendGrid (Email integration) on the Twilio Verify side. Click "Create new email integration."
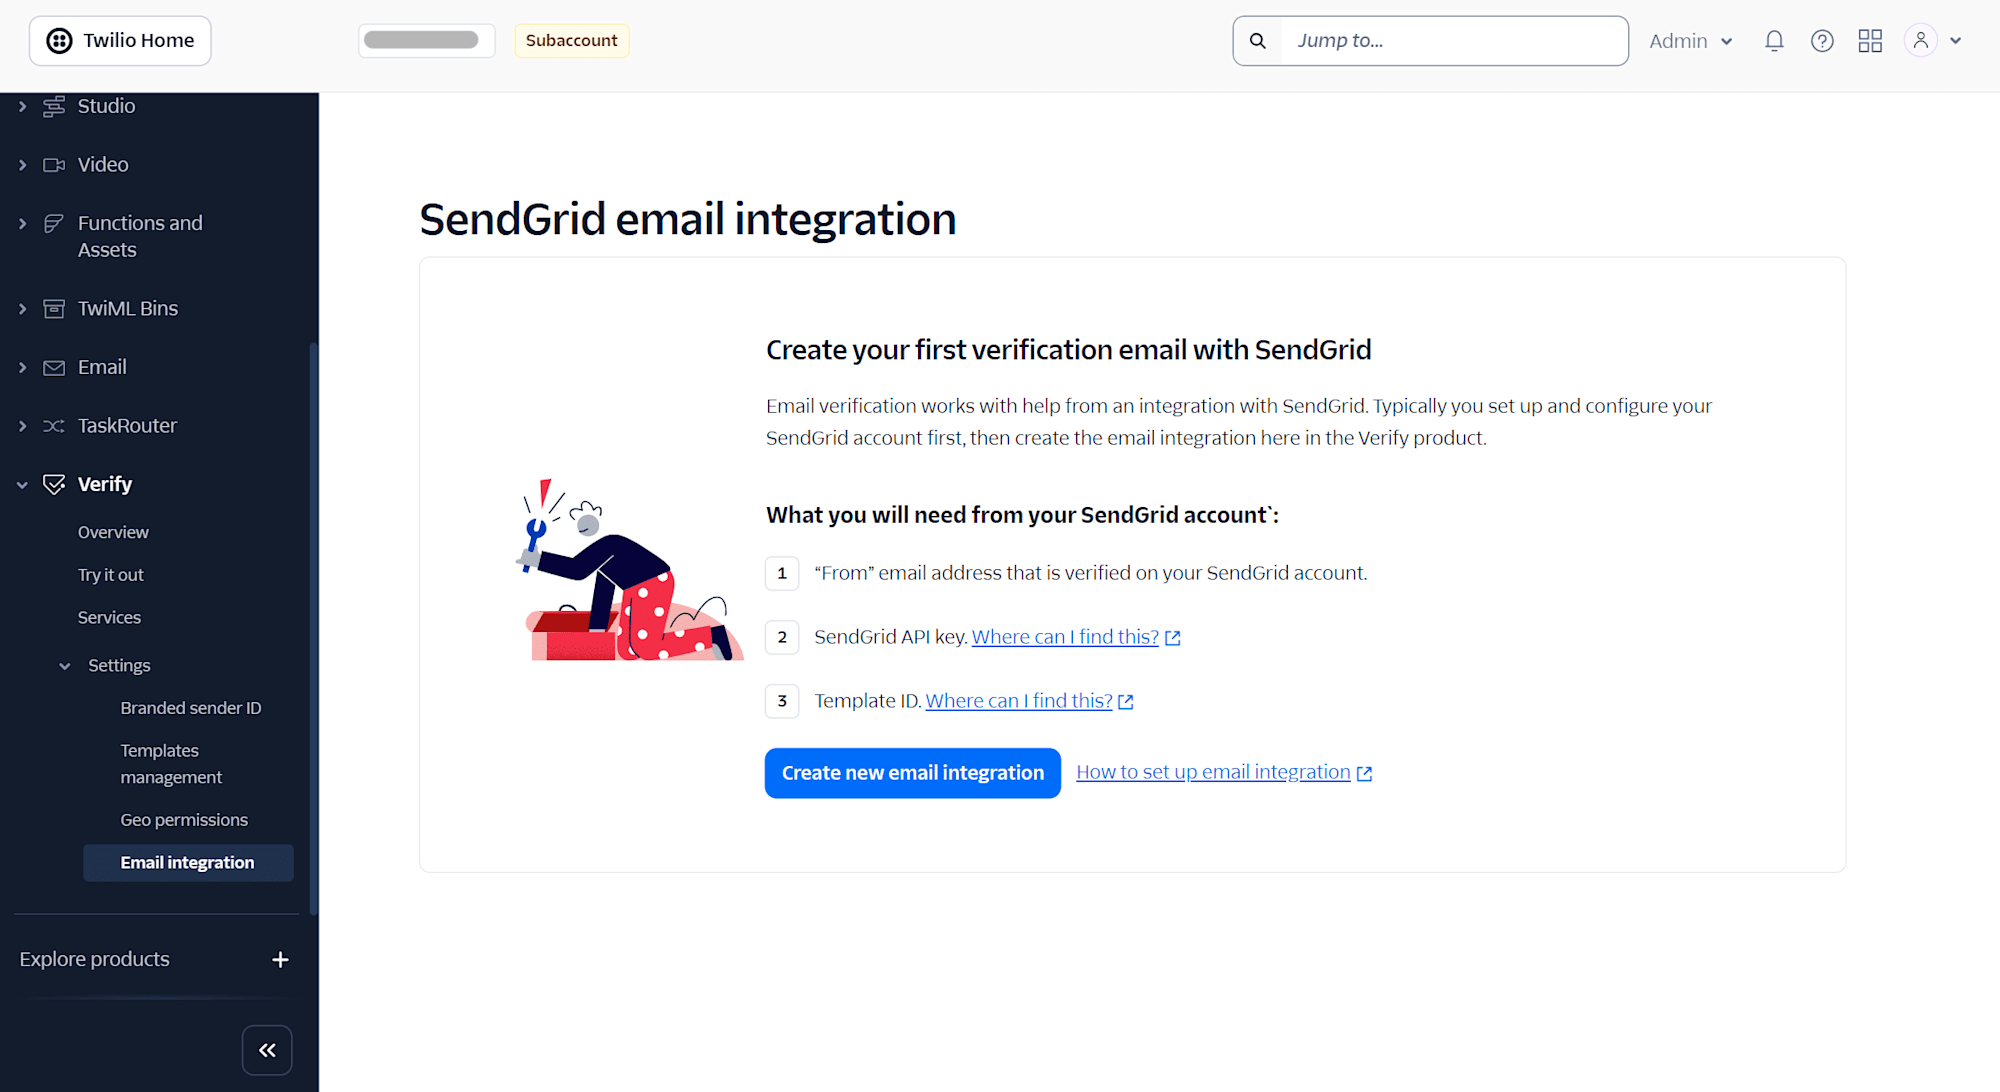
A dialog will open. Enter the following information.
| Field | Content |
|---|---|
| Integration name | My-SendGrid-Integration (an identifier displayed only within the Twilio console) |
| "From" email address | The sender address verified in SendGrid |
| "From" name | The sender name displayed in the recipient's inbox (e.g., Twilio Verify) |
| SendGrid API key | The API key created earlier (69 characters starting with SG.) |
| Template ID | The ID of the Dynamic Template created in SendGrid (a string starting with d-) |
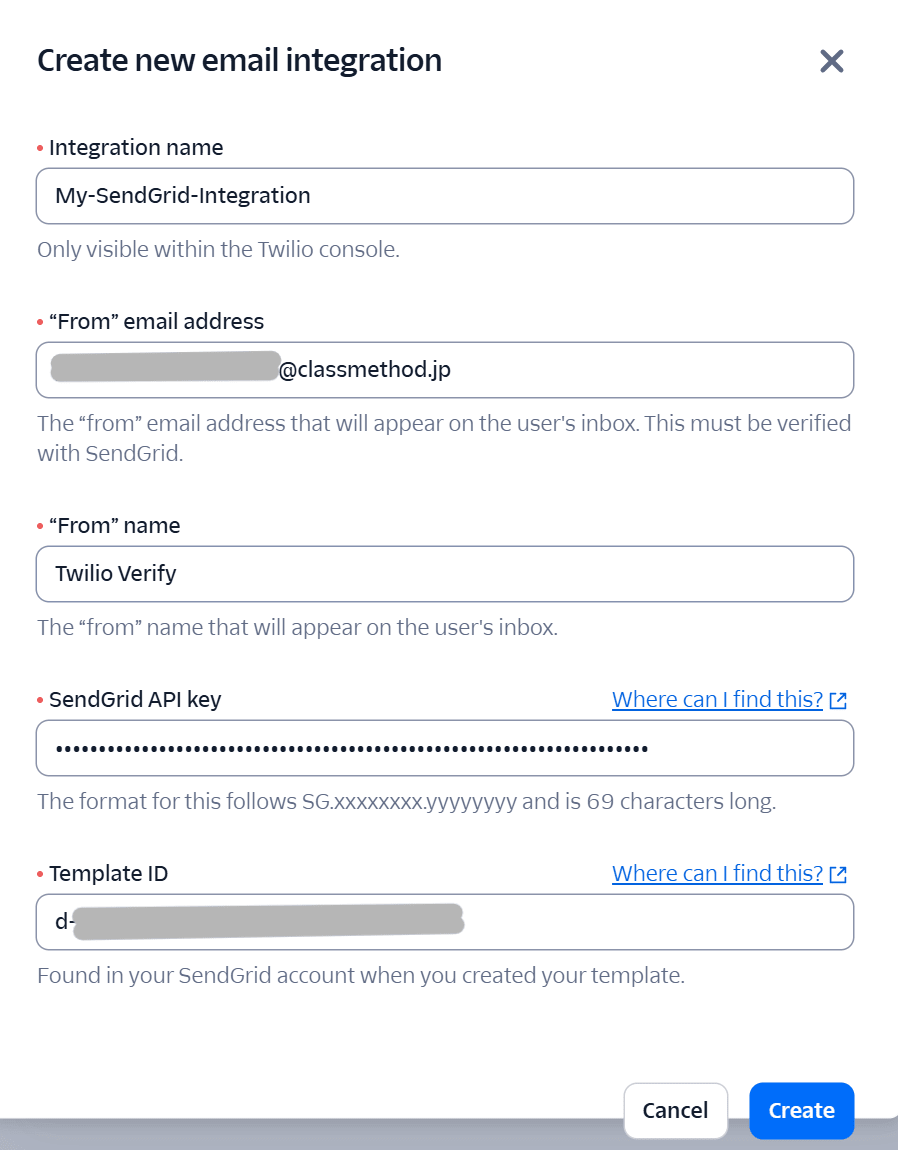
Click "Create." Once created successfully, you will be redirected to the Integration settings page, where an Email integration SID (a string starting with MD) will be issued.
Selecting the Integration in the Verify Service Email Tab
Next, link the created Verify Service with the Email integration you just configured. Navigate to My-Email-Verify-Service > Settings from the left menu and open the "Email" tab.
Select the My-SendGrid-Integration you just created from the "Select or change the existing email integration" dropdown and click "Save."
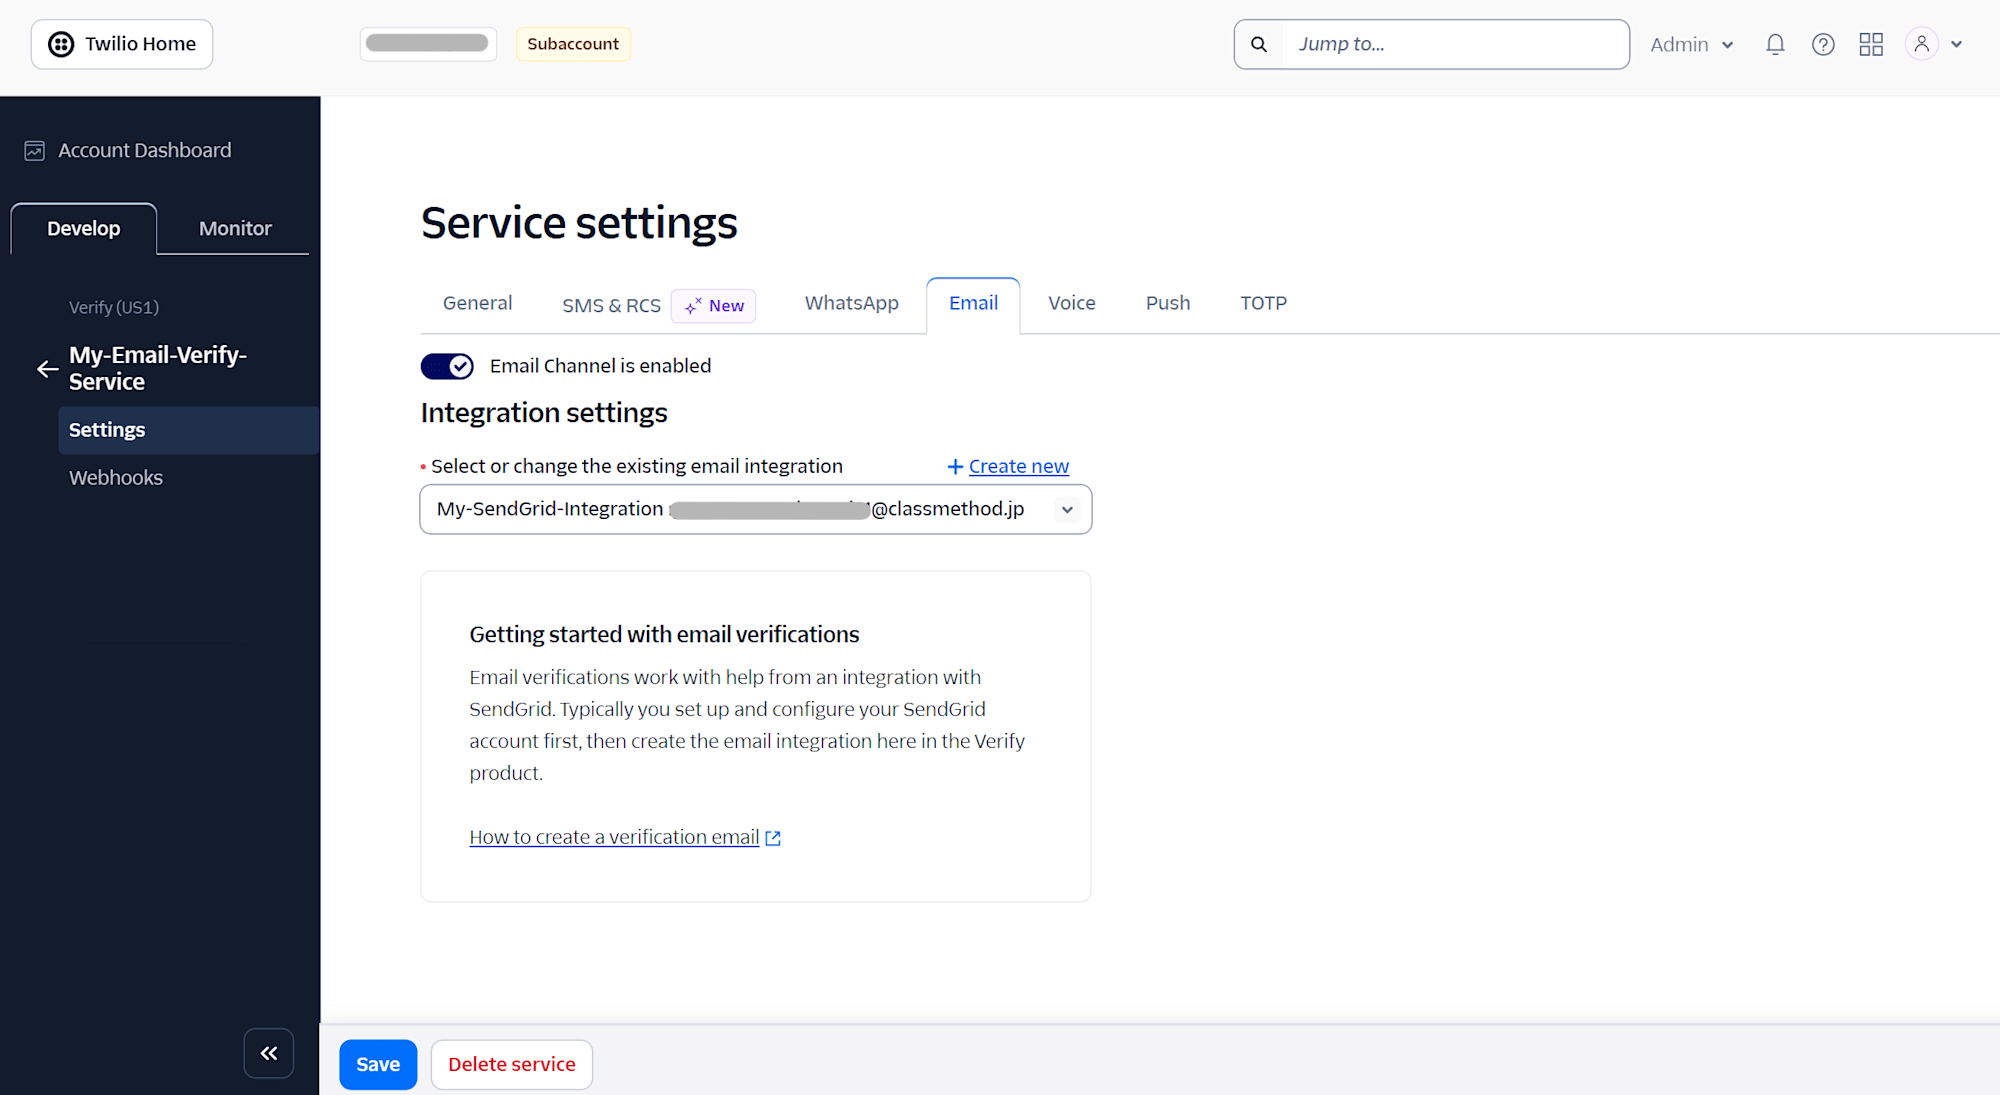
This completes the integration setup between Twilio Verify and SendGrid.
Verification
Using curl.exe on PowerShell, I'll try sending and verifying an OTP. Set TWILIO_ACCOUNT_SID, TWILIO_AUTH_TOKEN, and VERIFY_SERVICE_SID as environment variables in advance.
$env:TWILIO_ACCOUNT_SID = "ACxxxxxxxxxxxxxxxxxxxxxxxxxxxxxxxx"
$env:TWILIO_AUTH_TOKEN  = "xxxxxxxxxxxxxxxxxxxxxxxxxxxxxxxx"
$env:VERIFY_SERVICE_SID = "VAxxxxxxxxxxxxxxxxxxxxxxxxxxxxxxxx"
Sending the OTP
Use the following command to send an OTP to the specified email address. The key point is to specify Channel=email.
curl.exe -X POST "https://verify.twilio.com/v2/Services/$env:VERIFY_SERVICE_SID/Verifications" `
  --data-urlencode "To=destination email address" `
  --data-urlencode "Channel=email" `
  -u "$($env:TWILIO_ACCOUNT_SID):$($env:TWILIO_AUTH_TOKEN)"
The "status": "pending" in the response indicates that the OTP has been successfully sent.

After a short wait, an email will arrive via SendGrid. The subject will be Authentication Code: [OTP code], and the body will display the content configured in the SendGrid template. You can confirm that the {{twilio_code}} portion has been replaced with the actual OTP code.
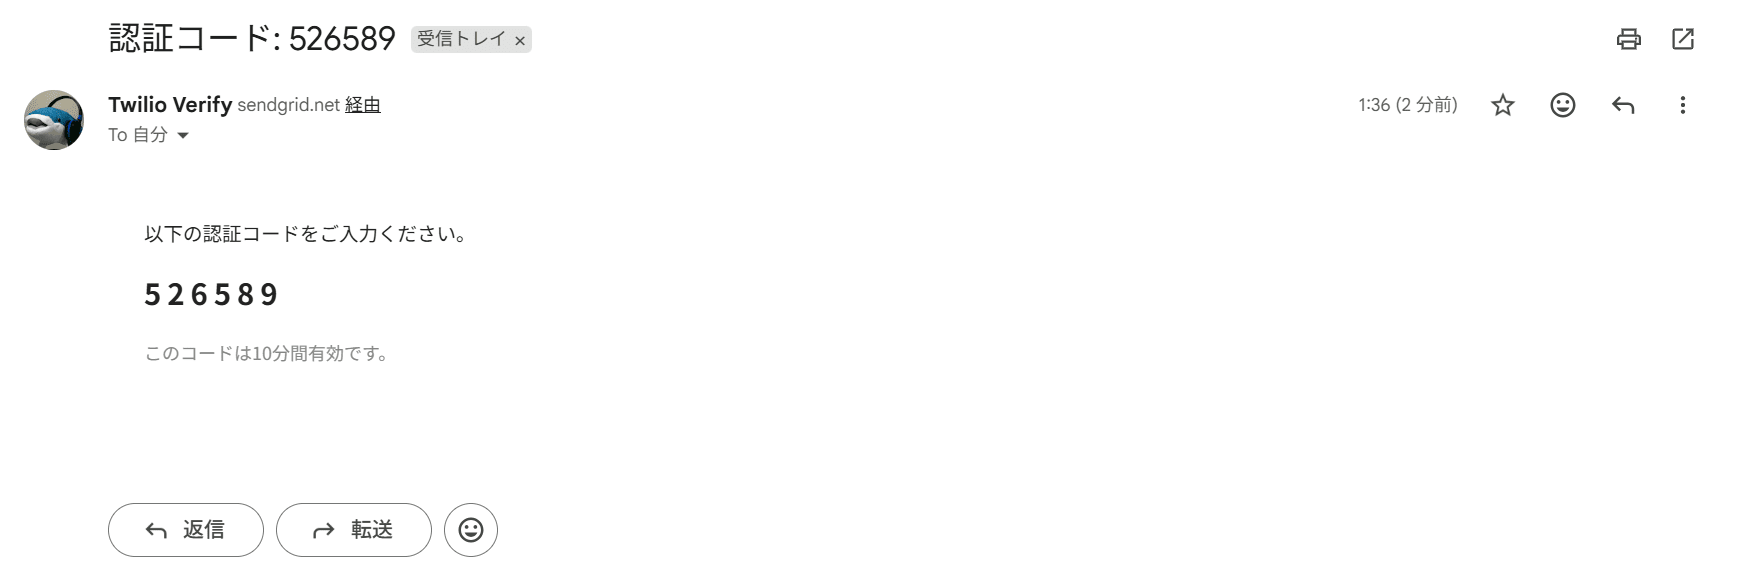
Code Verification (Correct Code)
Verify using the code written in the email.
curl.exe -X POST "https://verify.twilio.com/v2/Services/$env:VERIFY_SERVICE_SID/VerificationCheck" `
  --data-urlencode "To=destination email address" `
  --data-urlencode "Code=code written in the email" `
  -u "$($env:TWILIO_ACCOUNT_SID):$($env:TWILIO_AUTH_TOKEN)"
Authentication success can be confirmed by "status": "approved" and "valid": true in the response.

Code Verification (Incorrect Code)
Let's also check the behavior when an intentionally wrong code (000000) is entered.
curl.exe -X POST "https://verify.twilio.com/v2/Services/$env:VERIFY_SERVICE_SID/VerificationCheck" `
  --data-urlencode "To=destination email address" `
  --data-urlencode "Code=000000" `
  -u "$($env:TWILIO_ACCOUNT_SID):$($env:TWILIO_AUTH_TOKEN)"
"valid": false is returned, confirming that an incorrect code will not be authenticated.

Summary
This time, I tried OTP authentication using Twilio's Verify API with the email channel. I found that by simply changing the channel from SMS, the same API mechanism can be used, making it easy to adapt to a wide variety of use cases. I hope this blog post is helpful in some way.
Announcements
Monthly Twilio/SendGrid Seminars
Classmethod holds monthly seminars on Twilio/SendGrid.
Classmethod holds Twilio/SendGrid seminars every month. The content covers the basics for those who are not yet familiar with Twilio or SendGrid, so if you are considering introducing Twilio/SendGrid in the future, or if you have already introduced them and would like to revisit the fundamentals, please feel free to join us.