![[With Screenshots] X Official MCP "xmcp" Setup Guide (From Developer Registration to Operation Verification in Claude Code)](https://devio2024-media.developers.io/image/upload/f_auto,q_auto,w_3840/v1785143760/user-gen-eyecatch/awivz2a9nwruryg5e6rz.jpg)
[With Screenshots] X Official MCP "xmcp" Setup Guide (From Developer Registration to Operation Verification in Claude Code)

This page has been translated by machine translation. View original
Hello, I'm Keima.
Have you ever wanted to extract X posts from Claude Code?
There are several ways to do this, but this time I'll use the MCP server xmcp published by X's developer platform to retrieve X information.
X API pricing includes Pay Per Use.
You can try the API with just the credits you purchase, without subscribing to a monthly fixed plan.
Thinking "Before paying fixed costs, I want to try it with my own account first!", I went through the entire process from developer registration to verifying operation in Claude Code.
I hope this is helpful for those who want to use the X API via MCP.
Target audience: People who want to use the X API via an MCP server, people who want to follow the steps from X developer registration and credit purchase
0. Prerequisites
| Item | Value |
|---|---|
| OS | macOS 26.5.1 |
| Python | 3.14.6 |
| xmcp | xdevplatform/xmcp |
| Claude Code | 2.1.220 (MCP client in Chapter 9) |
1. Developer Registration
Sign in to the X developer site and apply for the developer program.
Enter your account name and your use case for X data and API, agree to the three checkboxes, and click "Submit".
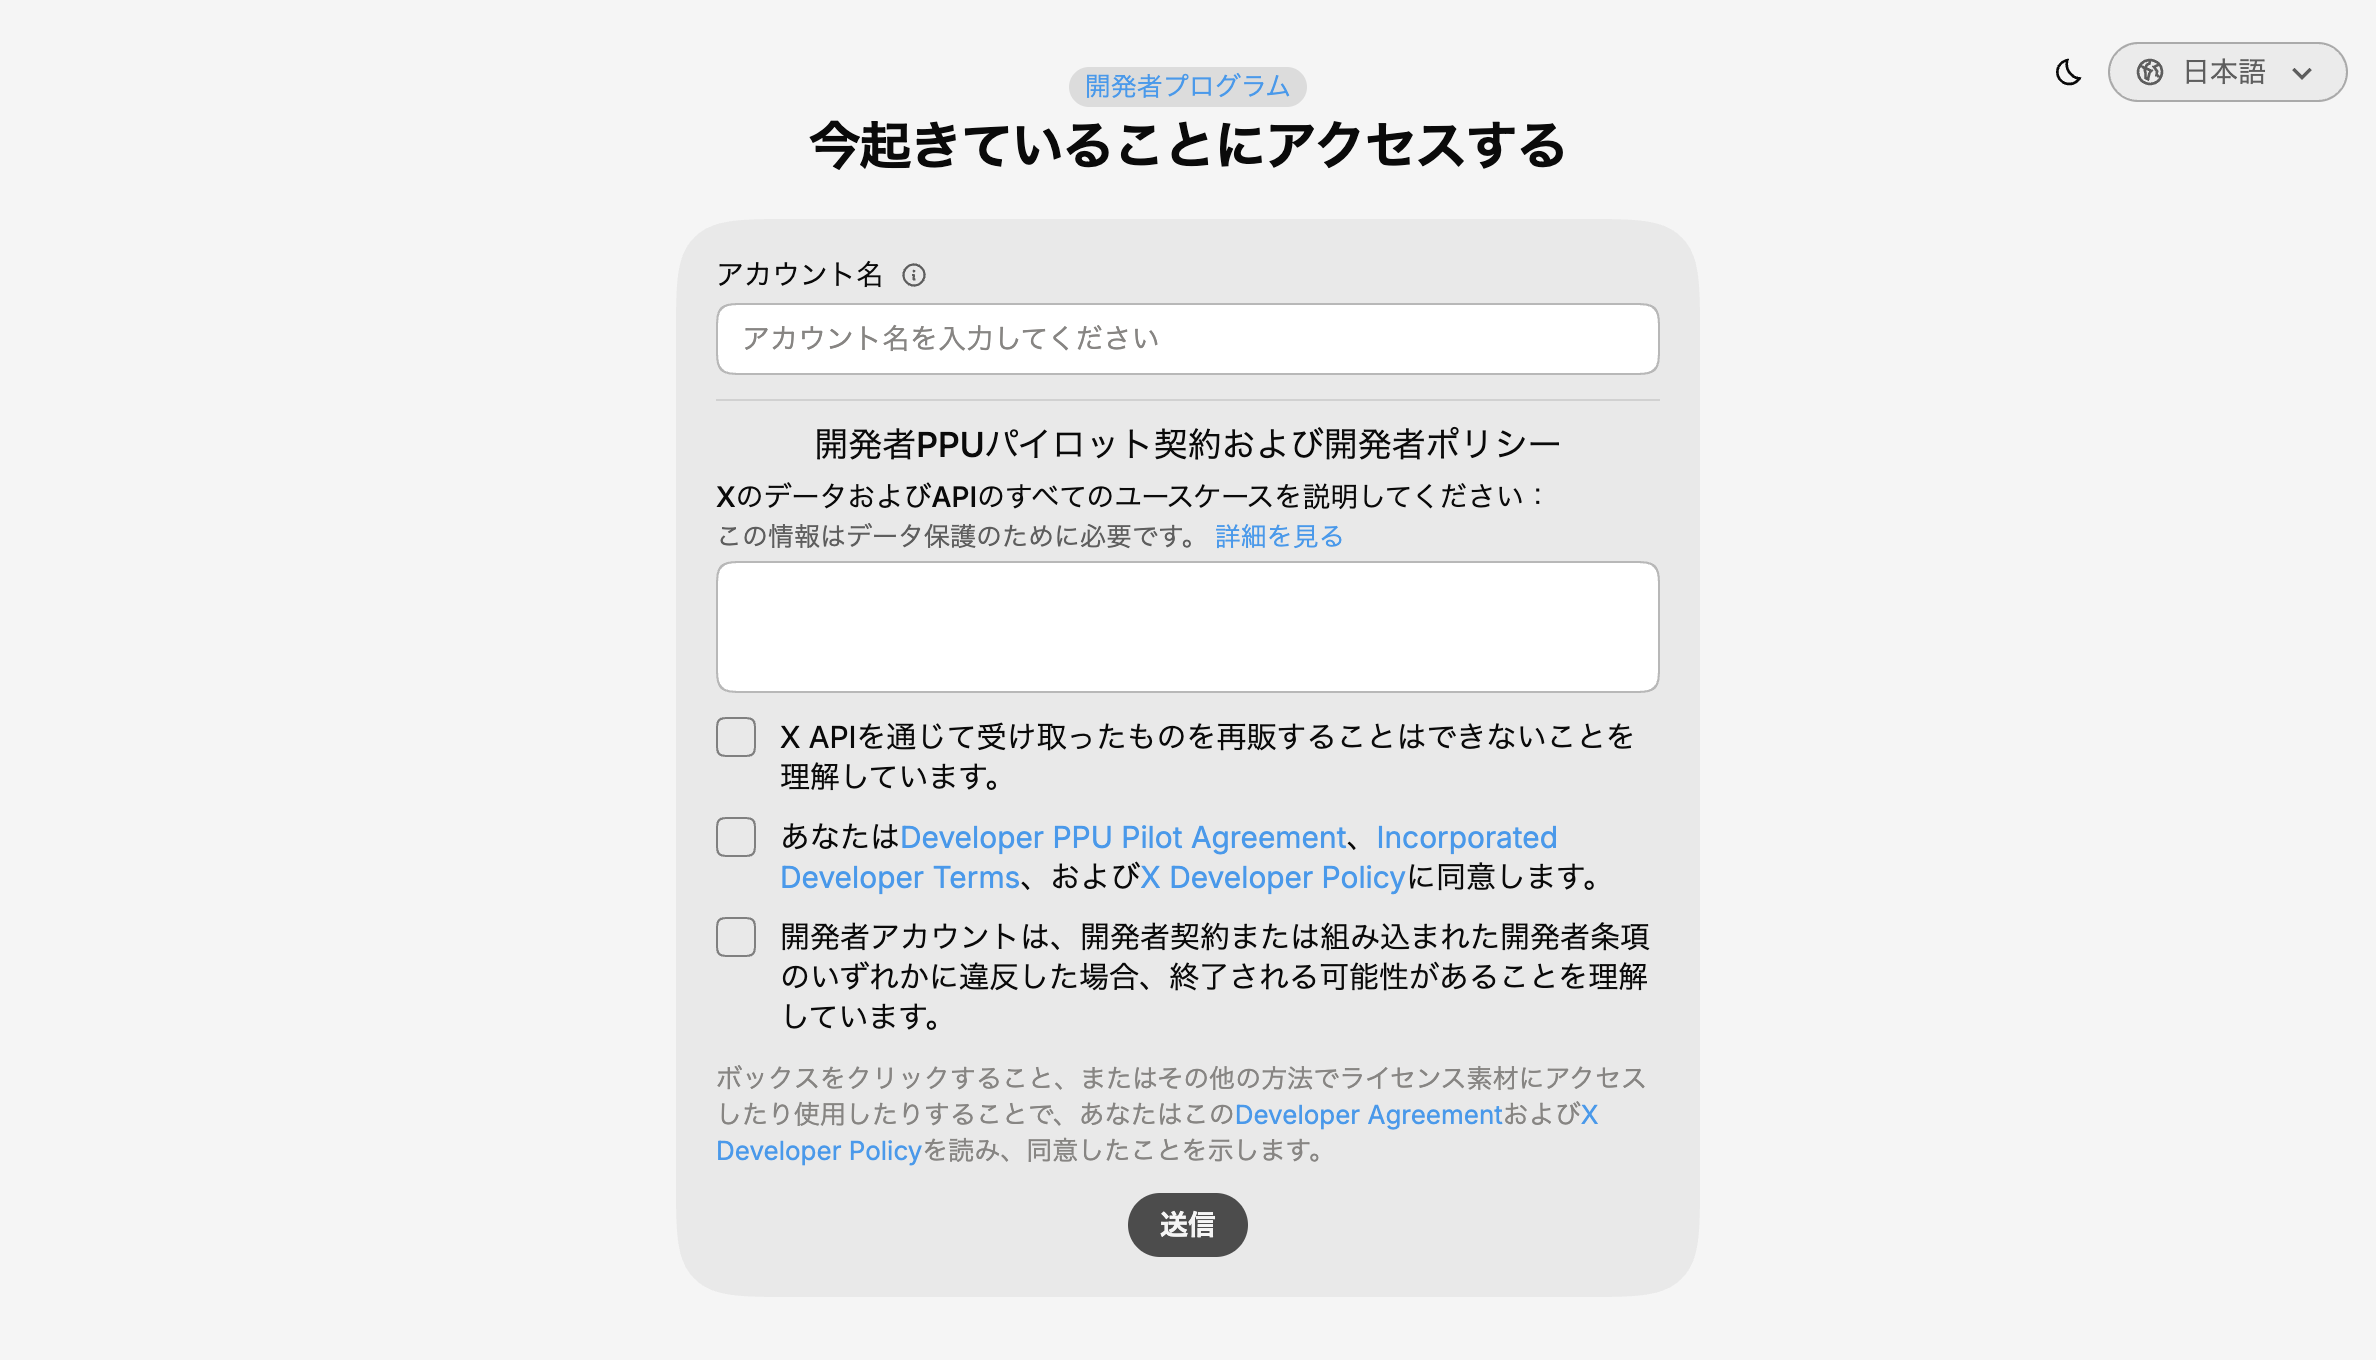
Once your application is approved, you can access the Developer Console dashboard.
At this point, one app is automatically created in the Development environment.
The name will be your account's numeric ID connected with your username (excluding @).
For an account @yourname, it would be something like 1234567890123456789yourname.
2. Purchasing Credits
Open "Credits" from the Billing section in the left menu, and click "Purchase credits".
The amount can be a preset of $5 / $25 / $100 / $250 / $500, or you can enter any amount.
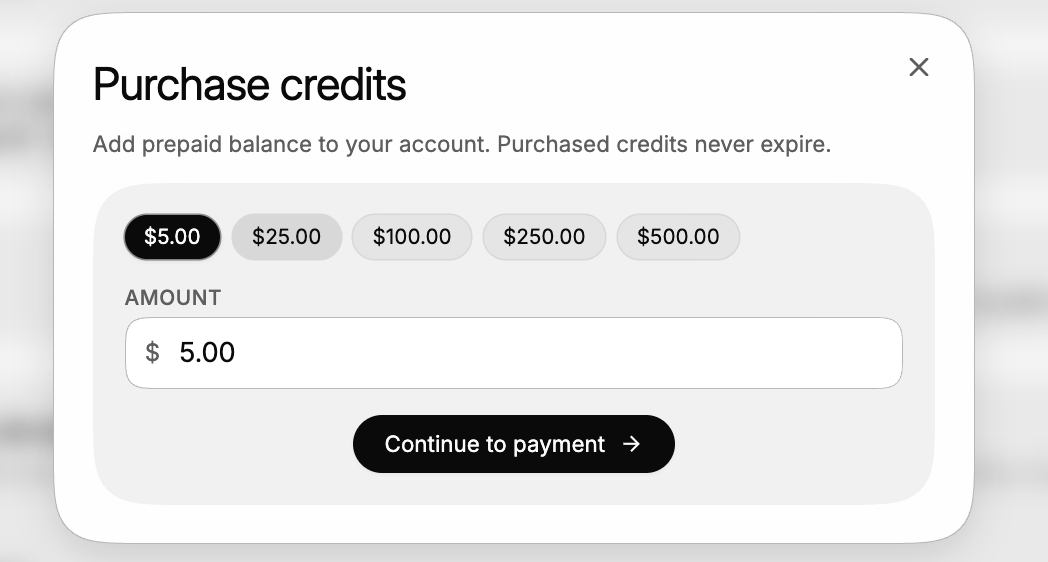
If you're just trying it out, the minimum $5 is sufficient
Once payment is complete, it will be reflected in your balance.
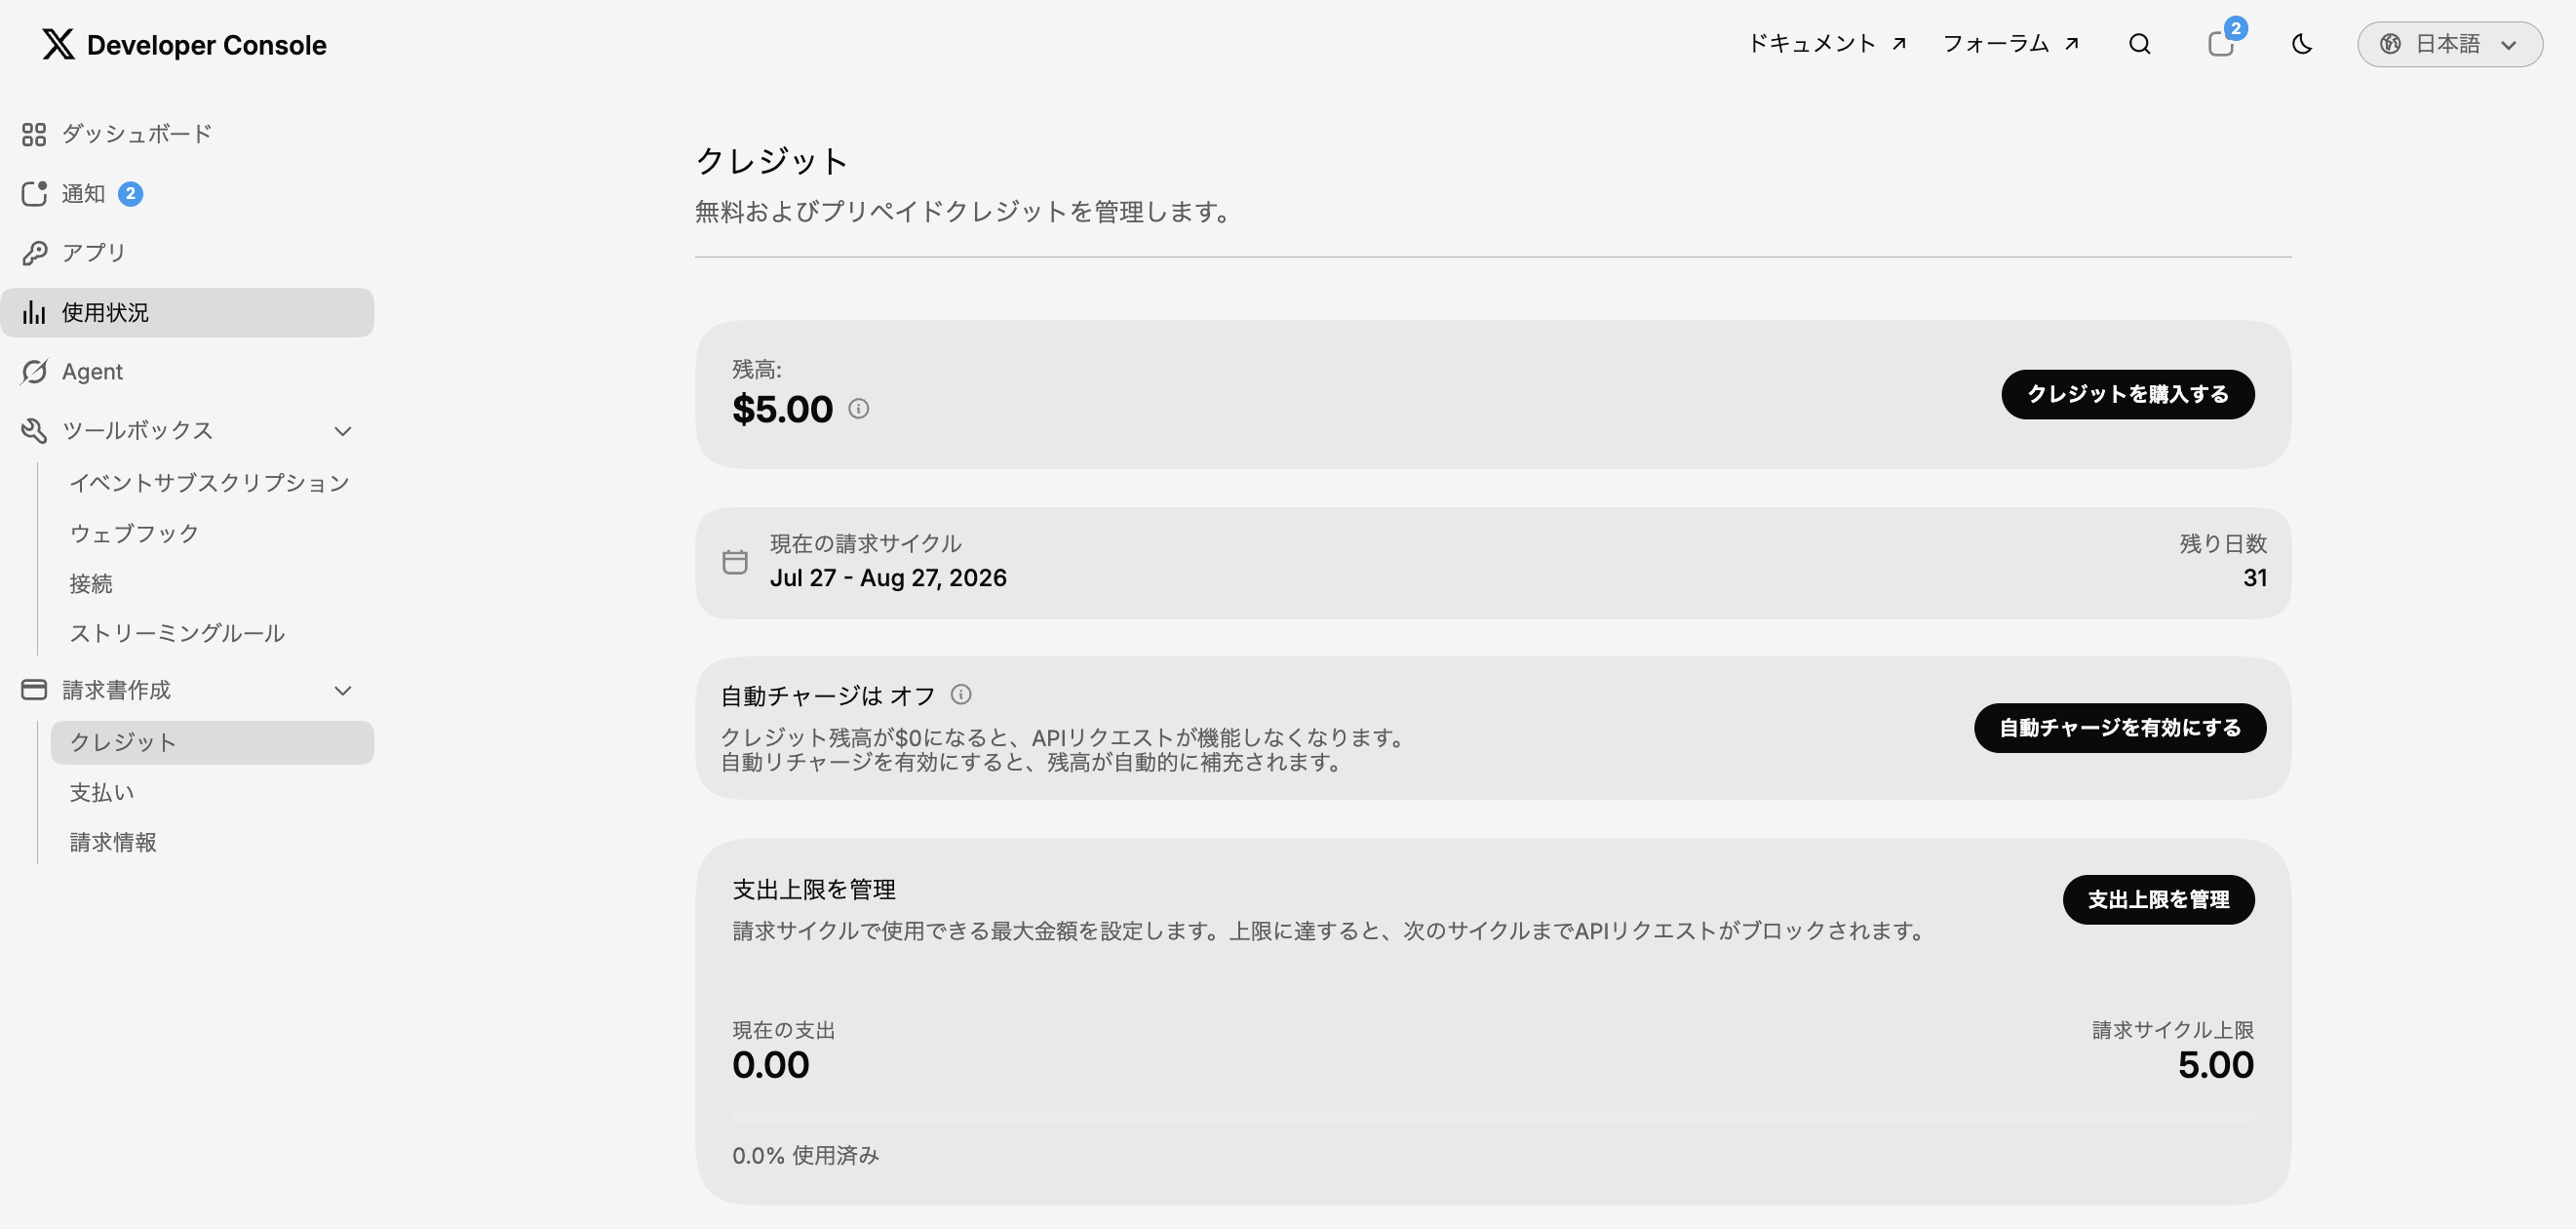
Balance of $5, with the billing cycle limit also set to $5
Auto-recharge is off immediately after purchase.
If you want the API to stop when the balance runs out, leave it off.
3. App Authentication Settings
Open "Apps" from the left menu, and you'll see the app automatically created in Chapter 1 listed under Development.
Click the app name to go to the details.
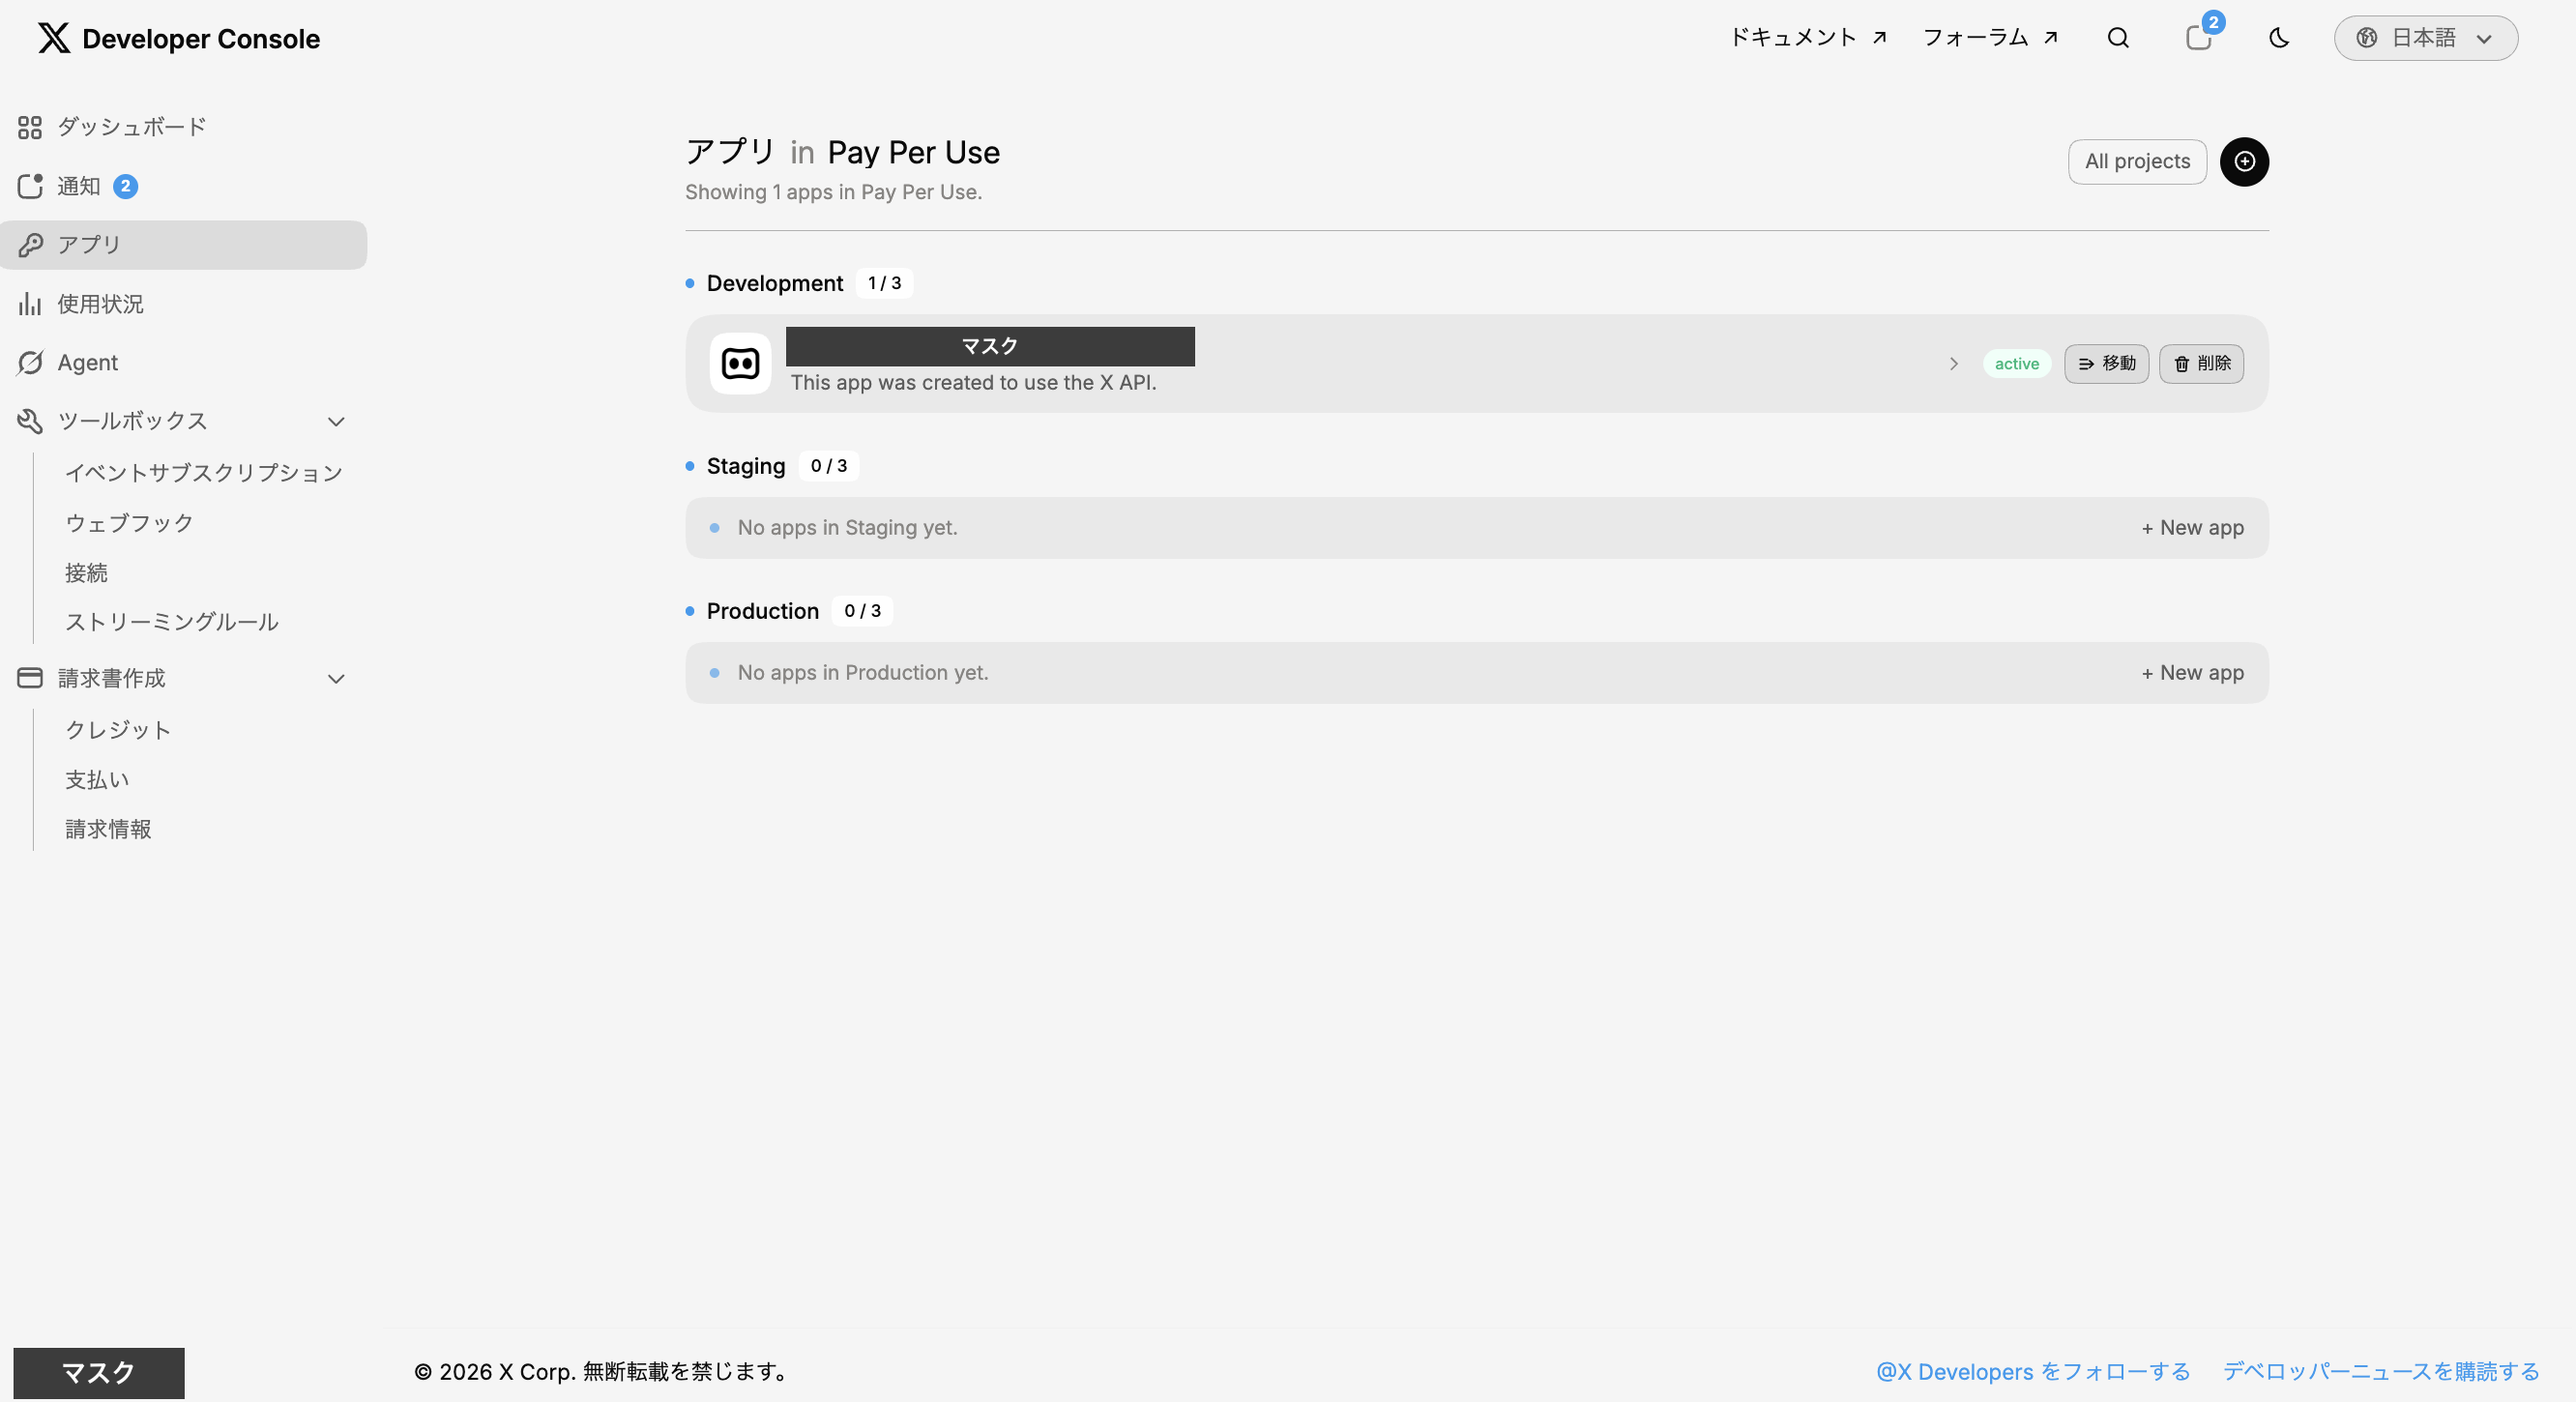
One app automatically created under Development
When you enter the app details screen, the Keys & Tokens tab opens.
You issue keys from this screen as well, but first complete the authentication settings.
If you start without registering a callback URI, the authorization in Chapter 8 will fail because there's no redirect destination.
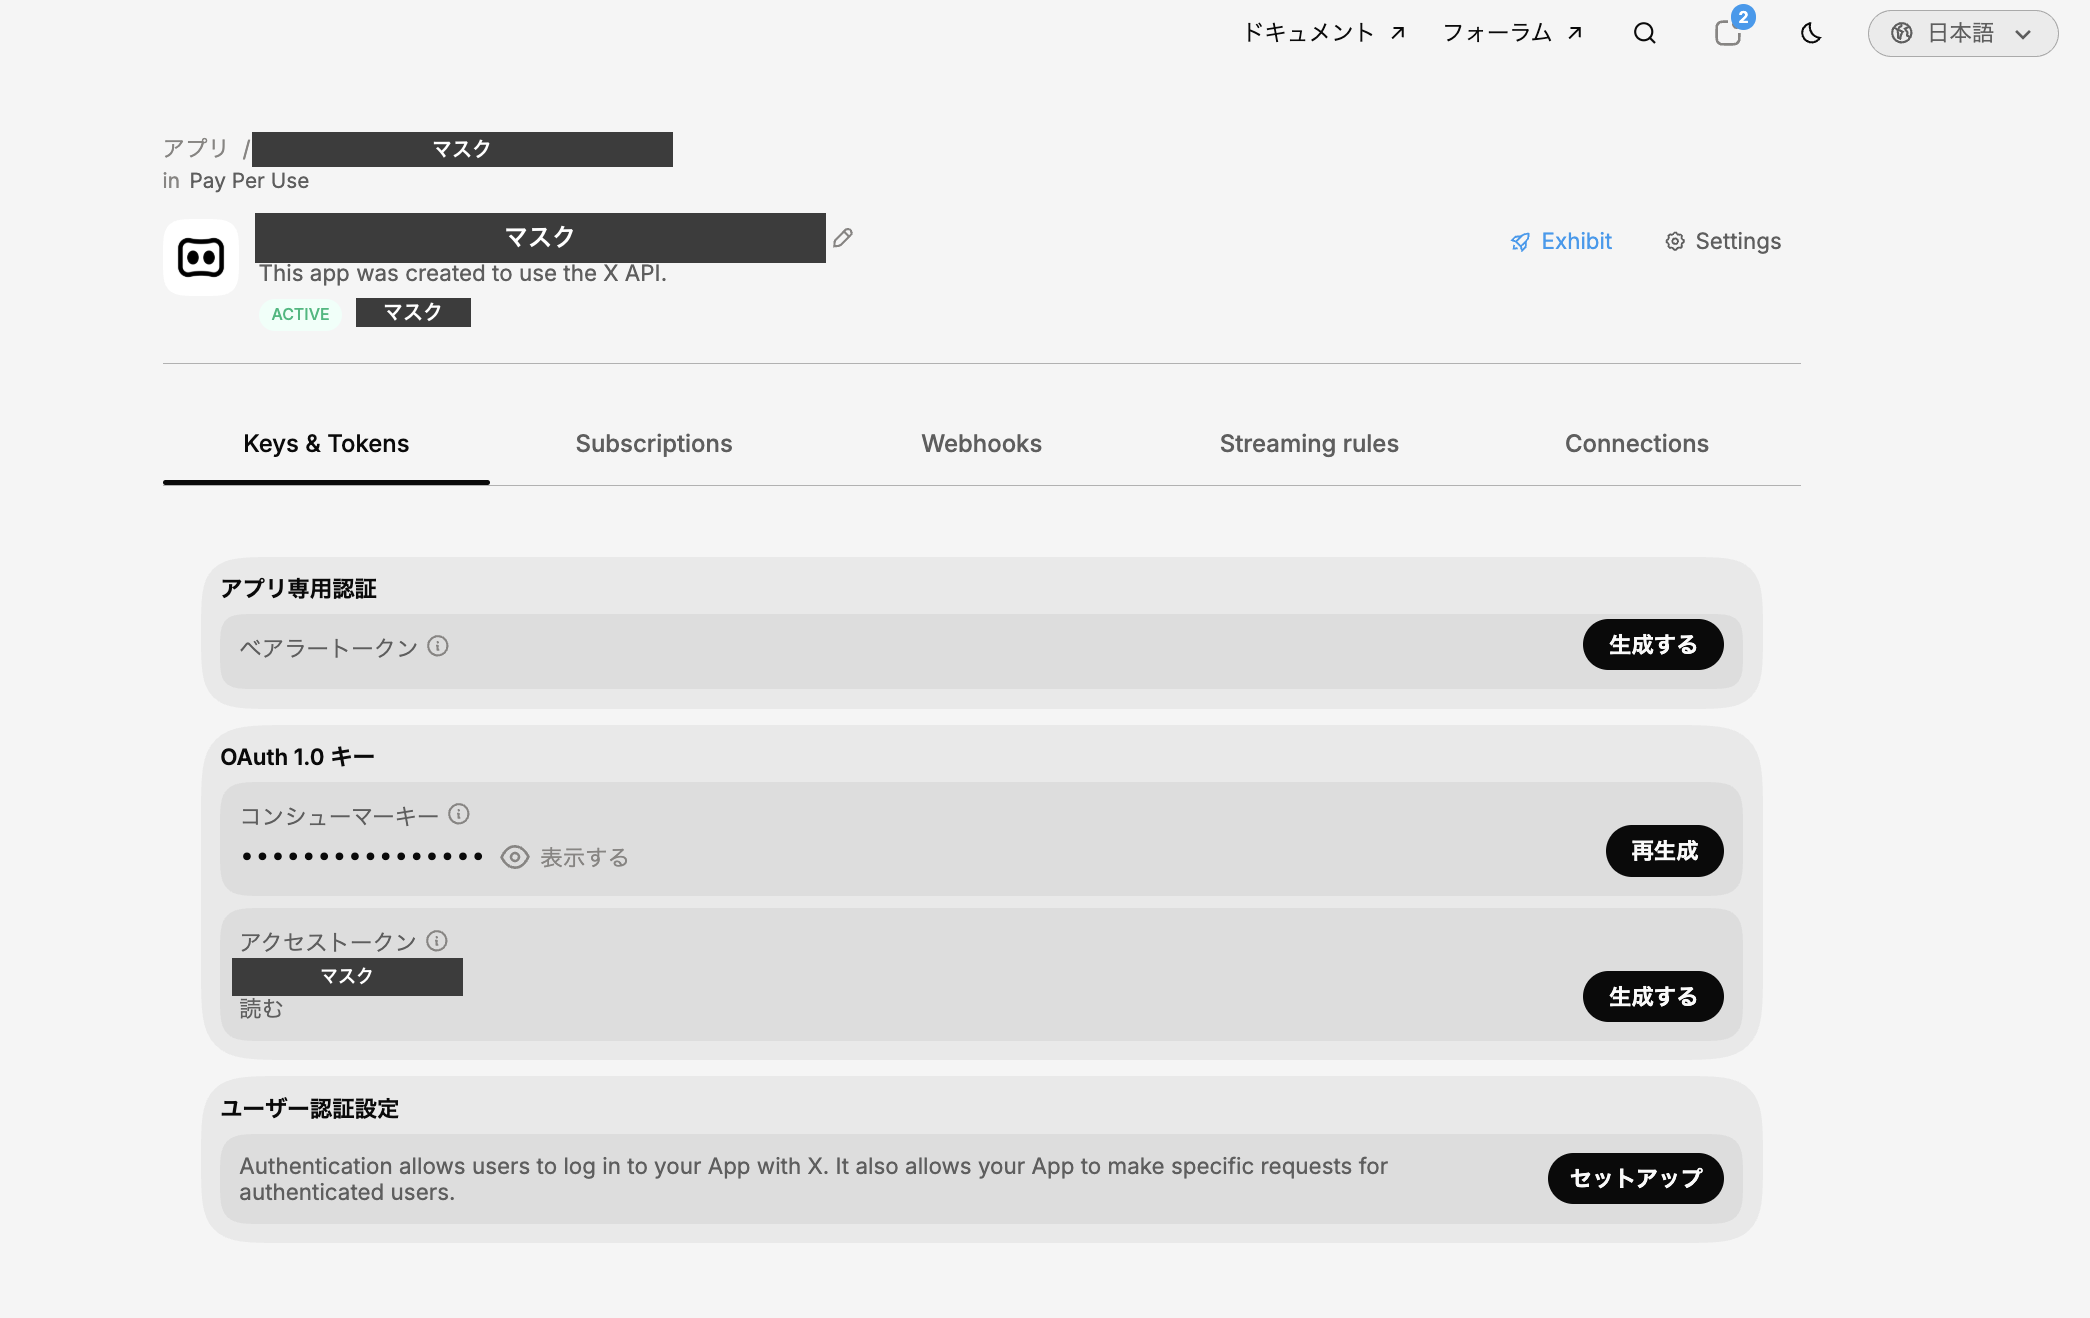
Keys are issued on this screen (Chapter 4). Enter authentication settings via "Settings" in the upper right
The three things to specify in the authentication settings are: app permissions, app type, and callback URI.
3.1 App Permissions and App Type
Click "Settings" in the upper right of the image above.
"App permissions" should be chosen to match the tools you use with xmcp.
Since I only use it for searching and viewing posts, I left it as "Read".
If you want to use the post creation (createPosts) tool, you'll need "Read and Write".
"App type" should be set to "Web App, Automated App or Bot (Confidential Client)".
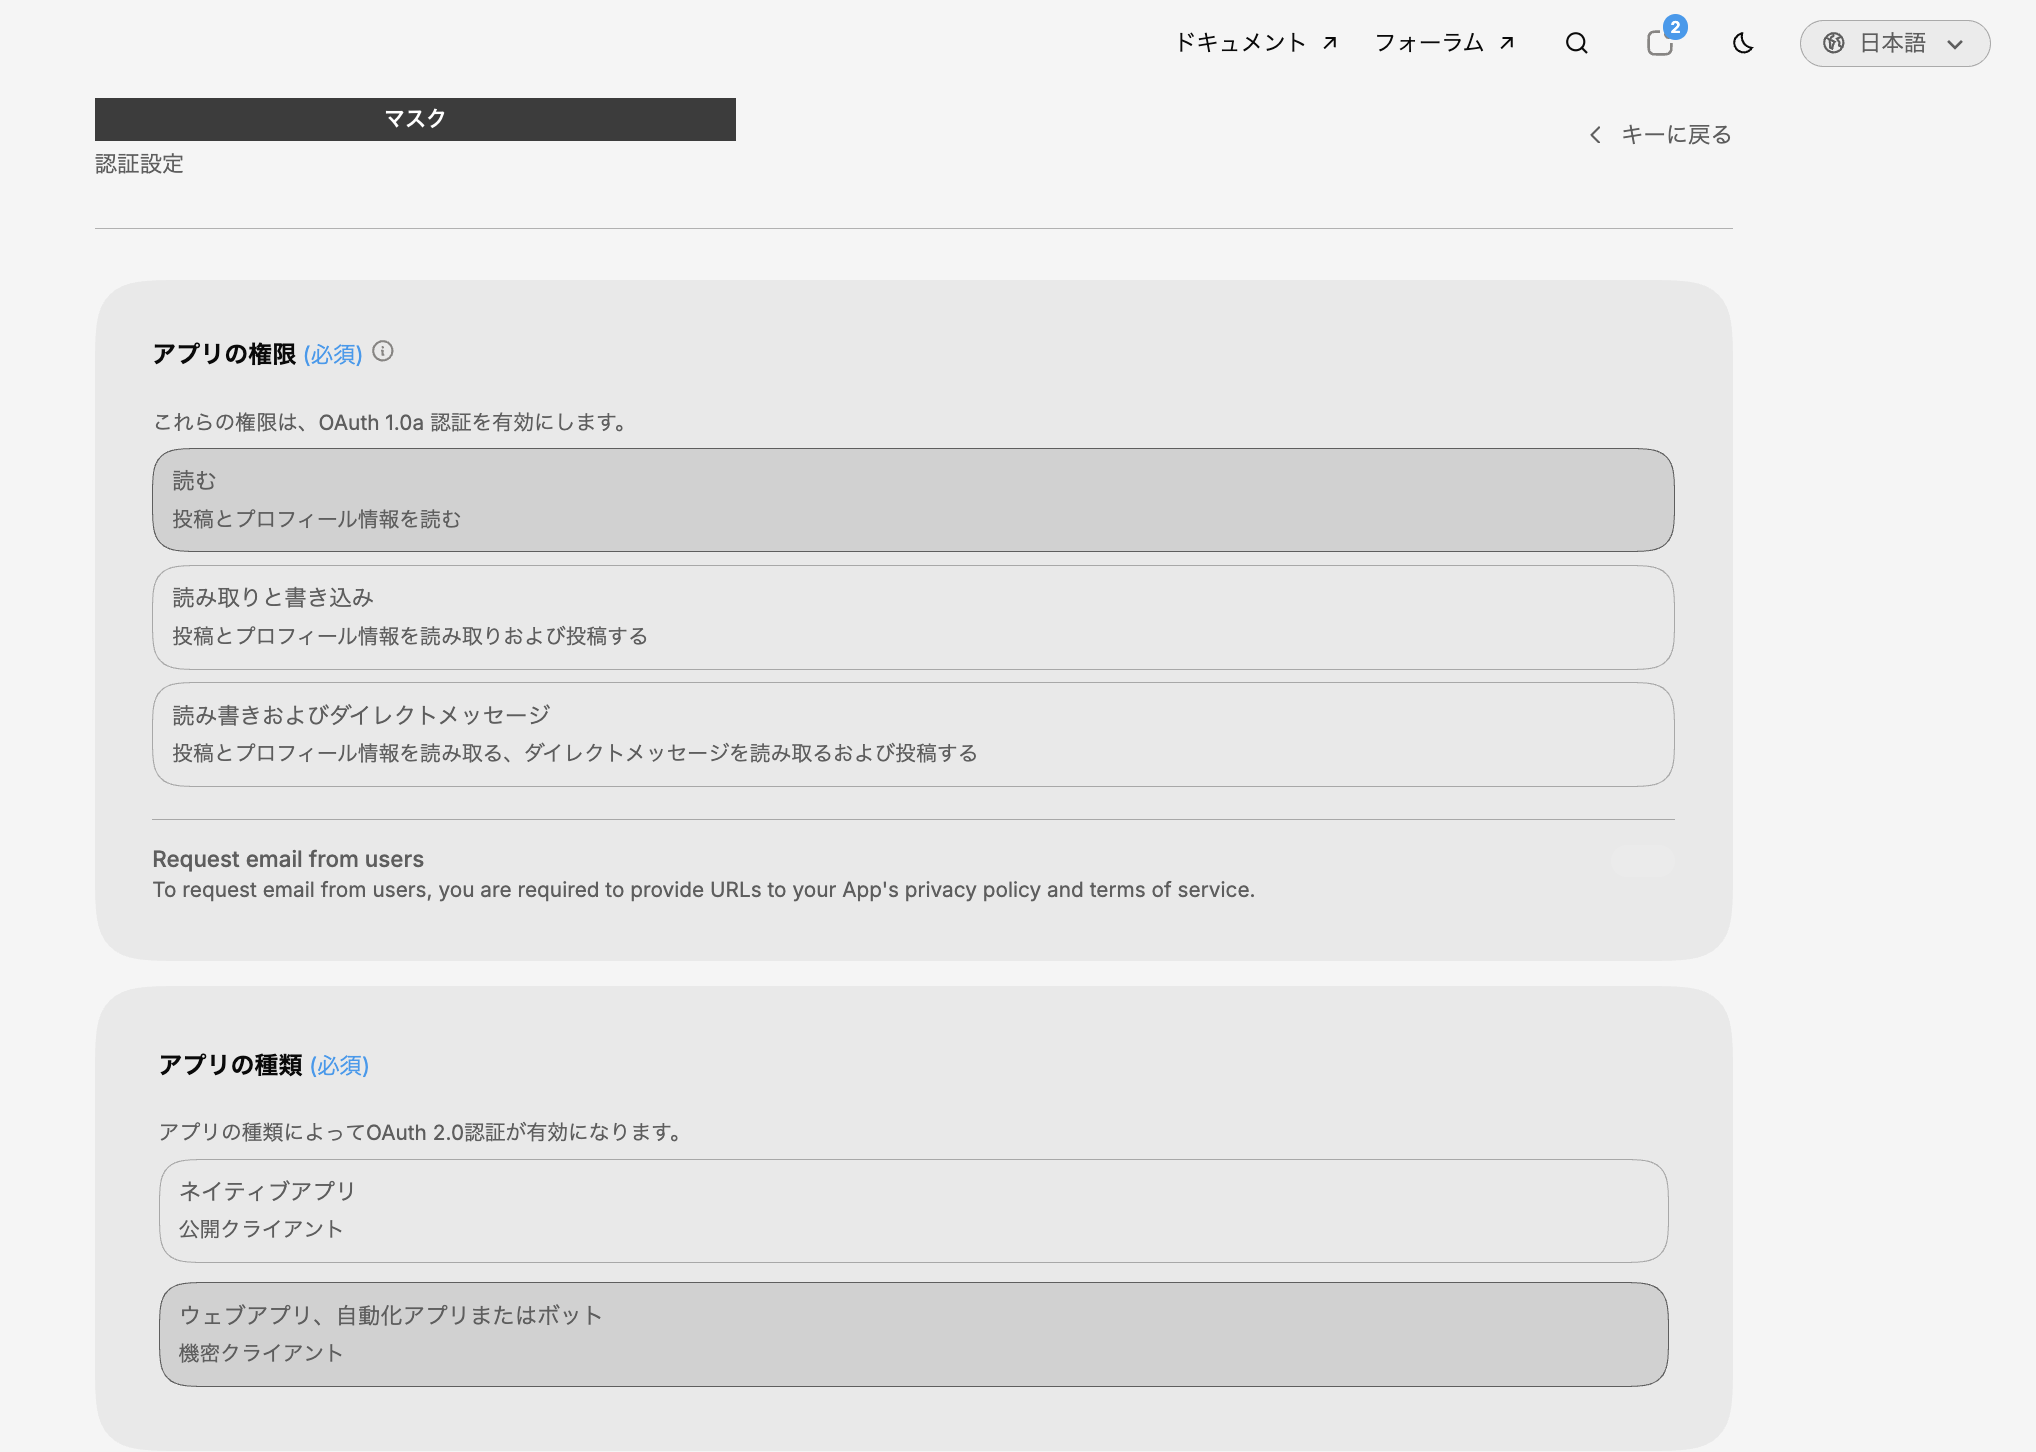
Permissions set to "Read", type set to "Web App, Automated App or Bot"
3.2 Callback URI
Enter the address where xmcp waits during OAuth 1.0a authorization in "Callback URI / Redirect URL".
With default settings, the value is as follows.
http://127.0.0.1:8976/oauth/callback
"Website URL" is also a required field.
For personal use, a GitHub profile or similar is sufficient.
Organization name, terms of service, and privacy policy can be left blank when saving.
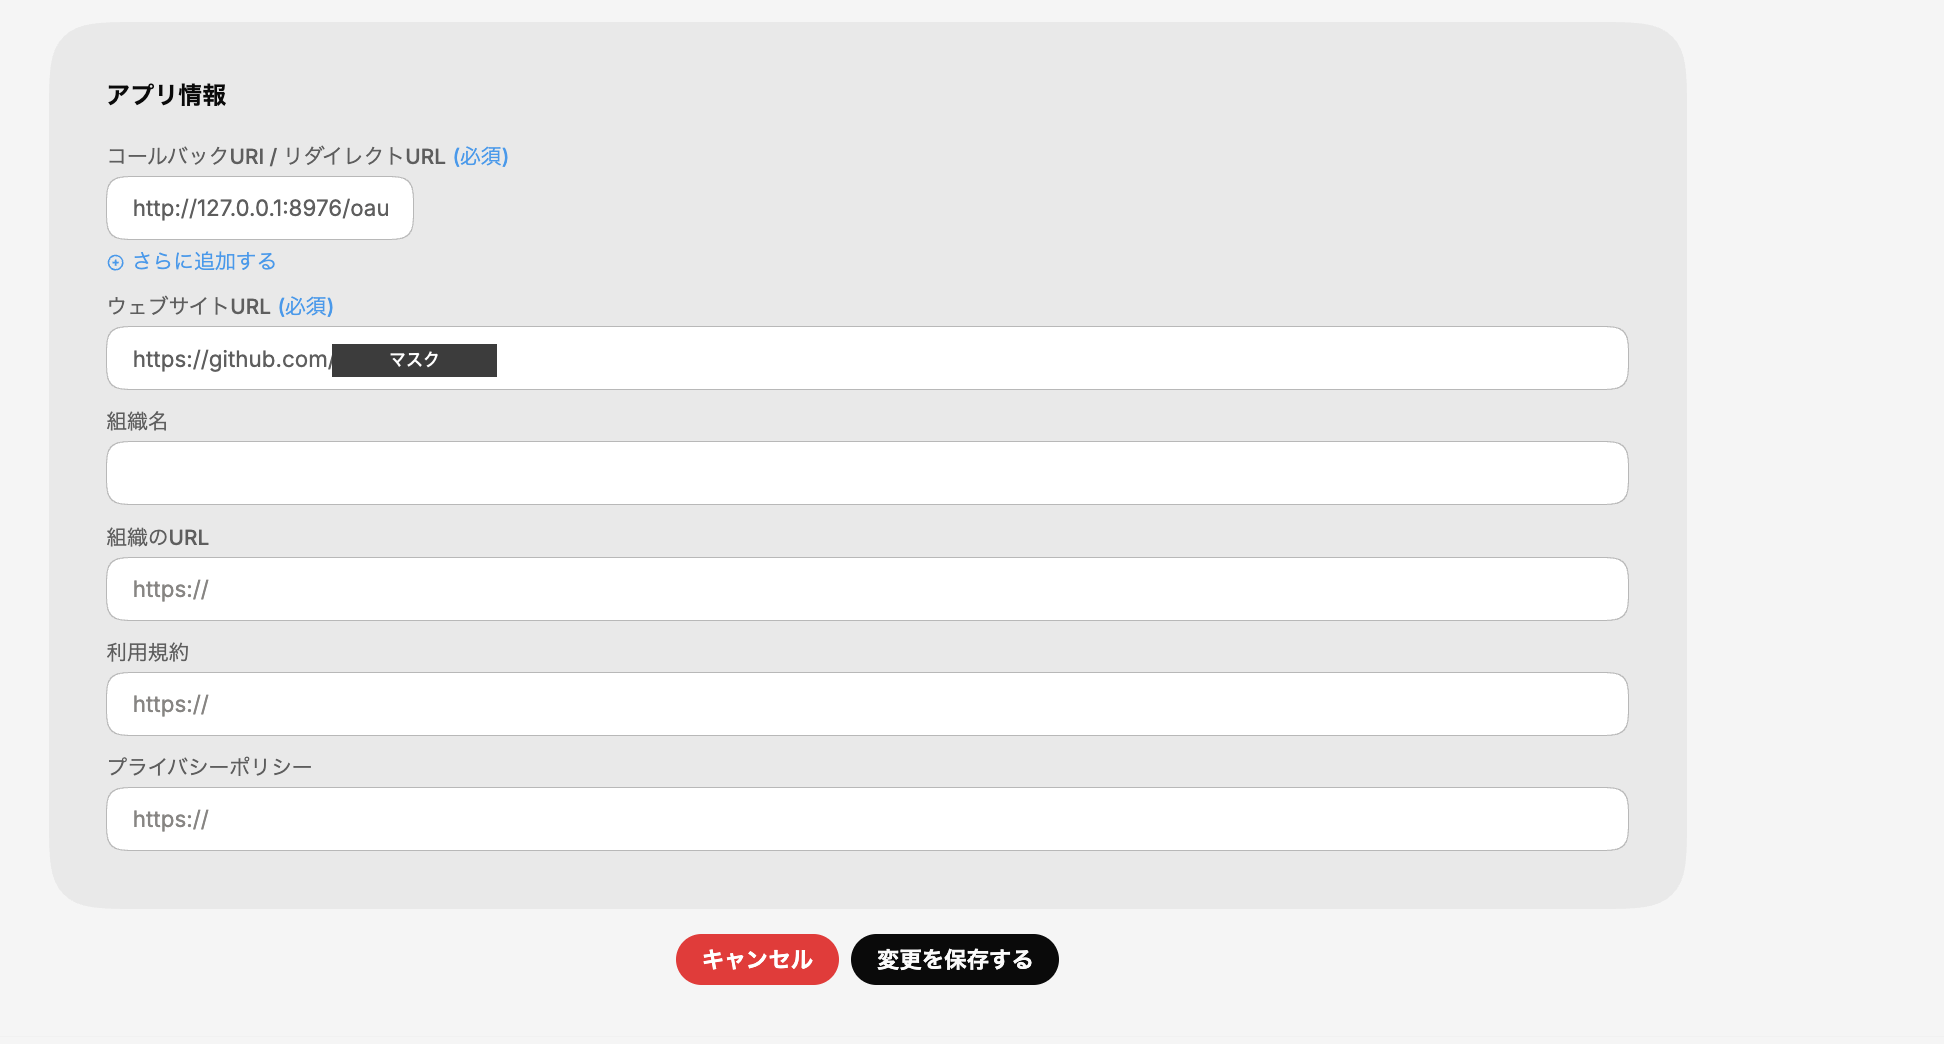
State with callback URI and website URL entered
Click "Save changes" when done.
4. Issuing Keys and Tokens
After saving the authentication settings, return to the Keys & Tokens tab from Chapter 3.
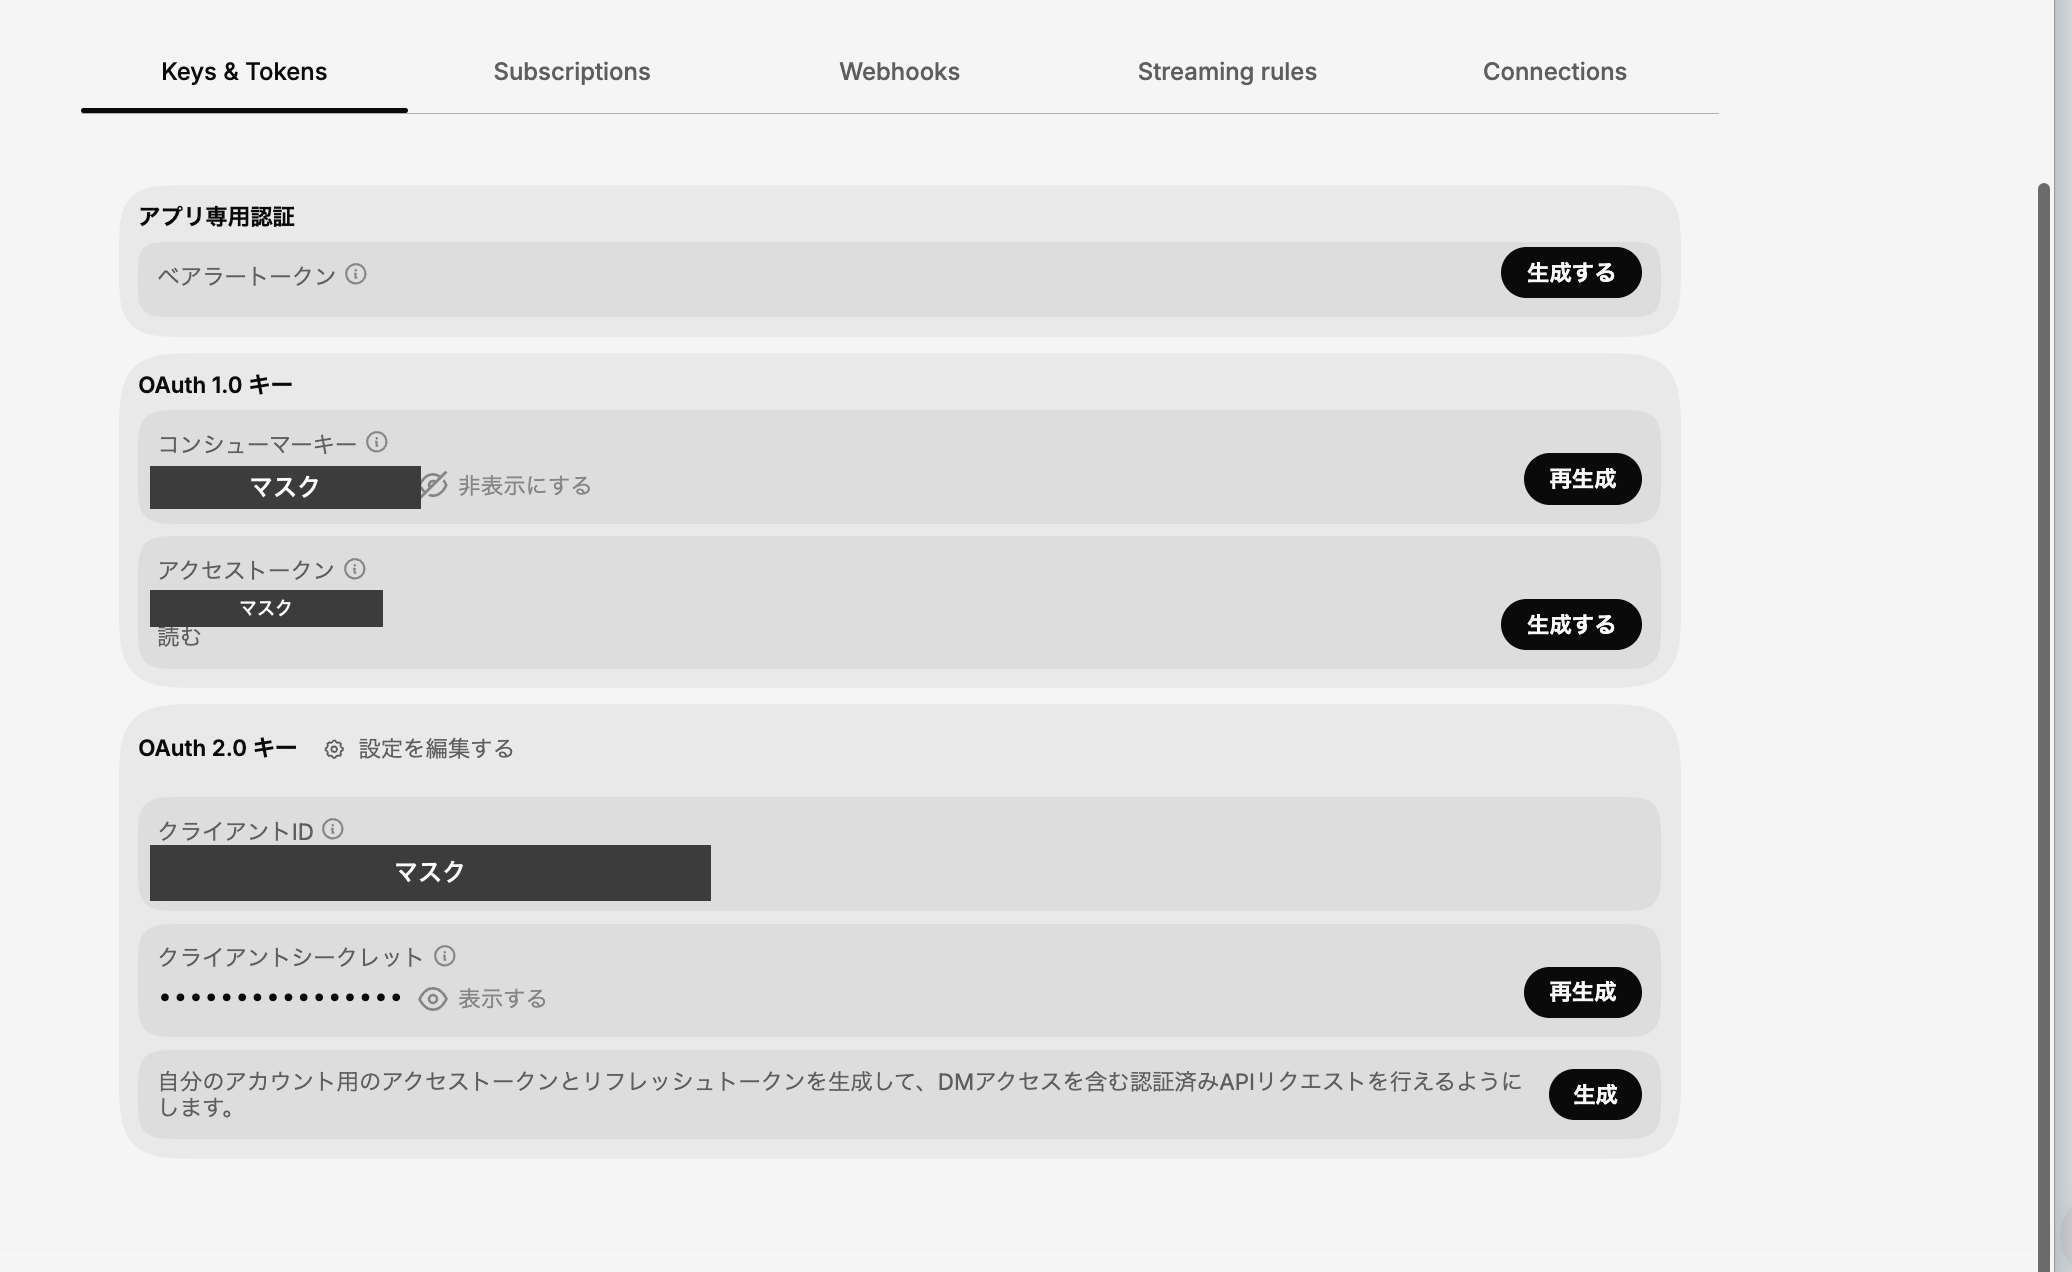
Screen for issuing keys (shown after issuance). Consumer key and client ID are hidden
This screen shows several similarly named keys, but you only need these two:
| Name on screen | Corresponding .env item |
|---|---|
| Consumer key | X_OAUTH_CONSUMER_KEY |
| Consumer secret | X_OAUTH_CONSUMER_SECRET |
Click "Regenerate" for the consumer key under "OAuth 1.0 Keys", and both the key and secret will be displayed.
Since the bearer token is listed as required in the README, issue it by clicking "Generate" under "App-only Authentication" (it is not used in the current code).
The access token on the same screen and the OAuth 2.0 keys issued by the selection in 3.1 are not used in xmcp.
Access tokens are obtained each time during server startup authorization, so there's no need to generate them here (Chapter 8).
The permissions currently set are displayed in the "Access Token" section of the image above (if you selected "Read" in 3.1, it shows "Read").
To change them, return to the authentication settings from "Settings" in the upper right, same as in 3.1.
5. Getting the Repository and Python Environment
From here, the work is local.
Clone the repository and create a virtual environment.
git clone https://github.com/xdevplatform/xmcp.git
cd xmcp
python3 -m venv .venv
source .venv/bin/activate
pip install -r requirements.txt
The contents of requirements.txt are these six items:
fastmcp
httpx
python-dotenv
requests-oauthlib
xai-sdk
xdk
In my environment, fastmcp-3.4.4, httpx-0.28.1, python-dotenv-1.2.2, requests-oauthlib-2.0.0, xai-sdk-1.17.0, and xdk-0.10.0 were installed.
Verify that the virtual environment is active.
which python
python --version
# Example output
/Users/<YOUR_NAME>/xmcp/.venv/bin/python
Python 3.14.6
6. Creating .env
Copy env.example and fill in the values obtained in Chapter 4.
cp env.example .env
The four lines to change are:
~/xmcp/.env:
X_OAUTH_CONSUMER_KEY=<YOUR_CONSUMER_KEY>
X_OAUTH_CONSUMER_SECRET=<YOUR_CONSUMER_SECRET>
X_BEARER_TOKEN=<YOUR_BEARER_TOKEN>
X_API_DEBUG=0
The default for X_API_DEBUG is 1, but if left at 1, the access token will be output in plain text in the startup log.
Since the token would remain if you start with stdout redirected to a file, set it to 0.
X_BEARER_TOKEN is listed as required in the README, but it is not used in requests in the current code.
Setting it in preparation for future changes is sufficient.
The remaining callback and MCP server settings work fine with the default values in env.example.
7. Limiting the Tools Used
xmcp generates over 100 tools from the X API's OpenAPI specification.
Since it includes post deletion and DM sending, allow only what you'll use.
The 13 tools I allowed are as follows:
| What you can do | operationId |
|---|---|
| Search posts from the last 7 days | searchPostsRecent |
| Search and retrieve news | searchNews / getNews |
| Retrieve posts by ID | getPostsById / getPostsByIds |
| View reactions to posts | getPostsLikingUsers / getPostsRepostedBy / getPostsReposts / getPostsQuotedPosts |
| Look up users | getUsersByUsername / getUsersByIds |
| View account posts and mentions | getUsersPosts / getUsersMentions |
By listing operationId values separated by commas in X_API_TOOL_ALLOWLIST, only those tools will be loaded.
~/xmcp/.env:
X_API_TOOL_ALLOWLIST=searchPostsRecent,searchNews,getNews,getPostsById,getPostsByIds,getPostsLikingUsers,getPostsRepostedBy,getPostsReposts,getPostsQuotedPosts,getUsersByUsername,getUsersByIds,getUsersPosts,getUsersMentions
This takes effect at startup, so restart the server after making changes.
The full list of specifiable operationId values is available in the repository's README.md.
8. Starting the Server
Start with the virtual environment active.
Pass the listening port via environment variable.
MCP_PORT=8001 python server.py
If the default 8000 is fine, MCP_PORT can be omitted.
When started, the browser first opens for authorization.
After approving the app on X's authorization screen, it redirects to the callback URI registered in 3.2, and xmcp receives the access token.
9. Registering with Claude Code and Verifying Operation
Register it as an MCP server with Claude Code.
Using --scope user makes it available from sessions started in any directory.
claude mcp add --transport http --scope user xmcp http://127.0.0.1:8001/mcp
Verify that it was registered.
claude mcp list
# Example output
xmcp: http://127.0.0.1:8001/mcp (HTTP) - ✔ Connected
Verify the loaded tools.
Start a new session and have it list the tool names.
claude -p <<'EOF'
Among the available MCP tools, please list only those whose names start with mcp__xmcp__. Do not execute the tools.
EOF
In my environment, the 13 tools allowed in Chapter 7 were listed with names like mcp__xmcp__searchPostsRecent.
Finally, actually call the X API.
claude -p --allowedTools "mcp__xmcp__searchPostsRecent" <<'EOF'
Please call mcp__xmcp__searchPostsRecent exactly once. The query is from:XDevelopers and max_results is 10. Report the number of results retrieved and the beginning of the first post's body.
EOF
✅ If posts are returned, everything from developer registration to this point is working.
In my environment, 5 posts were returned, and POST /mcp 200 OK was recorded in the server-side log.
10. Usage from the Second Time Onward
The settings up to this point are one-time only, but xmcp is only available while the process is running.
After restarting your PC or stopping it with Ctrl + C, run these 2 commands each time you want to use it:
cd ~/xmcp
source .venv/bin/activate && MCP_PORT=8001 python server.py
When started, the authorization screen opens in the browser, so approve it.
Since the design only holds access tokens in memory, this approval is required every time.
If you run claude mcp list while the server is not running, you'll see ✘ Failed to connect.
In that case, start the server first, then reload the Claude Code session.
11. Summary
I ran the X official MCP server implementation through the entire process from developer registration to calling it from Claude Code.
Since Pay Per Use is now available, you can try it from $5 without subscribing to a monthly plan.
The most likely stumbling block in the setup is registering the callback URI (3.2).
Since the design only holds access tokens in memory, browser approval is required every time you start.