
I tried configuring LiteLLM Proxy as a model source in Amazon Bedrock AgentCore Managed Harness
This page has been translated by machine translation. View original
Introduction
Hello, I'm Kamino from the Consulting Division, a big fan of La·Mu.
In Amazon Bedrock AgentCore's Managed Harness, you could previously select Amazon Bedrock / OpenAI / Google Gemini as model sources, but LiteLLM has been newly added!
By inserting a LiteLLM Proxy in between, you can incorporate proxy-layer governance features into Harness, such as issuing virtual API keys, team-based access control and usage tracking, and guardrail enforcement.
This time, I tried everything end-to-end, from building the LiteLLM Proxy to connecting it to Harness.
Prerequisites
This article was verified in the following environment.
| Item | Value |
|---|---|
| Amazon Bedrock AgentCore | us-east-1 |
| LiteLLM Proxy | main-v1.81.14-stable (ECS Fargate + ALB) |
| Terraform | >= 1.5 |
Model access for Claude Sonnet 4.5 / Claude Haiku 4.5 must be enabled in Amazon Bedrock.
Deploying LiteLLM Proxy
Cloning the Repository
I have prepared Terraform code for deploying LiteLLM Proxy on AWS. First, clone the repository.
git clone https://github.com/yuu551/lite-llm-sample.git
cd lite-llm-sample/terraform
If you want to learn more about building LiteLLM Proxy, please also check the article below.
Configuring terraform.tfvars
Copy terraform.tfvars.example and edit the settings.
cp terraform.tfvars.example terraform.tfvars
Since RDS is required for virtual API key management this time, set enable_rds to true. Guardrails are disabled since we won't be using them this time.
aws_region         = "us-east-1"
name_prefix        = "litellm-harness"
litellm_version    = "main-v1.81.14-stable"
litellm_master_key = "sk-xxxxxxxxxxxxxxxxxxxxxxxx"

ecs_cpu       = 512
ecs_memory    = 1024
desired_count = 1

enable_rds       = true
enable_redis     = false
enable_guardrail = false
litellm_master_key is the authentication key for administration. Please set a sufficiently random string.
Checking config.yaml
Let's check the template that serves as the basis for the config.yaml that is automatically generated at deployment time.
model_list:
  - model_name: claude-sonnet
    litellm_params:
      model: bedrock/us.anthropic.claude-sonnet-4-5-20250929-v1:0
      aws_region_name: ${aws_region}

  - model_name: claude-haiku
    litellm_params:
      model: bedrock/us.anthropic.claude-haiku-4-5-20251001-v1:0
      aws_region_name: ${aws_region}
claude-sonnet and claude-haiku, defined as model_name, will become the base of the model IDs specified on the Harness side later. When LiteLLM Proxy receives these aliases, it routes them to the corresponding Bedrock models behind the scenes.
Deployment
Deploy everything at once with Terraform.
terraform init
terraform apply
Deployment completes in a few minutes. The output service_url is the LiteLLM Proxy endpoint.
Apply complete! Resources: 42 added, 0 changed, 0 destroyed.

Outputs:

alb_dns_name = "litellm-harness-xxxxxxxxxx.us-east-1.elb.amazonaws.com"
service_url  = "http://litellm-harness-xxxxxxxxxx.us-east-1.elb.amazonaws.com"
Verify that it has started up correctly with a health check.
curl -s "$(terraform output -raw service_url)/health/liveliness" | jq .
If "I'm alive!" is returned, you're good to go!
Issuing a Virtual API Key
When connecting from AgentCore Harness to LiteLLM Proxy, a virtual API key for authentication is required. Use the LiteLLM Admin API to create a team and issue a key.
For more details on LiteLLM team and key management, please refer to the article below.
First, set the endpoint and master key as environment variables.
export LITELLM_PROXY_URL="$(terraform output -raw service_url)"
export LITELLM_MASTER_KEY="sk-xxxxxxxxxxxxxxxxxxxxxxxx"
Creating a Team
Create a team for AgentCore Harness.
curl -s "${LITELLM_PROXY_URL}/team/new" \
  -H "Authorization: Bearer ${LITELLM_MASTER_KEY}" \
  -H "Content-Type: application/json" \
  -d '{
    "team_alias": "agentcore-harness",
    "models": ["claude-sonnet", "claude-haiku"]
  }' | jq .
{
  "team_alias": "agentcore-harness",
  "team_id": "xxxxxxxx-xxxx-xxxx-xxxx-xxxxxxxxxxxx",
  "models": ["claude-sonnet", "claude-haiku"],
  ...
}
Access is restricted to the models specified in models. The team_id included in the response will be used in the next key issuance step.
Issuing a Virtual API Key
Issue a virtual API key tied to this team.
curl -s "${LITELLM_PROXY_URL}/key/generate" \
  -H "Authorization: Bearer ${LITELLM_MASTER_KEY}" \
  -H "Content-Type: application/json" \
  -d '{
    "team_id": "<team_id obtained above>",
    "key_alias": "agentcore-harness-key"
  }' | jq .
{
  "key": "sk-xxxxxxxxxxxxxxxxxxxxxxxxxxxxxxxx",
  "key_name": "agentcore-harness-key",
  ...
}
The key in the response is the virtual API key. Register this value with AgentCore Identity in the next step.
Creating a Credential Provider in AgentCore Identity
When connecting from Harness to LiteLLM Proxy, rather than entering the API key directly, authentication information is managed via AgentCore Identity's Credential Provider. Since it is encrypted and stored in AWS Secrets Manager behind the scenes, it's great that API keys can be handled securely.
Open Identity from the left menu of the AgentCore console.
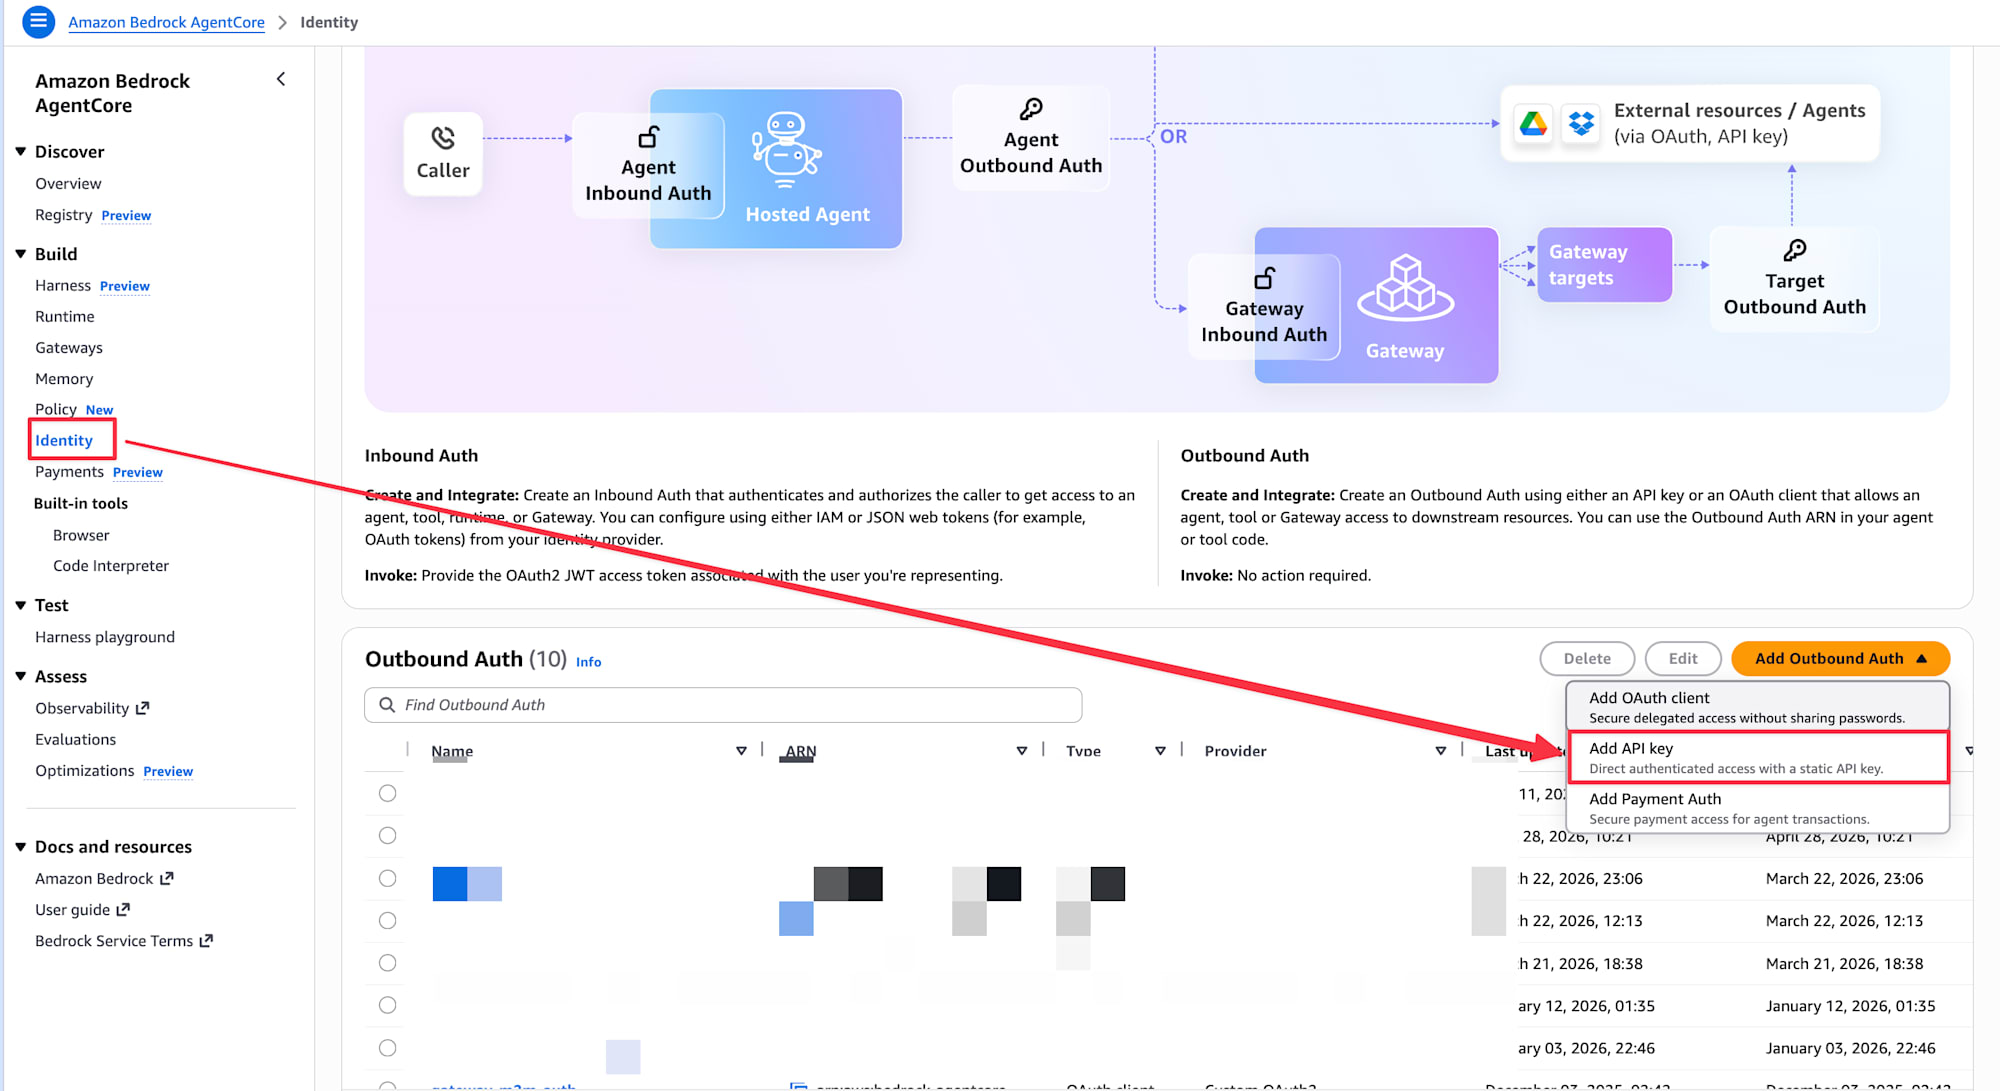
From the "Add Outbound Auth" button in the Outbound Auth section, select "Add API key".
Enter the following information.
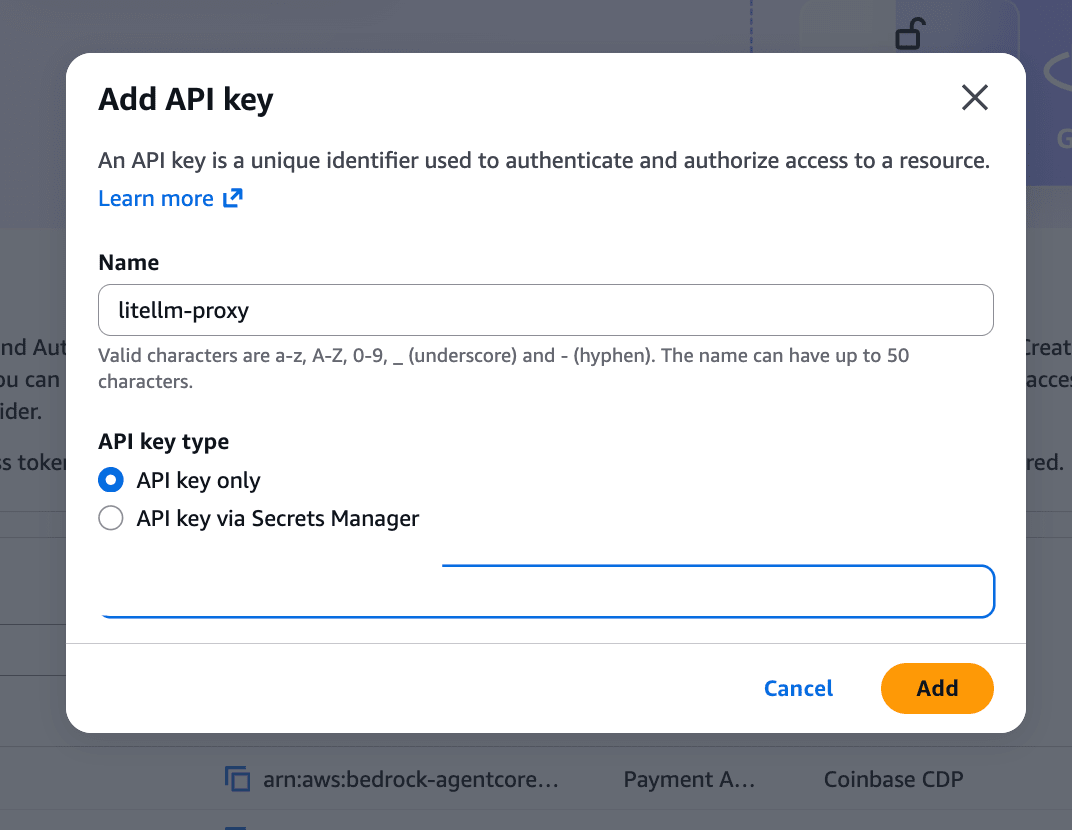
- Enter
litellm-proxyin the Name field - Select API key only for API key type
- Enter the virtual API key issued by LiteLLM Proxy earlier for API key
- Click the "Add" button
Once creation is complete, litellm-proxy will appear in the Outbound Auth list. The ARN of this Credential Provider can be selected from a dropdown when configuring Harness, so there is no need to note it down separately.
Harness Configuration
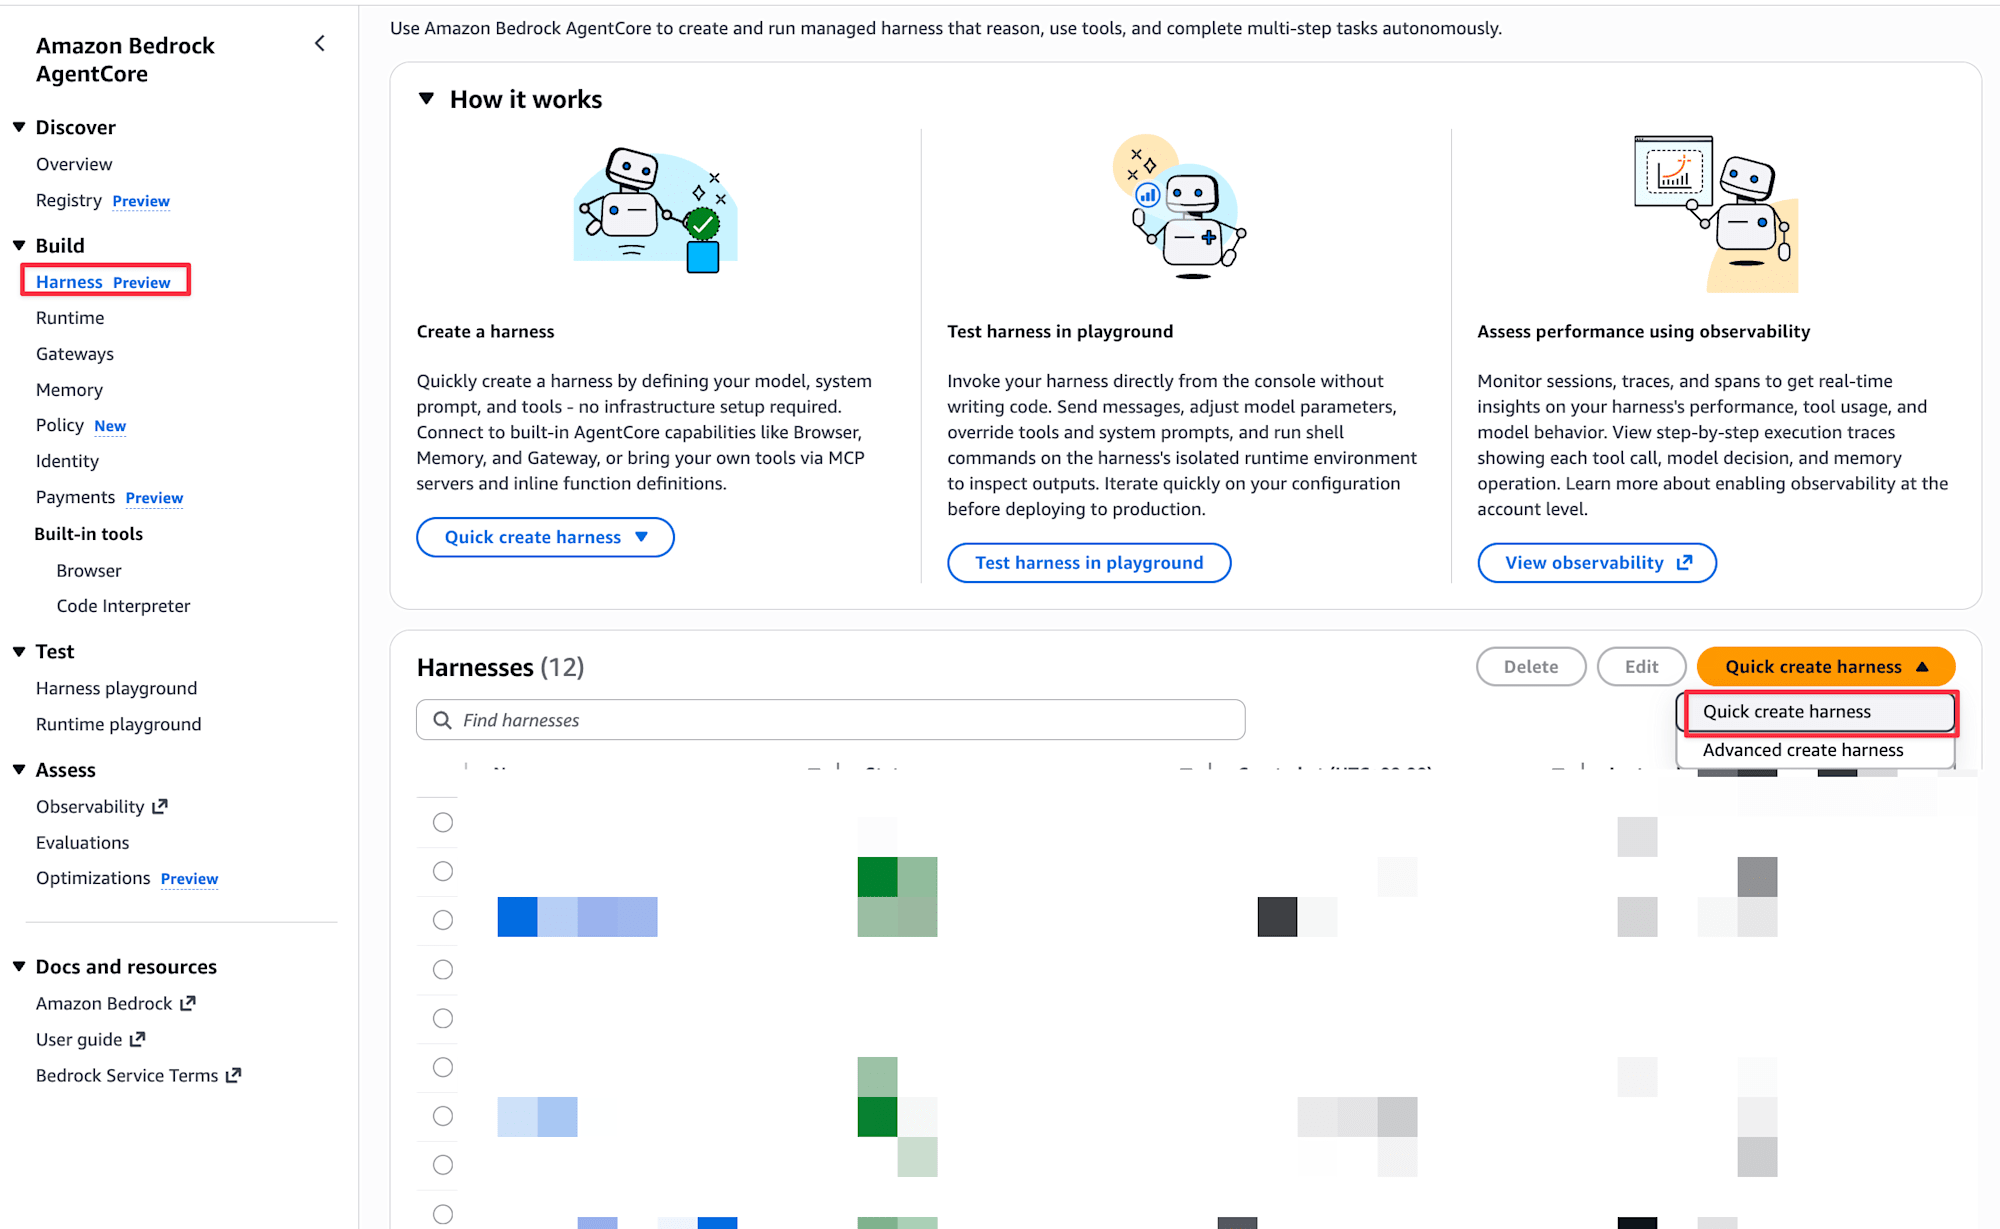
Creating a Harness
Select Harness from the left menu of the AgentCore console and quickly create one with Quick create harness. A Harness with default settings will be ready in about 30 seconds.
Setting LiteLLM as the Model Source
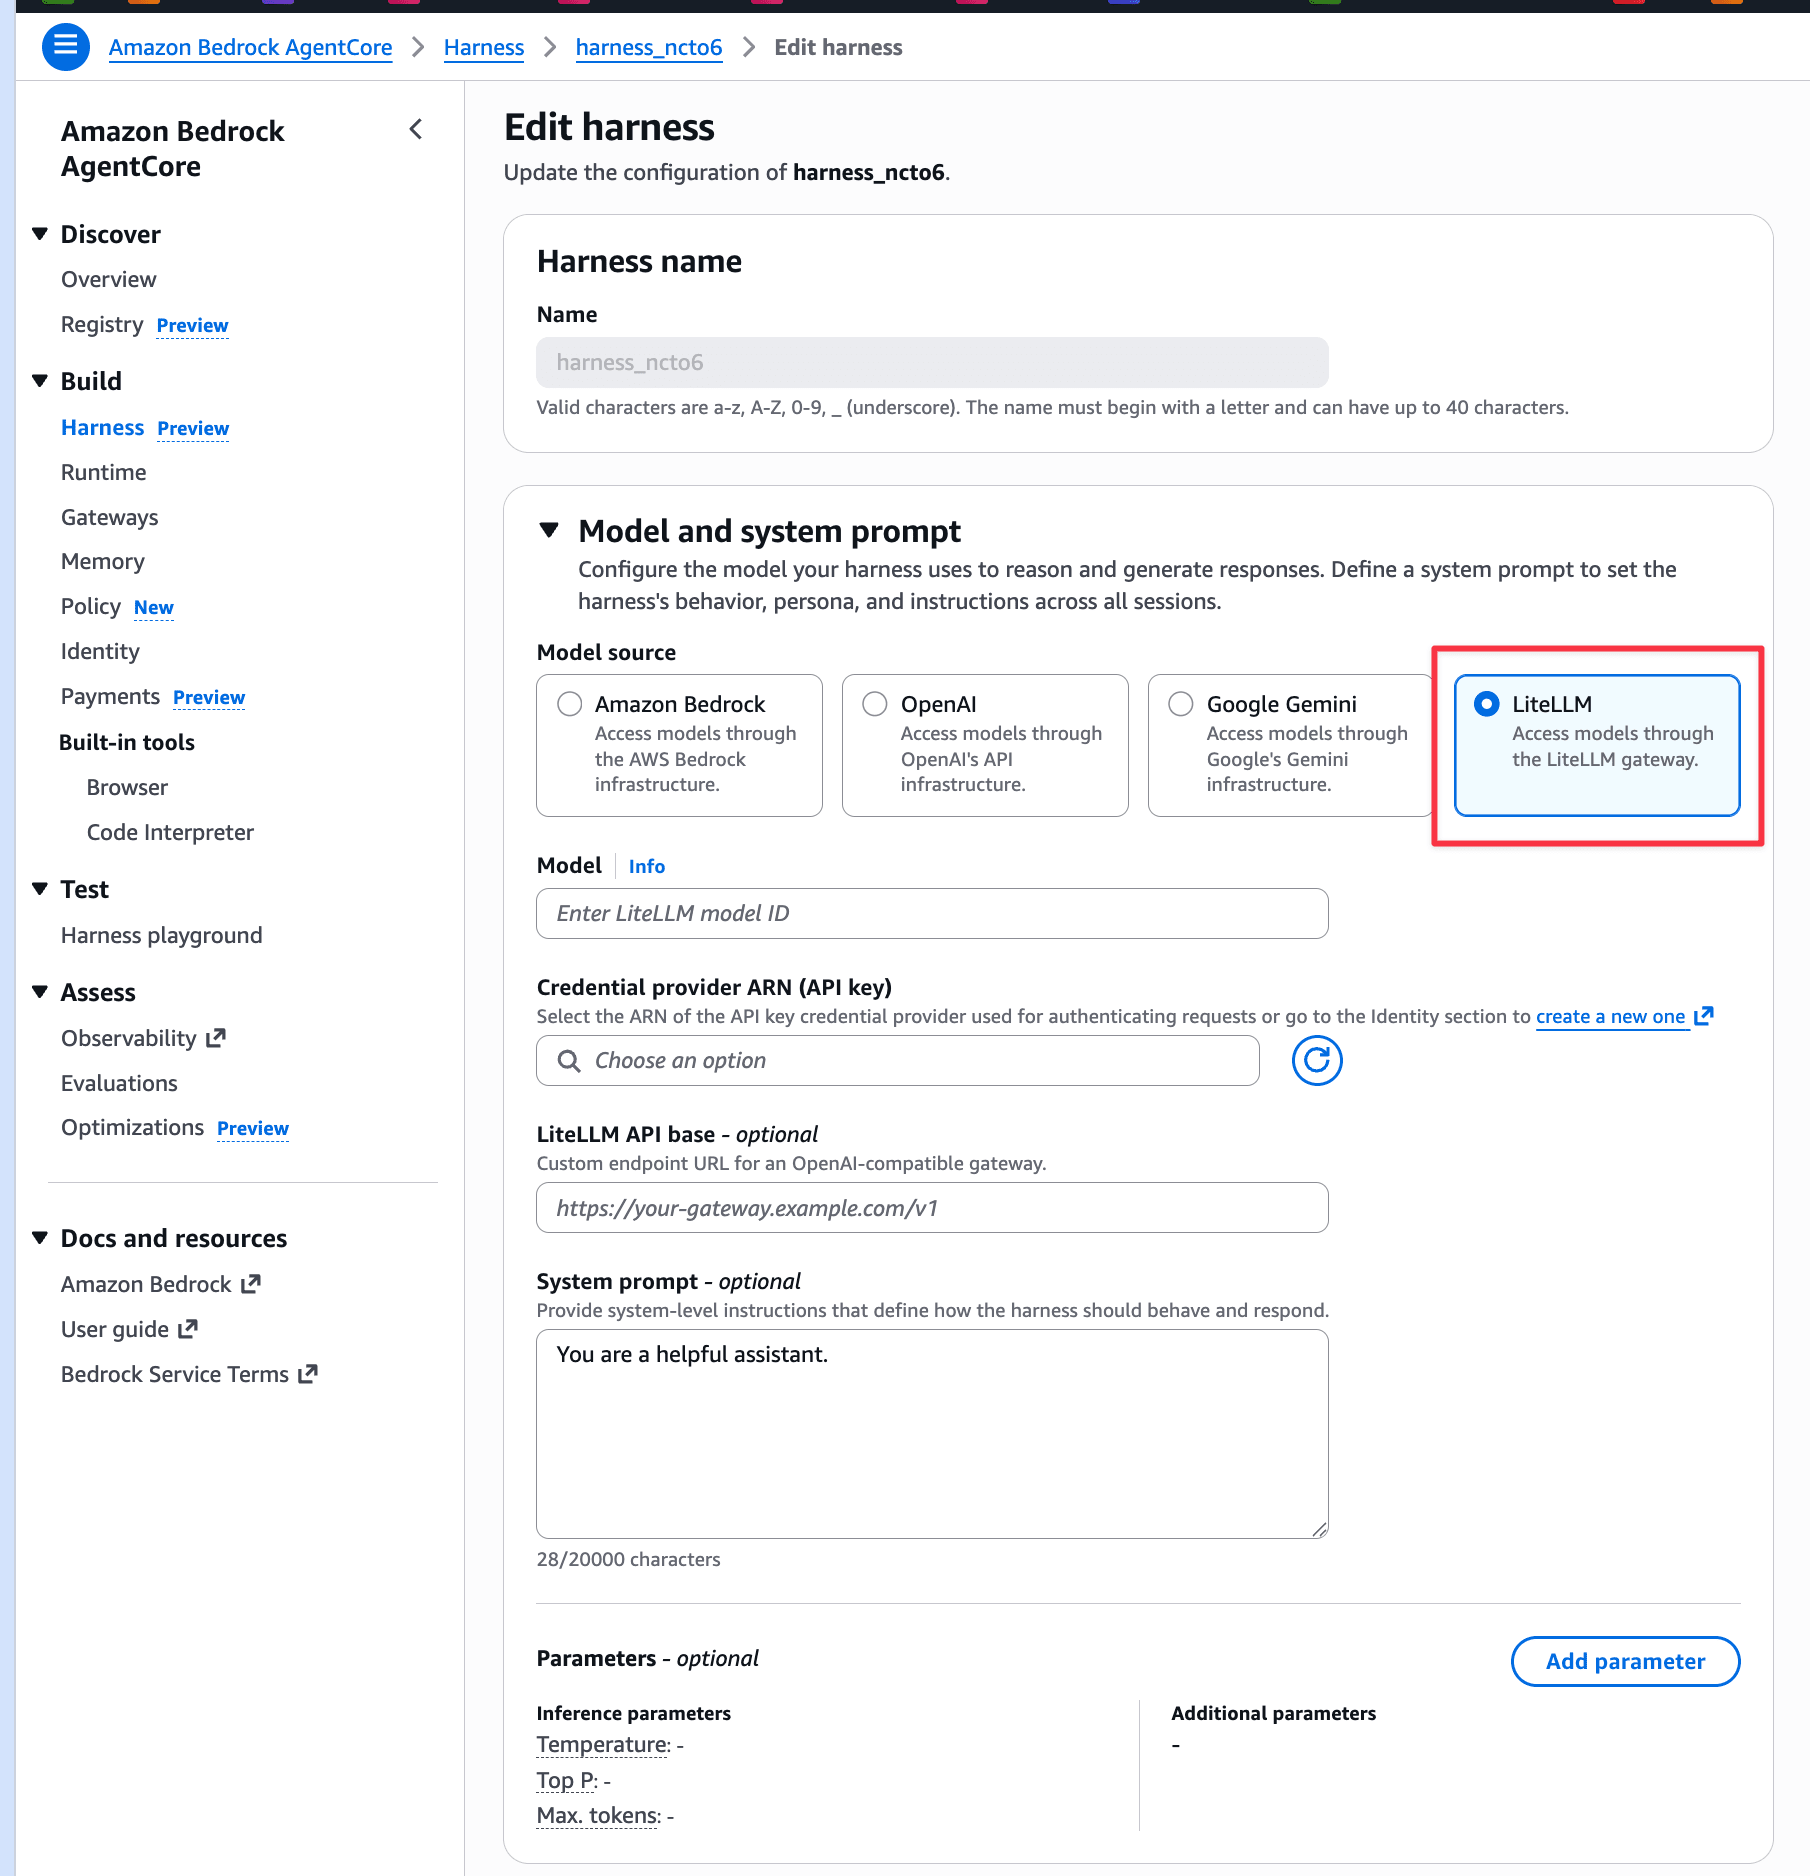
Open the edit screen for the created Harness and configure the Model and system prompt section.
When you select LiteLLM for Model source, LiteLLM-specific configuration items appear.
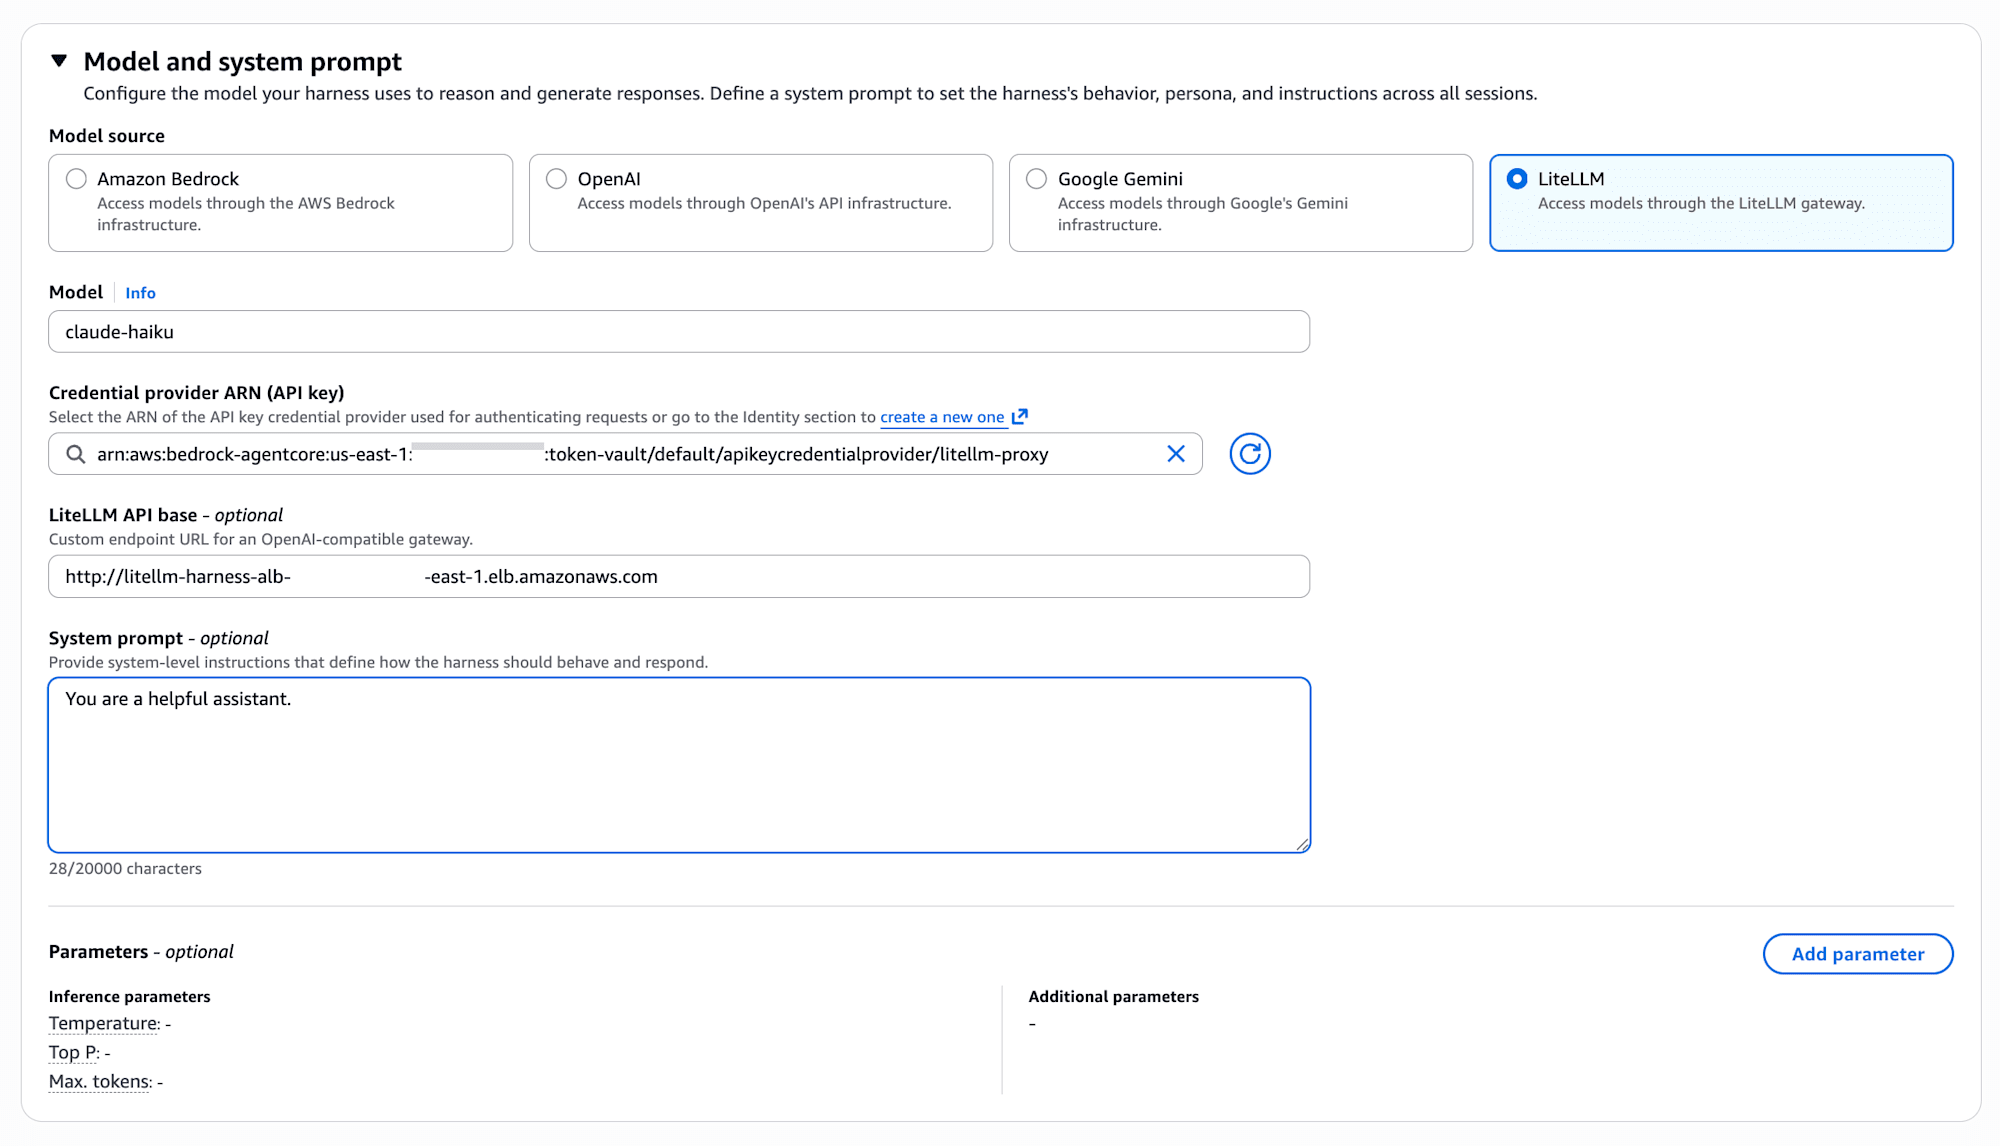
Configure as follows.
| Setting Item | Value | Description |
|---|---|---|
| Model source | LiteLLM | Access models via LiteLLM Proxy |
| Model | litellm_proxy/claude-haiku | litellm_proxy/ + model_name in config.yaml (described later) |
| Credential provider ARN (API key) | ARN of litellm-proxy | Select the Credential Provider created in the previous step |
| LiteLLM API base | http://<ALB_DNS> |
The service_url obtained with terraform output |
| System prompt | Any prompt | Defines the agent's behavior |
In the screenshot above, claude-haiku is entered for Model, but this specification will result in an error. The correct format is litellm_proxy/claude-haiku. The reason is explained in the operation verification section.
Select litellm-proxy, which was created in the console earlier, from the Credential provider ARN (API key) dropdown. If it doesn't appear in the dropdown, try clicking the refresh button.
Specify the service_url obtained with terraform output for LiteLLM API base.
Once configuration is complete, click the Save button to save.
Operation Verification
Open the Harness playground and give it a try!
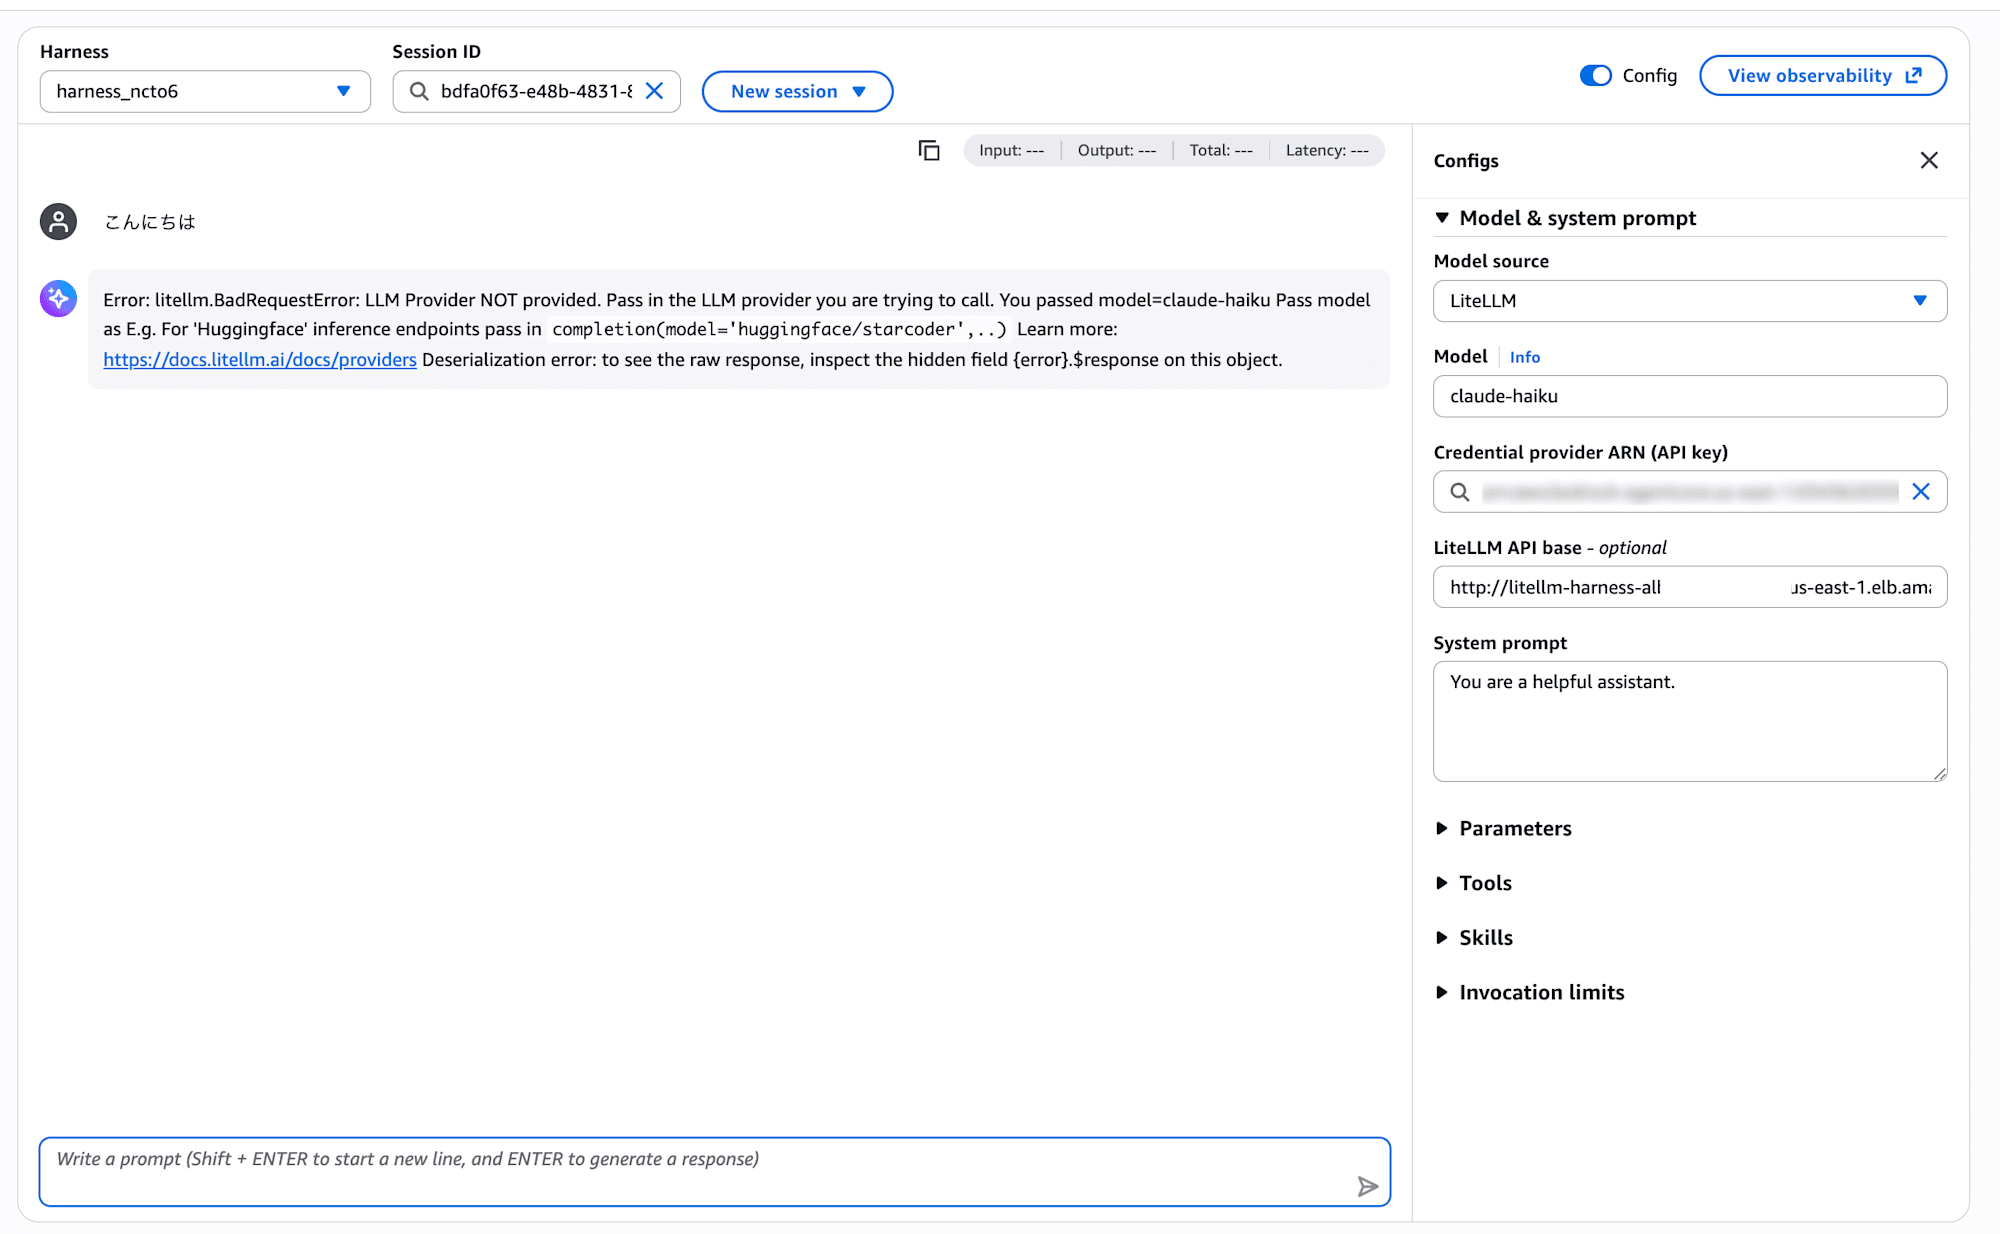
...Hmm, there's an error.
Error: litellm.BadRequestError: LLM Provider NOT provided.
Pass in the LLM provider you are trying to call.
You passed model=claude-haiku
From the error message, it looks like LiteLLM's provider determination is running in the Harness-side request processing. It seems that just an alias like claude-haiku isn't enough to determine which provider to send to.
Checking the Strands Agents LiteLLM documentation, it states that when calling a model via LiteLLM Proxy, you need to add the litellm_proxy/ prefix. Let's try changing the Model ID to litellm_proxy/claude-haiku.
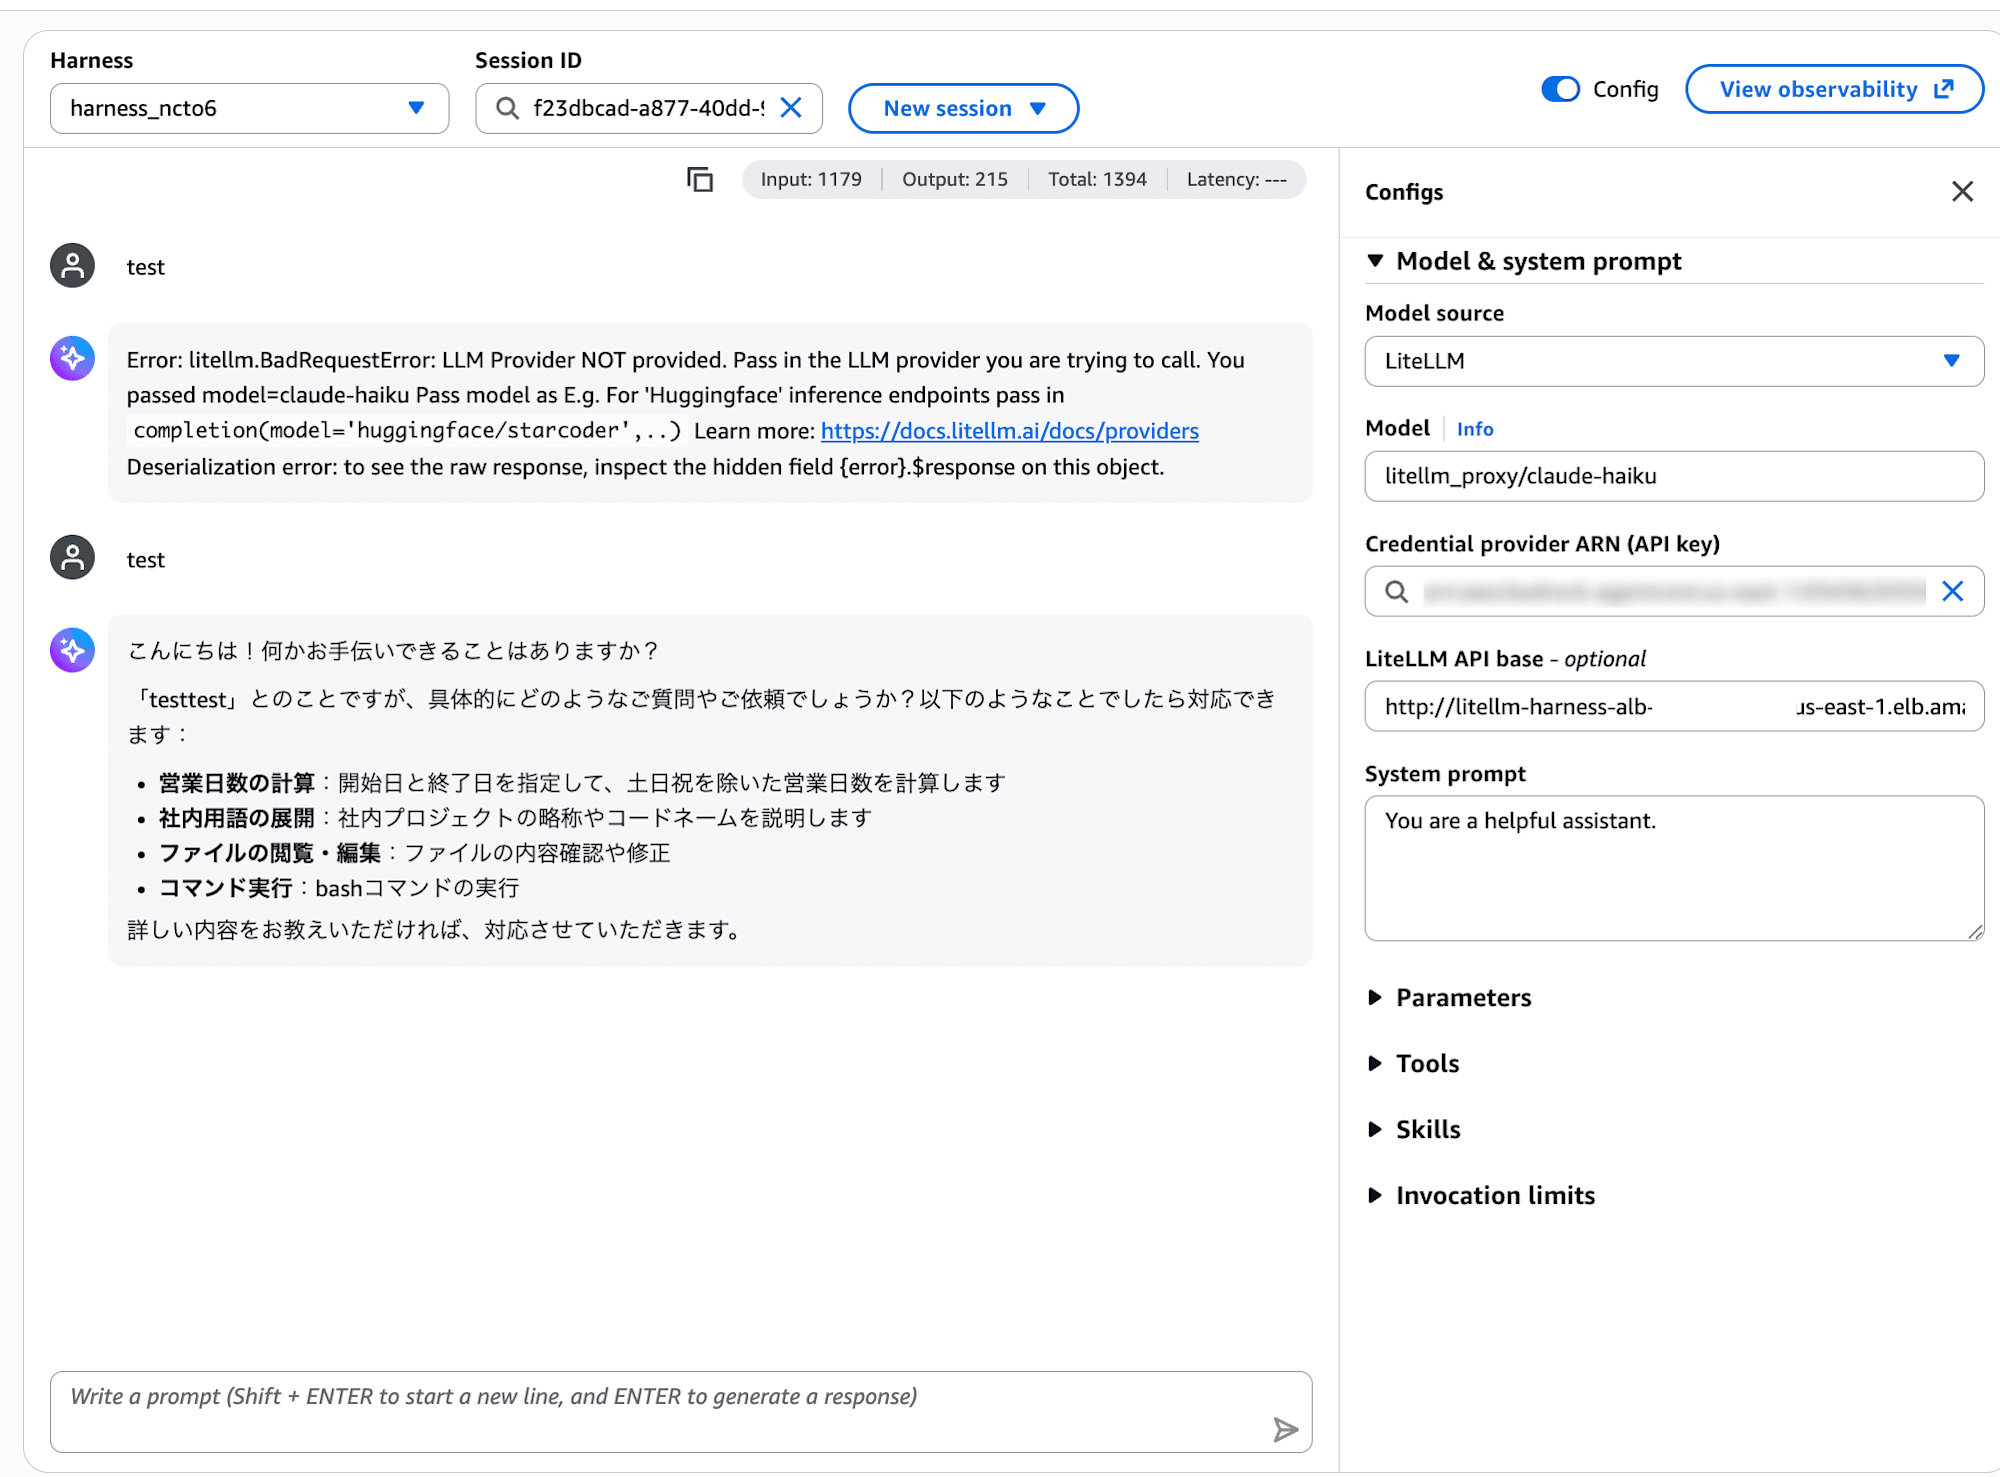
...A response came back successfully!!
Next, let's try switching the Model to litellm_proxy/claude-sonnet in the playground.
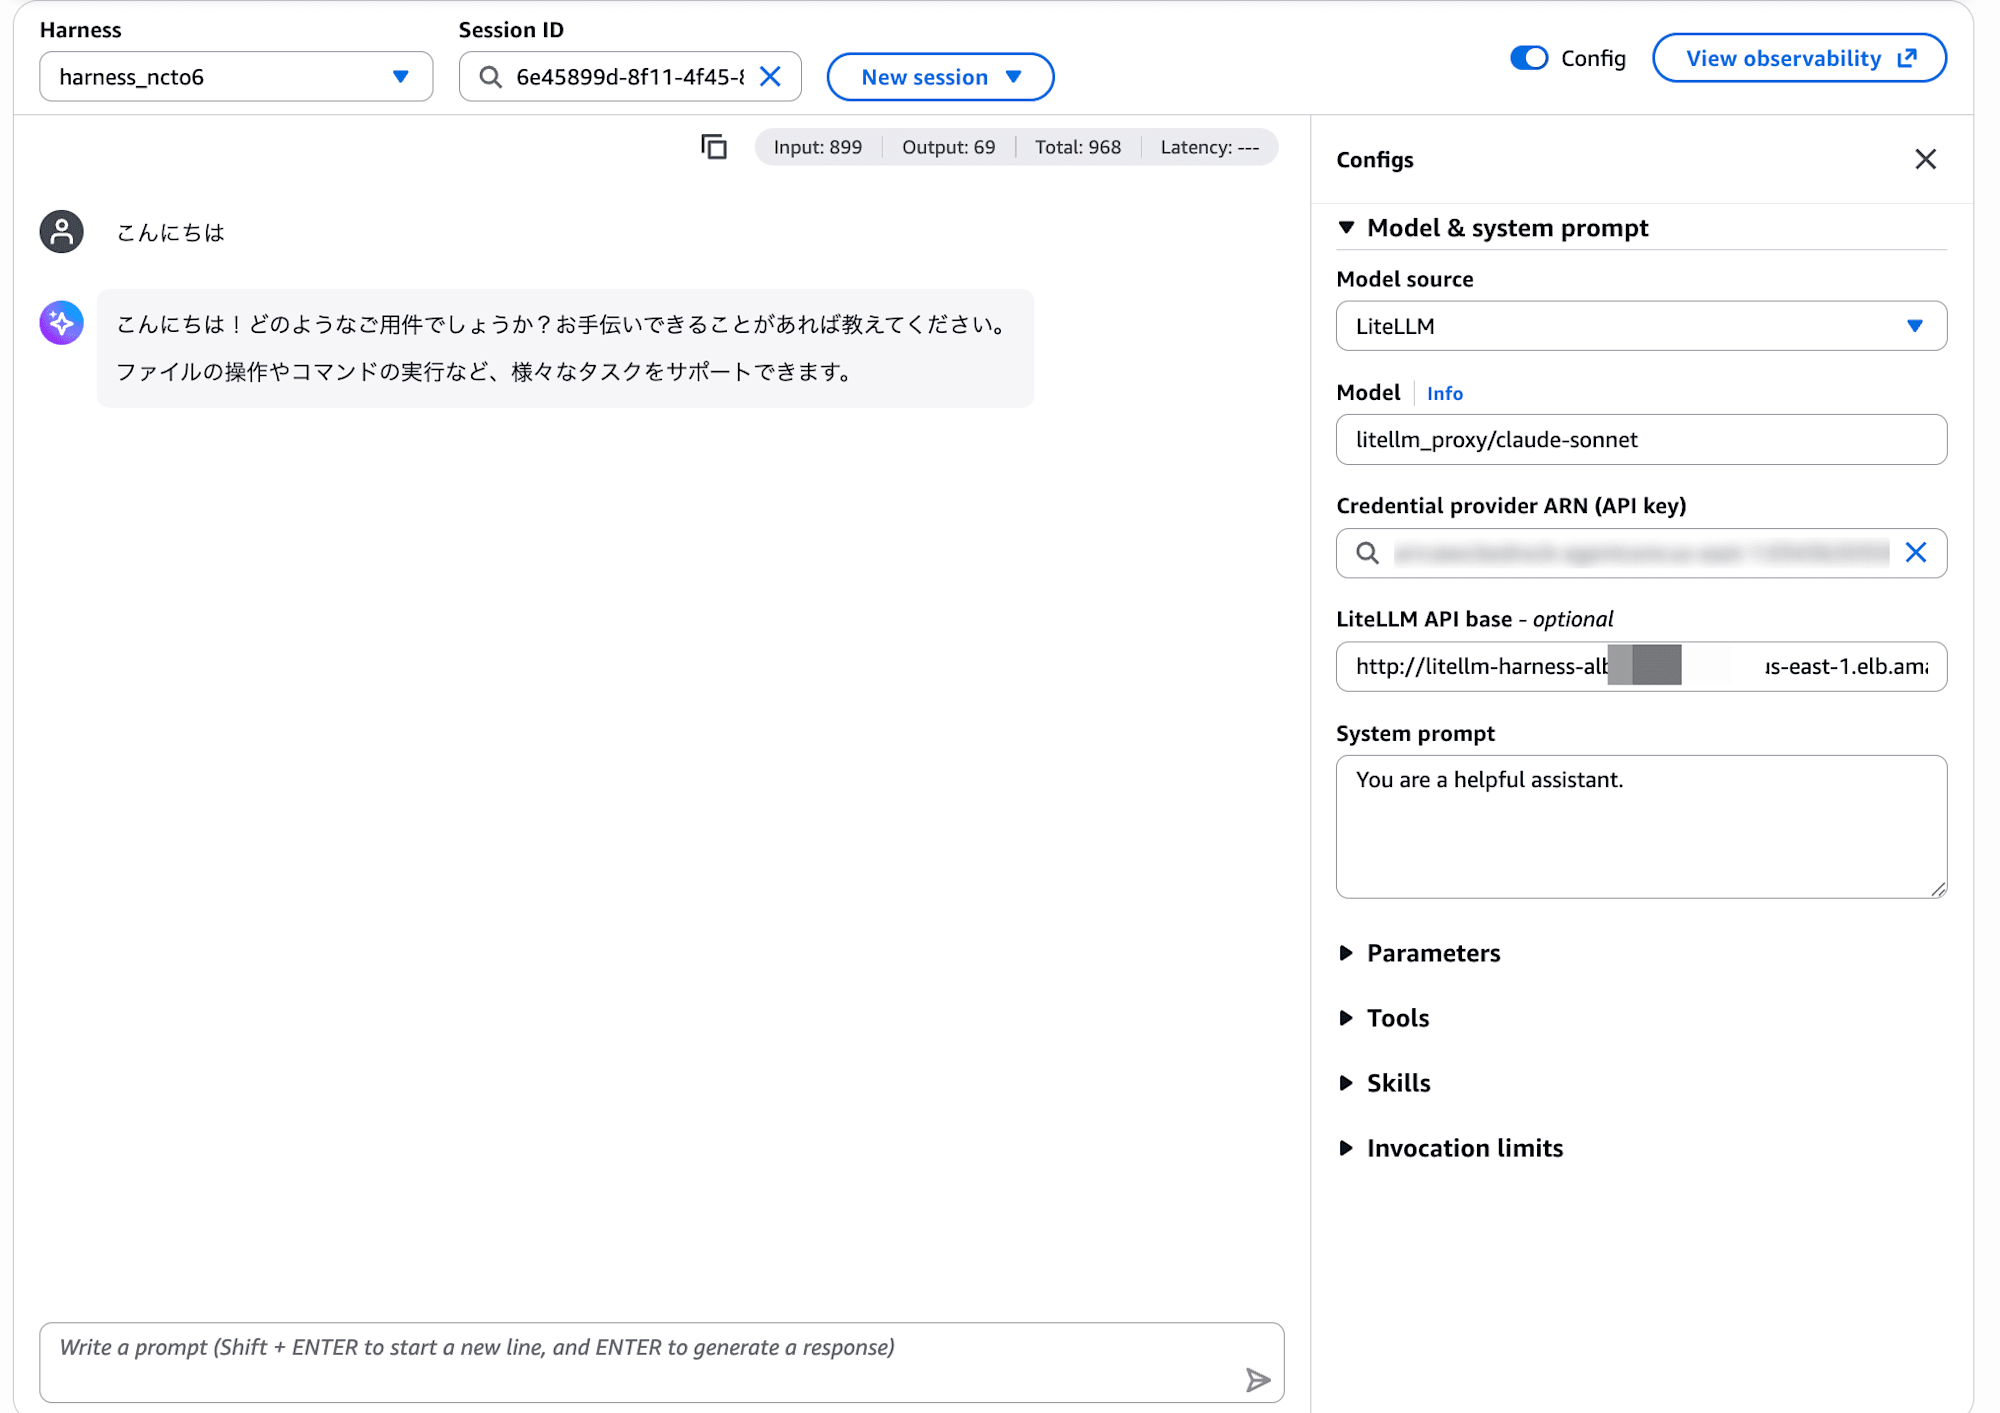
Sonnet is working fine too!! I was able to experience model switching as well.
Deleting Resources
Once verification is complete, don't forget to delete the resources created by Terraform.
cd lite-llm-sample/terraform
terraform destroy
Please also delete the Harness and Credential Provider on the AgentCore side from the console.
Conclusion
I tried everything from building the LiteLLM Proxy to connecting it to Harness, and it was simple — just register the virtual API key in the Credential Provider and specify the endpoint to easily use it from Harness!
I hope this article is helpful in some way. Thank you for reading to the end!
