
I tried publishing a WebSocket application with ALB using Amazon ECS Express Mode
This page has been translated by machine translation. View original
On November 21, 2025, Amazon ECS Express Mode was released.
I had the opportunity to try this feature that allows you to build production-ready container applications with just a few clicks or a single command, so I'd like to share my experience.
Prerequisites
Creating and registering container images
I prepared a container image to deploy to ECS Express Mode.
For this test, I created an Nginx image that includes a WebSocket echo server and pushed it to ECR.
Nginx test image creation and registration script
#!/bin/bash
set -e

REGION="ap-northeast-1"
ACCOUNT_ID="********"
REPO_NAME="websocket-nginx"
IMAGE_URI="${ACCOUNT_ID}.dkr.ecr.${REGION}.amazonaws.com/${REPO_NAME}:latest"

echo "=== 1. WebSocketサーバーを作成 ==="
cat > ws-server.js << 'EOF'
const WebSocket = require('ws');
const wss = new WebSocket.Server({ port: 8080 });

wss.on('connection', ws => {
  ws.on('message', (msg, isBinary) => {
    const data = isBinary ? msg : msg.toString();
    ws.send(data);
  });
});
EOF

echo "=== 2. package.jsonを作成 ==="
cat > package.json << 'EOF'
{"dependencies":{"ws":"^8.14.2"}}
EOF

echo "=== 3. Nginx設定を作成 ==="
cat > nginx.conf << 'EOF'
events {
    worker_connections 1024;
}

http {
    server {
        listen 80;
        root /usr/share/nginx/html;
        index index.html;

        location / {
            try_files $uri $uri/ =404;
        }

        location /ws {
            proxy_pass http://127.0.0.1:8080;
            proxy_http_version 1.1;
            proxy_set_header Upgrade $http_upgrade;
            proxy_set_header Connection "upgrade";
            proxy_set_header Host $host;
        }
    }

    server {
        listen 8081;

        location / {
            return 200 'WebSocket Echo\n';
            add_header Content-Type text/plain;
        }
    }
}
EOF

echo "=== 4. 起動スクリプトを作成 ==="
cat > start.sh << 'EOF'
#!/bin/sh
node /app/ws-server.js &
nginx -g 'daemon off;'
EOF

echo "=== 5. HTMLテストページを作成 ==="
cat > index.html << 'EOF'
<!DOCTYPE html>
<html>
<head>
    <title>WebSocket Test</title>
    <style>
        body { font-family: Arial; max-width: 600px; margin: 50px auto; }
        #messages { border: 1px solid #ccc; height: 300px; overflow-y: auto; padding: 10px; margin: 10px 0; }
        input, button { padding: 10px; margin: 5px 0; }
        input { width: 70%; }
        button { width: 25%; }
        .sent { color: blue; }
        .received { color: green; }
        .status { color: red; }
    </style>
</head>
<body>
    <h1>WebSocket Echo Test</h1>
    <div id="status" class="status">Disconnected</div>
    <div id="messages"></div>
    <input id="input" type="text" placeholder="Type message..." disabled>
    <button id="send" disabled>Send</button>
    <button id="connect">Connect</button>

    <script>
        let ws;
        const messages = document.getElementById('messages');
        const input = document.getElementById('input');
        const status = document.getElementById('status');
        const sendBtn = document.getElementById('send');
        const connectBtn = document.getElementById('connect');

        function log(msg, className) {
            const div = document.createElement('div');
            div.className = className;
            div.textContent = msg;
            messages.appendChild(div);
            messages.scrollTop = messages.scrollHeight;
        }

        connectBtn.onclick = () => {
            const protocol = location.protocol === 'https:' ? 'wss:' : 'ws:';
            const wsUrl = `${protocol}//${location.host}/ws`;

            ws = new WebSocket(wsUrl);

            ws.onopen = () => {
                status.textContent = 'Connected';
                status.style.color = 'green';
                input.disabled = false;
                sendBtn.disabled = false;
                connectBtn.disabled = true;
                log('Connected to ' + wsUrl, 'status');
            };

            ws.onmessage = (e) => {
                log('← ' + e.data, 'received');
            };

            ws.onclose = () => {
                status.textContent = 'Disconnected';
                status.style.color = 'red';
                input.disabled = true;
                sendBtn.disabled = true;
                connectBtn.disabled = false;
                log('Disconnected', 'status');
            };

            ws.onerror = (e) => {
                log('Error: ' + e, 'status');
            };
        };

        sendBtn.onclick = () => {
            if (ws && input.value) {
                ws.send(input.value);
                log('→ ' + input.value, 'sent');
                input.value = '';
            }
        };

        input.onkeypress = (e) => {
            if (e.key === 'Enter') sendBtn.click();
        };
    </script>
</body>
</html>
EOF

echo "=== 6. Dockerfileを作成 ==="
cat > Dockerfile << 'EOF'
FROM node:alpine
RUN apk add --no-cache nginx && mkdir -p /usr/share/nginx/html
WORKDIR /app
COPY package.json .
RUN npm install
COPY ws-server.js .
COPY nginx.conf /etc/nginx/nginx.conf
COPY index.html /usr/share/nginx/html/
COPY start.sh /start.sh
RUN chmod +x /start.sh
EXPOSE 80
CMD ["/start.sh"]
EOF

echo "=== 7. Dockerイメージをビルド ==="
docker build -t ${REPO_NAME} .

echo "=== 8. ECRにログイン ==="
aws ecr get-login-password --region ${REGION} | docker login --username AWS --password-stdin ${ACCOUNT_ID}.dkr.ecr.${REGION}.amazonaws.com

echo "=== 9. イメージにタグを付ける ==="
docker tag ${REPO_NAME}:latest ${IMAGE_URI}

echo "=== 10. ECRにプッシュ ==="
docker push ${IMAGE_URI}

echo "=== 完了 ==="
echo "イメージURI: ${IMAGE_URI}"
IAM Role
Using the "Create new role" option in the Express Mode console wizard, I created the following roles:
- Task execution role: ecsTaskExecutionRole
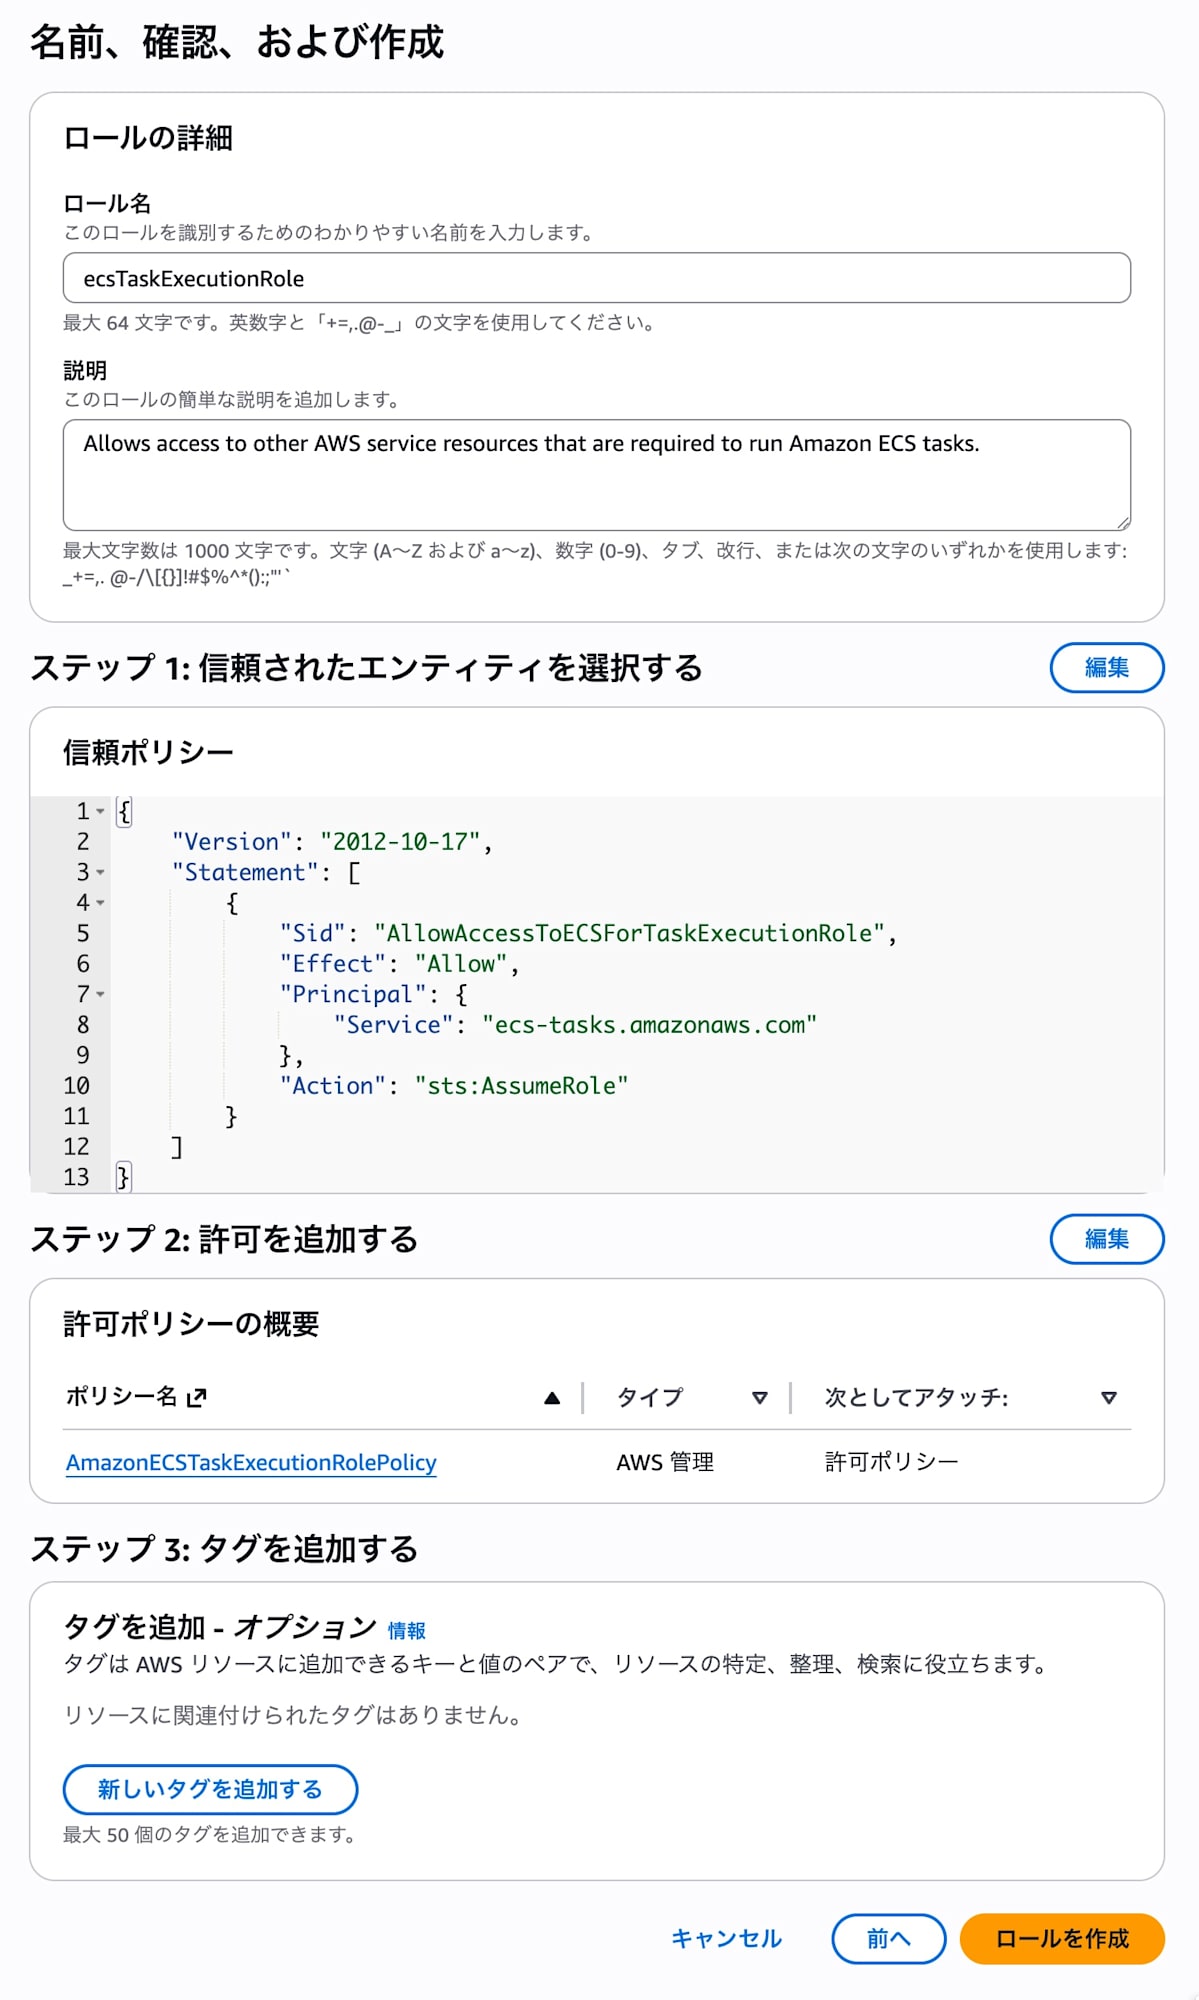
- Infrastructure role: ecsInfrastructureRoleForExpressServices

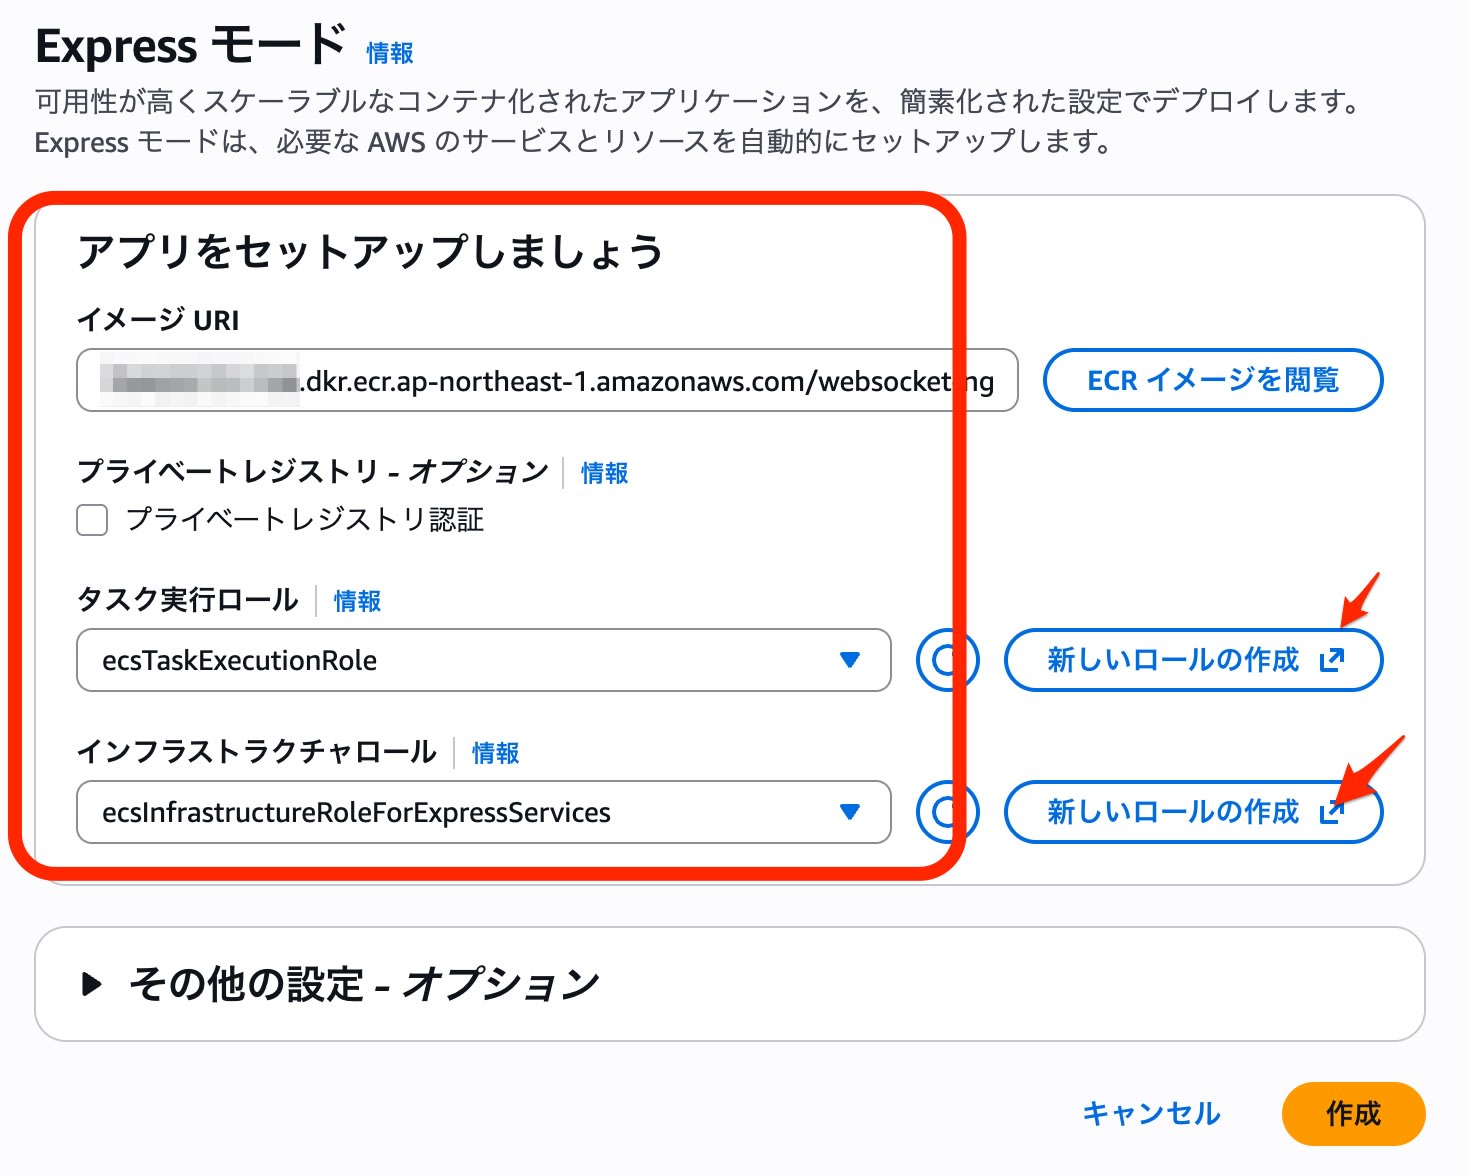
Setup
I went through the creation process from the Express mode console.
It was an extremely simple procedure - just specifying the pre-prepared ECR image URI and selecting the roles.
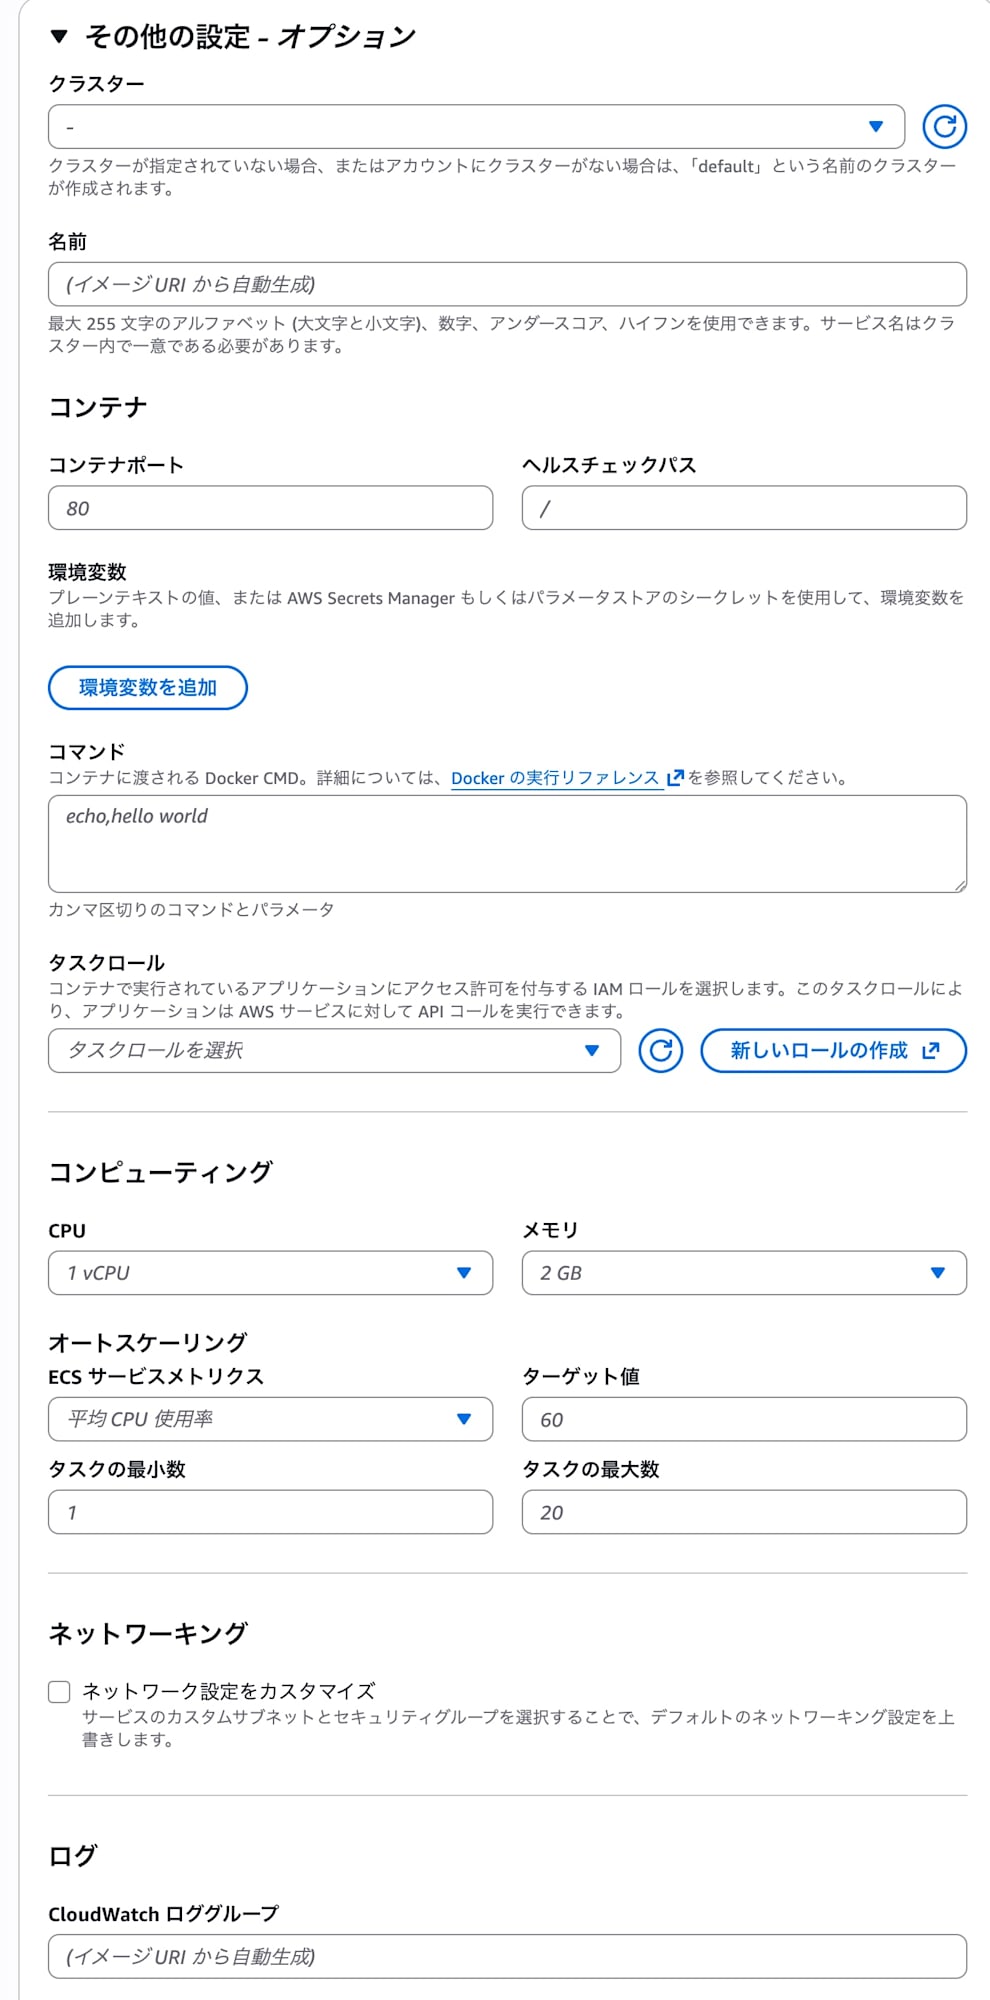
I left the CPU and memory option settings at their defaults.
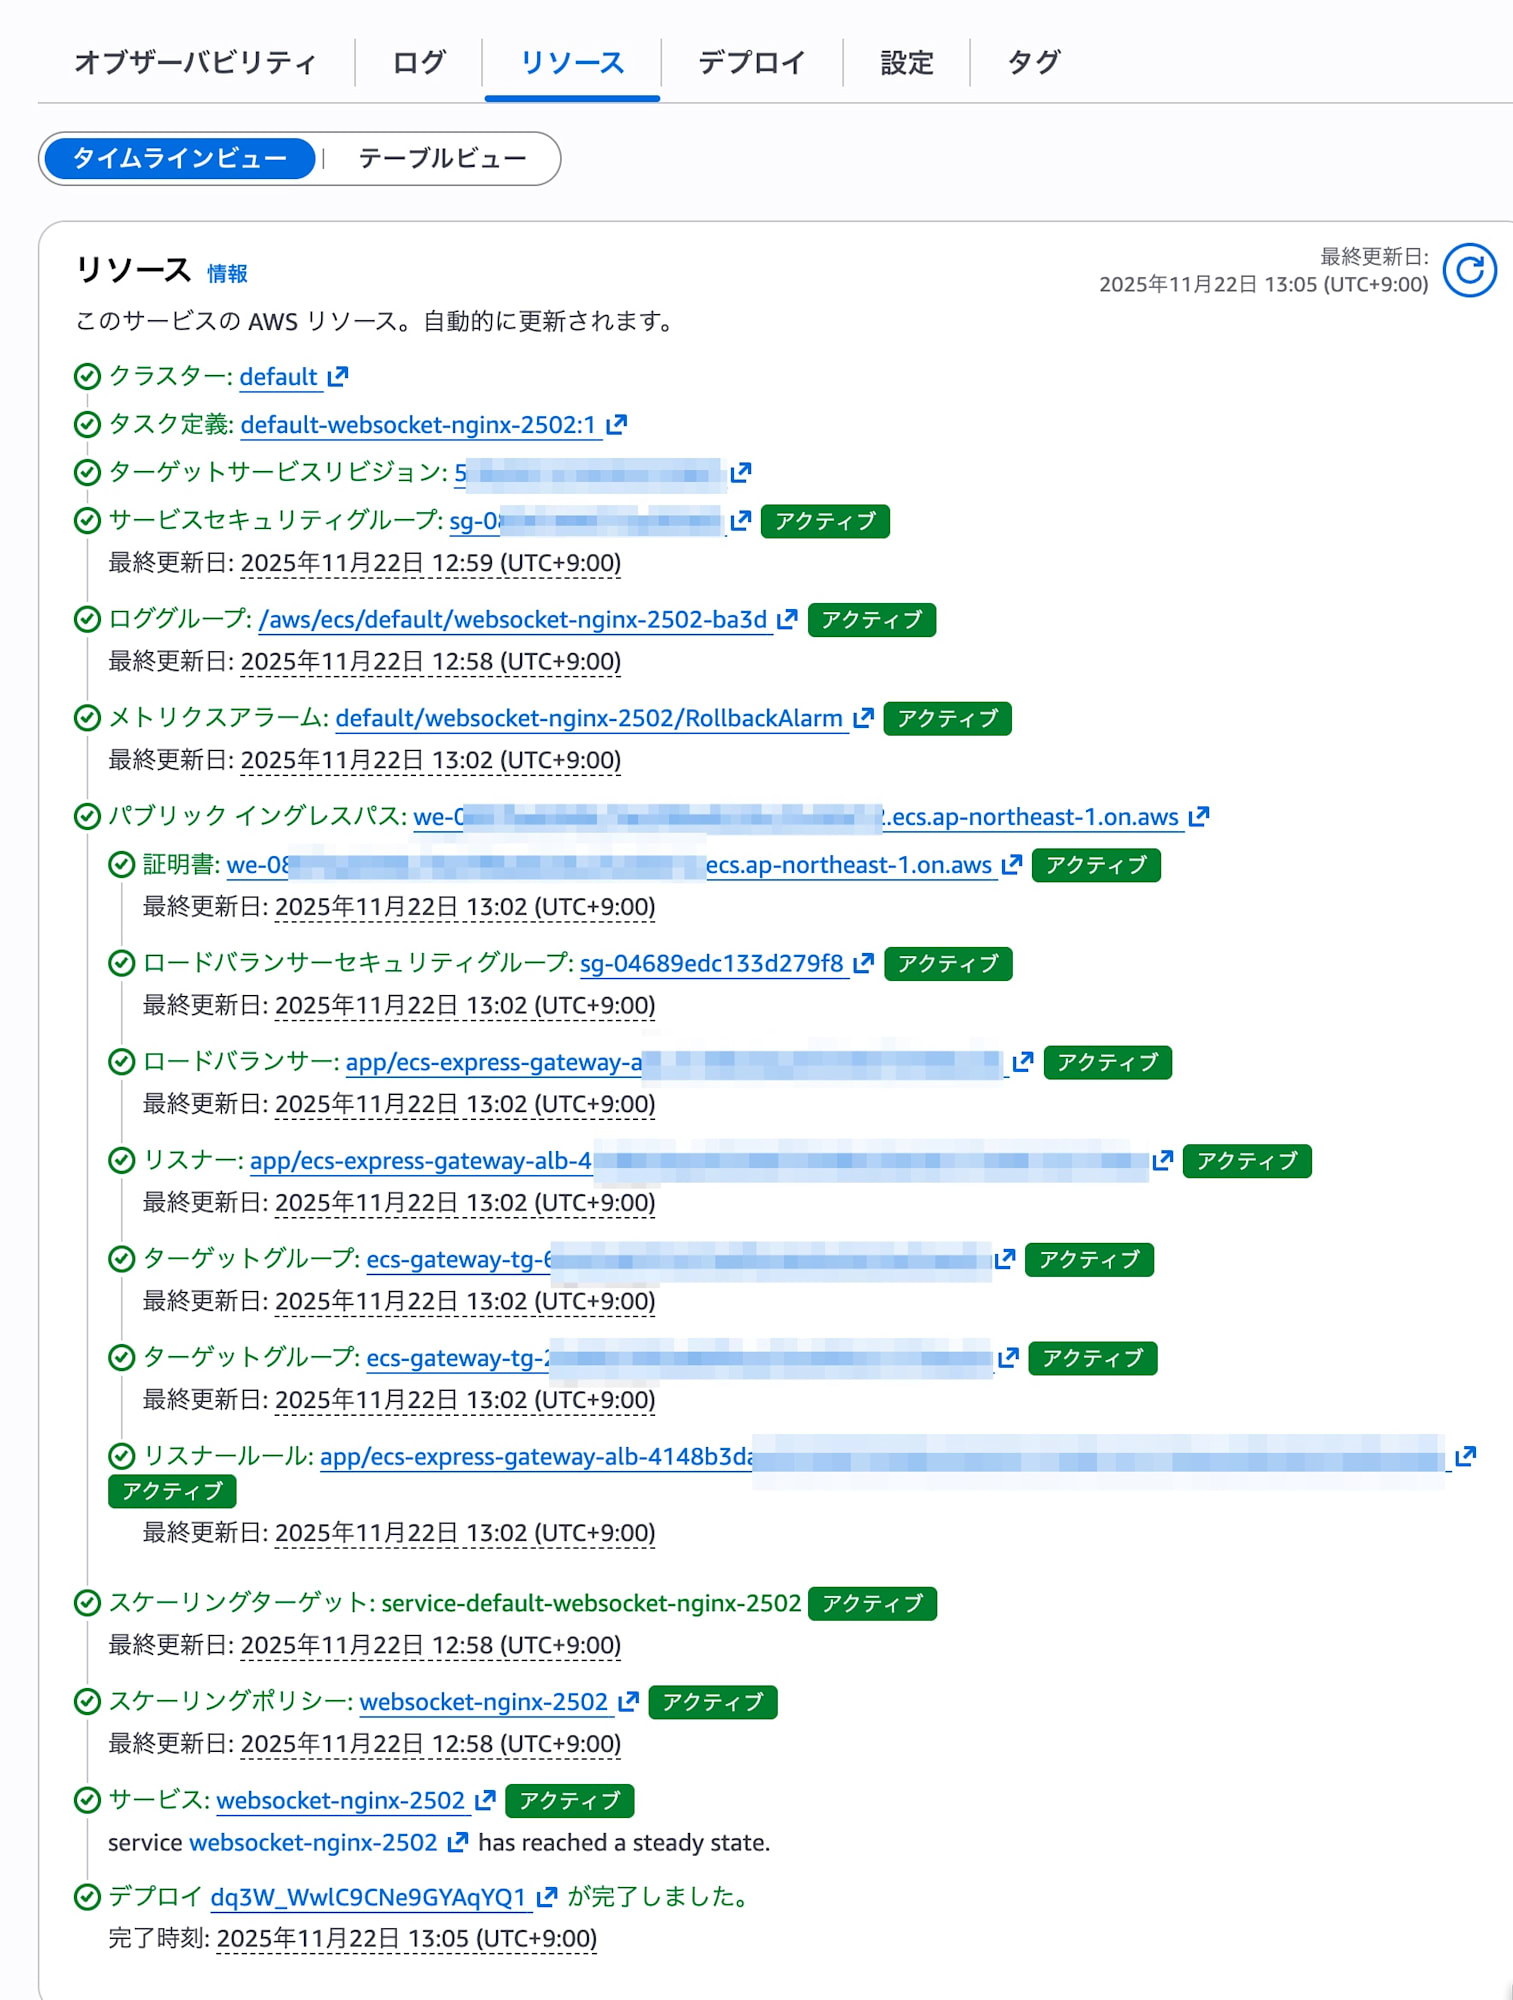
Progress
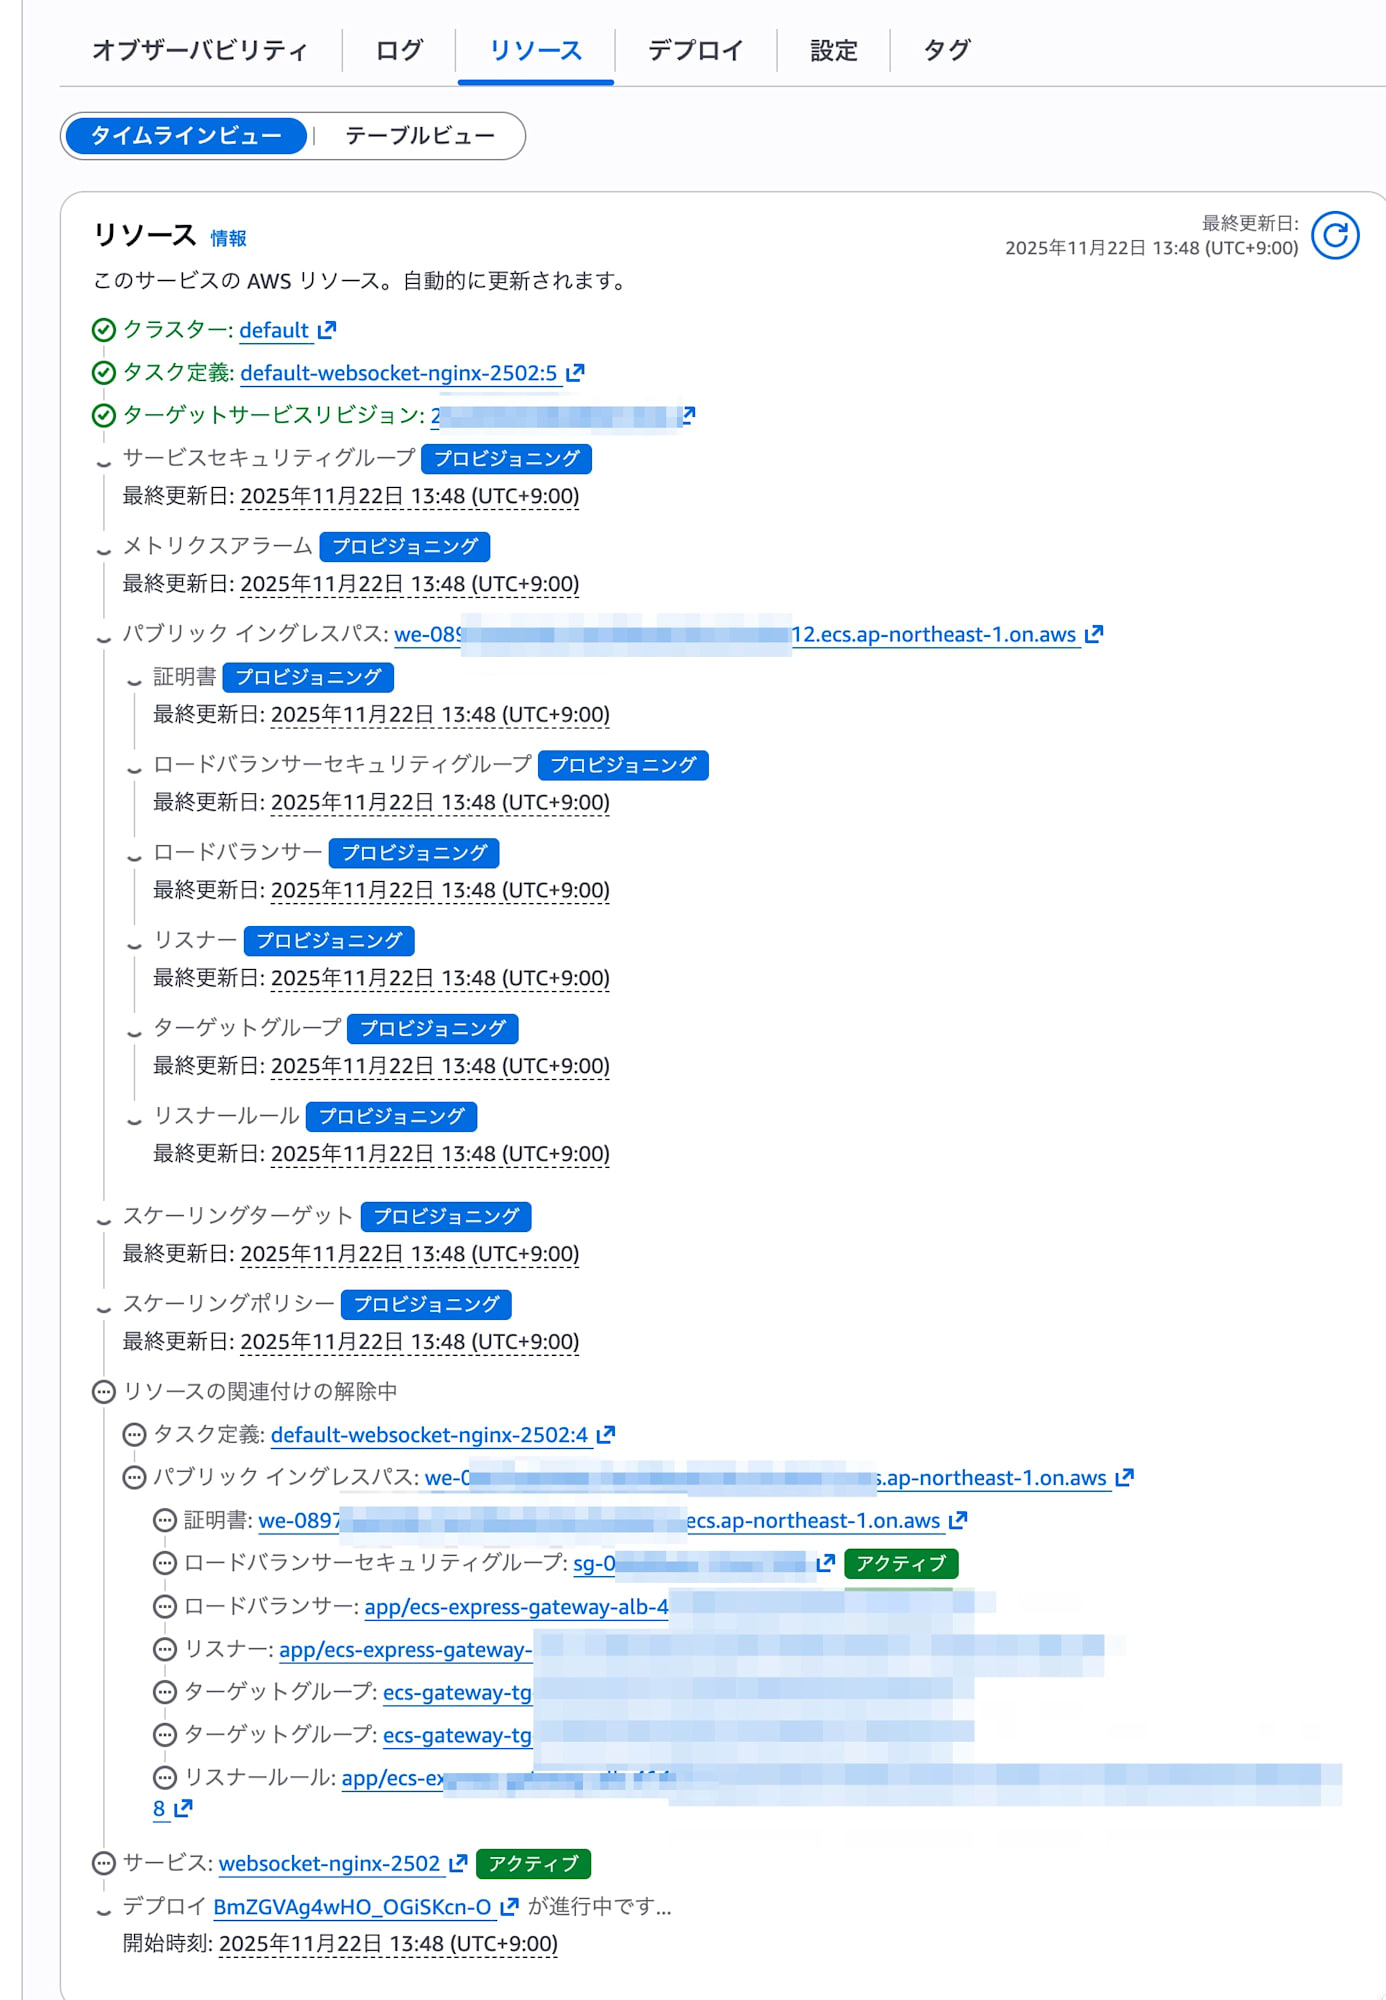
When the deployment starts, you can check the progress in the resources tab.
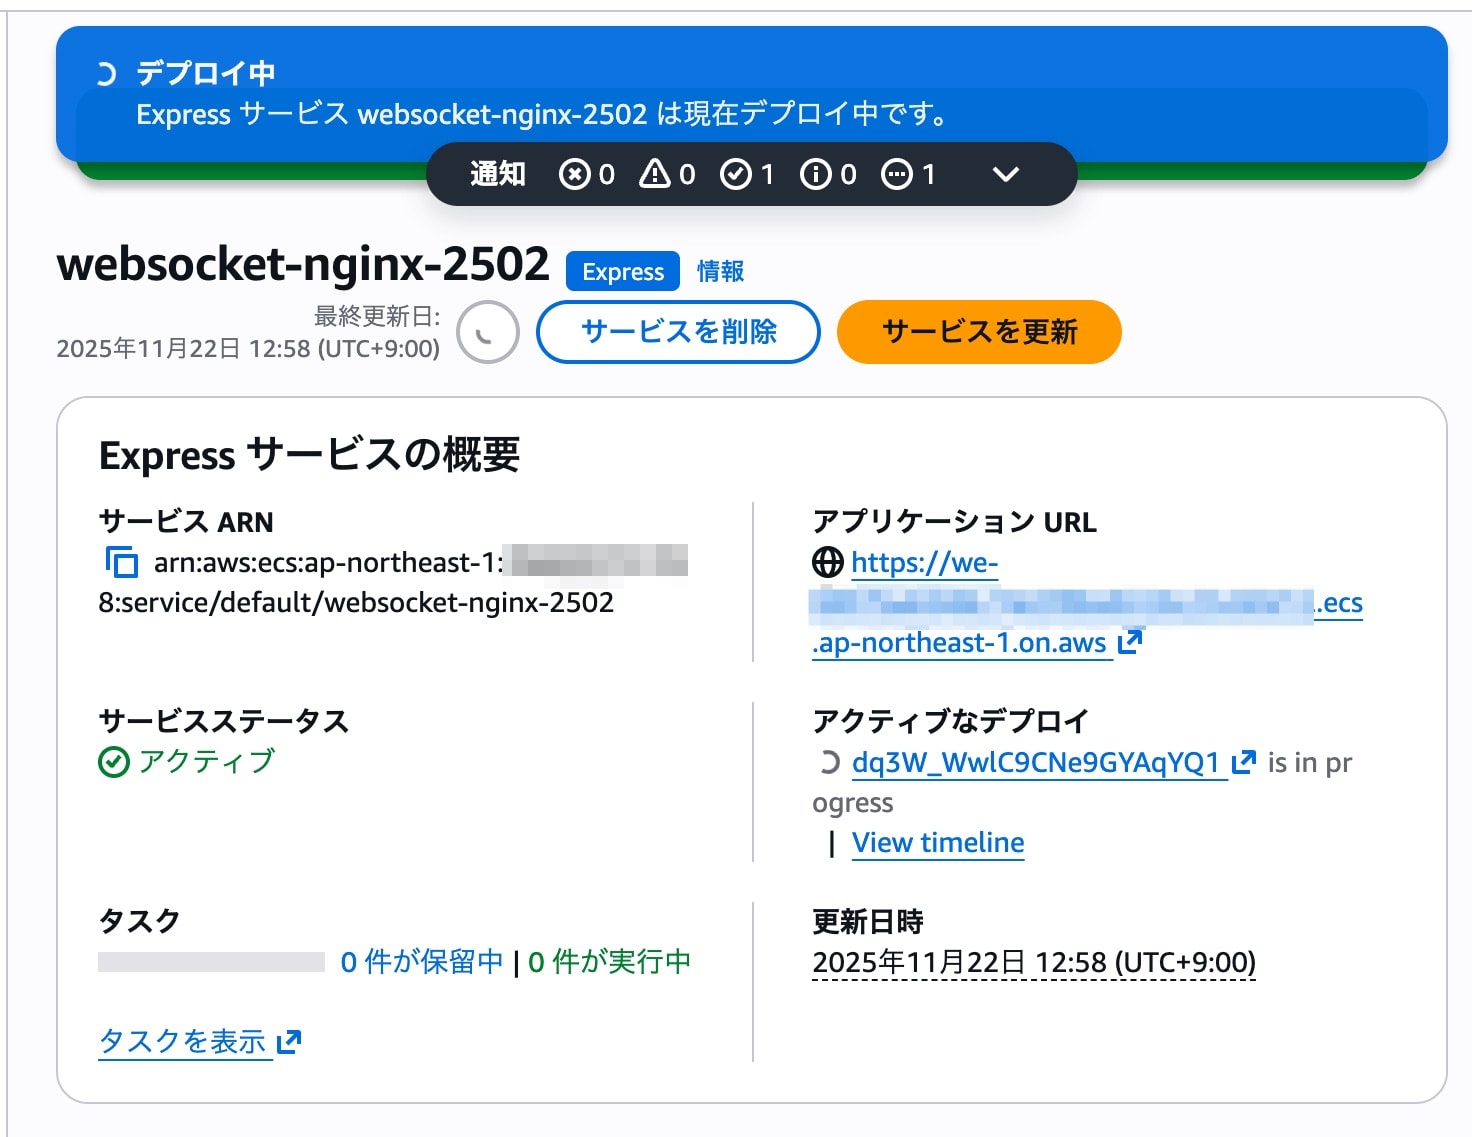
After about 8 minutes, all resources became "Active" and the deployment was completed.
Testing
Application functionality
I tried accessing the application URL with a browser.
The test application uses WebSocket, and I confirmed that the following functions worked without any issues:
- HTTP connection: Retrieving static HTML forms
- WebSocket connection: Sending and receiving messages
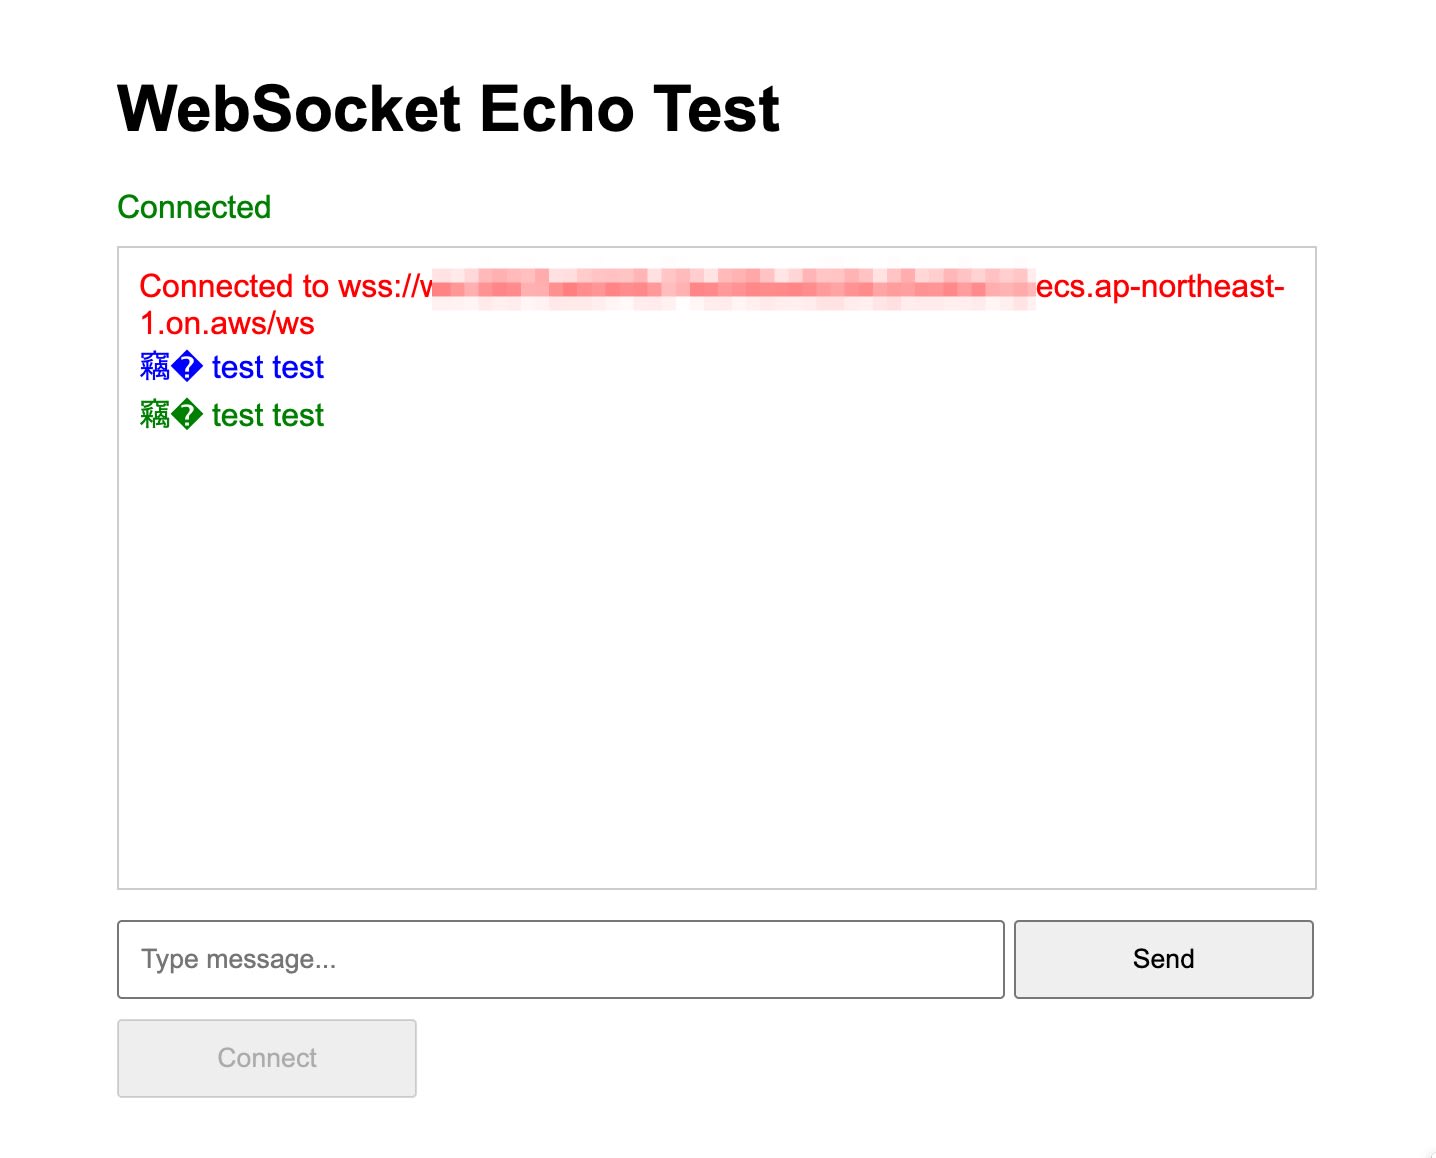
I confirmed that the ALB automatically built with Express Mode correctly handled WebSocket communications (Upgrade header) without any special configuration.
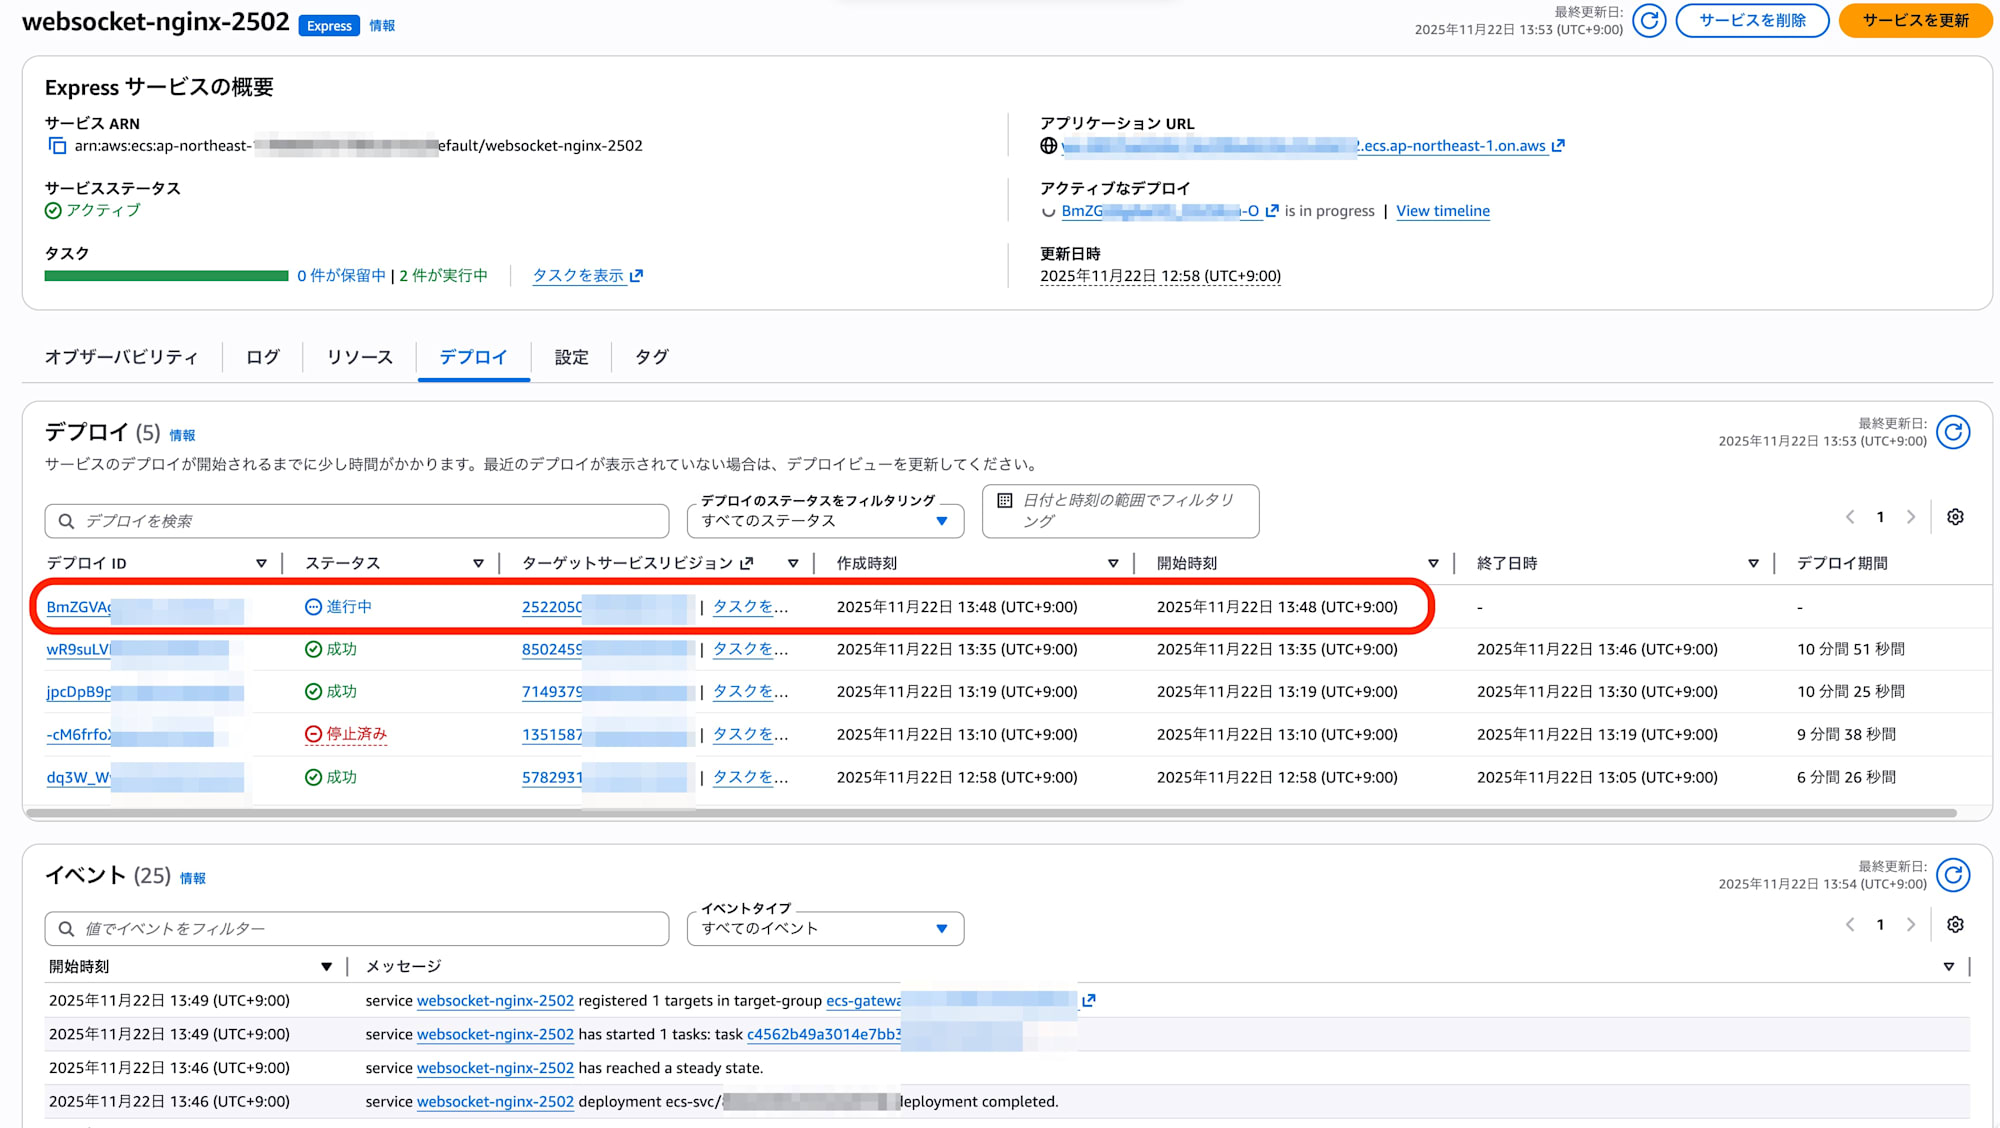
Deployment confirmation
I checked the application deployment behavior from "Update service."
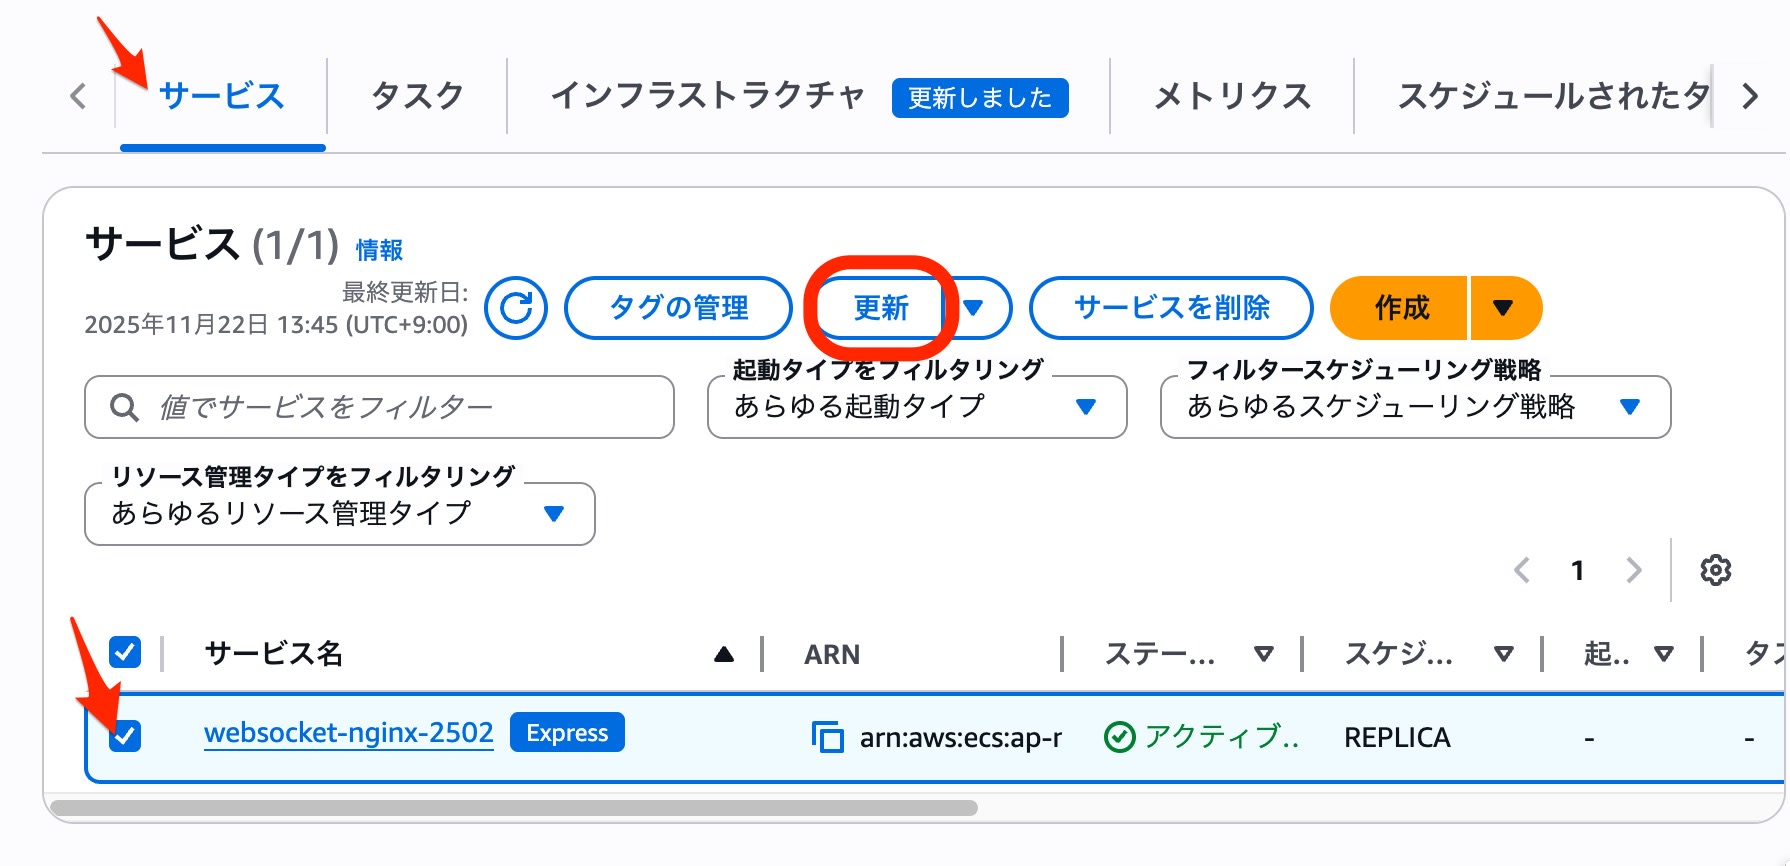
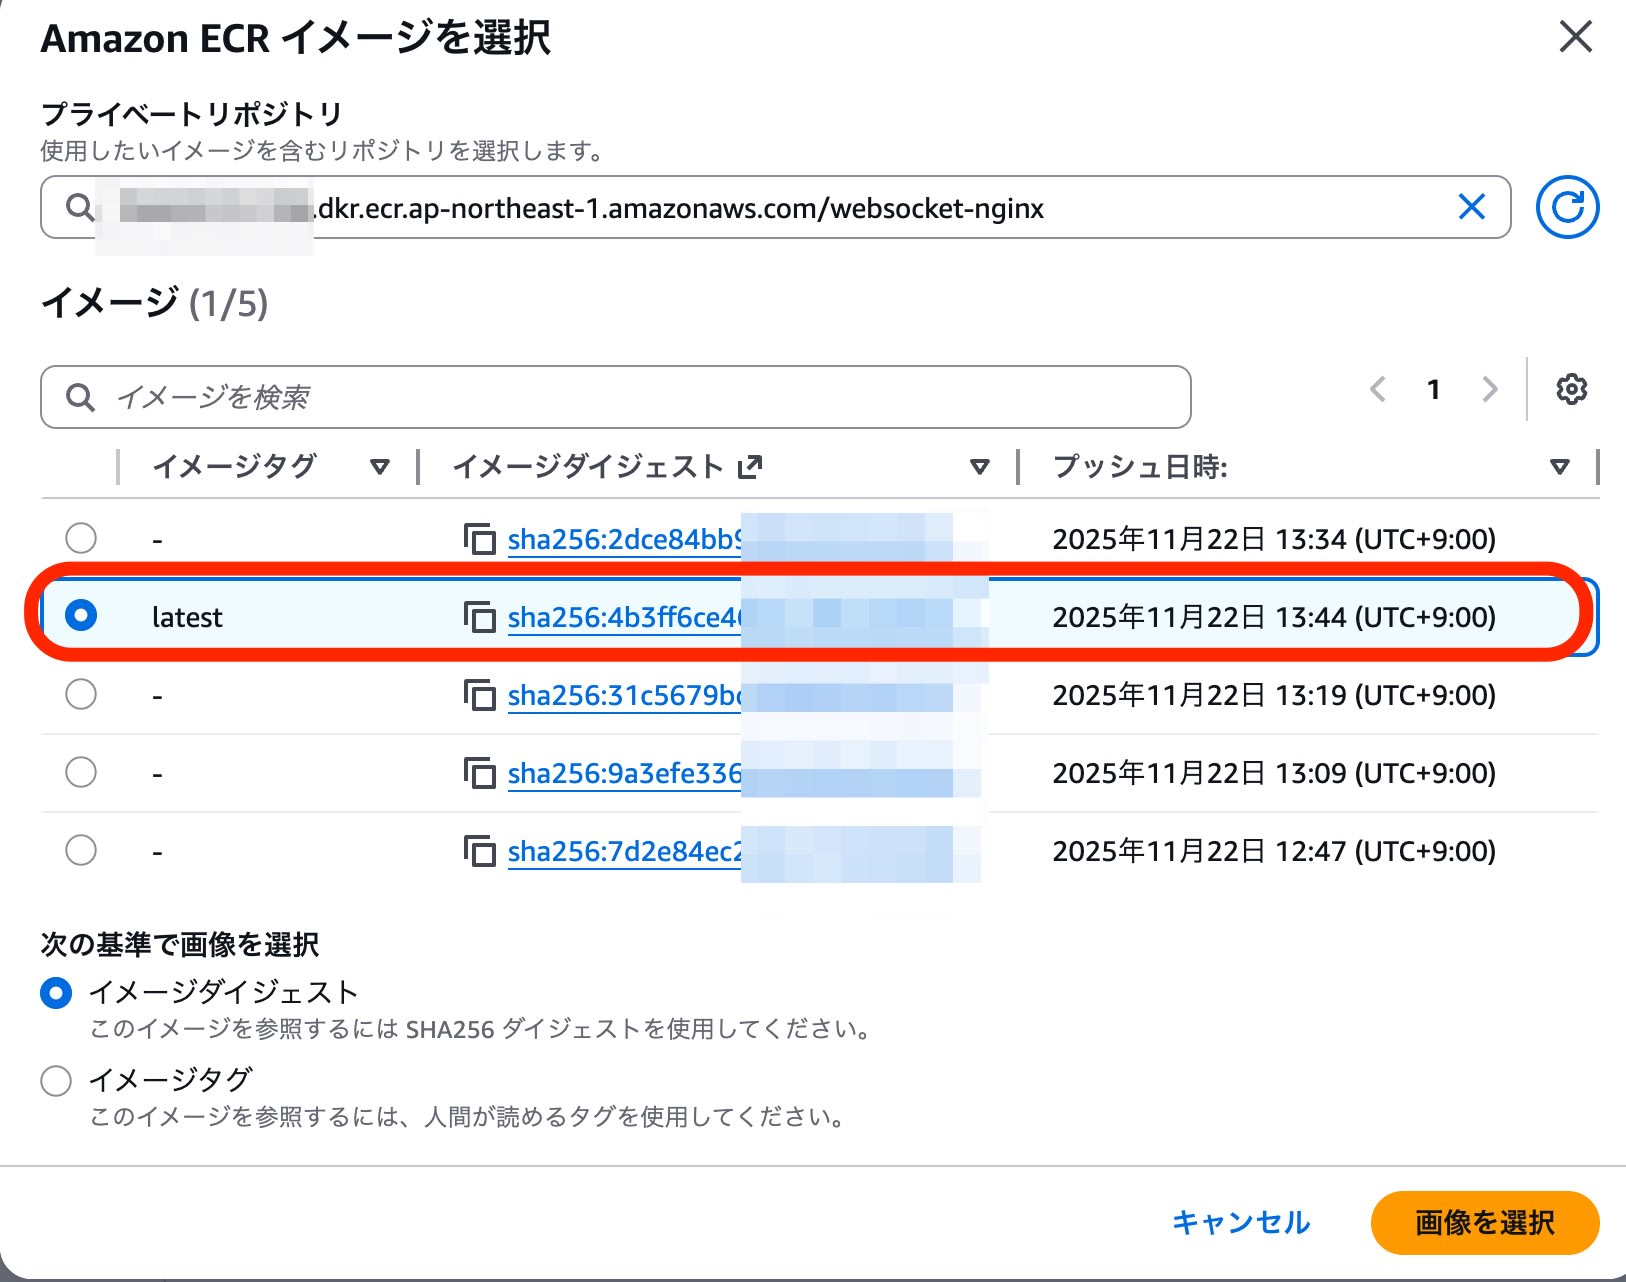
When specifying a new version of the ECR image and clicking "Update", the deployment started in the background.
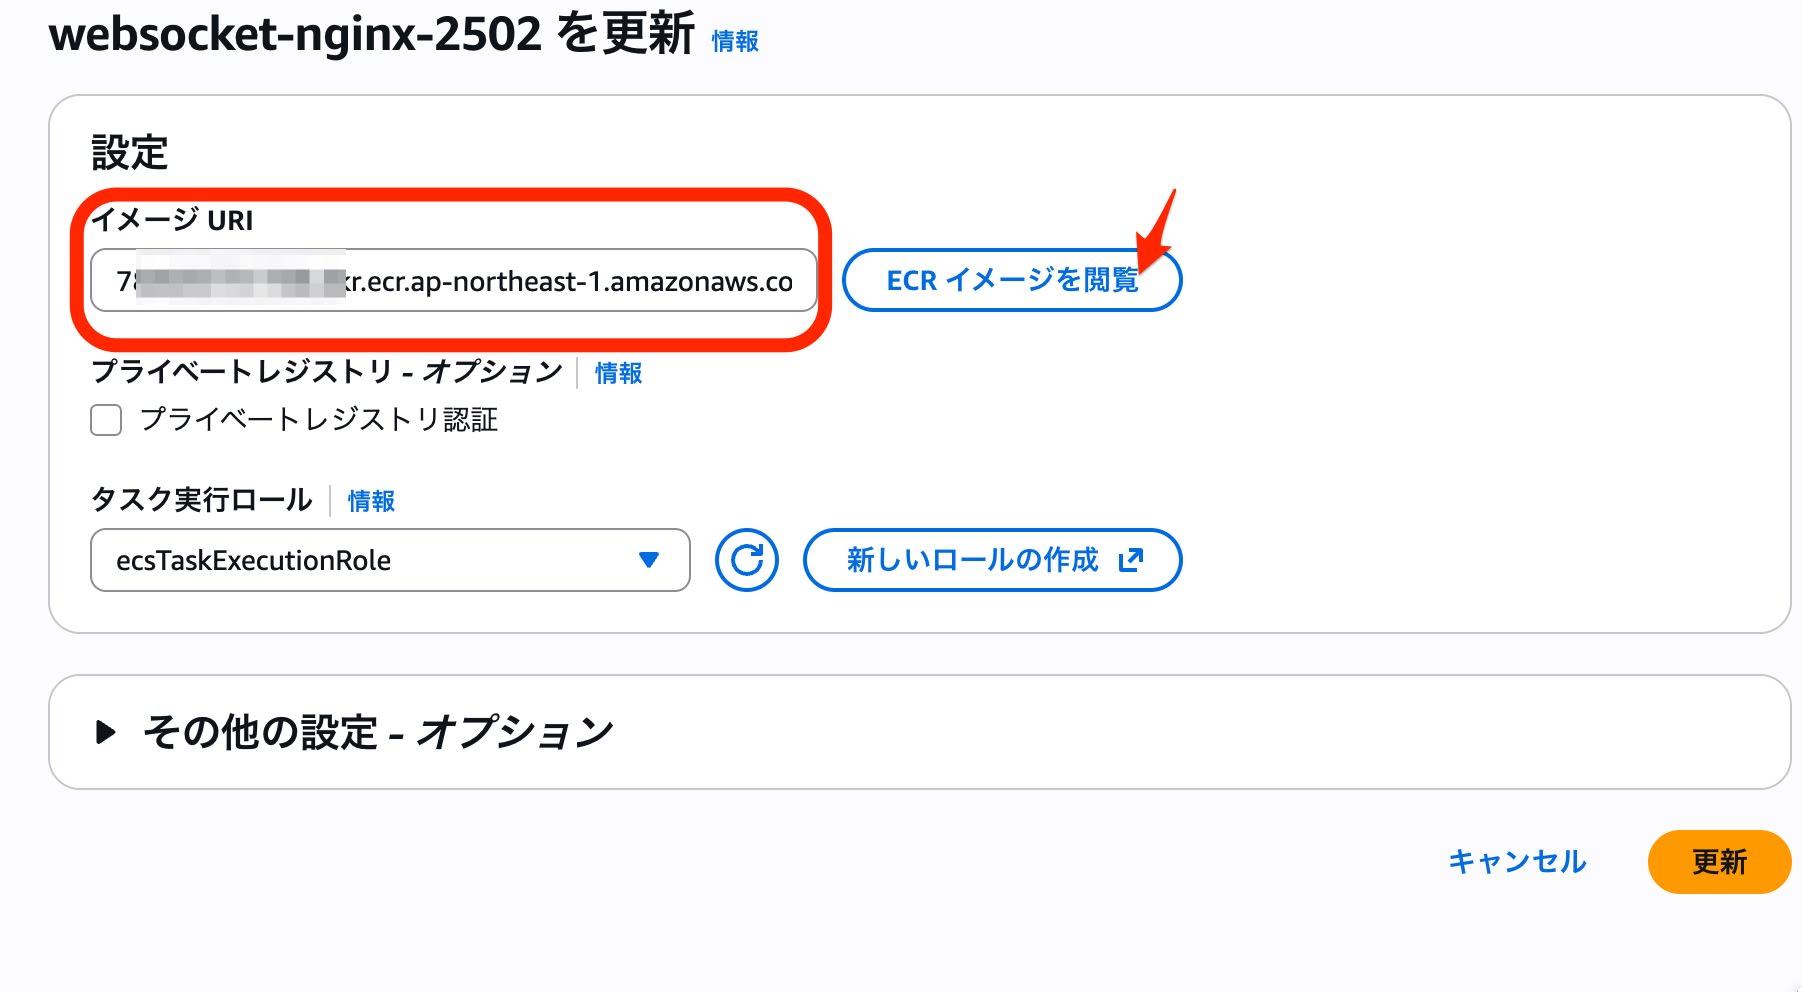
The image selection screen is as follows:
After the update started, it took about 10 minutes to complete the deployment.
The default deployment method was rolling update. I confirmed a safe behavior where the old tasks were stopped after the new tasks passed health checks and ran in parallel for a certain period.
Dashboard
I checked the tabs displayed on the Express service overview page.
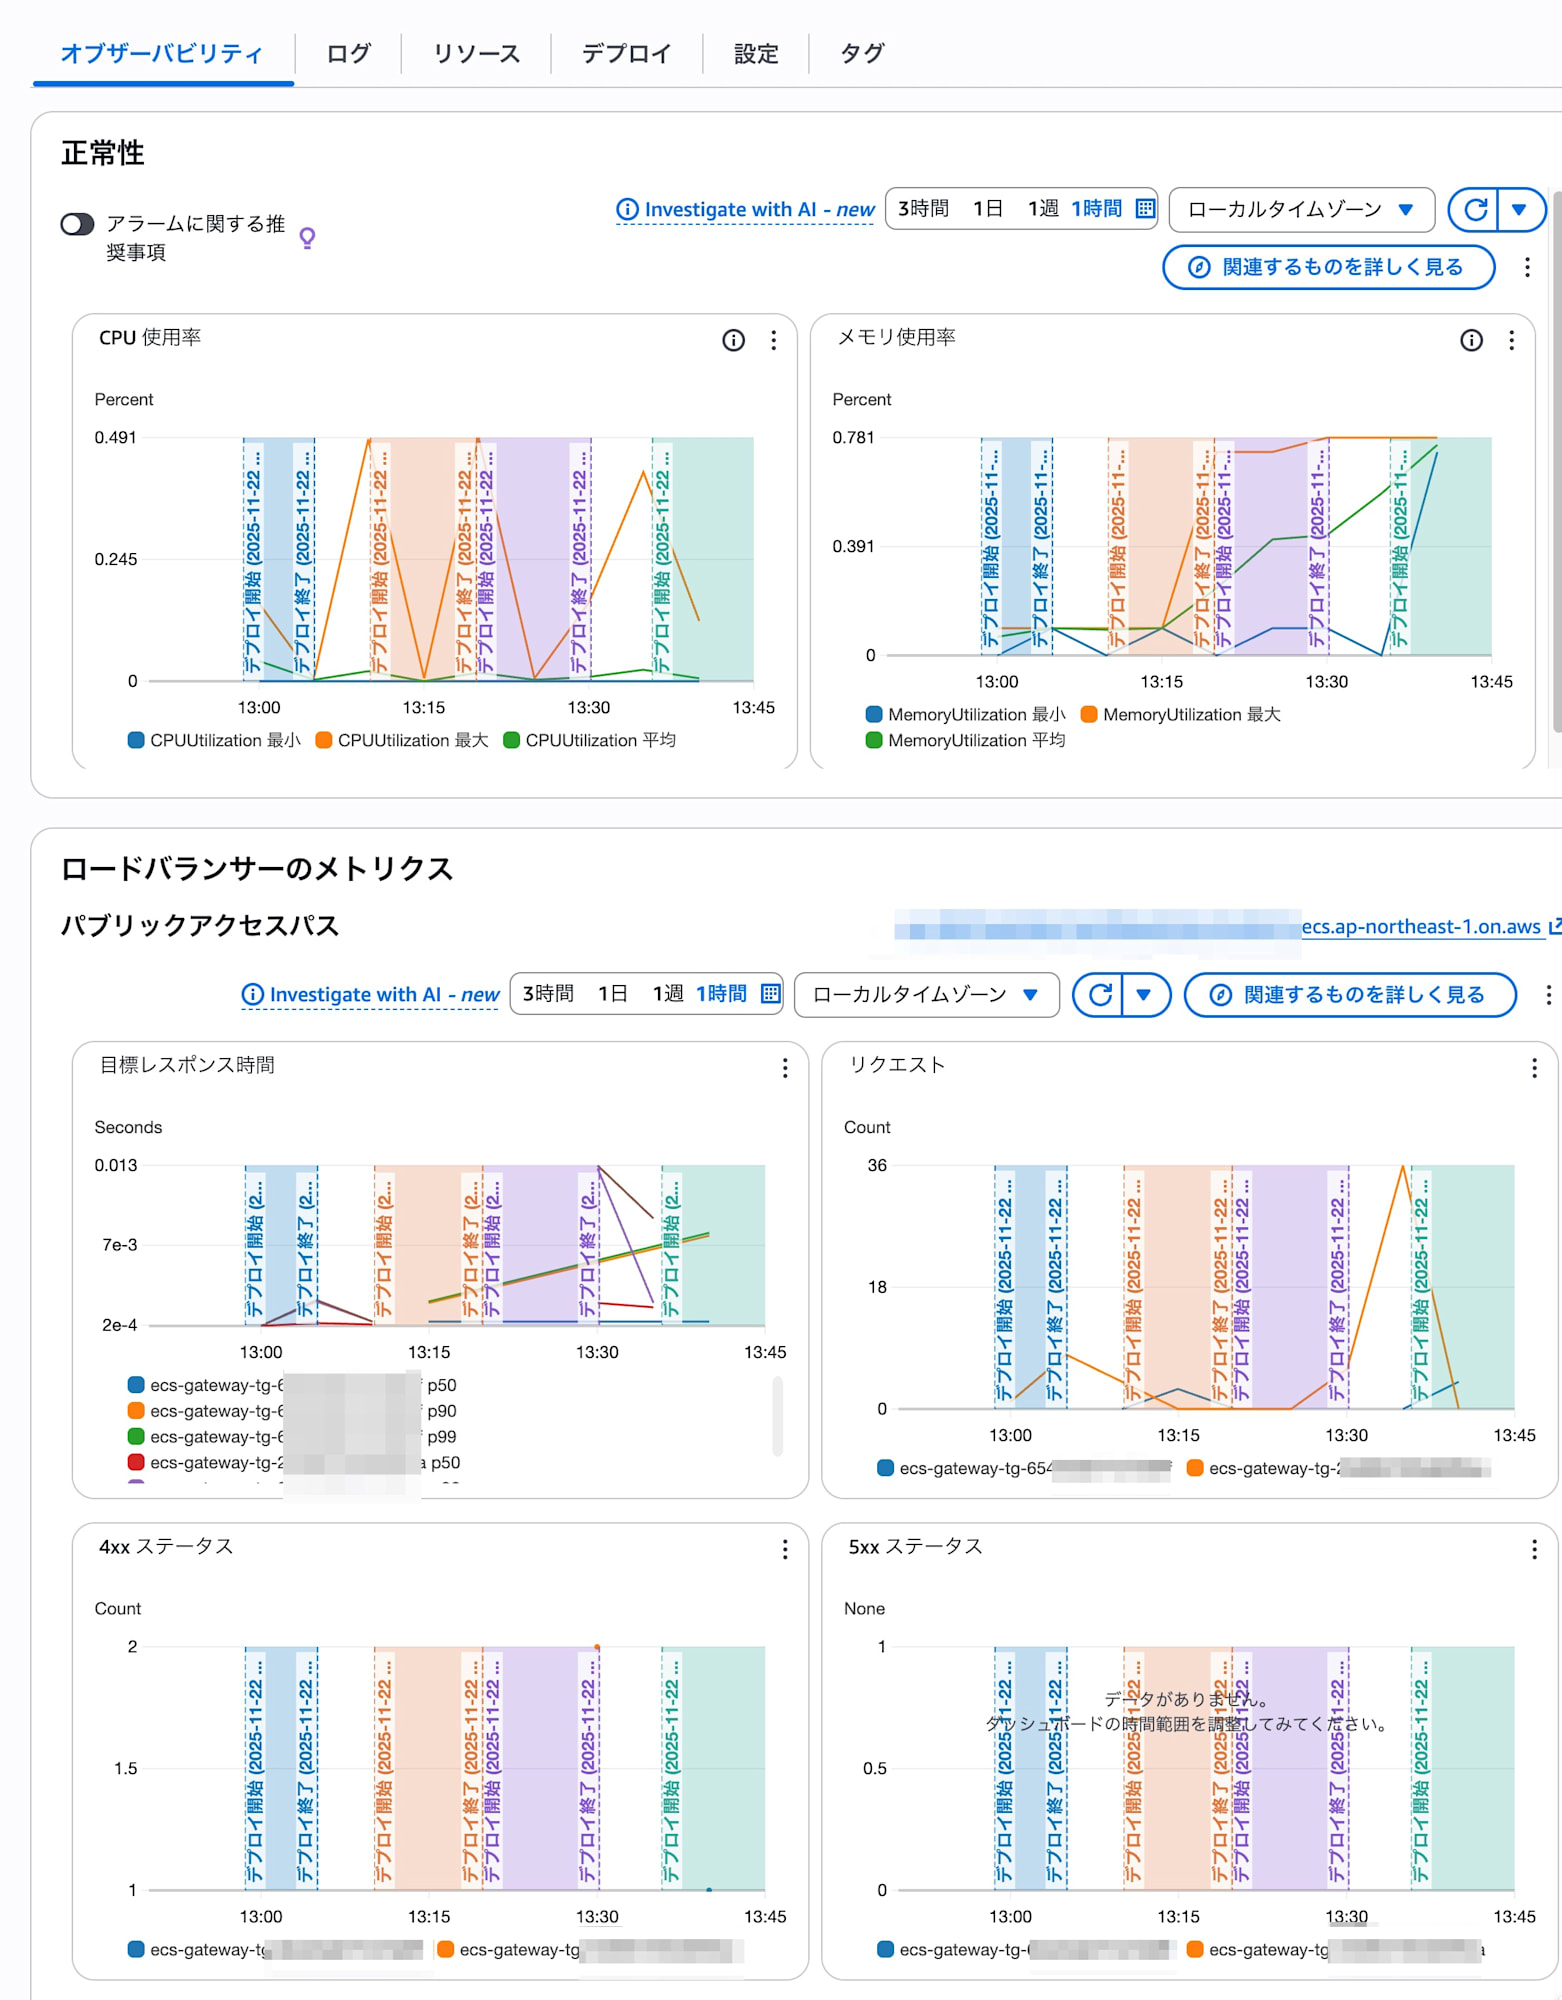
Observability
I could check CPU, memory usage, and load balancer metrics. The graphs reflected deployment timing, making it easy to notice changes caused by deployments.
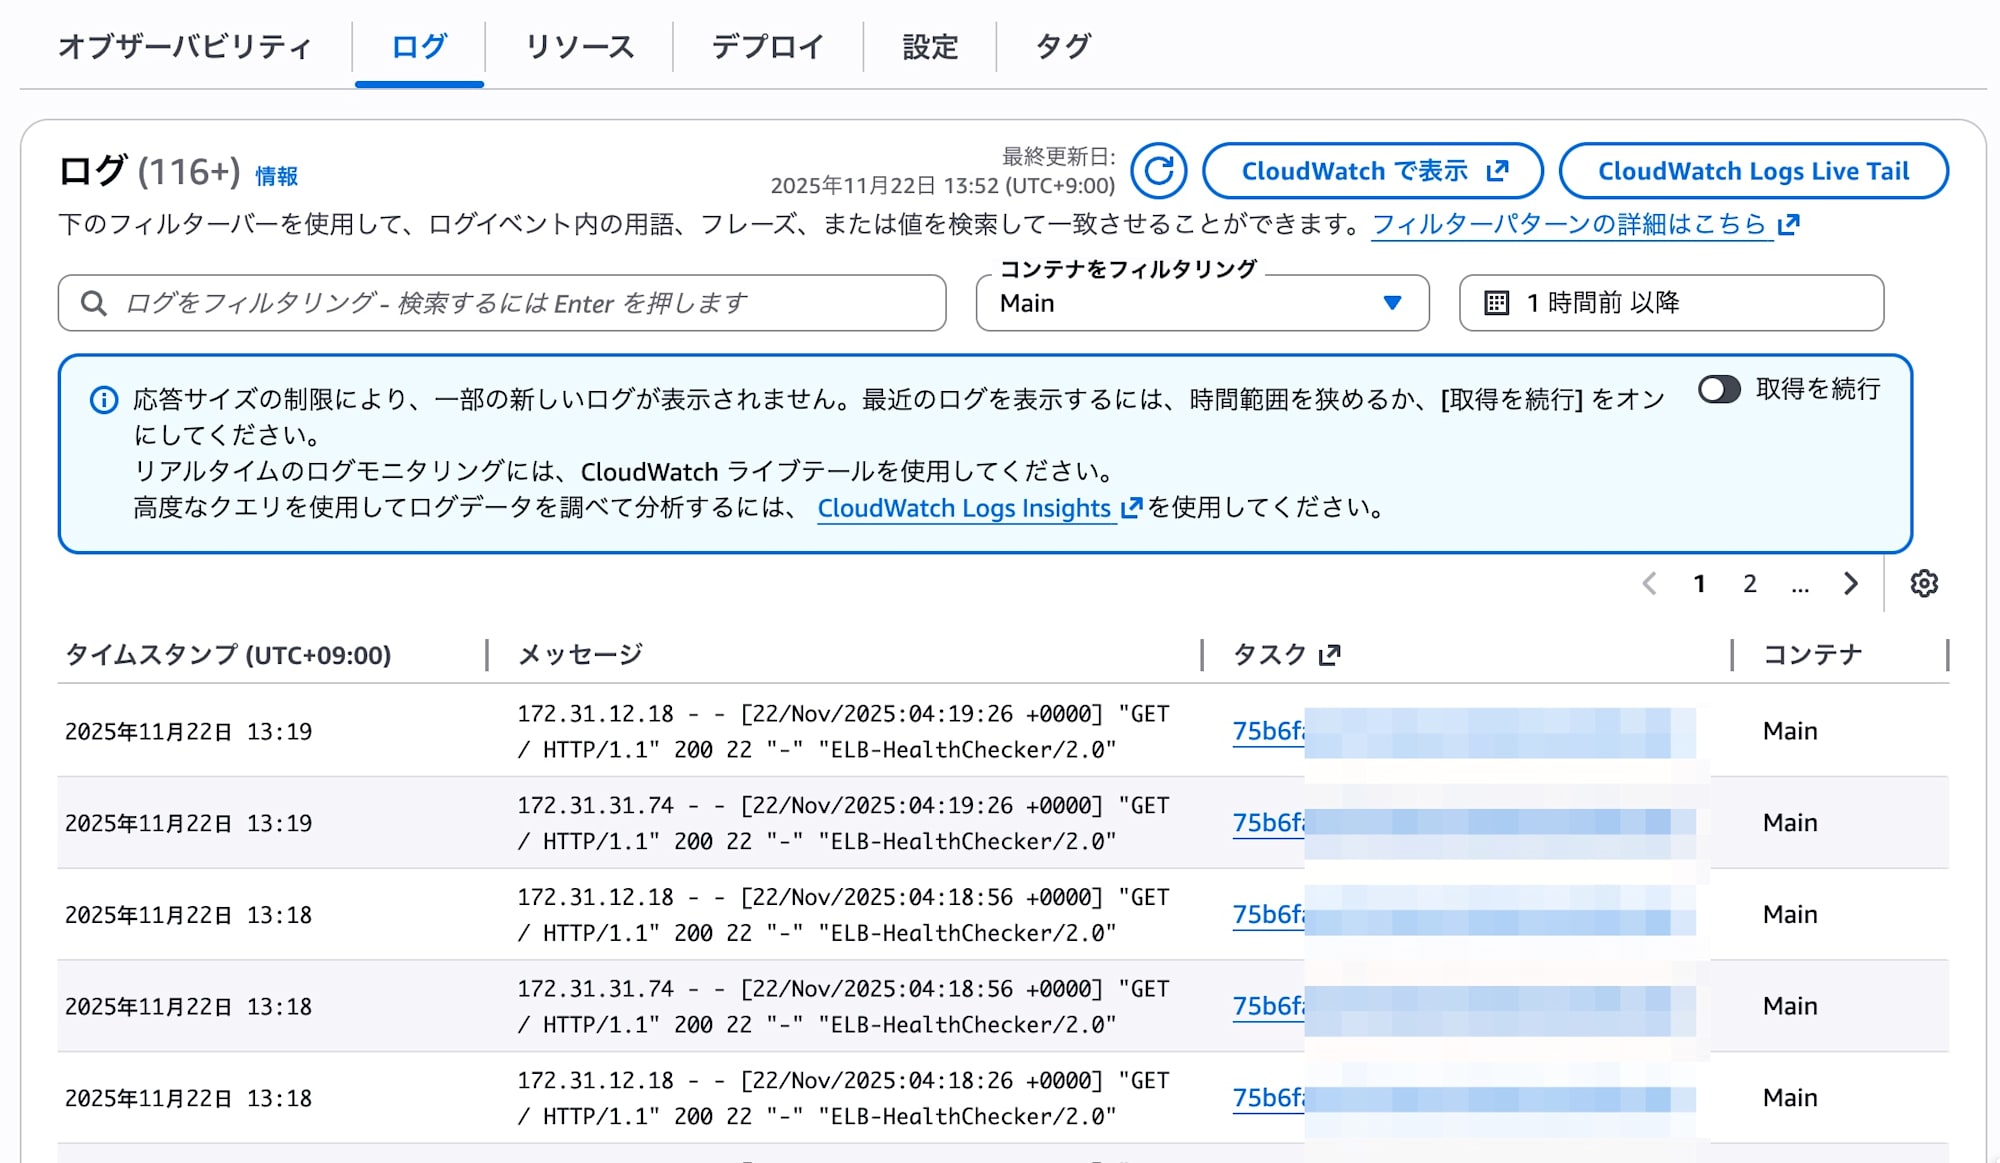
Logs
I could check the application logs of ECS tasks.
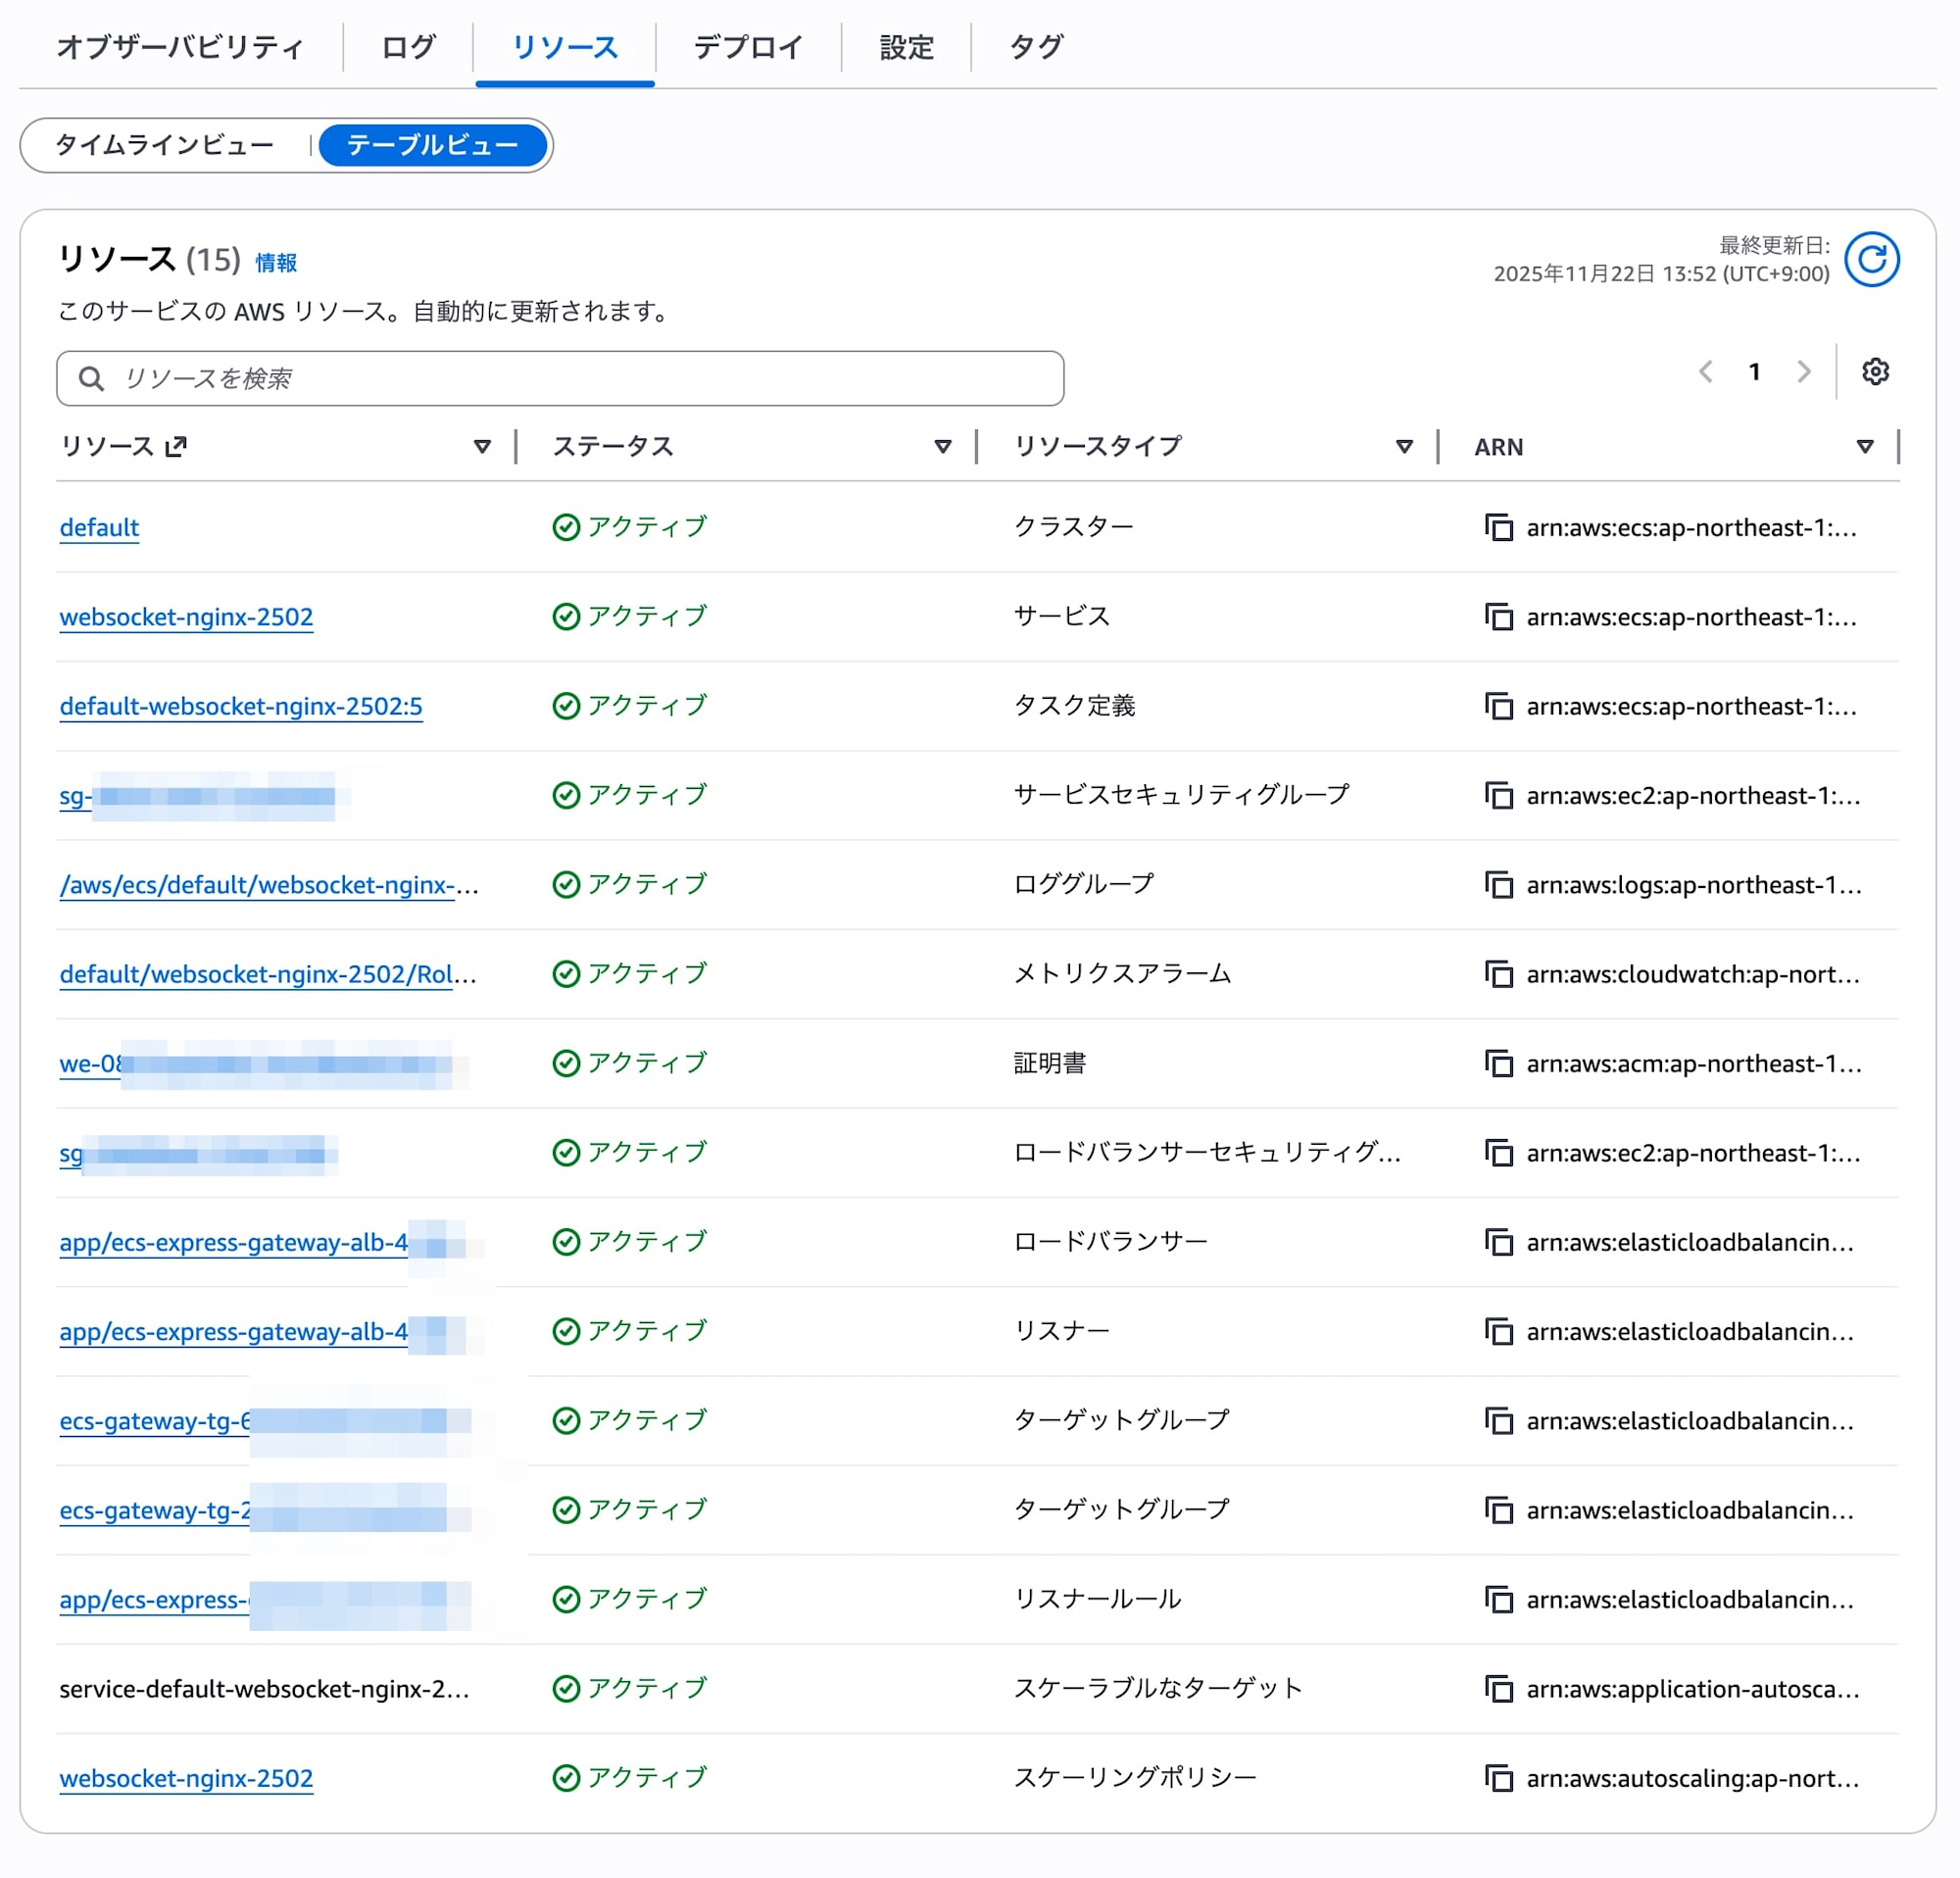
Resources
A list was displayed providing links to dashboards for AWS services (such as ECS and ALB) used by the Express service.
Summary
It's now possible to start using standard ECS with the same ease as App Runner.
Since multiple services can use a regular ALB as a load balancer, you can keep fixed costs down to the price of one ELB while utilizing advanced features like ALB listener rules, metrics, and logs.
For simple workloads, you can first launch with Express Mode and implement detailed settings as needed. When further customization becomes necessary, you can seamlessly migrate (graduate) to regular ECS operations, so there's no worry about future lock-in.
I would like to continue exploring support for CloudFormation and other IaC, customization of resources created with Express Mode, and adding monitoring sidecar containers.