![# [2026 Edition] How to Sync IDs to Entra ID Using AWS Managed Microsoft AD and Entra Connect Sync v2 (Pass-through Authentication)](https://images.ctfassets.net/ct0aopd36mqt/wp-thumbnail-4c76bbdf9d31ea69baca535bce476c36/6a4c372e63788f6173c877a01b935ce7/eyecatch_microsoft_entra_id?w=3840&fm=webp)
# [2026 Edition] How to Sync IDs to Entra ID Using AWS Managed Microsoft AD and Entra Connect Sync v2 (Pass-through Authentication)

This page has been translated by machine translation. View original
This is Shibata.
About 4 years ago, I wrote an article on the procedure for integrating AWS Managed Microsoft AD with Entra Connect Sync (formerly known as Azure AD Connect).
Since then, there have been changes on both the AWS side and the Entra side, so I decided to compile the latest procedures as of today.
Major Changes Over the Past 4 Years
The main changes over the past 4 years are as follows.
Changes on the AWS Side
The major changes in AWS Managed Microsoft AD include:
- The internal OS was updated from Windows Server 2012 R2 to Windows Server 2019
- The domain and forest functional levels were updated to Windows Server 2016
These two points stand out.
With both the internal OS version and functional level updated, features that were previously unsupported should now be available.
The most straightforward example is password writeback, which requires Windows Server 2016 or later OS, as mentioned in the previous article. However, based on publicly available information on the internet, unfortunately even when the OS version requirement is met, the necessary permissions cannot be configured, and password writeback is reportedly still unavailable in AWS Managed Microsoft AD environments.[1]
Additionally, a new Hybrid Edition has been introduced.
This involves a fairly specialized environment with unique constraints from assessments, making it difficult to make general statements.
For this reason, this article does not cover the Hybrid Edition.
Changes on the Entra Side
Regarding Entra, the most significant change is probably the rebranding from Azure AD to Entra ID.
And this year, Microsoft officially started promoting migration from Entra Connect Sync (formerly Azure AD Connect) to Entra Cloud Sync (formerly Azure AD Connect Cloud Sync).
Older versions of Microsoft Entra Connect prior to Ver.2.5.79.0 are scheduled to be retired at the end of September this year.
(Newer versions can continue to be used)
Mandatory upgrade required: All Microsoft Entra Connect Sync synchronization services not using version 2.5.79.0 or later will stop working on September 30, 2026. In May 2025, we released this version due to backend service changes to enhance the service. Please upgrade before this deadline to avoid service disruption.
That said, even now there are functional differences between Entra Connect Sync and Entra Cloud Sync, and switching between them is not straightforward.
The situation of using both depending on the use case will likely continue for a while longer.
Also, the requirement for domain administrator privileges to install Entra Cloud Sync remains unchanged, so its use in AWS Managed Microsoft AD environments should still not be possible.
I plan to verify this in a separate article.
Let's Try It
From here, I will proceed with the environment setup just like in the previous article.
Last time, the AWS Security Blog was used as a reference, but now the official documentation includes the setup procedure.
This time, I will follow the steps in the official documentation.
1. Initial Conditions
In this article, I will create the configuration shown below in my personal AWS test account.
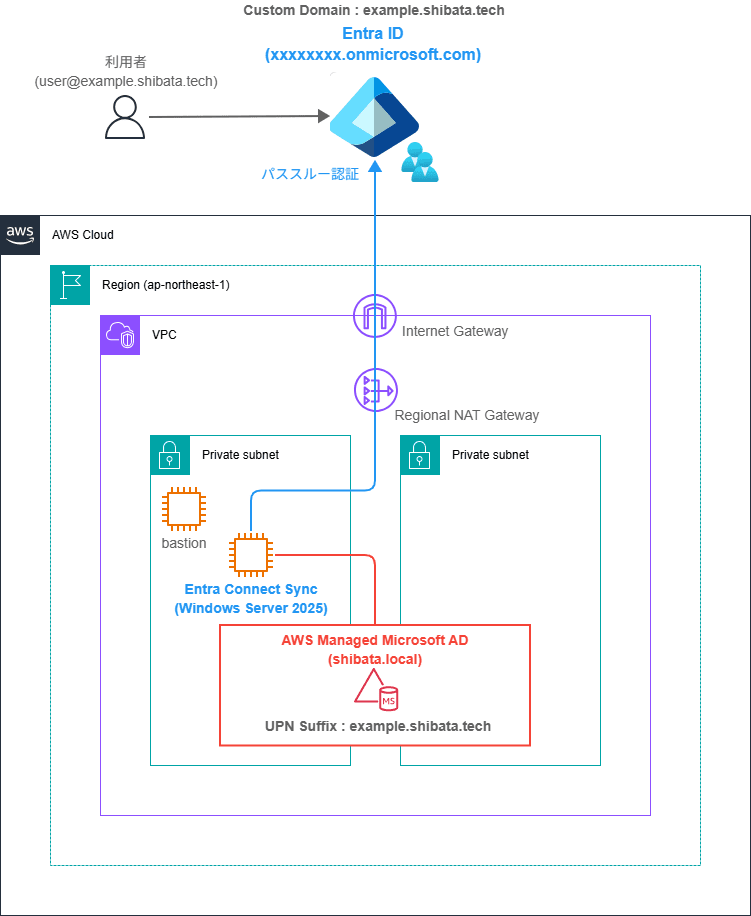
I will build AWS Managed Microsoft AD and a Windows Server 2025 EC2 instance with Entra Connect Sync v2 installed in a private subnet of a pre-prepared VPC environment.
Additionally, I will prepare a bastion server for managing Active Directory.
The specific setup procedures for the VPC, AWS Managed Microsoft AD, and each EC2 instance are omitted.
For EC2, I am using the latest Japanese AMI available as of today (ami-0196295f45708836d : Windows_Server-2025-Japanese-Full-Base-2026.08.12).
1-1. Initial State of Entra ID
Using Entra Connect Sync requires certain initial conditions on the Entra ID side as well.
This time, I am using the Entra ID tenant from my personal Azure environment[2], and I have already configured a custom domain example.shibata.tech.
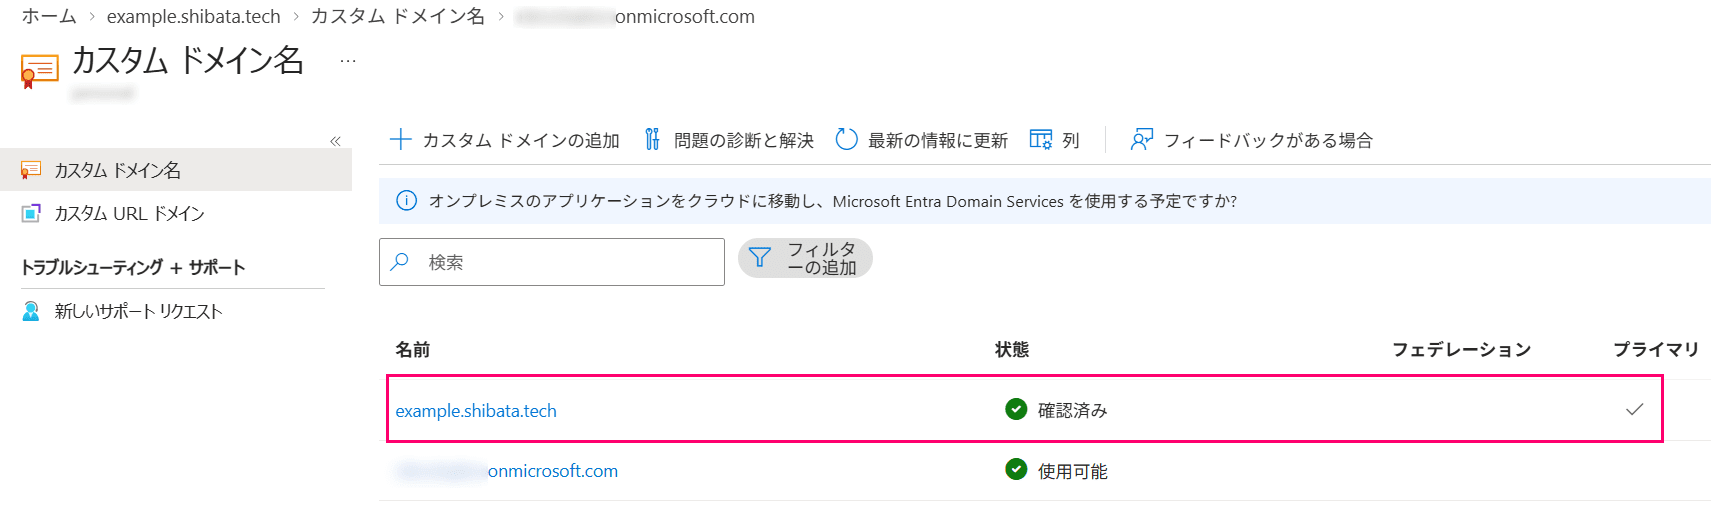
1-2. Initial State of AWS Managed Microsoft AD
To match the same conditions as last time, I prepared an Active Directory environment with the non-recommended domain name shibata.local and set the alternative UPN suffix to example.shibata.tech.
This time, I created it using the AWS CLI like this.
# Create a Standard Edition directory environment using AWS CLI
aws ds create-microsoft-ad \
    --edition 'Standard' \
    --name 'shibata.local' \
    --short-name 'corp' \
    --password 'P@ssword' \
    --vpc-settings 'VpcId=vpc-xxxxxxxx,SubnetIds=subnet-xxxxxxxx,subnet-yyyyyyyy'

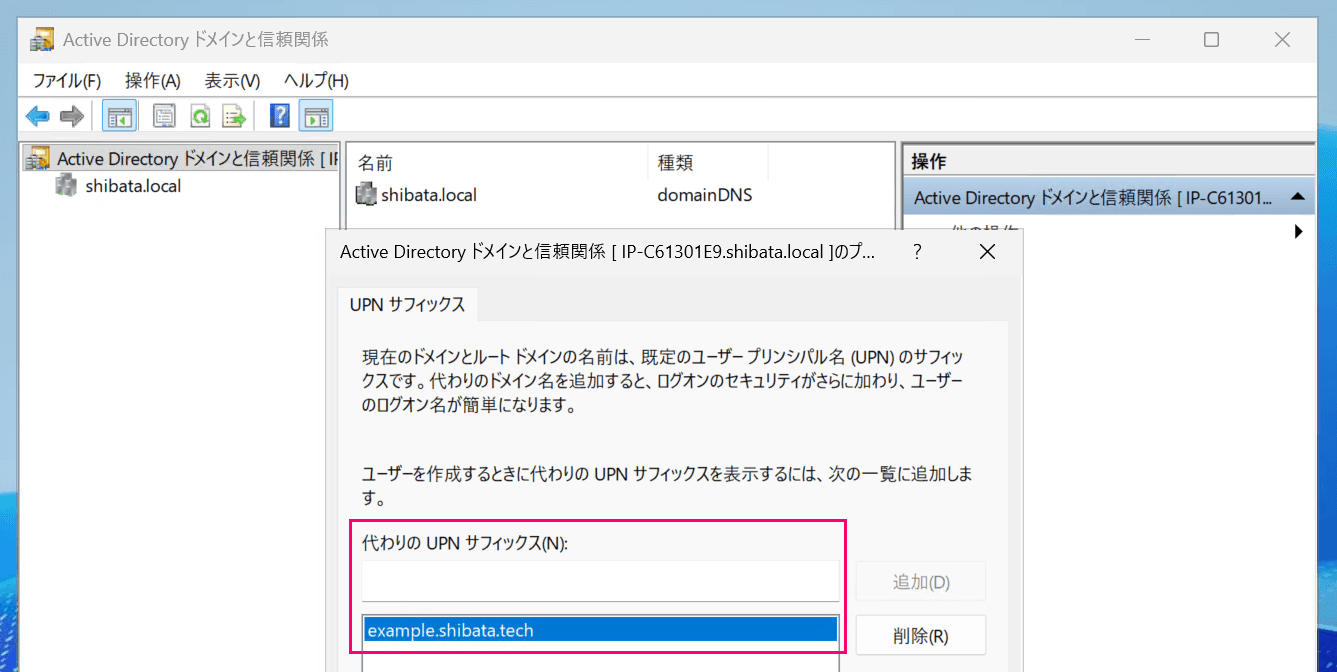
Alternative UPN Suffix has been configured
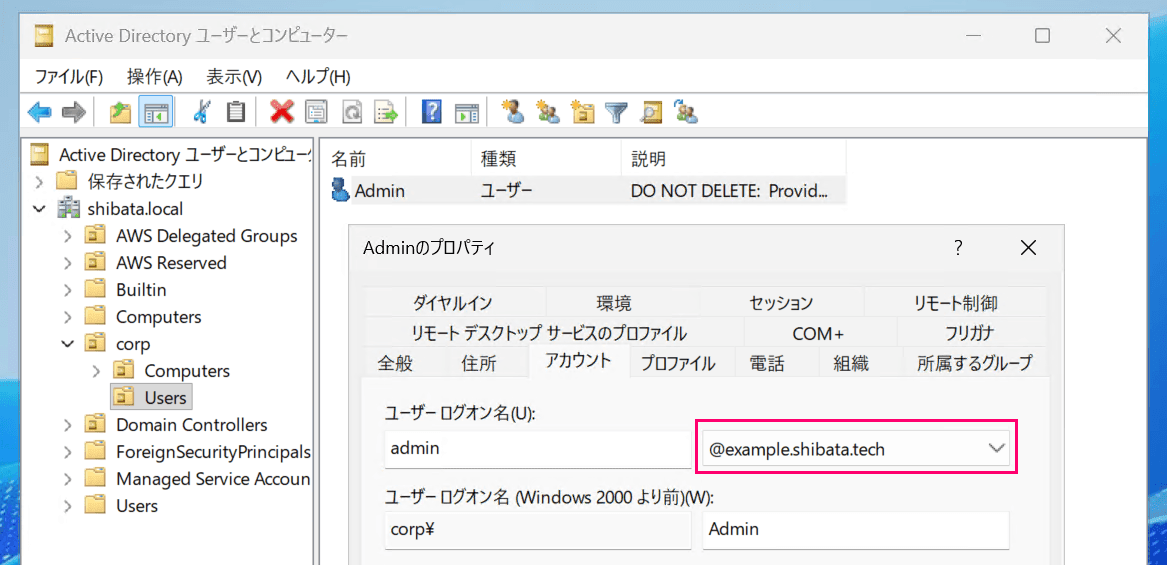
Example of using the alternative UPN Suffix with the admin user
1-3. Initial State of the Bastion Server
The bastion server is created using the AWS Managed Microsoft AD feature.
When created from the management console UI, English Windows Server 2019 is used, so I slightly modified the generated CLI command to create a Windows Server 2025 environment.
# Change AmiId to /aws/service/ami-windows-latest/Windows_Server-2025-Japanese-Full-Base and create the management instance
aws ssm start-automation-execution --document-name "AWS-CreateDSManagementInstance" --document-version "\$DEFAULT" \
    --parameters '{"DirectoryId":["d-0000000000"],"KeyPairName":["your-keypair"],"IamInstanceProfileName":["AmazonSSMDirectoryServiceInstanceProfileRole"],"SecurityGroupName":["AmazonSSMDirectoryServiceSecurityGroup"],"AmiId":["{{ssm:/aws/service/ami-windows-latest/Windows_Server-2025-Japanese-Full-Base}}"],"InstanceType":["t3.medium"],"MetadataOptions":["{\"HttpEndpoint\":\"enabled\",\"HttpTokens\":\"required\"}"]}' --region ap-northeast-1
2. Prerequisites for Entra Connect Sync
Next, let me confirm the prerequisites for Entra Connect Sync.
Not much has changed from last time, but I will list the key points.
2-1. Prerequisites for Entra ID
An Entra ID tenant with a custom domain added and configured is required.
When a custom domain is configured, the default limit of up to 50,000 objects is reportedly increased to 300,000 objects.
2-2. Prerequisites on the Active Directory Side
The Active Directory functional level must be Windows Server 2003 or later, and if you want to use password writeback, the domain controller OS must be Windows Server 2016 or later — this has not changed.
2-3. PowerShell Execution Policy
The requirement to change the PowerShell execution policy in order to run PowerShell scripts during Entra Connect Sync installation has also not changed.
Running Set-ExecutionPolicy with -Scope CurrentUser should be sufficient.
# Administrator privileges are not required since a scope is specified
Set-ExecutionPolicy -ExecutionPolicy RemoteSigned -Scope CurrentUser -Force
2-4. OS Specs for Entra Connect Sync
The current latest version must be installed on Windows Server 2019 or later, and installation on Windows Server 2022 through Windows Server 2025 is recommended.
It must be a full installation of the OS, not Server Core.
Also, the OS specifications required vary depending on the size of Active Directory, with the following minimum requirements defined.
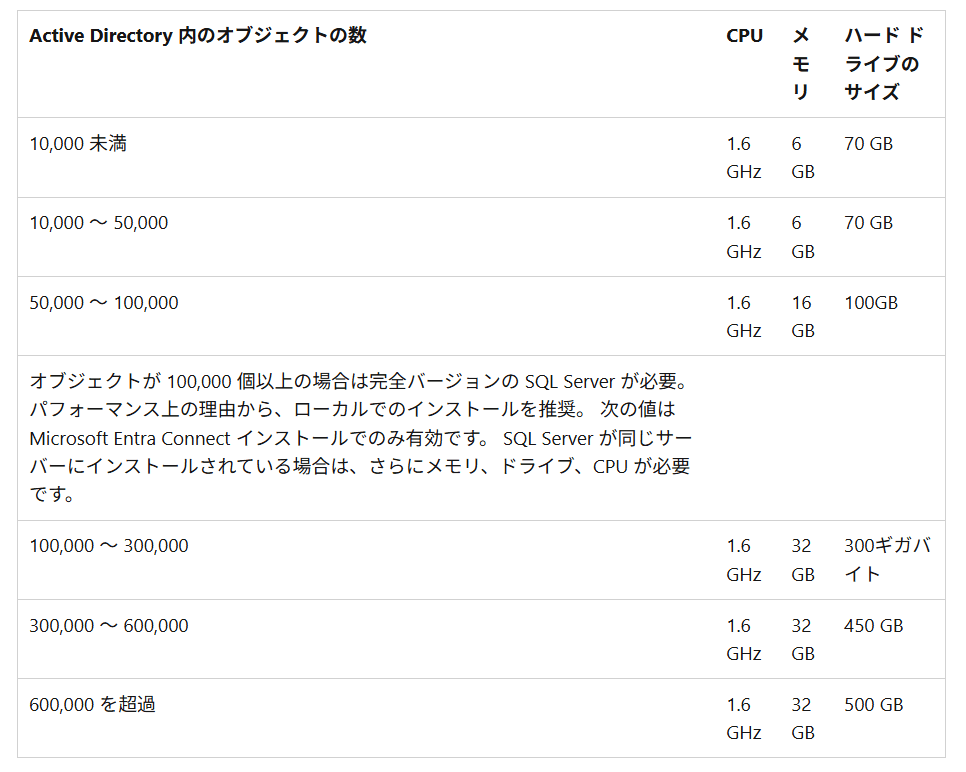
Compared to last time, the minimum required memory size has increased to 6 GB.
The point that SQL Server Express LocalDB 2019 is used by default has not changed[3], so please be aware of the CPU core count limit.
(When using SQL Server Express 2019, 4 CPU cores is the licensing limit)
This time, I will use t3.large (2 vCPU, 8 GiB memory) and EBS 70 GB, which meets the minimum specifications.
Please check the documentation for other detailed conditions.
2-5. Communication Requirements
The communication requirements for environments using Entra Connect Sync are summarized in the following document.
Please check the documentation for details, but the important points are as follows.
- Open the communication ports from Entra Connect Sync → Active Directory
- In the case of AWS Managed Microsoft AD, ports are open by default, so this is generally not an issue
- Open outbound communication (HTTP, HTTPS) from Entra Connect Sync → Entra ID
- Inbound communication is basically not used. Opening RDP is sufficient
- The default security group allows all outbound traffic, so this is generally not an issue
3. Installing Entra Connect Sync
From here, I will begin the installation of Entra Connect Sync.
Please make sure the EC2 instance has already joined the domain.
All subsequent work is performed with the administrator user admin@example.shibata.tech (admin@shibata.local).
3-1. Preparing the Synchronization Domain User
A dedicated domain user is required for ID synchronization with Entra Connect Sync.
This user can be automatically created during the Entra Connect Sync installation, but automatic creation requires "Enterprise Admin" privileges, which cannot be granted in AWS Managed Microsoft AD due to insufficient permissions. Therefore, it needs to be manually prepared separately.
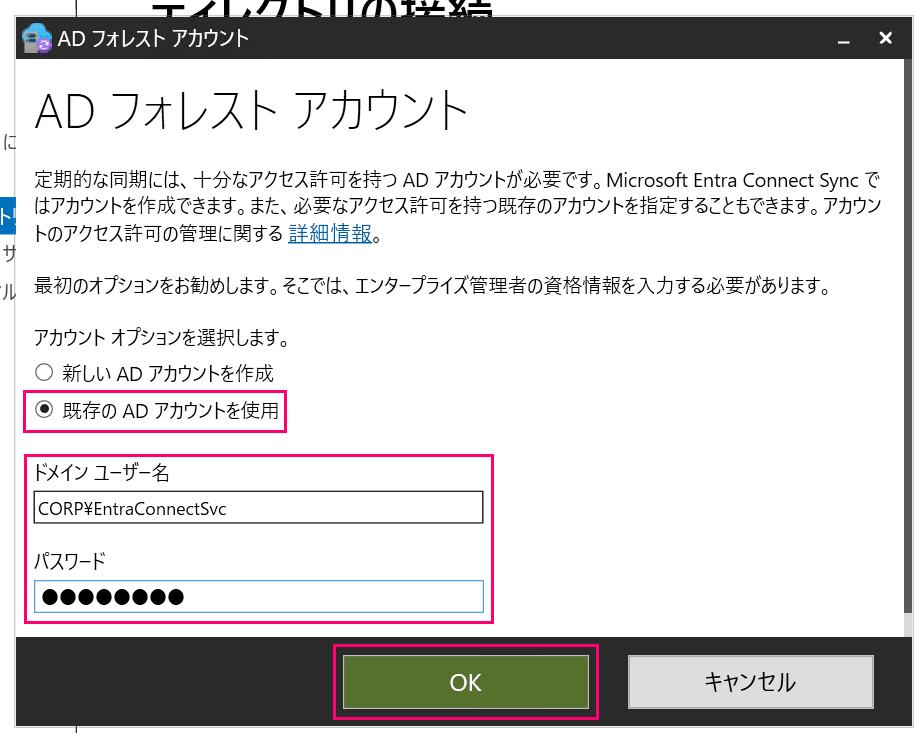
Since the AWS documentation does not specify a username to create, following the previous article, I will create a new user named EntraConnectSvc.
Please create the user using the following PowerShell commands or via the GUI.
# Creating the synchronization user

# Run from an AD-manageable environment such as a bastion server
# ※ Manual creation instead of PowerShell is also fine
$params = @{
    Name                 = 'EntraConnectSvc';
    UserPrincipalName    = 'EntraConnectSvc@example.shibata.tech';
    Description          = 'Entra Connect Sync account'
    AccountPassword      = ConvertTo-SecureString 'P@ssword' -AsPlainText -Force;
    PasswordNeverExpires = $true;
    Enabled = $true;
}
New-ADUser @Params
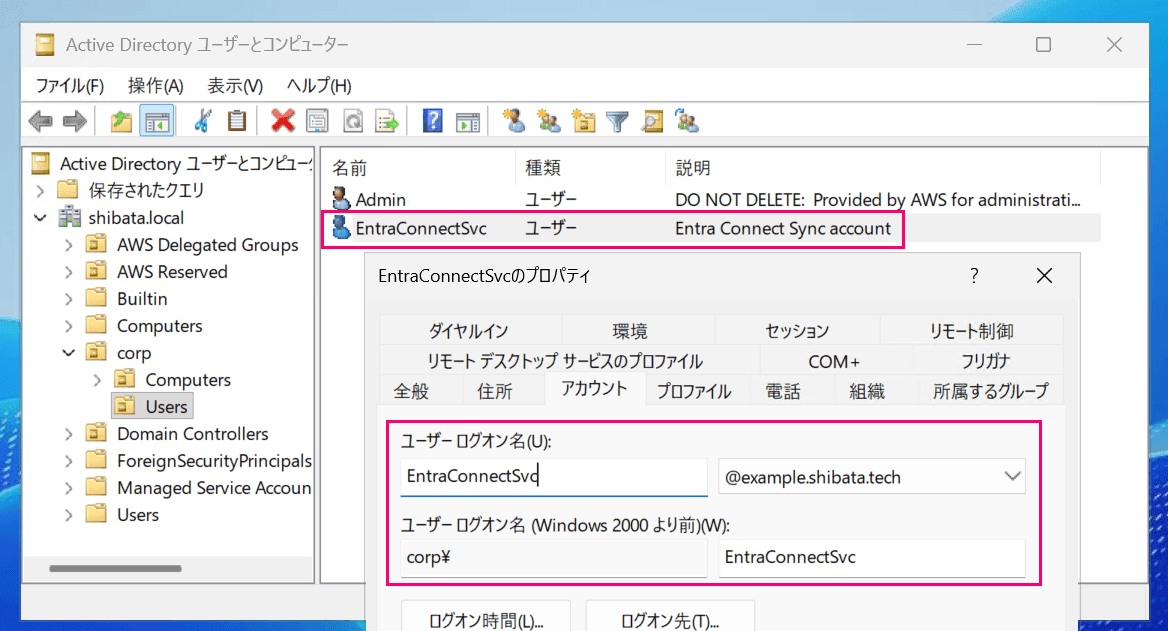
The user permissions can remain at their default state.
Permissions will be configured later.
3-2. Downloading and Installing Entra Connect Sync
The AWS documentation has steps to install the latest version of Entra Connect Sync from the following URL, but as of today, direct distribution of the installer has been discontinued, and the process has changed to downloading it from the Entra admin center after agreeing to the terms.
Please read the PDF and other materials at the above link and download the MSI installer (AzureADConnect.msi) from the Entra admin center.
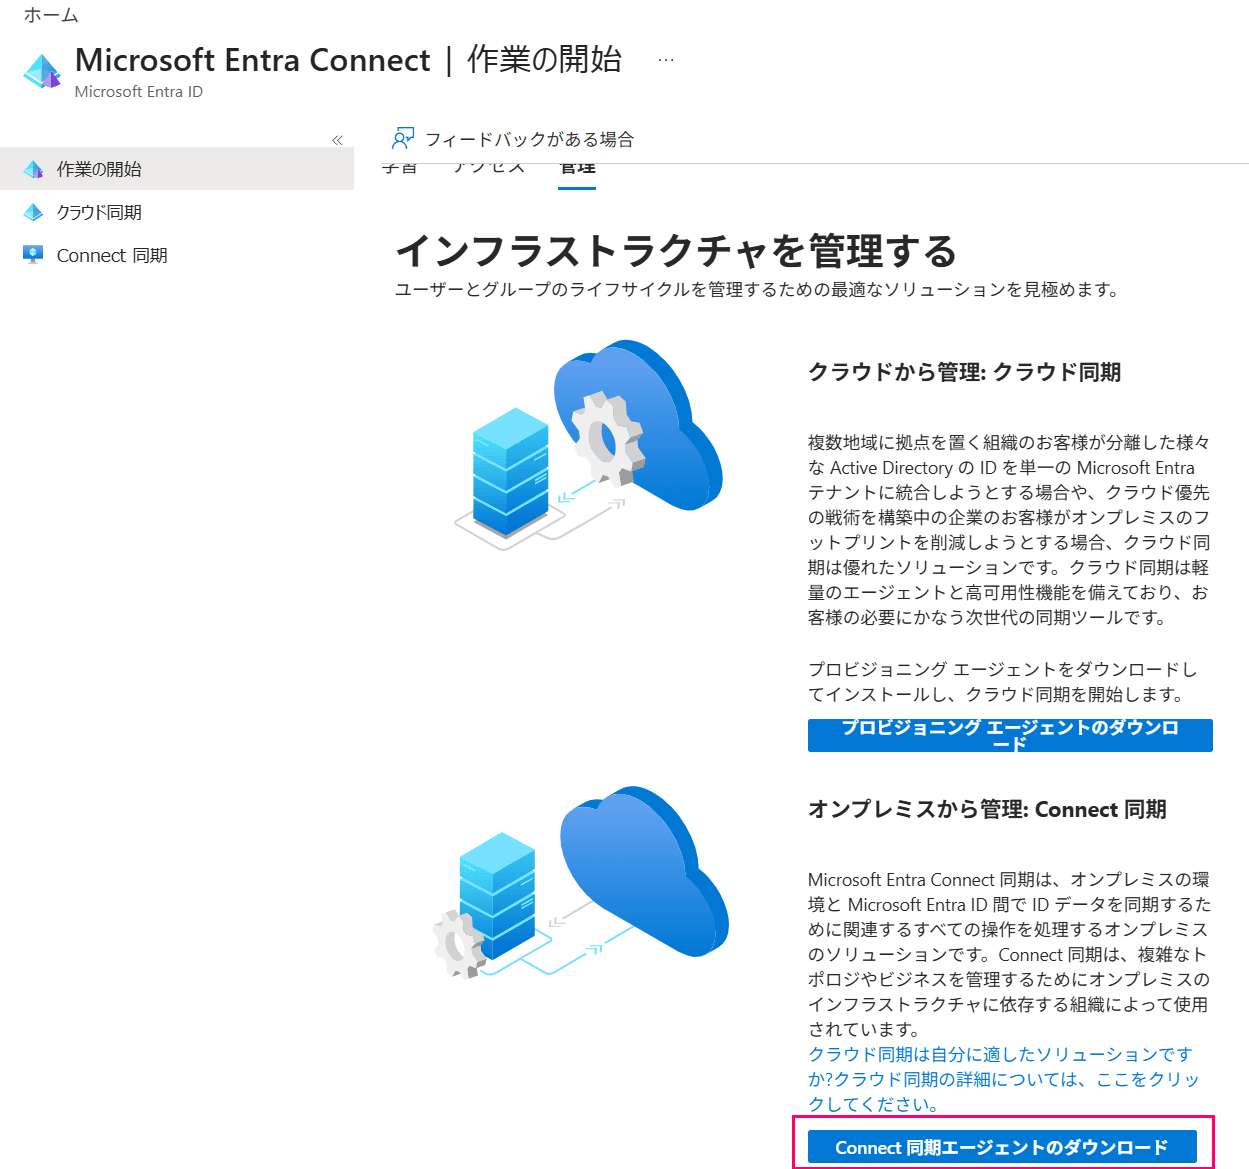
This time, I was able to download the Ver.2.6.84 installer.
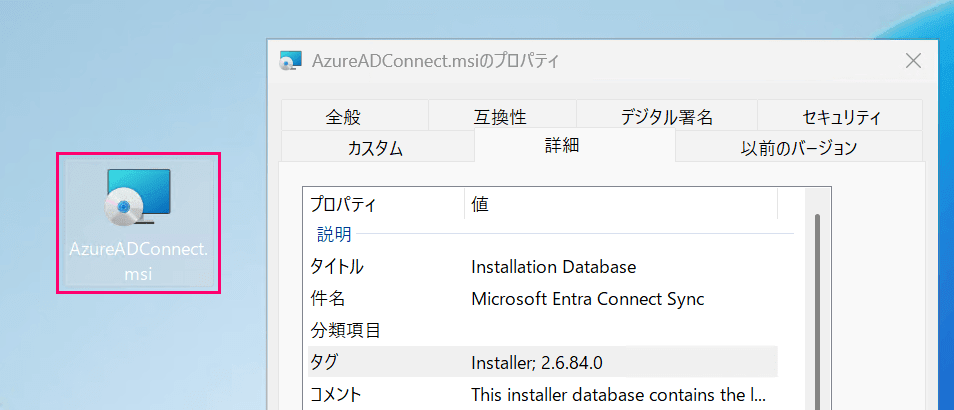
Run the MSI installer and wait for the Entra Connect Sync software installation to complete.
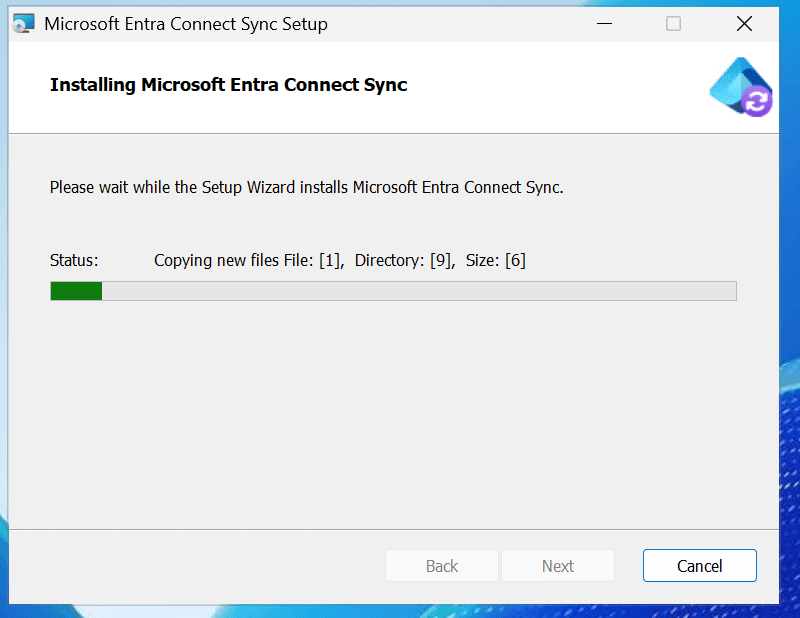
After installation, the initial setup wizard will start, but since there are tasks to complete before proceeding through the wizard, leave it as is for now.
3-3. Configuring Permissions for the Synchronization Domain User
With the initial setup wizard paused, perform the initial configuration of the EntraConnectSvc user.
Unlike last time, the AWS documentation now includes the content of the initial configuration script.
There is slightly more error handling, but what it actually does is the same as before:
- Add read permissions to the domain using the
Set-ADSyncBasicReadPermissionscommand - Add write permissions for the Entra ID source anchor using the
Set-ADSyncMsDsConsistencyGuidPermissionscommand
Since this script uses Active Directory module features, install RSAT-AD-Tools beforehand.
# (Requires administrator privileges) RSAT-AD-Tools must be installed in advance
Install-WindowsFeature RSAT-AD-Tools
Then, save the following script content to an appropriate directory.
This time, following the AWS documentation, I will save it to C:\temp\entra.ps1.
# For the latest version, refer to https://docs.aws.amazon.com/directoryservice/latest/admin-guide/ms_ad_connect_ms_entra_sync.html
$modulePath = "C:\Program Files\Microsoft Azure Active Directory Connect\AdSyncConfig\AdSyncConfig.psm1"

try {
    # Attempt to import the module
    Write-Host -ForegroundColor Green "Importing Module for Azure Entra Connect..."
    Import-Module $modulePath -ErrorAction Stop
    Write-Host -ForegroundColor Green "Success!"
} catch {
    # Display the exception message
    Write-Host -ForegroundColor Red "An error occurred: $($_.Exception.Message)"
}

Function Set-EntraConnectSvcPerms {
    [CmdletBinding()]
    Param (
        [String]$ServiceAccountName
    )

    #Requires -Modules 'ActiveDirectory' -RunAsAdministrator

    Try {
        $Domain = Get-ADDomain -ErrorAction Stop
    } Catch [System.Exception] {
        Write-Output "Failed to get AD domain information $_"
    }

    $BaseDn = $Domain | Select-Object -ExpandProperty 'DistinguishedName'
    $Netbios = $Domain | Select-Object -ExpandProperty 'NetBIOSName'

    Try {
        $OUs = Get-ADOrganizationalUnit -SearchBase "OU=$Netbios,$BaseDn" -SearchScope 'Onelevel' -Filter * -ErrorAction Stop | Select-Object -ExpandProperty 'DistinguishedName'
    } Catch [System.Exception] {
        Write-Output "Failed to get OUs under OU=$Netbios,$BaseDn $_"
    }

    Try {
        $ADConnectorAccountDN = Get-ADUser -Identity $ServiceAccountName -ErrorAction Stop | Select-Object -ExpandProperty 'DistinguishedName'
    } Catch [System.Exception] {
        Write-Output "Failed to get service account DN $_"
    }

    Foreach ($OU in $OUs) {
        try {
            Set-ADSyncMsDsConsistencyGuidPermissions -ADConnectorAccountDN $ADConnectorAccountDN -ADobjectDN $OU -Confirm:$false -ErrorAction Stop
            Write-Host "Permissions set successfully for $ADConnectorAccountDN and $OU"

            Set-ADSyncBasicReadPermissions -ADConnectorAccountDN $ADConnectorAccountDN -ADobjectDN $OU -Confirm:$false -ErrorAction Stop
            Write-Host "Basic read permissions set successfully for $ADConnectorAccountDN on OU $OU"
        } catch {
            Write-Host "An error occurred while setting permissions for $ADConnectorAccountDN on OU $OU : $_"
        }
    }
}
With the script saved, run the Set-EntraConnectSvcPerms command as follows.
Specify the sAMAccountName of the synchronization user as the argument (in this case, EntraConnectSvc).
# Import the saved entra.ps1
Import-Module C:\temp\entra.ps1
# Configure permissions for the EntraConnectSvc user. Specify the sAMAccountName as the argument
Set-EntraConnectSvcPerms -ServiceAccountName 'EntraConnectSvc'
The execution result looks like this.
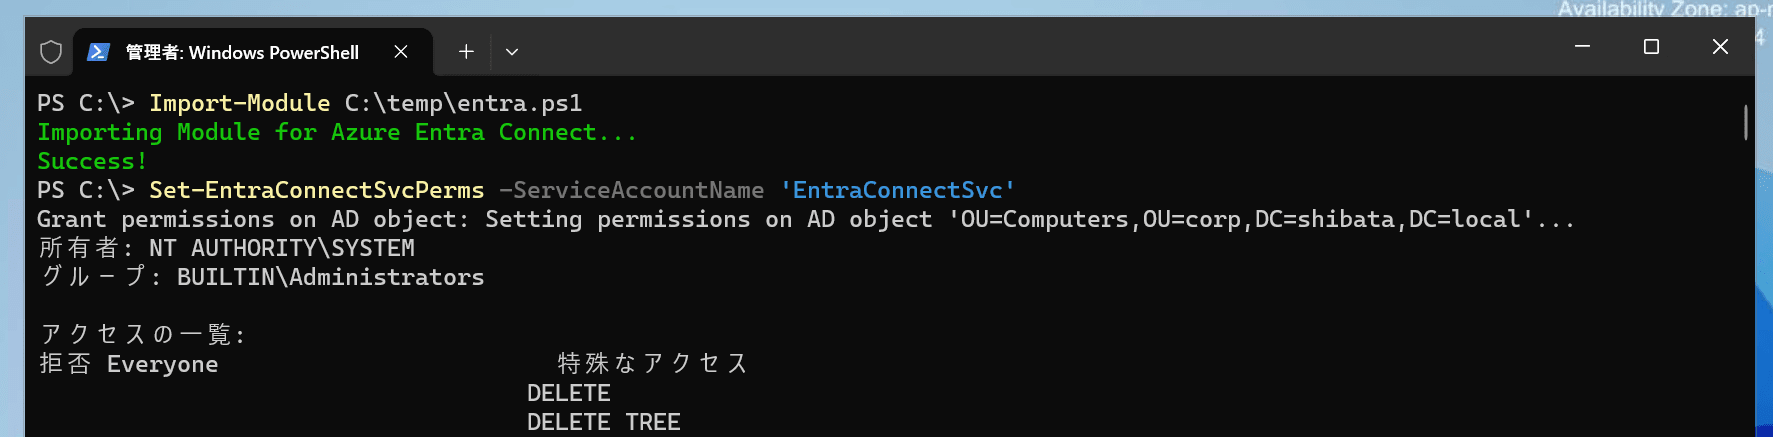
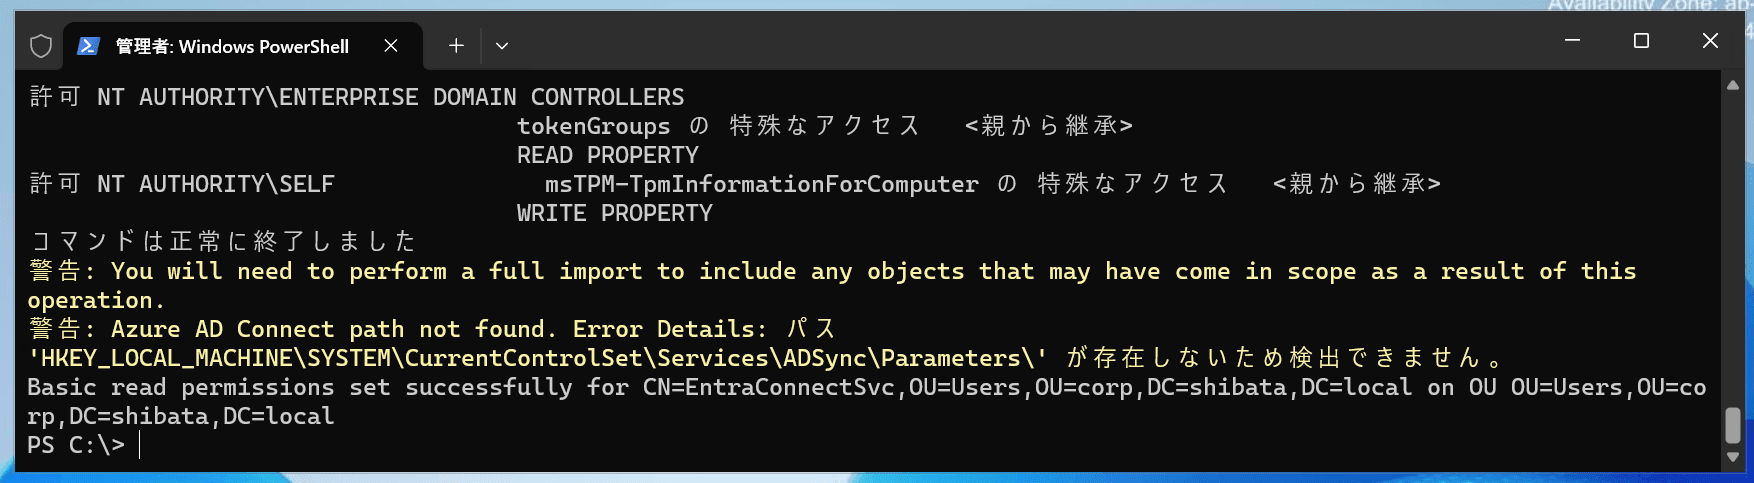
Some warnings appear, but as long as you see the logs:
Permissions set successfully for CN=EntraConnectSvc,OU=Users,OU=corp,DC=shibata,DC=local and OU=Computers,OU=corp,DC=shibata,DC=local
and
Basic read permissions set successfully for CN=EntraConnectSvc,OU=Users,OU=corp,DC=shibata,DC=local on OU OU=Users,OU=corp,DC=shibata,DC=local
there should be no issues.
3-4. Initial Configuration of Entra Connect Sync
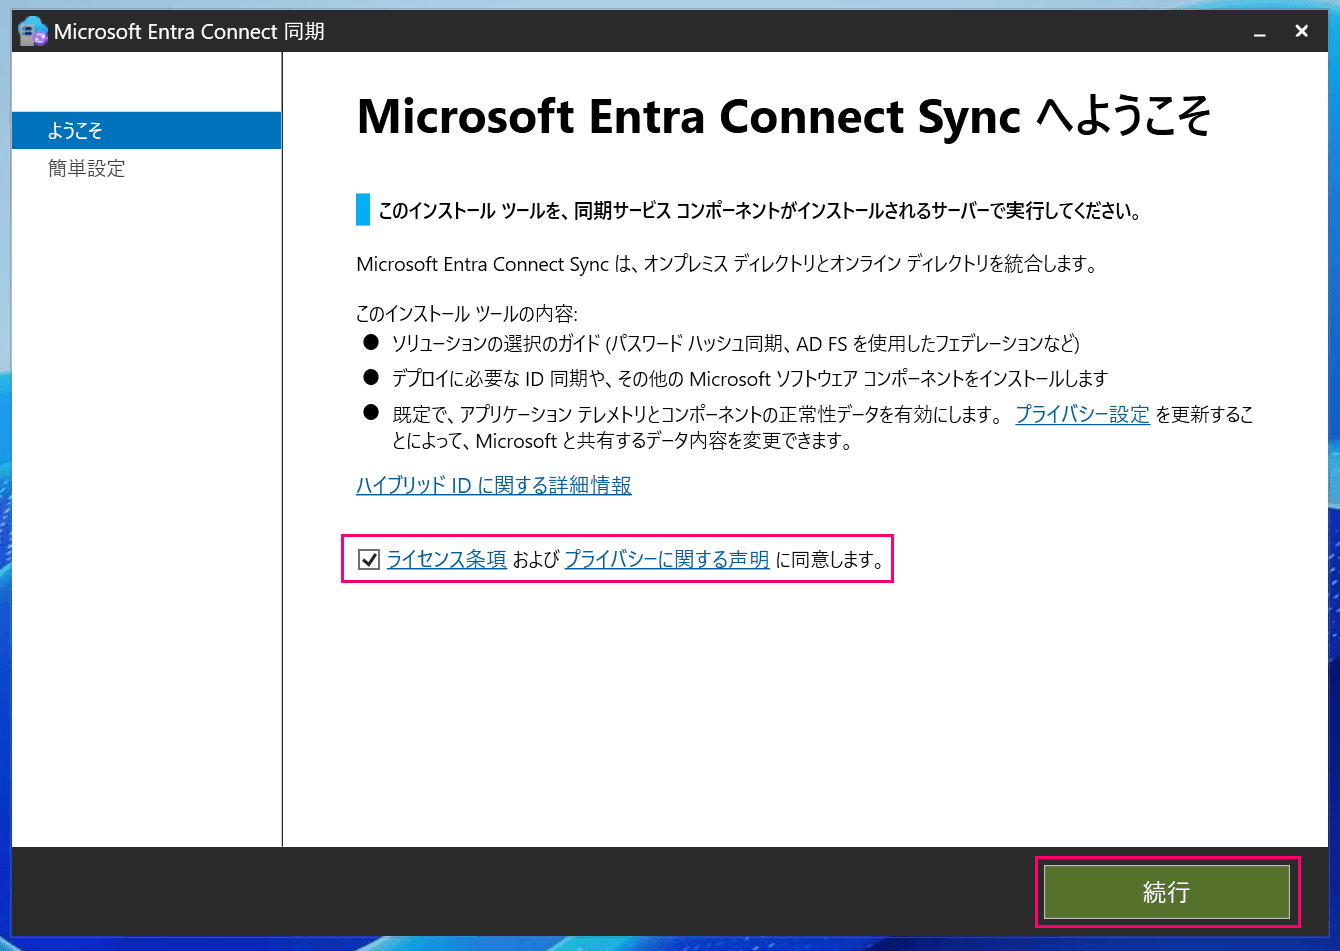
From here, I will resume the initial setup wizard that was left on hold.
"Agree to the license terms" and click "Continue."
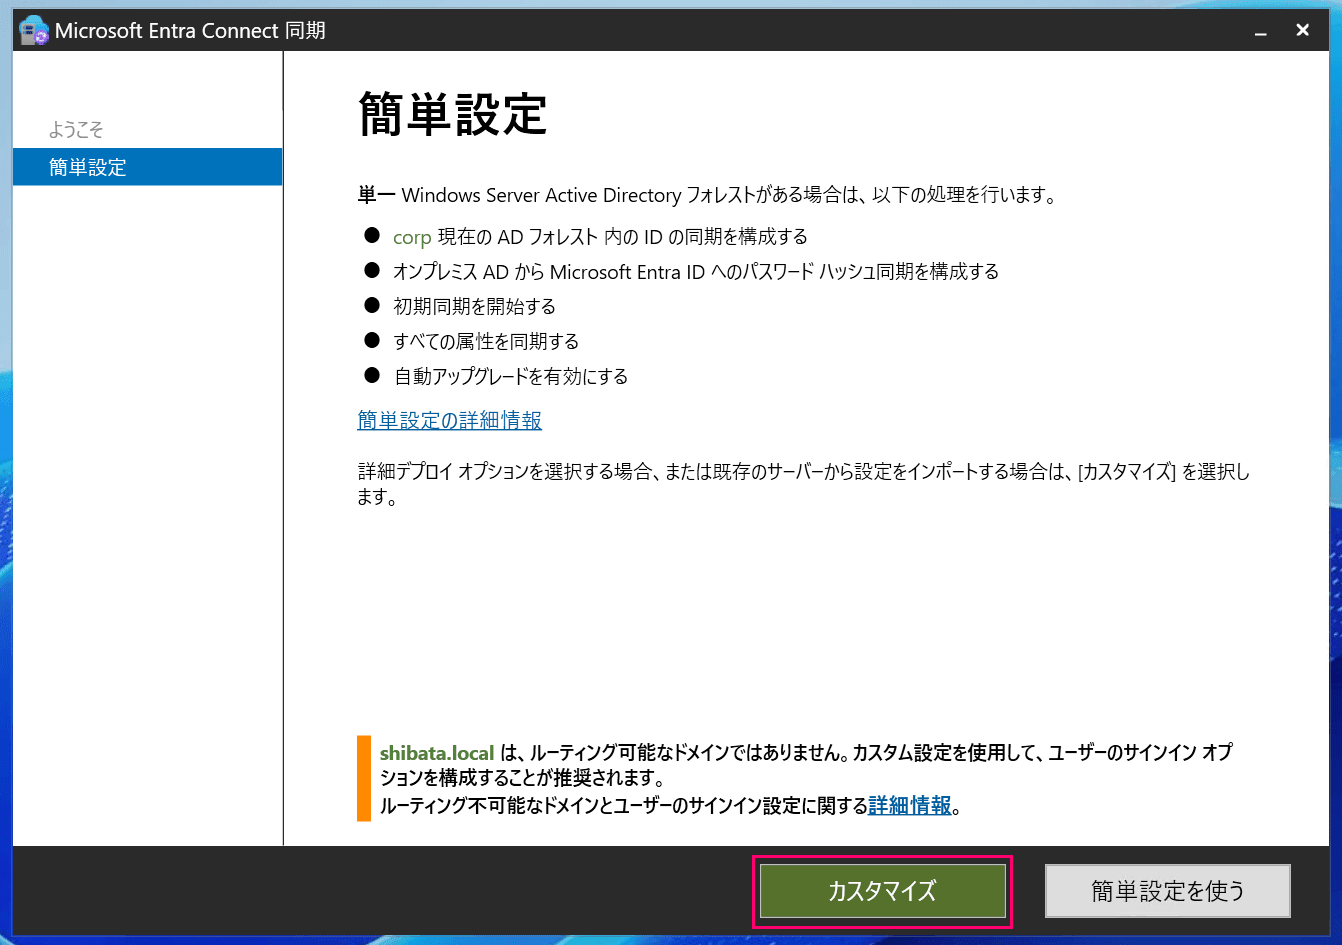
Next, select "Customize."
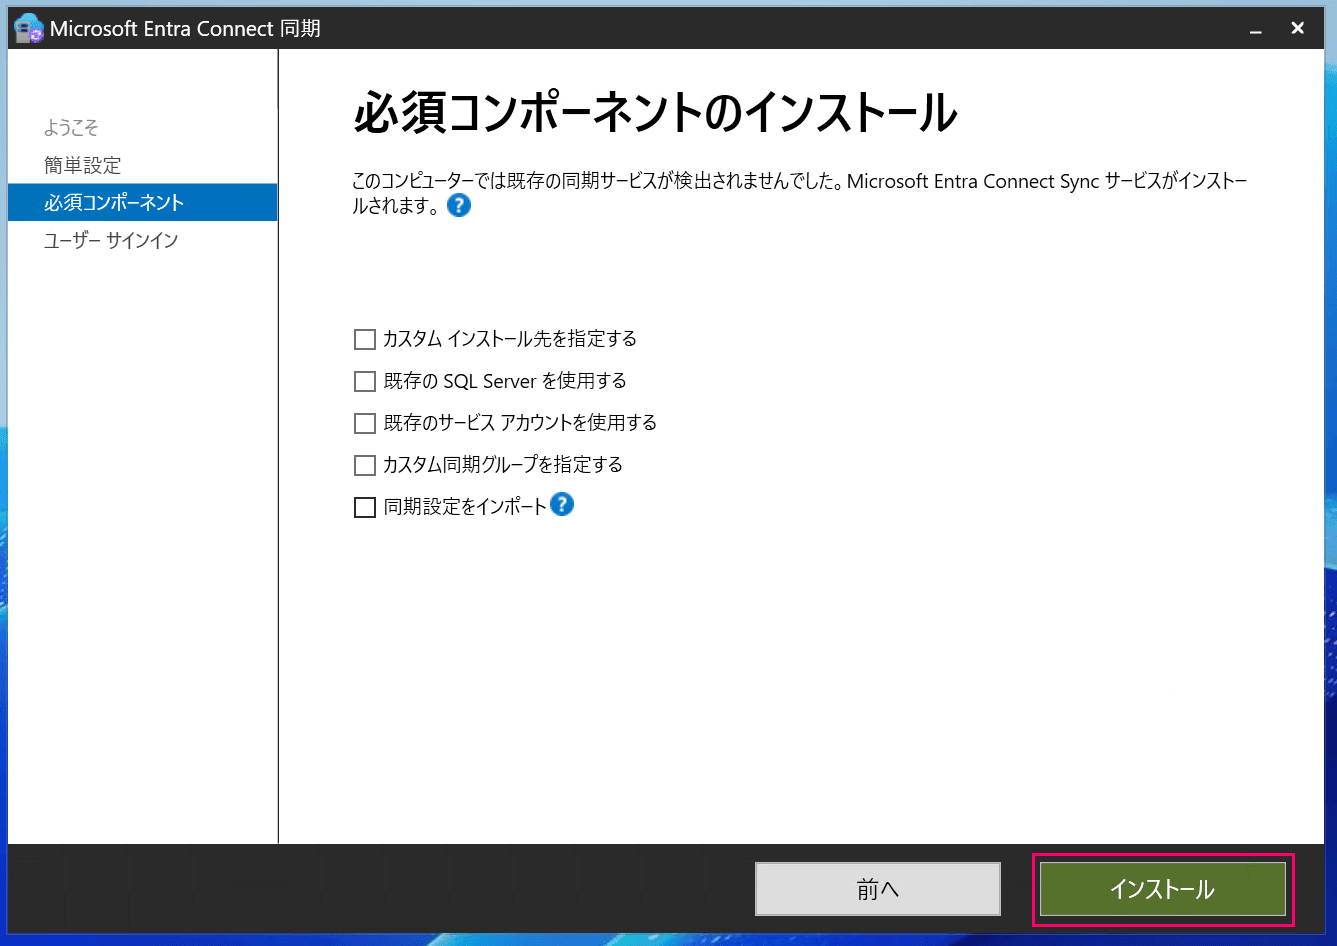
Leave the required component installation at its default settings and click "Install."
(Customize as needed depending on your environment)
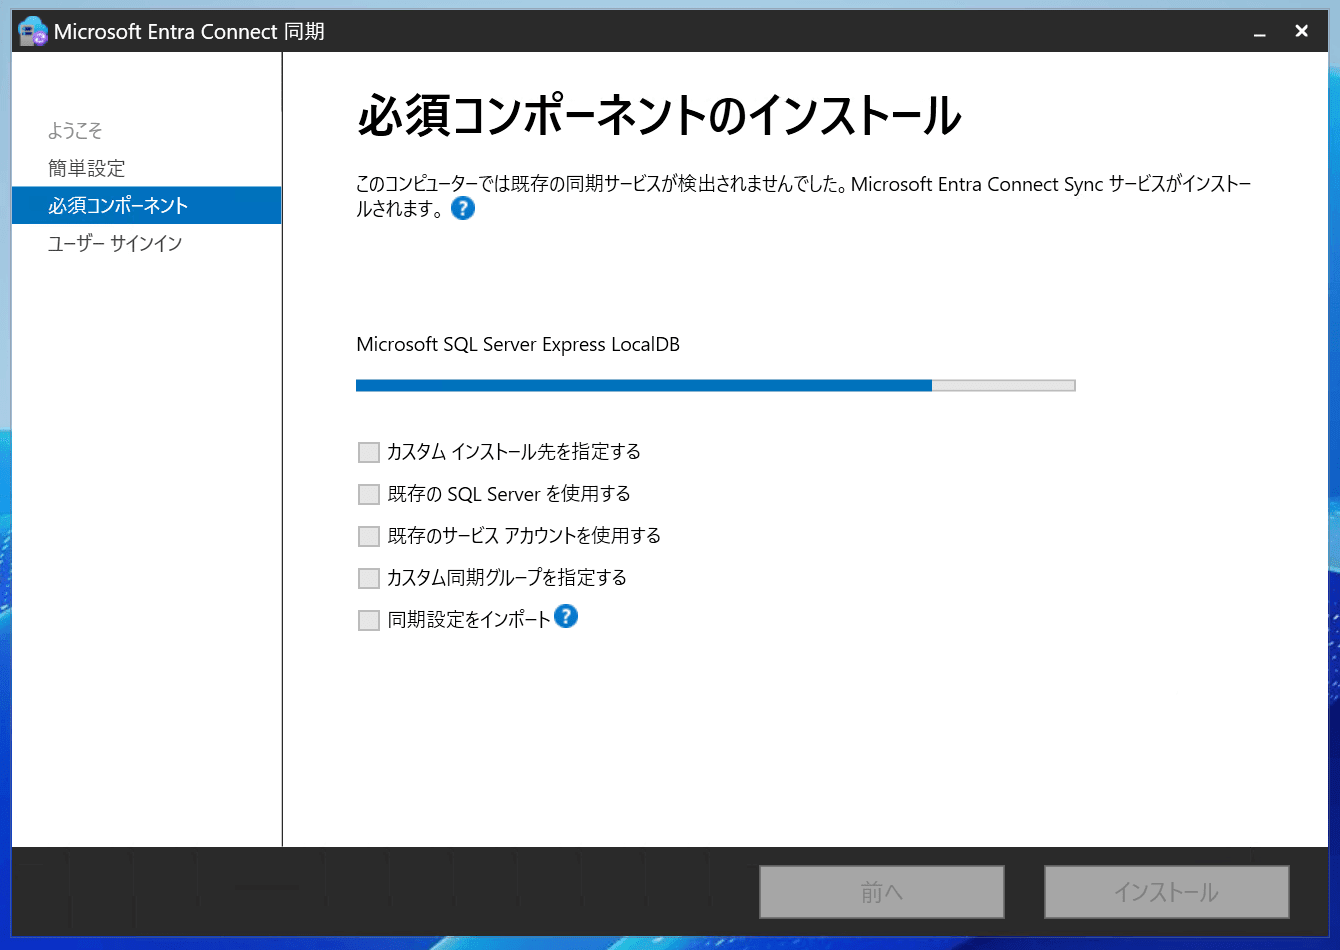
The installation of required components such as SQL Server Express Local DB will begin, so wait a moment.
When the installation of required components is complete, the following screen appears, and you proceed with various settings.
This time, I will select "Pass-through Authentication."
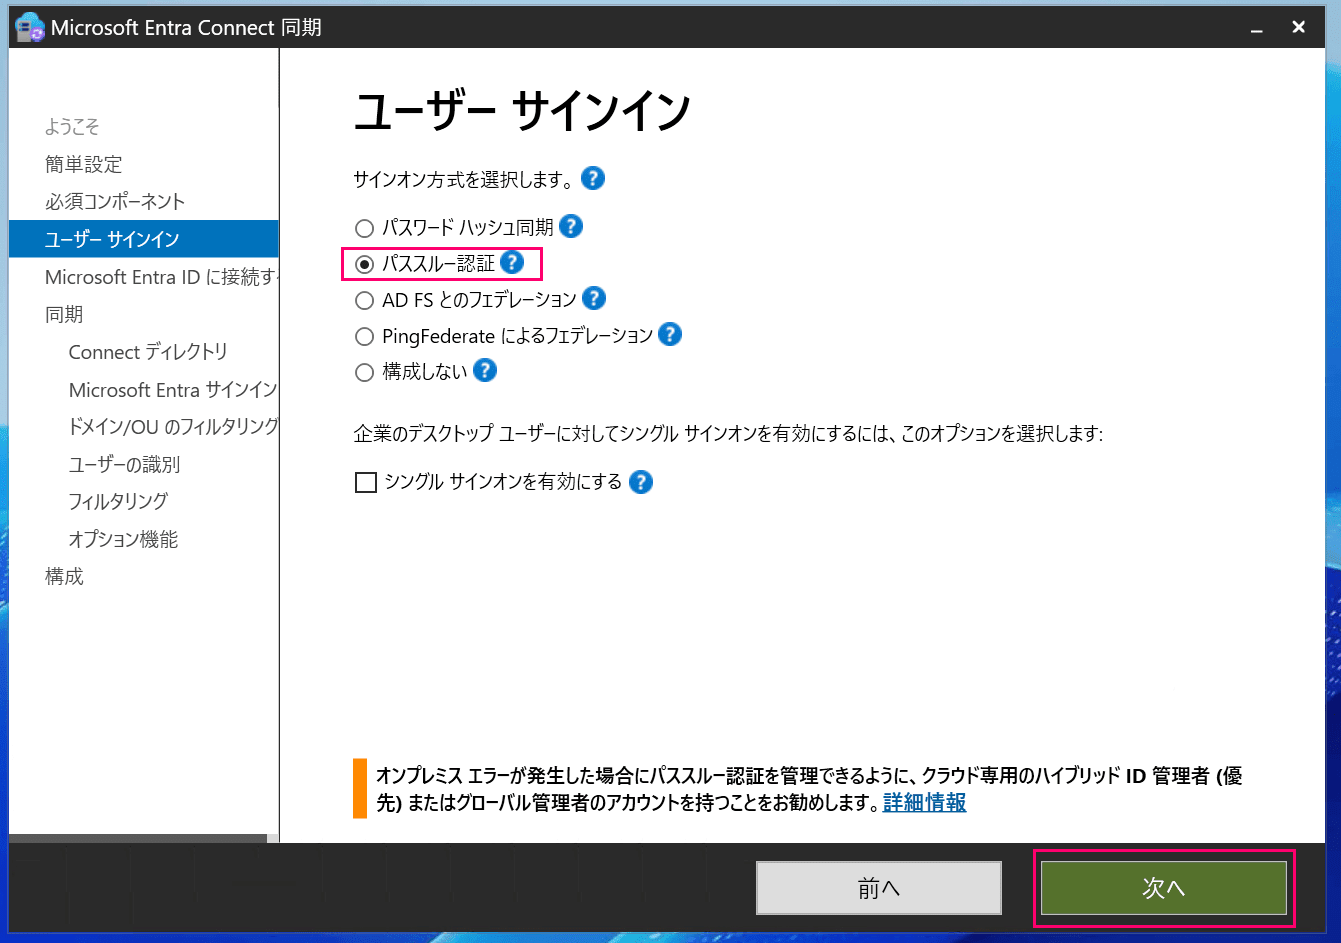
Note that in the AWS documentation, you choose either "Pass-through Authentication" or "Do not configure," and configurations other than these are likely unsupported.
Next, enter the account information for the Entra ID global administrator (or hybrid identity administrator).
This information is only used during installation.
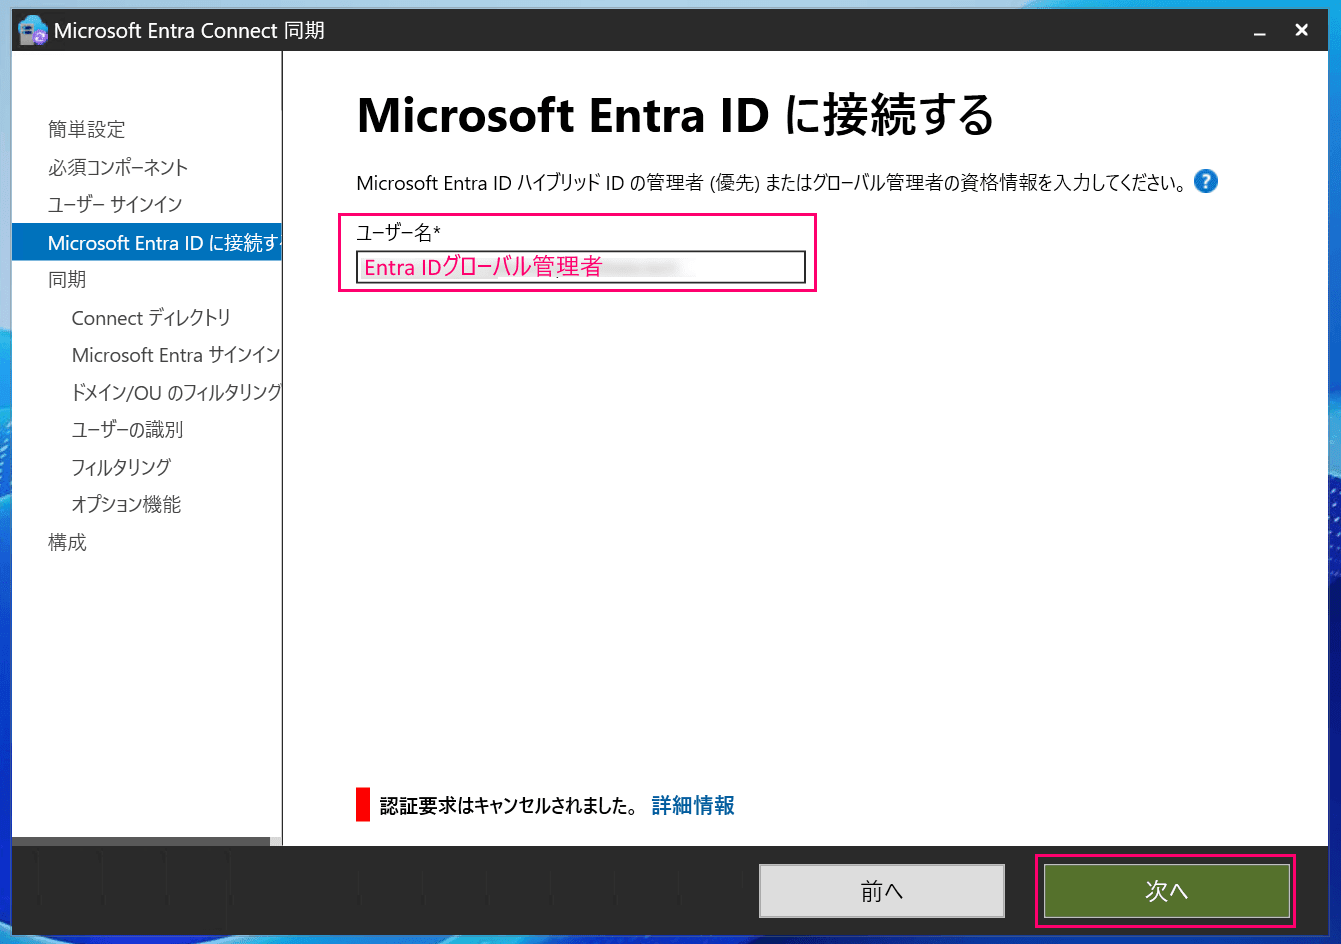
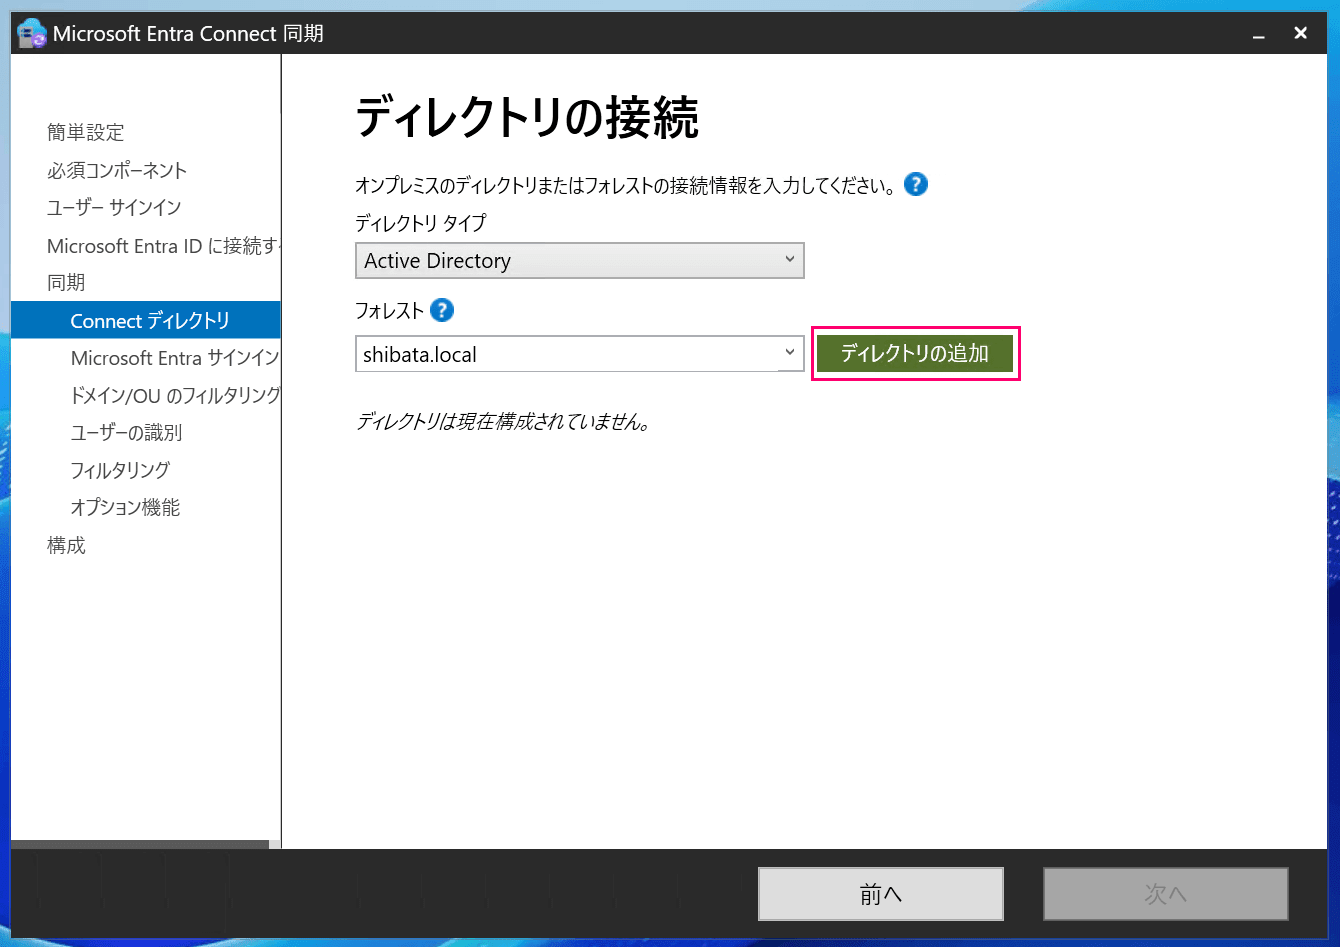
Once signed in successfully, the configuration moves to the Active Directory side.
With the target forest specified, click "Add Directory."
A dialog for configuring the synchronization user for Entra ID appears. Select "Use existing AD account" and enter the information for the EntraConnectSvc user created earlier.
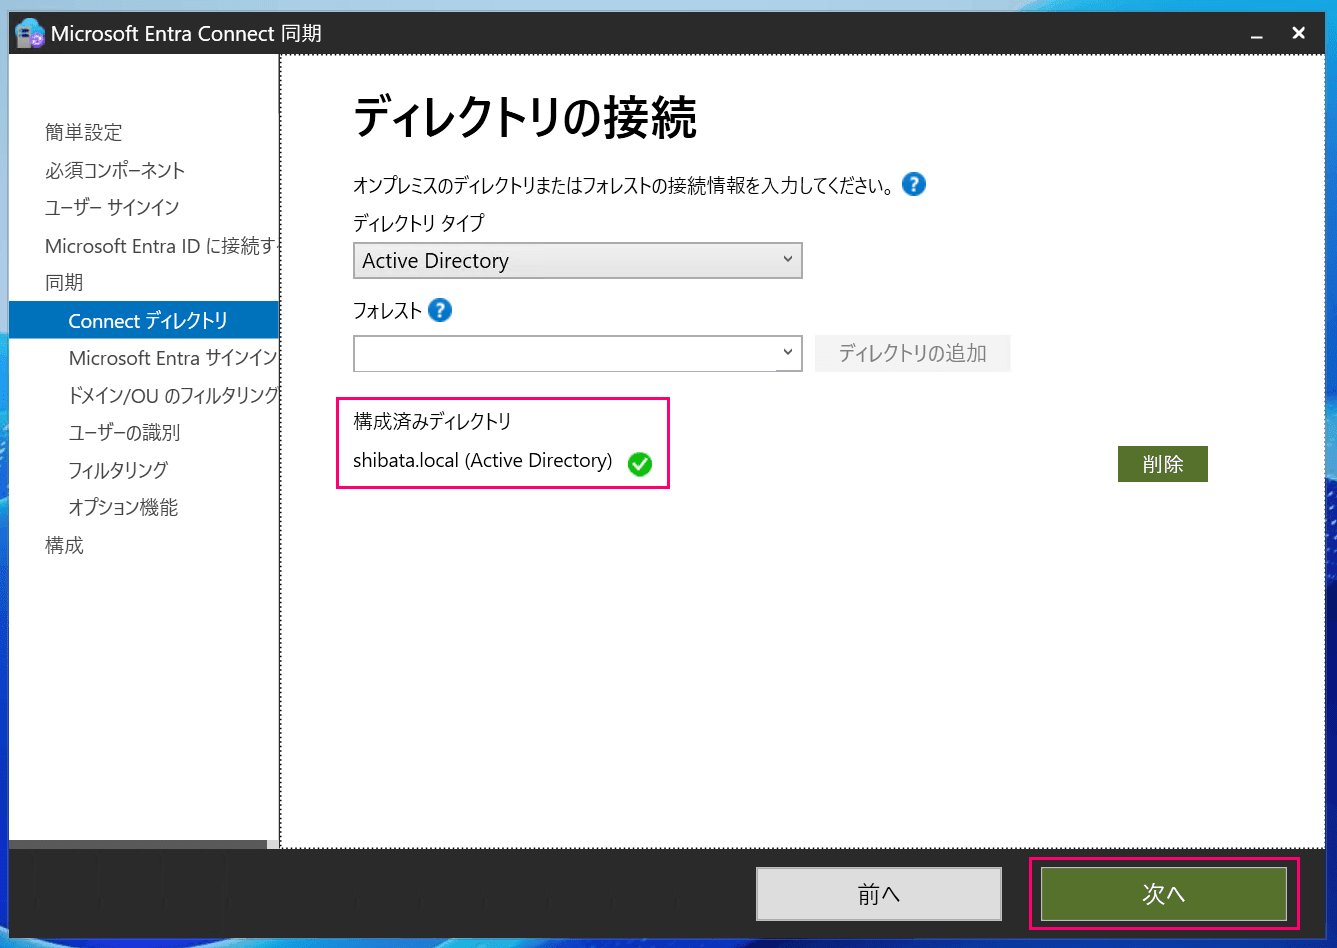
If there are no issues, the domain will appear in the "Configured Directories" field. Click "Next" to proceed.
Next, configure the Active Directory attribute to use as the Entra ID username.
Normally, UPN (userPrincipalName) is used as the Entra ID username, so I am leaving it as is.
(With this setting, synchronization will be "Entra ID user UPN ⇔ on-premises domain user UPN")
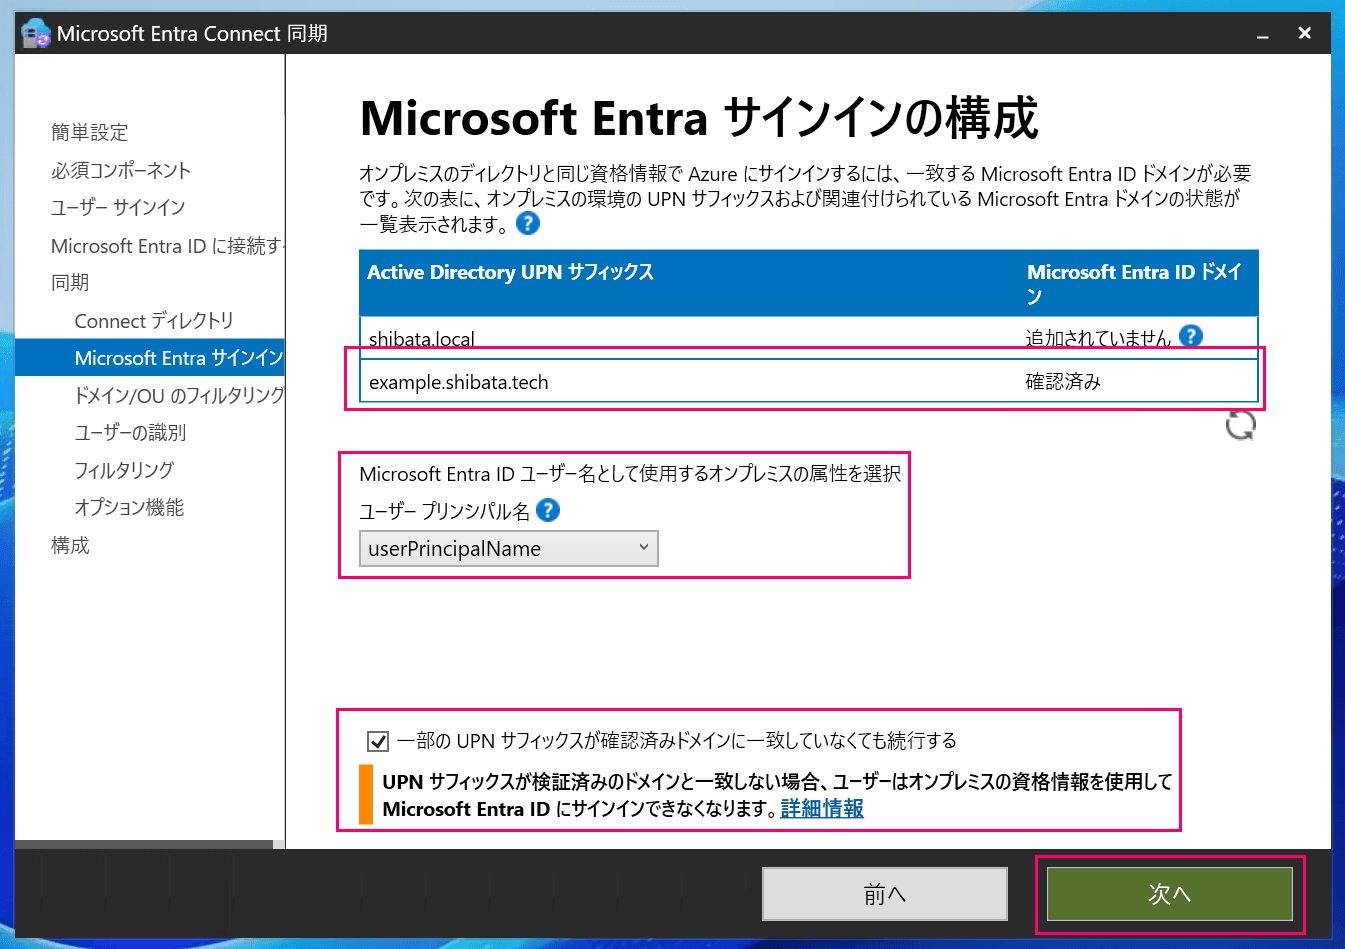
Since I have added the alternative UPN suffix example.shibata.tech to the shibata.local domain, a warning appears saying "Continue even if some UPN suffixes do not match verified domains," but since there is no issue, check the box and click "Next."
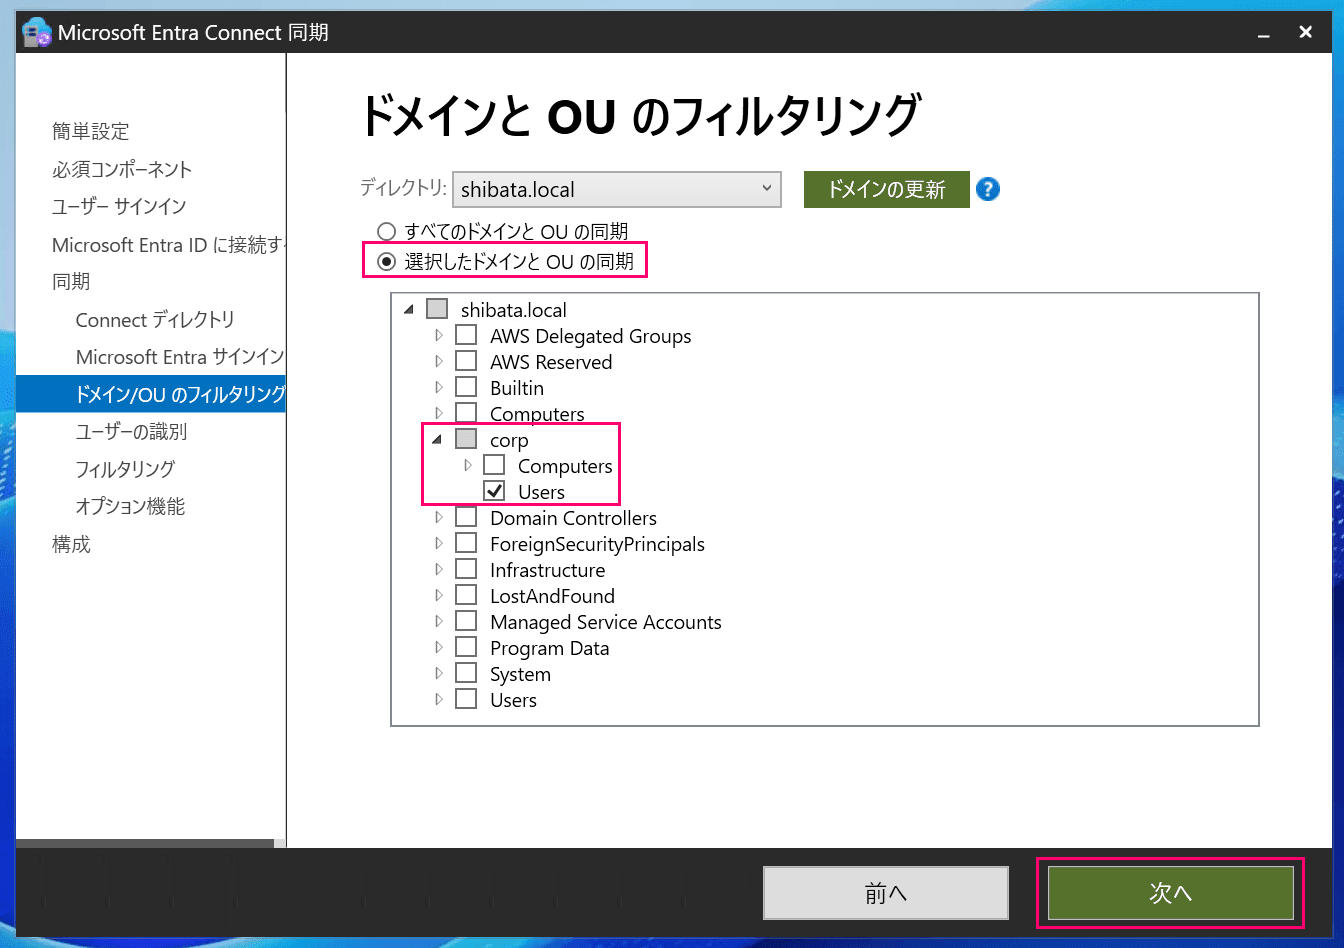
Next, select the synchronization targets.
Since this is an AWS Managed Microsoft AD environment, I have configured it to synchronize only the "NET BIOS name\Users" OU.
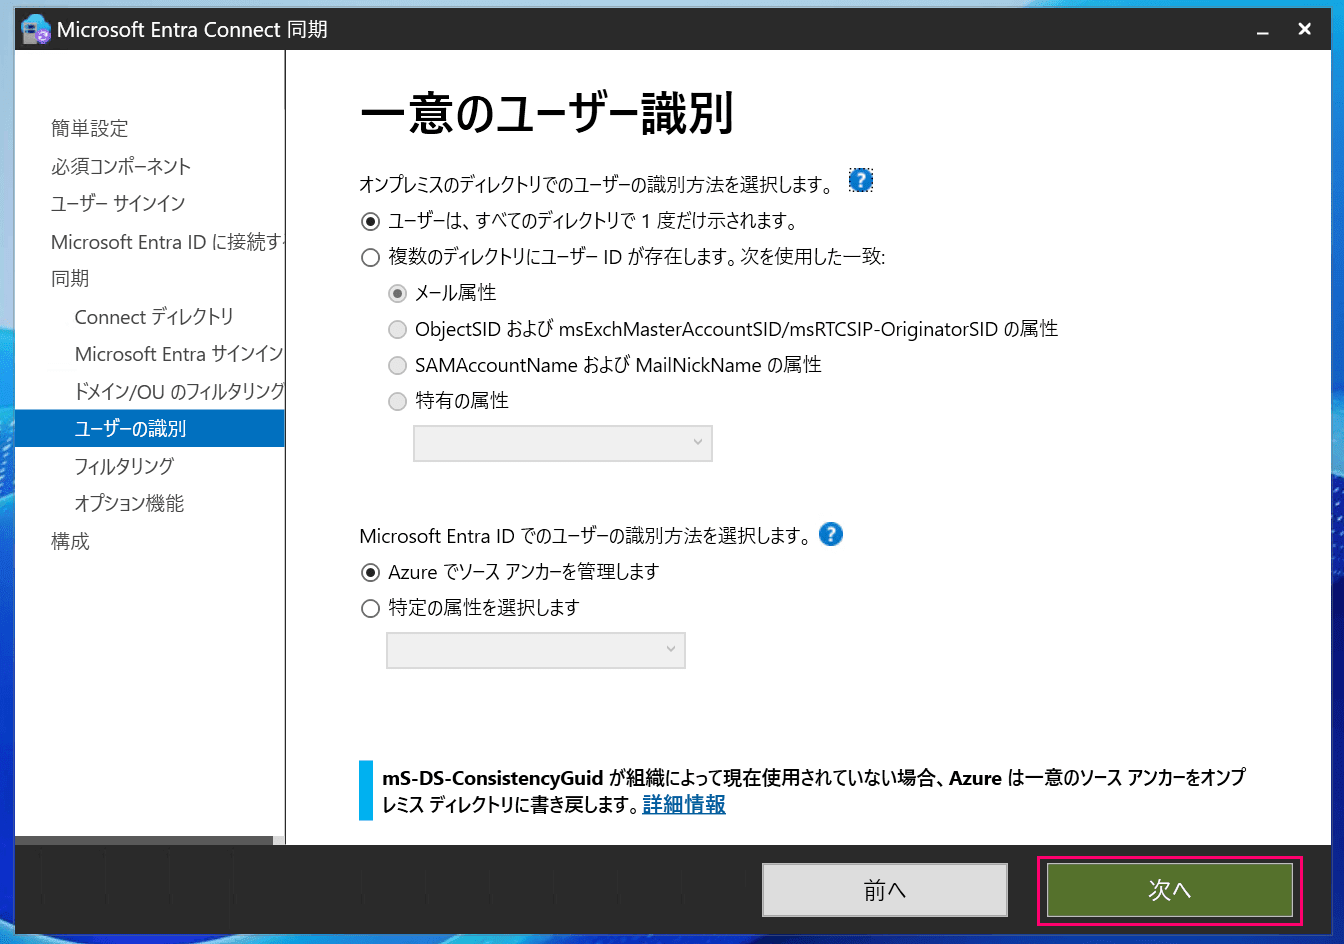
Decide the identification method for the Active Directory domain side.
Since the default settings are fine, proceed by clicking "Next."
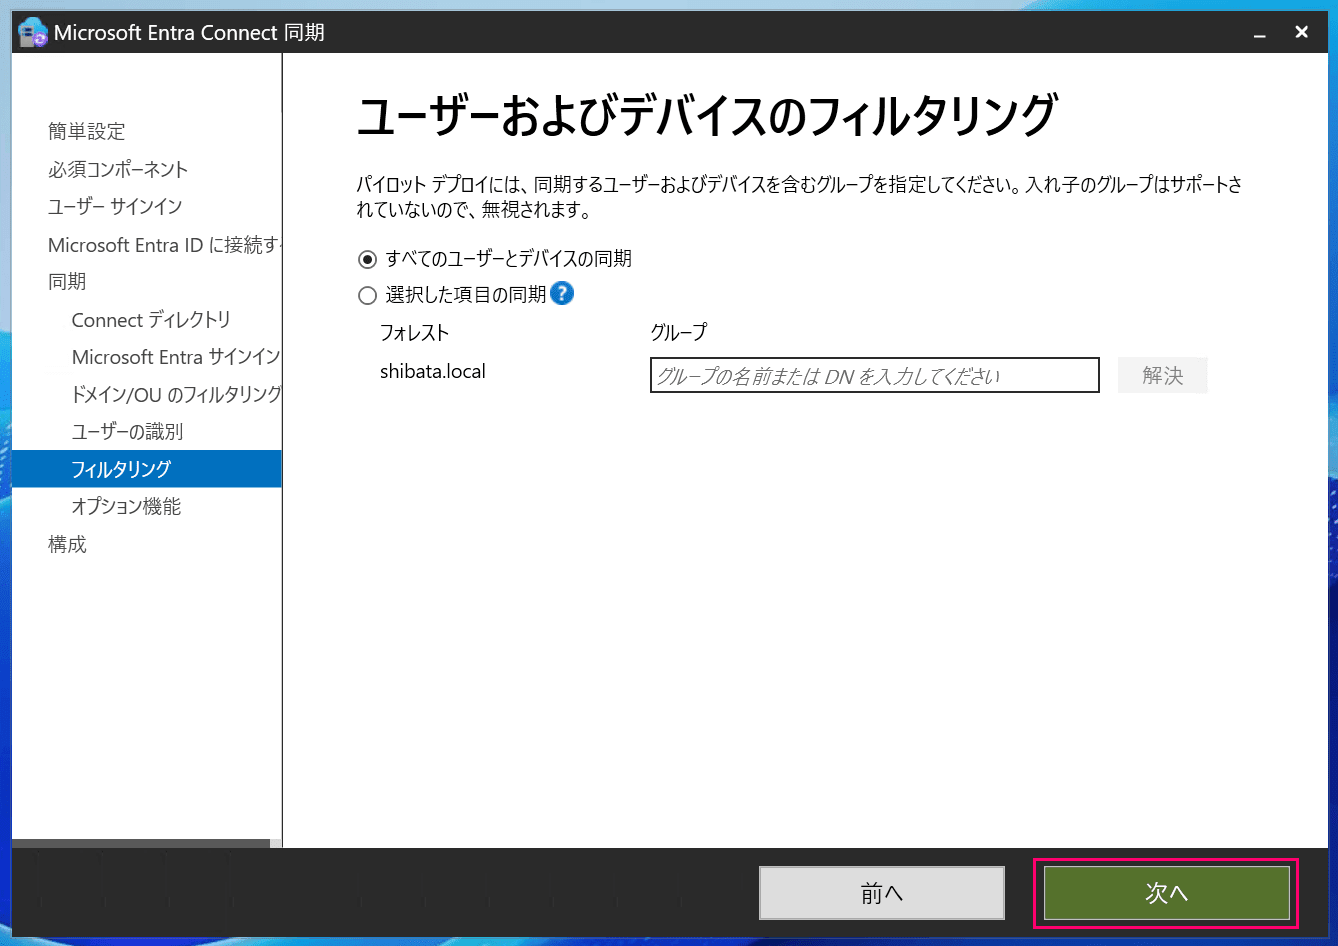
Since no filtering settings are needed, proceed by clicking "Next."
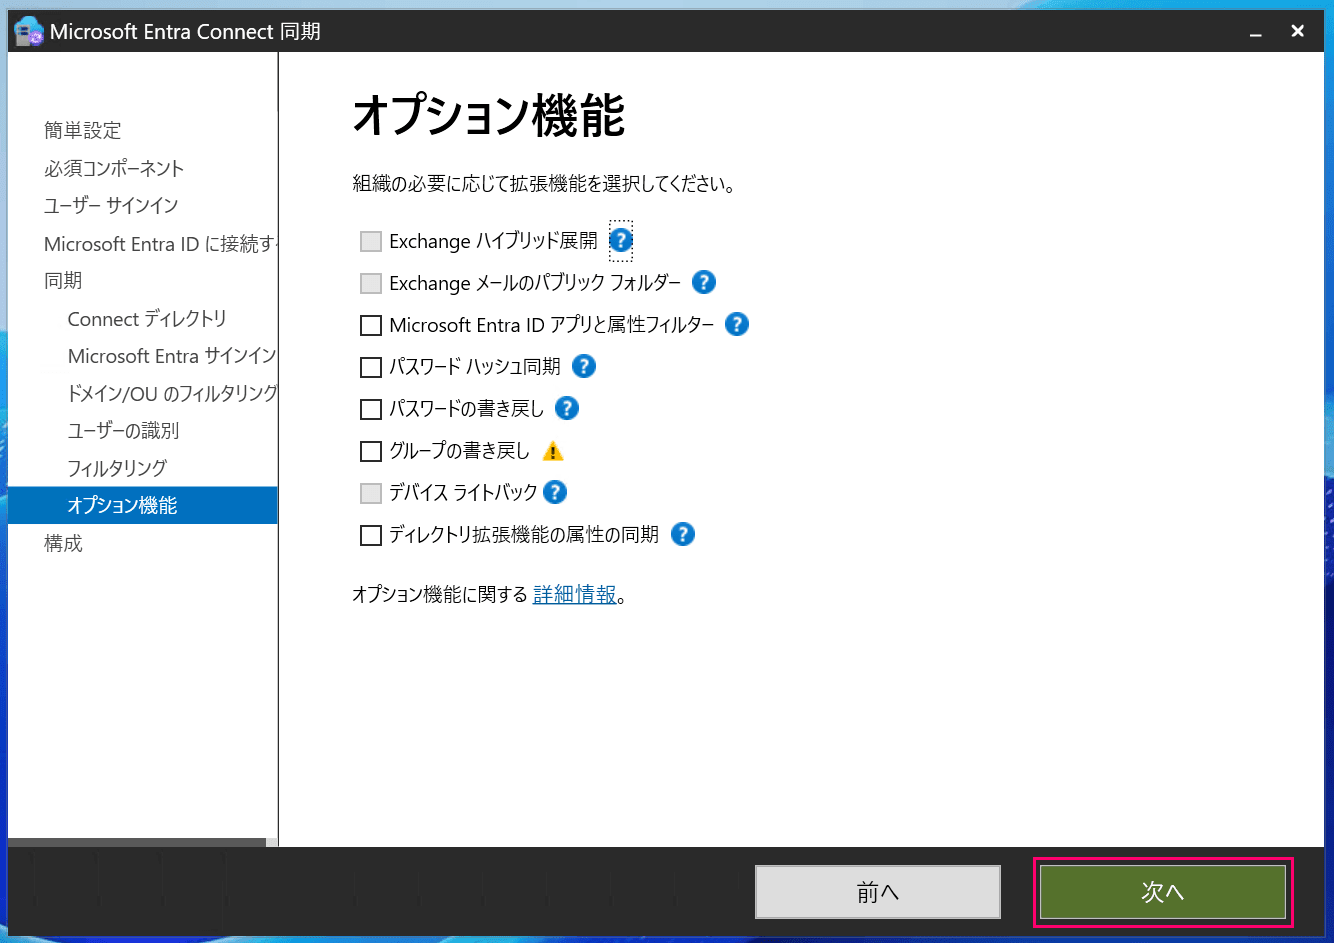
Leave the optional features at their defaults and click "Next."
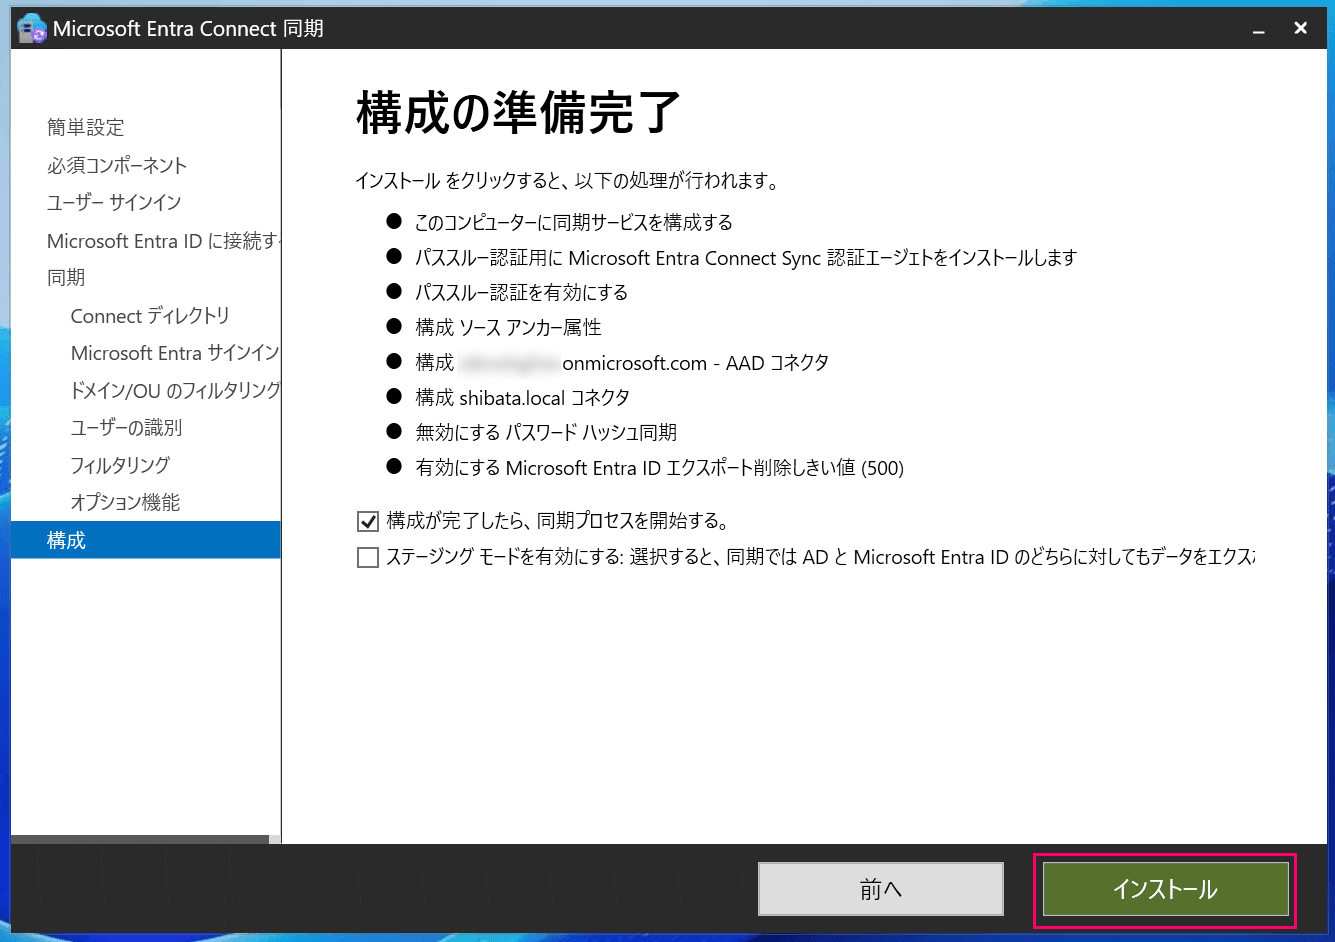
A final confirmation screen appears. Verify that the configuration is correct and click "Install."
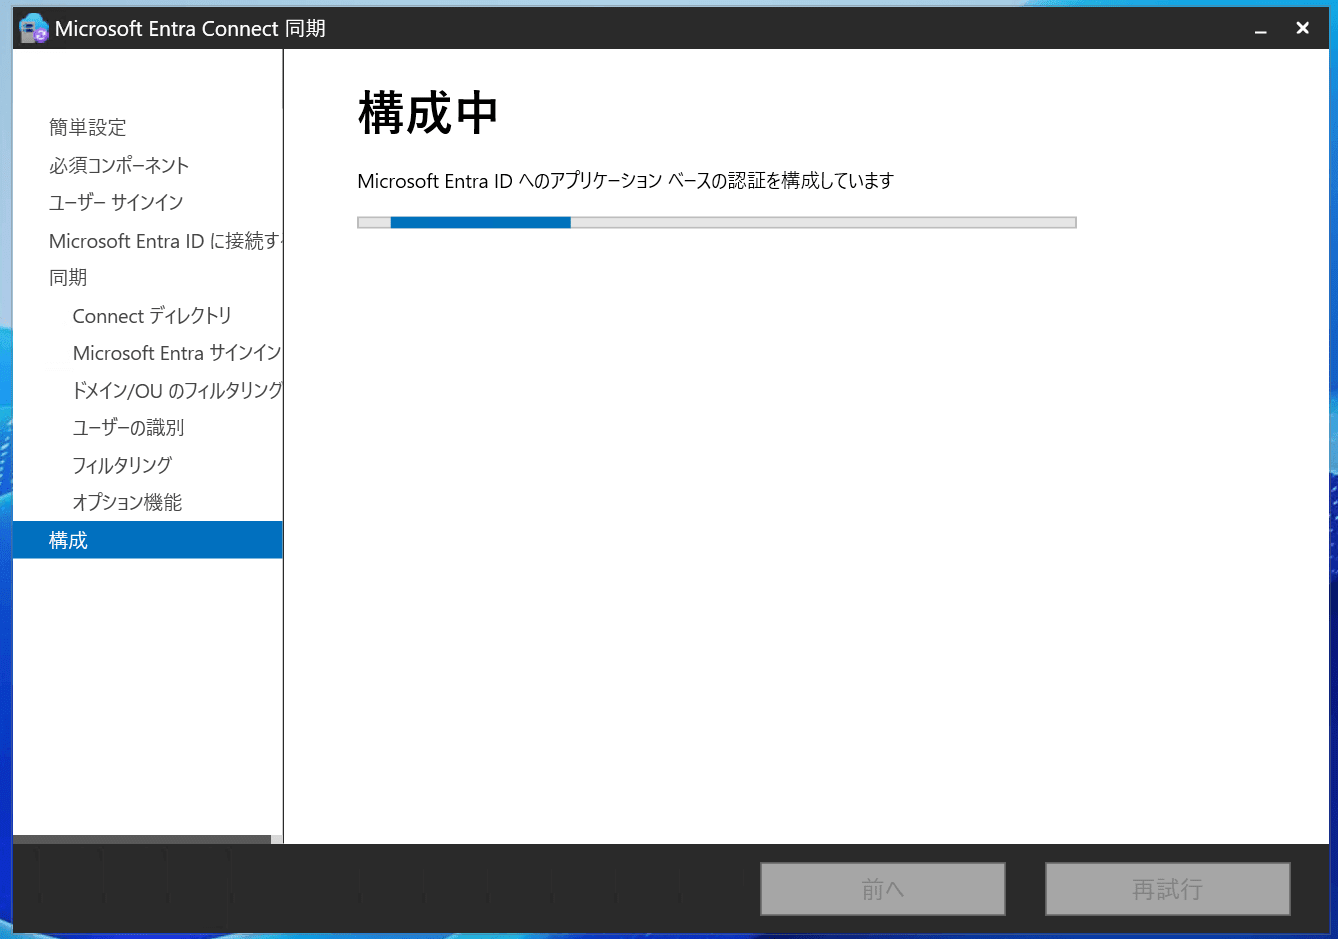
Wait for the installation to complete.
When the installation is complete, the screen shown below appears. Click "Finish" to close the wizard.
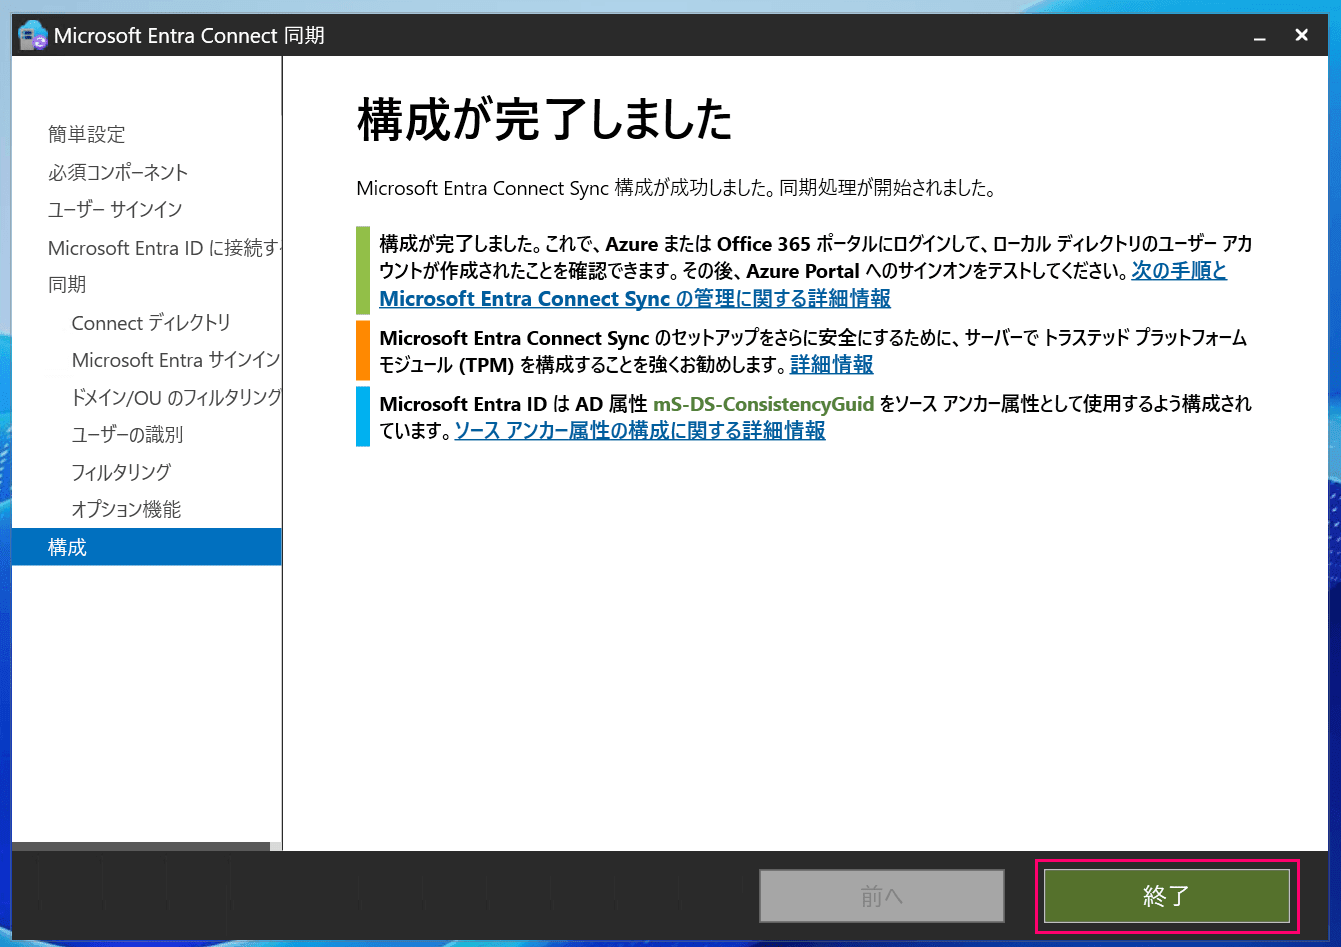
This completes the installation of Entra Connect Sync.
4. Verification
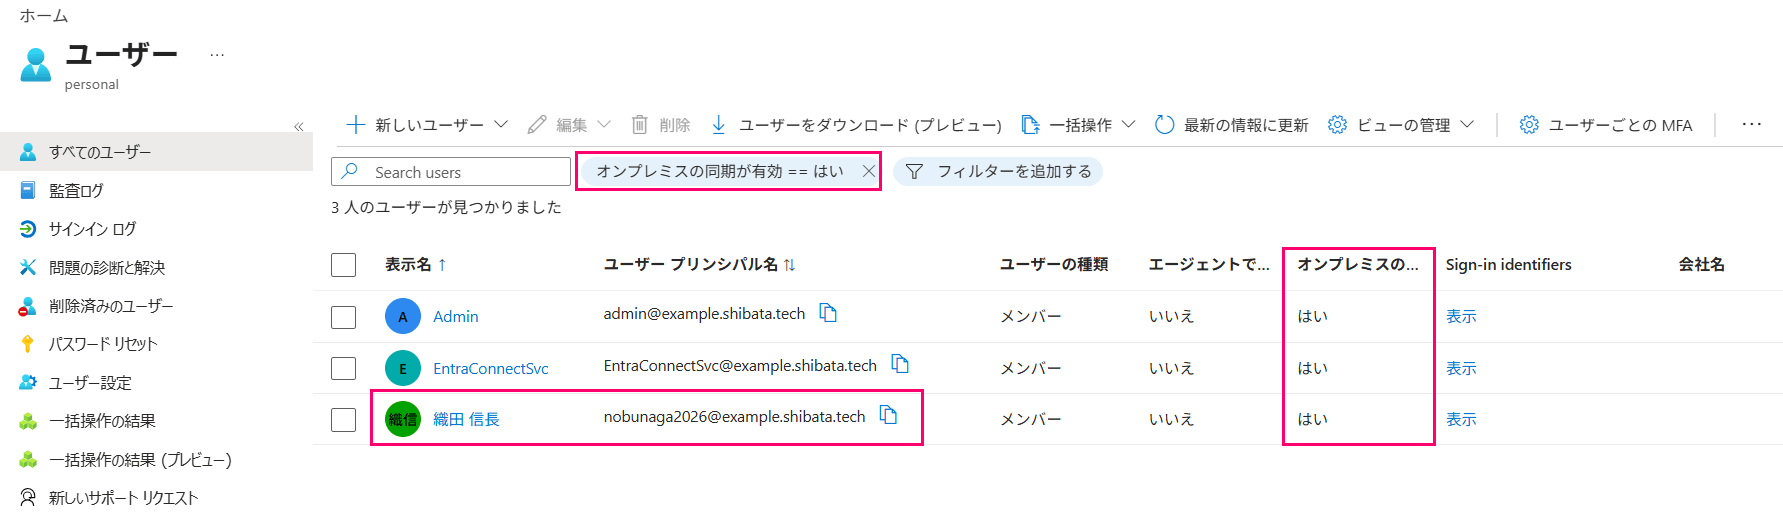
With this in place, checking the Entra ID side shows that users are synchronized as shown below.
As in the previous article, I added a test user Nobunaga Oda and verified the synchronization.
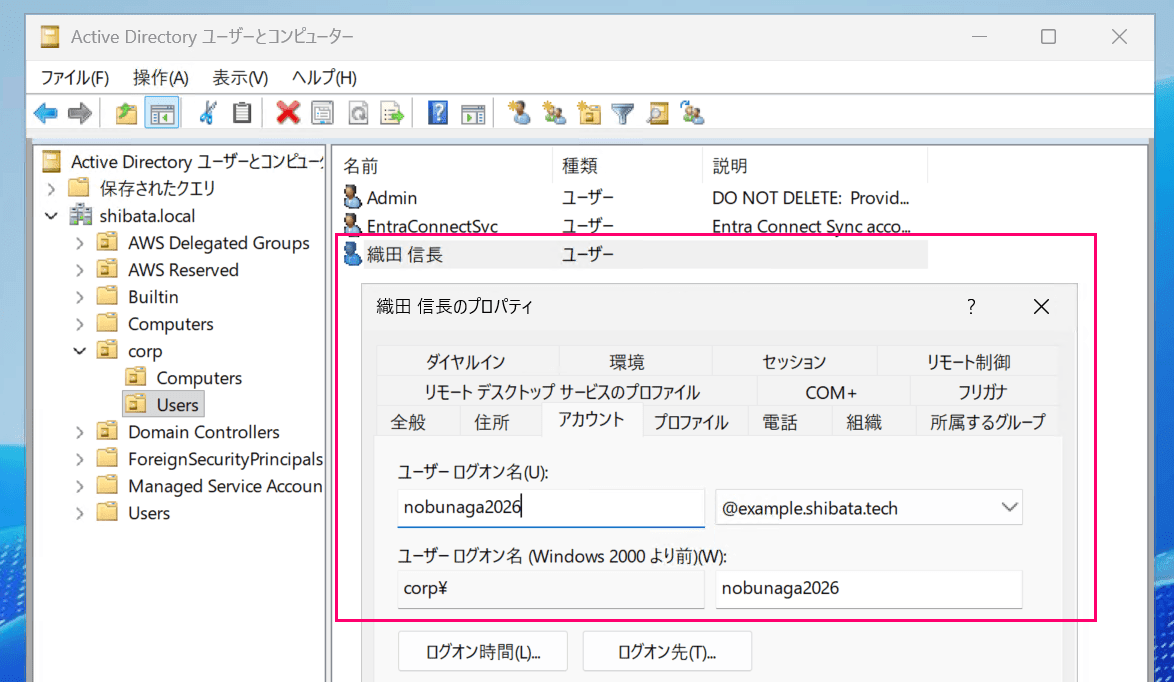
As before, a Nobunaga Oda user was prepared and synchronization was confirmed
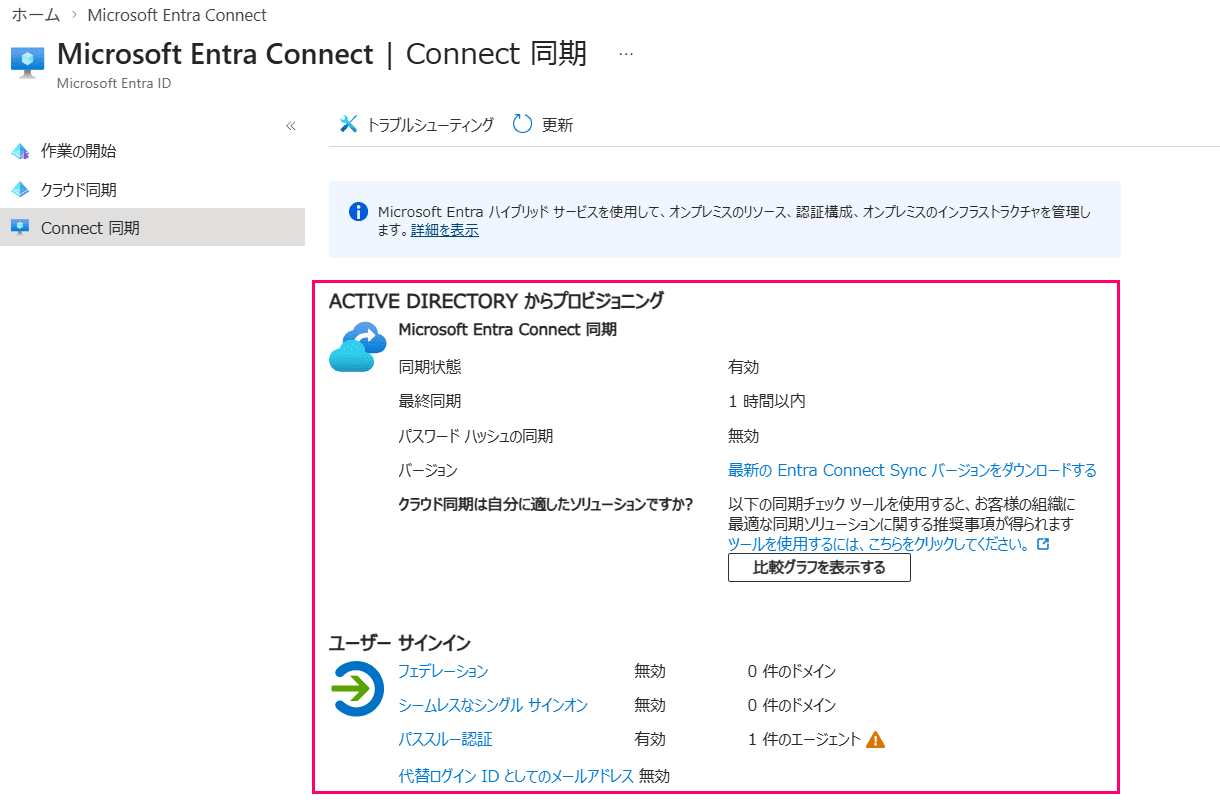
Synchronized users can be identified by the "On-premises sync enabled" field.
Also, the Entra Connect Sync status looks like this.
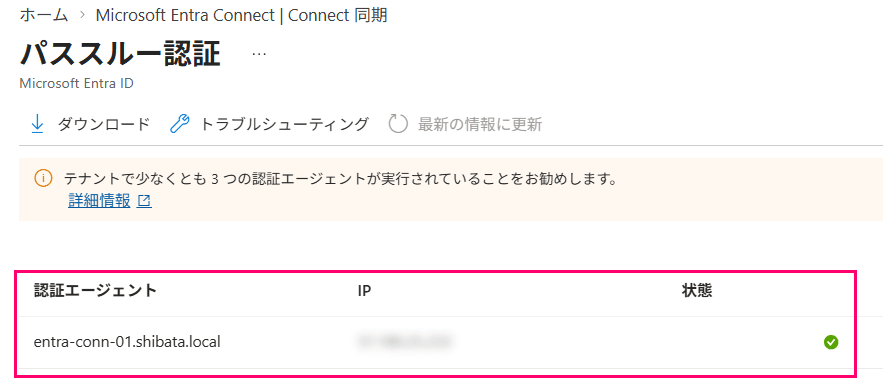
The agent information in use looks like this.
Status Check Tools and Manual Synchronization
To check the status on the Entra Connect Sync server side, it is convenient to use "Synchronization Service Manager".
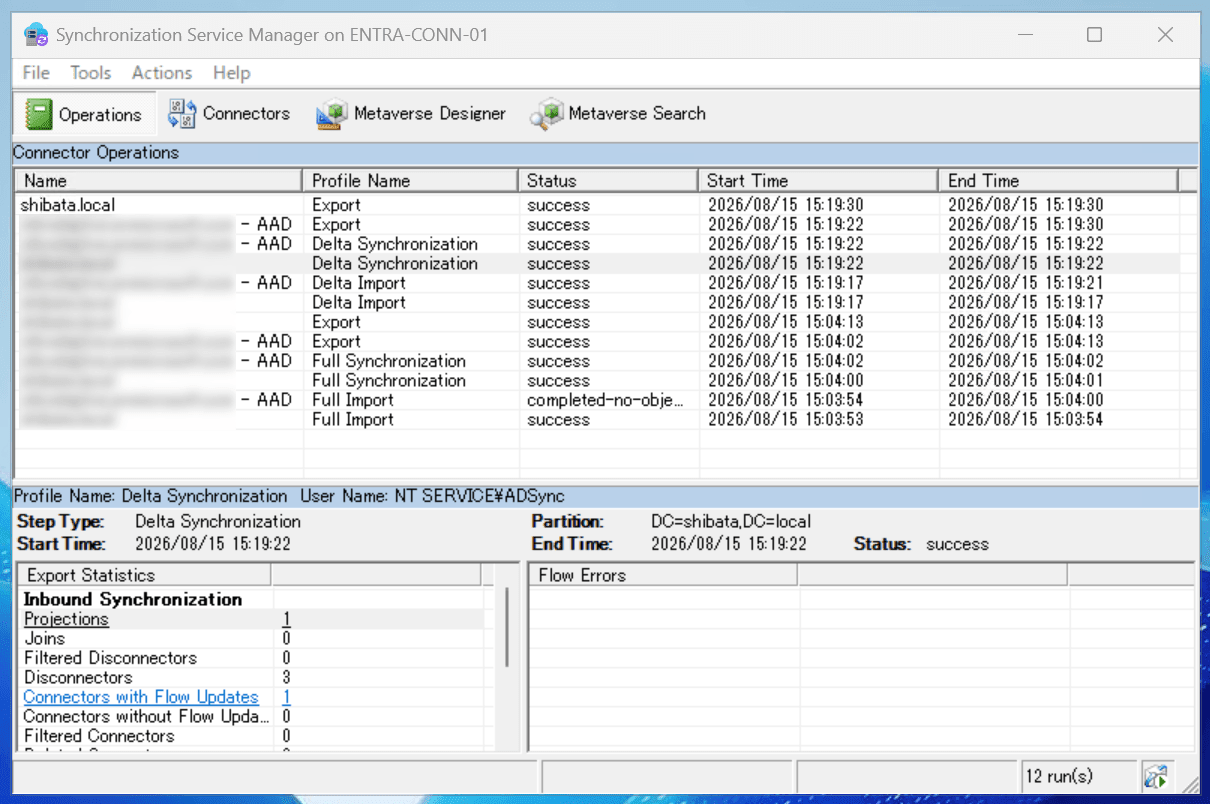
While it may not be possible to understand the details, anyone can determine whether the status is normal or abnormal.
In addition, although the default synchronization interval is every 30 minutes, it is also possible to trigger an immediate synchronization from a PowerShell command.
# Run a delta sync immediately
Start-ADSyncSyncCycle -PolicyType Delta

# Run a full sync immediately
Start-ADSyncSyncCycle -PolicyType Initial
This document contains other useful commands as well, so it is worth reading through.
Finally
That is all.
This is the first update in 4 years, but I was able to use Entra Connect Sync in an AWS Managed Microsoft AD environment with nearly the same steps as last time.
I hope the content of this article proves useful to everyone.
I haven't actually verified the behavior myself, but I was able to confirm that granting permissions via the Set-ADSyncPasswordWritebackPermissions command fails, making it highly likely that password writeback cannot be used. ↩︎
As of 2026, it has unfortunately become difficult to freely create new Entra ID Free tenants... ↩︎
The documentation stated that SQL Server Express LocalDB 2019 would be used, but this installation resulted in SQL Server Express LocalDB 2022 being installed... However, since the use of regular SQL Server 2022 is supported, I don't think there is a particular issue at this time. ↩︎