![[Beginner] Set up your Kiro before you use it! Customize your Kiro~](https://devio2024-media.developers.io/image/upload/f_auto,q_auto,w_3840/f_auto,q_auto/v1790874832/eyecatch/ka0q8r1fii0ptkuwmyu2.png)
[Beginner] Set up your Kiro before you use it! Customize your Kiro~

Ciallo~(∠ ω< )⌒ ★ this is AnonymousPenguin, and I want sweets!
Do you want to try or start using Kiro, but find the information too much and too scattered?
Did you try to learn about it by chatting with a chatbot, but there were no pictures to look at?
This article has you covered~
It teaches the first customization of Kiro CLI, which means the global scope: it takes effect no matter when or where you start Kiro.
Let's start with a big picture of all the information. You don't need to understand it fully, just keep an impression. It will make sense once you do the steps~
Kiro updates often, so by the time you read this there may be more things you can customize. This article covers the basic, stable ones, so you can still read it and follow along.
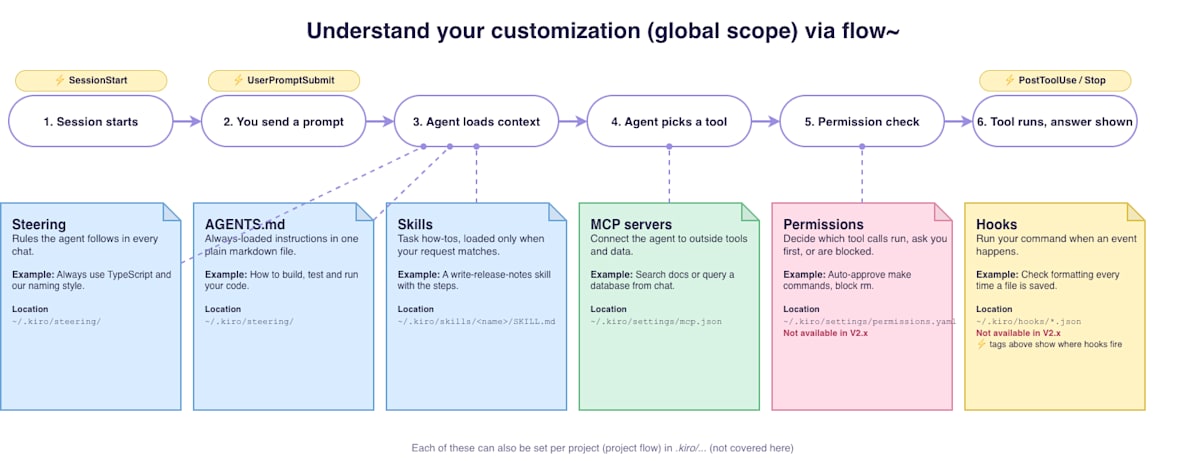
Here is where each config file lives in Finder / File Explorer:
| Item | What it does | Location |
|---|---|---|
| Permissions | Decides what the agent may do without asking | ~/.kiro/settings/permissions.yaml (V3 only) |
| AGENTS.md | Your always-on rules for the agent | ~/.kiro/steering/AGENTS.md |
| Steering files | Rules that load only when they are relevant | ~/.kiro/steering/*.md |
| MCP servers | Extra tools the agent can call | ~/.kiro/settings/mcp.json |
| Skills | Instruction sets the agent loads when needed | ~/.kiro/skills/<skill-name>/SKILL.md |
| Hooks | Small scripts that run at certain moments | ~/.kiro/hooks/*.json (V3 only) |
Reference:
Let's get started
All screenshots are from a Mac, but Windows works in a similar way.
Prerequisites
- You have a computer.
- You can open a terminal.
- Kiro CLI is installed. Both V2 and V3 can follow this article.
This article is written based on the released V3 information.
If you are on V2, you can still follow every step. Steering, AGENTS.md, skills and MCP already work on V2. The permissions file and the hooks file are new in V3, so they take effect as soon as you run V3. You don't need to redo anything.
To start V3 today (15 Oct 2026), run:
kiro-cli --v3
V3 is expected to become the default in CLI 3.0 (end of October 2026).
Reference:
1. Prepare a permissions file
Permissions restrict what the agent can do at the system level, for example deleting important files. So this is the first thing to set up before you let an agent work for you.
Open your terminal, start Kiro with kiro-cli --v3, and enter this prompt:
Read the official Kiro permissions docs at https://kiro.dev/docs/permissions/ (and https://kiro.dev/docs/cli/v3/permissions/) first. Then write a permissions.yaml file to ~/Downloads/permissions.yaml. Do NOT write to ~/.kiro.

Requirements:
- Use only the format and fields the docs define: a top-level `rules:` list, each rule with `capability`, `match` (glob patterns only), `effect` (allow / ask / deny) and optional `exclude`. Do not invent fields.
- Add rules for a cautious beginner:
  1. allow reading files (fs_read)
  2. ask before writing files (fs_write)
  3. allow safe shell commands: ls, cat, git status, git diff
  4. deny dangerous shell commands: rm -rf *, sudo *
  5. ask for all other shell commands
- Add a short YAML comment above each rule explaining it.
- Use capability names exactly as the docs list them. If a capability or match syntax is unclear in the docs, tell me instead of guessing.
- After writing, show me the file and tell me which doc sections you used.
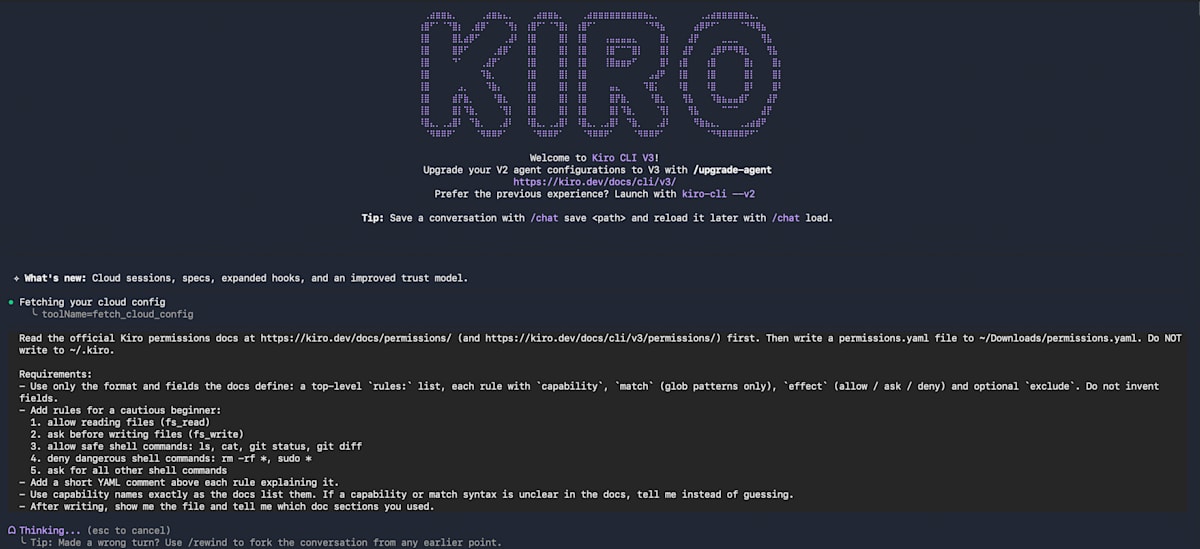
What this prompt does: it asks the agent to read the official docs and write a permissions.yaml into your Downloads folder (not into ~/.kiro, so you can review it first). The rules are:
- reading files is allowed
- writing files asks you first
- a few safe commands (
ls,cat,git status,git diff) are allowed rm -rf *(delete everything in a folder, without asking) andsudo *(run a command with full administrator power) are denied- every other shell command asks you first
Kiro has built-in defaults even if you have no permissions file. On V3, for example:
- Reading files in your workspace is allowed without asking.
- Read-only commands such as
git status,git log,git diffandpwdare allowed without asking.- Writing to
~/.kiro/settings/is always denied, and everything else asks you first.- In headless mode (no one to answer), every "ask" becomes a "deny".
See this for the full list:
So it is actually safe to skip this file. But I prefer to be in control of everything, and I recommend you write this file too. That way you know what will happen when something goes wrong, instead of leaving it as a black box.
On V2,
~/.kiro/settings/permissions.yamlis ignored. Adenyrule there does nothing, so don't rely on it for protection until you run V3.
2. Prepare AGENTS.md and steering/*.md
These are the files where you tell the agent how you want it to behave.
What's the difference between AGENTS.md and steering files?
To you they're both markdown notes. To Kiro, the difference is when each one is loaded into the agent's context.
AGENTS.mdis always loaded. It has no settings, so you can't switch it off or limit it.- A steering file starts with a few lines at the top (the front-matter) that tell Kiro when to load it:
| Label at the top of the file | Kiro loads it when… | Example |
|---|---|---|
inclusion: always |
every message | "Never delete files without asking" |
inclusion: fileMatch |
you work on files matching a pattern | TypeScript style rules, loaded only for .ts files |
inclusion: manual |
you type #file-name |
a rarely used checklist |
inclusion: auto |
your request matches its description | "API design" rules, loaded when you build an endpoint |
Rule of thumb: put what you want every time in AGENTS.md. Put what you want only sometimes in steering.
On V2, only
alwaysfiles are loaded automatically. The other modes work on V3. Also, if you use a custom agent, steering files are not included automatically; you have to add them to the agent'sresources.
Reference:
Now enter this prompt in Kiro. Kiro will interview you and write suitable steering/*.md and AGENTS.md files for you:
Read the official Kiro steering docs at https://kiro.dev/docs/steering/ first.

Goal: help me write my GLOBAL instructions for Kiro CLI: one AGENTS.md plus a few steering/*.md files. They apply to every project, so keep them project-independent.

Step 1 - Interview me BEFORE writing anything.
Ask me everything you need to write useful, specific files. Cover at least: my role and experience level, preferred reply language and tone, how much explanation I want, coding languages and style preferences, rules for safety (deleting files, running commands, git), how I want changes made (minimal vs refactor), how I want testing and verification reported, and anything I always or never want you to do. Ask in small batches (max 5 questions at a time), explain why each matters, and let me say "skip". Stop asking when you have enough, and summarize what you learned for my confirmation.

Step 2 - Write the files to ~/Downloads/kiro-global/ (do NOT write to ~/.kiro):
- AGENTS.md: plain markdown, no front-matter, always loaded. Put my general rules here.
- steering/<topic>.md: one file per topic (for example style.md, safety.md), each with the front-matter the docs define. Choose the inclusion mode (always, fileMatch, manual or auto) deliberately and tell me why for each file.
- Keep every file short, specific and written as direct rules, not vague advice.
- Do not invent Kiro features or fields. If the docs are unclear, tell me.

Step 3 - Show me each file, which doc sections you used, and where to put them: AGENTS.md and steering/*.md both go inside ~/.kiro/steering/.
What this prompt does: Kiro first reads the steering docs, then asks you questions (who you are, how you like replies, your safety rules, and so on) in small batches. After you confirm its summary, it writes AGENTS.md and a few steering files into ~/Downloads/kiro-global/ for you to review.
It is totally fine if you can't answer every question. This is the global scope: the more you answer, the more the agent's behavior in every project may change. So keep your answers concise and general. You can change the files later.
3. Activate the permissions file, AGENTS.md and steering files
Kiro's customization files live in a hidden folder, so first make hidden folders visible, if you haven't yet.
Mac: open the terminal and run:
defaults write com.apple.finder AppleShowAllFiles -bool true
This makes hidden files permanently visible. Then run:
killall Finder
This restarts Finder so the setting applies.
Windows: follow this guide:
Now you can find the .kiro folder in your home folder. This is where we move the files.
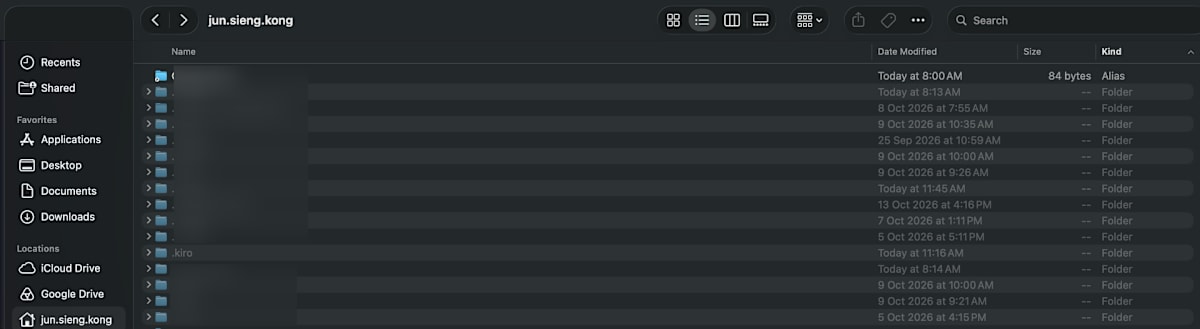
- Move
permissions.yamlfrom~/Downloadsinto~/.kiro/settings/. - Move
AGENTS.mdand everything inside~/Downloads/kiro-global/steering/into~/.kiro/steering/, all in the same folder (create the folder if it doesn't exist).
At this point your .kiro folder should look something like this (an example, yours filename may will differ):
~/.kiro/
├── settings/
│   └── permissions.yaml
└── steering/
    ├── AGENTS.md
    ├── safety.md
    ├── style.md
    ├── code-changes.md
    └── testing.md
Check that yours looks similar, then restart kiro-cli to activate everything!
Congratulations, the basic setup is done~ The next part is the most interesting one: giving your agent new abilities!
4. Install an MCP server and a skill
MCP server: an MCP server gives the agent extra tools it can call. For example, an agent isn't great at operating draw.io by itself. If you install a draw.io MCP server, it gets proper tools to create and open diagrams.
Skill: a skill is a written set of instructions (a SKILL.md file) that the agent loads when it is relevant to your request. Think of it as a how-to guide the agent reads when it needs it.
Let's get hands-on. First, the MCP server. I'll install the draw.io one.
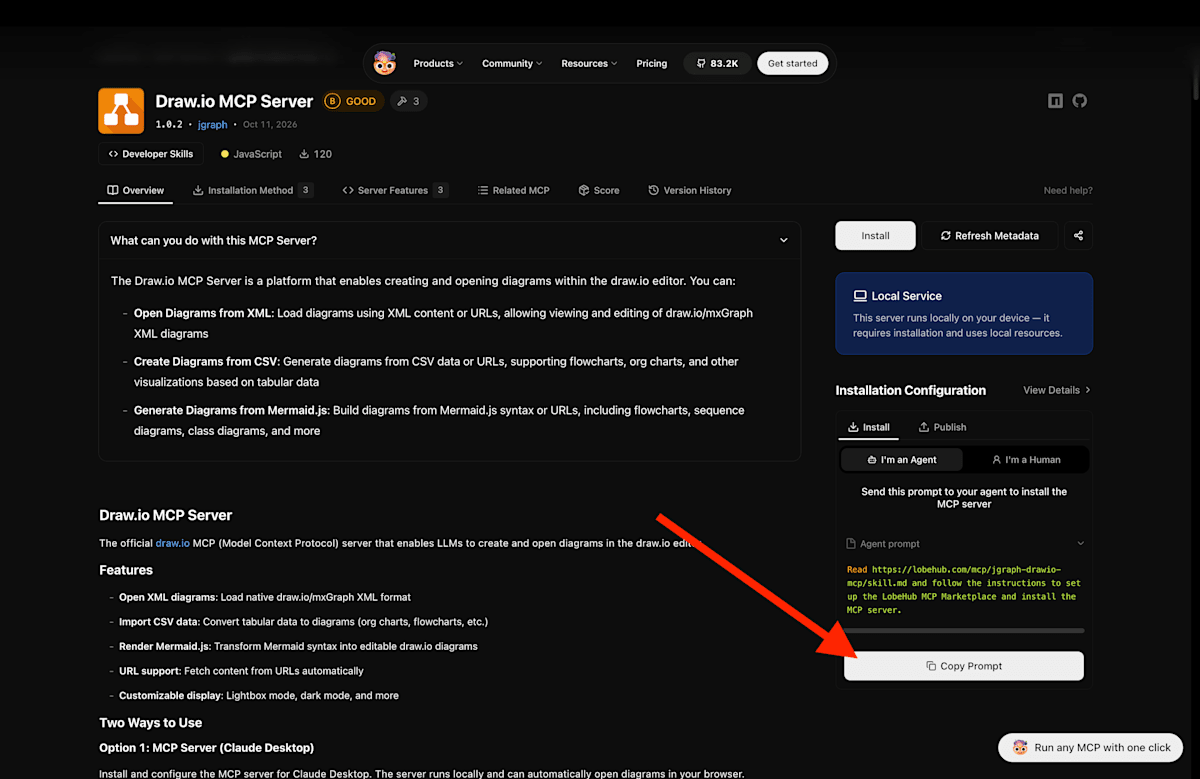
- Go to:
LobeHub is a community marketplace where people share MCP servers and skills. There are many similar marketplaces, so feel free to use others. LobeHub is just one of my recommendations~
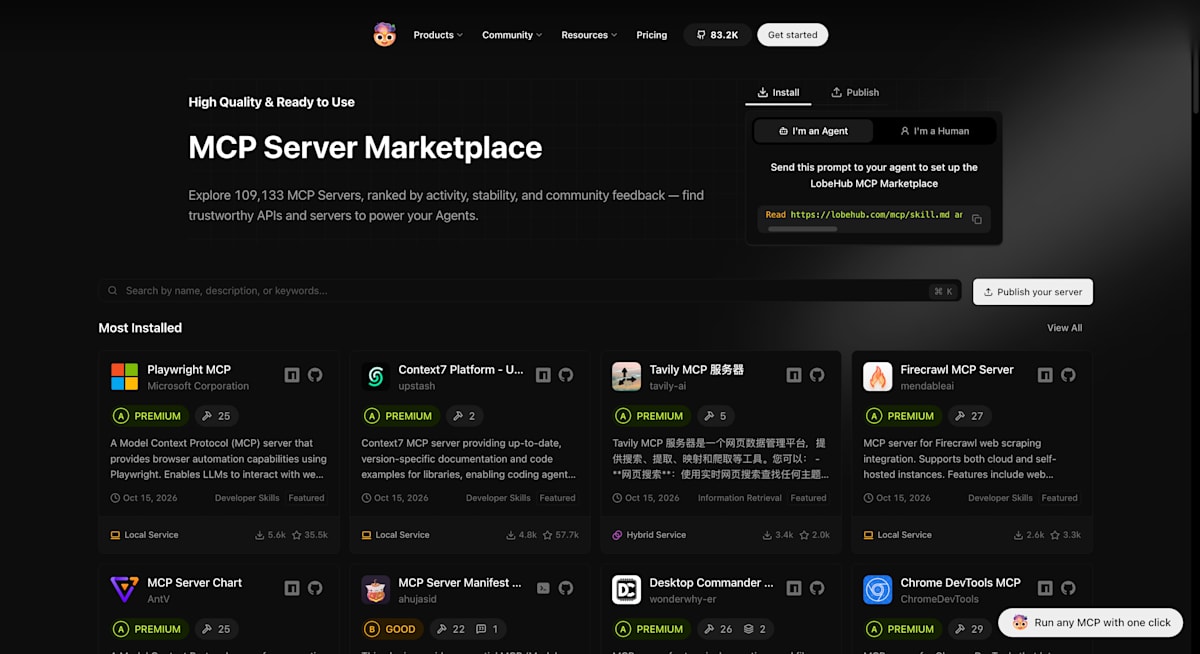
2. Search for "drawio" and pick the one you like. I picked the official draw.io MCP.
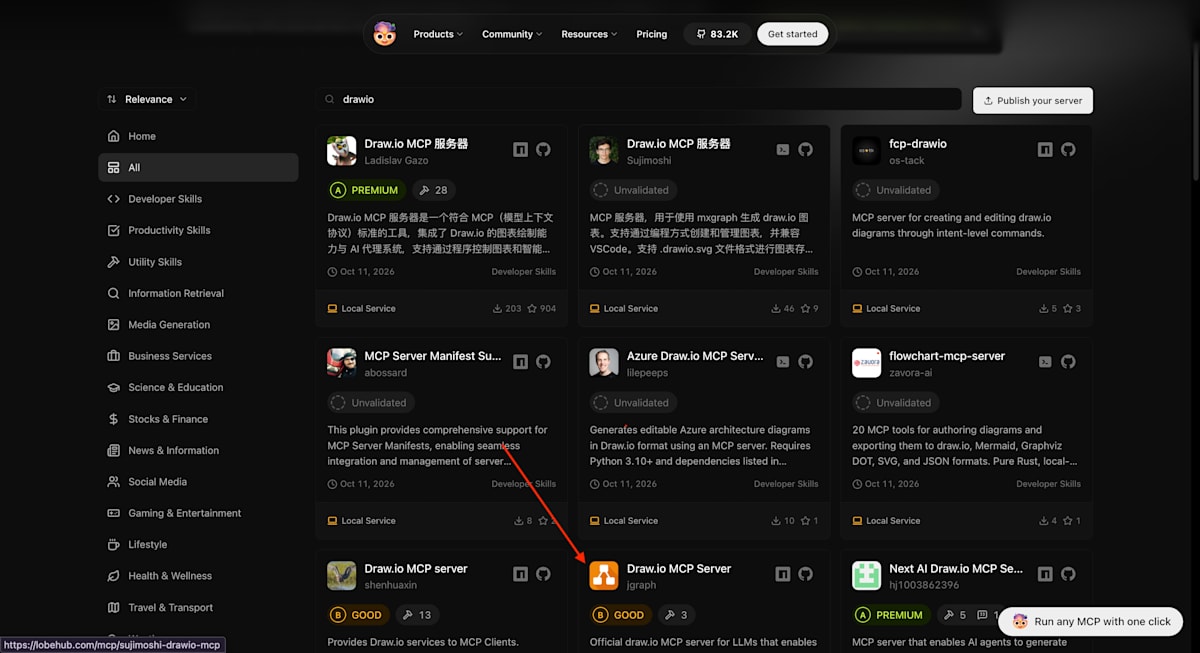
3. Click Copy prompt and paste it into Kiro~
Sometime mcp server may not successfully installed in one prompt. For me I get this type of response:
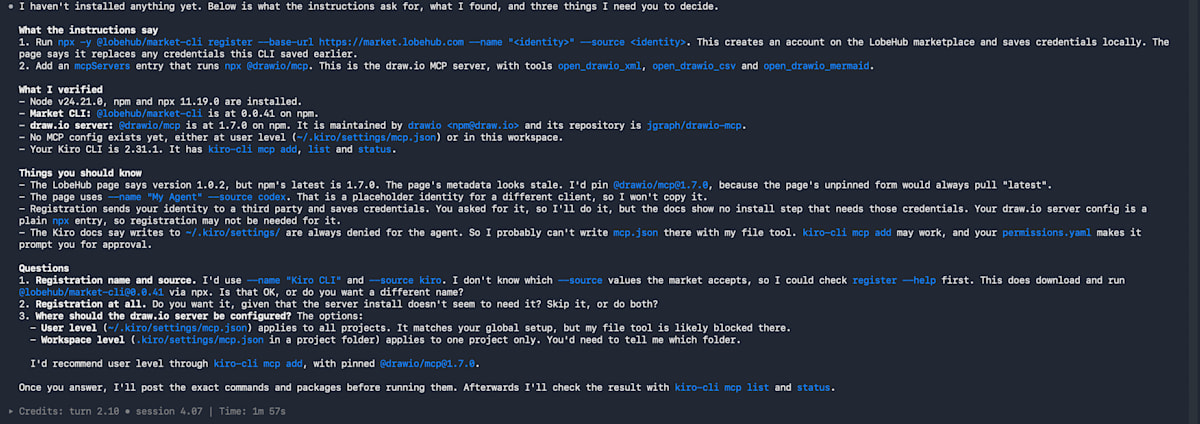
Here my AGENTS.md and steering files started to work. I had written rules like "don't act on your own; ask me about anything unclear" and "when you hit a problem, web-search or ask me and offer solutions; only act when everything is clear and allowed". So Kiro stopped and asked me what name to use on LobeHub, and about the outdated official documentation. I answered them one by one. That is proof the files are in effect.
After the install finishes, restart kiro-cli and try it. I typed:
drawio a chocolate
Before installing:
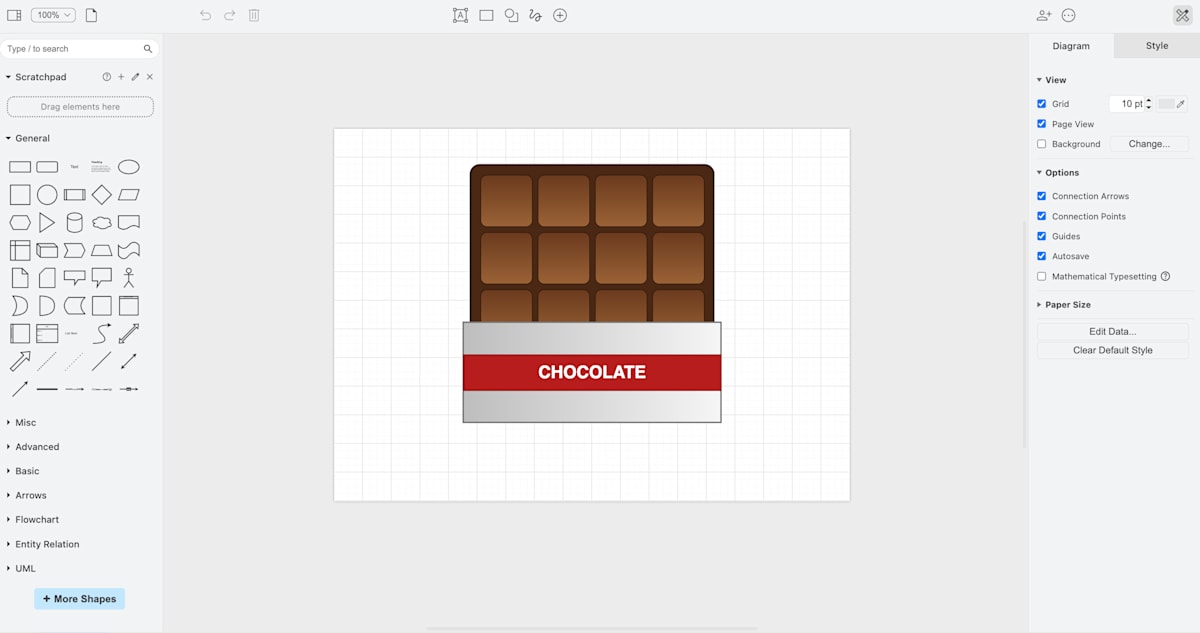
After installing:
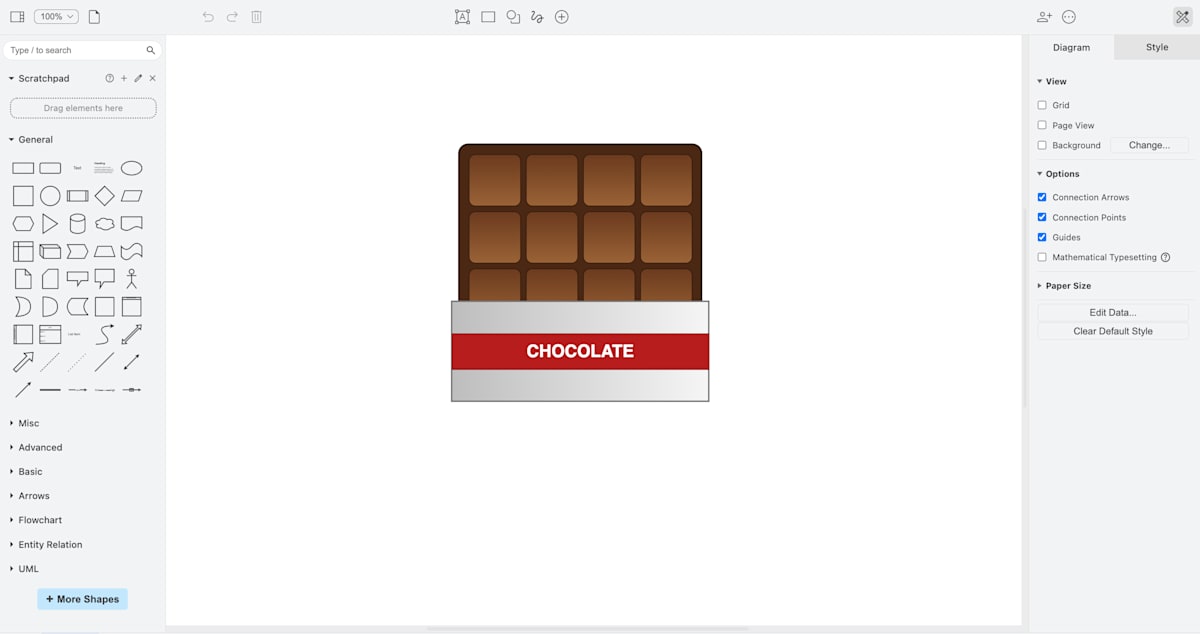
They look about the same... BUT this time it opened the draw.io website in my browser automatically, which it didn't do before, so my workflow is smoother! (draw.io is XML under the hood, so the agent can write a diagram even without the MCP. That is normal.) This is a simple MCP server. More advanced ones may have a more obvious effect. There are so many MCP servers out there, so try anything that interests you!
You can type
/mcpin Kiro to see the MCP servers you have installed. The config is saved in~/.kiro/settings/mcp.json.
Next, installing a skill. I recommend one of the best, grill-me.
- Go to:
and search for "grill-me".
2. Select grill-me by Mattpocock.
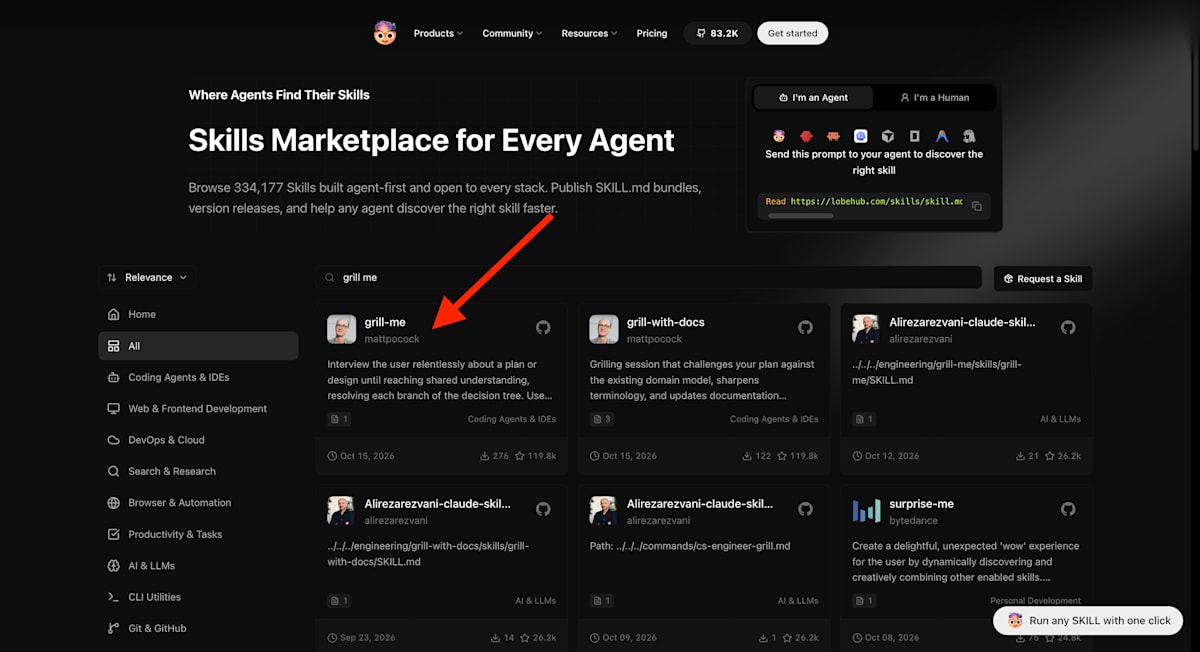
3. Copy the prompt and paste it into Kiro to install it~
Sometimes the agent installs a skill into the wrong place, for example because the skill's repository documentation is outdated. Please check manually that the skill is in
~/.kiro/skills/:
~/.kiro/skills/
└── grill-me/
    └── SKILL.md
Always restart kiro-cli after installing an MCP server or a skill.
To check that the installation worked, type /grill-me. It should appear as a command option:

Each skill may be triggered in a different way, so check the skill's source to see how to use it.
What is grill-me? It makes the agent interview you with questions, one at a time, until your plan or idea is clear. Use it when you have a vague idea and want to think it through before building.
Congratulations, you have officially got started with Kiro CLI!
5. Hooks (optional)
The settings above are general. Hooks are less general, so I'll go through them briefly.
A hook is a small command that Kiro runs automatically at a certain moment, for example every time you send a prompt. You write the command once and Kiro runs it for you every time.
Here is an example: before every prompt, run git status and give the result to the agent, so it always knows which files in your project have changed. Save this as ~/.kiro/hooks/git-status.json:
{
  "version": "v1",
  "hooks": [
    {
      "name": "inject-git-status",
      "description": "Add git status to every prompt",
      "trigger": "UserPromptSubmit",
      "action": { "type": "command", "command": "git status --short" },
      "timeout": 10
    }
  ]
}
What it does: on every UserPromptSubmit (every time you press Enter on a prompt), Kiro runs git status --short in your current folder and attaches the output to your message. I tested this on V3: the agent could quote the git status output without running any tool itself.
Hooks in a standalone file are V3 only. On V2 this file is ignored.
To learn how to write your own hook, refer to
Closing
These are the general concepts of agent setup and configuration. The file names and locations differ between agents, but they are mostly similar, so you can reuse these ideas when you try another agent.
This article covers global settings only. You can also set up a project-level .kiro/ folder inside a single project, which is not covered here.
Thank you for following along until here! You can now start your Kiro journey, and feel free to share your experience with me~
Adiós~