
Cloudflare WorkersでQueueをトリガーにして動かす

こんばんは、情報システム室の夏目です。
個人開発でCloudflare Workersを最近使っているのですが、Queueをトリガーとして実行するのを試してみました。
基本的な使い方
プロジェクトの雛型を作る
$ npm create cloudflare@latest
Need to install the following packages:
create-cloudflare@2.72.5
Ok to proceed? (y) y
npm notice run npx
npm notice run 'create-cloudflare'

──────────────────────────────────────────────────────────────────────────────────────────────────────────
👋 Welcome to create-cloudflare v2.72.5!
🧡 Let's get started.
📊 Cloudflare collects telemetry about your usage of Create-Cloudflare.

Learn more at: https://github.com/cloudflare/workers-sdk/blob/main/packages/create-cloudflare/telemetry.md
──────────────────────────────────────────────────────────────────────────────────────────────────────────

╭ Create an application with Cloudflare Step 1 of 3
│
├ In which directory do you want to create your application?
│ dir ./trial-queue-worker
│
├ What would you like to start with?
│ category Hello World example
│
├ Which template would you like to use?
│ type Worker only
│
├ Which language do you want to use?
│ lang TypeScript
│
├ Copying template files
│ files copied to project directory
│
├ Updating name in `package.json`
│ updated `package.json`
│
├ Installing dependencies
│ installed via `npm install`
│
├ Do you want to add an AGENTS.md file to help AI coding tools understand Cloudflare APIs?
│ no agents
│
╰ Application created

╭ Configuring your application for Cloudflare Step 2 of 3
│
├ Installing wrangler A command line tool for building Cloudflare Workers
│ installed via `npm install wrangler --save-dev`
│
├ Selecting workerd compatibility date
│ compatibility date 2026-09-03
│
├ Generating types for your application
│ generated to `./worker-configuration.d.ts` via `npm run cf-typegen`
│
├ Installing @types/node
│ installed via npm
│
├ Do you want to use git for version control?
│ no git
│
╰ Application configured

╭ Deploy with Cloudflare Step 3 of 3
│
├ Do you want to deploy your application?
│ no deploy via `npm run deploy`
│
╰ Done

────────────────────────────────────────────────────────────
🎉  SUCCESS  Application created successfully!

💻 Continue Developing
Change directories: cd trial-queue-worker
Deploy: npm run deploy

📖 Explore Documentation
https://developers.cloudflare.com/workers

🐛 Report an Issue
https://github.com/cloudflare/workers-sdk/issues/new/choose

💬 Join our Community
https://discord.cloudflare.com
────────────────────────────────────────────────────────────
Hello World example のカテゴリーを使用して、 Worker Only のテンプレートを使用します。
言語は TypeScript を選択します。
テンプレートそのままのコードは次のようになっています。
/**
 * Welcome to Cloudflare Workers! This is your first worker.
 *
 * - Run `npm run dev` in your terminal to start a development server
 * - Open a browser tab at http://localhost:8787/ to see your worker in action
 * - Run `npm run deploy` to publish your worker
 *
 * Bind resources to your worker in `wrangler.jsonc`. After adding bindings, a type definition for the
 * `Env` object can be regenerated with `npm run cf-typegen`.
 *
 * Learn more at https://developers.cloudflare.com/workers/
 */

export default {
	async fetch(request, env, ctx): Promise<Response> {
		return new Response("Hello World!");
	},
} satisfies ExportedHandler<Env>;
Queueをトリガーとするコードに編集する
export default {
	async queue(batch: MessageBatch<unknown>, env: Env, ctx: ExecutionContext<unknown>) {
		for (const [index, message] of batch.messages.entries()) {
			console.debug({ message: `message: ${index}`, value: message });
		}
	},
} satisfies ExportedHandler<Env>;
async queue(batch, env, ctx): Promise<void> という関数がQueueをトリガーとするWorkerのコードになります。
ここではQueueから取得したメッセージをログ出力させています。
Queueを作成する
$ npx wrangler queues create "worker-queue"
npm notice run trial-queue-worker@0.0.0 npx
npm notice run 'wrangler' queues create worker-queue

 ⛅️ wrangler 4.129.0
────────────────────
🌀 Creating queue 'worker-queue'
✅ Created queue 'worker-queue'

Configure your Worker to send messages to this queue:

{
  "queues": {
    "producers": [
      {
        "queue": "worker-queue",
        "binding": "worker_queue"
      }
    ]
  }
}
Configure your Worker to consume messages from this queue:

{
  "queues": {
    "consumers": [
      {
        "queue": "worker-queue"
      }
    ]
  }
}
wranglerコマンドを使って、Queueを作成します。
(ここでは worker-queue という名前で作成しています)
wrangler.jsonc にトリガーを定義する
{
	"workers_dev": false,
	"preview_urls": false,
	"queues": {
		"consumers": [
			{ "queue": "worker-queue" }
		]
	}
}
wrangler.jsoncに上記内容を追記します。
Queueをトリガーにするために必要なのは上記のうち queues の中身だけです。
今回はトリガーにするので queues.consumers を定義します。
queues.consumers[].queue にはQueueの名前を書きます。
ここでは先ほど作成した worker-queue を指定しています。
workers_dev と preview_urls はHTTPトリガー (async fetch())を呼び出すためのURLを発行するかの設定です。
今回はQueueをトリガーとする関数しか書いていないので無効化しています。
見ての通り queues.consumers は配列なので、一つのWorkerに複数のQueueをトリガーに設定することができます。
その際、どのQueueでも async queue() の関数が実行されます。
(つまりQueue毎に処理を変えるのなら、そのように実装する必要があります)
デプロイする
$ npm run deploy
npm notice run trial-queue-worker@0.0.0 deploy
npm notice run wrangler deploy

 ⛅️ wrangler 4.129.0
────────────────────
Total Upload: 0.28 KiB / gzip: 0.21 KiB
Worker Startup Time: 4 ms
Uploaded trial-queue-worker (1.44 sec)
Deployed trial-queue-worker triggers (4.36 sec)
  Consumer for worker-queue
Current Version ID: c71b47a2-d775-4029-8e4d-16d82e8b04c4
npm run deploy でCloudflareにデプロイします。
ここでは tiral-queue-worker というWorkerが作成されます。
CLIからデプロイしていますが、Github連携などでもデプロイできます。
Queueにデータを入れて動かす
作成したQueueにはCloudflareのコンソールやREST API、 queues.producer としてバインディングしたWorkerからデータを投入することができます。
ここではCloudflareのコンソールから投入します。
コンピュート -> Queues を開きます。
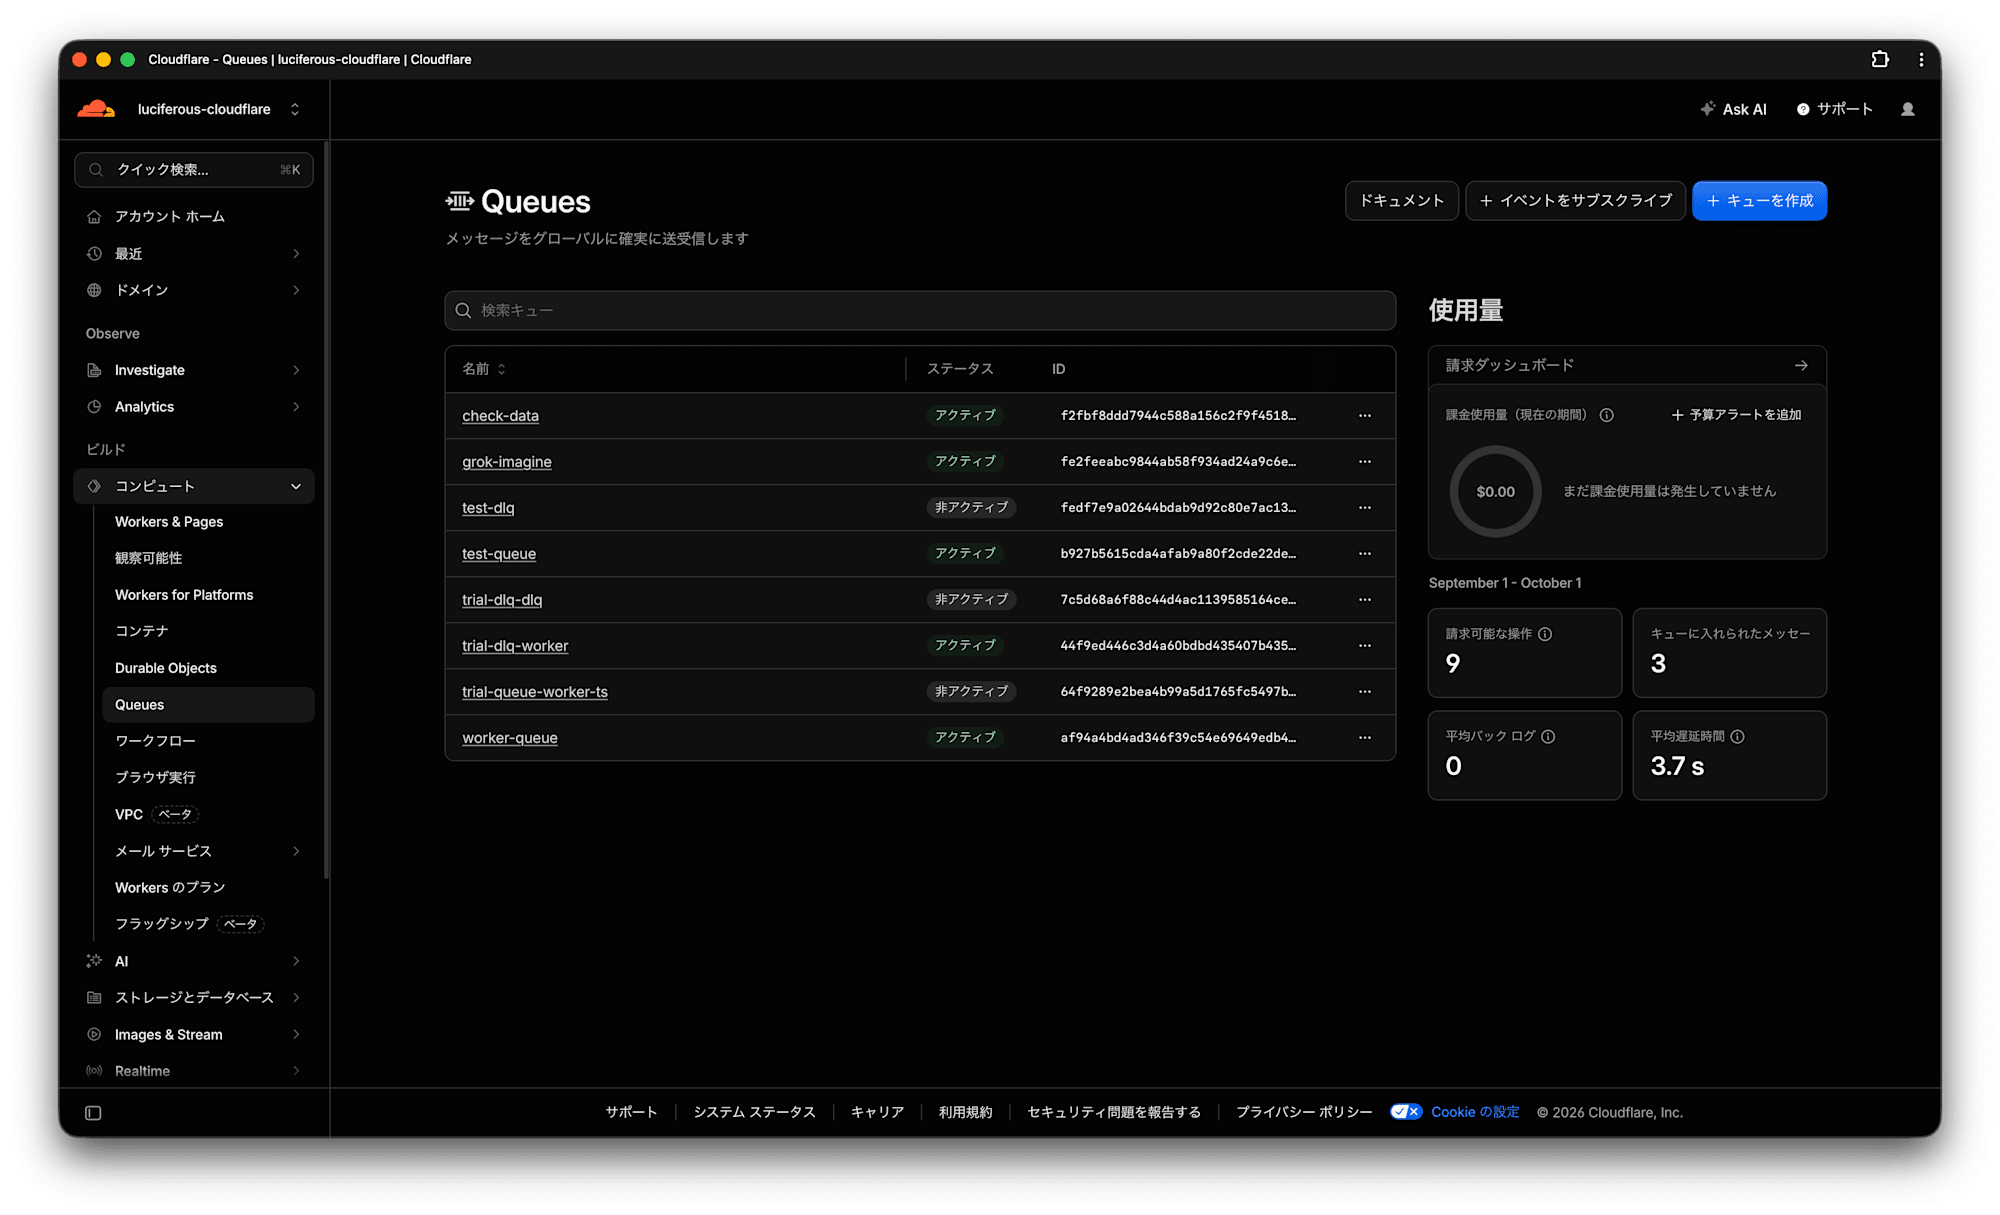
作成した worker-queue をクリックします。
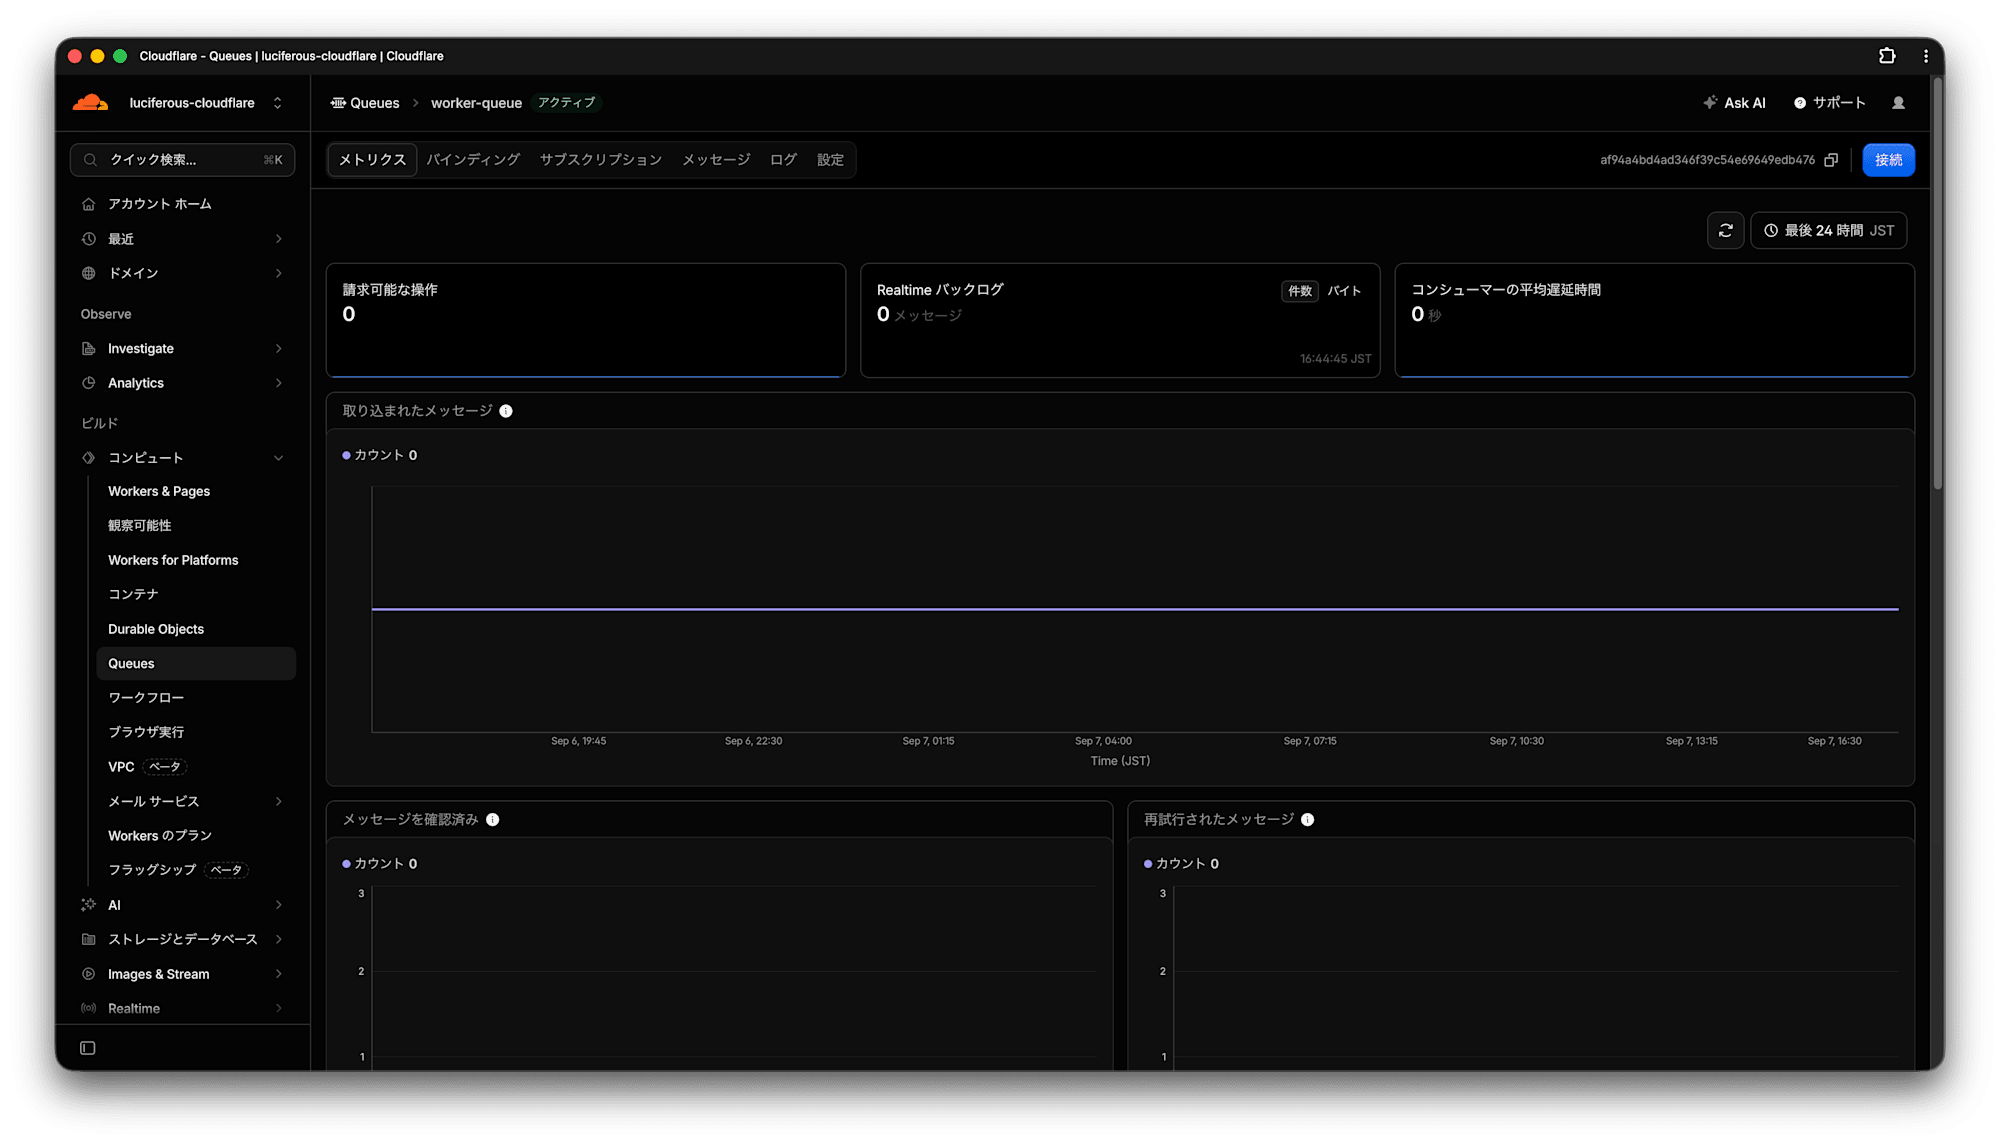
メッセージ をクリックします。
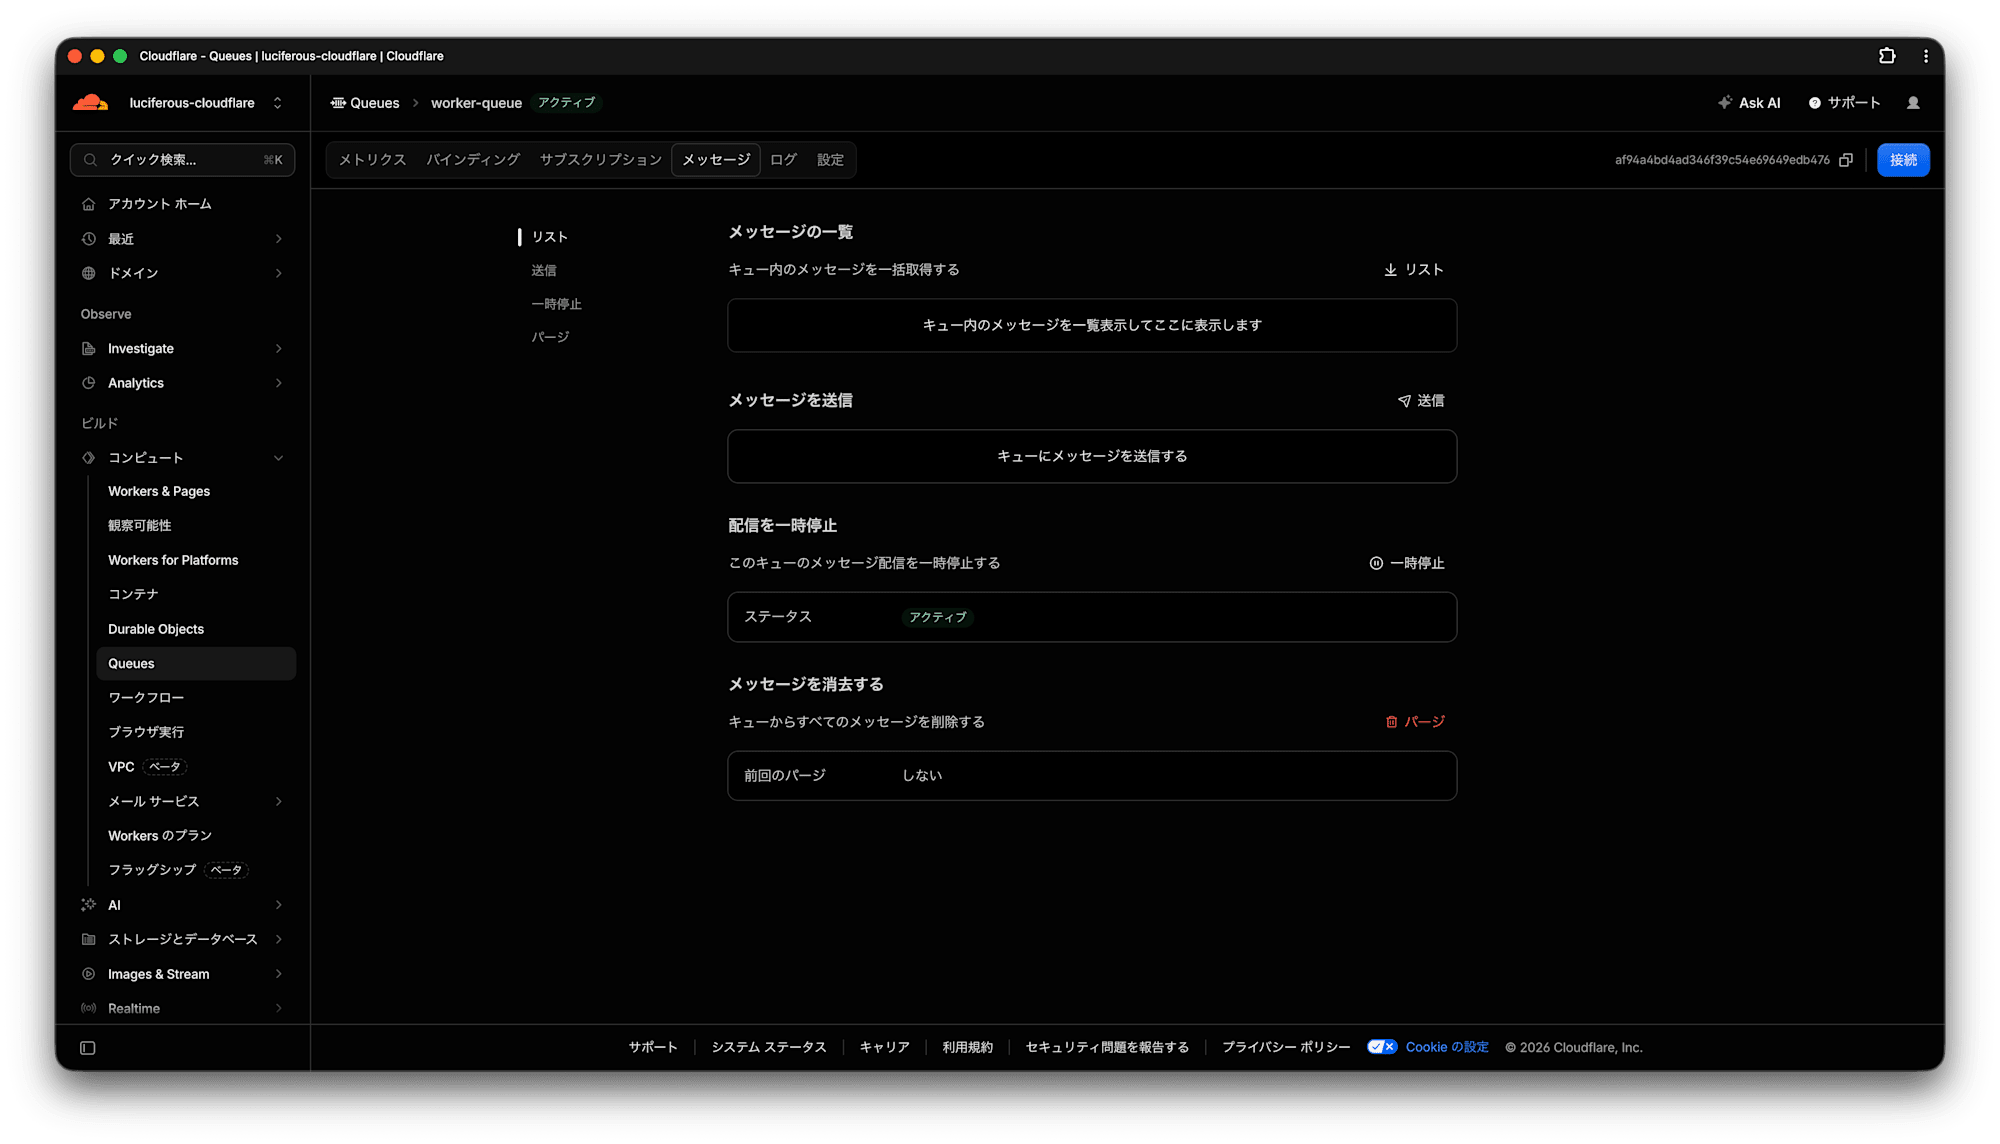
メッセージを送信 の右にある 送信 をクリックします。
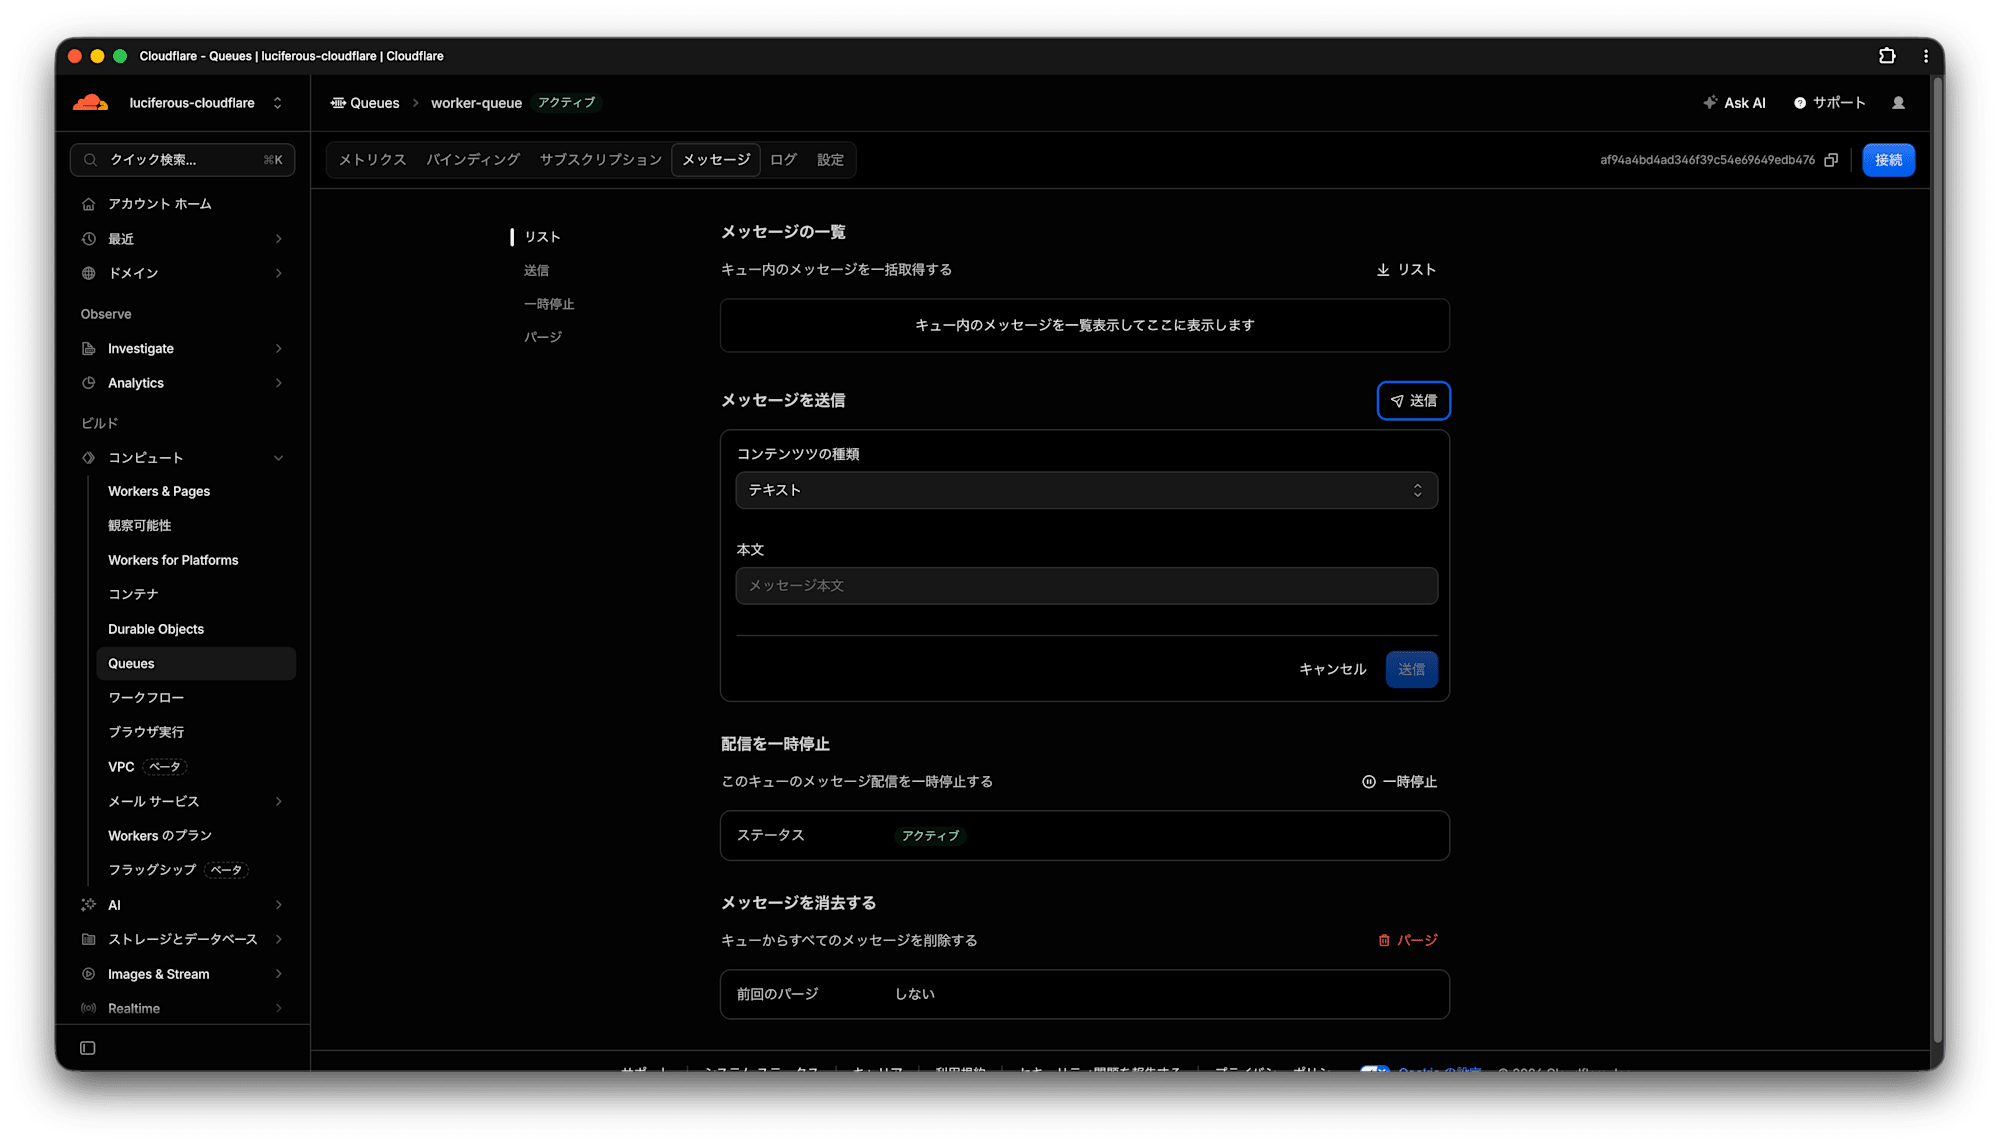
Queueに投入するメッセージを入力するフォームが表示されます。
Queueにメッセージを投入する際に、Cloudflareでは テキスト か JSON を選択して投入します。
今回は テキスト を選択し、 本文には 122333 を入力します。
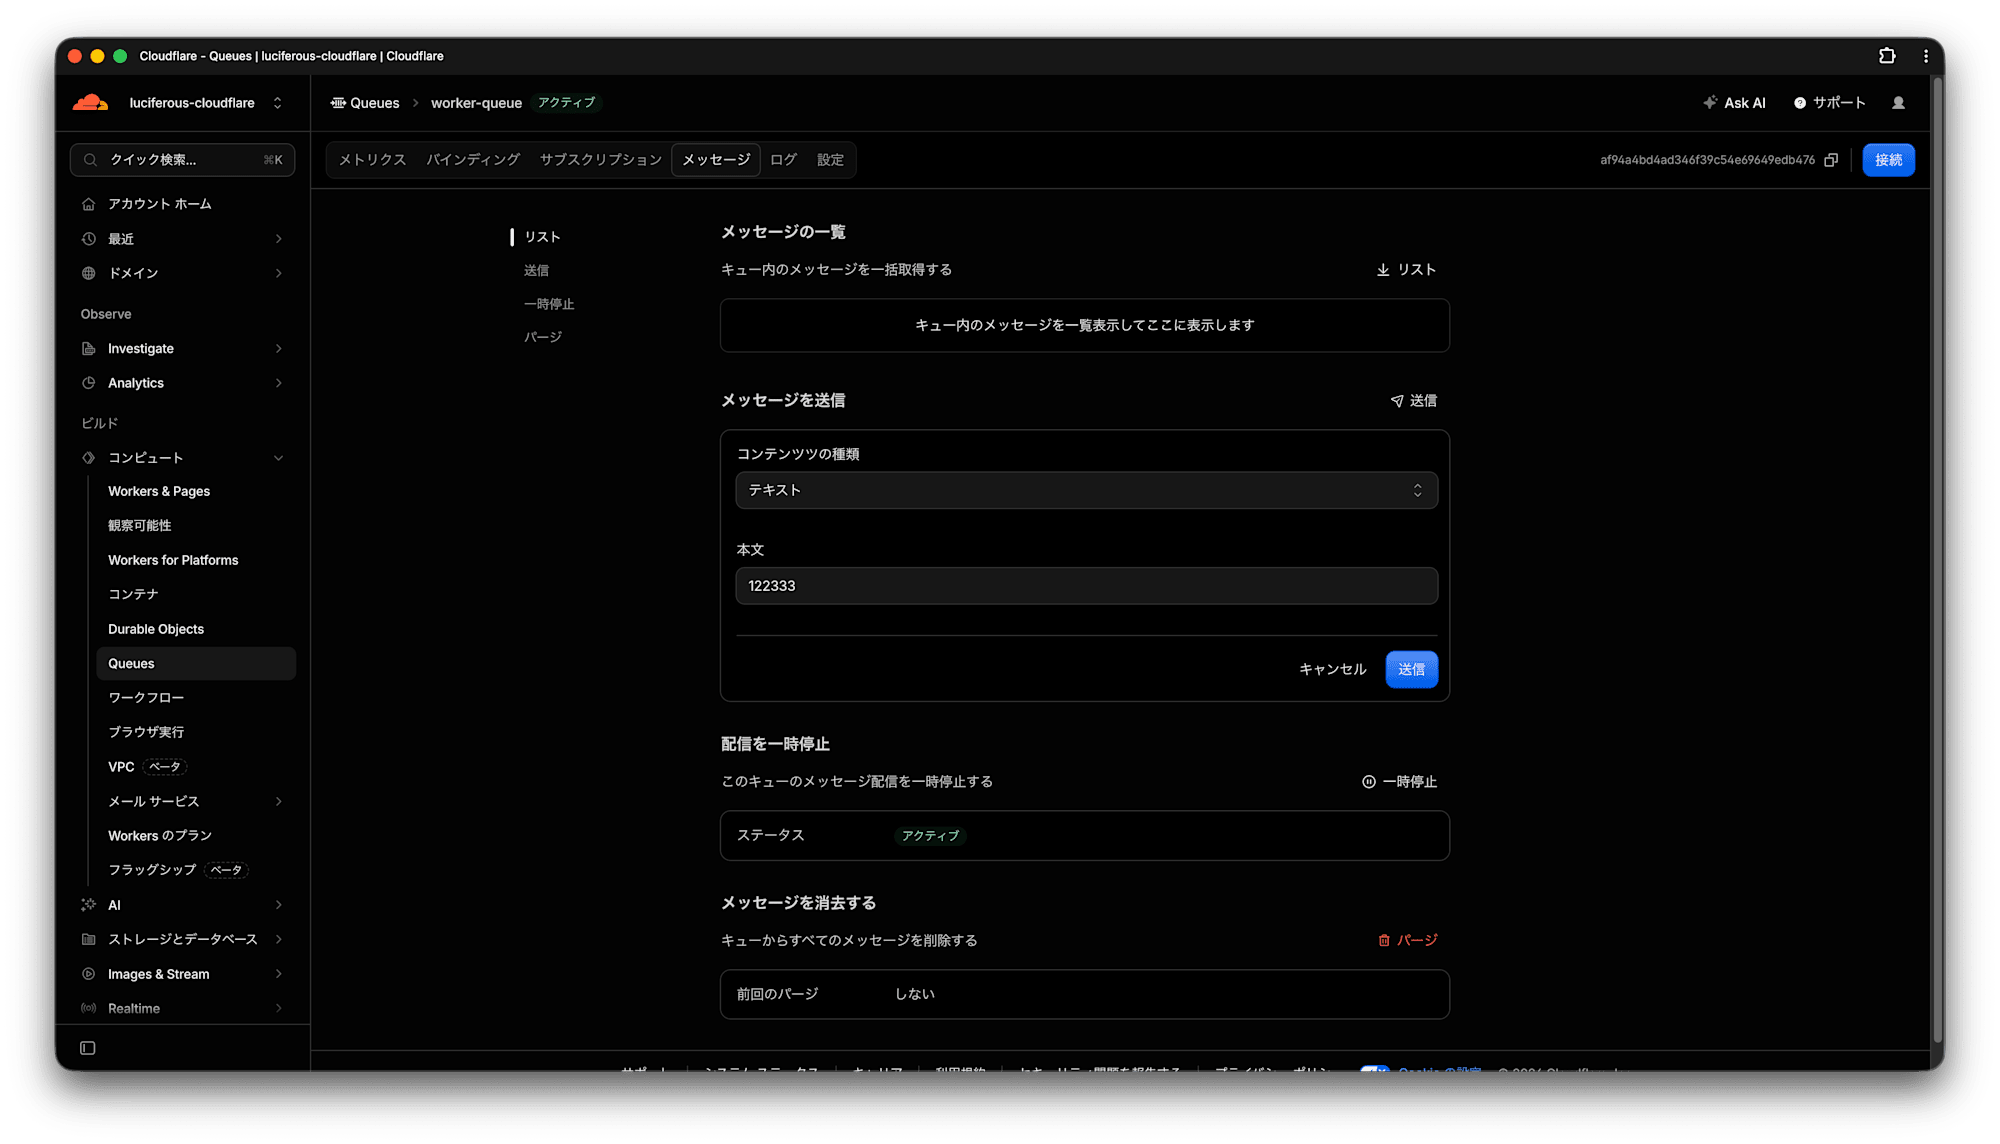
送信 ボタンをクリックします。
これでQueueにメッセージが投入されます。
ログを確認する
CloudflareのコンソールからWorkerの実行ログを確認します。
コンピュート -> Workers & Pages をクリックします。
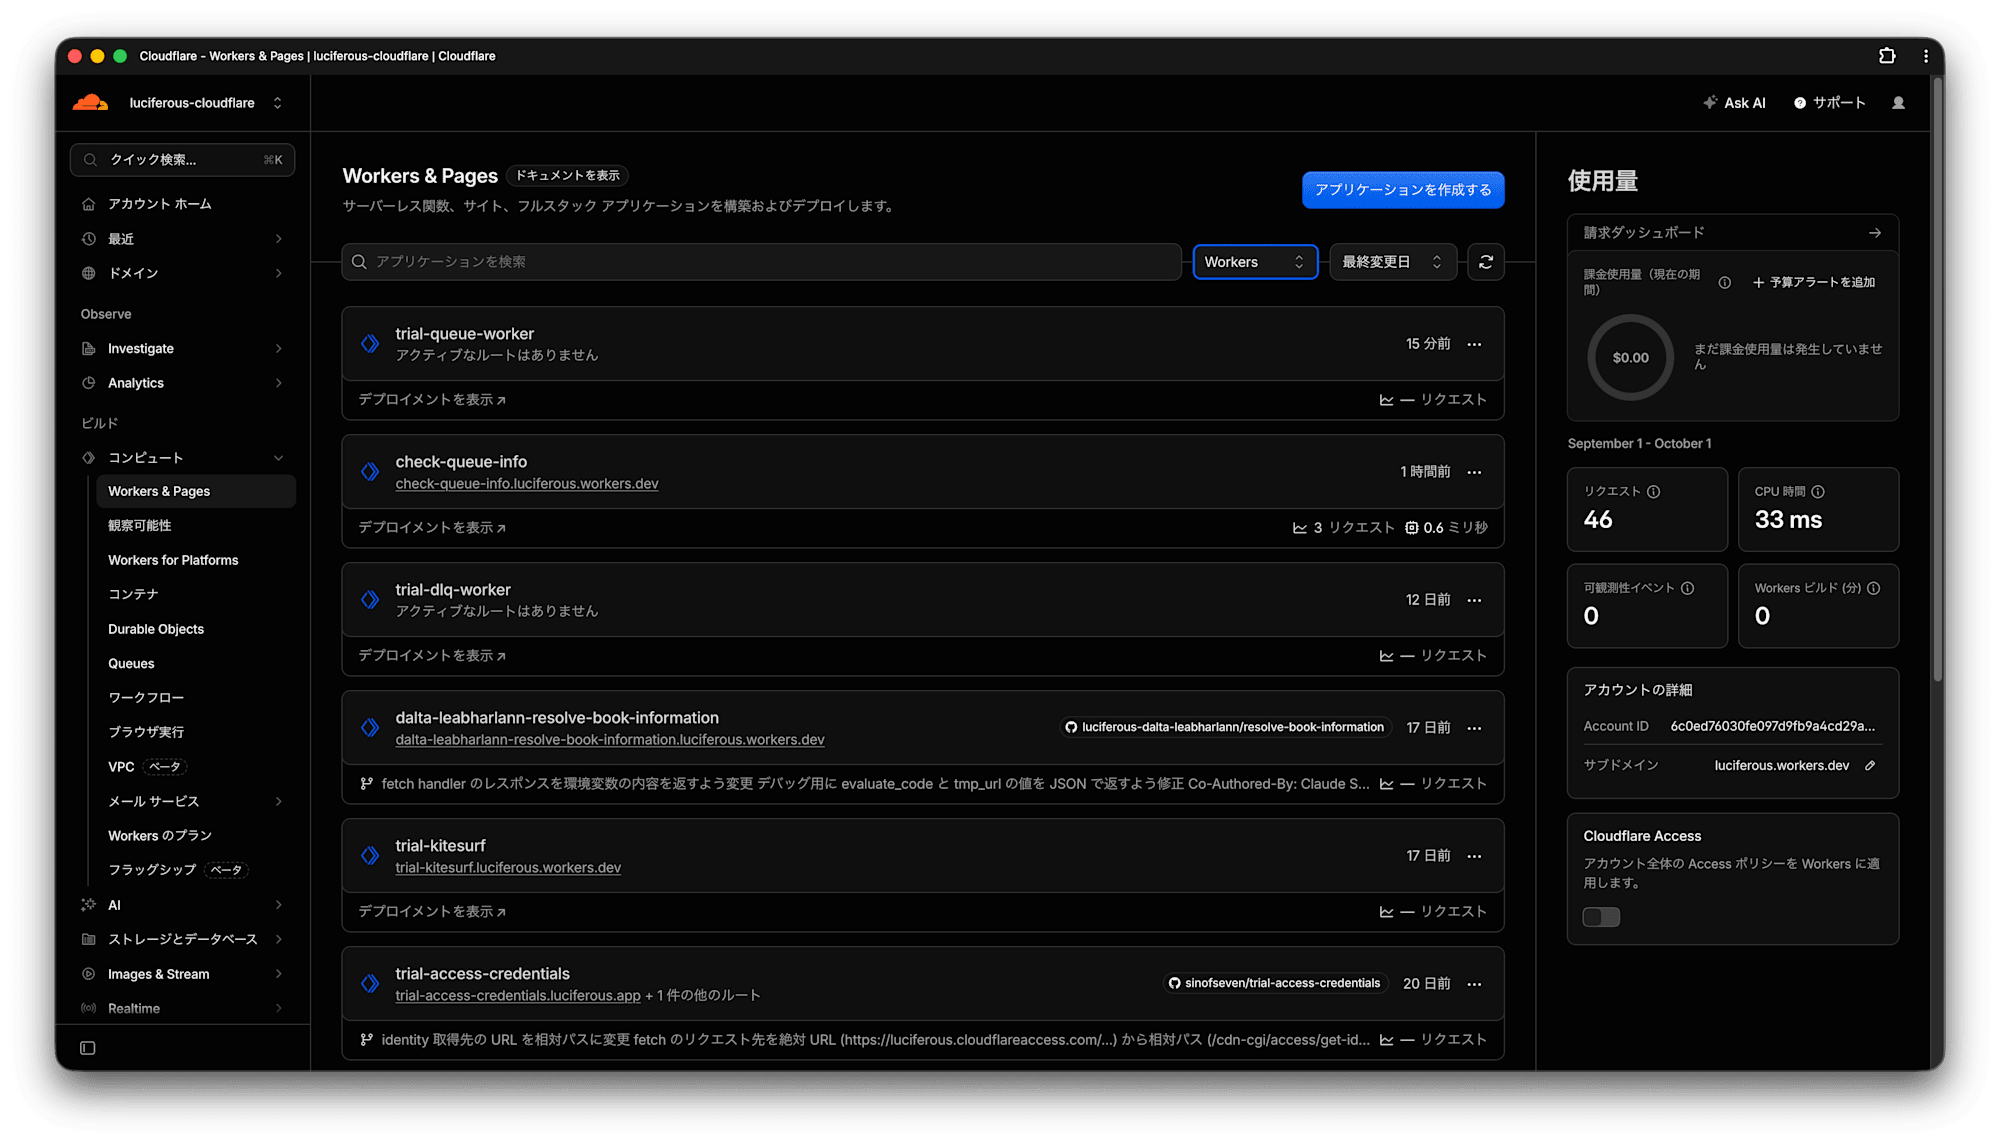
今回作成した trial-queue-worker をクリックします。
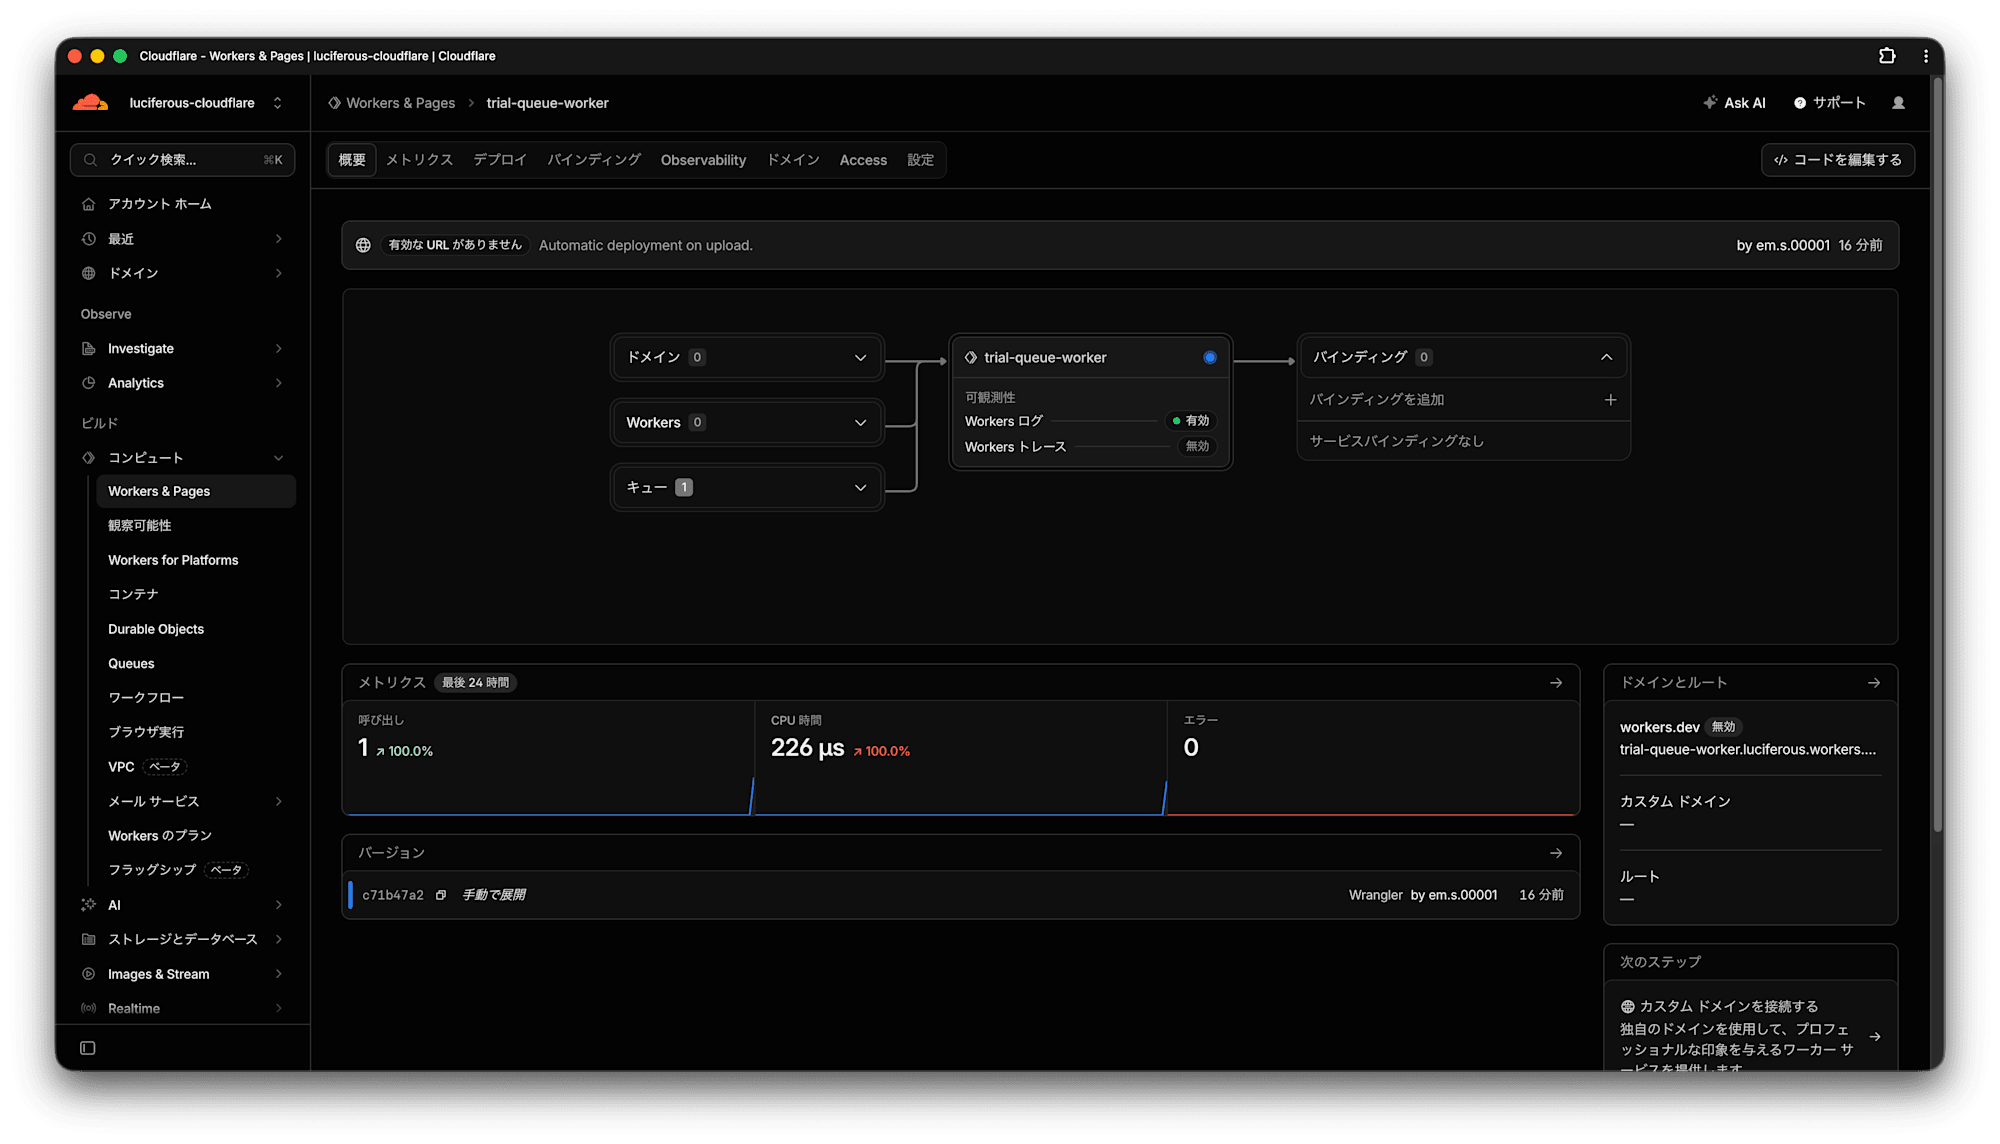
Observability をクリックします。
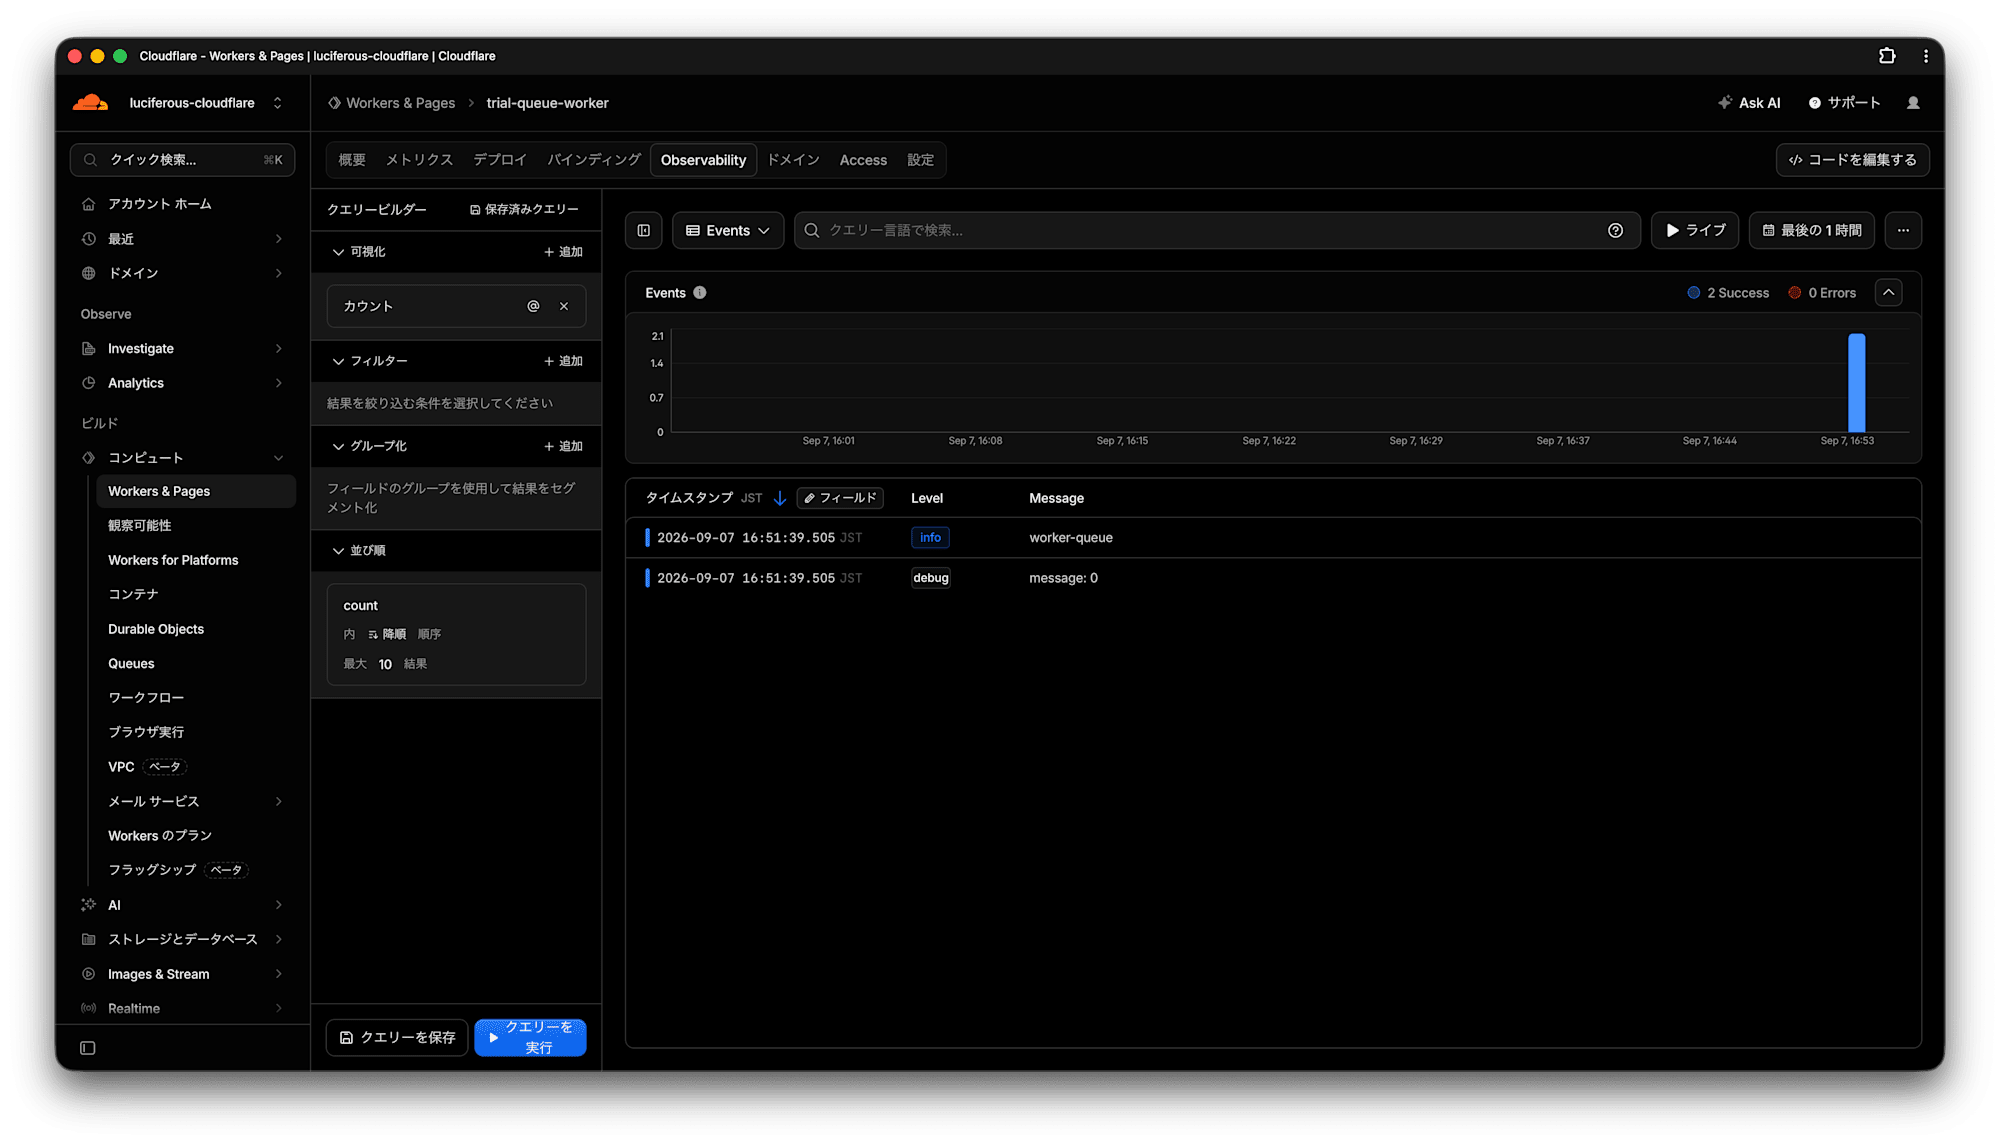
今回は実行してから十分な時間が経っていたのでログが表示されています。
ログが表示されていなければ、右上の 最後の1時間 をクリックして期間を調整してから、左下の クエリーを実行 をクリックします。
(クエリーはデフォルトのものを使用します)
今回デプロイしたコードではメッセージの内容をdebug出力しています。
クリックするとログの詳細が見れます。
{
  "level": "debug",
  "message": "message: 0",
  "value": {
    "body": "122333",
    "timestamp": "2026-09-07T07:51:33.455Z",
    "id": "fb198d4351ff05ac4bfbf412e9e53a75",
    "attempts": 1
  },
  "$workers": {
    "truncated": false,
    "scriptName": "trial-queue-worker",
    "scriptVersion": {
      "id": "c71b47a2-d775-4029-8e4d-16d82e8b04c4"
    },
    "eventType": "queue",
    "executionModel": "stateless",
    "requestId": "e615fd5dc9946876952750f987c37207",
    "event": {
      "queue": "worker-queue",
      "batchSize": 1
    },
    "traceId": "3e7dcc3defd887c6b7eb977b1445ca2b",
    "spanId": "2eec4db96608337c"
  },
  "$metadata": {
    "id": "01M1XDKX7H0000000000000001",
    "requestId": "e615fd5dc9946876952750f987c37207",
    "traceId": "3e7dcc3defd887c6b7eb977b1445ca2b",
    "spanId": "2eec4db96608337c",
    "trigger": "worker-queue",
    "service": "trial-queue-worker",
    "level": "debug",
    "message": "message: 0",
    "account": "6c0ed76030fe097d9fb9a4cd29a874af",
    "type": "cf-worker",
    "fingerprint": "\u0000\u0000\u0000\u0000\u0000\u0000\u0000\u0000\u0000\u0000\u0000\u0000\u0000\u0000\u0000\u0000\u0000\u0000\u0000\u0000\u0000\u0000\u0000\u0000\u0000\u0000\u0000\u0000\u0000\u0000\u0000\u0000",
    "origin": "queue"
  }
}
console.debug({ message: `message: ${index}`, value: message }); と実装したので message と value というキーにその内容が記録されています。
$workers と $metadata にWorkerの設定やメタデータが記録されています。
これが基本的な使い方になります。
設定などの詳細
wrangler.jsoncや型定義などの詳細を調べたのでまとめます。
wrangler.jsonc で設定できること
{
  "queues": {
    "consumers: [
      "queue": "<QUEUE NAME>",
      "max_batch_size": 10,
      "max_batch_timeout": 5,
      "max_retries": 3,
      "dead_letter_queue": "<DLQ NAME>",
      "max_concurrency": 250,
      "retry_delay": 0
    ]
  }
}
Queueをトリガーにする際、上記の設定を行うことができます。
queue- string, 必須
- トリガーとするQueueの名前
max_batch_size- number,
default: 10 - Workerの実行1回で処理する最大メッセージ数
- number,
max_batch_timeout- number,
default: 5 - メッセージが一定の数になるまで待機する最大秒数
- Workerの実行時間の上限とは異なる
- number,
max_retries- number,
default: 3 - 各メッセージの最大リトライ回数
初回処理の1回 + 最大リトライ回数
- number,
dead_letter_queue- string
- 最大リトライ回数までリトライしたメッセージを送信するQueueの名前
- リトライしたメッセージがそのまま指定したQueueに入る
max_concurrency- number
- Workerの最大並列処理数
- 指定していなければ最大までスケーリングします
- QueueのLimits によると
250と記載されています
- QueueのLimits によると
retry_delay- number,
default: 0 - メッセージをリトライする際のデフォルト待機秒数
- ここで指定した値とは別に、Workerの実装で明示的に指定することもできる
- number,
wrangler.jsoncで設定できる項目は上記7個で、必須なのは queue だけです。
TypeScriptの型定義
export default {
	async queue(batch: MessageBatch<unknown>, env: Env, ctx: ExecutionContext<unknown>) {},
} satisfies ExportedHandler<Env>;
今回書いた、コードに関係する型の定義はこのようになっています。
type ExportedHandlerQueueHandler<Env = unknown, Message = unknown, Props = unknown> = (batch: MessageBatch<Message>, env: Env, ctx: ExecutionContext<Props>) => void | Promise<void>;
interface ExportedHandler<Env = unknown, QueueHandlerMessage = unknown, CfHostMetadata = unknown, Props = unknown> {
    queue?: ExportedHandlerQueueHandler<Env, QueueHandlerMessage, Props>;
}
interface MessageBatch<Body = unknown> {
    readonly messages: readonly Message<Body>[];
    readonly queue: string;
    readonly metadata: MessageBatchMetadata;
    retryAll(options?: QueueRetryOptions): void;
    ackAll(): void;
}
interface Message<Body = unknown> {
  readonly id: string;
  readonly timestamp: Date;
  readonly body: Body;
  readonly attempts: number;
  retry(options?: QueueRetryOptions): void;
  ack(): void;
}
interface QueueRetryOptions {
  delaySeconds?: number;
}
これにはいくつか重要な点があります。
bodyの型を指定する方法
Queueにメッセージを投入するとき、 テキスト で投入すると bodyの型は stringに、 JSON で投入するとobjectになります。
この型を指定する場合は次のように書きます。
export default {
	async queue(batch: MessageBatch<string>, env: Env, ctx: ExecutionContext<unknown>): Promise<void> {}
} satisfies ExportedHandler<Env, string>;
MessageBatch<string> だけではエラーが出てしまう。
これは ExportHandler で bodyの型をしているからである。
そのため、 ExportHandler のジェネリクスにおいて二つ目の型を書く必要がある。
上記サンプルではstringにしているが、JSONで投入する際の型も同様に書く。
ack() と retry()
Cloudflare WorkersでQueueをトリガーとする場合におけるメッセージの扱いに関する関数です。
まず前提として下記のようになっています。
- Workerが正常終了したとき、Workerが終了する直前に
batch.ackAll()されたことになり、Queueから削除されます - Workerがエラー終了したとき、Workerが終了する直前に
batch.retryAll()されたことになり、Queueから削除されずリトライ対象になります
batch.ackAll(), batch.retryAll() は原則としてWorkerに渡された全てのメッセージに反映されます。
では個別のメッセージの ack() と retry() はどう使うのか。
実はこれらの ack() や ackAll() などは一番最初に呼び出されたものが優先されるというルールがあります。
つまり「成功した個別メッセージで都度 ack() をしているとき、Workerがエラー終了したとしても ack() したメッセージはキューから削除されてリトライされない」ということも可能になります。
逆に「失敗した個別メッセージで都度 retry() を実行しつつエラー終了させないようにして、Workerが正常終了しても失敗したメッセージだけリトライする」みたいなことも可能です。
ここは async queue() をどのように実装するかで色々やり方はあります。
retry() と retryAll() のオプション
retry() と retryAll() では delaySeconds というオプションを指定することができます。
これはリトライをする前に待機する秒数を明示的に指定するというものです。
まとめ
以上、Cloudflare WorkersでQueueをトリガーに使う方法をまとめました。
何かのお役に立てたら幸いです。