
OpenTelemetry Laravel auto-instrumentationが自動設定したスパンの名前をカスタマイズしてみた
リテールアプリ共創部@大阪の岩田です。
OpenTelemetry Laravel auto-instrumentationを使えばLaravel製アプリケーションのインストルメンテーションが簡単に実現できます。非常に便利な機能ではあるのですが、細かい調整を入れようと思うとやはり多少のコード実装が必要になってきます。
今回はCloudWatchのトレースマップでの見え方を調整するためOpenTelemetry Laravel auto-instrumentationが自動生成するスパンの名前を手動で上書きしてみたので、手順を紹介します。
環境
今回利用した環境は以下の通りです。
- PHP: 8.1.15
- 各種ライブラリ
- laravel/framework: v10.40.00
- open-telemetry/api: 1.4.0
- open-telemetry/exporter-otlp: 1.2.0
- open-telemetry/opentelemetry-auto-laravel: 1.2.0
- open-telemetry/sdk: 1.6.0
- OpenTelemetry auto-instrumentation extension: 1.1.3
対象となるLaravel製アプリケーションはバッチ処理のみを責務としており、cronで指定されたスケジュールに従ってartisan schedule:runを実行しています。
やってみる
スケジュール実行されるコマンドのトレース結果がCloudWatch上でどう見えるかを確認していきます。
自動インストルメンテーションにお任せ
まずはOpenTelemetry Laravel auto-instrumentationにお任せしてみます。細かな手順は割愛しますが、以下ブログと同様の手順でインストルメンテーションしています。
結果は以下のようになりました。

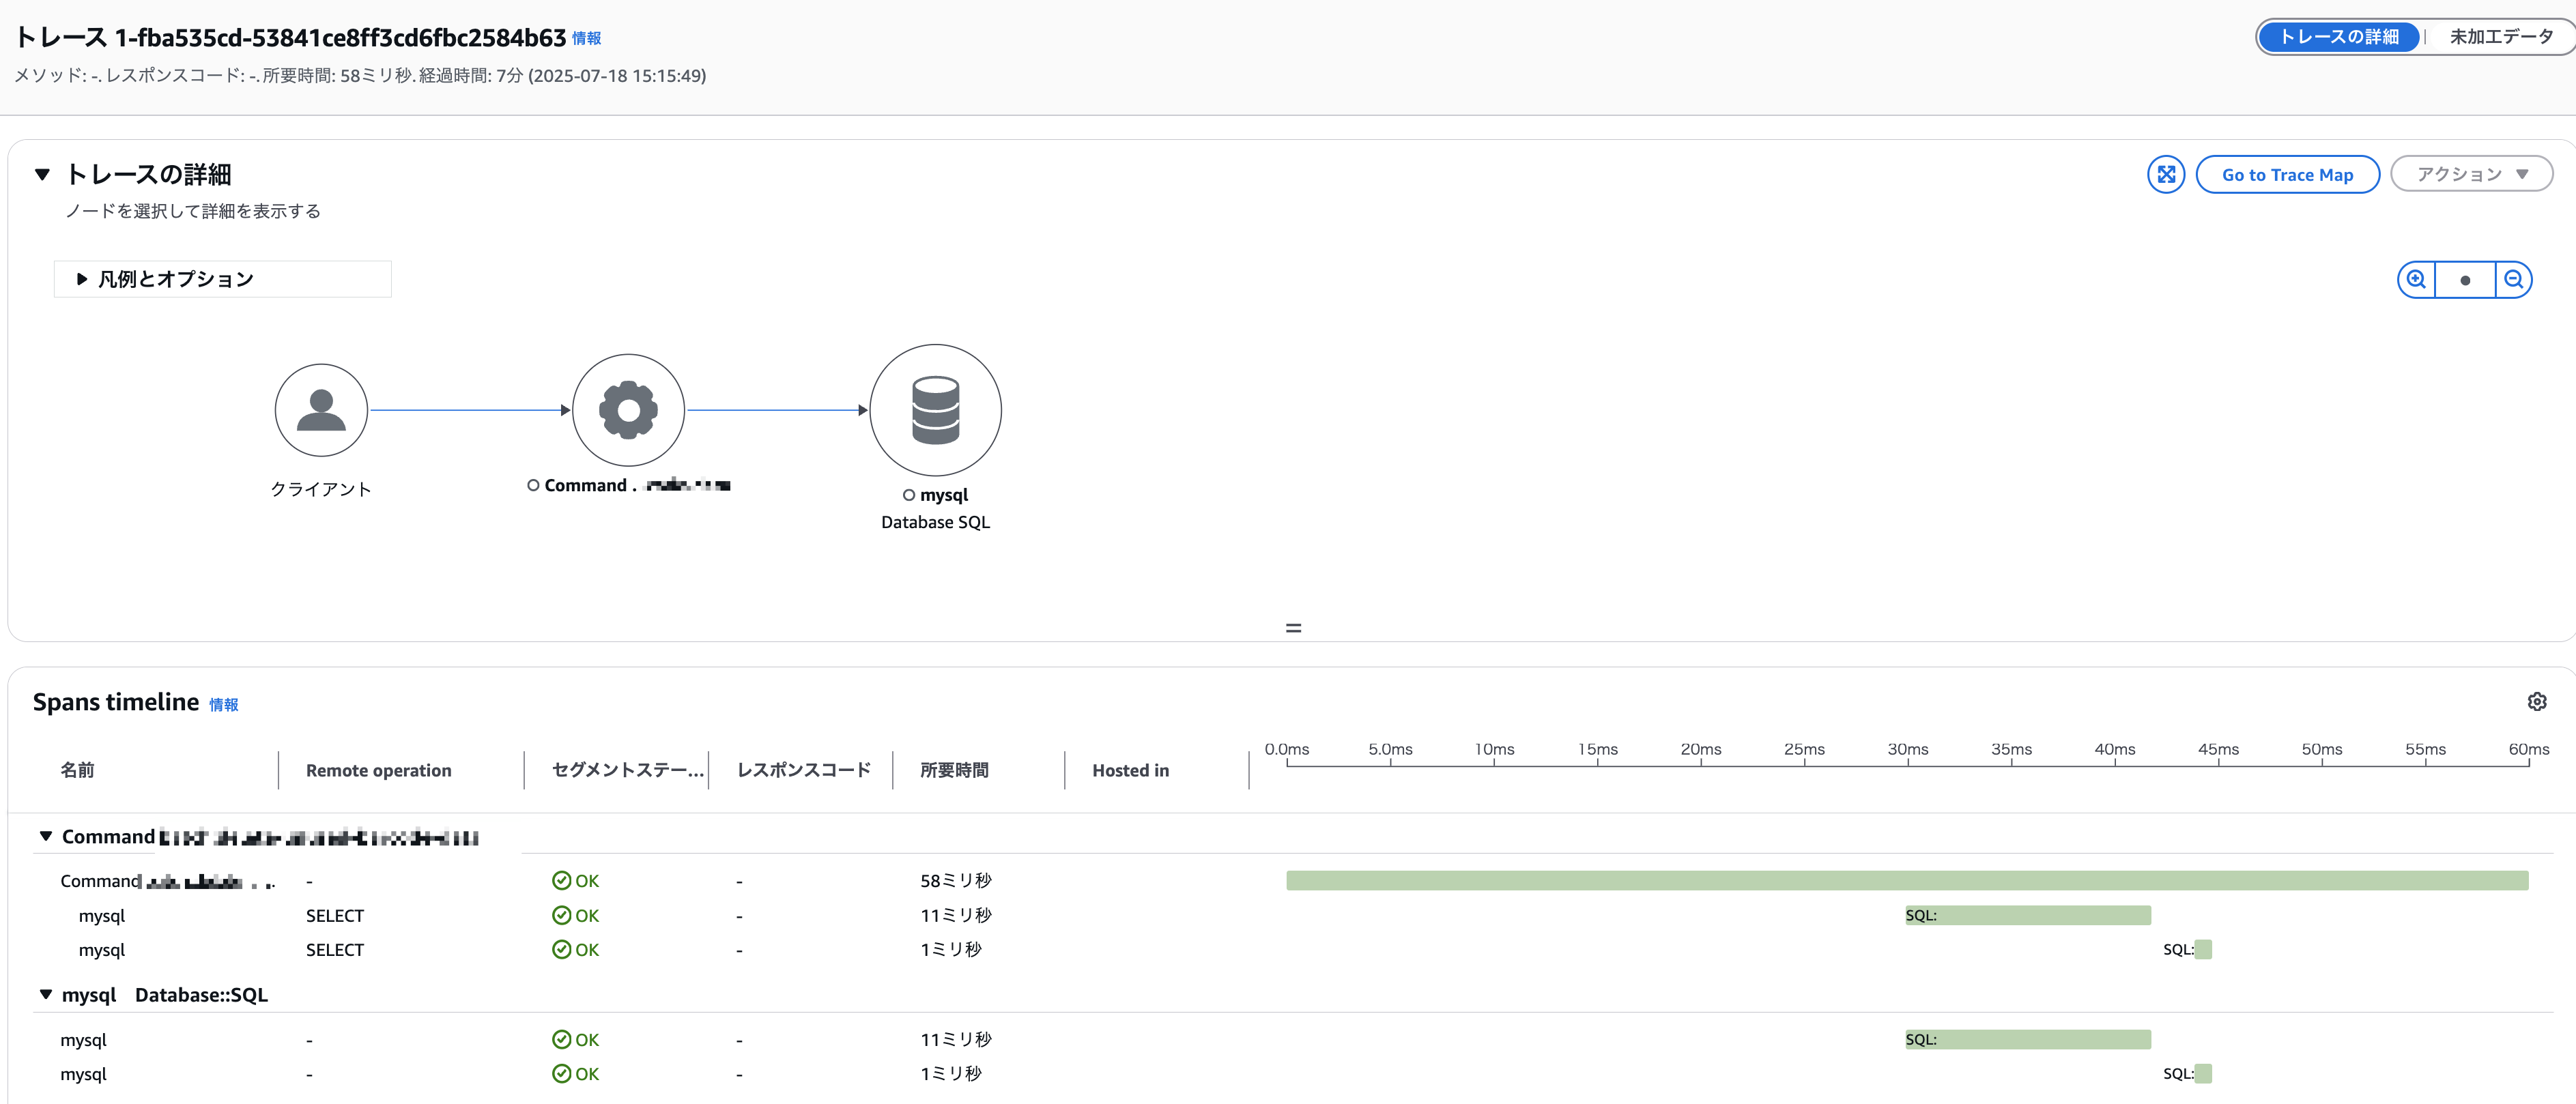
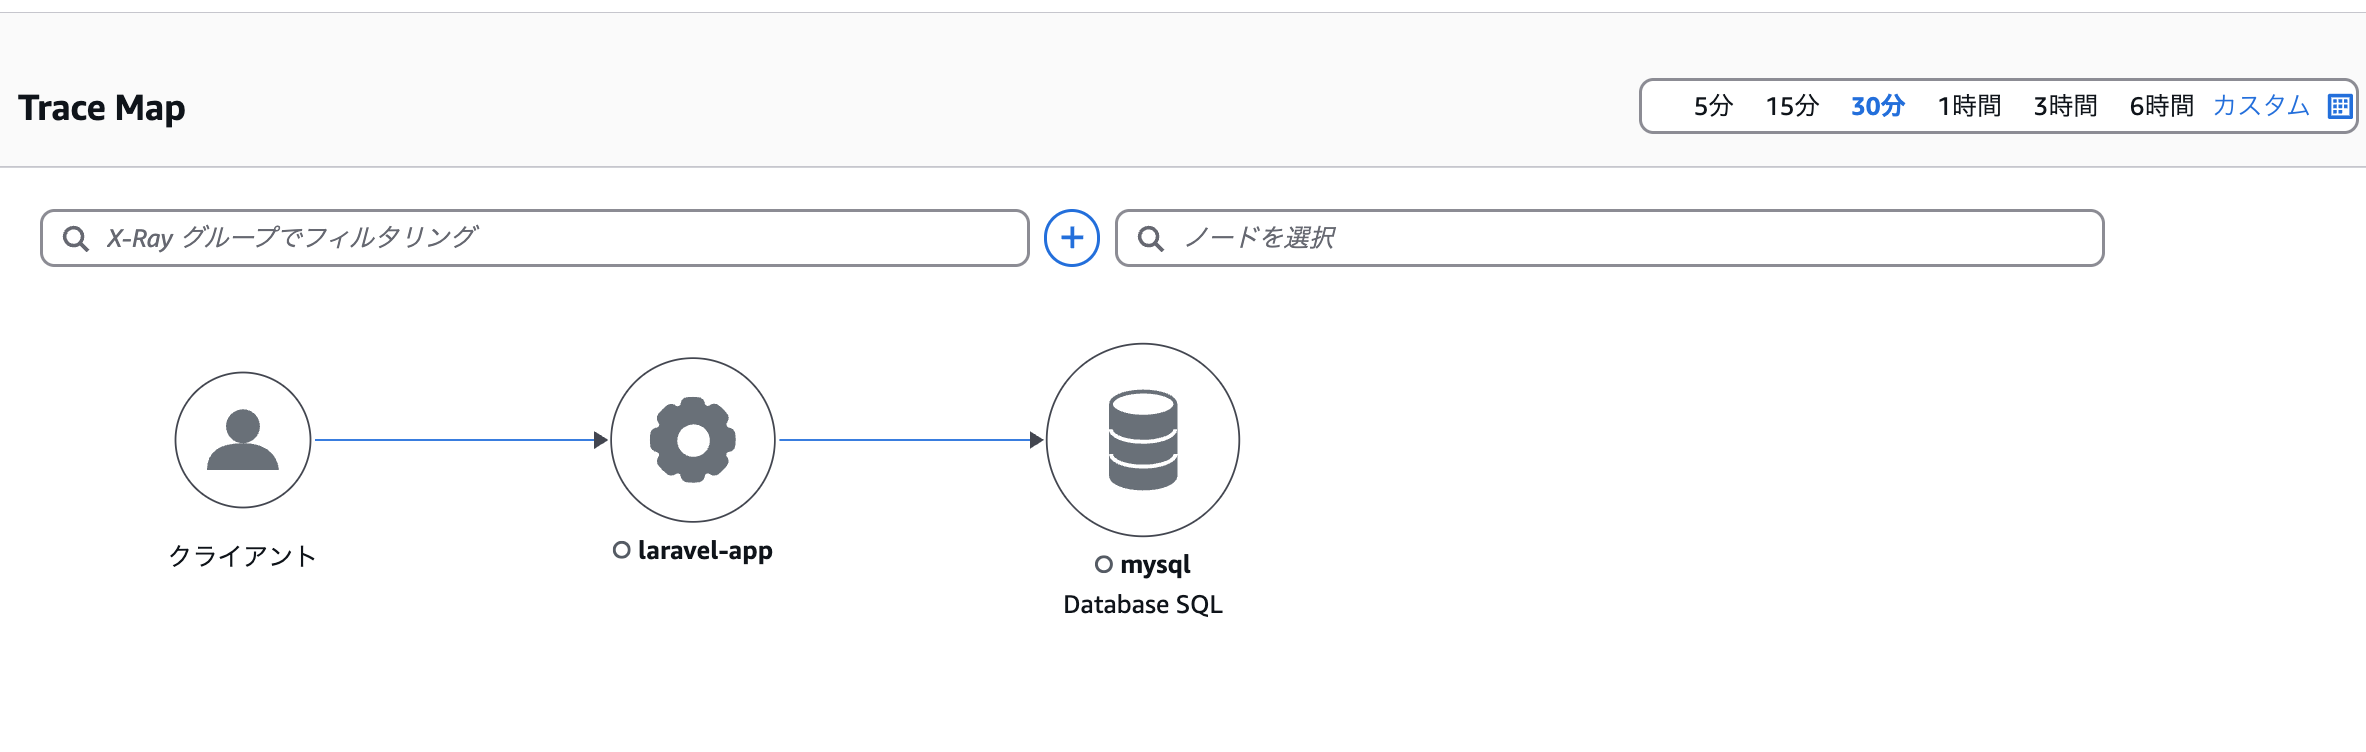
コマンドを実行しているLaralvelのアプリケーションは1つですが、実行しているコマンドが2種類あるため、トレースマップ上の表示は Command... という形式になっています。
恐らくここで設定された文字列ですね。
Laravelのアプリケーションは1つなので、環境変数 OTEL_SERVICE_NAME で指定した名前で集約して欲しかったのですが、どうもそういう挙動にはなっていないようです。深堀りして確認していくと、X-Rayに送信された生のトレースデータは以下のようになっていました。
{
    "Id": "1-fba535cd-53841ce8ff3cd6fbc2584b63",
    "Duration": 0.058,
    "Segments": [
        {
            "Id": "726ad6af8ee41ead",
            "Document": {
                "id": "726ad6af8ee41ead",
                "name": "Command ...`",
                "start_time": 1752819349.153934,
                "trace_id": "1-fba535cd-53841ce8ff3cd6fbc2584b63",
                "end_time": 1752819349.211495,
                "aws": {
                    "span.kind": "LOCAL_ROOT"
                },
                "annotations": {
                    "aws.local.service": "laravel-app",
                    "span.name": "Command ...",
                    "aws.local.operation": "InternalOperation",
                    "span.kind": "INTERNAL",
                    "aws.local.environment": "generic:default"
                }
    ...略
これを見る限りSegments[0].Document.nameに設定された文字列でトレースマップ上のノードは集約されているように見えます。ということは生データの Segments[0].Document.name をカスタムできれば期待した形のトレースマップが得られそうです。
独自のSpanProcessorを実装する
スパンの属性をカスタマイズするために SpanProcessorInterface を実装した独自のクラスを作りました。
class MyProcessor implements SpanProcessorInterface
{
    public function onStart(ReadWriteSpanInterface $span, ContextInterface $parentContext): void
    {
        $parentSpan = $parentContext->get(ContextKeys::span());
        if ($parentSpan == null){
            $span->updateName('laravel-app');
        }
    }

    public function onEnd(ReadableSpanInterface $span): void
    {
    }

    public function forceFlush(?CancellationInterface $cancellation = null): bool
    {
        return true;
    }

    public function shutdown(?CancellationInterface $cancellation = null): bool
    {
        return true;
    }
}
大したことはやっていなくて、onStartの中で親スパンの存在をチェックし、親スパンが存在しない場合は$span->updateName('laravel-app');でlaravel-appという名前をスパンにセットするだけです。
この独自SpanProcessorを利用するようインストルメンテーション関連の処理を記述します。
$resource = ResourceInfo::create(Attributes::create([
    ResourceAttributes::SERVICE_NAME => 'laravel-app',
    ResourceAttributes::SERVICE_VERSION => env('OTEL_SERVICE_VERSION', '0.1'),
    ResourceAttributes::DEPLOYMENT_ENVIRONMENT_NAME => env('APP_ENV', 'development'),
]));

$transport = (new PsrTransportFactory())->create(
    env('OTEL_EXPORTER_OTLP_TRACES_ENDPOINT', 'http://otel-collector:4318/v1/traces'),
    'application/json'
);
$spanExporter = new SpanExporter($transport);

$tracerProvider = TracerProvider::builder()
    ->addSpanProcessor(new MyProcessor())
    ->addSpanProcessor(BatchSpanProcessor::builder($spanExporter)->build())
    ->setResource($resource)
    ->build();

Sdk::builder()
    ->setTracerProvider($tracerProvider)
    ->setAutoShutdown(true)
    ->buildAndRegisterGlobal();
TracerProvider::builder()->addSpanProcessor(new MyProcessor())で独自のSpanProcessorを追加した後に->addSpanProcessor(BatchSpanProcessor::builder($spanExporter)->build())でBatchSpanProcessorを追加しています。これによりスパン名を上書きした後にBatchSpanProcessorで各スパンが処理されるようになります。
ここまでの実装まとめです。
<?php
require_once __DIR__.'/vendor/autoload.php';

use OpenTelemetry\Context\ContextInterface;
use OpenTelemetry\Context\ContextKeys;
use OpenTelemetry\Contrib\Otlp\SpanExporter;
use OpenTelemetry\SDK\Common\Attribute\Attributes;
use OpenTelemetry\SDK\Common\Future\CancellationInterface;
use OpenTelemetry\SDK\Resource\ResourceInfo;
use OpenTelemetry\SDK\Sdk;
use OpenTelemetry\SDK\Trace\ReadableSpanInterface;
use OpenTelemetry\SDK\Trace\ReadWriteSpanInterface;
use OpenTelemetry\SDK\Trace\SpanProcessor\BatchSpanProcessor;
use OpenTelemetry\SDK\Trace\TracerProvider;
use OpenTelemetry\SemConv\ResourceAttributes;
use OpenTelemetry\SDK\Common\Export\Http\PsrTransportFactory;
use OpenTelemetry\SDK\Trace\ReadWriteSpan;
use OpenTelemetry\SDK\Trace\SpanProcessorInterface;

class MyProcessor implements SpanProcessorInterface
{
    public function onStart(ReadWriteSpanInterface $span, ContextInterface $parentContext): void
    {
        $parentSpan = $parentContext->get(ContextKeys::span());
        if ($parentSpan == null){
            $span->updateName('laravel-app');
        }
    }

    public function onEnd(ReadableSpanInterface $span): void
    {
    }

    public function forceFlush(?CancellationInterface $cancellation = null): bool
    {
        return true;
    }

    public function shutdown(?CancellationInterface $cancellation = null): bool
    {
        return true;
    }
}

$resource = ResourceInfo::create(Attributes::create([
    ResourceAttributes::SERVICE_NAME => 'laravel-app',
    ResourceAttributes::SERVICE_VERSION => env('OTEL_SERVICE_VERSION', '0.1'),
    ResourceAttributes::DEPLOYMENT_ENVIRONMENT_NAME => env('APP_ENV', 'development'),
]));

$transport = (new PsrTransportFactory())->create(
    env('OTEL_EXPORTER_OTLP_TRACES_ENDPOINT', 'http://otel-collector:4318/v1/traces'),
    'application/json'
);
$spanExporter = new SpanExporter($transport);

$tracerProvider = TracerProvider::builder()
    ->addSpanProcessor(new MyProcessor())
    ->addSpanProcessor(BatchSpanProcessor::builder($spanExporter)->build())
    ->setResource($resource)
    ->build();

Sdk::builder()
    ->setTracerProvider($tracerProvider)
    ->setAutoShutdown(true)
    ->buildAndRegisterGlobal();
このファイルを読み込むようにapp.phpを修正します。
<?php

/*
|--------------------------------------------------------------------------
| Create The Application
|--------------------------------------------------------------------------
|
| The first thing we will do is create a new Laravel application instance
| which serves as the "glue" for all the components of Laravel, and is
| the IoC container for the system binding all of the various parts.
|
*/

require_once __DIR__ . '/../instrument.php';

$app = new Illuminate\Foundation\Application(
    $_ENV['APP_BASE_PATH'] ?? dirname(__DIR__)
);
...略
この状態で再度artisanからコマンドを実行してみました。
今度はトレースマップ上の表示が全てlaravel-appというノードに集約されています!
トレースの詳細は以下の通りでした。
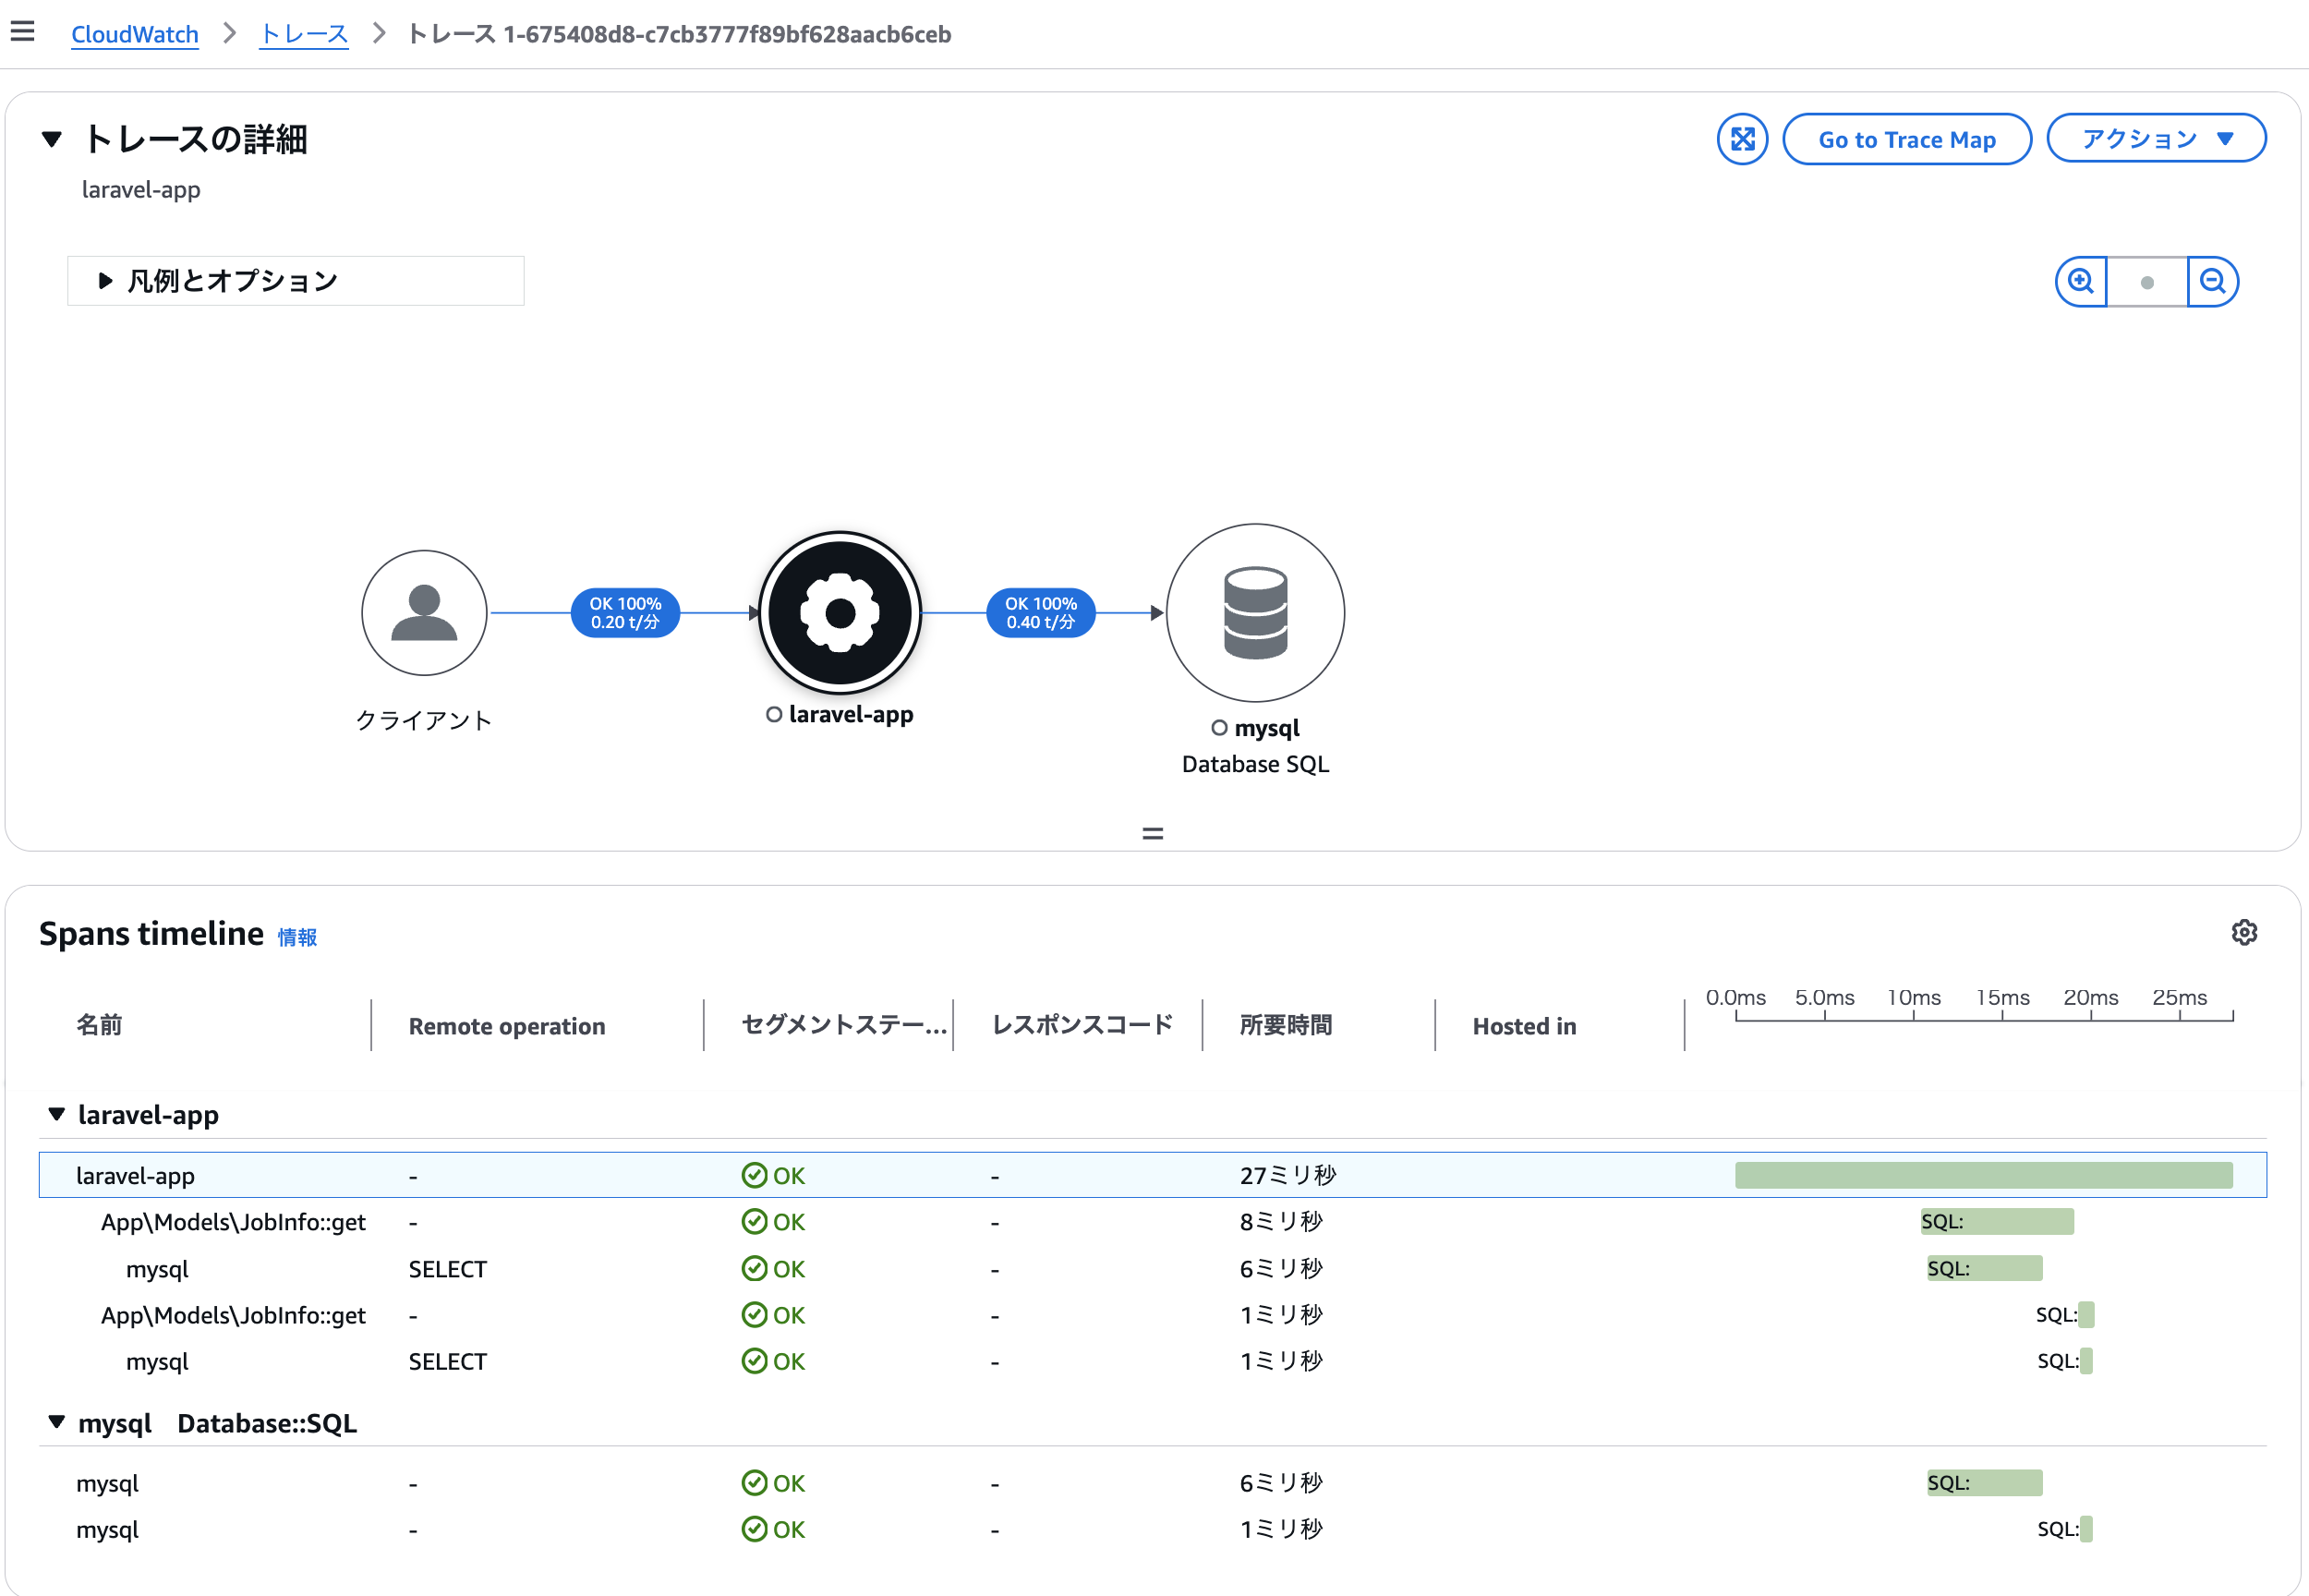
生データは以下の通りでした。
{
    "Id": "1-675408d8-c7cb3777f89bf628aacb6ceb",
    "Duration": 0.027,
    "Segments": [
        {
            "Id": "fece3fa19ce0b517",
            "Document": {
                "id": "fece3fa19ce0b517",
                "name": "laravel-app",
                "start_time": 1752823358.502099,
                "trace_id": "1-675408d8-c7cb3777f89bf628aacb6ceb",
                "end_time": 1752823358.5288877,
                "aws": {
                    "span.kind": "LOCAL_ROOT"
                },
                "annotations": {
                    "aws.local.service": "laravel-app",
                    "span.name": "laravel-app",
                    "aws.local.operation": "InternalOperation",
                    "span.kind": "INTERNAL",
                    "aws.local.environment": "generic:default"
                },
...略
Segments[0].Document.nameが Command: ...からlaravel-app に変わっていることが分かります。トレースマップは意図通りの表示になった一方でトレースの詳細からコマンド名の情報が失われているのはデメリットと言えそうです。ただ、この問題については独自実装したSpanProcessorの処理でコマンド名をメタデータとして付与するなどの方法で対策できそうです。
まとめ
OpenTelemetry Laravel auto-instrumentationが自動設定したスパンの名前をカスタマイズしてみました。基本的には自動インストルメンテーションに任せて楽をしつつ、細かなところは手動でカスタマイズしてシステムの非機能要件に合わせていくのが良さそうだと思いました。


