Macのマルチディスプレイ設定をAutomatorで切り替える
はじめに
AI事業本部/生成AIインテグレーション部/ソリューションチームの竹口です。
Macを使っていると、ディスプレイを拡張したい場面が多々あります。
その際には、ケーブルを付け替えて設定を開いてディスプレイ配置を変更して…という手順を踏むと思います。
複数のディスプレイ設定を家や出先やらで一々設定し直すのは面倒なので、楽したいなと思いショートカットで変更できるようにしました。
使用ツール
Macでのマルチディスプレイの解像度と配置情報を書き出し、その内容をコマンドで反映させるdisplayplacerというコマンドラインユーティリティを見つけました。便利なのでご紹介します。
また、書き出した内容を一々どこかにメモしてターミナルに貼り付けるのも面倒なので、Automatorでアプリとして登録してみました。
やってみた
インストール
brew tap jakehilborn/jakehilborn && brew install displayplacer
現在のディスプレイ設定を発行
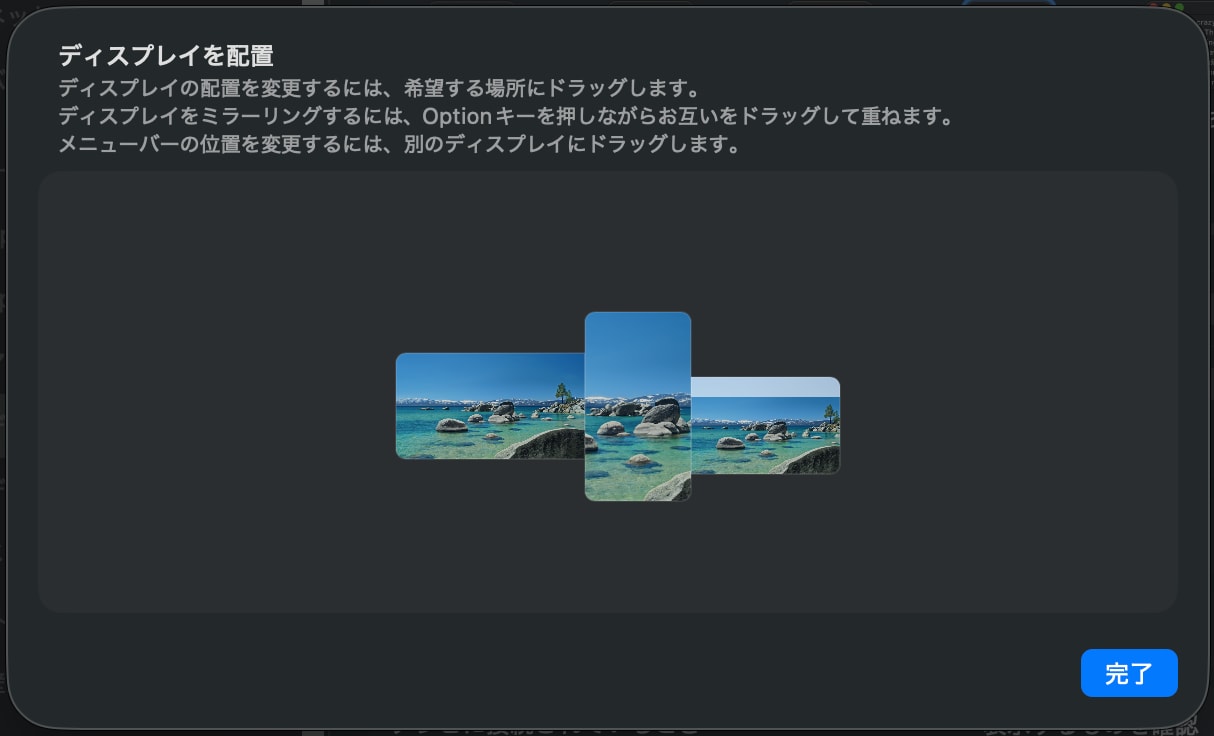
記録しておきたいディスプレイ配置を手動で設定します。
ターミナルで displayplacer list コマンドを実行します。
現在接続しているディスプレイの画面情報や可能な解像度、配置などが表示されるのですが、最終行に表示される displayplacer "id..." コマンドを実行することで、現在のディスプレイ解像度や配置の構成といった設定を適用することができます。
(略)
  mode 116: res:720x1280 hz:50 color_depth:8
  mode 117: res:900x1600 hz:60 color_depth:8

Execute the command below to set your screens to the current arrangement. If screen ids are switching, please run `displayplacer --help` for info on using contextual or serial ids instead of persistent ids.

displayplacer "id:37D8832A-2D66-02CA-B9F7-8F30A301B230 res:1512x982 hz:120 color_depth:8 enabled:true scaling:on origin:(0,0) degree:0" "id:4C1E7460-4839-4840-BFF5-697171F4D43F res:1920x1080 hz:60 color_depth:8 enabled:true scaling:off origin:(-3000,-246) degree:0" "id:E202B668-504F-4428-8758-252576E913AF res:1080x1920 hz:75 color_depth:8 enabled:true scaling:off origin:(-1080,-665) degree:270"
コマンドの動作確認
ディスプレイの配置を変更します。
先ほど取得したコマンドを実行します。
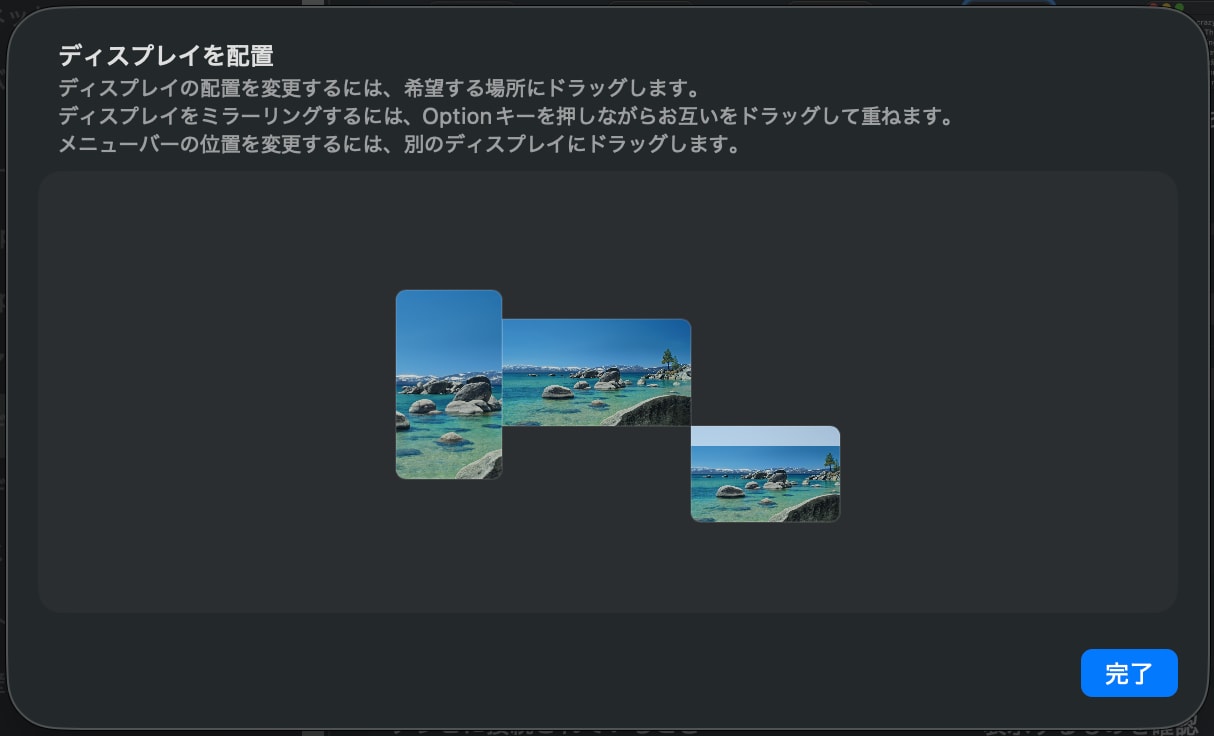
displayplacer "id:37D8832A-2D66-02CA-B9F7-8F30A301B230 res:1512x982 hz:120 color_depth:8 enabled:true scaling:on origin:(0,0) degree:0" "id:4C1E7460-4839-4840-BFF5-697171F4D43F res:1920x1080 hz:60 color_depth:8 enabled:true scaling:off origin:(-3000,-246) degree:0" "id:E202B668-504F-4428-8758-252576E913AF res:1080x1920 hz:75 color_depth:8 enabled:true scaling:off origin:(-1080,-665) degree:270"
記録したディスプレイの配置が反映されました。
Automatorでアプリとして配置を登録
シェルスクリプトを作成
今回発行したコマンドをシェルスクリプトとして保存し、Automatorから呼び出すことで、ディスプレイ設定を手軽に切り替えられるようにしてみます。
.shファイルを作成し、編集します。今回はDesktopに保存しました。
$touch ~/Desktop/Home-display.sh
$vim ~/Desktop/Home-display.sh
先頭に /opt/homebrew/bin/displayplacer をつけて、その後ろにコマンドを貼り付けます。
/opt/homebrew/bin/displayplacer "id:37D8832A-2D66-02CA-B9F7-8F30A301B230 res:1512x982 hz:120 color_depth:8 enabled:true scaling:on origin:(0,0) degree:0" "id:4C1E7460-4839-4840-BFF5-697171F4D43F res:1920x1080 hz:60 color_depth:8 enabled:true scaling:off origin:(-3000,-246) degree:0" "id:E202B668-504F-4428-8758-252576E913AF res:1080x1920 hz:75 color_depth:8 enabled:true scaling:off origin:(-1080,-665) degree:270"
~
(略)
~
"~/Desktop/Home-display.sh" 1L, 416B
作成したスクリプトファイルに実行権限を付与します。
$chmod +x ~/Desktop/Home-display.sh
Automatorでアプリとして登録
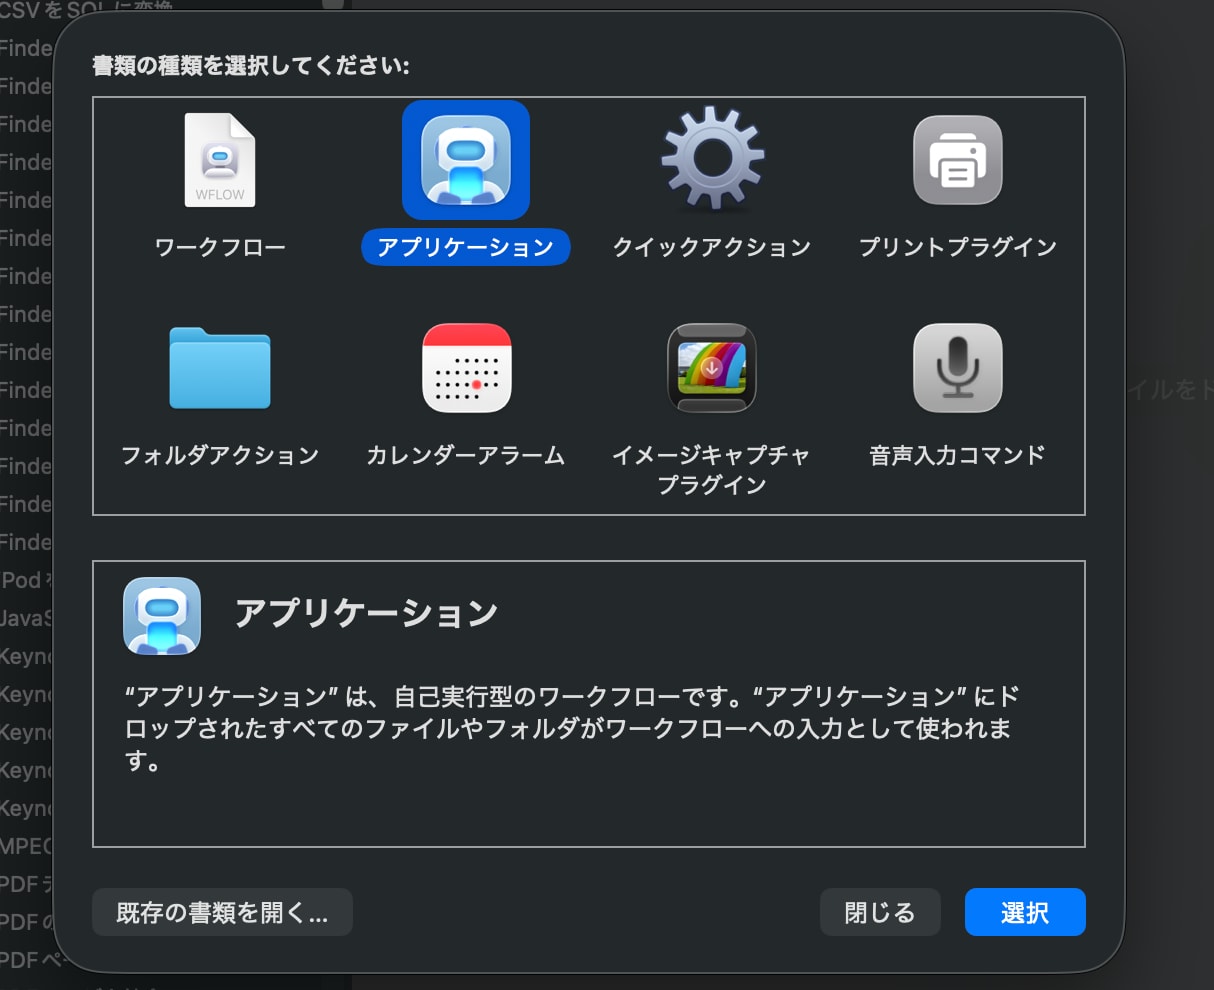
Automatorを起動して、「アプリケーション」を選択します。
[アクション]から、「AppleScriptを実行」を選択します。
以下のように設定しました。
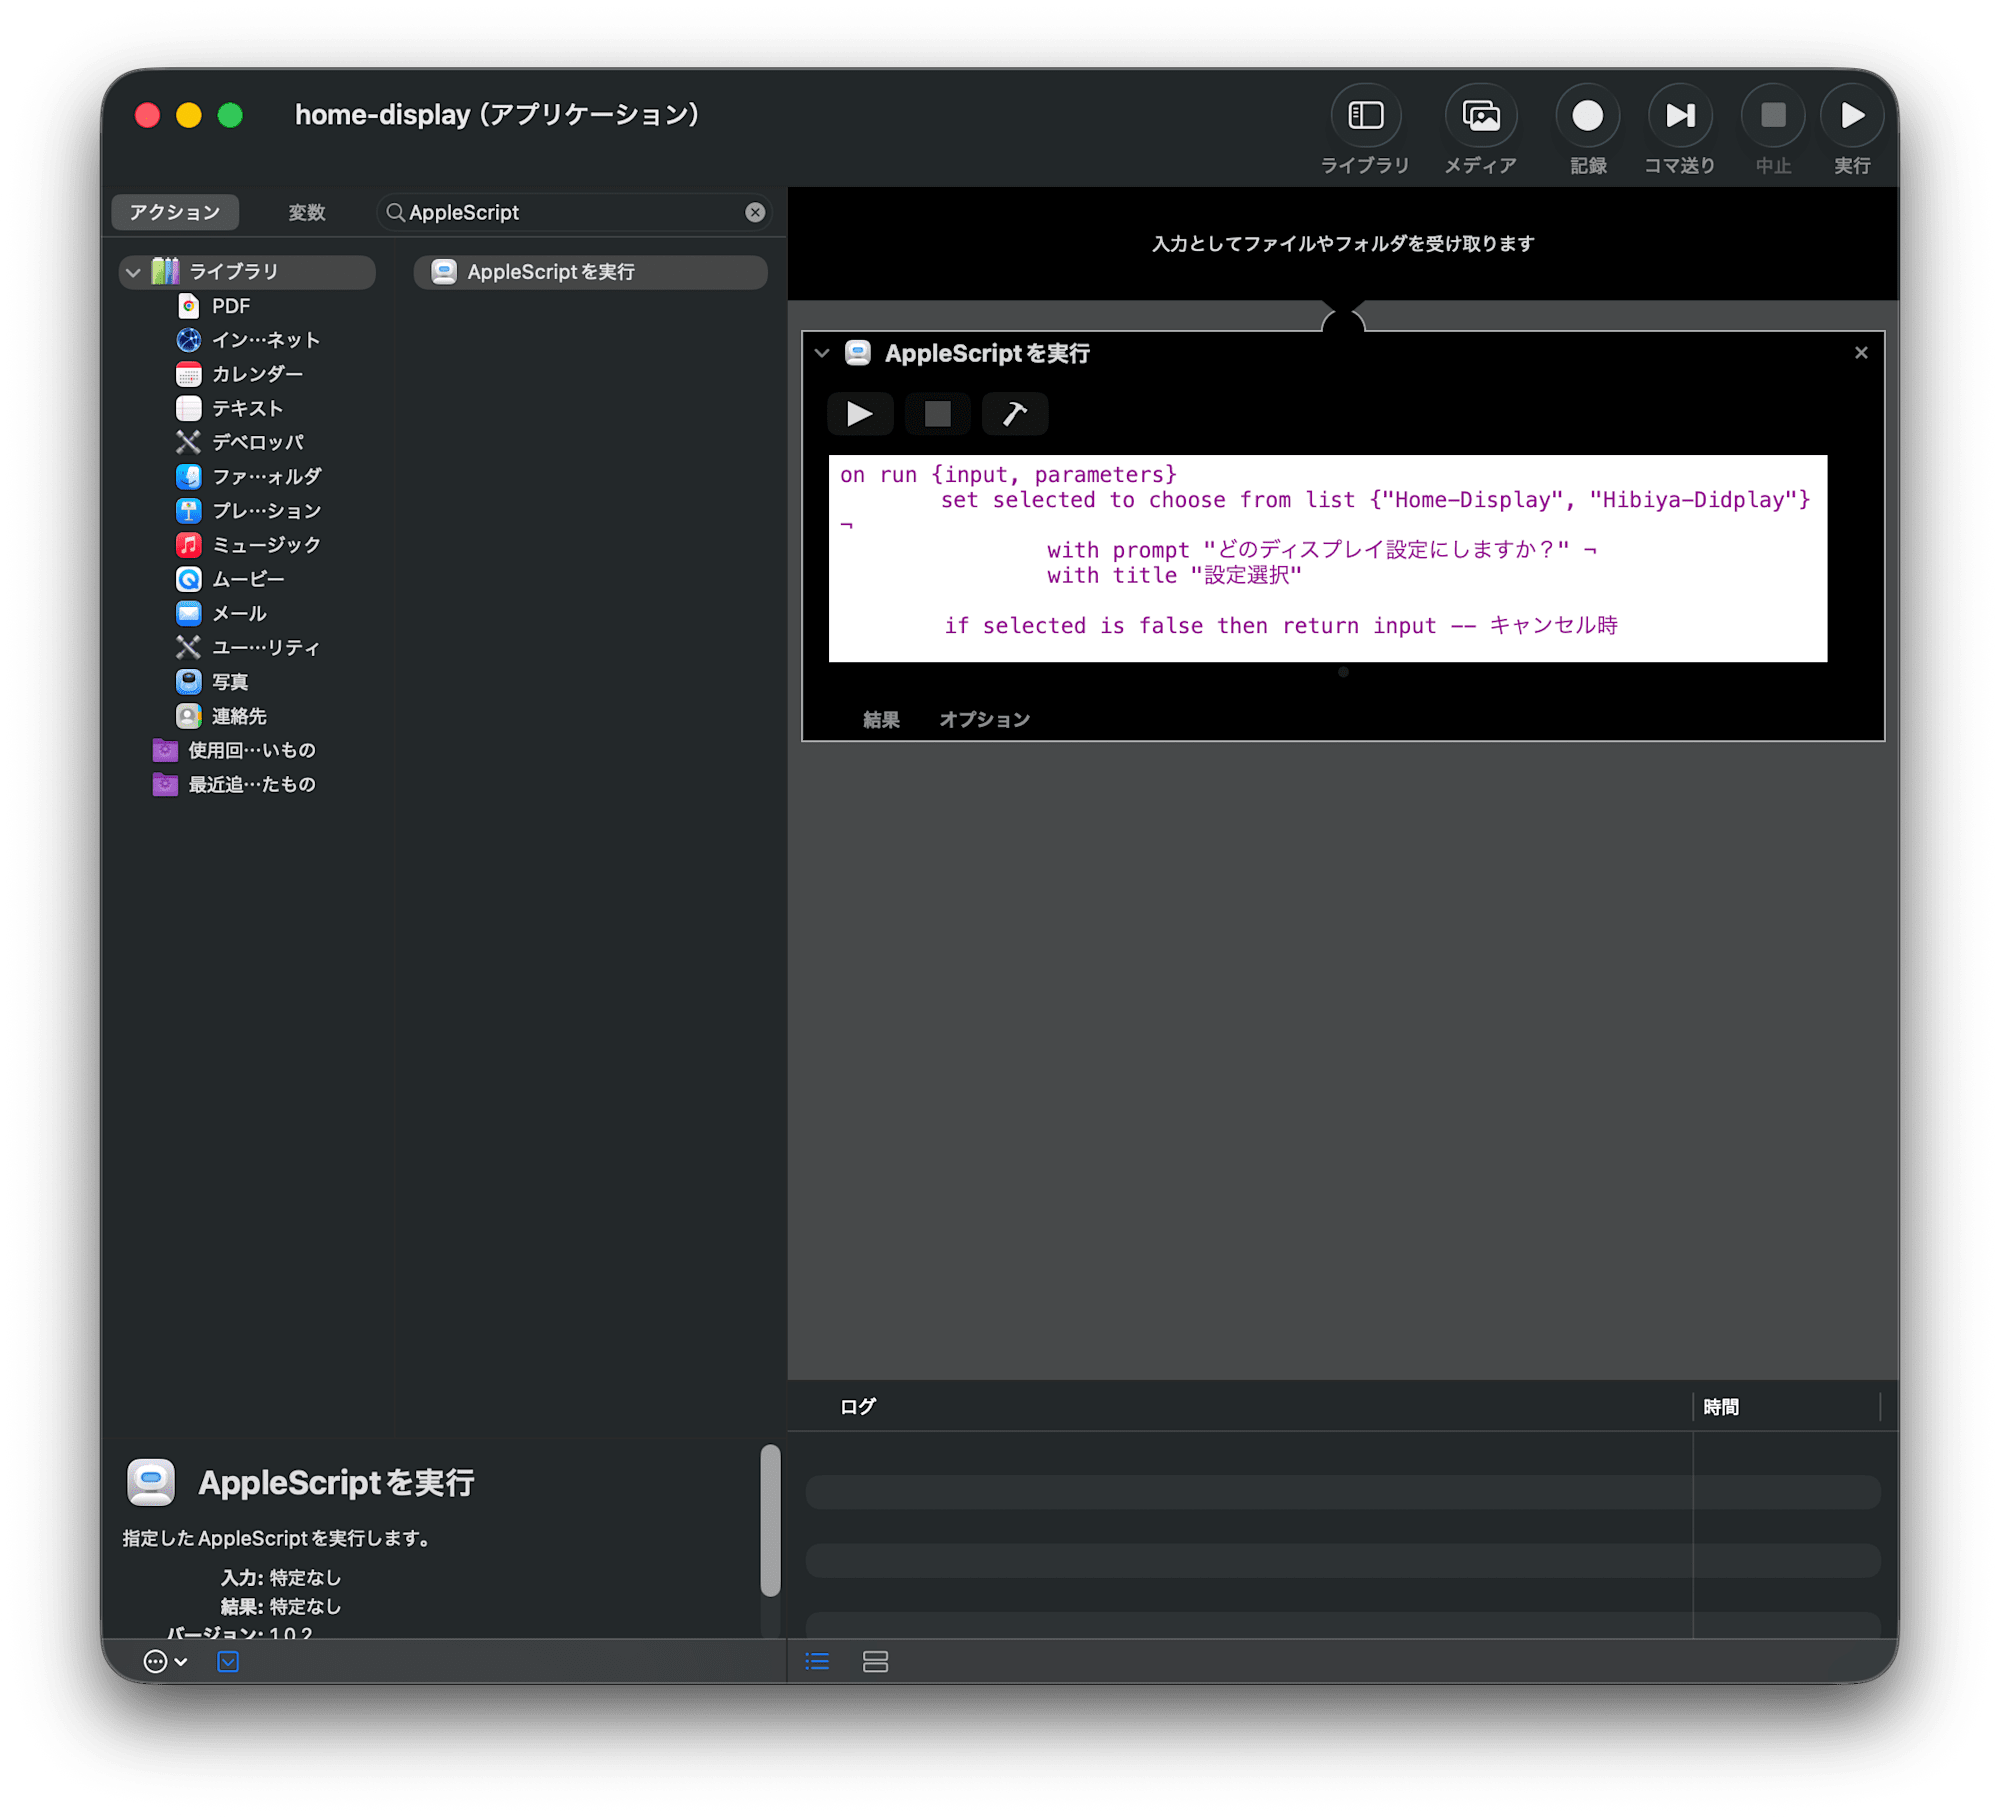
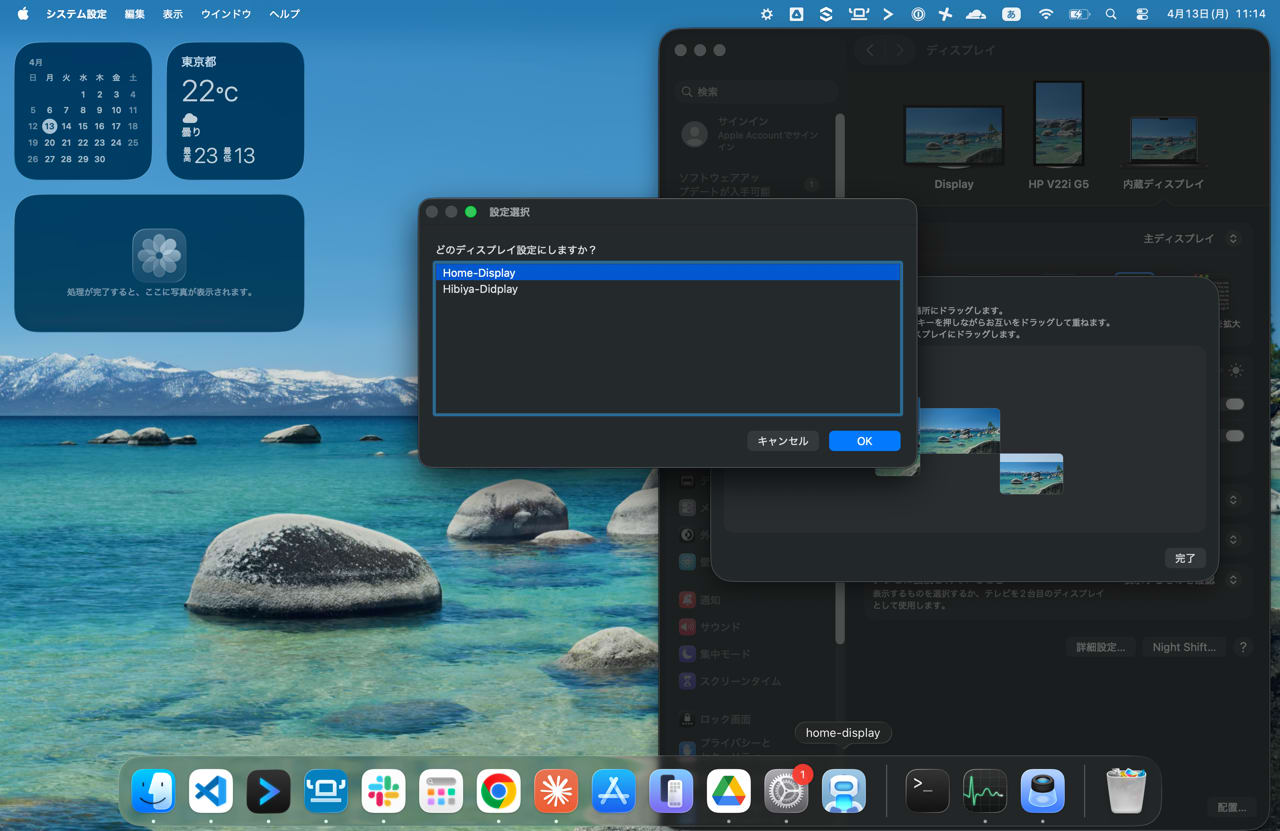
on run {input, parameters}
		set selected to choose from list {"Home-Display", "Hibiya-Didplay"} ¬
                with prompt "どのディスプレイ設定にしますか?" ¬
                with title "設定選択"

        if selected is false then return input -- キャンセル時

        set choice to item 1 of selected

        if choice is "Home-Display" then
                do shell script "/bin/zsh " & quoted form of "/Users/takeguchi.miori/Desktop/Home-display.sh"
        else if choice is "Hibiya-Didplay" then
                do shell script "/bin/zsh " & quoted form of "/Users/takeguchi.miori/Desktop/Hibiya-display.sh"
        end if

        return input
end run
アプリとして登録することができました。
おわりに
displayplacerとAutomatorを使うことで、複数のディスプレイ設定の切り替えを楽に行えるようにできました。
出先や家でのディスプレイ設定の切り替え作業に面倒を感じている方は、ぜひ試してみてください。
参考