![[Rust] Chrome ExtensionでGoogle Driveからダウンロードしたzipを操作する [WASM]](https://devio2023-media.developers.io/wp-content/uploads/2021/02/webassembly-eye.png)
[Rust] Chrome ExtensionでGoogle Driveからダウンロードしたzipを操作する [WASM]
この記事は公開されてから1年以上経過しています。情報が古い可能性がありますので、ご注意ください。
Introduction
諸事情により「zip形式の複数画像(jpg)をまとめたファイル」を簡単に見るための
Chrome Extensionを作成してます。
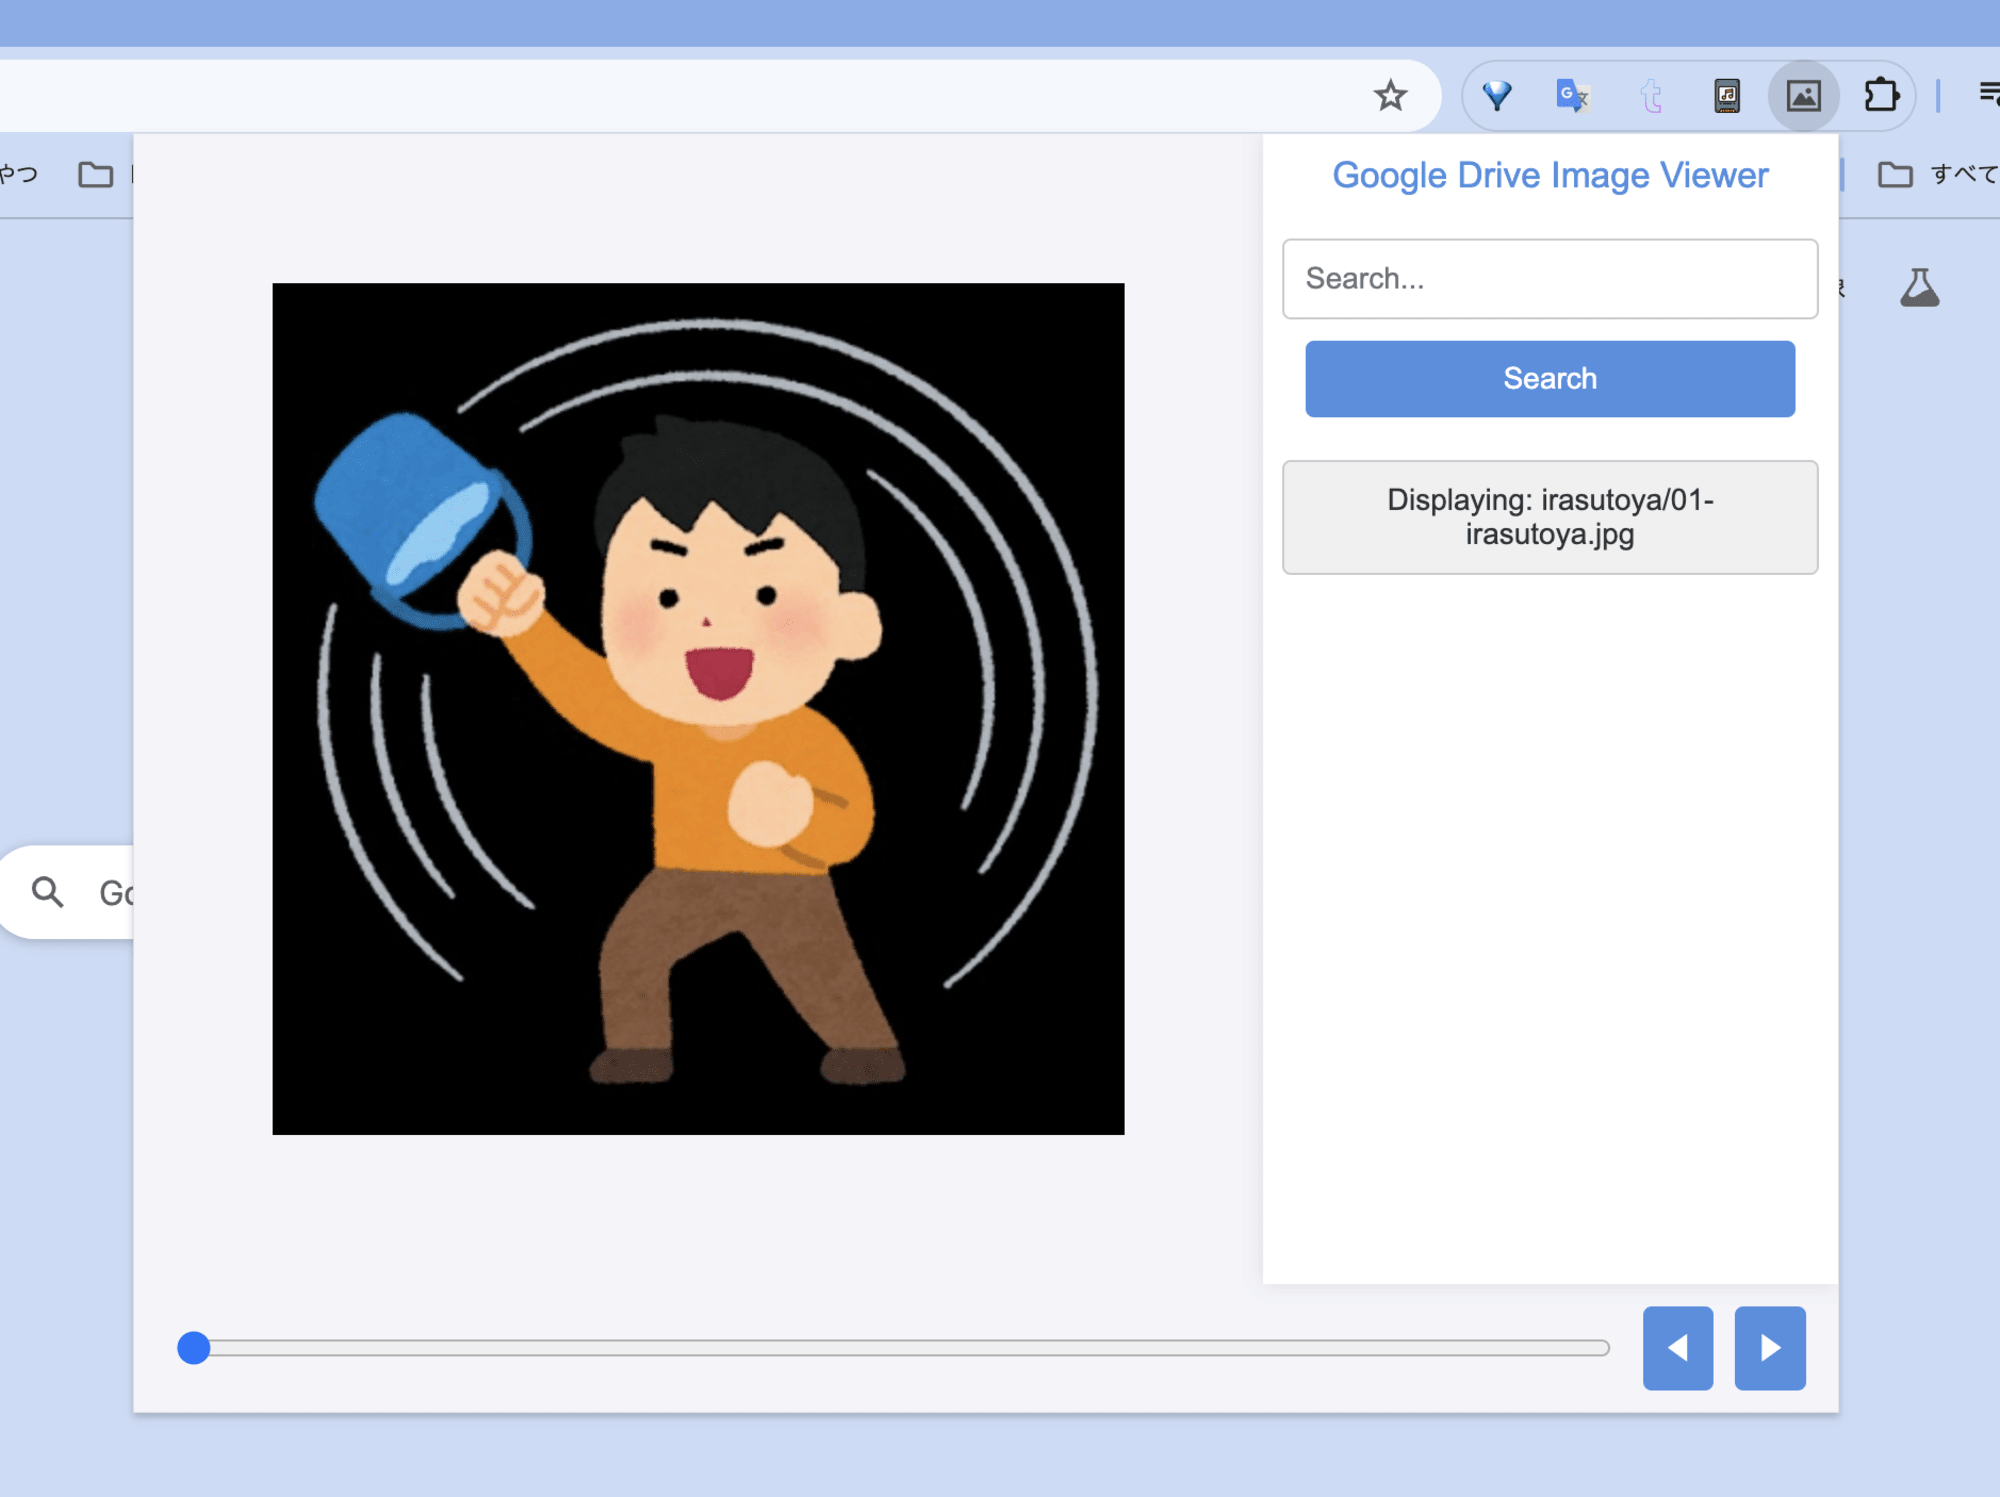
エクスプローラ風のダイアログでGoogle Drive上のzipファイルを指定すると
そのファイルをダウンロードしてzipファイルからindex指定でファイルを順番に取得するような処理を実装してます。
JSZipとかつかってjsだけでzipを展開して
画像を表示してもよいのですが、せっかくなのでRustでつくったWASMを実行してみました。
Environment
- MacBook Pro (14-inch, M3, 2023)
- OS : MacOS 14.5
- Rust : 1.79.0
- wasm-pack 0.12.1
- gh : 2.49.2
Try
まずはCargoでWASM用プロジェクトを作成します。
このWASMではzipファイルを操作するための関数を定義します。
% cargo new zip_extractor --lib
Cargo.tomlはこんな感じです。
解凍やランダムアクセス処理はzip crate使います。
その他wasm-bindgenとかもろもろ。
[package]
name = "zip_extractor"
version = "0.1.0"
edition = "2021"

[lib]
crate-type = ["cdylib"]

[features]
default = ["console_error_panic_hook"]

[dependencies]
zip = { version = "0.5.13", default-features = false, features = [ "deflate" ]}
serde = { version = "1.0", features = ["derive"] }
serde_json = "1.0"

console_error_panic_hook = { version = "0.1.6", optional = true }
wasm-bindgen = "0.2.92"
wasm-bindgen-futures = "0.4.42"
serde-wasm-bindgen = "0.6.5"

[dependencies.web-sys]
version = "0.3"
features = ["FileReader", "File","console"]

[dependencies.log]
version = "0.4"

[dependencies.console_log]
version = "0.2"

[profile.release]
opt-level = "z"
lto = true
WASMでは2つの関数を定義します。
1つはzipバイナリをうけとって、アーカイブされているファイル名一覧を返す、
list_files_in_zip関数。
&[u8]でzipバイナリを受けとり、zip crateをつかって
アーカイブされているファイル一覧を取得します。
#[wasm_bindgen]
pub fn list_files_in_zip(data: &[u8]) -> Result<JsValue, JsValue> {
    info!("Received data of length: {}", data.len());

    let cursor = Cursor::new(data);
    let mut zip = ZipArchive::new(cursor).map_err(|_| JsValue::from_str("Failed to read ZIP archive"))?;

    let mut file_names = Vec::new();
    for i in 0..zip.len() {
        let file = zip.by_index(i).map_err(|_| JsValue::from_str("Failed to read file from ZIP archive"))?;

        let file_name = match String::from_utf8(file.name_raw().to_vec()) {
            Ok(name) => name,
            Err(_) => {
                info!("Failed to decode file name as UTF-8");
                return Err(JsValue::from_str("Failed to decode file name as UTF-8"));
            }
        };
        file_names.push(file_name);
    }

    Ok(to_value(&file_names).unwrap_or(JsValue::from_str("[]")))
}
こちらはzipバイナリとindex指定でファイルを取得するための関数です。
by_indexを使い、index指定でほしいファイルを取得しています。
だいたい実行速度は20ms〜30msくらいでした。
#[wasm_bindgen]
pub fn extract_index_from_zip(data: &[u8], index: usize) -> Result<JsValue, JsValue> {
    info!("Received data of length: {}", data.len());
    info!("Looking for file at index: {}", index);

    let cursor = Cursor::new(data);
    let mut zip = ZipArchive::new(cursor).map_err(|_| JsValue::from_str("Failed to read ZIP archive"))?;

    let mut file = zip.by_index(index).map_err(|_| {
        info!("File not found at index: {}", index);
        JsValue::from_str("File not found in ZIP archive")
    })?;

    let mut file_data = Vec::new();
    file.read_to_end(&mut file_data).map_err(|_| JsValue::from_str("Failed to read file data"))?;
    info!("Found file at index: {}", index);

    Ok(to_value(&file_data).map_err(|_| JsValue::from_str("Failed to convert file data to JsValue"))?)
}
WASMモジュール全文はこちら。
use wasm_bindgen::prelude::*;
use zip::read::ZipArchive;
use std::io::{Cursor, Read};
use serde_wasm_bindgen::to_value;
use log::info;

#[wasm_bindgen(start)]
pub fn main() {
    console_log::init_with_level(log::Level::Debug).expect("error initializing log");
    console_error_panic_hook::set_once();
}

#[wasm_bindgen]
pub fn extract_index_from_zip(data: &[u8], index: usize) -> Result<JsValue, JsValue> {
    info!("Received data of length: {}", data.len());
    info!("Looking for file at index: {}", index);

    let cursor = Cursor::new(data);
    let mut zip = ZipArchive::new(cursor).map_err(|_| JsValue::from_str("Failed to read ZIP archive"))?;

    // Use by_index to find the file directly by its index
    let mut file = zip.by_index(index).map_err(|_| {
        info!("File not found at index: {}", index);
        JsValue::from_str("File not found in ZIP archive")
    })?;

    let mut file_data = Vec::new();
    file.read_to_end(&mut file_data).map_err(|_| JsValue::from_str("Failed to read file data"))?;
    info!("Found file at index: {}", index);

    Ok(to_value(&file_data).map_err(|_| JsValue::from_str("Failed to convert file data to JsValue"))?)
}

#[wasm_bindgen]
pub fn list_files_in_zip(data: &[u8]) -> Result<JsValue, JsValue> {
    info!("Received data of length: {}", data.len());

    let cursor = Cursor::new(data);
    let mut zip = ZipArchive::new(cursor).map_err(|_| JsValue::from_str("Failed to read ZIP archive"))?;

    let mut file_names = Vec::new();
    for i in 0..zip.len() {
        let file = zip.by_index(i).map_err(|_| JsValue::from_str("Failed to read file from ZIP archive"))?;

        let file_name = match String::from_utf8(file.name_raw().to_vec()) {
            Ok(name) => name,
            Err(_) => {
                info!("Failed to decode file name as UTF-8");
                return Err(JsValue::from_str("Failed to decode file name as UTF-8"));
            }
        };
        file_names.push(file_name);
    }

    Ok(to_value(&file_names).unwrap_or(JsValue::from_str("[]")))
}
あとはwasmpackでビルドします。
target webを忘れずに。
% wasm-pack build --target web
[INFO]: 🎯  Checking for the Wasm target...
[INFO]: 🌀  Compiling to Wasm...
    Finished `release` profile [optimized] target(s) in 0.02s
[INFO]: Optimizing wasm binaries with `wasm-opt`...
[INFO]: Optional fields missing from Cargo.toml: 'description', 'repository', and 'license'. These are not necessary, but recommended
[INFO]: ✨   Done in 0.43s
[INFO]: 📦   Your wasm pkg is ready to publish at /・・・/pkg.
ビルドは成功すると、pkgディレクトリに各種ファイル(wasmとかjs)が生成されます。
Chrome Extensionから使う
あとは生成されたwasmファイル郡を
Chrome Extension用ディレクトリにコピーすれば使用できます。
ExtensionのソースはGenAIに聞けばいくらでも答えてくれるので、
関係ありそうなところだけ抜粋します。
manifest.jsonは以下のような感じです。
content_security_policyでWASMを使えるように設定しておきます。
{
    "manifest_version": 3,
    "name": "Hoge Viewer",
    "version": "1.0",
    "permissions": ["identity", "downloads", "storage"],
    "host_permissions": ["https://www.googleapis.com/"],
    "action": {
      "default_popup": "popup.html",
      "default_icon": {
        "16": "images/icon16.png",
        "48": "images/icon48.png",
        "128": "images/icon128.png"
      }
    },
    "content_security_policy": {
      "extension_pages": "script-src 'self' 'wasm-unsafe-eval'"
    }
  }
popupから使用されるスクリプトでは
WASM関数のimportを初期化を行います。
//popup.js
import init, { list_files_in_zip, extract_index_from_zip } from '../pkg/zip_extractor.js';

document.addEventListener('DOMContentLoaded', async () => {
  await init();
});
Google Driveからzipをダウンロードする関数は下記のような感じです。
GCPのコンソールとmanifest.jsonで
OAuth2の設定を適切にしておく必要があります。
ダウンロードしたzipをUint8Arrayでwrapして
WASMのlist_files_in_zipに渡します。
var fileList;
var zipData;

function downloadAndExtractZip(fileId) {
  chrome.identity.getAuthToken({ interactive: true }, (token) => {
    fetch(`https://www.googleapis.com/drive/v3/files/${fileId}?alt=media`, {
      headers: {
        Authorization: 'Bearer ' + token,
      },
    })
      .then((response) => response.arrayBuffer())
      .then((arrayBuffer) => {
        zipData = new Uint8Array(arrayBuffer);
        const fileListData = list_files_in_zip(zipData);
        // インデックスとファイル名をセットにしてオブジェクトに保存
        fileList = fileListData.map((name, index) => ({ index, name }));
      })
      .catch((error) => {
        console.error('Error:', error);
      });
  });
}
この関数はindexを指定してzipファイルから
任意の位置にある画像ファイルを取得します。
function showImage(index) {
    try {
      const fileIndex = fileList[currentIndex].index;
      const fileData = extract_index_from_zip(zipData, index);
      const blob = new Blob([new Uint8Array(fileData)], { type: 'image/jpeg' });
      const url = URL.createObjectURL(blob);
      //popup.htmlのimageに設定
      document.getElementById('image-viewer').src = url;
    } catch (error) {
      console.error('Error extracting file:', error);
    }
}
これで、Chrome Extensionでzipに圧縮された複数画像を
Google Driveからダウンロードして表示するビューアが実現できます。
Summary
今回はRustでzip操作するWASMを実装して
Chrome Extensionから使ってみました。
wasmpackが楽すぎます。
また、wee_allocとか使えばWASMのサイズを削減できたりするので、
もっと使いやすくなるかもしれません。