かんたん!VS Code拡張機能開発
この記事は公開されてから1年以上経過しています。情報が古い可能性がありますので、ご注意ください。
こんにちは、CX事業本部 IoT事業部の若槻です。
今回は、VS Code拡張機能(Extension)の開発手順について簡潔にまとめたのでご紹介します。
前回のエントリでもVS Code拡張を作成しました。既存ブログなどを見ながら四苦八苦して実装したのですが、手順自体は意外と簡単でした。
手順概要
VS Code拡張機能を開発する手順は以下のようになります。
- プロジェクト作成(yoコマンドで1発)
- コマンド内容を実装(JS/TSで処理を記述)
- コマンドの呼び出され方を定義(package.jsonを編集)
- 動作確認(VS Codeのデバッガーを使用)
- VS Codeで拡張機能として利用可能にする(vsixファイルに変換してインポート)
なお、ここで紹介するのは自分で開発して自分で使うExtensionを作る想定の手順です。マーケットプレイスへの公開手順は紹介しません。(ただし公開手順も難しくはないようです)
手順
1. プロジェクト作成
プロジェクトの作成はYeoman(yo)を使用するのが一番簡単です。Yeomanでは予め用意した雛形に則ってプロジェクト初期化を行えるモジュールです。
まずgenerator-codeをグローバルインストールします。これをYoemanで使用するとVS Code拡張のプロジェクトの雛形を生成できます。
$ npm install -g generator-code
yo codeを実行すると、generator-codeを使用してVS Code拡張のプロジェクト作成が開始されます。変なおじさんが出てきていくつか項目の指定を求められます。
$ npx yo code

     _-----_     ╭──────────────────────────╮
    |       |    │   Welcome to the Visual  │
    |--(o)--|    │   Studio Code Extension  │
   `---------´   │        generator!        │
    ( _´U`_ )    ╰──────────────────────────╯
    /___A___\   /
     |  ~  |
   __'.___.'__
 ´   `  |° ´ Y `

? What type of extension do you want to create? New Extension (TypeScript)
? What's the name of your extension? vs-devio-opener
? What's the identifier of your extension? vs-devio-opener
? What's the description of your extension?
? Initialize a git repository? Yes
? Bundle the source code with webpack? Yes
? Which package manager to use? npm
項目の指定は上から、
- コマンドをJavaScript/TypeScriptのいずれで開発するかの選択
- Extension名の指定
- ExtensionIDの指定(Extension名と同じでもOK)
- Extensionの説明(必須ではない)
- Git Initするかどうか
- Webpackを使うかどうか(モジュールのバンドリングをするならYes)
- パッケージマネージャーの選択(npm/npmp/yarn)
という内容です。
実行を完了すると、指定したエクステンション名(vs-devio-opener)のプロジェクトディレクトリが作成できました。

2. コマンド内容を実装
VS Code拡張の実体はCommands(コマンド)です。(Command Paletteから実行できるあれです。)
コマンドの処理内容はextension.tsで記述します。既定で作成されるファイル内容は下記になります。
// The module 'vscode' contains the VS Code extensibility API
// Import the module and reference it with the alias vscode in your code below
import * as vscode from 'vscode';

// This method is called when your extension is activated
// Your extension is activated the very first time the command is executed
export function activate(context: vscode.ExtensionContext) {
  // Use the console to output diagnostic information (console.log) and errors (console.error)
  // This line of code will only be executed once when your extension is activated
  console.log(
    'Congratulations, your extension "vs-devio-opener" is now active!'
  );

  // The command has been defined in the package.json file
  // Now provide the implementation of the command with registerCommand
  // The commandId parameter must match the command field in package.json
  let disposable = vscode.commands.registerCommand(
    'vs-devio-opener.helloWorld',
    () => {
      // The code you place here will be executed every time your command is executed
      // Display a message box to the user
      vscode.window.showInformationMessage('Hello World from vs-devio-opener!');
    }
  );

  context.subscriptions.push(disposable);
}

// This method is called when your extension is deactivated
export function deactivate() {}
上記を必要最低限な記述にするとこうなります。
import * as vscode from 'vscode';

export function activate(context: vscode.ExtensionContext) {

  let disposable = vscode.commands.registerCommand(
    'vs-devio-opener.helloWorld',
    () => {
      vscode.window.showInformationMessage('Hello World from vs-devio-opener!');
    }
  );

  context.subscriptions.push(disposable);
}
vscode.window.showInformationMessage()でメッセージ表示をする処理を、vscode.commands.registerCommandで登録しています。このコマンドの登録処理は必須となります。
これらvscode.XXXX.hogehogeはVS Code APIの一種で、一覧は下記から確認可能です。
3. コマンドの呼び出され方を定義
そして同じく既定で作成されたファイルpackage.jsonでは、extension.tsで登録したコマンドの実行のされ方を定義しています。
{
  "activationEvents": [
    "onCommand:vs-devio-opener.helloWorld"
  ],
  //省略,
  "contributes": {
    "commands": [
      {
        "command": "vs-devio-opener.helloWorld",
        "title": "Hello World"
      }
    ]
  },
}
activationEventsでは、どのコマンドがどのイベント発生時に呼び出される(アクティベートされる)かを定義します。上記ではonCommand:vs-devio-opener.helloWorldと指定することにより、vs-devio-opener.helloWorld明示的に呼び出された時にそのコマンドがアクティベートされるようになります。利用可能なActivation Events一覧は下記で確認可能です。
一方でcontributes.commandsでは、コマンドに付与する呼び出しUIを定義します。上記ではvs-devio-opener.helloWorldコマンドをHello Worldというタイトルで呼び出せるようになっています。
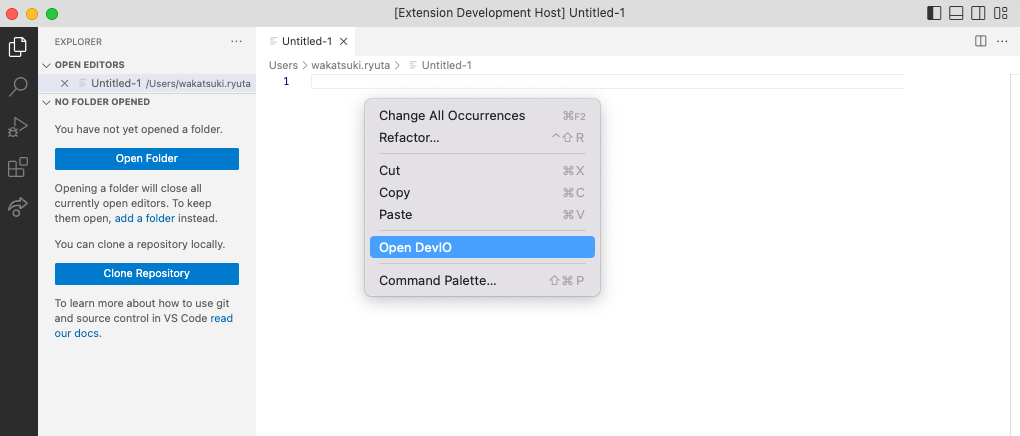
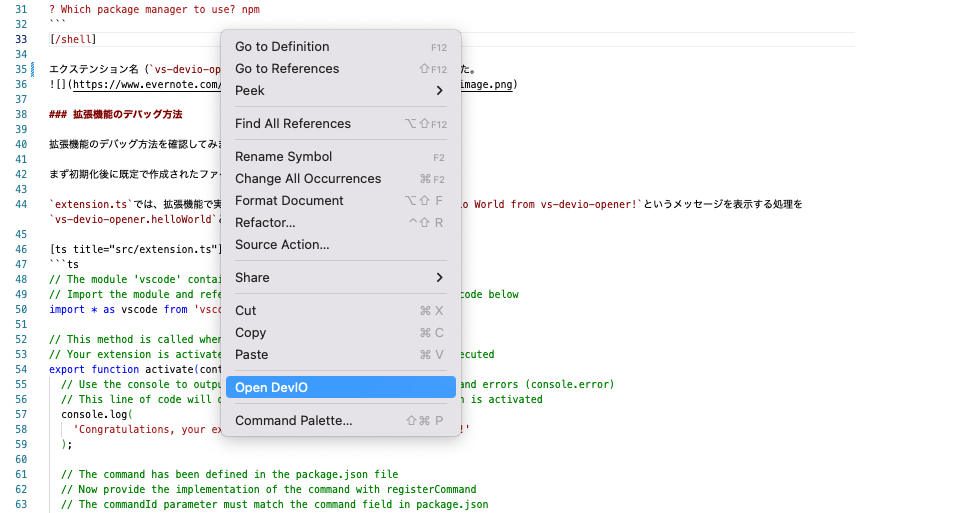
そしてさらにcontributes.menusを定義すれば、コマンドをCommand Palette以外から呼び出せるようになります。例えば下記のようにcontributes.menusでeditor/contexを定義すると、エディター画面でのコンテキストメニューからコマンドを呼び出せるようになります。
  "activationEvents": [
    "onCommand:vscode-context.openDevio"
  ],
  "main": "./dist/extension.js",
  "contributes": {
    "commands": [
      {
        "command": "vscode-context.openDevio",
        "title": "Open DevIO"
      }
    ],
    "menus": {
      "editor/context": [
        {
          "when": "editorFocus",
          "command": "vscode-context.openDevio",
          "group": "myGroup@1"
        }
      ]
    }
  }
}
利用可能なcontributes.menus一覧は下記で確認可能です。
4. 動作確認
Extensionの動作確認はVS Codeのデバッガーで実施可能です。
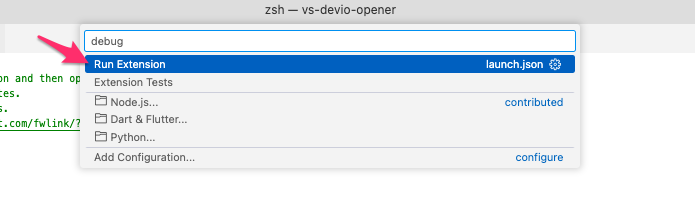
VS Codeのデバッガーで[Run Extension]をクリック。

Command Paletteで[Run Extension]を選択。
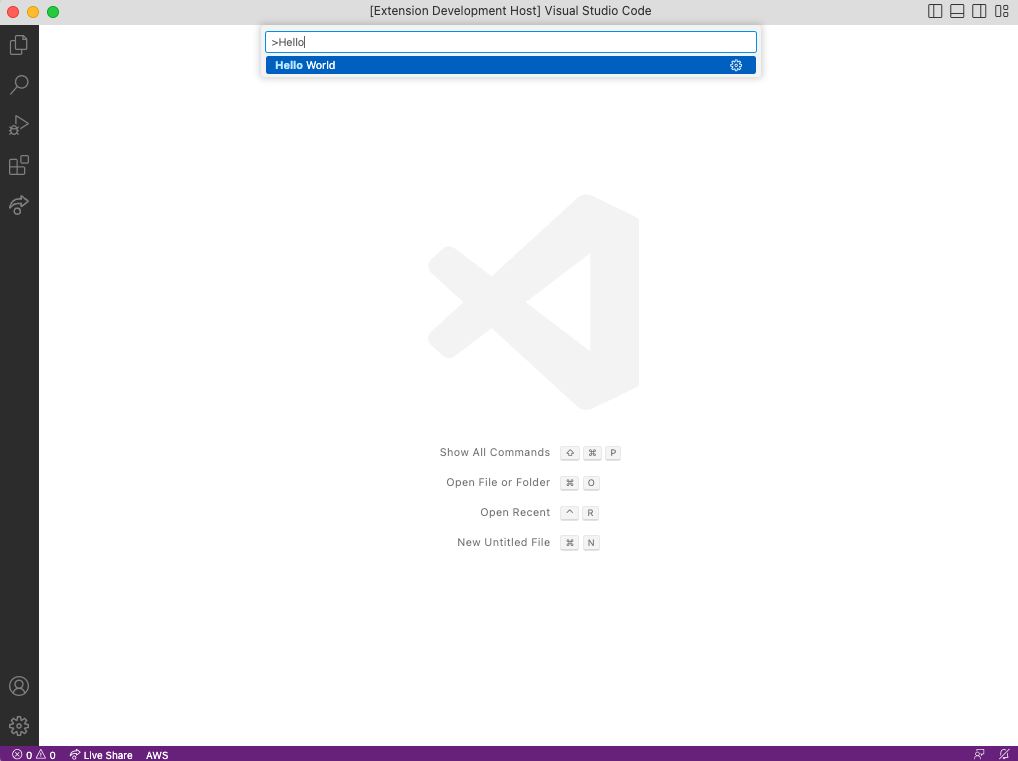
すると別ウィンドウが開くので、Command PaletteでHello Worldを実行します。
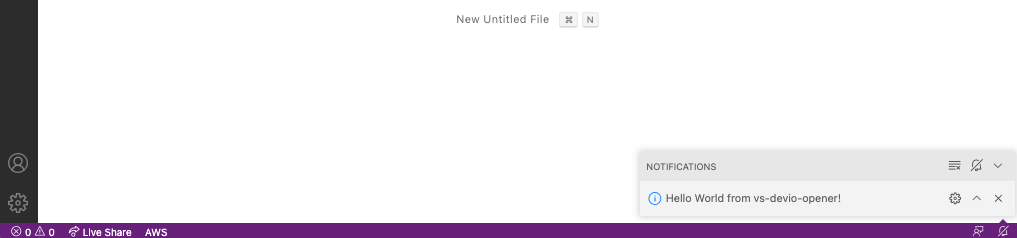
通知欄にメッセージが表示されました。デバッグで動かせましたね。
もちろん、contributes.menusの定義によりコンテキストメニューに登録されていれば、そこからも実行可能です。
5. VS Codeで拡張機能として利用可能にする
動作確認が出来たら、いよいよ実際にVS CodeでExtensionとして利用できるようにします。
まずREADMEを編集します。(デフォルトの内容のままだとvsce package実行時にエラーとなるため。)自分だけが使うのであれば簡単な内容で結構です。
# vs-devio-opener README

指定したDevelopersIOのページを開ける拡張機能です。
次のvsce packageを実行してプロジェクトをパッケージします。vsceはVisual Studio Code Extension Managerです。
npx vsce package
実行するとプロジェクトフォルダ内にvsixファイルが生成されます。
$ ls vs-devio-opener-0.0.1.vsix
vs-devio-opener-0.0.1.vsix
VS Codeの[install from VSIX]でvsixファイルを読み込みます。

これにより登録したコマンドをVS Code拡張として呼び出せるようになりました。
補足:拡張機能の公開
VS Code Extensionの公開もvsceの実行で行えます。詳しくは下記をご覧ください。
おわりに
VS Code拡張機能(Extension)の開発手順について簡潔にまとめてみました。
皆さんも自分だけのExtensionを作ってVS Codeでの開発作業の効率化を図っていきましょう。
以上


