![[アップデート] Amazon Location Serviceに住所入力フォームを作成できるツールが追加されました](https://images.ctfassets.net/ct0aopd36mqt/wp-thumbnail-f36cef9ba3ca42e18d3618d0cc78cf76/4d0e1f809e52df6a5080f28b41bd9109/amazon-location-service?w=3840&fm=webp)
[アップデート] Amazon Location Serviceに住所入力フォームを作成できるツールが追加されました
こんにちは、クラウド事業本部 コンサルティング部の荒平(@eiraces)です。
AWS re:Invent 2025は現地参加しています!
タイトル通り、Amazon Location Serviceに住所入力フォーム作成の補助をするツールが登場しました。
ノーコードで作成でき、出力したコードをサイトなどに組み込むことができます。
Today, AWS announced Address Form Solution Builder from Amazon Location Service, enabling developers to build a customized address form, without writing any code, that helps their users enter their address with predictive suggestions, autofill address fields such as postal code, and customizable layout. This guided experience allows developers to generate a ready-to-use application in minutes and download the developer package in React JavaScript, React Typescript, or Standalone HTML/JavaScript.
(機械翻訳)
本日、AWSはAmazon Location ServiceからAddress Form Solution Builderを発表しました。これにより、開発者はコードを書くことなく、予測候補の表示や郵便番号などの住所フィールドの自動入力、カスタマイズ可能なレイアウトなどを備えた、ユーザーが住所を入力しやすいようにカスタマイズされた住所フォームを構築できます。このガイド付きエクスペリエンスにより、開発者はすぐに使えるアプリケーションを数分で生成し、React JavaScript、React Typescript、またはスタンドアロンHTML/JavaScriptで開発者パッケージをダウンロードできます。
先にまとめ
- Address Form Solution Builderは住所入力フォームを作成できる
- レイアウトはある程度のカスタマイズが可能
- React, HTML+JSで出力可能
- ユーザーの入力時間減少やミスの低減が図れることがメリット
やってみる
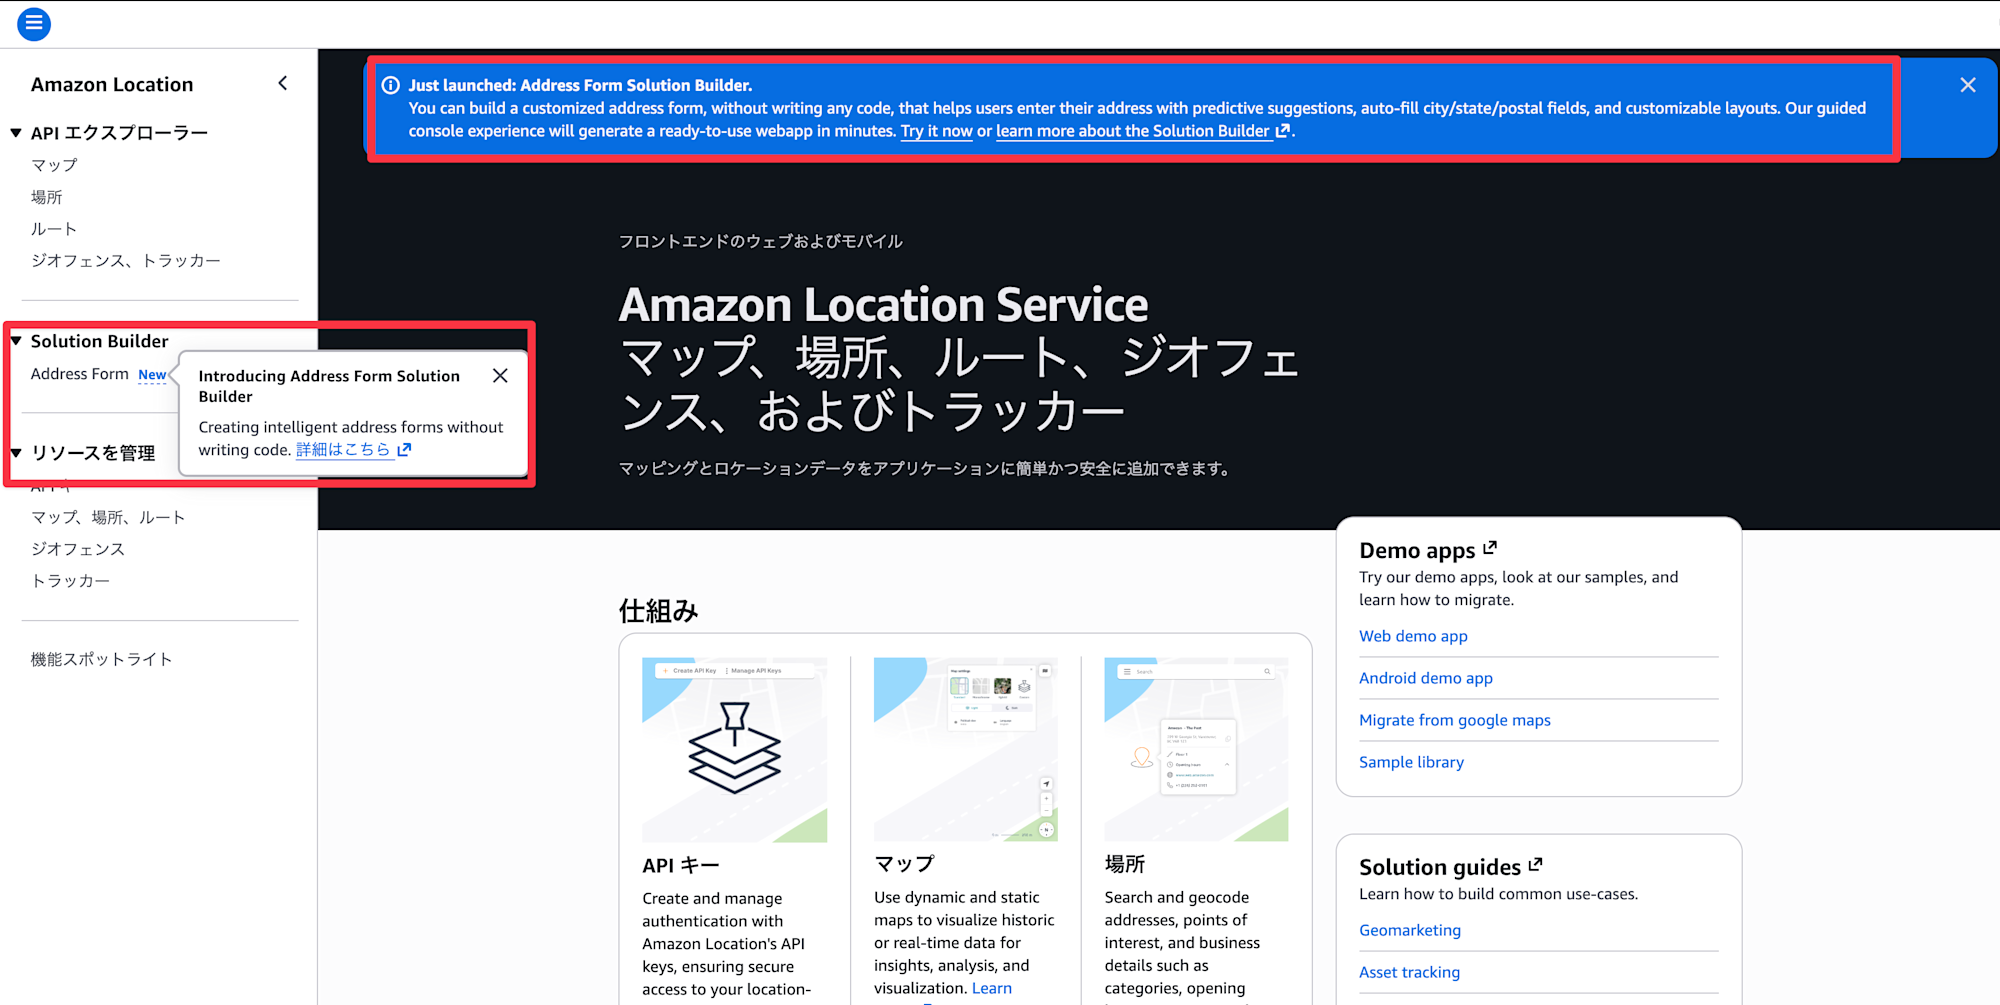
既に東京リージョンでも使えるようになっているので、触ってみます。
(Just launched: Address Form Solution Builder と表示されています!)
デフォルトのレイアウトは以下の通りになっています。住所が左、地図が右という感じですね。

地図の場所や、表示する項目を消したり、追加したりができそうです。
デフォルトの項目より多く表示することは確認時点ではできませんでした。

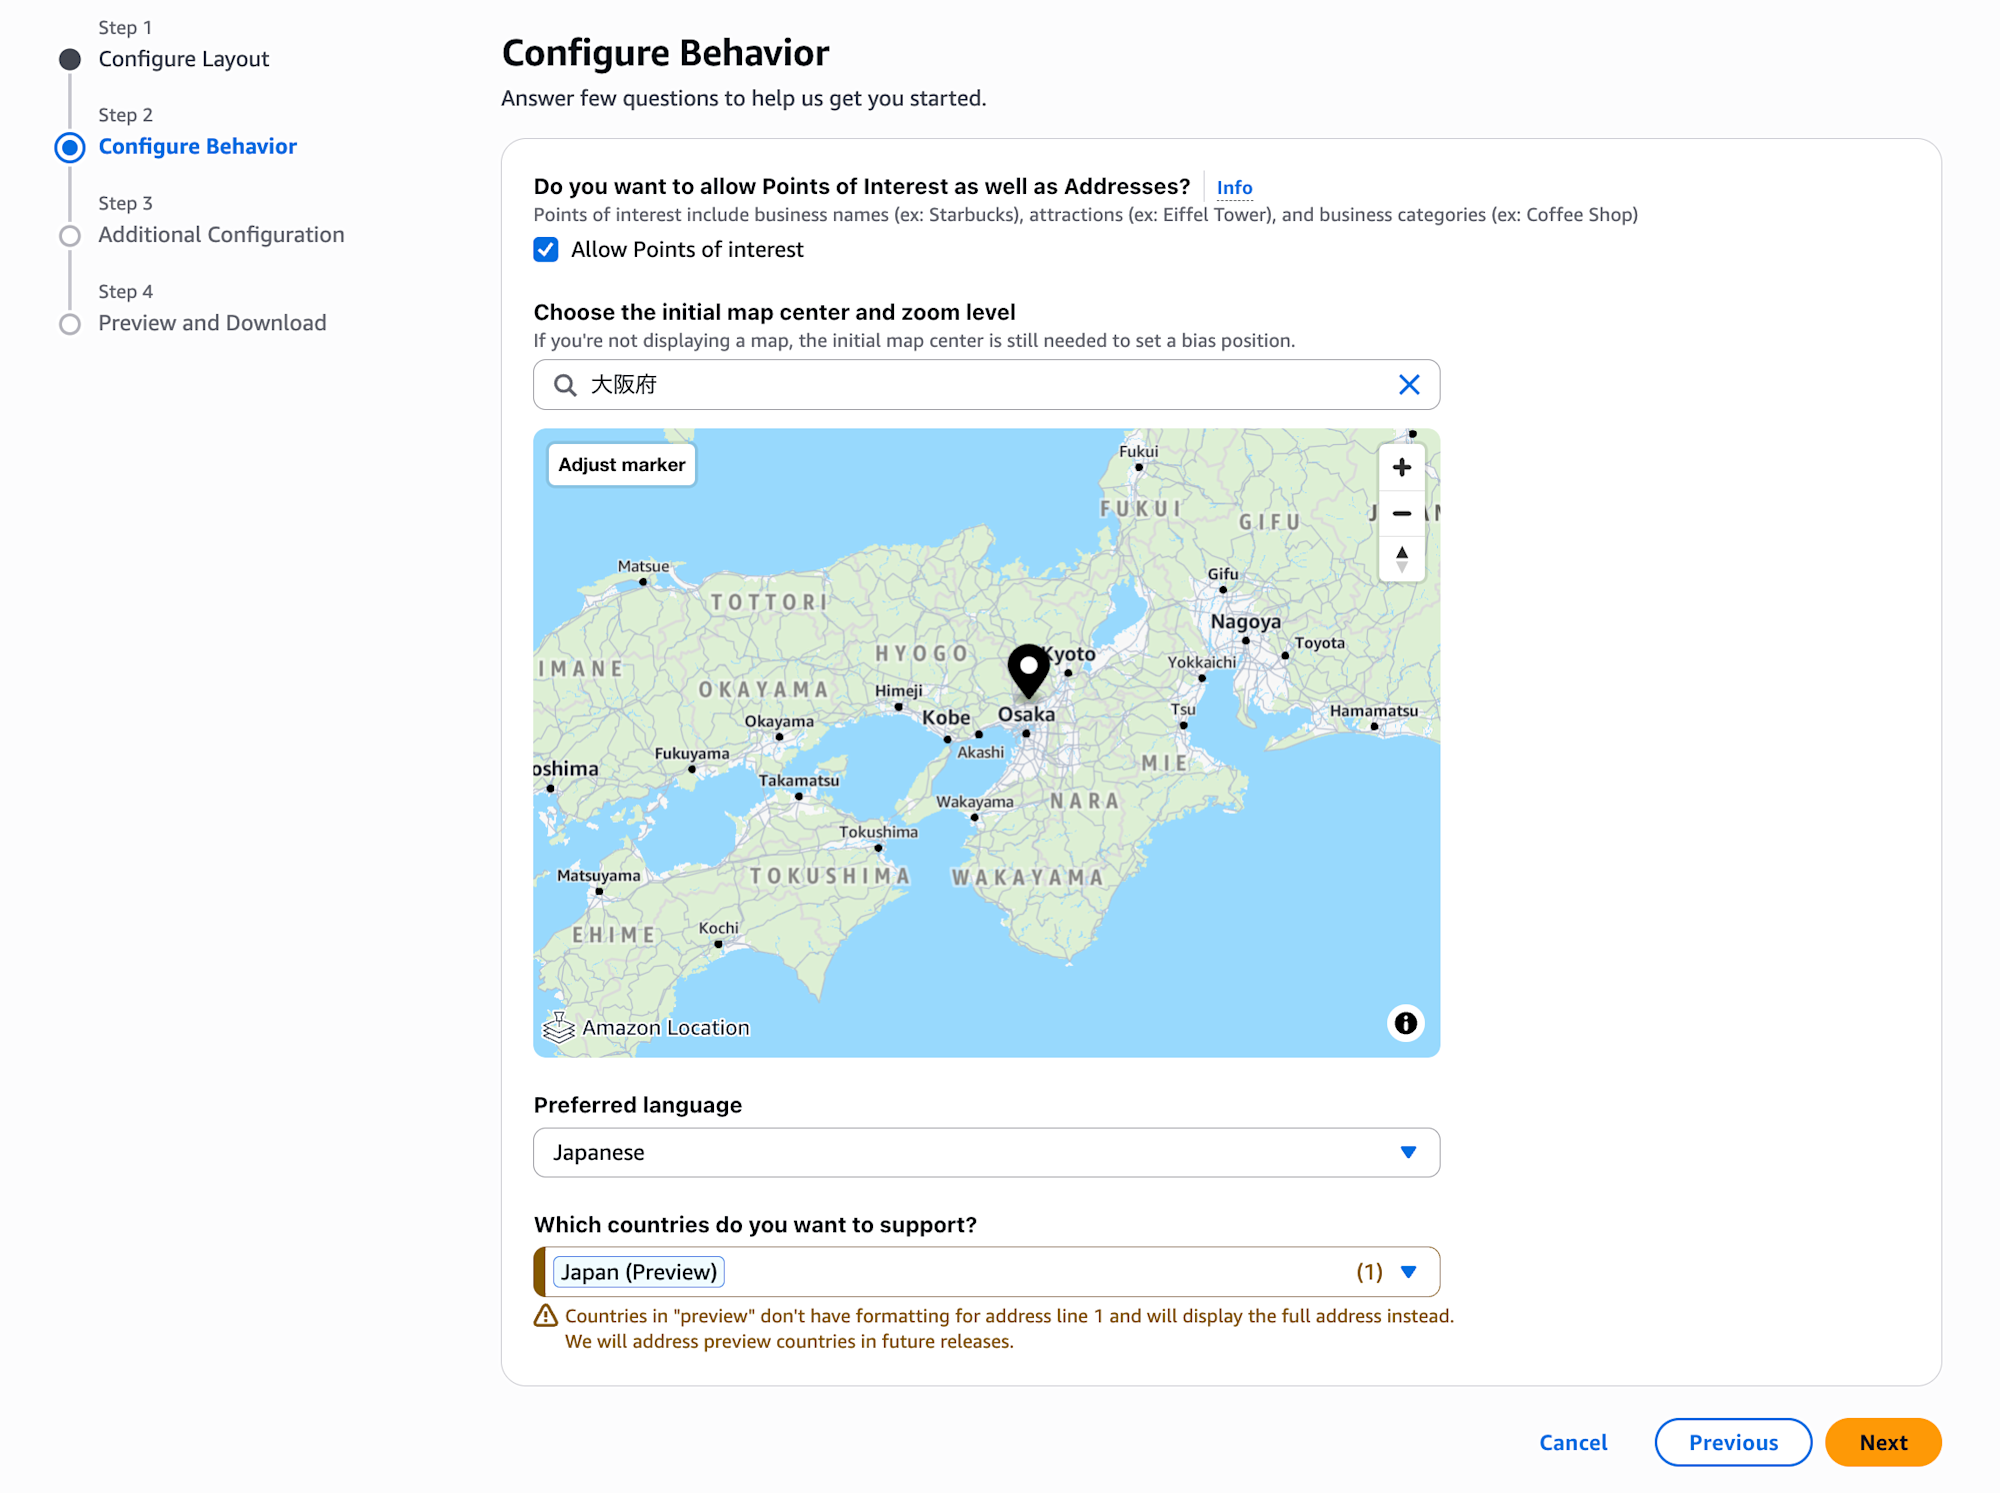
入力時に「POI(Point of Interest)」を許可するか設定できます。これは「スターバックス」などざっくりの施設名を入力しても候補として出してくれる機能です。
これを無効にすると完全な住所が必要になります。
また、地図の初期状態(中心・ズームレベル)を設定し、優先の言語を選びます。
プレビュー時点では、日本は住所1の設定がなくフル表記されると記載がありました。
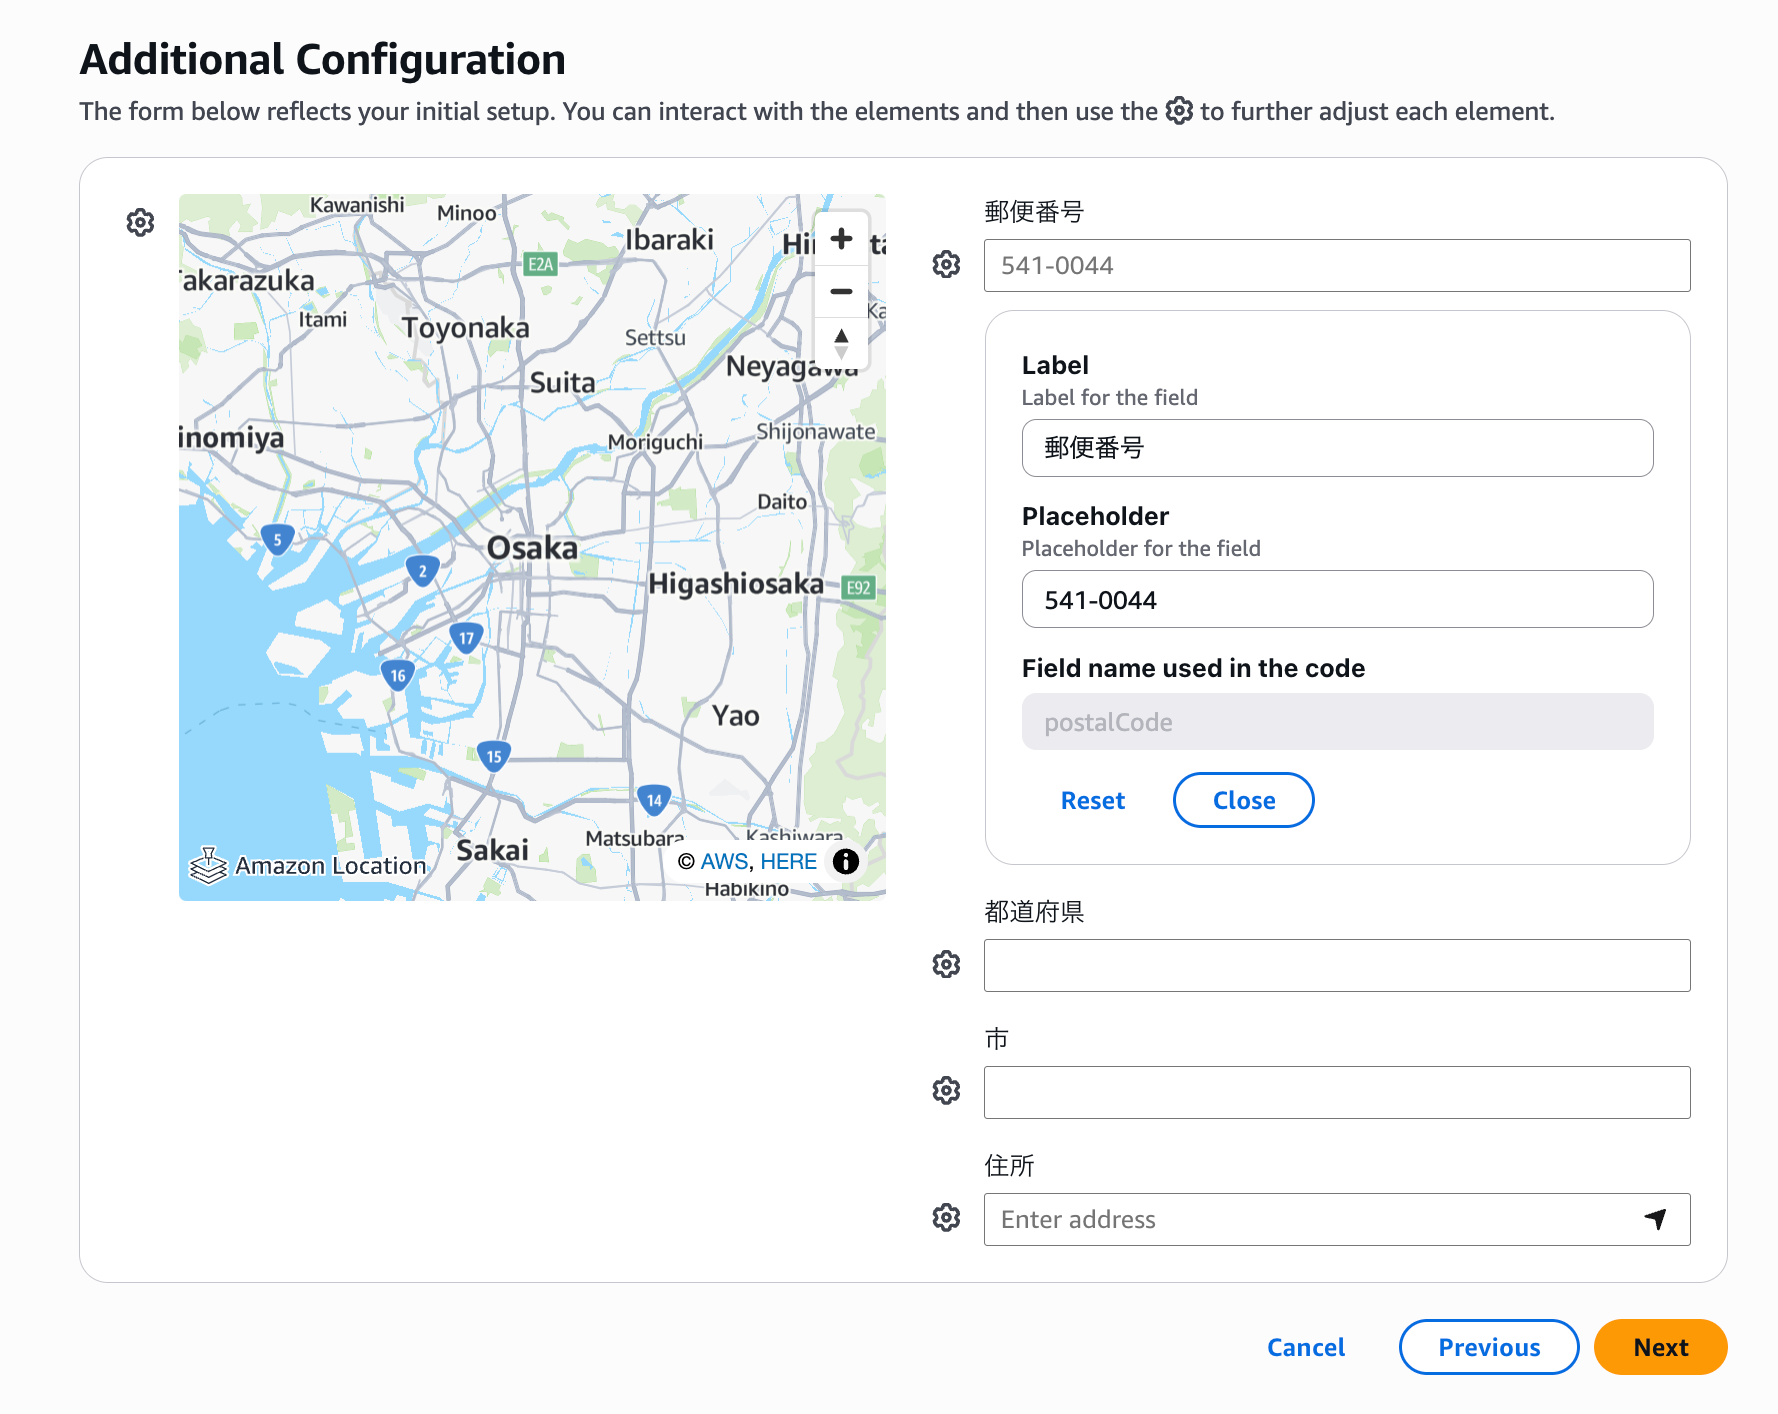
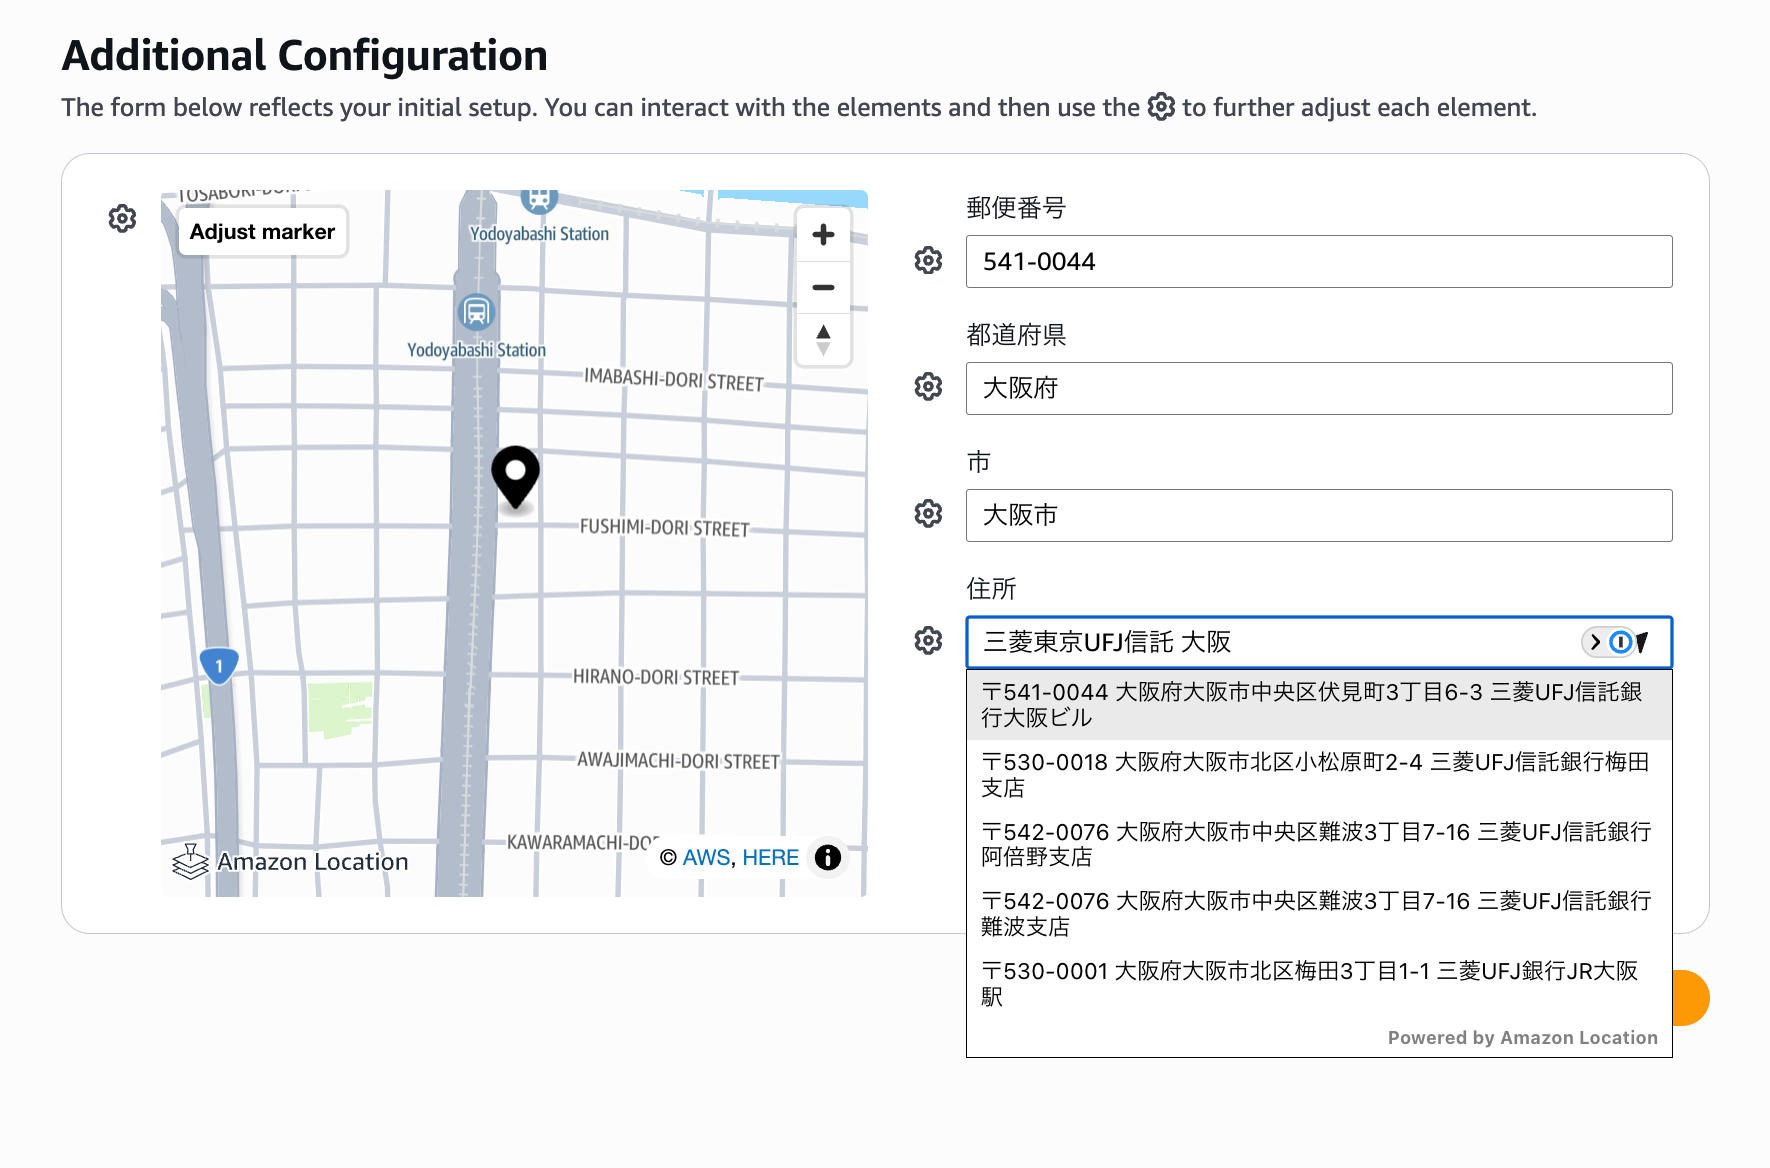
追加の設定を行います。
設定項目のラベルや、初期状態の値を設定できるようです。
現在地マークを押すと、今居る場所が表示されました。ユーザーからするととても便利ですね。
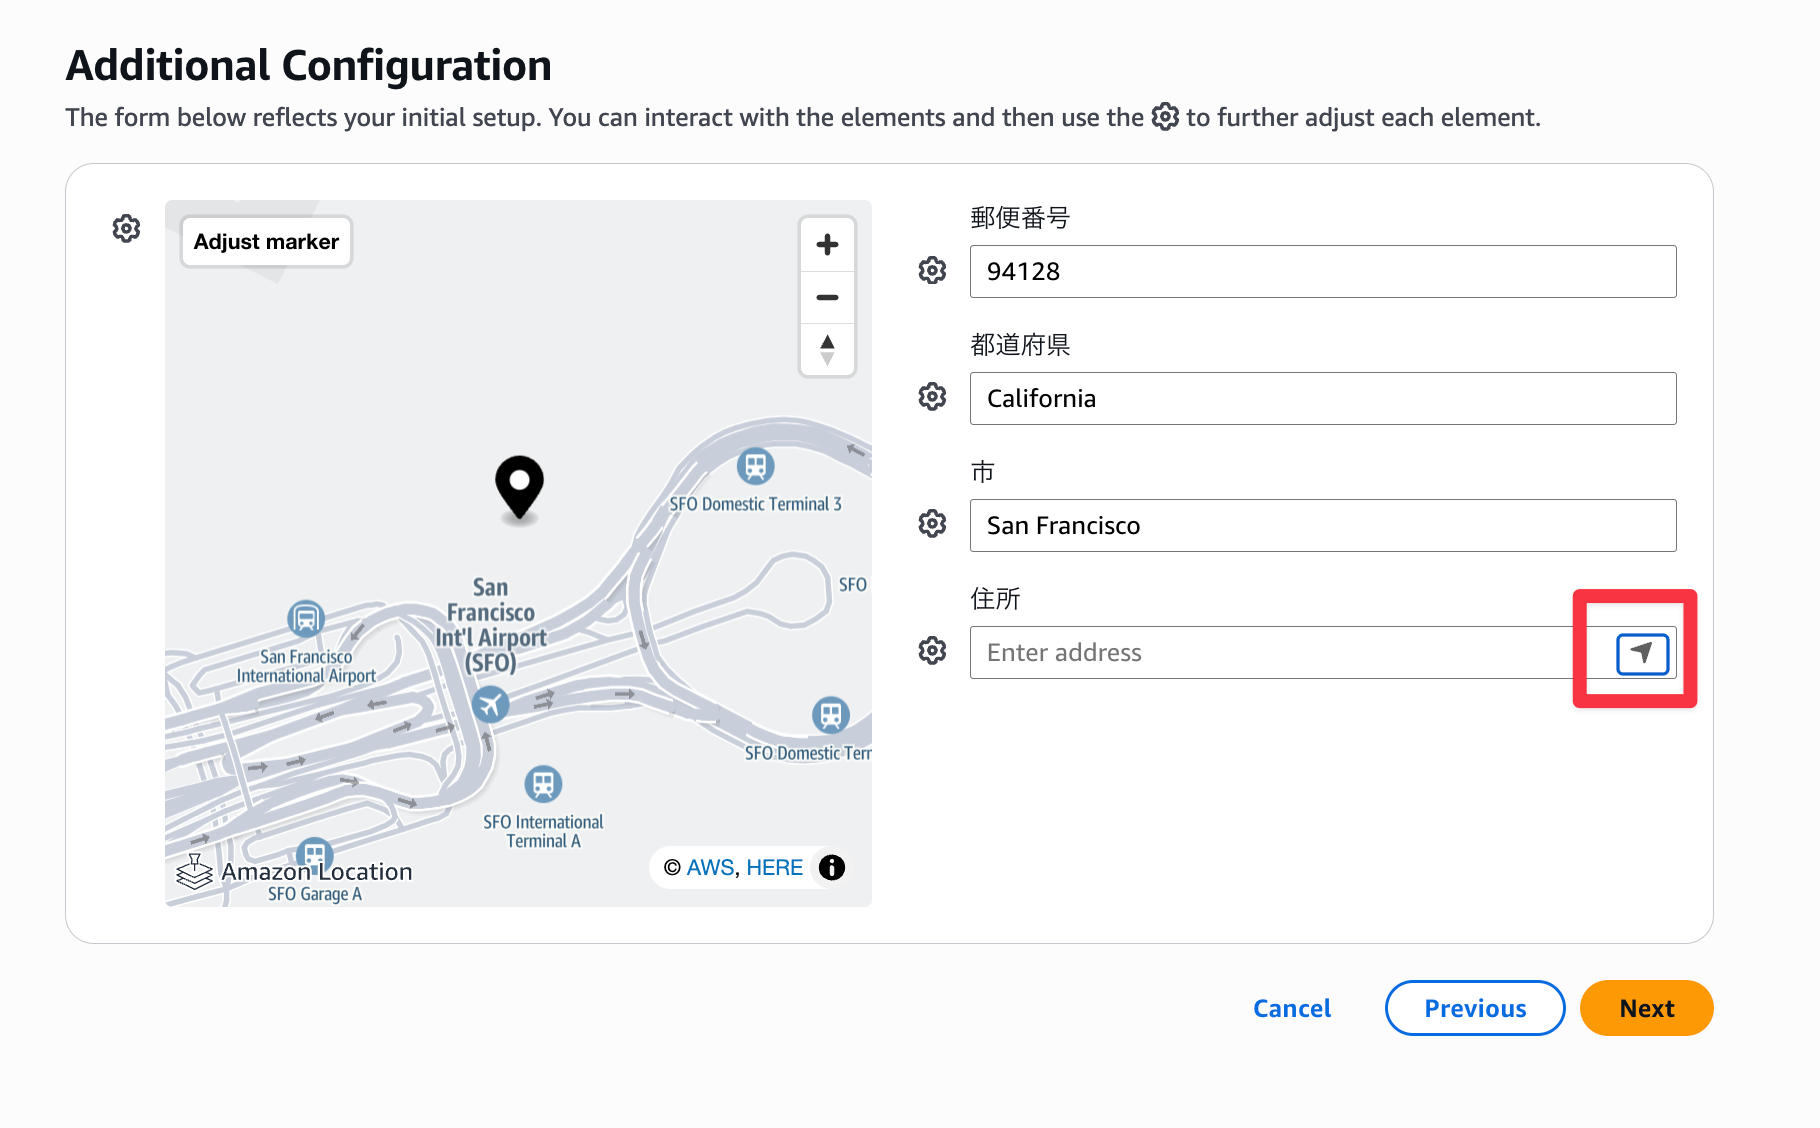
POIを有効にしているので、クラスメソッド大阪オフィスの場所も大体の情報から絞り込めるようです。
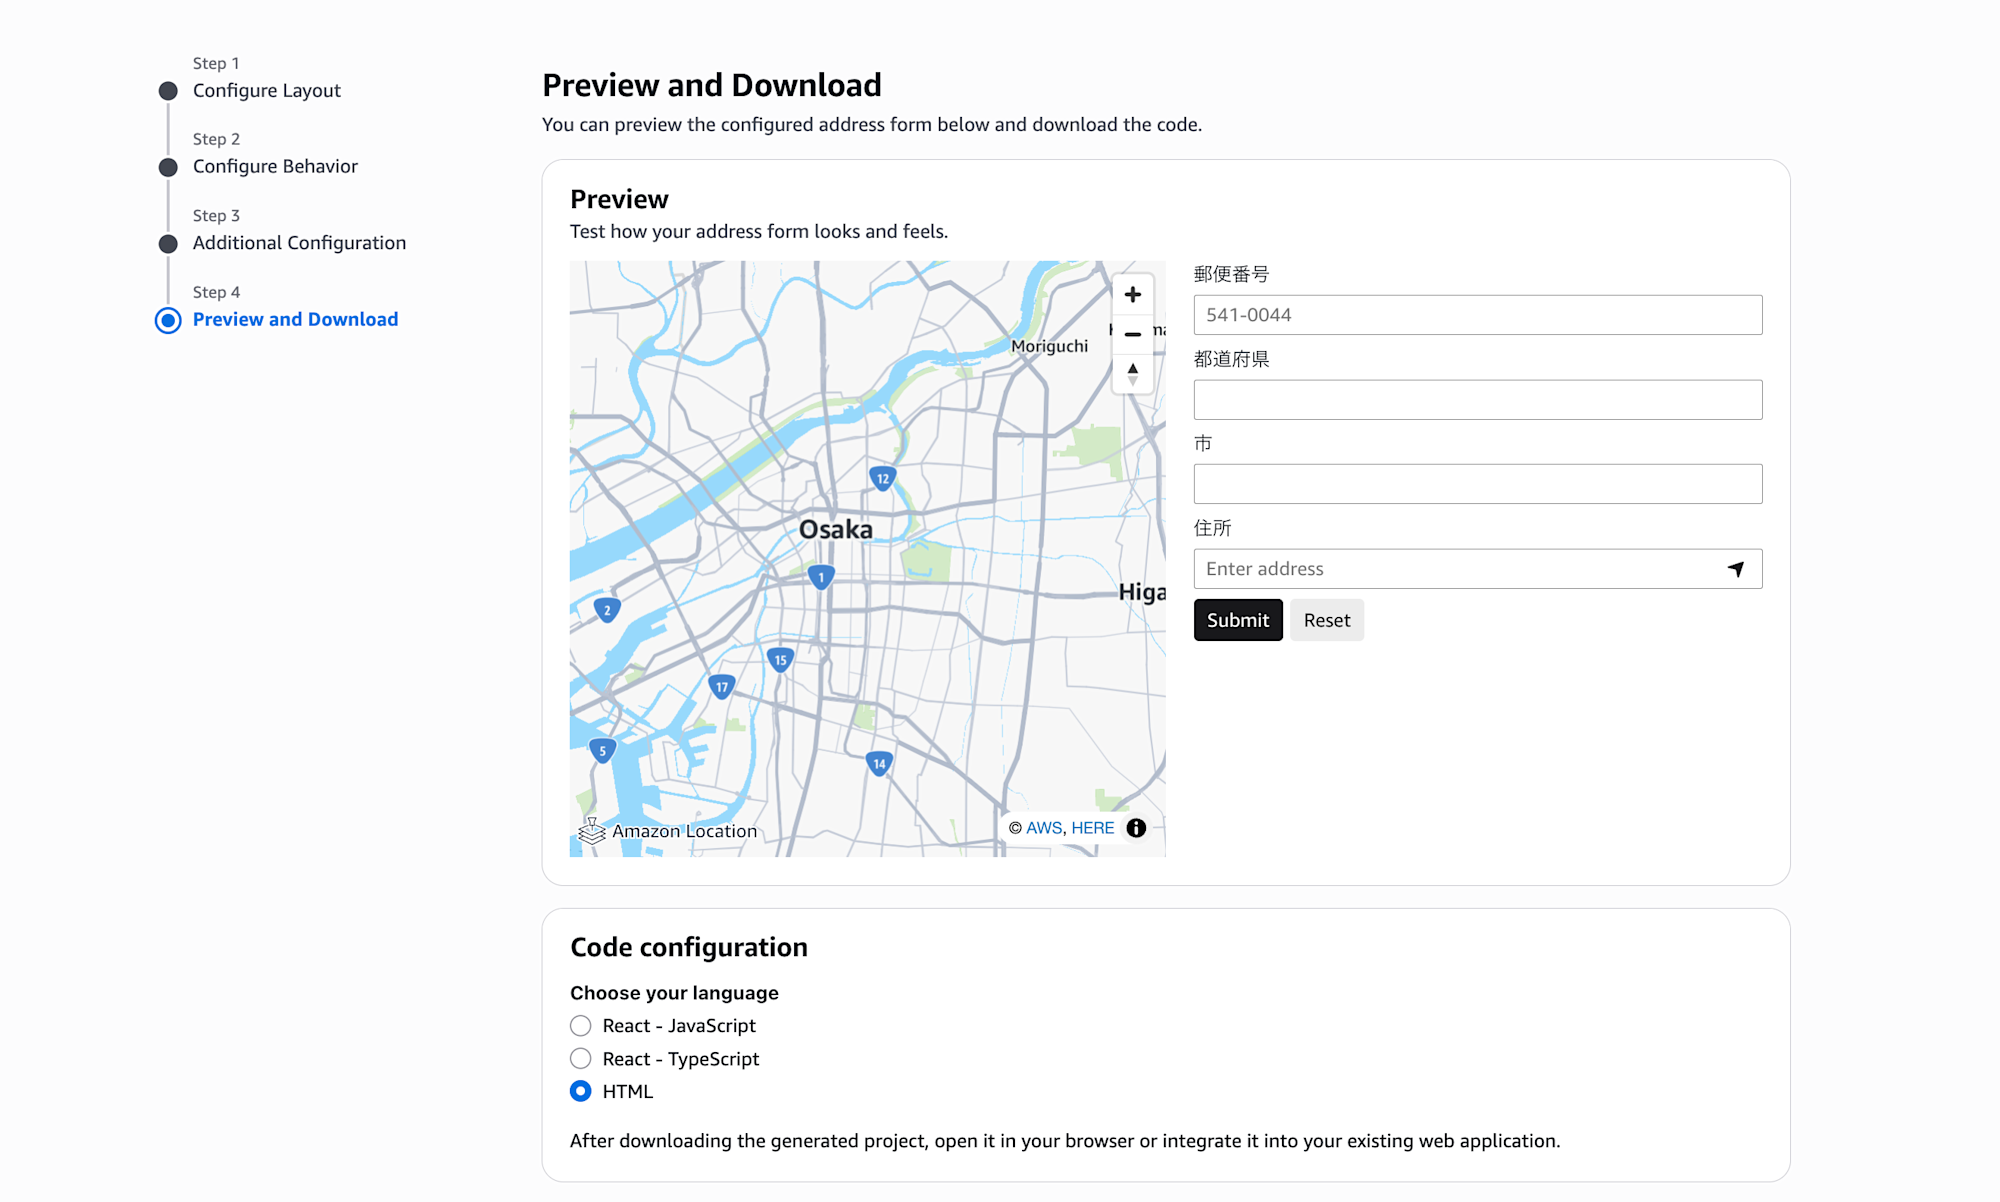
住所入力フォームが完成したら、ReactかHTMLでダウンロードし、表示したいページに組み込みます。
API Keyを組み込むことができますが、Location Serviceは都度課金される有償のサービスなので、使いすぎには注意しましょう。
API Keyには有効期限を設けたほうが望ましいです。

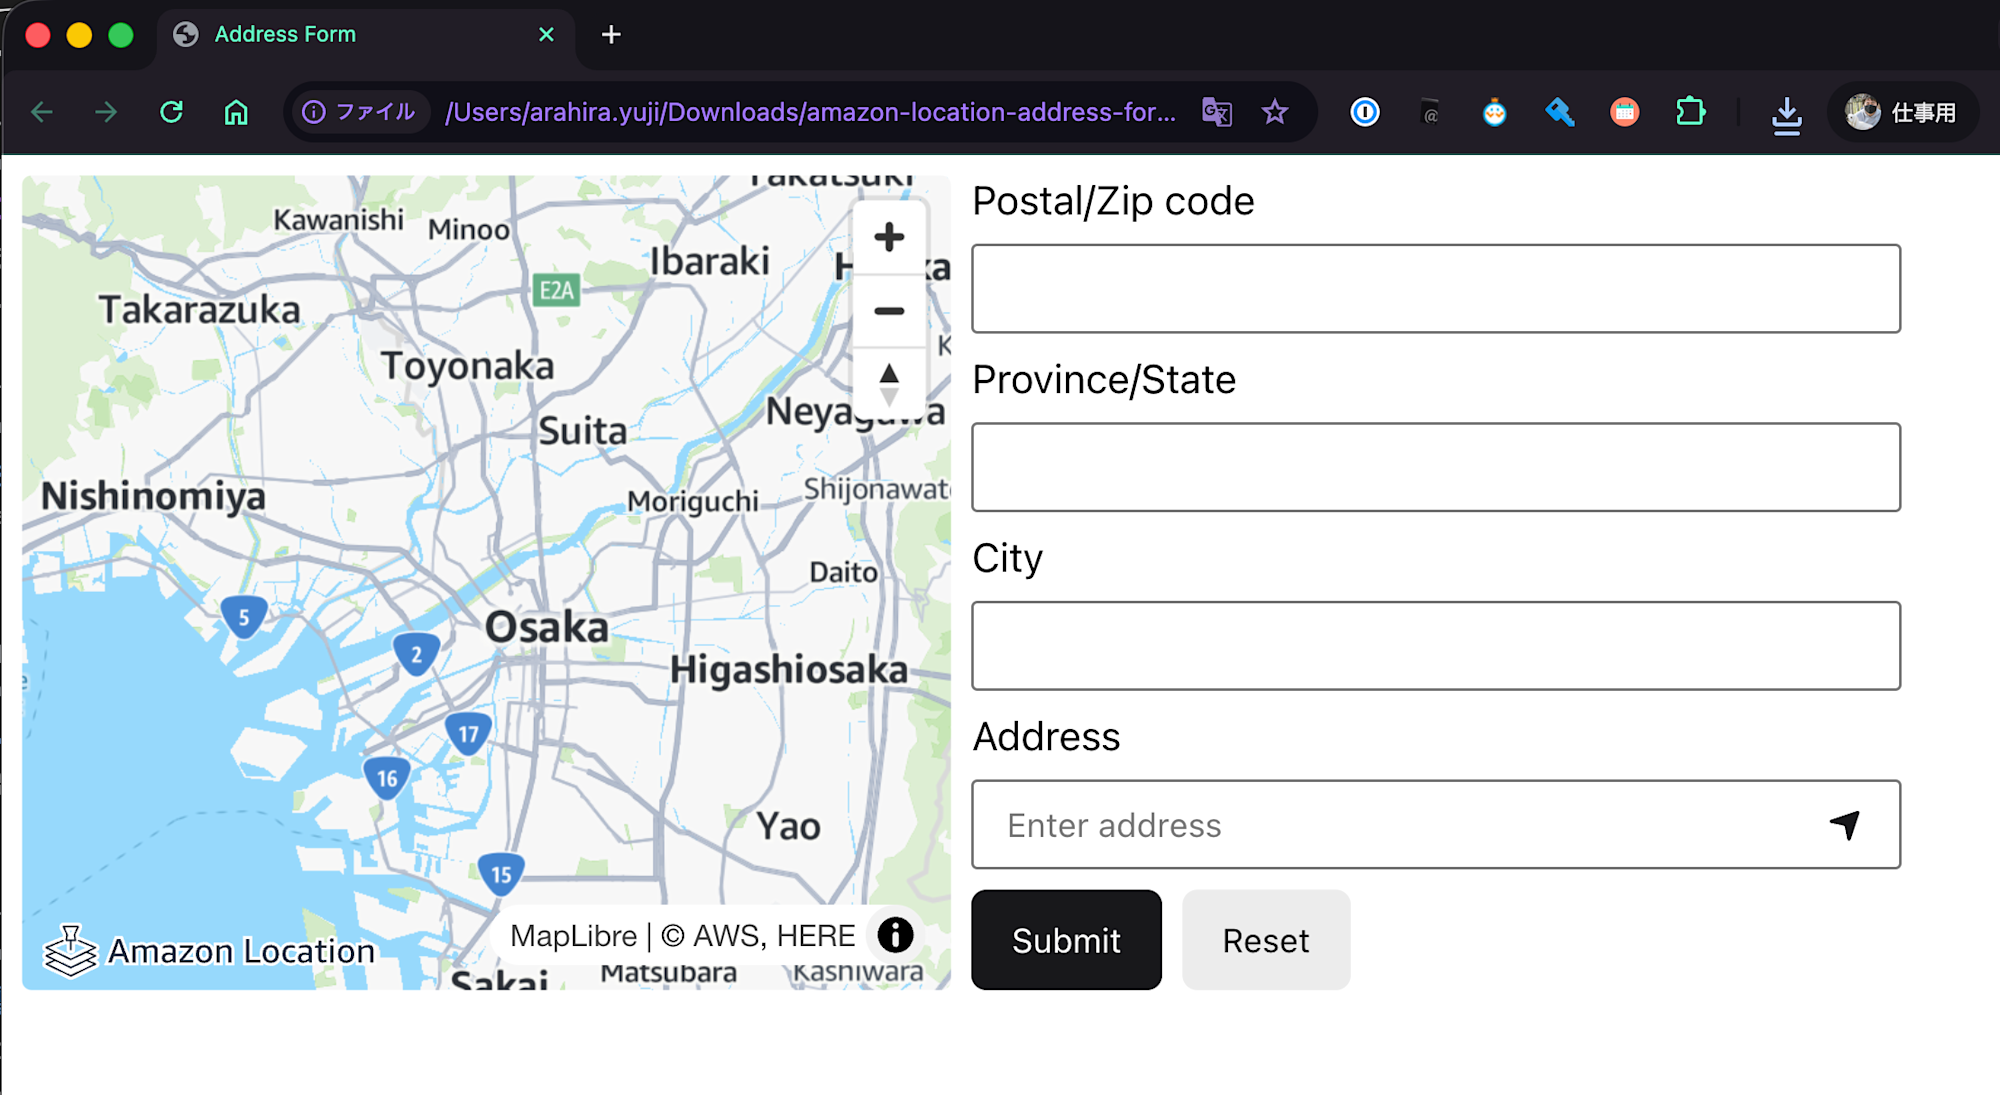
ローカルに落としたHTMLでカスタマイズした住所入力フォーム・地図が開けました!
手軽でとても良いですね。
おわりに
ノーコードで住所入力のフォームが作成できました。必要最低限の機能が揃っており、すぐにでも始められるのが良いですね。
ECサイトなどでユーザーの住所入力を受けたい場面などで使えそうです。
このエントリが誰かの助けになれば幸いです。
それでは、クラウド事業本部 コンサルティング部の荒平がお送りしました!
参考
ダウンロードしたZipに以下のReadmeが付いていました。
API Keysのベストプラクティスにも触れられていたので、利用時には必読です。
# Amazon Location Address Form

This project contains an application using the Amazon Location Address Form SDK.

## Getting Started

1. **Set up your API Key**:
   - If you chose not to include your API key during download, look for the `your_api_key_here` placeholder in the downloaded files
   - Replace `your_api_key_here` with your actual Amazon Location API key

2. **Run the Application**:
   - Open the `index.html` file in your web browser
   - The address form should load and be ready to use

## API Key Best Practices

For comprehensive API key security guidelines, refer to the **[Amazon Location Service Developer Guide - API Key Best Practices](https://docs.aws.amazon.com/location/latest/developerguide/using-apikeys.html#api-keys-best-practices)**.

## How to Create and Manage API Keys

### Creating API Keys Using Amazon Location Console

1. **Access the Amazon Location Console**:
   - Log into your AWS Account
   - Open the [Amazon Location Service Console](https://console.aws.amazon.com/location/)
   - Choose **API keys** from the left menu

2. **Create a New API Key**:
   - On the **API keys** page, choose **Create API key**
   - Fill in the following information:
     - **Name** – A name for your API key, such as `ExampleKey`
     - **Description** – An optional description for your API key
     - **Resources** – In the dropdown, choose the Amazon Location resources to give access to with this API key. You can add more than one resource by choosing **Add resource**
     - **Actions** – Specify the actions you want to authorize with this API key. You must select at least one action to match each resource type you have selected

3. **Configure Required Actions for Address Forms**:
   For address form functionality, you need these specific actions:
   - **Maps Actions**: `geo-maps:GetTile` - For retrieving map tiles
   - **Places Actions**:
     - `geo-places:Autocomplete` - For real-time address suggestions
     - `geo-places:Suggest` - For real-time address suggestions
     - `geo-places:GetPlace` - For detailed place information
     - `geo-places:ReverseGeocode` - For converting coordinates to addresses

4. **Set Security Configuration (Optional)**:
   - **Expiration time** – Add an expiration date and time for your API key (see expiry section below)
   - **Client restrictions** – Add one or more web domains where you can use the API key. For example, if the API key is for an application running on `example.com`, you could put `*.example.com/` as an allowed referrer
   - **Tags** – Add tags to the API key

5. **Complete Creation**:
   - Choose **Create API key** to create the API key
   - On the detail page, choose **Show API key** to see the key value
   - The key value will have the format `v1.public.a1b2c3d4...`

### Managing Existing API Keys

1. **View API Keys**:
   - In the Amazon Location Console, go to **API keys**
   - Review your existing keys and their configurations

2. **Update API Key Settings**:
   - Click on an API key name to view details
   - You can modify:
     - Resources and actions
     - Expiration time
     - Client restrictions
     - Tags

3. **Monitor Usage**:
   - Check API key usage statistics in the AWS Console
   - Set up CloudWatch alarms for unusual activity
   - Review monthly billing for API key costs

## Setting API Key Expiry Dates

### When to Set Expiry Dates

Setting expiry dates is a security best practice that helps you:
- Rotate API keys on a regular basis
- Create temporary API keys for specific projects
- Automatically deactivate unused keys
- Maintain better security hygiene

### How to Set Expiry Dates

#### During API Key Creation:
1. In the **Create API key** page in the Amazon Location Console
2. Look for the **Expiration time** field
3. Optionally add an expiration date and time for your API key
4. Choose an appropriate expiration based on your use case

#### For Existing API Keys:
1. Navigate to your API key in the Amazon Location Console
2. Click on the API key name to view details
3. Look for **Edit** option
4. Modify the expiration time as needed
5. Save your changes

### Important Notes About Expiry

- When an API key reaches its expiration time, it is automatically deactivated
- Inactive keys can no longer be used to make requests
- You can change a temporary key to a permanent key by removing the expiration time
- You can delete an API key 90 days after deactivating it
- If you attempt to deactivate an API key that has been used within the last seven days, you'll be prompted to confirm the change

## Additional Resources

- **[Amazon Location Service API Key Documentation](https://docs.aws.amazon.com/location/latest/developerguide/using-apikeys.html)** - Complete guide for creating and managing API keys
- [Amazon Location Service Console](https://console.aws.amazon.com/location/) - Manage your API keys and resources
- [Amazon Location Service API Reference](https://docs.aws.amazon.com/location/latest/APIReference/) - API documentation for programmatic access