CloudFrontの署名付きURL(signed URL)で、データのGetとPutを試す
CloudFrontの署名付きURLを利用して、ファイルのGetとPutを試してみました。
2024.06.17
この記事は公開されてから1年以上経過しています。情報が古い可能性がありますので、ご注意ください。
CloudFrontでは署名付きURL(signed URL)が利用できます。
本記事では、CloudFrontの署名付きURLを利用して、ファイルのGetとPutを試してみました。
おすすめの方
- CloudFrontをCloudFormationで作成したい方
- CloudFrontの署名付きURLを利用したい方
- boto3でCloudFrontの署名付きURLを発行したい方
ライブラリをインストールする
pip install cryptography
pip install requests
pip install boto3
署名の準備をする
公開鍵と秘密鍵を作成し、公開鍵をCloudFrontに登録する
openssl genrsa -out private_key.pem 2048
openssl rsa -pubout -in private_key.pem -out public_key.pem

cat public_key.pem | pbcopy
CloudFrontに登録します。
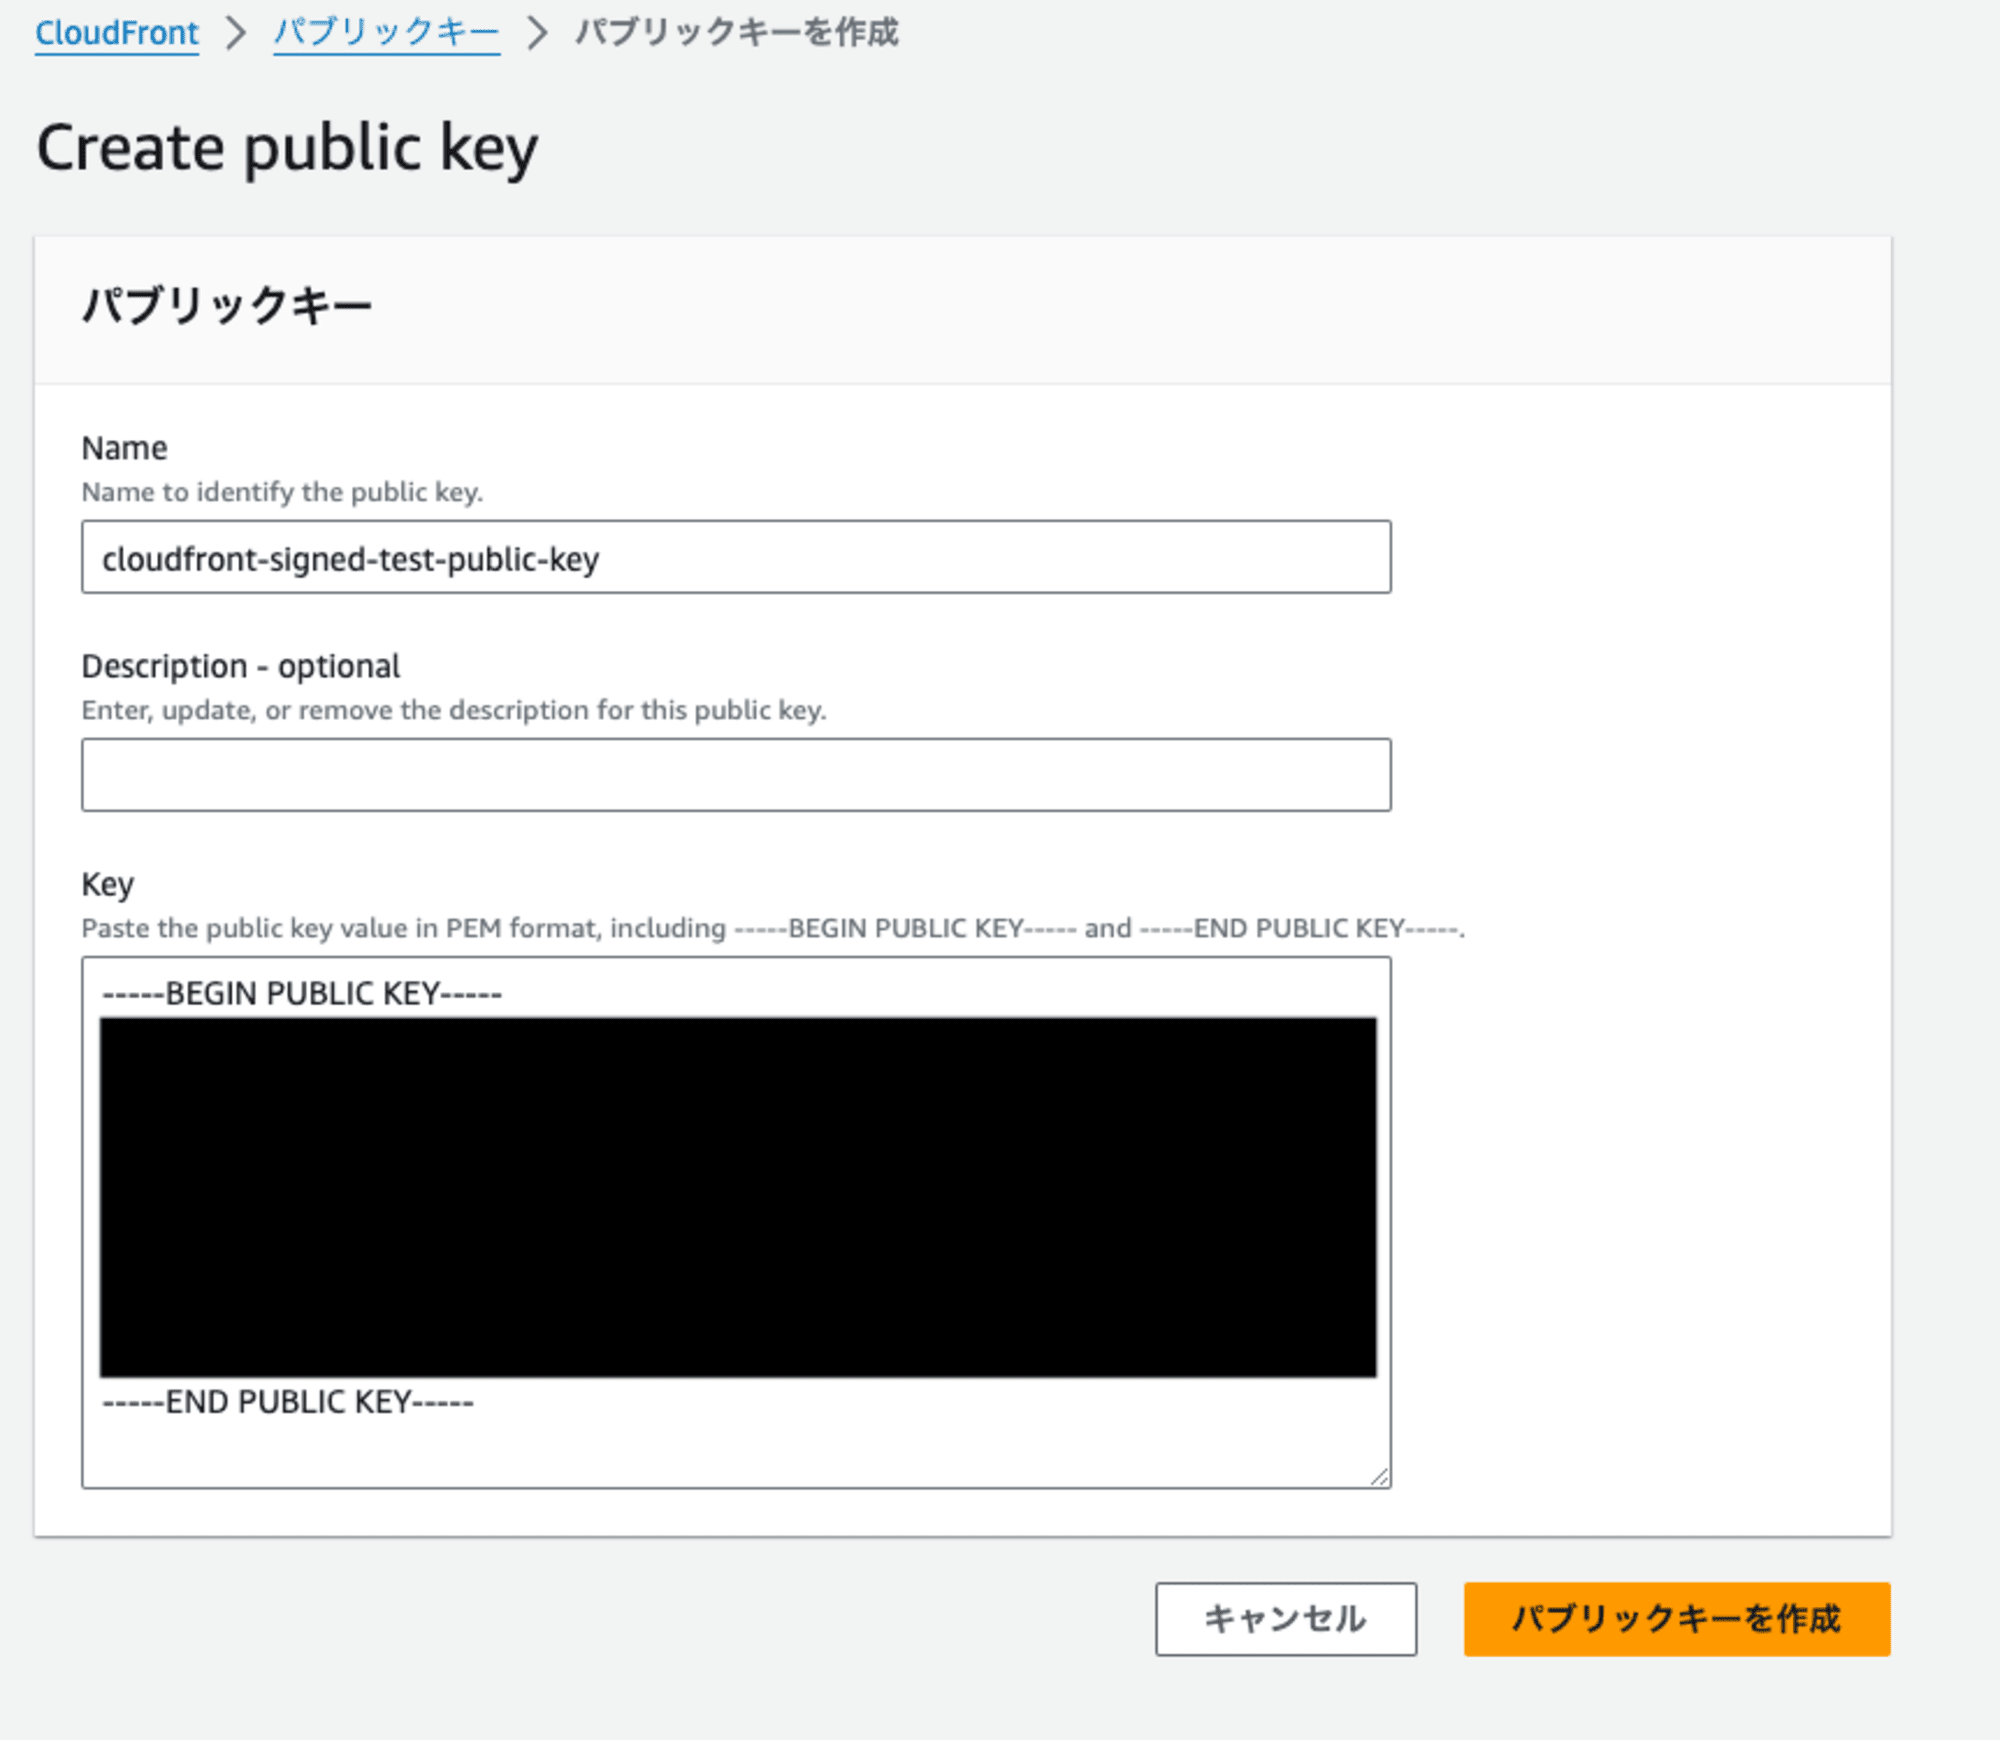
キーIDが必要になるので、メモしておきます。

パラメータストアにキーIDと秘密鍵を登録する
キーIDをスクリプトに書いたり、秘密鍵をローカルで利用しても良いのですが、せっかくなのでパラメータストアに登録します。 (Lambdaで実行する場合の想定です。)
aws ssm put-parameter \
    --name "/CloudFront/TestKeyId" \
    --type "String" \
    --value "K1UK4TLV6SCORY" \
    --overwrite
aws ssm put-parameter \
    --name "/CloudFront/TestPrivateKey" \
    --type "SecureString" \
    --value file://private_key.pem \
    --overwrite
CloudFrontを作成する
テンプレートファイル
バケットポリシーは、GetとPutを指定します。
AWSTemplateFormatVersion: "2010-09-09"
Description: CloudFront Stack


Parameters:
  TestKeyId:
    Type: AWS::SSM::Parameter::Value<String>
    Default: /CloudFront/TestKeyId

Resources:
  TestBucket:
    Type: AWS::S3::Bucket
    Properties:
      BucketName: !Sub cloudfront-s3-test-${AWS::AccountId}-${AWS::Region}
      PublicAccessBlockConfiguration:
        BlockPublicAcls: true
        BlockPublicPolicy: true
        IgnorePublicAcls: true
        RestrictPublicBuckets: true

  TestBucketPolicy:
    Type: AWS::S3::BucketPolicy
    Properties:
      Bucket: !Ref TestBucket
      PolicyDocument:
        Id: TestBucket-BucketPolicy
        Statement:
          - Effect: Allow
            Action:
              - s3:GetObject
              - s3:PutObject
            Resource:
              - !Sub arn:aws:s3:::${TestBucket}/*
            Principal:
              Service: cloudfront.amazonaws.com
            Condition:
              StringEquals:
                AWS:SourceArn:
                  !Sub arn:aws:cloudfront::${AWS::AccountId}:distribution/${TestDistribution}

  TestOriginAccessControl:
    Type: AWS::CloudFront::OriginAccessControl
    Properties:
      OriginAccessControlConfig:
        Name: TestOriginAccessControl
        OriginAccessControlOriginType: s3
        SigningBehavior: always
        SigningProtocol: sigv4

  TestKeyGroup:
    Type: AWS::CloudFront::KeyGroup
    Properties:
      KeyGroupConfig:
        Name: test-key-group
        Items:
          - !Ref TestKeyId

  TestDistribution:
    Type: AWS::CloudFront::Distribution
    Properties:
      DistributionConfig:
        Origins:
          - Id: !Sub S3-${TestBucket}
            DomainName: !GetAtt TestBucket.RegionalDomainName
            OriginAccessControlId: !GetAtt TestOriginAccessControl.Id
            S3OriginConfig: {}
        Enabled: true
        DefaultRootObject: index.html
        DefaultCacheBehavior:
          TargetOriginId: !Sub S3-${TestBucket}
          AllowedMethods:
            - HEAD
            - DELETE
            - POST
            - GET
            - OPTIONS
            - PUT
            - PATCH
          # CachingDisabled
          # https://docs.aws.amazon.com/AmazonCloudFront/latest/DeveloperGuide/using-managed-cache-policies.html#managed-cache-policy-caching-disabled
          CachePolicyId: 4135ea2d-6df8-44a3-9df3-4b5a84be39ad
          ViewerProtocolPolicy: https-only
          TrustedKeyGroups:
            - !Ref TestKeyGroup
        HttpVersion: http2
デプロイ
aws cloudformation deploy \
    --template-file cloudfront.yaml \
    --stack-name CloudFront-Signed-Sample-Stack \
    --capabilities CAPABILITY_NAMED_IAM \
    --no-fail-on-empty-changeset
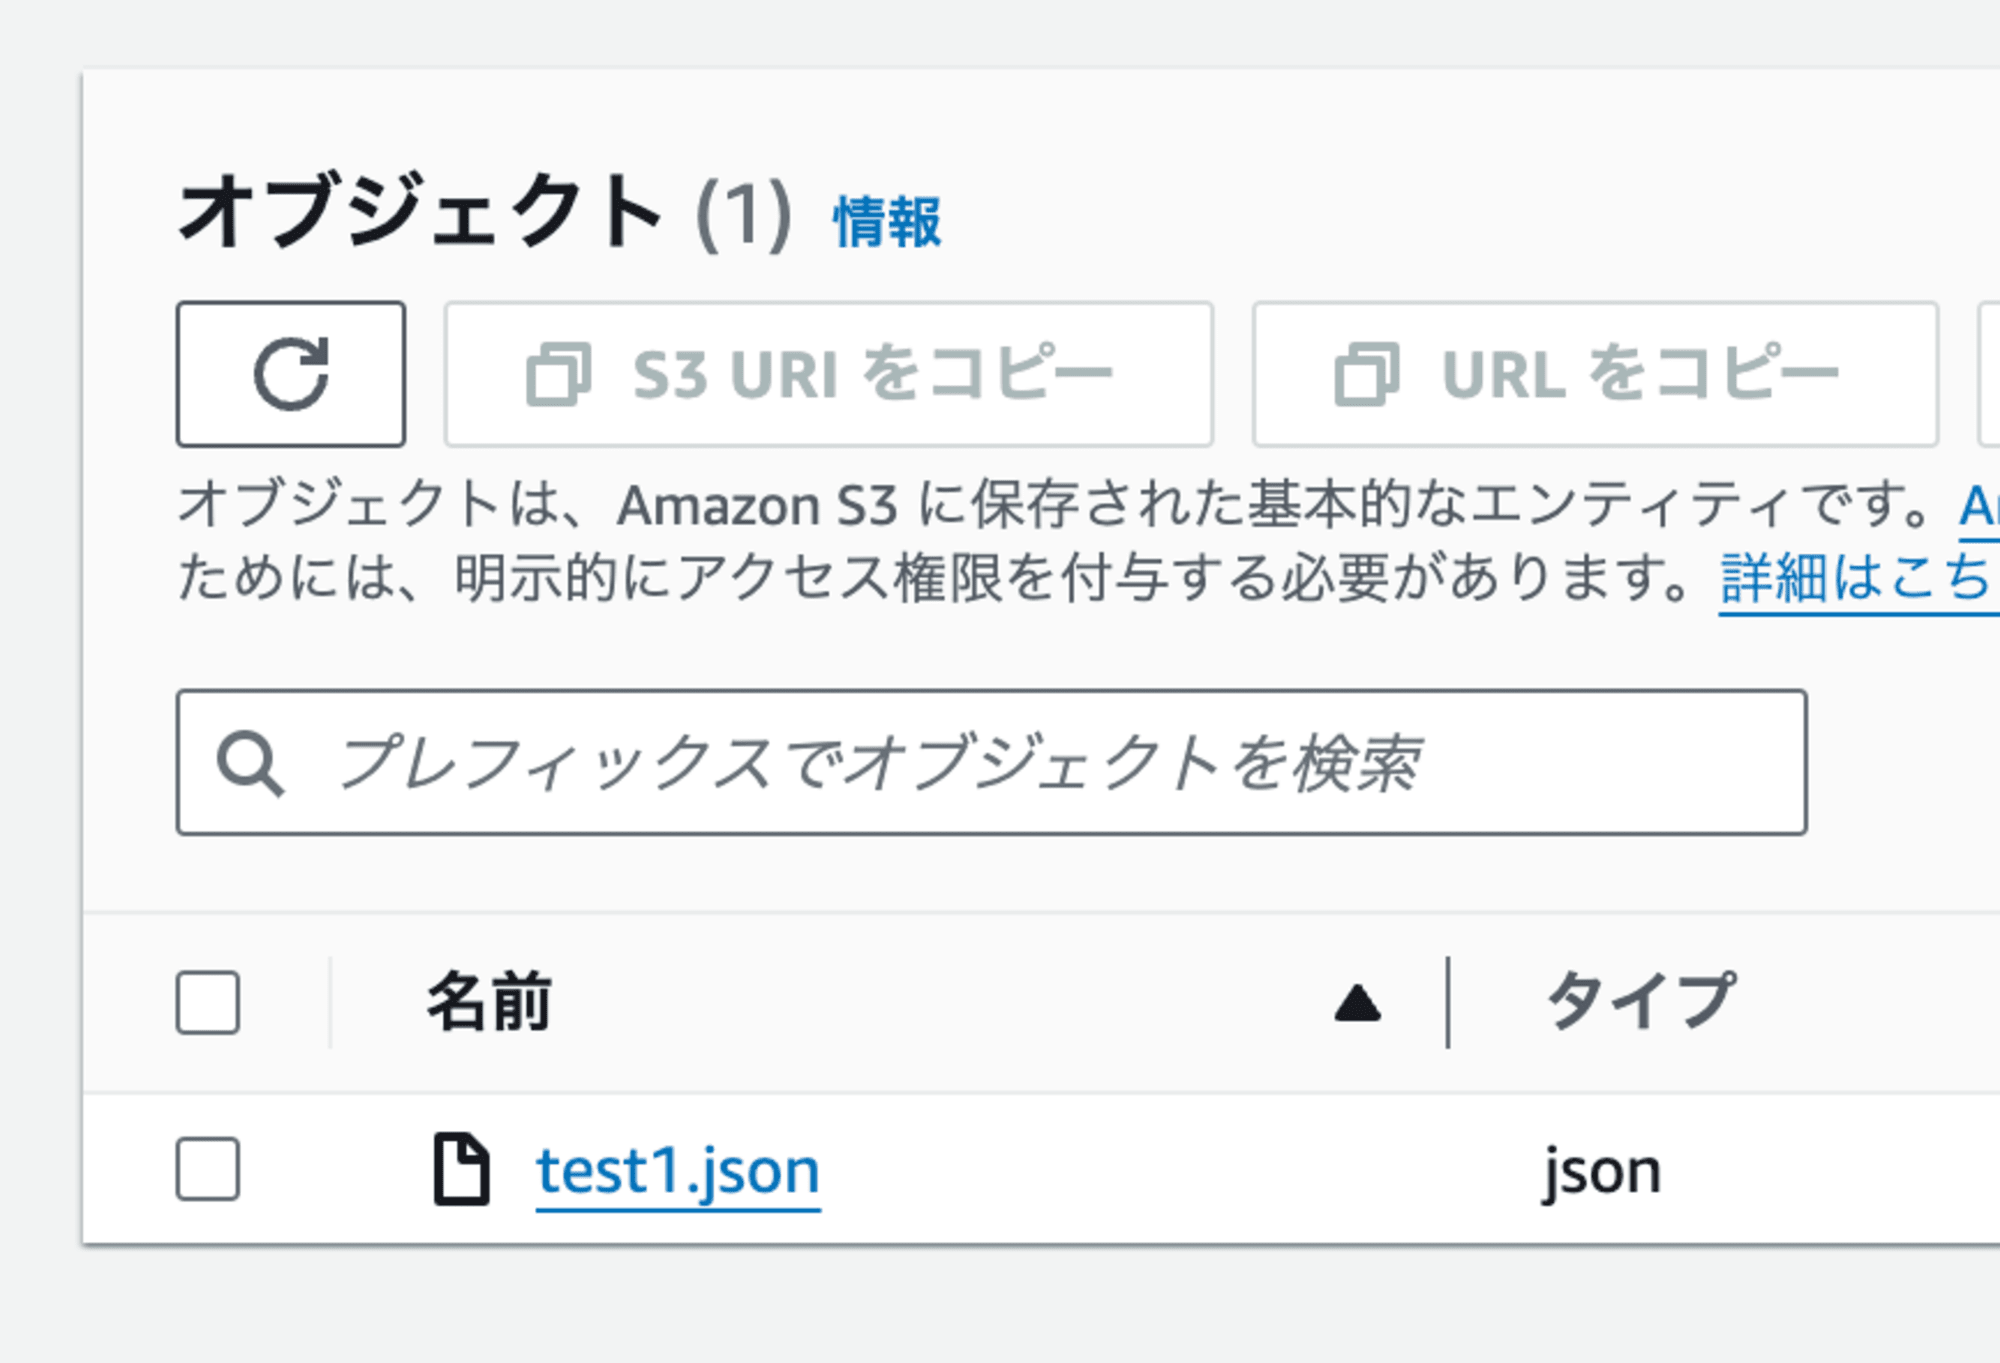
適当なファイルをS3バケットに置いて取得してみる
適当なJSONファイルを作成して、S3バケットに格納します。
echo '{"test": 1234}' > test1.json
aws s3 cp test1.json s3://cloudfront-s3-test-AwsAccountId-ap-northeast-1
CloudFrontにキーペア情報を設定しているため、そのままでは取得できません。
$ curl https://d37rg55oefqsgq.cloudfront.net/test1.json

<?xml version="1.0" encoding="UTF-8"?><Error><Code>MissingKey</Code><Message>Missing Key-Pair-Id query parameter or cookie value</Message></Error>
CloudFrontの署名付きURLを利用して、データのGetとPutを試す
署名付きURLを発行するスクリプト
それぞれ、次のGetとPutを試します。
- Get: test1.json
- Put: test7.json
CloudFrontに登録したキーIDや秘密鍵は、パラメータストアから取得しています。
import boto3
import requests
import json

from datetime import datetime
from zoneinfo import ZoneInfo

from cryptography.hazmat.backends import default_backend
from cryptography.hazmat.primitives import hashes
from cryptography.hazmat.primitives import serialization
from cryptography.hazmat.primitives.asymmetric import padding
from botocore.signers import CloudFrontSigner

BASE_URL = "https://d37rg55oefqsgq.cloudfront.net"


ssm = boto3.client("ssm")


def main():
    print("# get (test1.json)")
    signed_url1 = get_signed_url(
        f"{BASE_URL}/test1.json",
        datetime(2024, 6, 15, 20, 00, 0, tzinfo=ZoneInfo("Asia/Tokyo")),
    )
    resp = requests.get(signed_url1)
    print(resp.text)

    print("# put (test7.json)")
    data = {"test": "7777"}
    signed_url7 = get_signed_url(
        f"{BASE_URL}/test7.json",
        datetime(2024, 6, 15, 20, 00, 0, tzinfo=ZoneInfo("Asia/Tokyo")),
    )
    resp = requests.put(signed_url7, data=json.dumps(data))
    print(resp.status_code)

    print("# get (test7.json)")
    resp = requests.get(signed_url7)
    print(resp.text)


def rsa_signer(data):
    # https://github.com/boto/boto3/blob/develop/boto3/examples/cloudfront.rst
    res = ssm.get_parameter(Name="/CloudFront/TestPrivateKey", WithDecryption=True)
    private_key = serialization.load_pem_private_key(
        res["Parameter"].get("Value").encode(),
        password=None,
        backend=default_backend(),
    )
    return private_key.sign(data, padding.PKCS1v15(), hashes.SHA1())


def get_key_id():
    res = ssm.get_parameter(Name="/CloudFront/TestKeyId")
    return res["Parameter"].get("Value")


def get_signed_url(target_url, expire_date):
    key_id = get_key_id()

    cloudfront_signer = CloudFrontSigner(key_id, rsa_signer)

    return cloudfront_signer.generate_presigned_url(
        target_url, date_less_than=expire_date
    )


if __name__ == "__main__":
    main()
スクリプトを実行する
$ python app.py

# get (test1.json)
{"test": 1234}

# put (test7.json)
200

# get (test7.json)
{"test": "7777"}
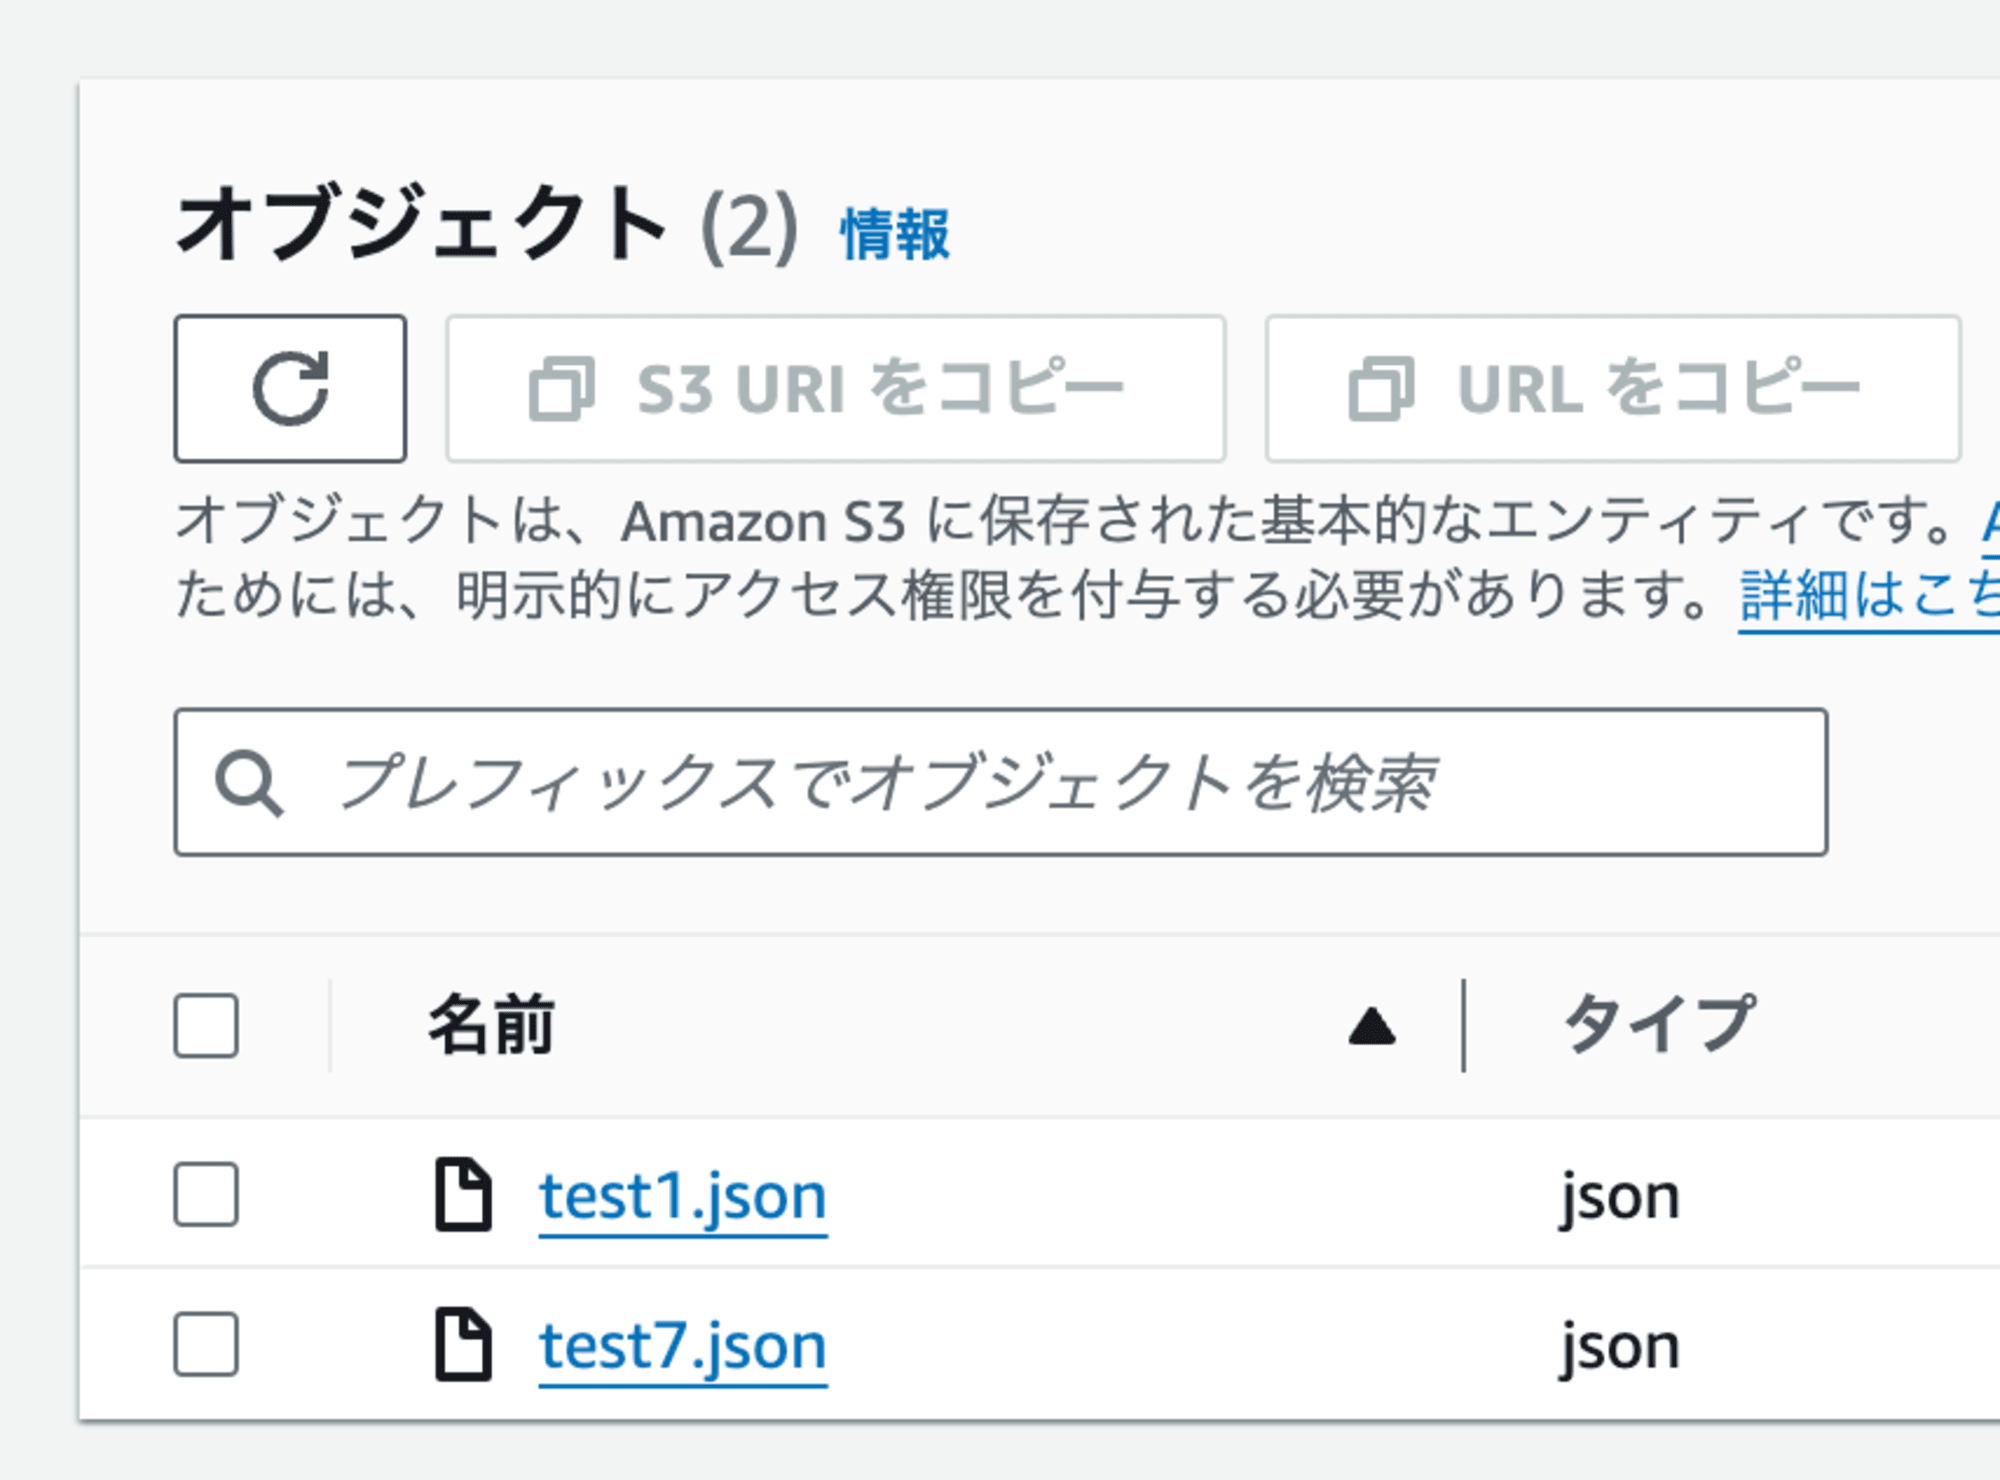
S3バケットの様子
「test7.json」が増えていました。
さいごに
S3バケットの署名付きURLはAPIが異なりますが、CloudFrontは同じAPIを利用することを知りました。
- S3
- generate_presigned_url()
- generate_presigned_post()
地味なハマりポイントかもしれません。参考になれば幸いです。
参考
- Amazon Simple Storage Service オリジンへのアクセスの制限 - Amazon CloudFront
- 署名付き URL の使用 - Amazon CloudFront
- Use field-level encryption to help protect sensitive data - Amazon CloudFront
- AWS::CloudFront::OriginAccessControl - AWS CloudFormation
- put-parameter — AWS CLI 1.33.9 Command Reference
- boto3/boto3/examples/cloudfront.rst at develop · boto/boto3


