เรียนรู้การทำ Inforgraphic และ Title สุดเท่จาก Canva
この記事は公開されてから1年以上経過しています。情報が古い可能性がありますので、ご注意ください。
มาทำความรู้จัก Canva เบื้องต้นกัน (About Canva)
Canva เป็นเพลทฟอร์ม ที่ช่วยในการออกแบบดีไซน์ และ สร้าง Infographic หรือ Poster ในขนาดต่างๆ ซึ่งมีธีมและรูปแบบตัวหนังสือให้เลือกมากมาย และ จุดเด่นอีกข้อ ของแอพนี้ก็คือ เราไม่จำเป็นต้องมีรูปภาพเอง หรือ ถ่ายแบบเอง เพราะแอพนี้มีรูปภาพพื้นหลังหรือธีมให้เลือกใช้มากมาย ซึ่งเหมาะกับความต้องการของคุณแน่นอน
(Canva is a platform to help people design and make Infographic or Poster in any resolution. There are have many theme and font of graphic to choose. And another good point of this app is you don have to take a photo or design by your own because it have so many theme and background photo for design.)
มาเริ่มกันเลย (Let start at the begining)
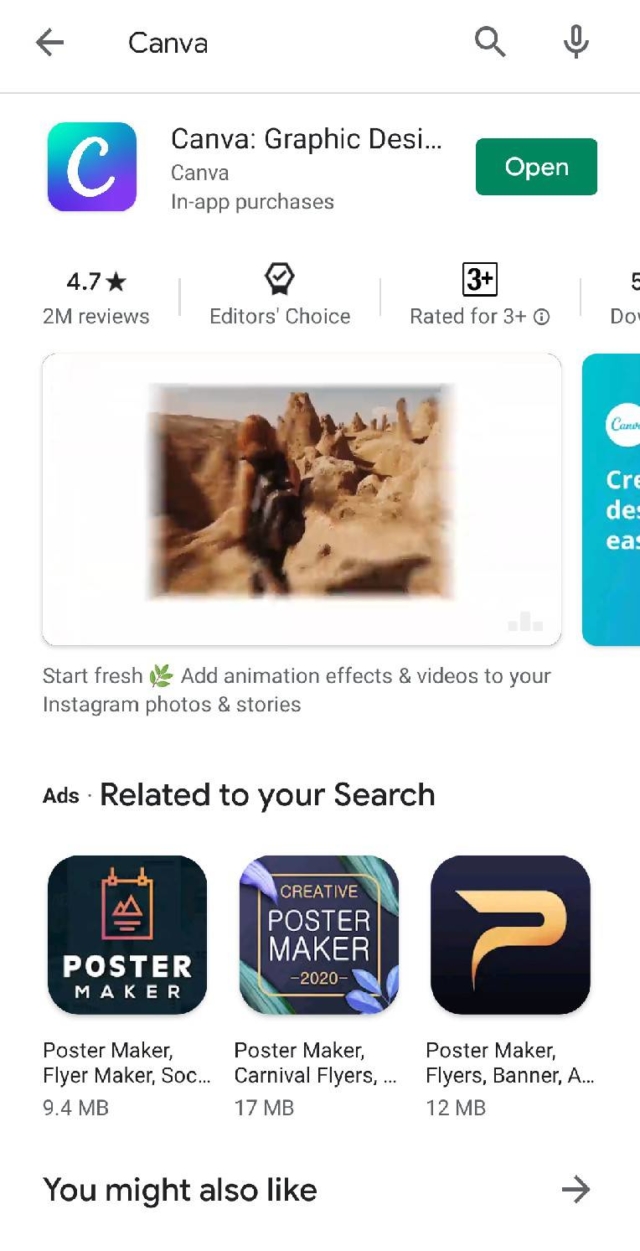
- ดาวน์โหลดแอพพลิเคชั่นถ้าคุณใช้ Android ให้ค้นหาคำว่า Canva ในแอพ Playstore แต่ในกรณีที่ใช้ iOS ให้ค้นหาคำว่า Canva ใน Appstore
(1. Download this Application if you use Android search Canva in playstore but if you use iOS try to search Canva in your Appstore.)
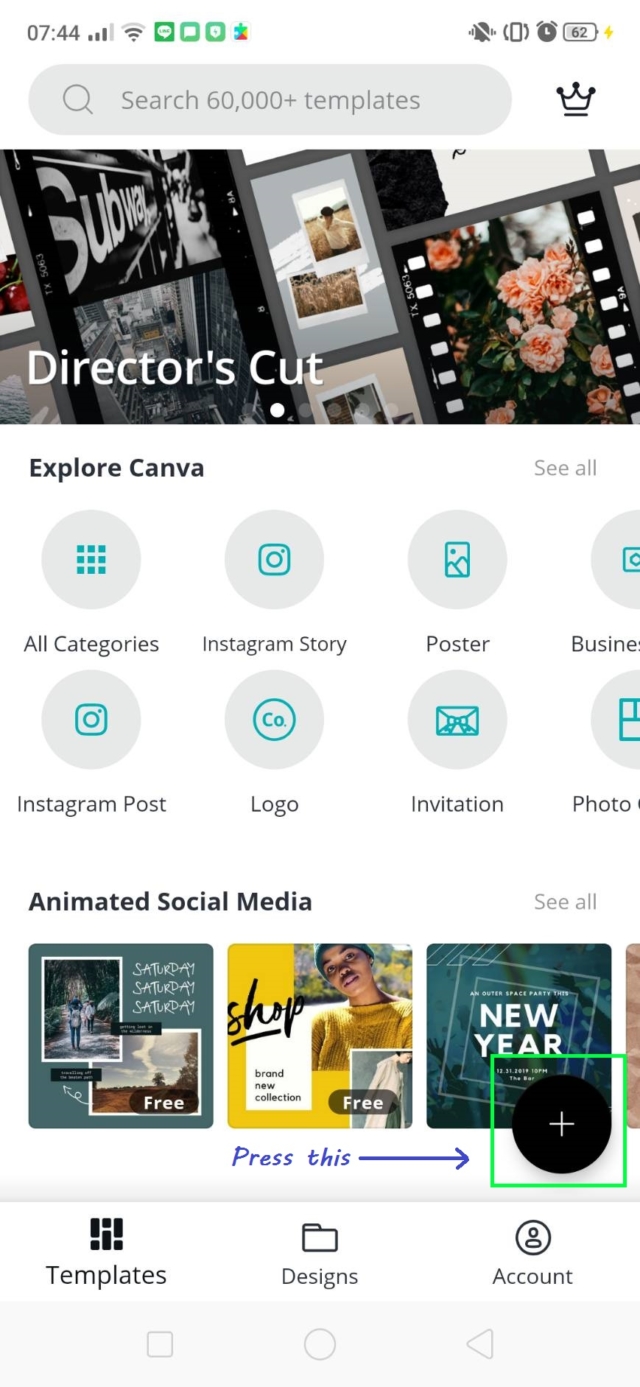
2. ครั้งแรกเมื่อเราเข้าแอพ Canva เราจะมองเห็นหน้าต่างแบบนี้ ให้เรากดไปที่ปุ่มวงกลมสีดำที่มีเครื่องหมายบวก และ กำหนดขนาดที่เราต้องการ
(2. First when you open Canva Application you will see interface like this. You have to press the a black circle button for select your resolution of your design.)
3. ขั้นต่อไปเมื่อเรากดเลือกขนาด เราจะเห็นขนาดและรูปแบบที่แตกต่างกันแยกกันไปในแต่ละแอพ เช่น IG post, IG story, Facebook cover, Twitter post, LinkedIn และอื่นๆ อีกมากมาย แต่ในบทความนี้เราจะสร้างขนาดของ poster สำหรับทำ featured image ในเว็บไซต์ Developers.IO กัน
(3. After that you will see the many platform of resolution to choose for suitable another Social application ex.Instragram post, Instragram story, Facebook cover, Twitter post, LinkedIn Banner etc. But on this lesson i will choose my own resolution for design featured image in Website Developers.IO)
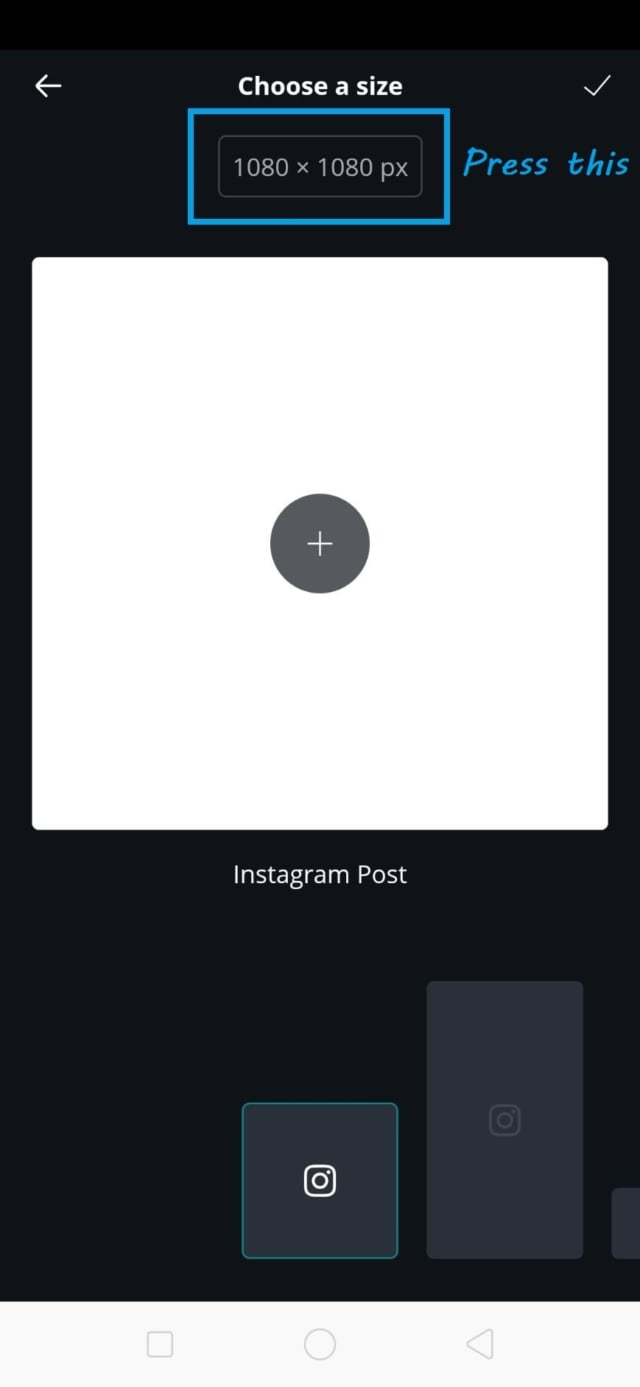
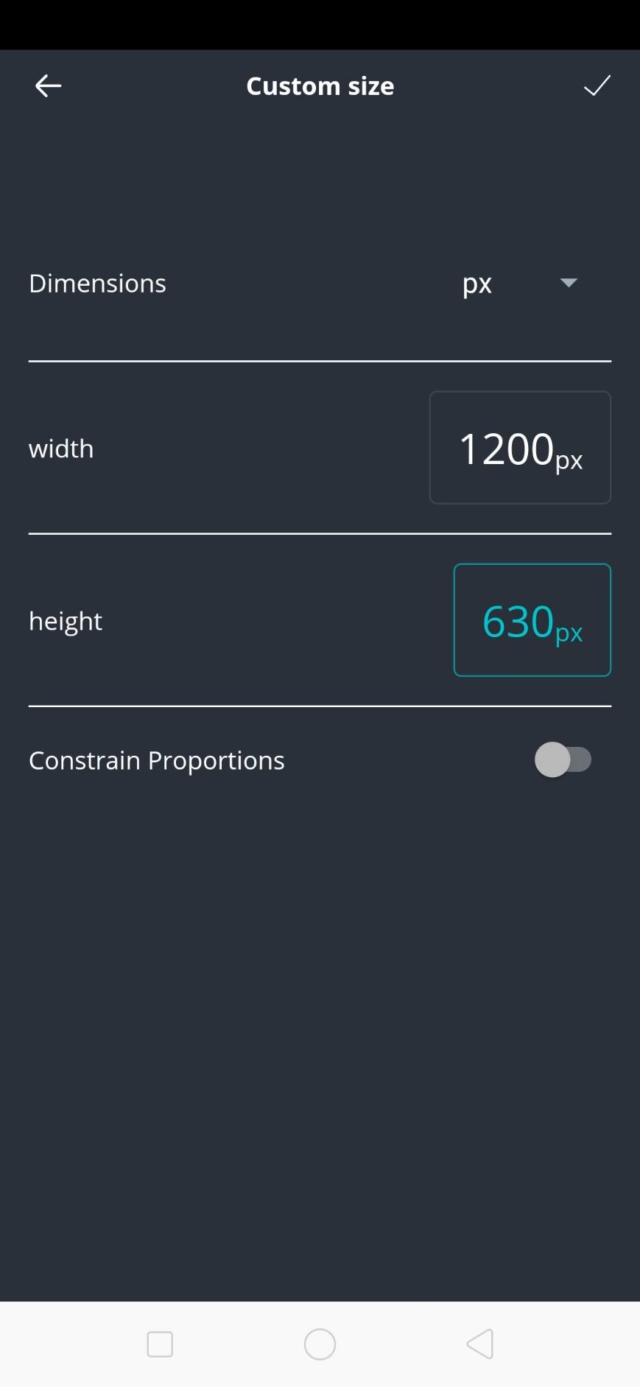
4. เลือกกำหนดขนาดของรูปภาพเอง โดยในเว็บไซต์ Developers.IO ส่วนของ featured image นั้นจะอยู่ที่ขนาด 1200px, 630px
(4. Customize your own resolution. In Developers.IO the featured image is 1200px, 630px)
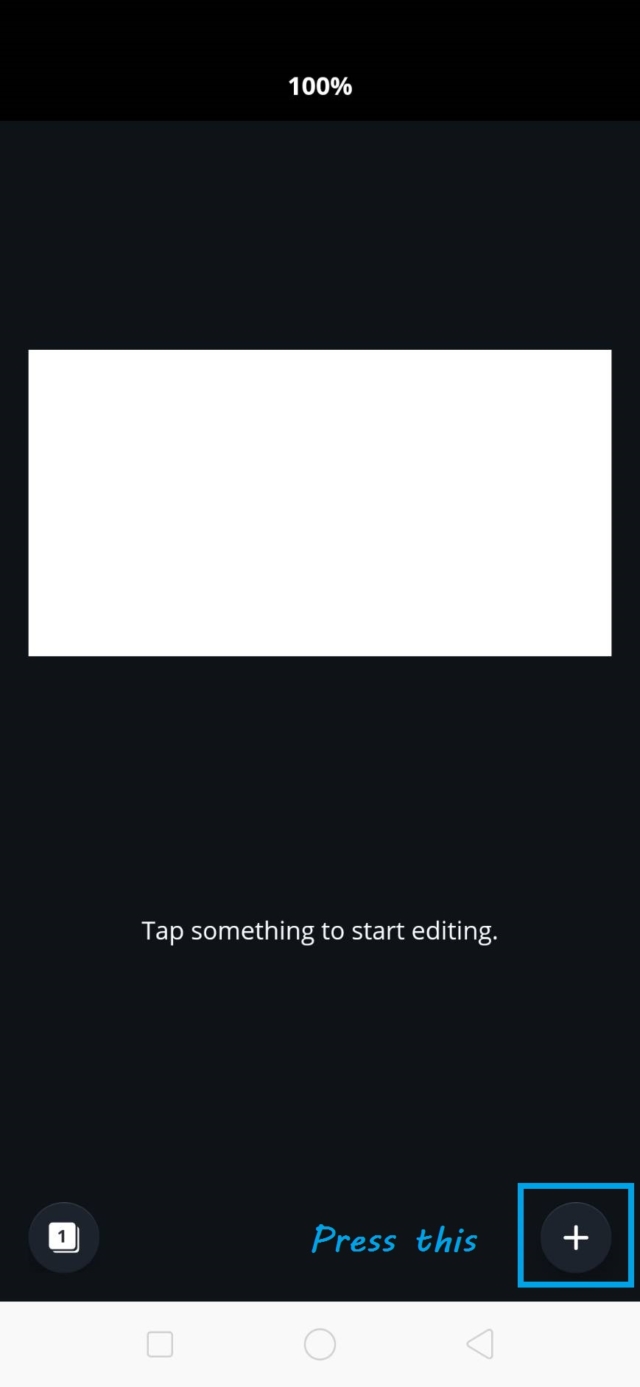
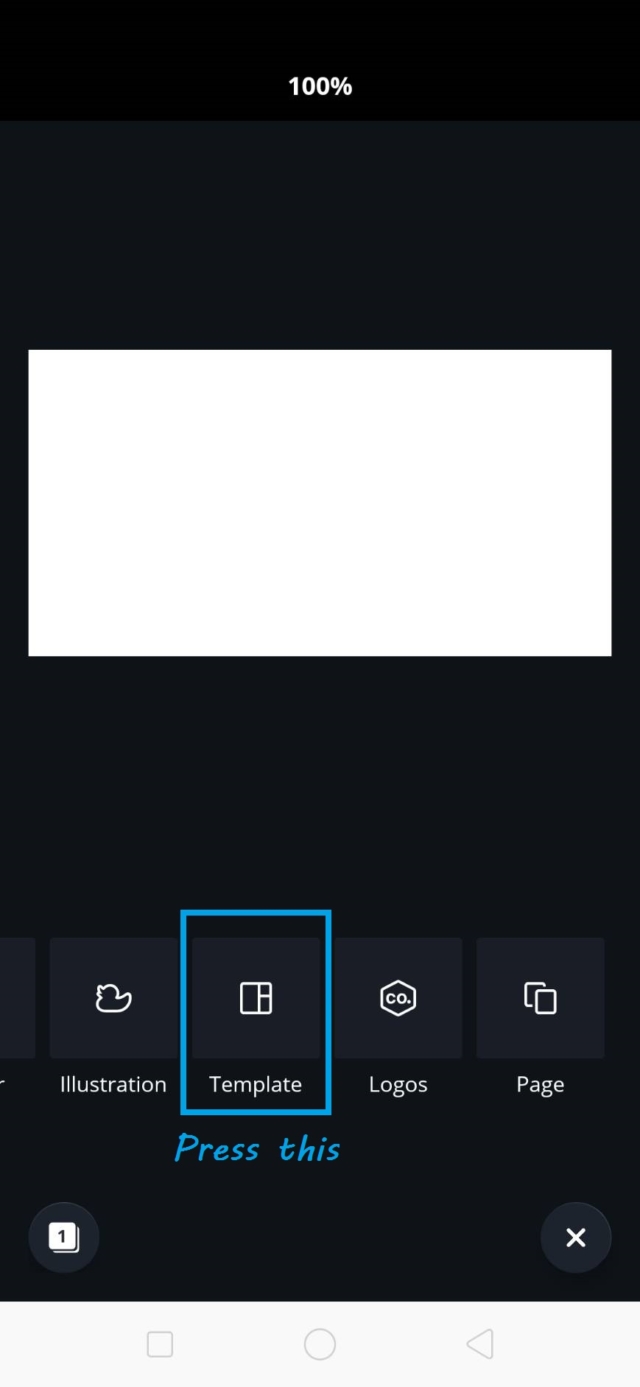
5. หลังจากเลือกขนาดรูปภาพแล้ว ก็จะแสดงหน้าจอแบบนี้ จากนั้นให้เรากดปุ่มวงกลมสีดำรูปบวกตามภาพ พอกดเสร็จ เราจะเครื่องมือที่ใช้ออกแบบและด๊ไซน์มากมาย แต่เราเลือกที่จะทำทุกอย่างให้ง่ายที่สุดดังนั้น มองข้ามเครื่องมือเหล่านั้นไปก่อน แล้วเลื่อนไปทางขวาสุดจนเราเห็นเมนูที่ชื่อว่า Template
(5. After you customize resolution it will show interface like this. And then press the circle button. You will see many tool for design the image but we choose the easy way to make it. So slide a tool bar to the right side until you see Template menu.)
 ---->
---->
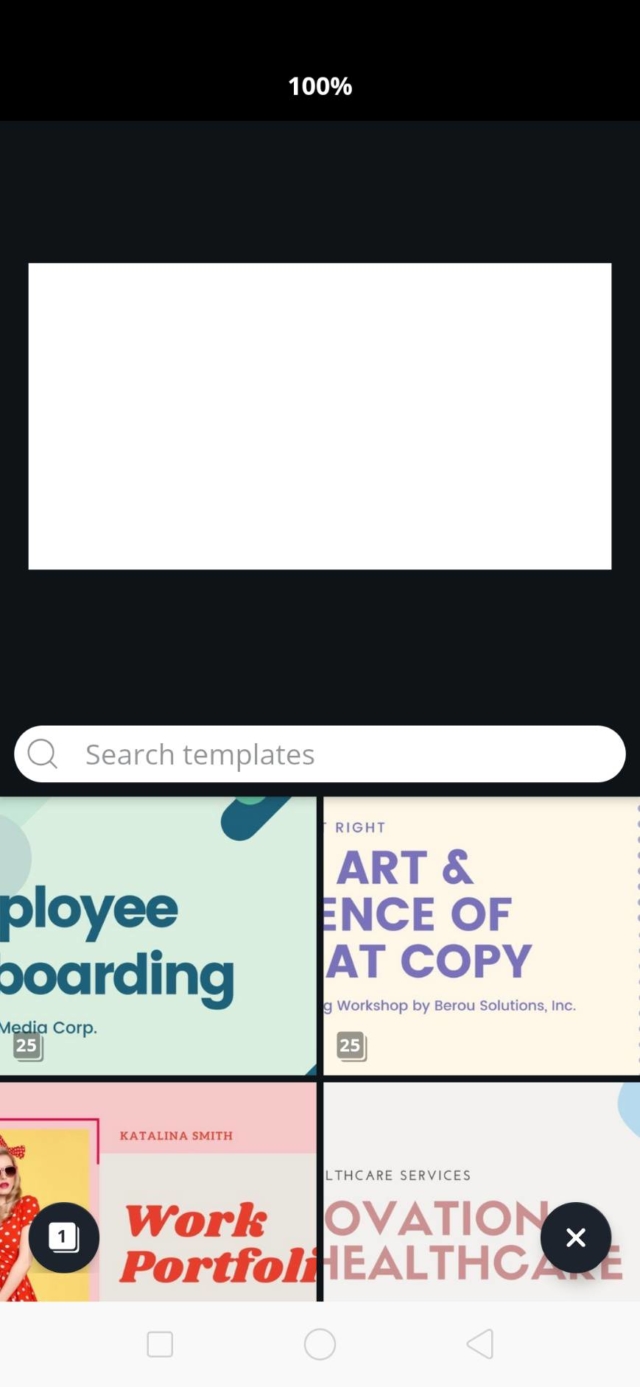
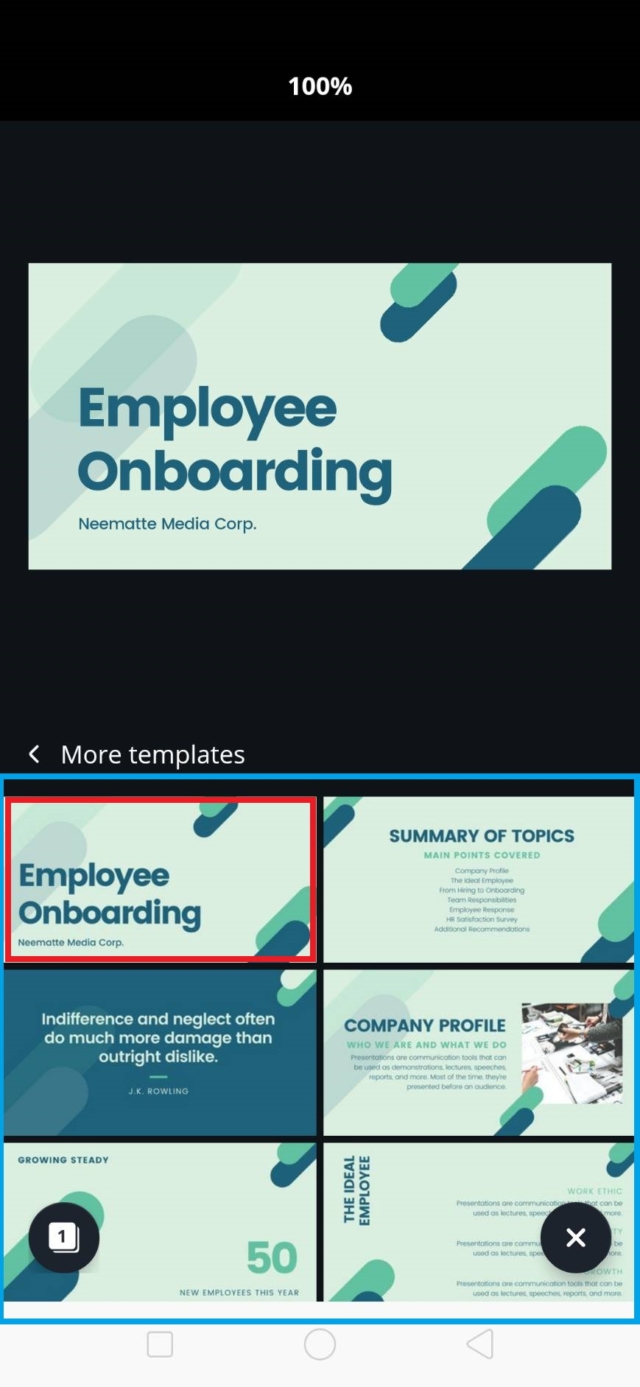
6. เลือก template และ style ที่เราต้องการ ซึ่งมีในแอพนั้นมี template ให้เราได้เลือกใช้มากมาย ค้นหาสไตล์หรือรูปแบบที่เหมาะกับตัวเราได้เลย
(6. Choose your template and style that you want. There are so many template ready to use for you.)
7. เมื่อเราเลือกสไตล์และรูปแบบเสร็จแล้วจะแสดงให้เห็นข้อมูลดังนี้ มันคือรูปแบบที่แตกต่างกันออกไปตามการใช้งาน เช่น หน้าปก หรือ ส่วนเนื้อหาข้อมูลสำคัญ แต่ในบทความนี้เราจะเลือกรูปแบบของหน้าปก เพื่อทำ featured image ในเว็บไซต์ Developers.IO กัน
(7. When you already choose a template you will see display like this. It a style of your template you choose for make a different information you want to share. Title page, Information page and Contact page. At this lesson i want you to make a Display of feature image in Developers.IO so i choose title page for design.)
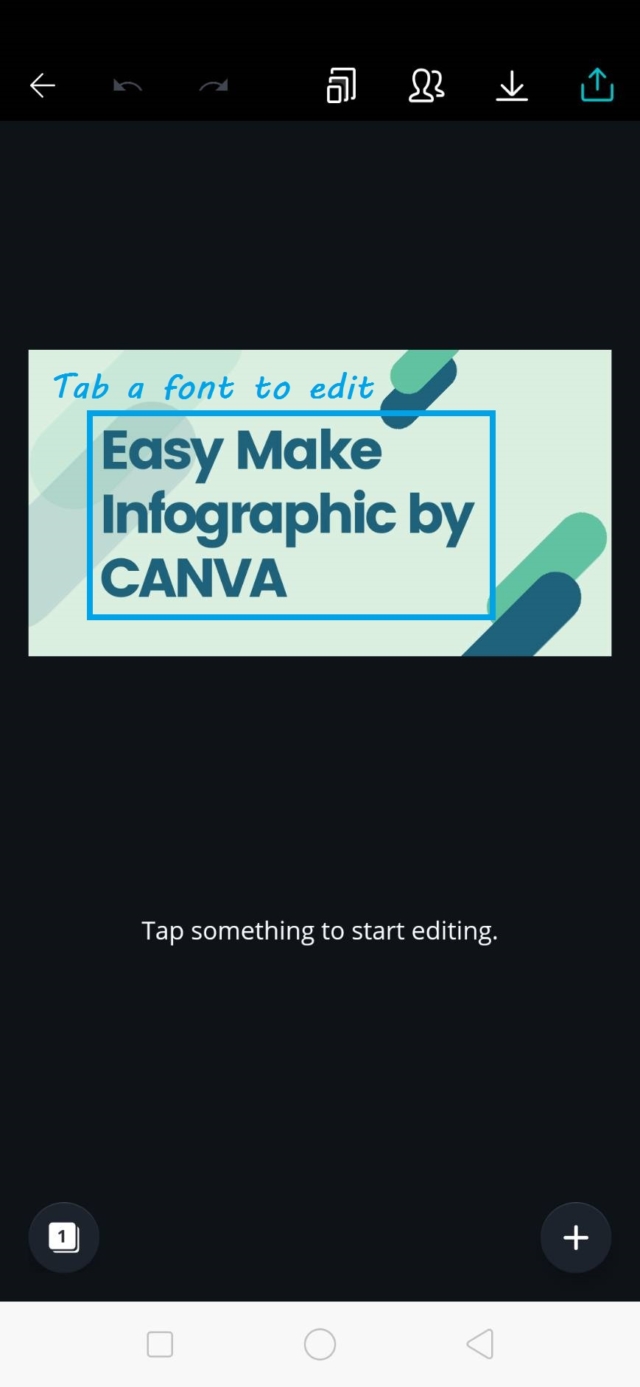
8.เมื่อเราเลือกรูปแบบหน้าปกแล้ว เราสามารถแก้ไข้ข้อความได้จากการแตะไปที่ตัวหนังสือที่เห็น และ ทำการแก้ไขเปลี่ยนแปลงตามข้อมูลที่เราต้องการ
(8.When you choose a title page. You have to tab a font for edit your own information.)
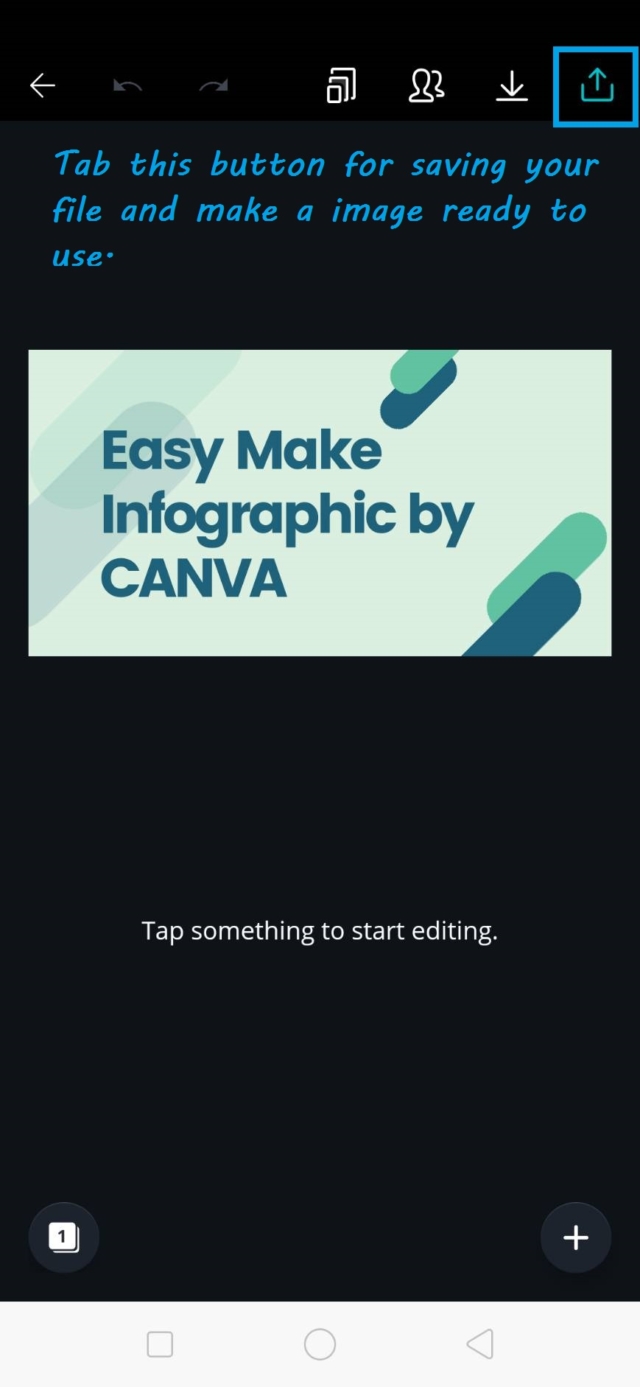
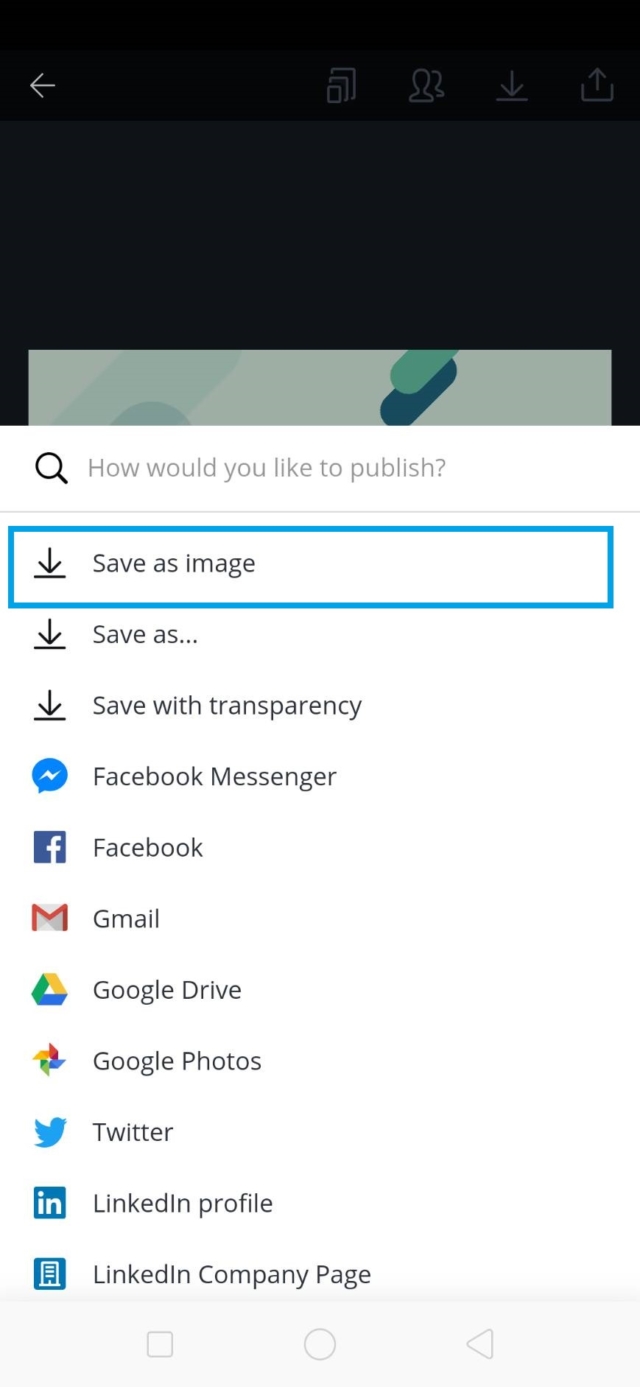
9.หลังจากทำการตกแต่งและใส่ข้อมูลลงไปแล้ว ให้เราแตะไปที่ปุ่มขวาบนสุด และ เลือก Save as iamge หลังจากนั้นตัวไฟล์ที่เราทำจะถูกเก็บบันทึกเป็นรูปภาพอยู่ในเครื่องมือถือของเรา เพื่อนำไปใช้ในโอกาสต่างๆ
(9.After you finish. You have to tab a button at the top of right side and choose Save as image for saving your file into image and ready to use in another action.)
 ---->
---->
10. เสร็จแล้วครับ และนี้คือผลงานของผม
(10. Finish and this is my result.)