
AWS Amplifyの公式チュートリアルでToDoリストアプリ(React)をデプロイしてみた
この記事は公開されてから1年以上経過しています。情報が古い可能性がありますので、ご注意ください。
こんにちは、CX事業本部 IoT事業部の若槻です。
今回は、AWS Amplifyの公式チュートリアルでToDoリストアプリ(React)をデプロイしてみました。
AWS Amplifyとは?
AWS Amplifyとは、AWSでフルスタックなアプリケーションを高速かつ簡単に構築できるサービスです。
Amplifyでは次のようなWebおよびモバイルのアプリケーションが構築可能です。
- JavaScript
- React
- ReactNative
- Angular
- Vue
- Next.js
- Android
- iOS
- Ionic
- Flutter
Amplifyでアプリケーションを構築すると、静的ホスティング(S3)、認証(Cognito)、データAPI(AppSync + DynamoDB)、GitHub連携のCI/CD(AWS Codeシリーズ)がすべて数コマンドで作成でき、Amplify上で統合的に管理されます。これによりバックエンド開発に習熟していないフロントエンド開発者でも難なくフルスタックアプリケーションが構築可能となります。
チュートリアルで学んでみる
このAmplifyを学ぶためにチュートリアルを試そうといくつか探したのですが、まず次のDevelopersIO記事が見つかりました。
内容を実際に試してみたのですが、昨年2020年の記事ということもあり、パッケージのアップデートなどにより陳腐化している部分もありました。具体的にはReactのUIコンポーネントのパッケージ@aws-amplify/ui-reactなどは執筆時からメジャーアップデートがあり、Authenticatorコンポーネント周りの仕様が変わって手順通りにやると上手く動かない部分がありました。
そこで公式チュートリアルを探し出してそちらをやってみることにしました。
やってみた
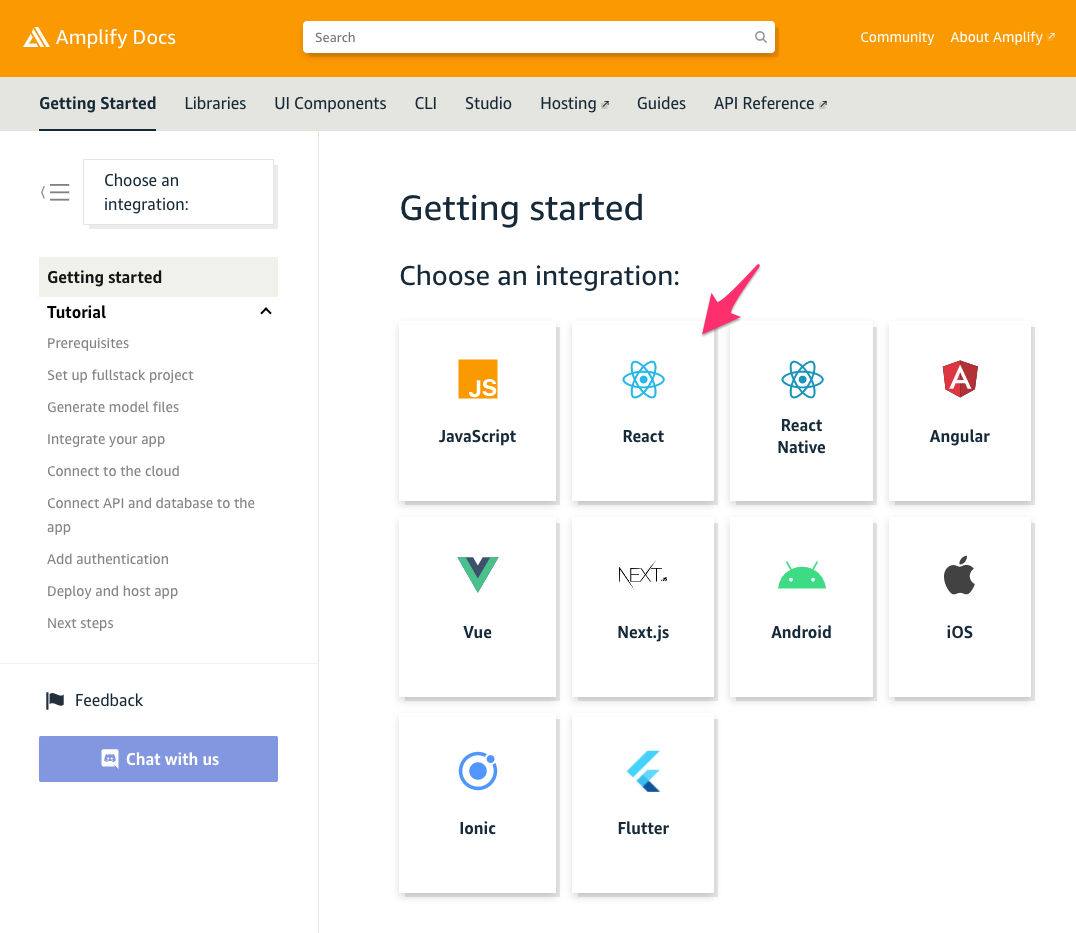
今回試してみたチュートリアルは次のドキュメントで紹介されているものです。
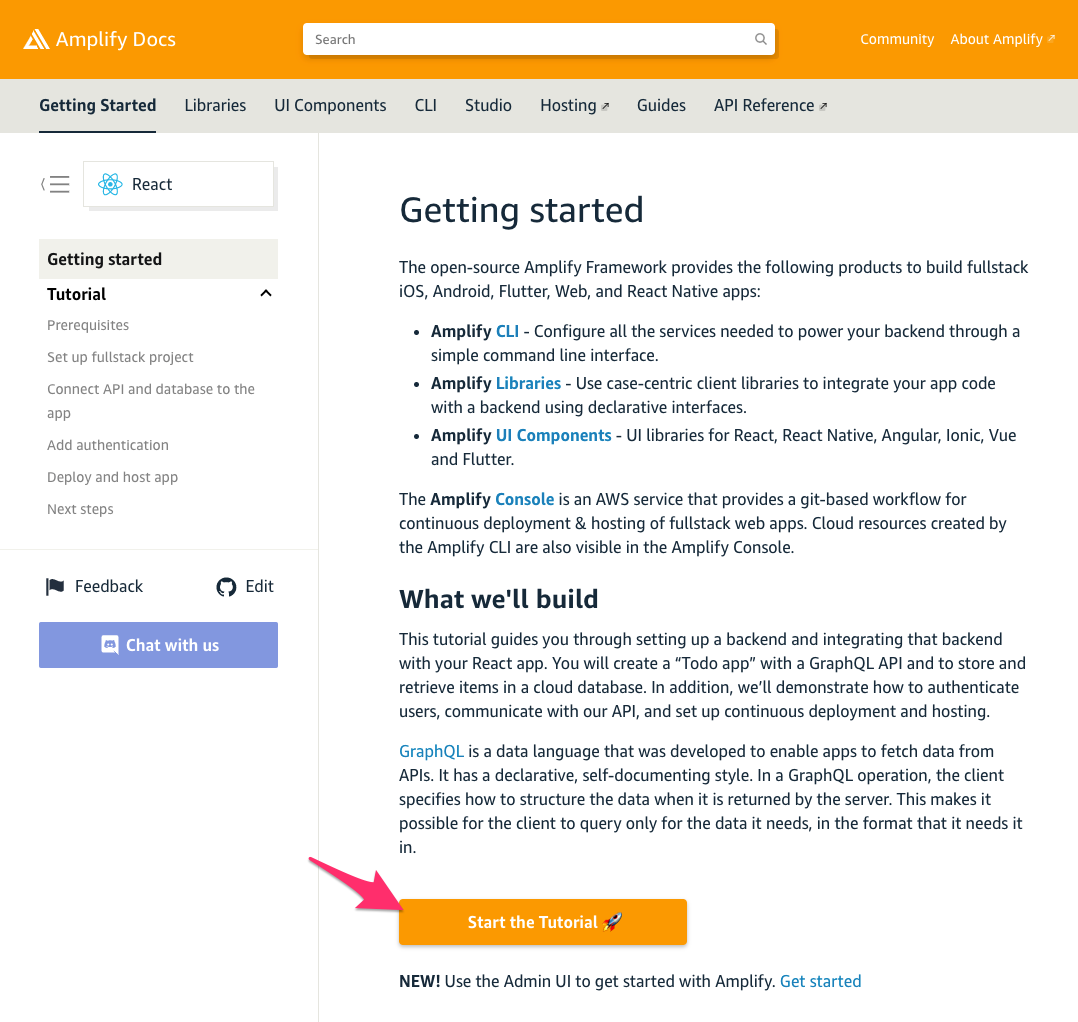
各種フレームワークのチュートリアルが用意されています。今回は[React]を選択します。
[Start the Tutorial]からチュートリアルを開始してきます!
ここからはチュートリアルに沿って次の内容を行っていきます。
- Prerequisites(Amplify環境の準備)
- Set up fullstack project(Amplifyプロジェクトのバックエンドおよびフロントエンドの初期化)
- Connect API and database to the app(APIのデプロイおよびフロントエンドからの接続の実装)
- Add authentication(認証の実装)
- Deploy and host app(Amplifyアプリのデプロイ)
Prerequisites
npmで@aws-amplify/cliをインストールします。
$ npm install -g @aws-amplify/cli
amplify configureを実行して、Amplifyプロジェクトの開発で使うためのCLIプロファイルを作成します。(作成済みの場合は省略してください)
$ amplify configure
Follow these steps to set up access to your AWS account:

Sign in to your AWS administrator account:
https://console.aws.amazon.com/
Press Enter to continue

Specify the AWS Region
? region:  ap-northeast-1
Specify the username of the new IAM user:
? user name:  amplify-qQQI3
Complete the user creation using the AWS console
https://console.aws.amazon.com/iam/home?region=ap-northeast-1#/users$new?step=final&accessKey&userNames=amplify-qQQI3&permissionType=policies&policies=arn:aws:iam::aws:policy%2FAdministratorAccess
Press Enter to continue
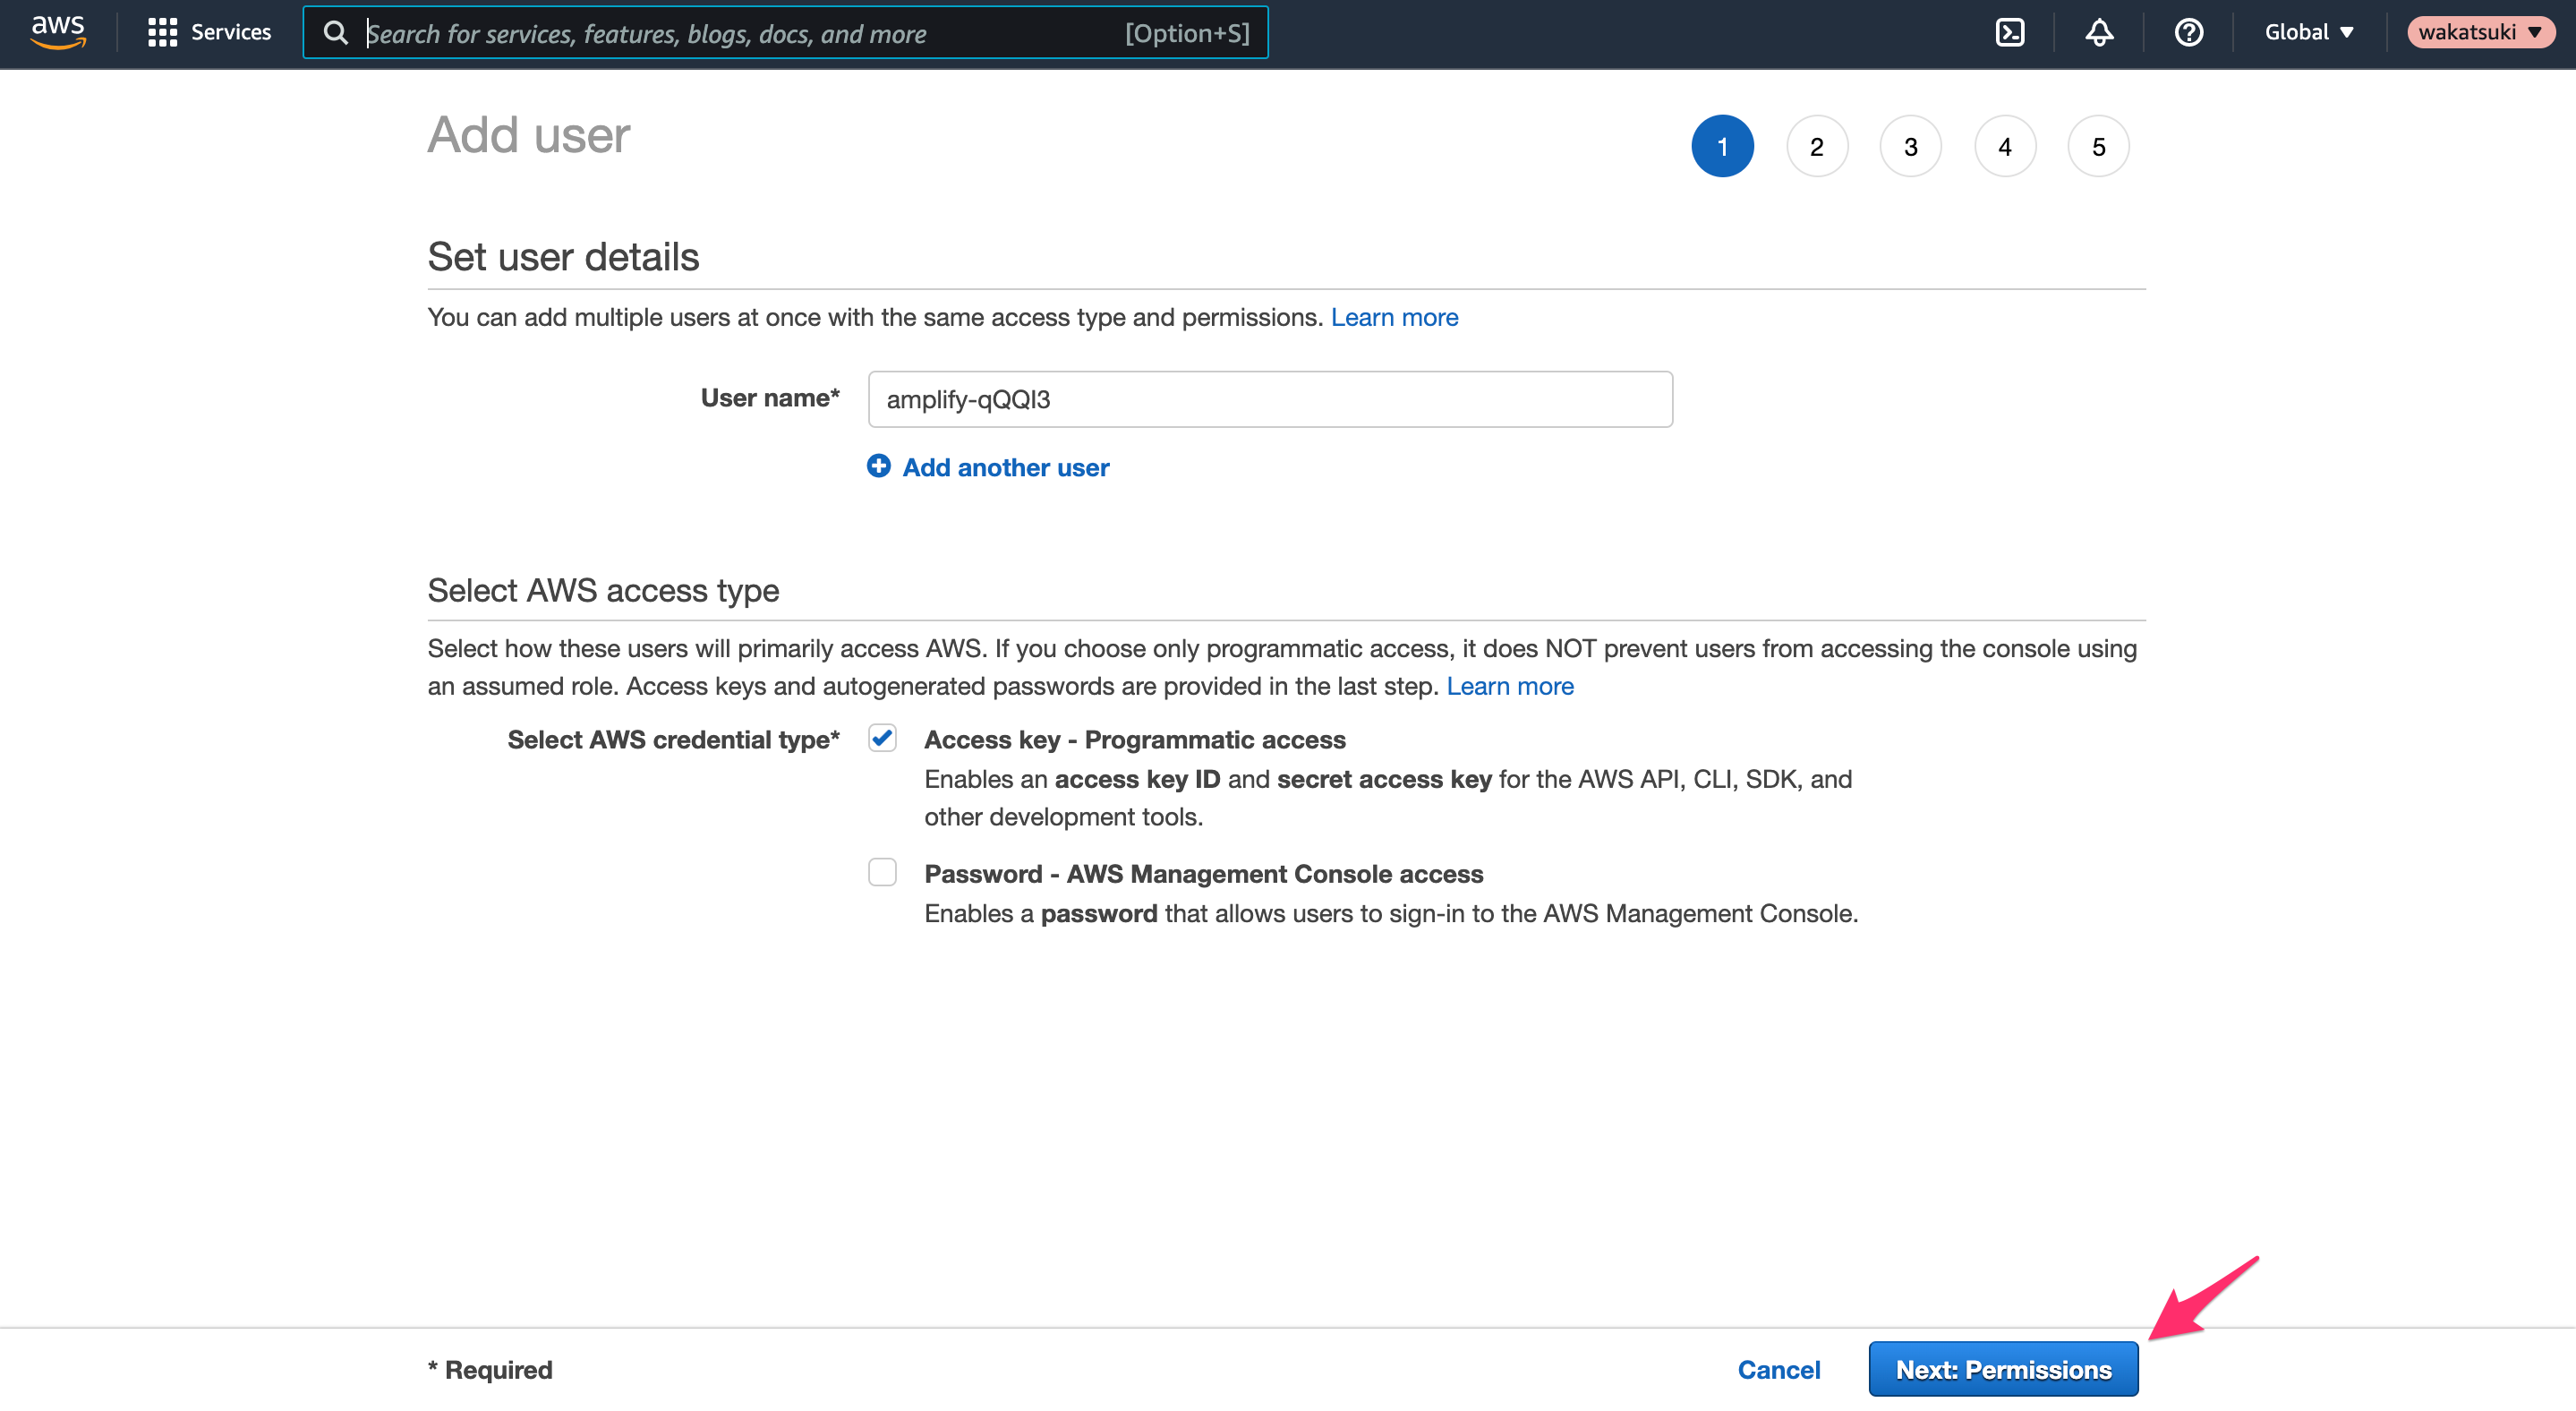
IAMユーザー作成のコンソール画面が立ち上がります。このまま[Permissions]をクリックします。
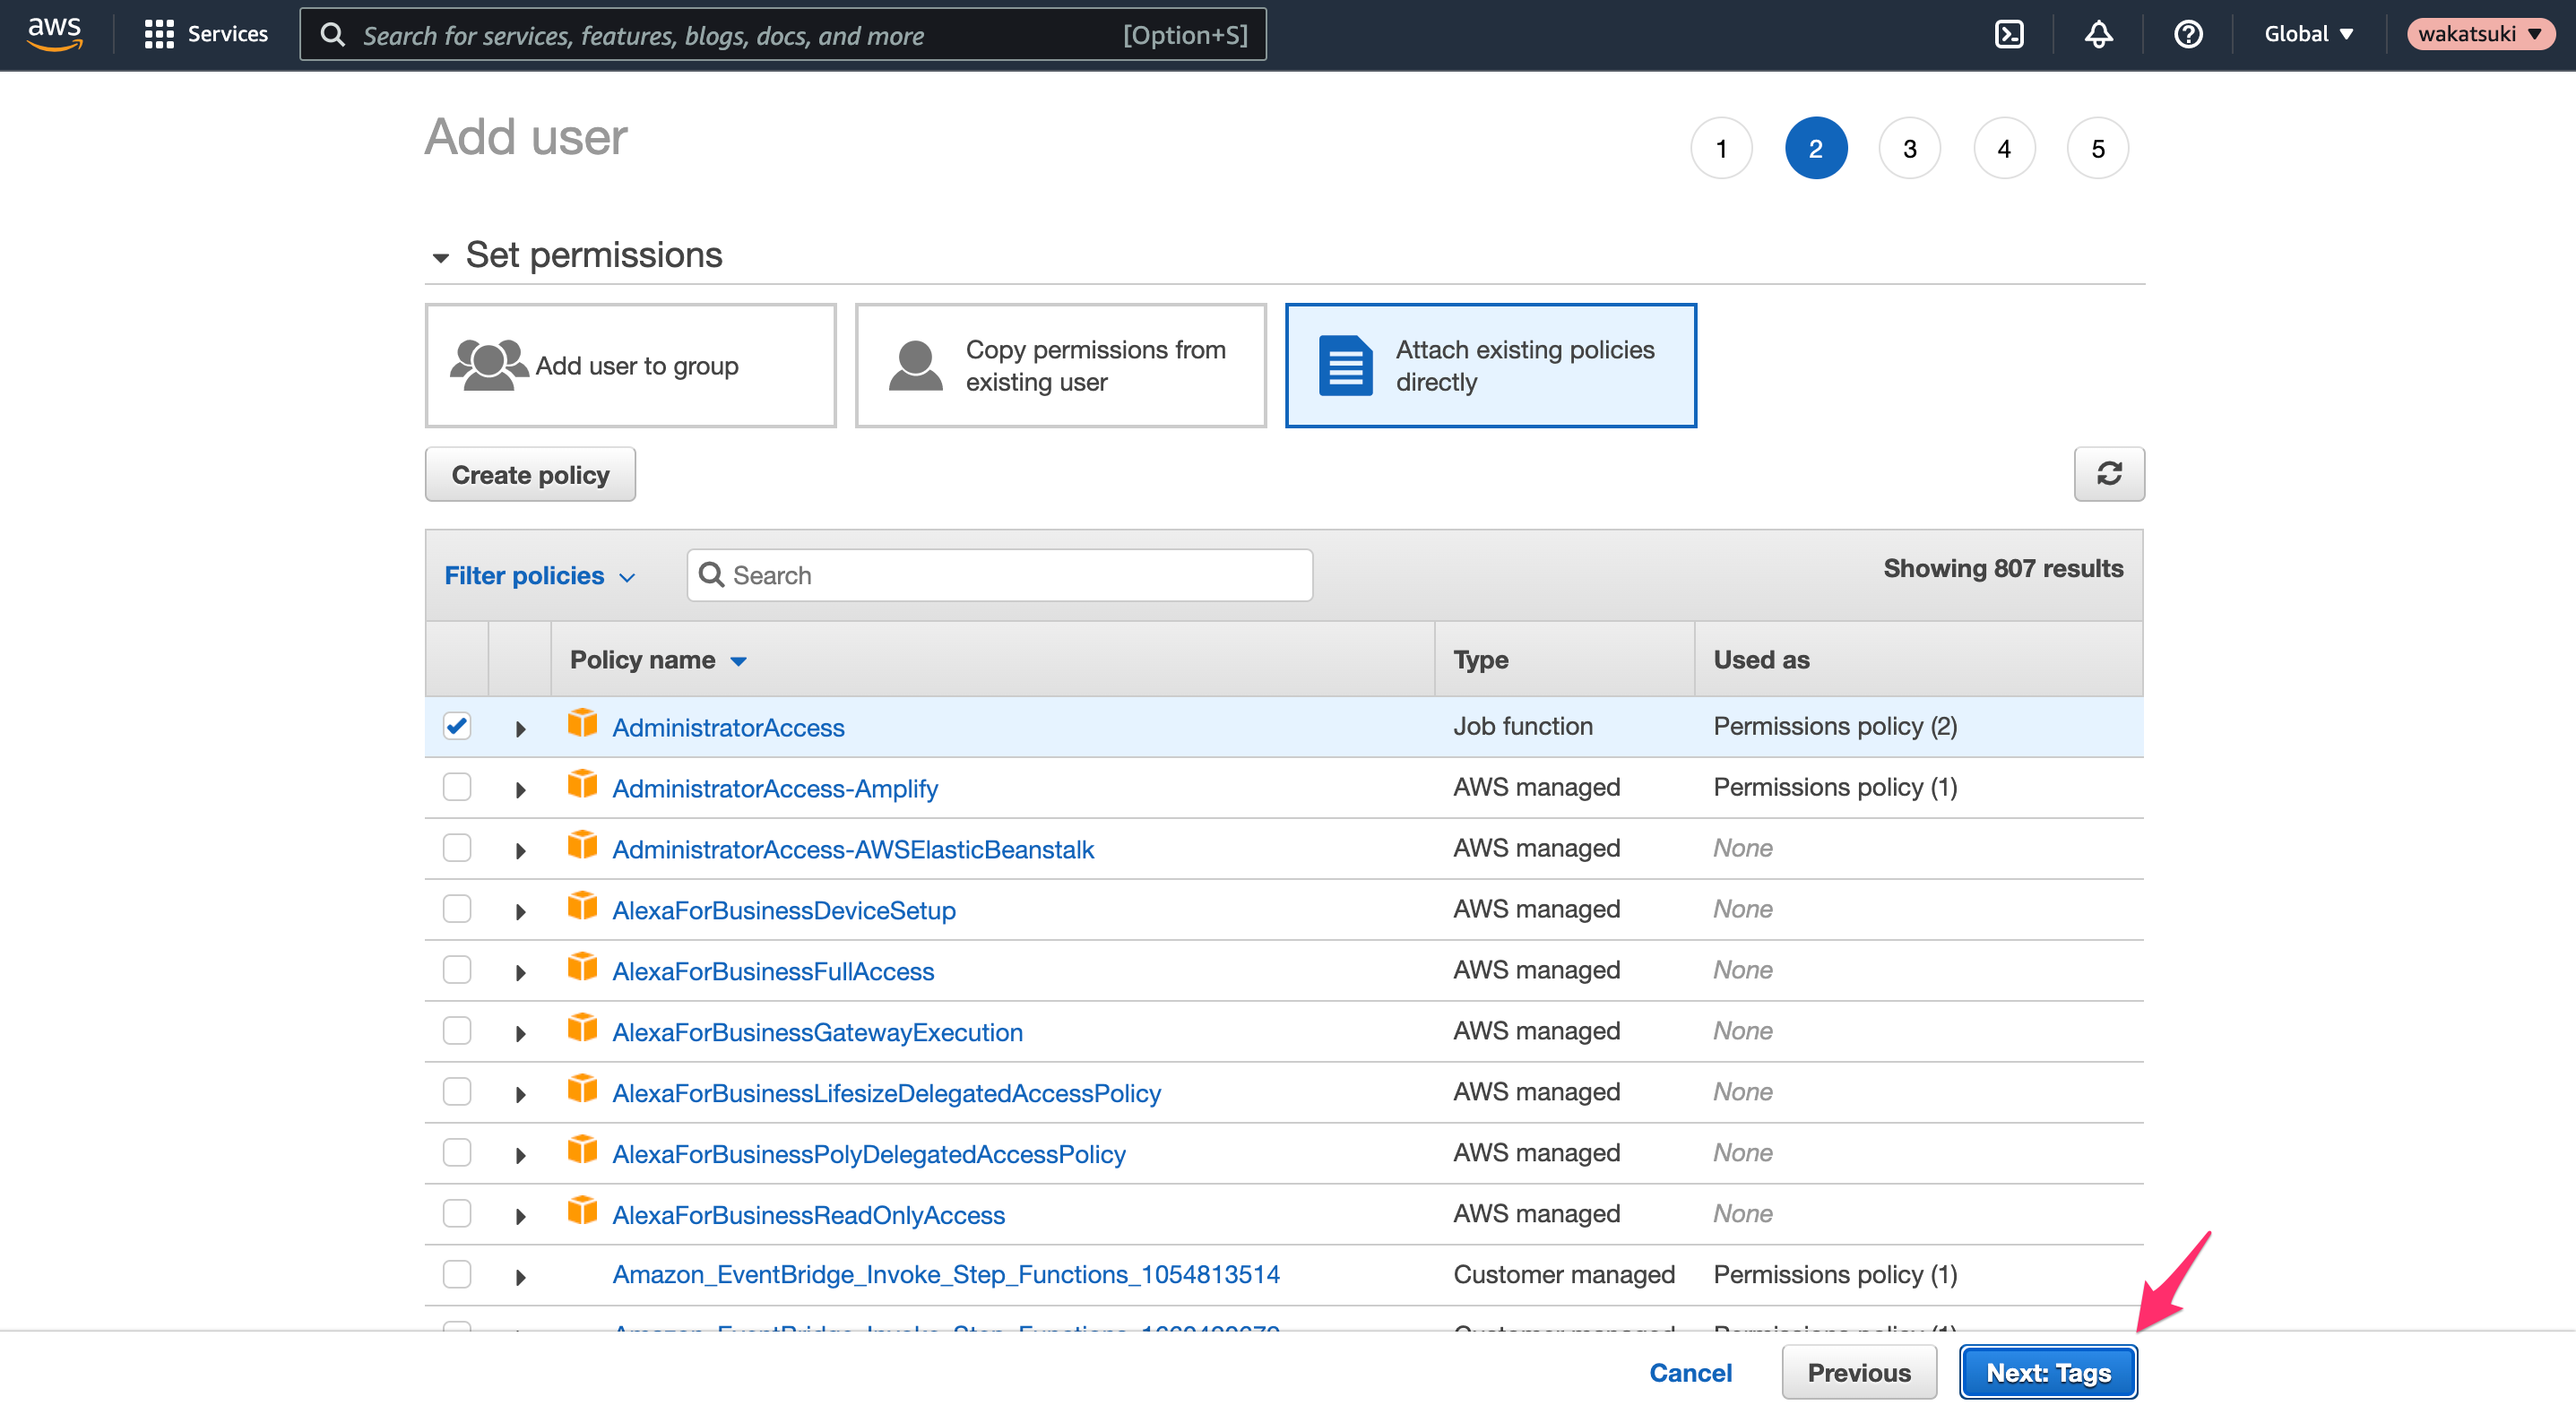
AdministratorAccessが選択された状態で、[Next]をクリックします。
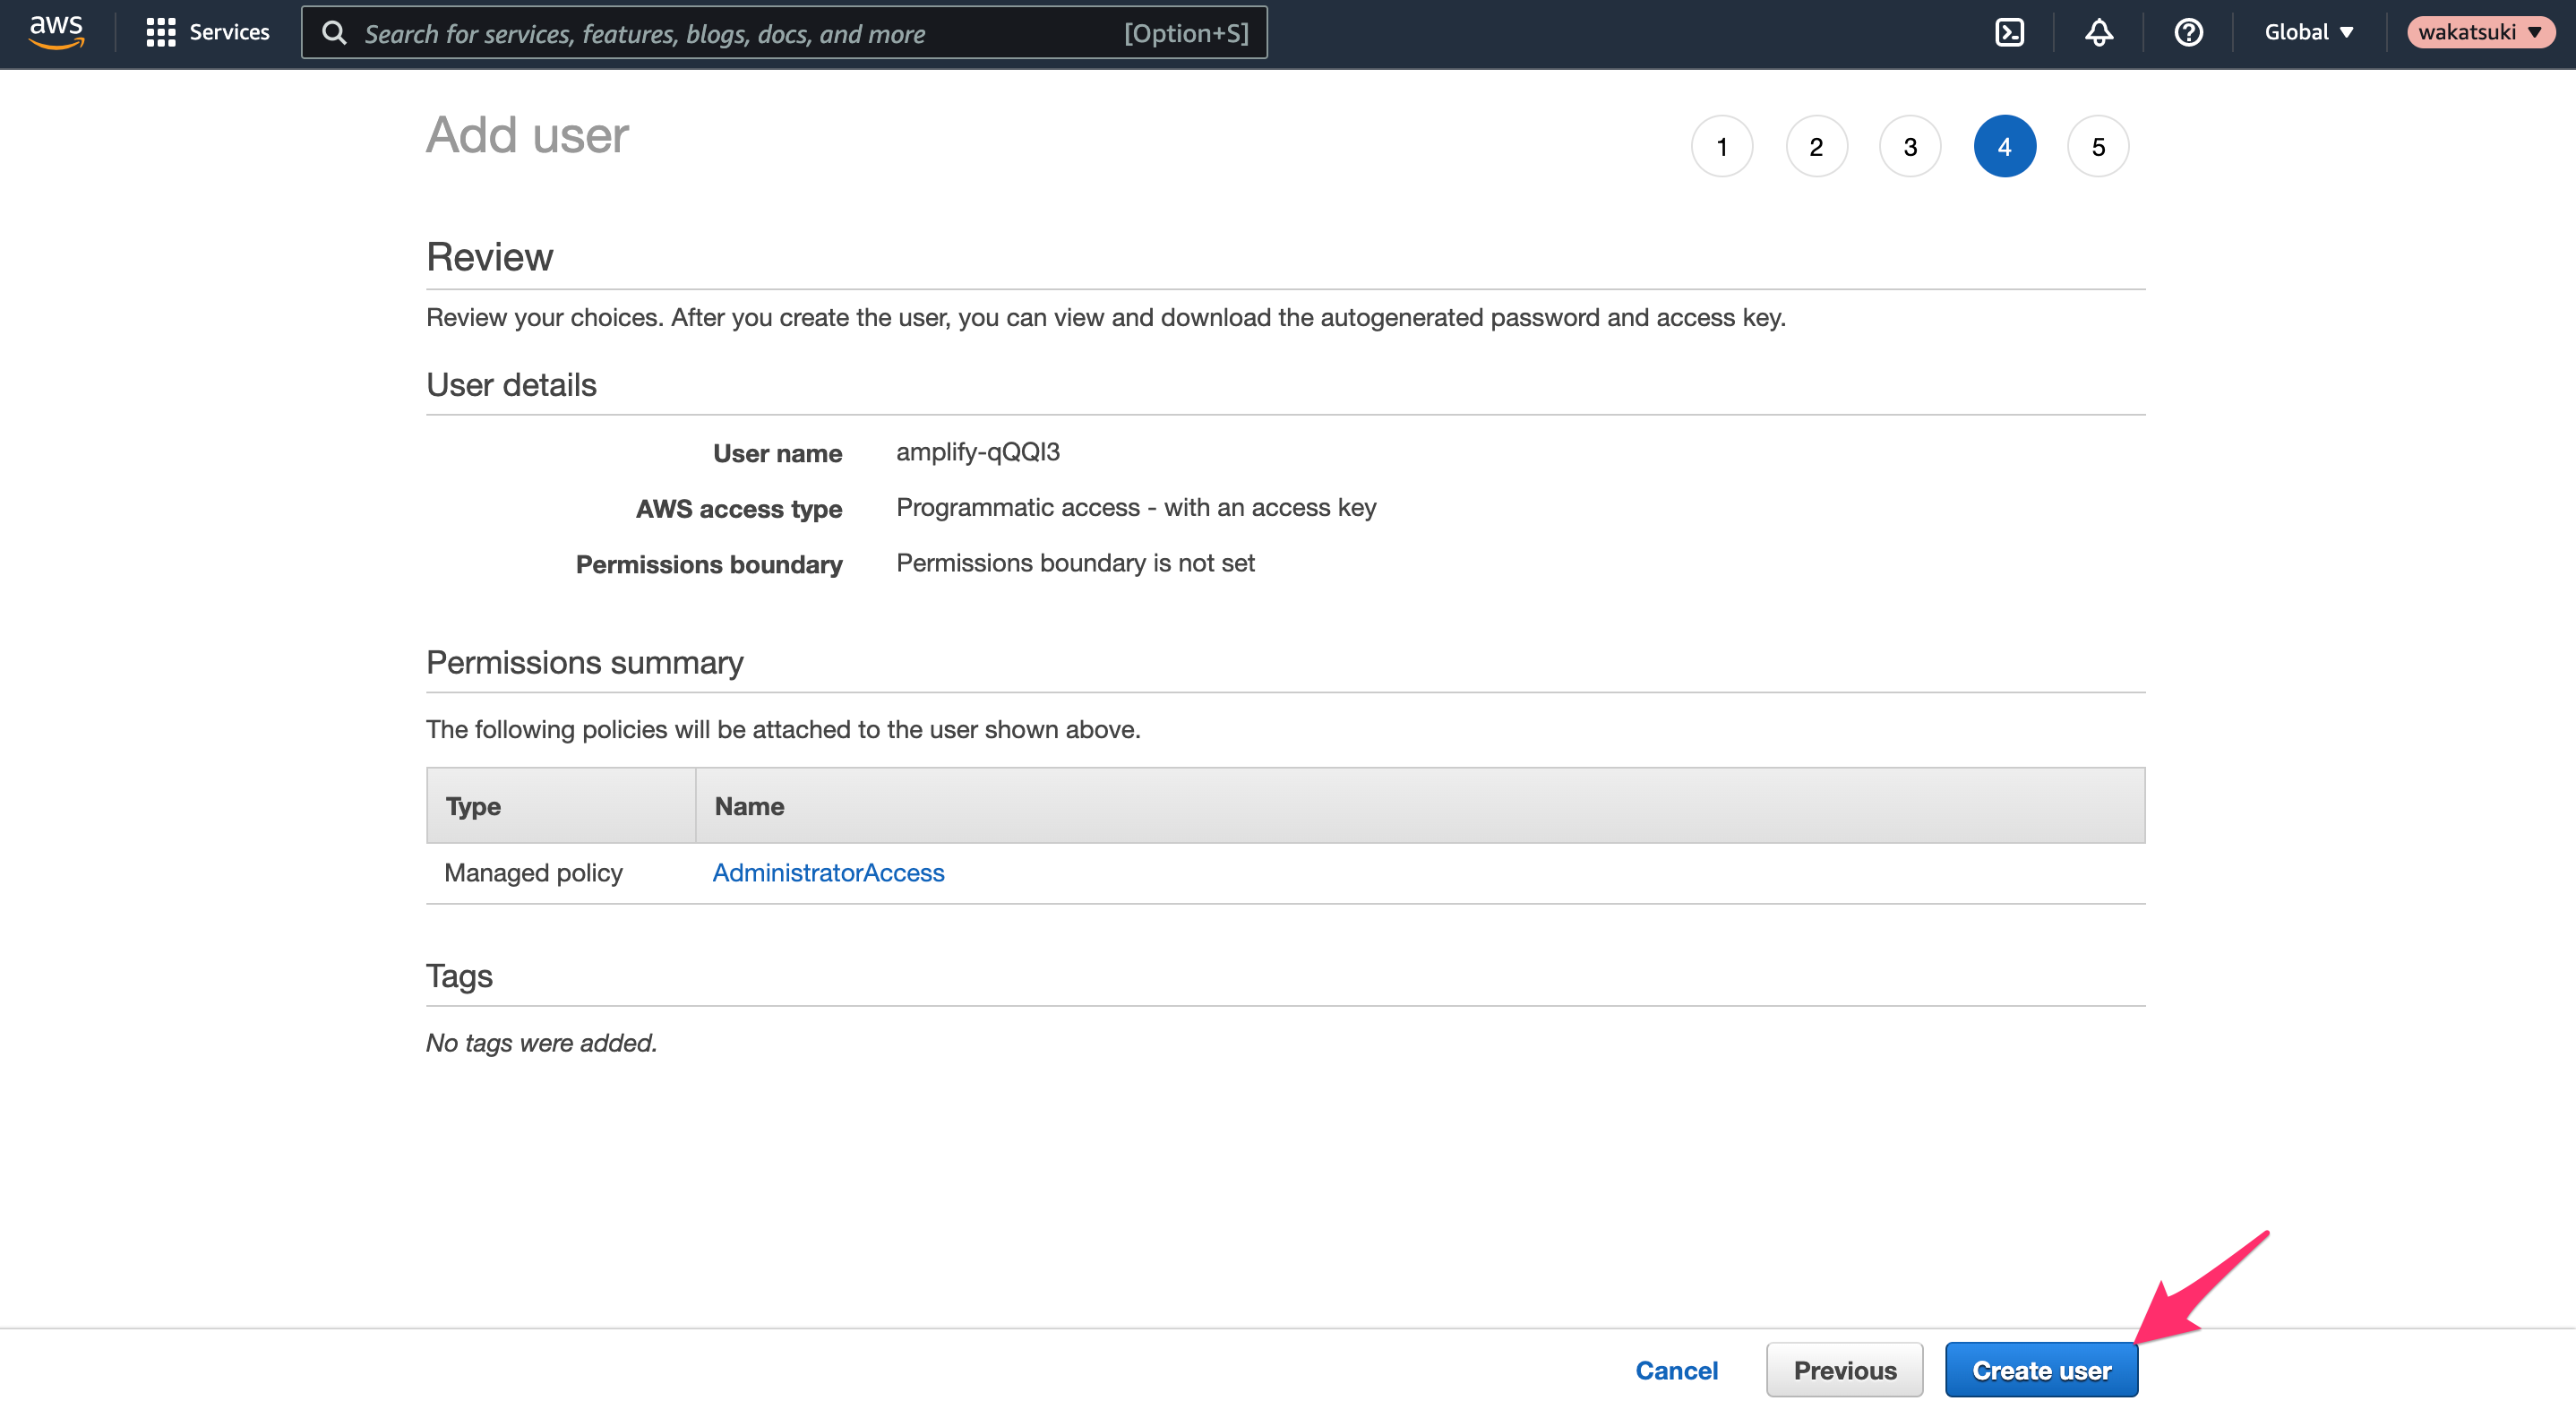
[Review]をクリックします。
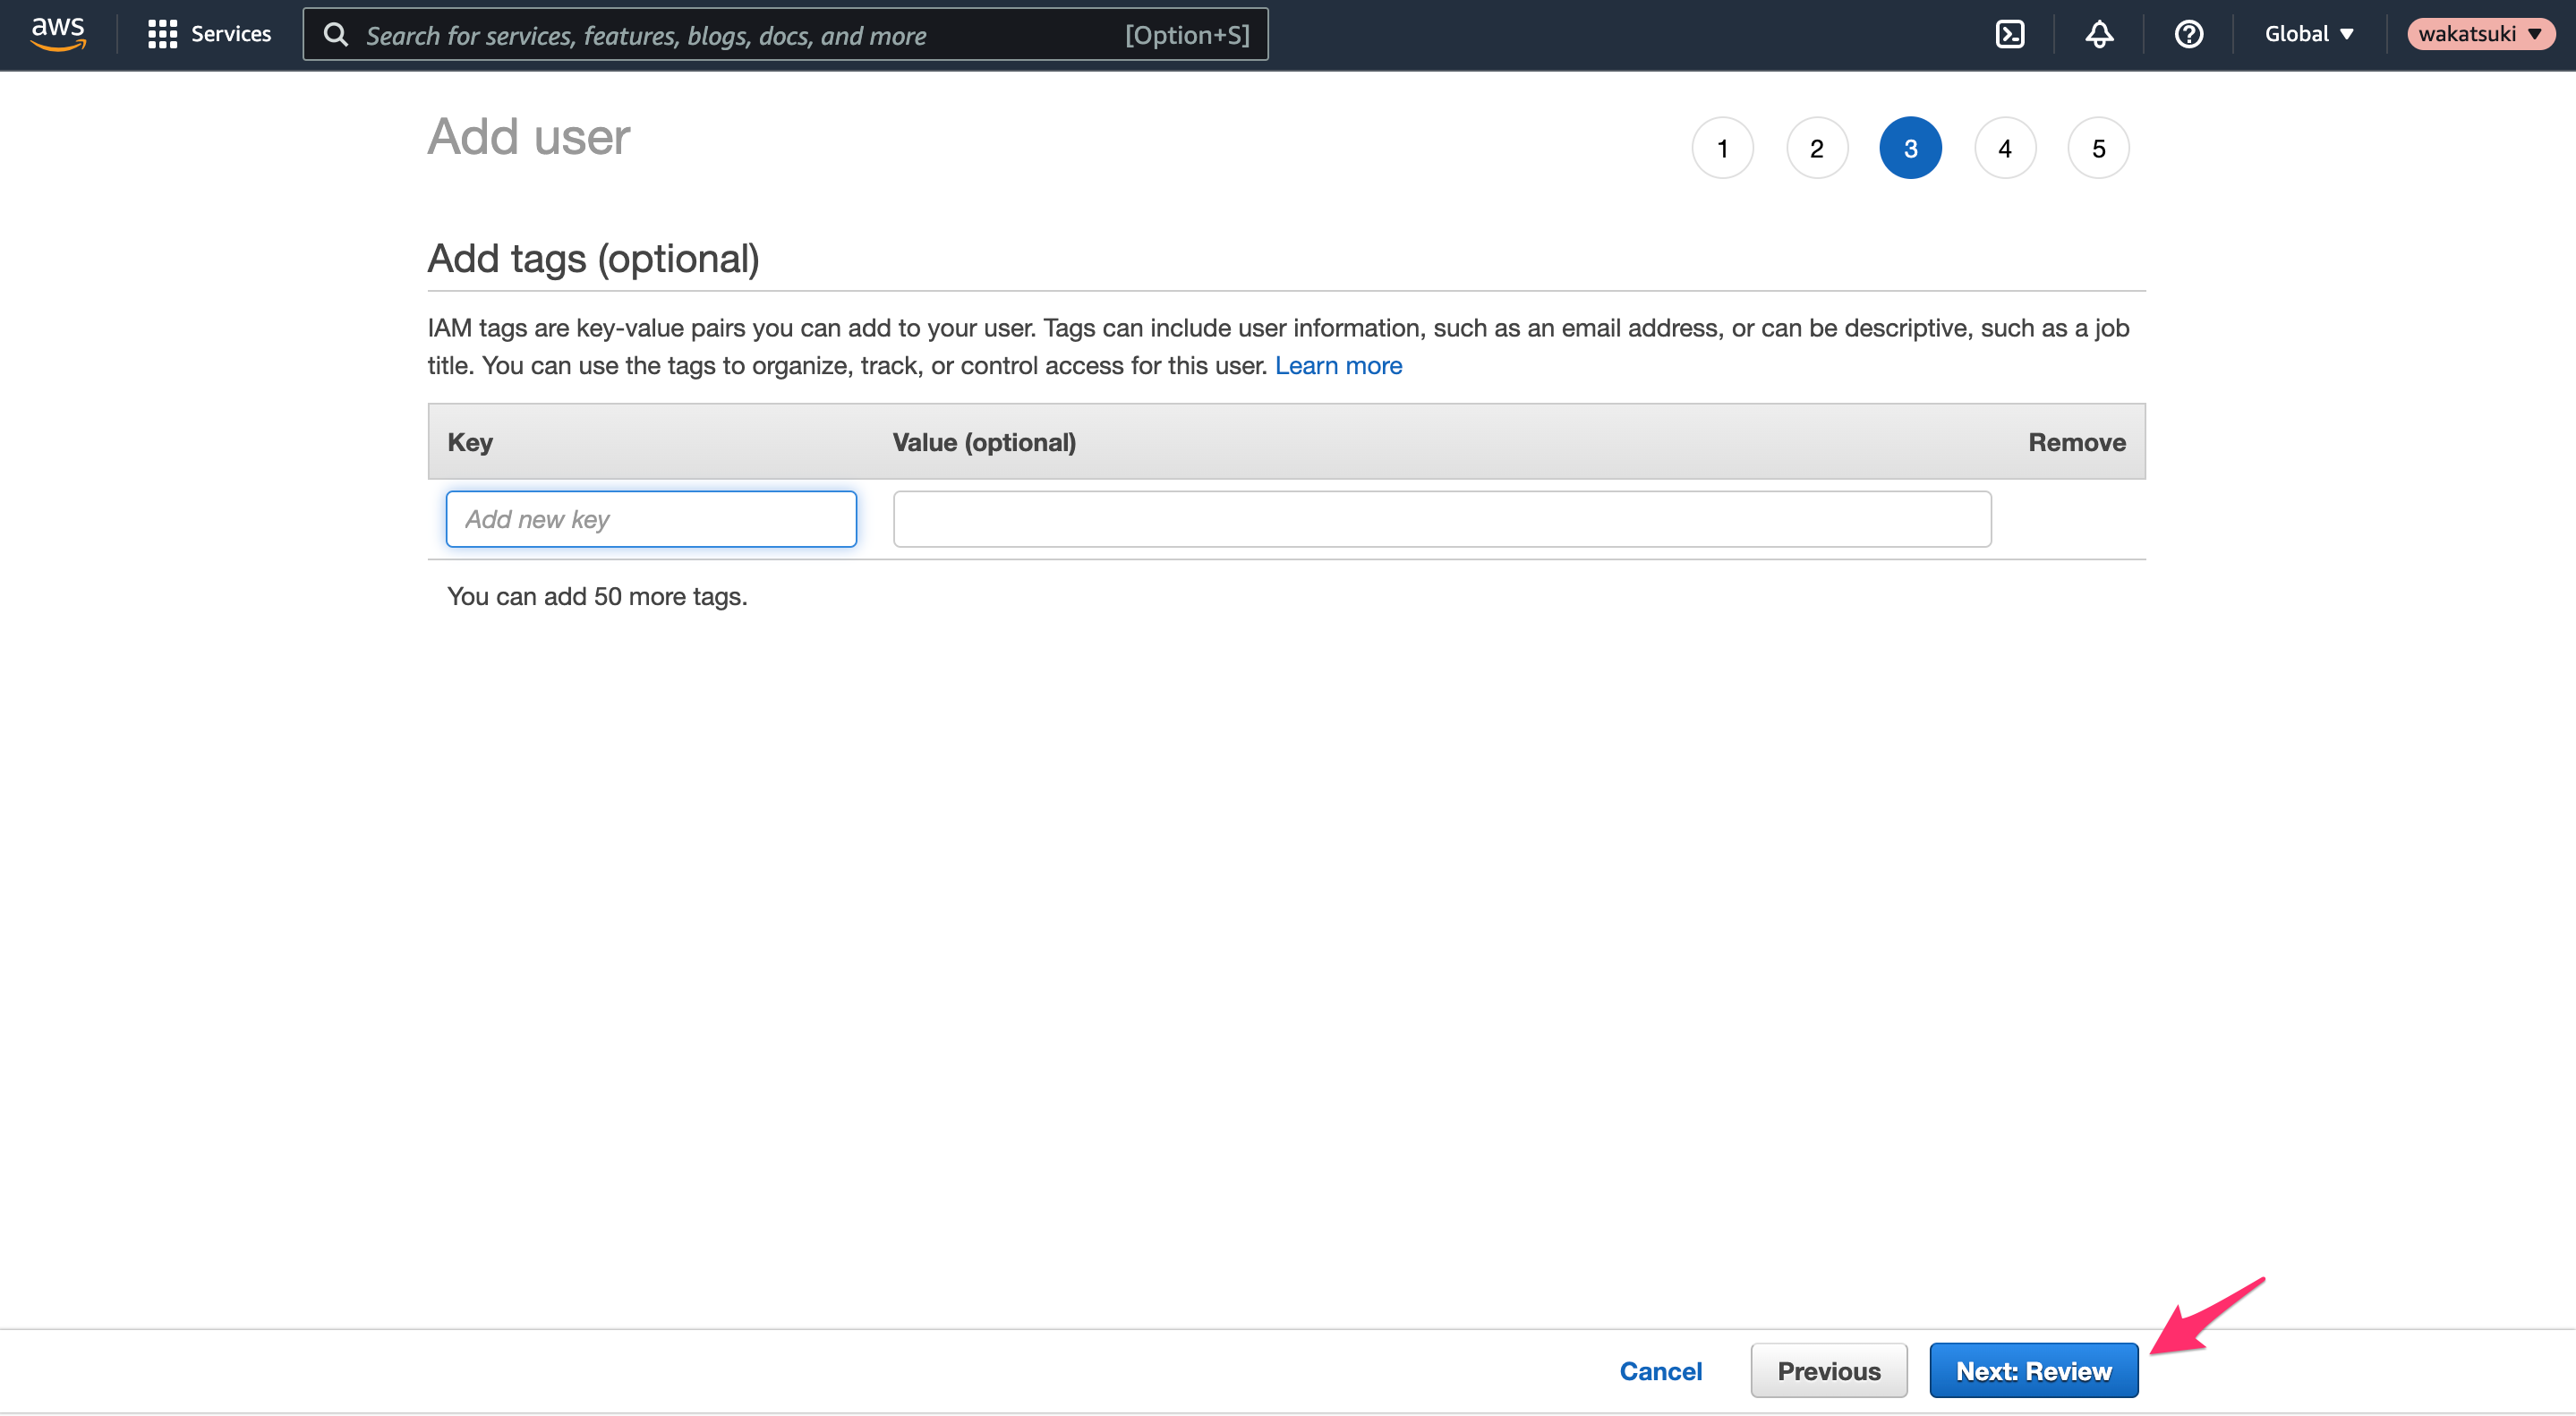
[Create user]をクリックして作成を完了します。
作成ができました。[Access key ID]と[Secret access key]を控えます。
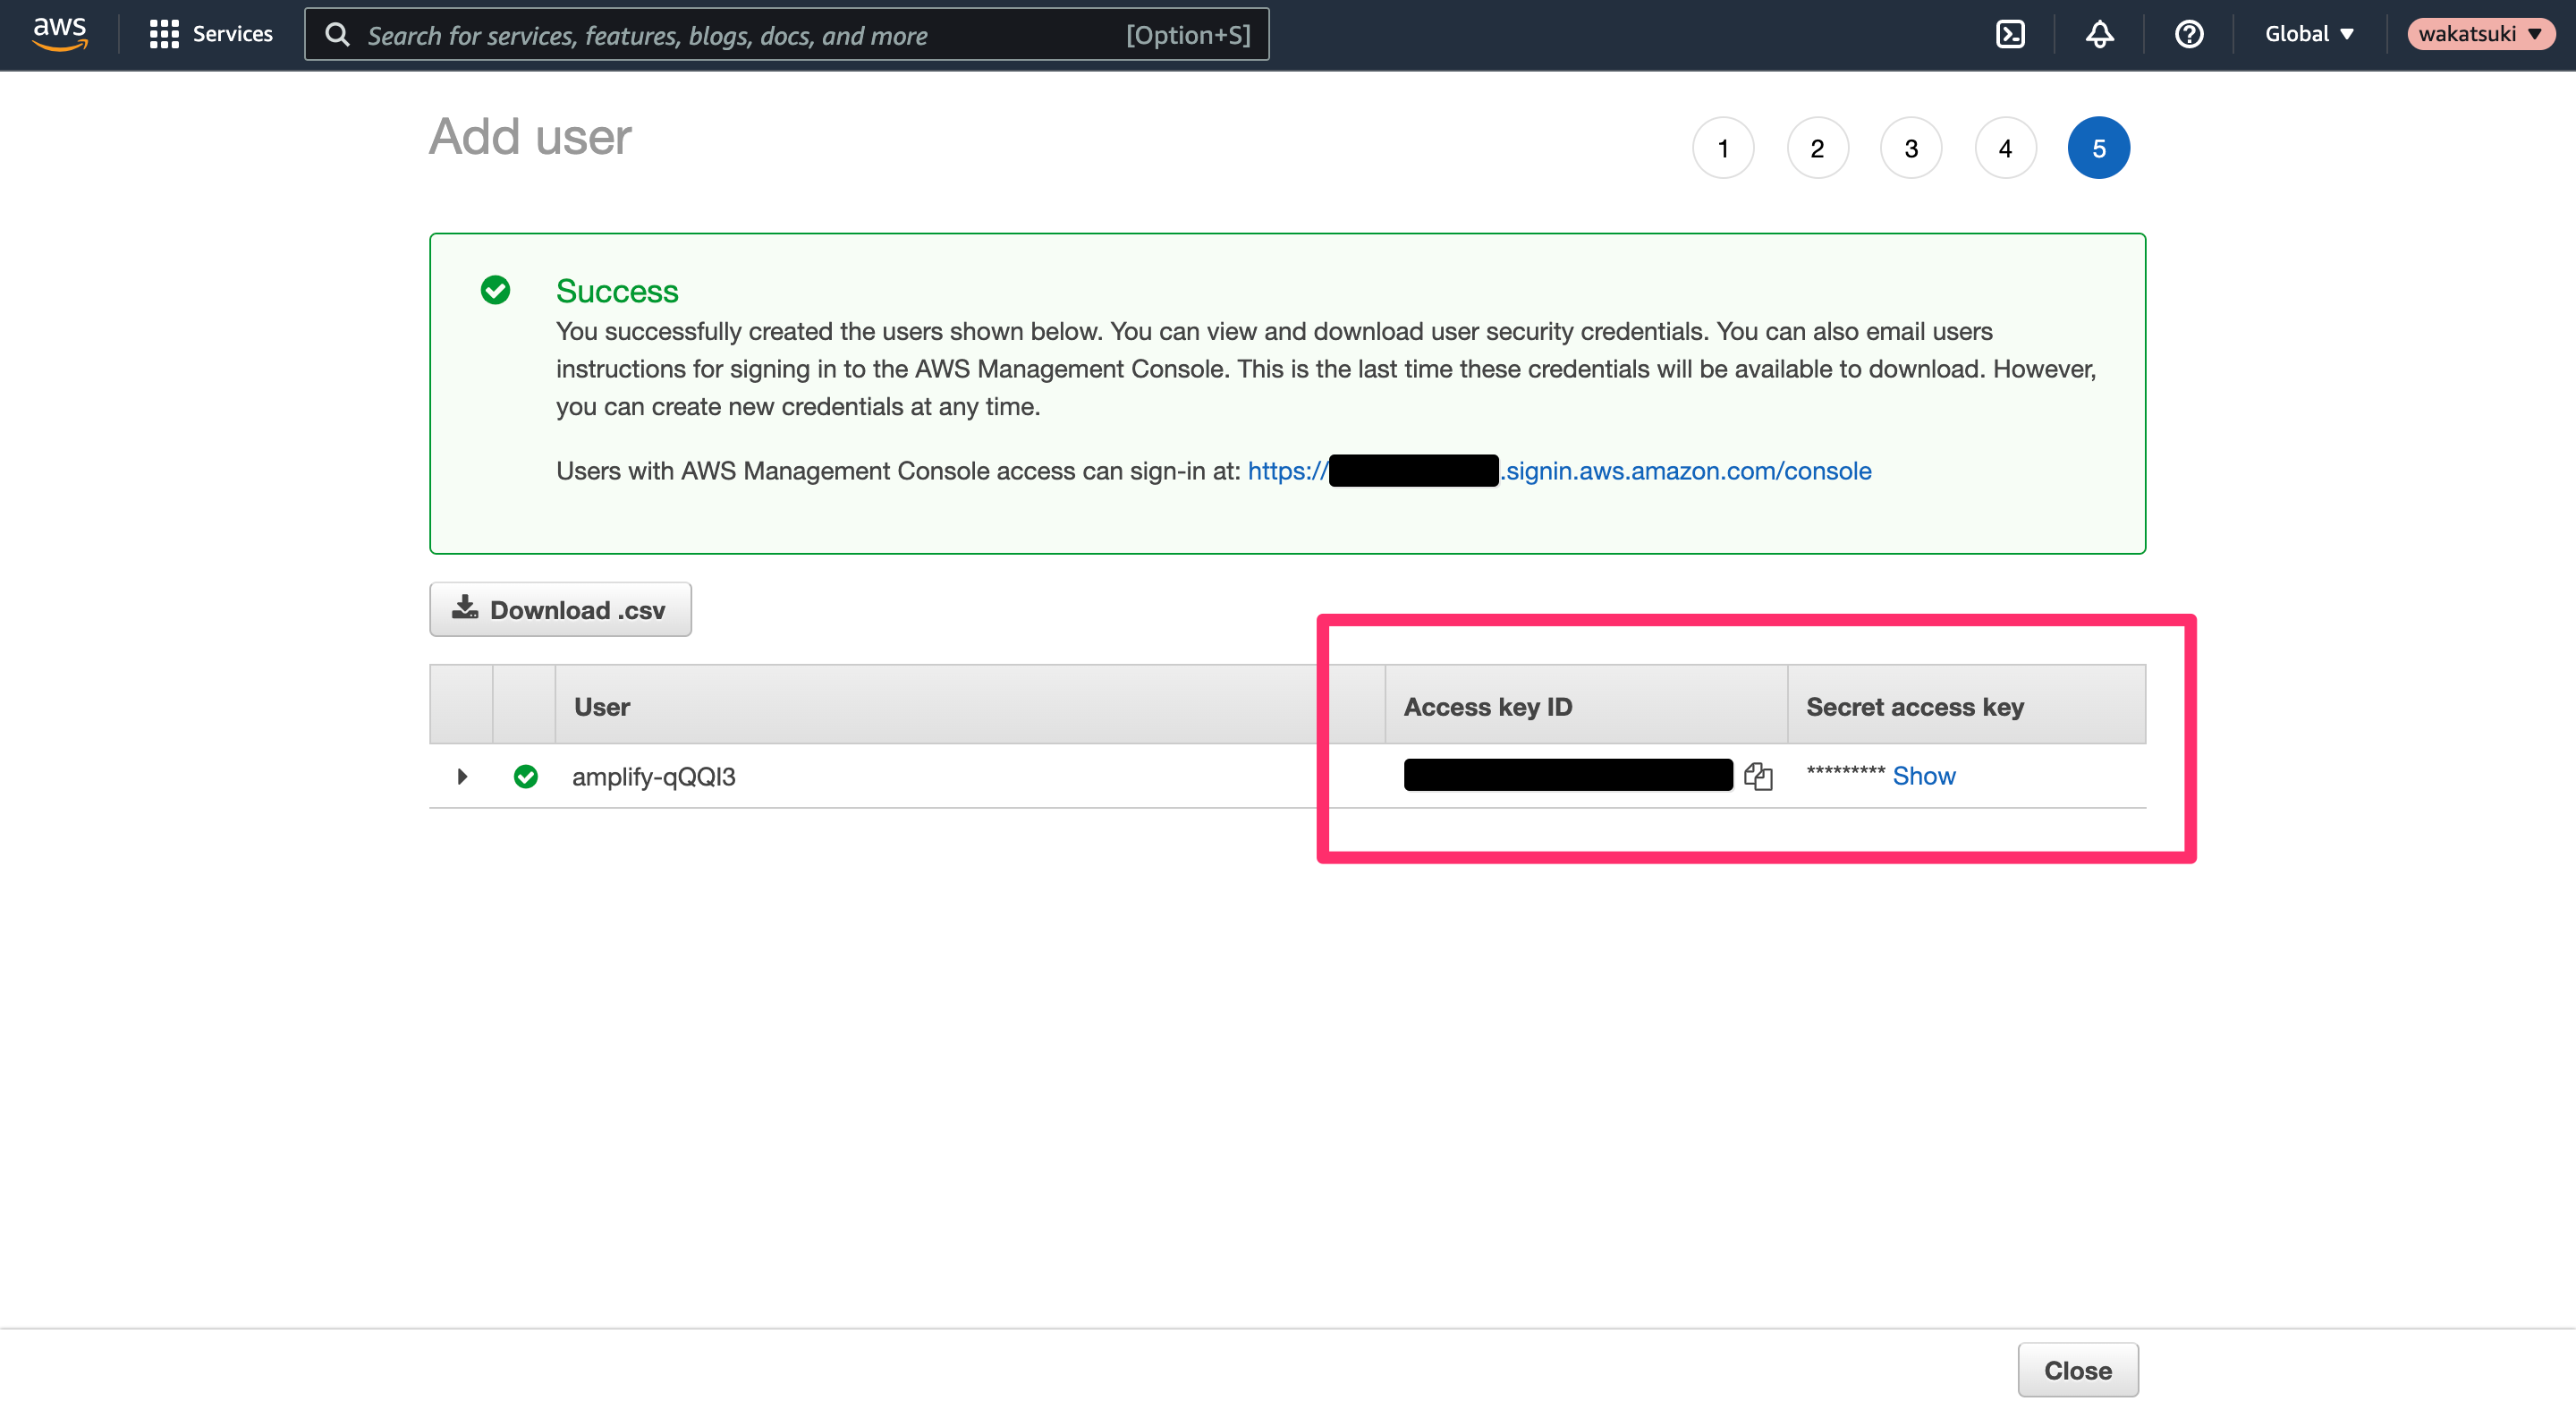
ターミナルに戻り[Access key ID]と[Secret access key]を指定します。
Press Enter to continue

Enter the access key of the newly created user:
? accessKeyId:  ********************
? secretAccessKey:  ****************************************
プロファイル名を指定して構成を完了します。
This would update/create the AWS Profile in your local machine
? Profile Name:  amplify-tutorial

Successfully set up the new user.
Set up fullstack project
Create a new React App
create-react-appでReactアプリケーションを新規作成します。
$ npx create-react-app react-amplified
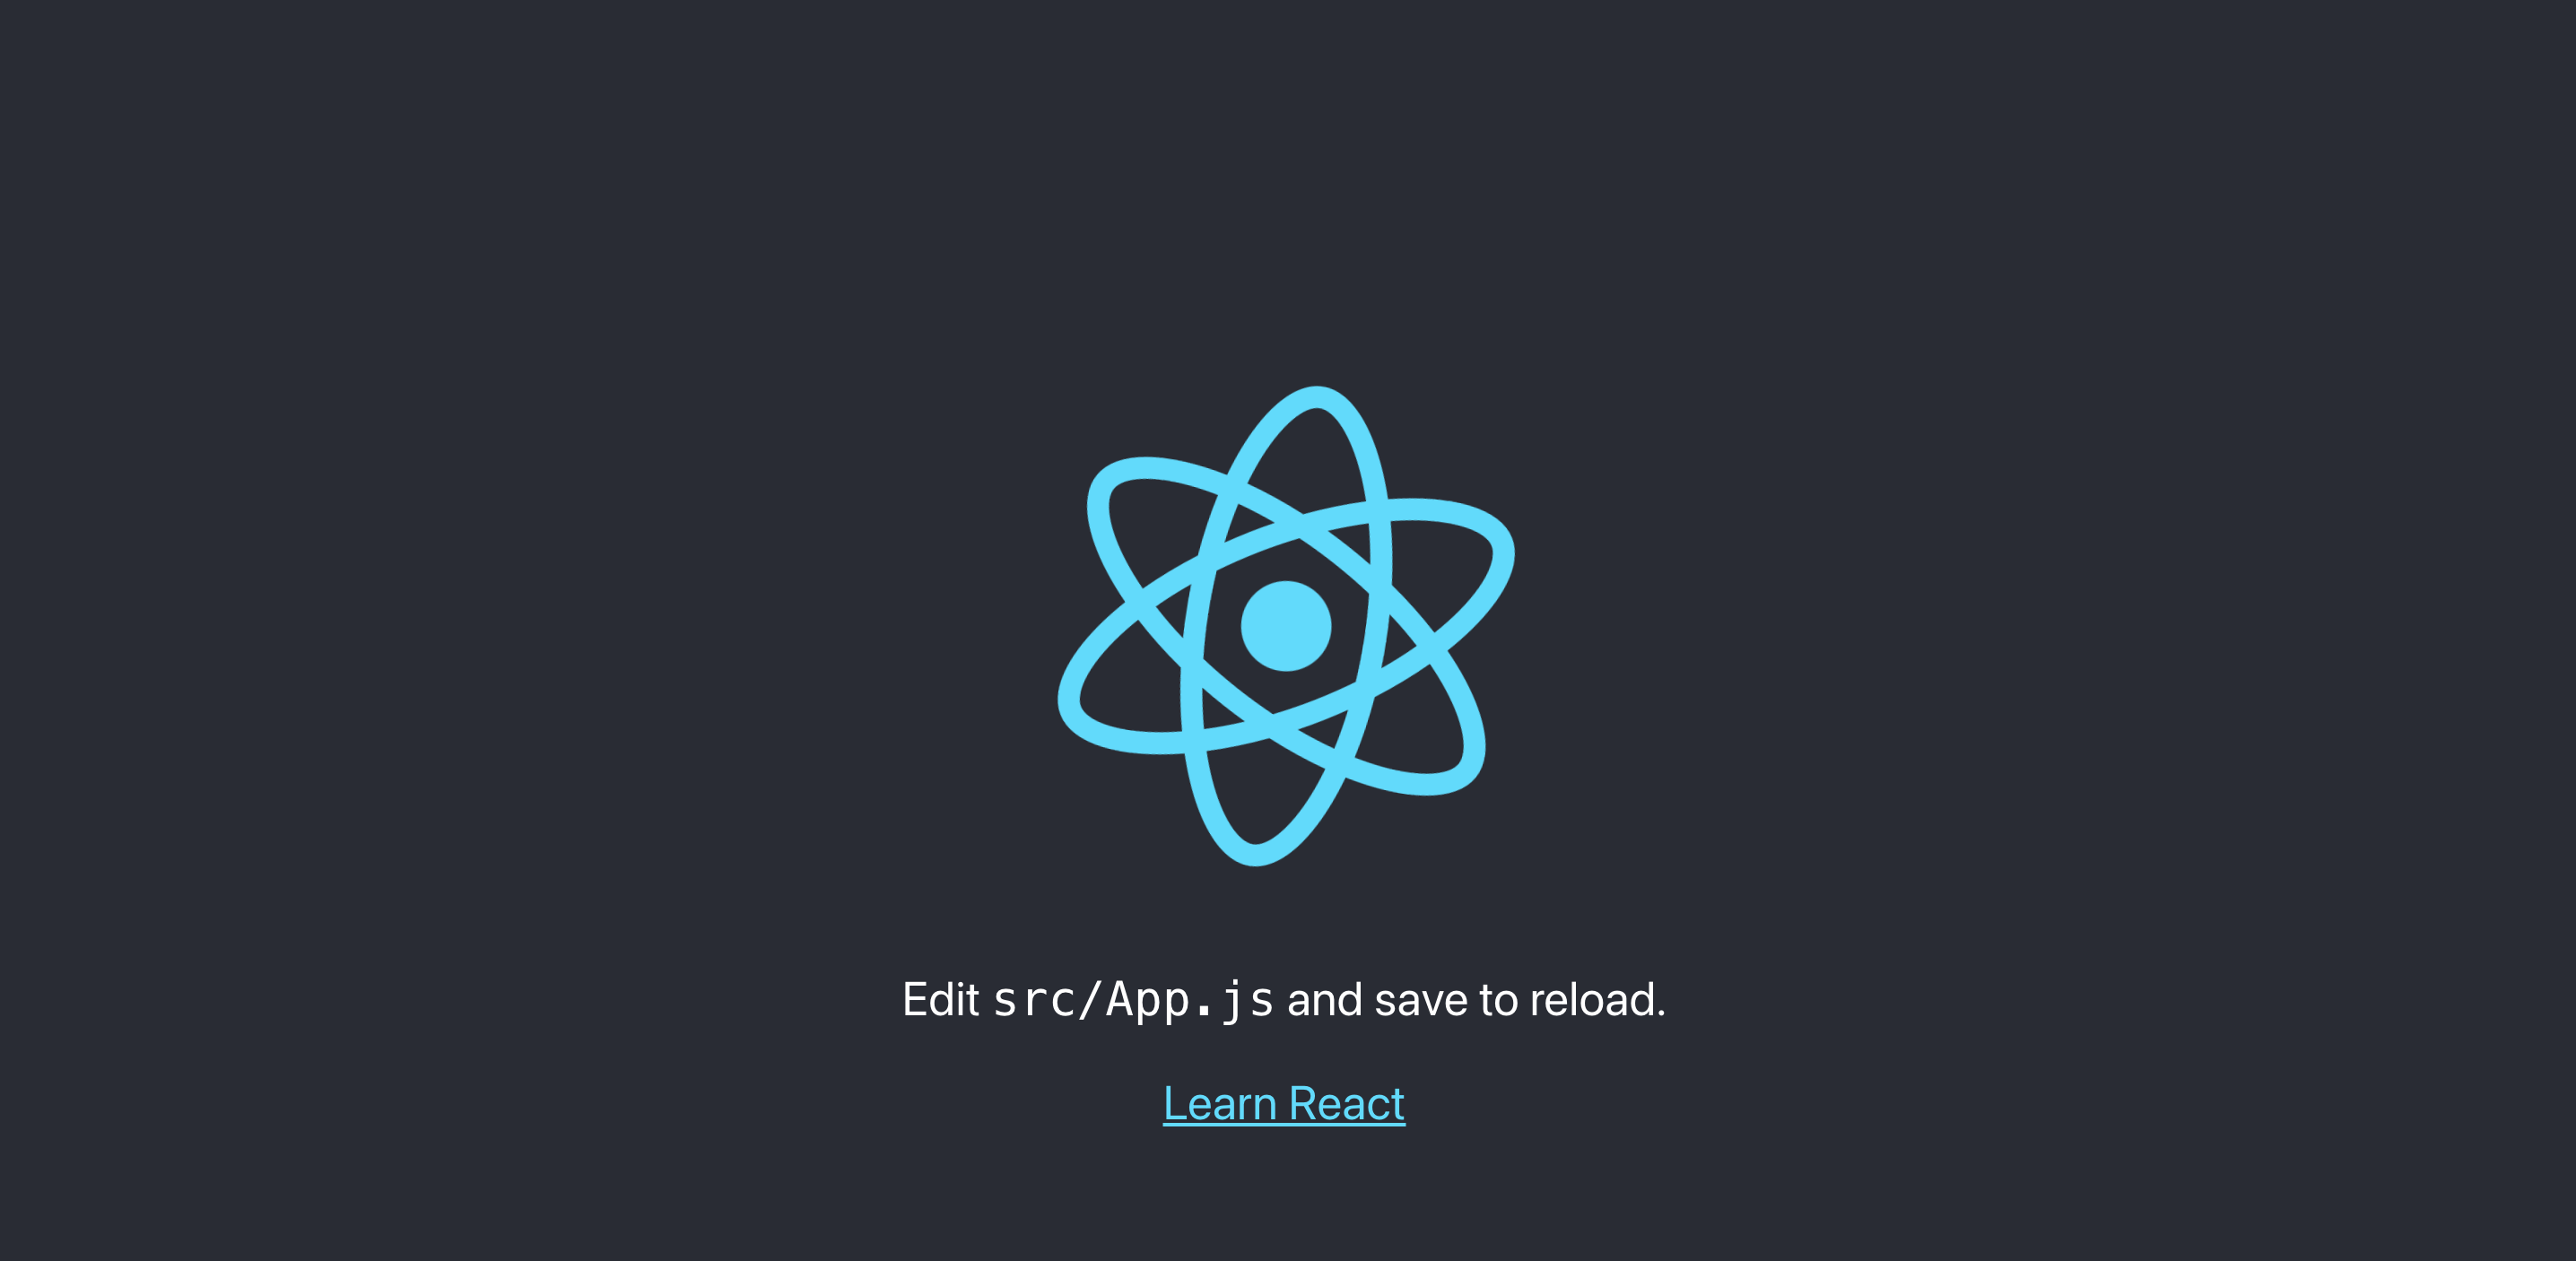
npm startするとhttp://localhost:3000/でデフォルトのReact画面にアクセスできるようになりました。
$ cd react-amplified
$ npm start
Initialize a new backend
amplify initを実行してAmplifyのルートプロジェクトの作成を開始します。
$ amplify init
Note: It is recommended to run this command from the root of your app directory
? Enter a name for the project reactTutorial
The following configuration will be applied:

Project information
| Name: reactTutorial
| Environment: dev
| Default editor: Visual Studio Code
| App type: javascript
| Javascript framework: react
| Source Directory Path: src
| Distribution Directory Path: build
| Build Command: npm run-script build
| Start Command: npm run-script start

? Initialize the project with the above configuration? Yes
Using default provider  awscloudformation
? Select the authentication method you want to use: AWS profile

For more information on AWS Profiles, see:
https://docs.aws.amazon.com/cli/latest/userguide/cli-configure-profiles.html

? Please choose the profile you want to use amplify-tutorial
Adding backend environment dev to AWS Amplify app: d3rz69ld4gfk0n
⠴ Initializing project in the cloud...

CREATE_IN_PROGRESS amplify-reacttutorial-dev-233814 AWS::CloudFormation::Stack Thu Dec 30 2021 23:38:18 GMT+0900 (Japan Standard Time) User Initiated
CREATE_IN_PROGRESS DeploymentBucket                 AWS::S3::Bucket            Thu Dec 30 2021 23:38:22 GMT+0900 (Japan Standard Time)
CREATE_IN_PROGRESS UnauthRole                       AWS::IAM::Role             Thu Dec 30 2021 23:38:22 GMT+0900 (Japan Standard Time)
CREATE_IN_PROGRESS AuthRole                         AWS::IAM::Role             Thu Dec 30 2021 23:38:22 GMT+0900 (Japan Standard Time)
⠦ Initializing project in the cloud...

CREATE_IN_PROGRESS DeploymentBucket AWS::S3::Bucket Thu Dec 30 2021 23:38:24 GMT+0900 (Japan Standard Time) Resource creation Initiated
⠦ Initializing project in the cloud...

CREATE_IN_PROGRESS AuthRole   AWS::IAM::Role Thu Dec 30 2021 23:38:33 GMT+0900 (Japan Standard Time) Resource creation Initiated
CREATE_IN_PROGRESS UnauthRole AWS::IAM::Role Thu Dec 30 2021 23:38:33 GMT+0900 (Japan Standard Time) Resource creation Initiated
⠇ Initializing project in the cloud...

CREATE_COMPLETE DeploymentBucket AWS::S3::Bucket Thu Dec 30 2021 23:38:47 GMT+0900 (Japan Standard Time)
⠇ Initializing project in the cloud...

CREATE_COMPLETE AuthRole   AWS::IAM::Role Thu Dec 30 2021 23:38:53 GMT+0900 (Japan Standard Time)
CREATE_COMPLETE UnauthRole AWS::IAM::Role Thu Dec 30 2021 23:38:53 GMT+0900 (Japan Standard Time)
⠏ Initializing project in the cloud...

CREATE_COMPLETE amplify-reacttutorial-dev-233814 AWS::CloudFormation::Stack Thu Dec 30 2021 23:38:56 GMT+0900 (Japan Standard Time)
✔ Successfully created initial AWS cloud resources for deployments.
✔ Initialized provider successfully.
Initialized your environment successfully.

Your project has been successfully initialized and connected to the cloud!

Some next steps:
"amplify status" will show you what you've added already and if it's locally configured or deployed
"amplify add <category>" will allow you to add features like user login or a backend API
"amplify push" will build all your local backend resources and provision it in the cloud
"amplify console" to open the Amplify Console and view your project status
"amplify publish" will build all your local backend and frontend resources (if you have hosting category added) and provision it in the cloud

Pro tip:
Try "amplify add api" to create a backend API and then "amplify publish" to deploy everything
Install Amplify libraries
Amplifyの必要なDependencyをインストールします。
$ npm install aws-amplify @aws-amplify/ui-react@1.x.x
aws-amplifyパッケージはAmplifyアプリで動作するメインライブラリです。@aws-amplify/ui-reactはReactのUIコンポーネントを含むパッケージです。
Set up frontend
src/index.jsを次のように修正します。Amplifyにハイライトの3行を追記します。
import React from 'react';
import ReactDOM from 'react-dom';
import './index.css';
import App from './App';
import reportWebVitals from './reportWebVitals';
import Amplify from "aws-amplify";
import awsExports from "./aws-exports";
Amplify.configure(awsExports);

ReactDOM.render(
  <React.StrictMode>
    <App />
  </React.StrictMode>,
  document.getElementById('root')
);

// If you want to start measuring performance in your app, pass a function
// to log results (for example: reportWebVitals(console.log))
// or send to an analytics endpoint. Learn more: https://bit.ly/CRA-vitals
reportWebVitals();
これによりReactアプリケーションがAmplifyのバックエンドと通信できるようになります。
Connect API and database to the app
Create a GraphQL API and database
amplify add apiを実行してGraphQL APIを作成します。
$  amplify add api
? Select from one of the below mentioned services: GraphQL
? Here is the GraphQL API that we will create. Select a setting to edit or continue Continue
? Choose a schema template: Single object with fields (e.g., “Todo” with ID, name, description)

⚠️  WARNING: your GraphQL API currently allows public create, read, update, and delete access to all models via an API Key. To configure PRODUCTION-READY authorization rules, review: https://docs.amplify.aws/cli/graphql/authorization-rules

GraphQL schema compiled successfully.

Edit your schema at /Users/wakatsuki.ryuta/projects/cm-rwakatsuki/amplify-react-tutorial/react-amplified/amplify/backend/api/reacttutorial/schema.graphql or place .graphql files in a directory at /Users/wakatsuki.ryuta/projects/cm-rwakatsuki/amplify-react-tutorial/react-amplified/amplify/backend/api/reacttutorial/schema
✔ Do you want to edit the schema now? (Y/n) · yes
? Choose your default editor: Visual Studio Code
Edit the file in your editor: /Users/wakatsuki.ryuta/projects/cm-rwakatsuki/amplify-react-tutorial/react-amplified/amplify/backend/api/reacttutorial/schema.graphql
✅ Successfully added resource reacttutorial locally

✅ Some next steps:
"amplify push" will build all your local backend resources and provision it in the cloud
"amplify publish" will build all your local backend and frontend resources (if you have hosting category added) and provision it in the cloud
すると次のファイルがエディターで開きます。これがToDoアプリのGraphQLスキーマです。
[graphql title="react-amplified/amplify/backend/api/reacttutorial/schema.graphql" highlight="5-9"]
# This "input" configures a global authorization rule to enable public access to
# all models in this schema. Learn more about authorization rules here: https://docs.amplify.aws/cli/graphql/authorization-rules
input AMPLIFY { globalAuthRule: AuthRule = { allow: public } } # FOR TESTING ONLY!

type Todo @model {
  id: ID!
  name: String!
  description: String
}
[/graphql]
amplify pushを実行してAmplifyバックエンドをデプロイします。
$  amplify push
⠸ Fetching updates to backend environment: dev from the cloud.
⚠️  WARNING: your GraphQL API currently allows public create, read, update, and delete access to all models via an API Key. To configure PRODUCTION-READY authorization rules, review: https://docs.amplify.aws/cli/graphql/authorization-rules

GraphQL schema compiled successfully.

Edit your schema at /Users/wakatsuki.ryuta/projects/cm-rwakatsuki/amplify-react-tutorial/react-amplified/amplify/backend/api/reacttutorial/schema.graphql or place .graphql files in a directory at /Users/wakatsuki.ryuta/projects/cm-rwakatsuki/amplify-react-tutorial/react-amplified/amplify/backend/api/reacttutorial/schema
✔ Successfully pulled backend environment dev from the cloud.
⠧ Building resource api/reacttutorial
⚠️  WARNING: your GraphQL API currently allows public create, read, update, and delete access to all models via an API Key. To configure PRODUCTION-READY authorization rules, review: https://docs.amplify.aws/cli/graphql/authorization-rules

GraphQL schema compiled successfully.

Edit your schema at /Users/wakatsuki.ryuta/projects/cm-rwakatsuki/amplify-react-tutorial/react-amplified/amplify/backend/api/reacttutorial/schema.graphql or place .graphql files in a directory at /Users/wakatsuki.ryuta/projects/cm-rwakatsuki/amplify-react-tutorial/react-amplified/amplify/backend/api/reacttutorial/schema

    Current Environment: dev

┌──────────┬───────────────┬───────────┬───────────────────┐
│ Category │ Resource name │ Operation │ Provider plugin   │
├──────────┼───────────────┼───────────┼───────────────────┤
│ Api      │ reacttutorial │ Create    │ awscloudformation │
└──────────┴───────────────┴───────────┴───────────────────┘
? Are you sure you want to continue? Yes

⚠️  WARNING: your GraphQL API currently allows public create, read, update, and delete access to all models via an API Key. To configure PRODUCTION-READY authorization rules, review: https://docs.amplify.aws/cli/graphql/authorization-rules

GraphQL schema compiled successfully.

Edit your schema at /Users/wakatsuki.ryuta/projects/cm-rwakatsuki/amplify-react-tutorial/react-amplified/amplify/backend/api/reacttutorial/schema.graphql or place .graphql files in a directory at /Users/wakatsuki.ryuta/projects/cm-rwakatsuki/amplify-react-tutorial/react-amplified/amplify/backend/api/reacttutorial/schema
⠹ Building resource api/reacttutorial
⚠️  WARNING: your GraphQL API currently allows public create, read, update, and delete access to all models via an API Key. To configure PRODUCTION-READY authorization rules, review: https://docs.amplify.aws/cli/graphql/authorization-rules

GraphQL schema compiled successfully.

Edit your schema at /Users/wakatsuki.ryuta/projects/cm-rwakatsuki/amplify-react-tutorial/react-amplified/amplify/backend/api/reacttutorial/schema.graphql or place .graphql files in a directory at /Users/wakatsuki.ryuta/projects/cm-rwakatsuki/amplify-react-tutorial/react-amplified/amplify/backend/api/reacttutorial/schema
? Do you want to generate code for your newly created GraphQL API Yes
? Choose the code generation language target javascript
? Enter the file name pattern of graphql queries, mutations and subscriptions src/graphql/**/*.js
? Do you want to generate/update all possible GraphQL operations - queries, mutations and subscriptions Yes
? Enter maximum statement depth [increase from default if your schema is deeply nested] 2

(中略)

GraphQL endpoint: https://xxxxxxxxxxxxxxxxxxxx.appsync-api.ap-northeast-1.amazonaws.com/graphql
GraphQL API KEY: XXXXXXXXXXXXXXXXXXXXXx
デプロイが完了したらAPIエンドポイントとAPIアクセスキーを取得できました。
amplify statusを実行すると現在のAmplifyプロジェクトのステータスを確認できます。
$  amplify status

    Current Environment: dev

┌──────────┬───────────────┬───────────┬───────────────────┐
│ Category │ Resource name │ Operation │ Provider plugin   │
├──────────┼───────────────┼───────────┼───────────────────┤
│ Api      │ reacttutorial │ No Change │ awscloudformation │
└──────────┴───────────────┴───────────┴───────────────────┘

GraphQL endpoint: https://xxxxxxxxxxxxxxxxxxxx.appsync-api.ap-northeast-1.amazonaws.com/graphql
GraphQL API KEY: XXXXXXXXXXXXXXXXXXXXXx
AmplifyのコンソールでGraphQL APIを確認する場合はamplify console apiを実行します。
$  amplify console api
? Select from one of the below mentioned services: GraphQL
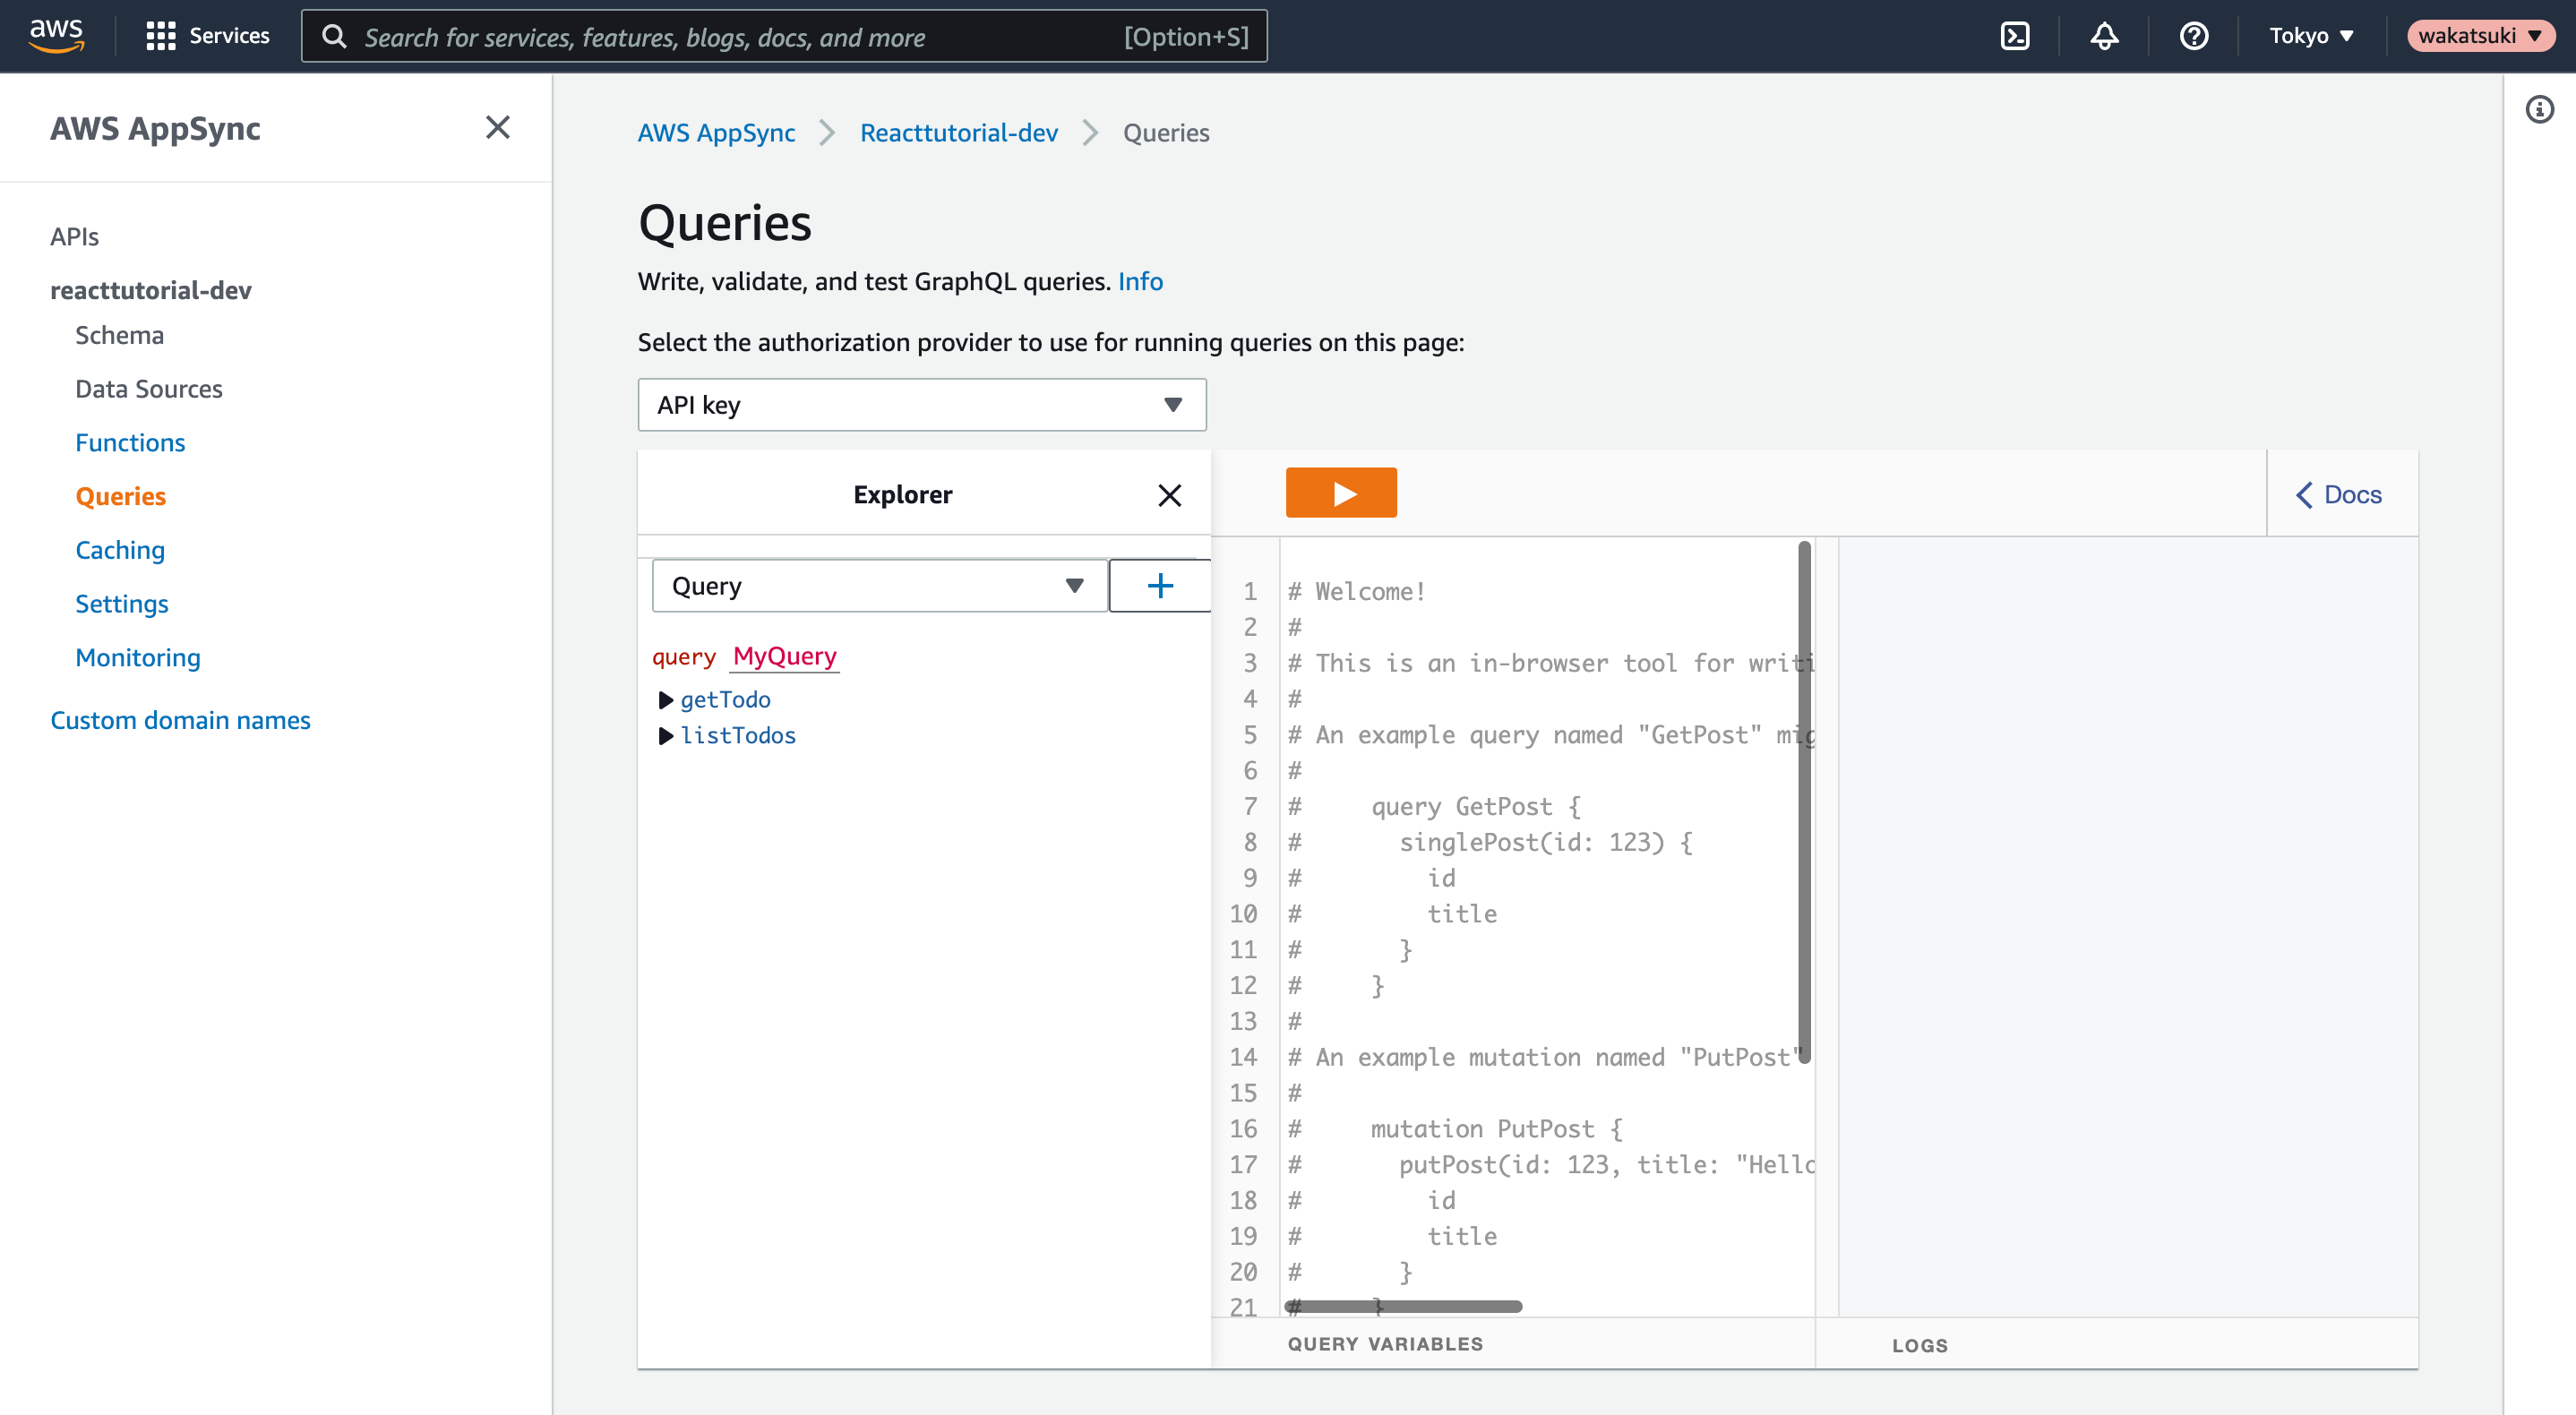
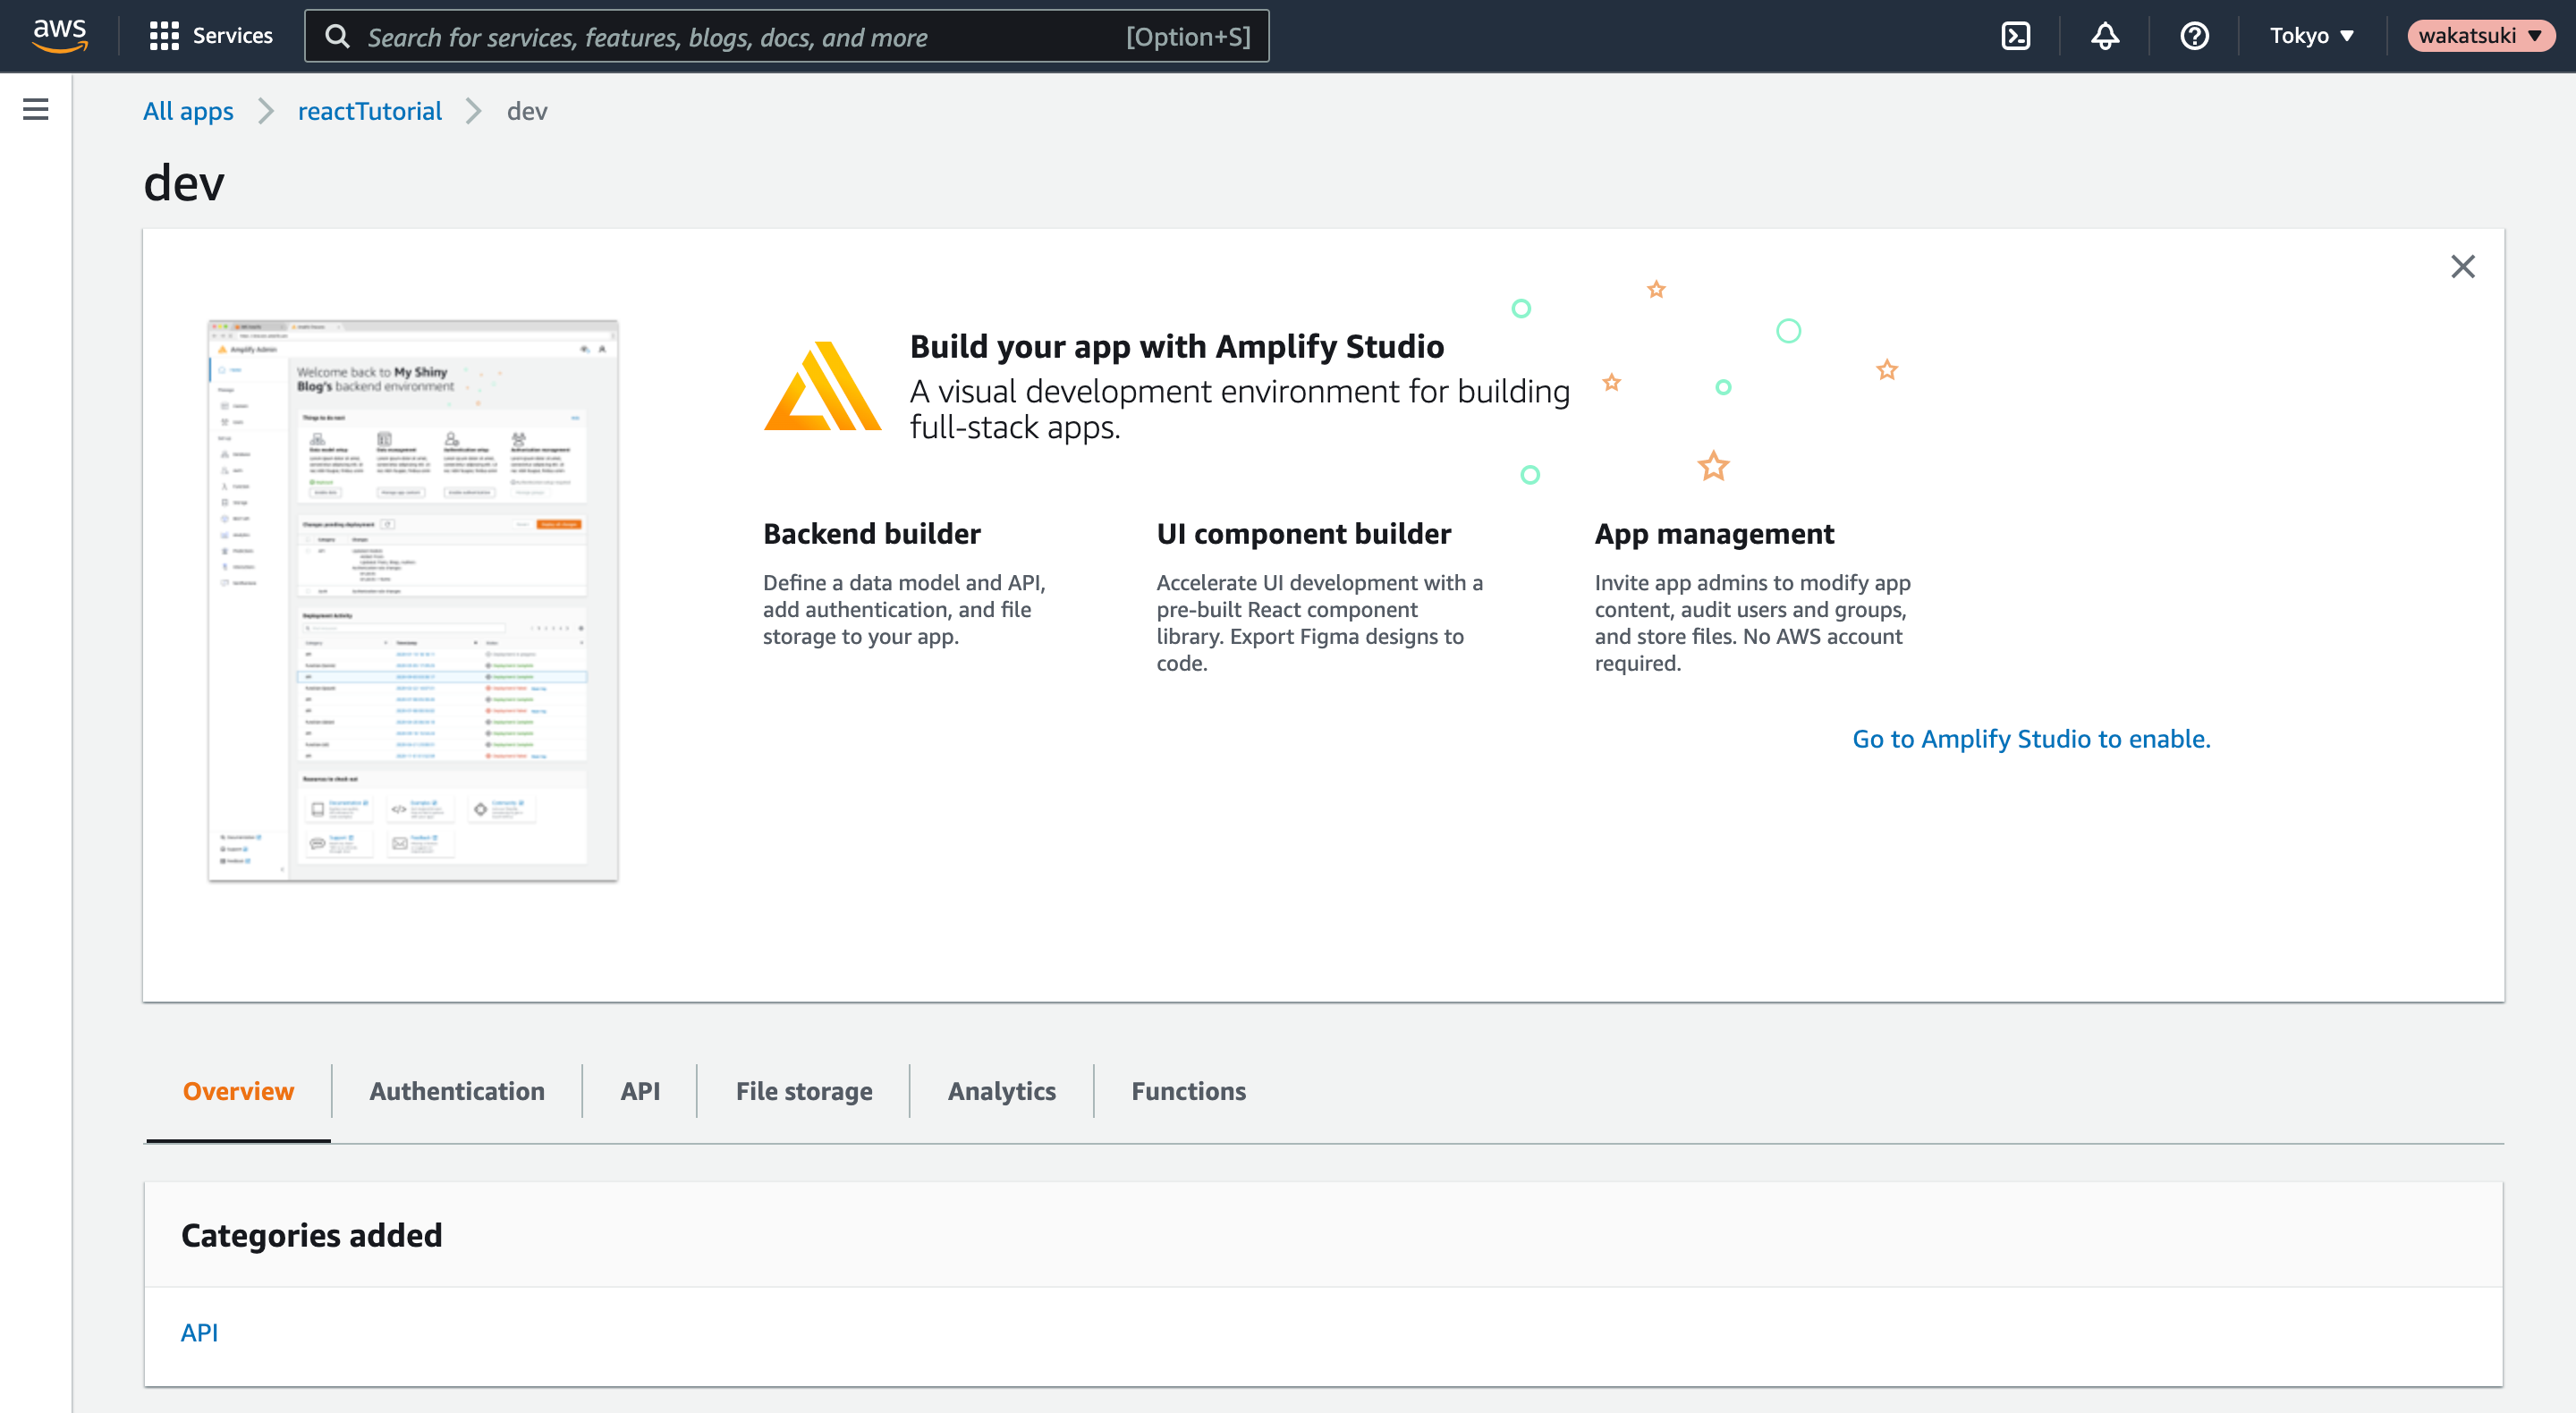
Amplifyのコンソールでアプリを確認する場合はamplify consoleを実行します。
$  amplify console
✔ Which site do you want to open? · Console
https://ap-northeast-1.console.aws.amazon.com/amplify/home?region=ap-northeast-1#/d2arqk4y129tio/YmFja2VuZA/dev
コンソールで開けました。
Connect frontend to API
作成したAPIにアクセスするフロントエンドを実装します。src/App.jsを次の通りに更新します。
/* src/App.js */
import React, { useEffect, useState } from 'react'
import Amplify, { API, graphqlOperation } from 'aws-amplify'
import { createTodo } from './graphql/mutations'
import { listTodos } from './graphql/queries'

import awsExports from "./aws-exports";
Amplify.configure(awsExports);

const initialState = { name: '', description: '' }

const App = () => {
  const [formState, setFormState] = useState(initialState)
  const [todos, setTodos] = useState([])

  useEffect(() => {
    fetchTodos()
  }, [])

  function setInput(key, value) {
    setFormState({ ...formState, [key]: value })
  }

  async function fetchTodos() {
    try {
      const todoData = await API.graphql(graphqlOperation(listTodos))
      const todos = todoData.data.listTodos.items
      setTodos(todos)
    } catch (err) { console.log('error fetching todos') }
  }

  async function addTodo() {
    try {
      if (!formState.name || !formState.description) return
      const todo = { ...formState }
      setTodos([...todos, todo])
      setFormState(initialState)
      await API.graphql(graphqlOperation(createTodo, {input: todo}))
    } catch (err) {
      console.log('error creating todo:', err)
    }
  }

  return (
    <div style={styles.container}>
      <h2>Amplify Todos</h2>
      <input
        onChange={event => setInput('name', event.target.value)}
        style={styles.input}
        value={formState.name}
        placeholder="Name"
      />
      <input
        onChange={event => setInput('description', event.target.value)}
        style={styles.input}
        value={formState.description}
        placeholder="Description"
      />
      <button style={styles.button} onClick={addTodo}>Create Todo</button>
      {
        todos.map((todo, index) => (
          <div key={todo.id ? todo.id : index} style={styles.todo}>
            <p style={styles.todoName}>{todo.name}</p>
            <p style={styles.todoDescription}>{todo.description}</p>
          </div>
        ))
      }
    </div>
  )
}

const styles = {
  container: { width: 400, margin: '0 auto', display: 'flex', flexDirection: 'column', justifyContent: 'center', padding: 20 },
  todo: {  marginBottom: 15 },
  input: { border: 'none', backgroundColor: '#ddd', marginBottom: 10, padding: 8, fontSize: 18 },
  todoName: { fontSize: 20, fontWeight: 'bold' },
  todoDescription: { marginBottom: 0 },
  button: { backgroundColor: 'black', color: 'white', outline: 'none', fontSize: 18, padding: '12px 0px' }
}

export default App
Run locally
更新したフロントエンドアプリをローカルで起動します。
$ npm start
ToDoリストの作成コンソールが表示できました!

Add authentication
Create authentication service
amplify add authを実行して、Amplifyアプリに認証機能を追加します。
$  amplify add auth
Using service: Cognito, provided by: awscloudformation

 The current configured provider is Amazon Cognito.

 Do you want to use the default authentication and security configuration? Default configuration
 Warning: you will not be able to edit these selections.
 How do you want users to be able to sign in? Username
 Do you want to configure advanced settings? No, I am done.
✅ Successfully added auth resource reacttutoriala9041a5c locally

✅ Some next steps:
"amplify push" will build all your local backend resources and provision it in the cloud
"amplify publish" will build all your local backend and frontend resources (if you have hosting category added) and provision it in the cloud
Create login UI
src/App.jsでwithAuthenticatorコンポーネントのimportを追記します。
/* src/App.js */
import React, { useEffect, useState } from 'react'
import Amplify, { API, graphqlOperation } from 'aws-amplify'
import { createTodo } from './graphql/mutations'
import { listTodos } from './graphql/queries'
import { withAuthenticator } from '@aws-amplify/ui-react'
AppをwithAuthenticatorでラップしてexportするようにします。
export default withAuthenticator(App)
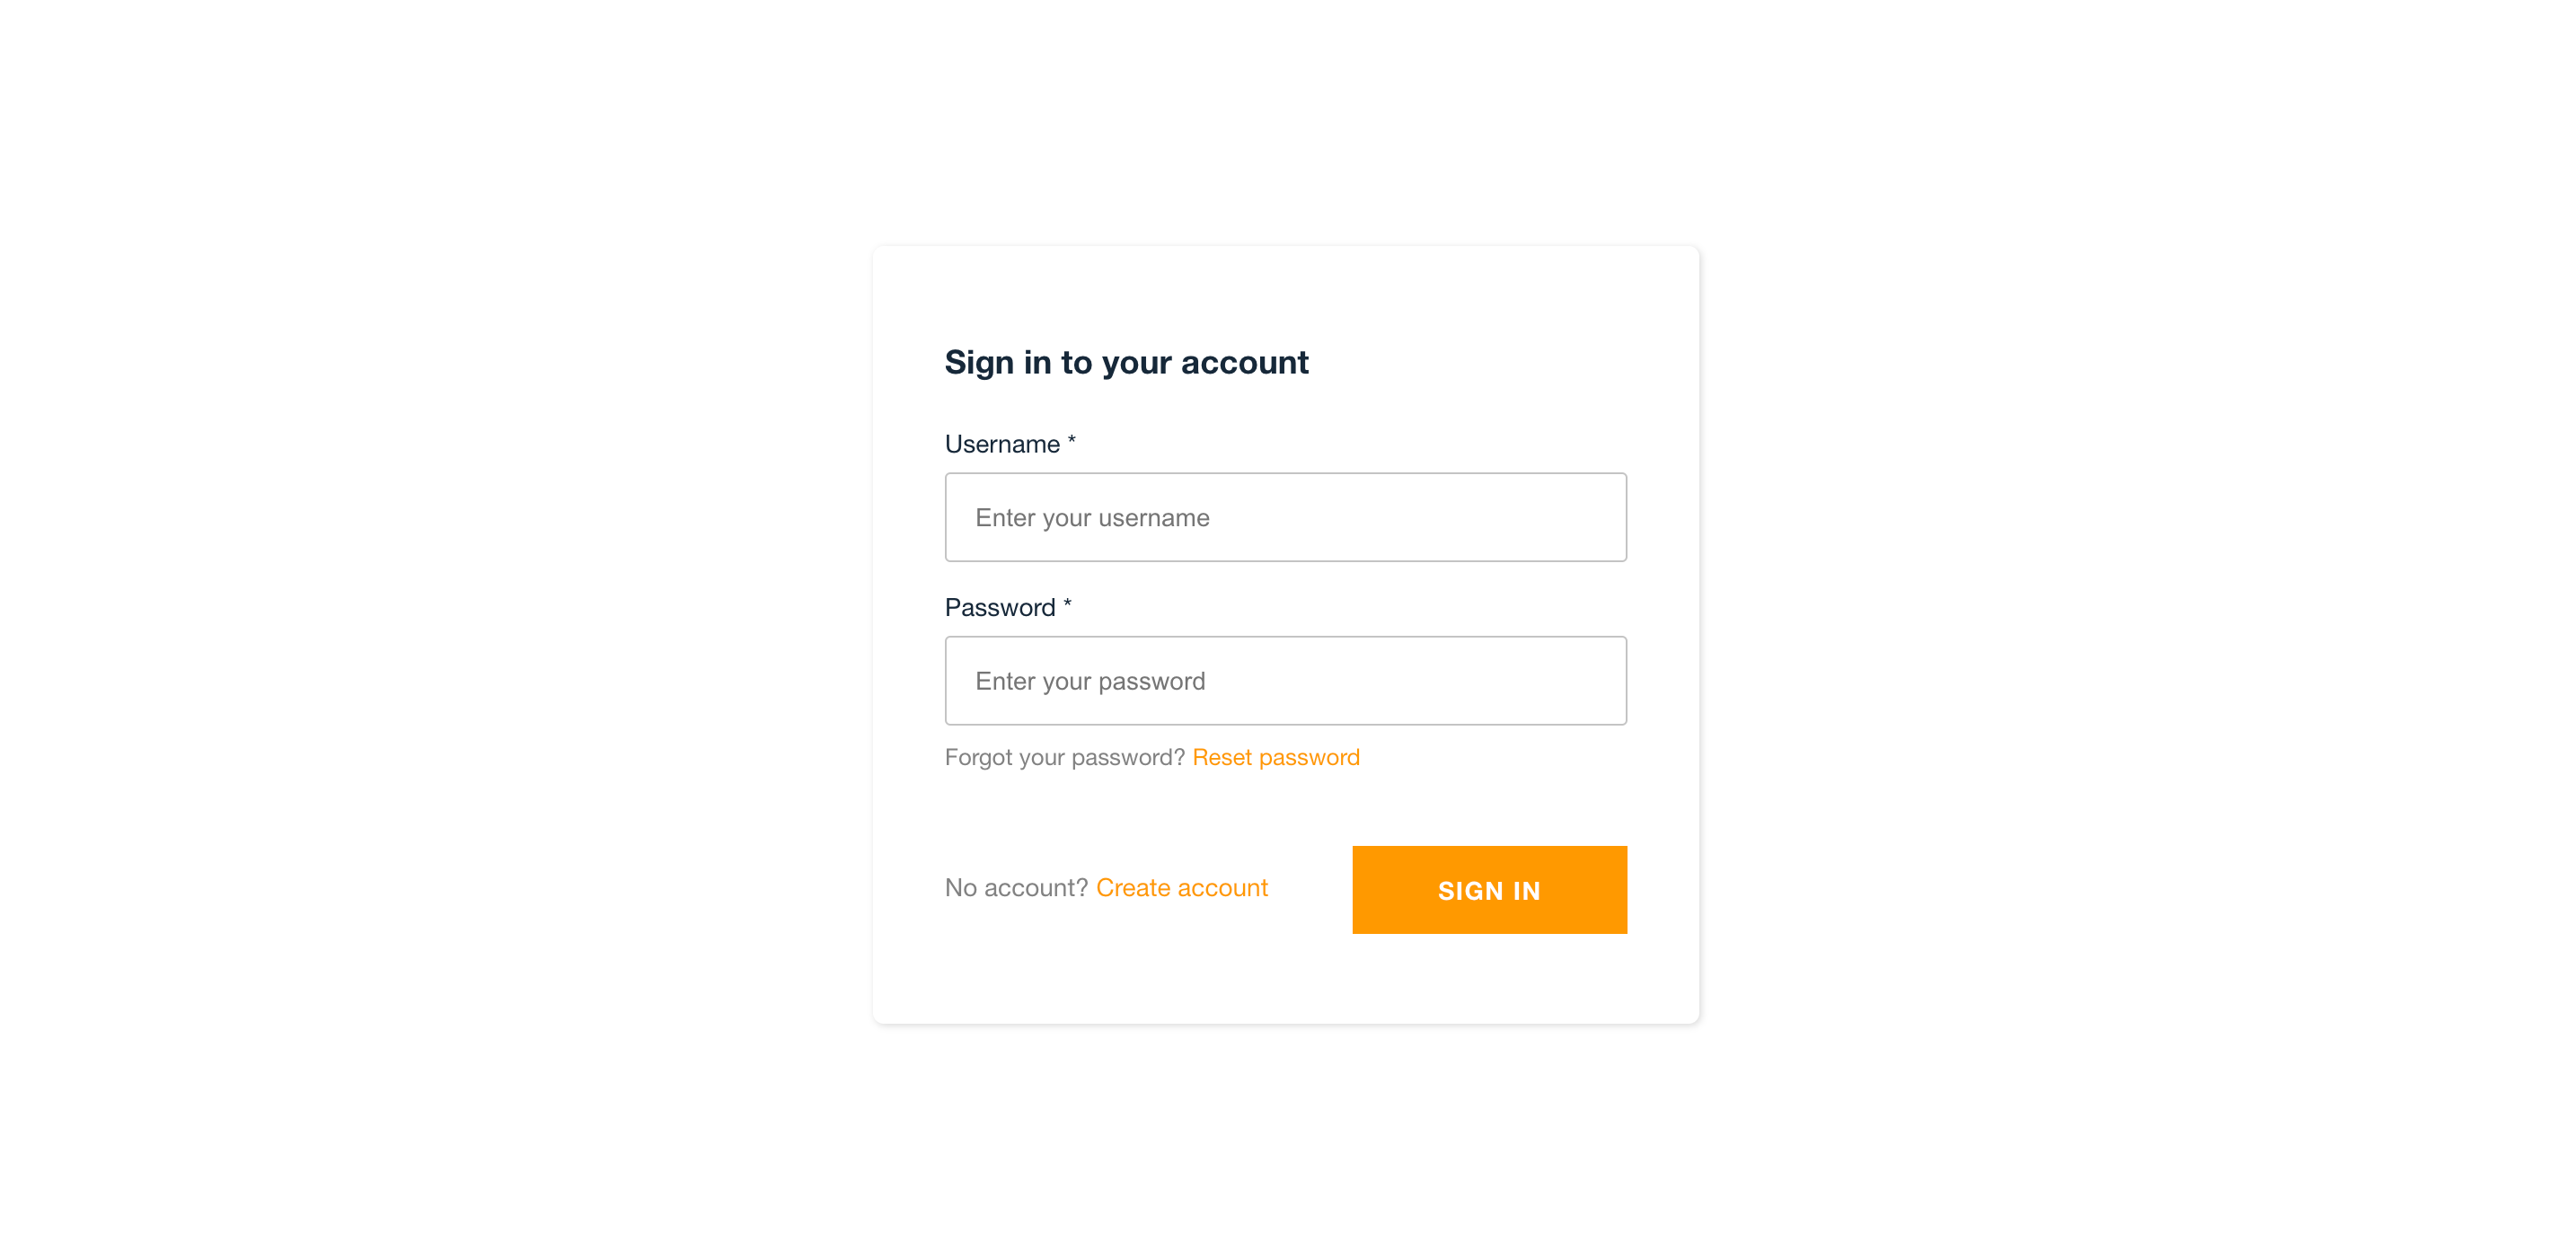
ローカルでアプリを起動します。
$ npm start
すると未認証なのでサインインコンソールが表示されました。
Deploy and host app
Add hosting to your app
アプリのホスティングのデプロイ方法を設定します。今回は手動デプロイとします。
$  amplify add hosting
? Select the plugin module to execute Hosting with Amplify Console (Managed hosting with custom domains, Continuous deployment)
? Choose a type Manual deployment

You can now publish your app using the following command:

Command: amplify publish
Publish your app
amplify publishを実行してアプリをパブリッシュします。
$  amplify publish
⠴ Fetching updates to backend environment: dev from the cloud.
⚠️  WARNING: your GraphQL API currently allows public create, read, update, and delete access to all models via an API Key. To configure PRODUCTION-READY authorization rules, review: https://docs.amplify.aws/cli/graphql/authorization-rules

⠦ Fetching updates to backend environment: dev from the cloud.GraphQL schema compiled successfully.

Edit your schema at /Users/wakatsuki.ryuta/projects/cm-rwakatsuki/amplify-react-tutorial/react-amplified/amplify/backend/api/reacttutorial/schema.graphql or place .graphql files in a directory at /Users/wakatsuki.ryuta/projects/cm-rwakatsuki/amplify-react-tutorial/react-amplified/amplify/backend/api/reacttutorial/schema
✔ Successfully pulled backend environment dev from the cloud.

    Current Environment: dev

┌──────────┬───────────────────────┬───────────┬───────────────────┐
│ Category │ Resource name         │ Operation │ Provider plugin   │
├──────────┼───────────────────────┼───────────┼───────────────────┤
│ Auth     │ reacttutoriala9041a5c │ Create    │ awscloudformation │
├──────────┼───────────────────────┼───────────┼───────────────────┤
│ Hosting  │ amplifyhosting        │ Create    │ awscloudformation │
├──────────┼───────────────────────┼───────────┼───────────────────┤
│ Api      │ reacttutorial         │ No Change │ awscloudformation │
└──────────┴───────────────────────┴───────────┴───────────────────┘
? Are you sure you want to continue? Yes
⠸ Building resource api/reacttutorial

(中略)

The project was built assuming it is hosted at /.
You can control this with the homepage field in your package.json.

The build folder is ready to be deployed.
You may serve it with a static server:

  npm install -g serve
  serve -s build

Find out more about deployment here:

  https://cra.link/deployment

✔ Zipping artifacts completed.
✔ Deployment complete!
https://dev.xxxxxxxxxxxxxxxx.amplifyapp.com
表示されたURLにアクセスするとAmplify上でホストされたアプリを開けました!
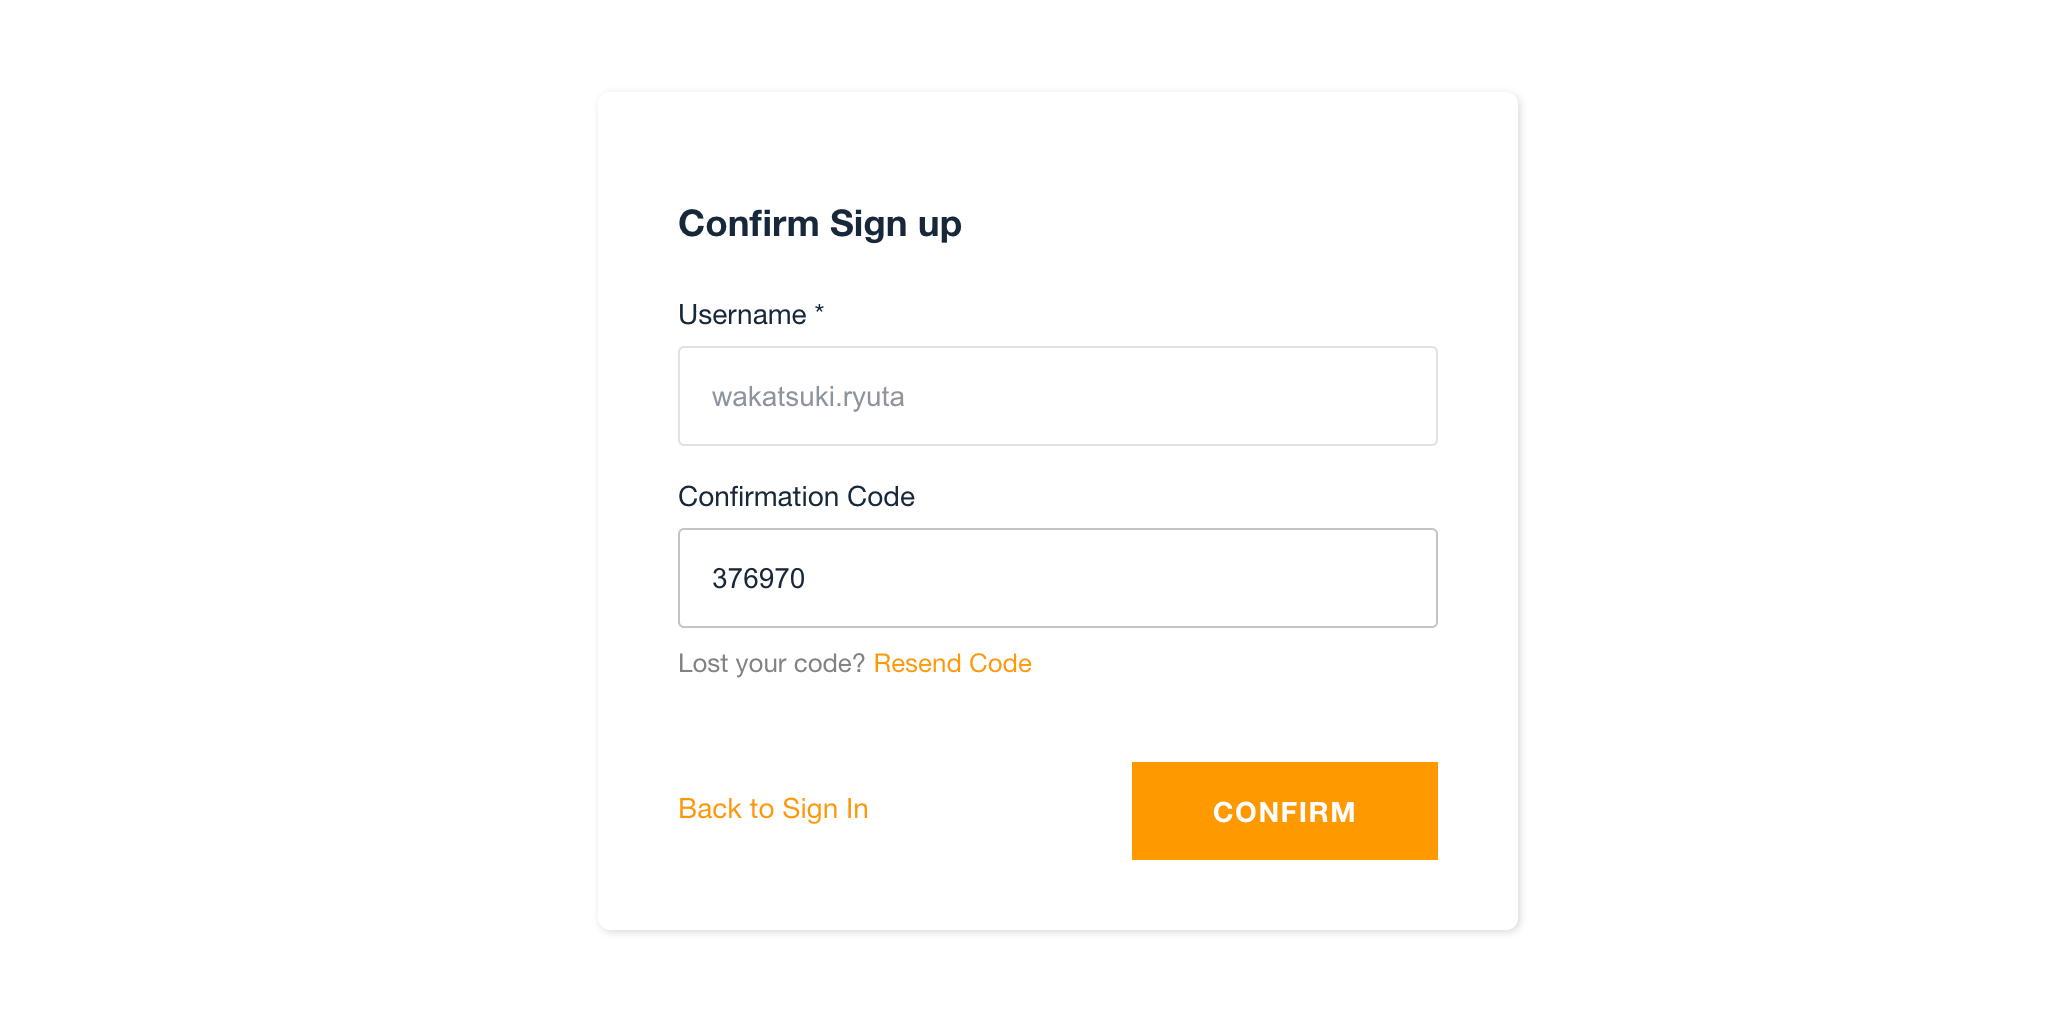
最初に[Create accounde]でユーザーを登録します。
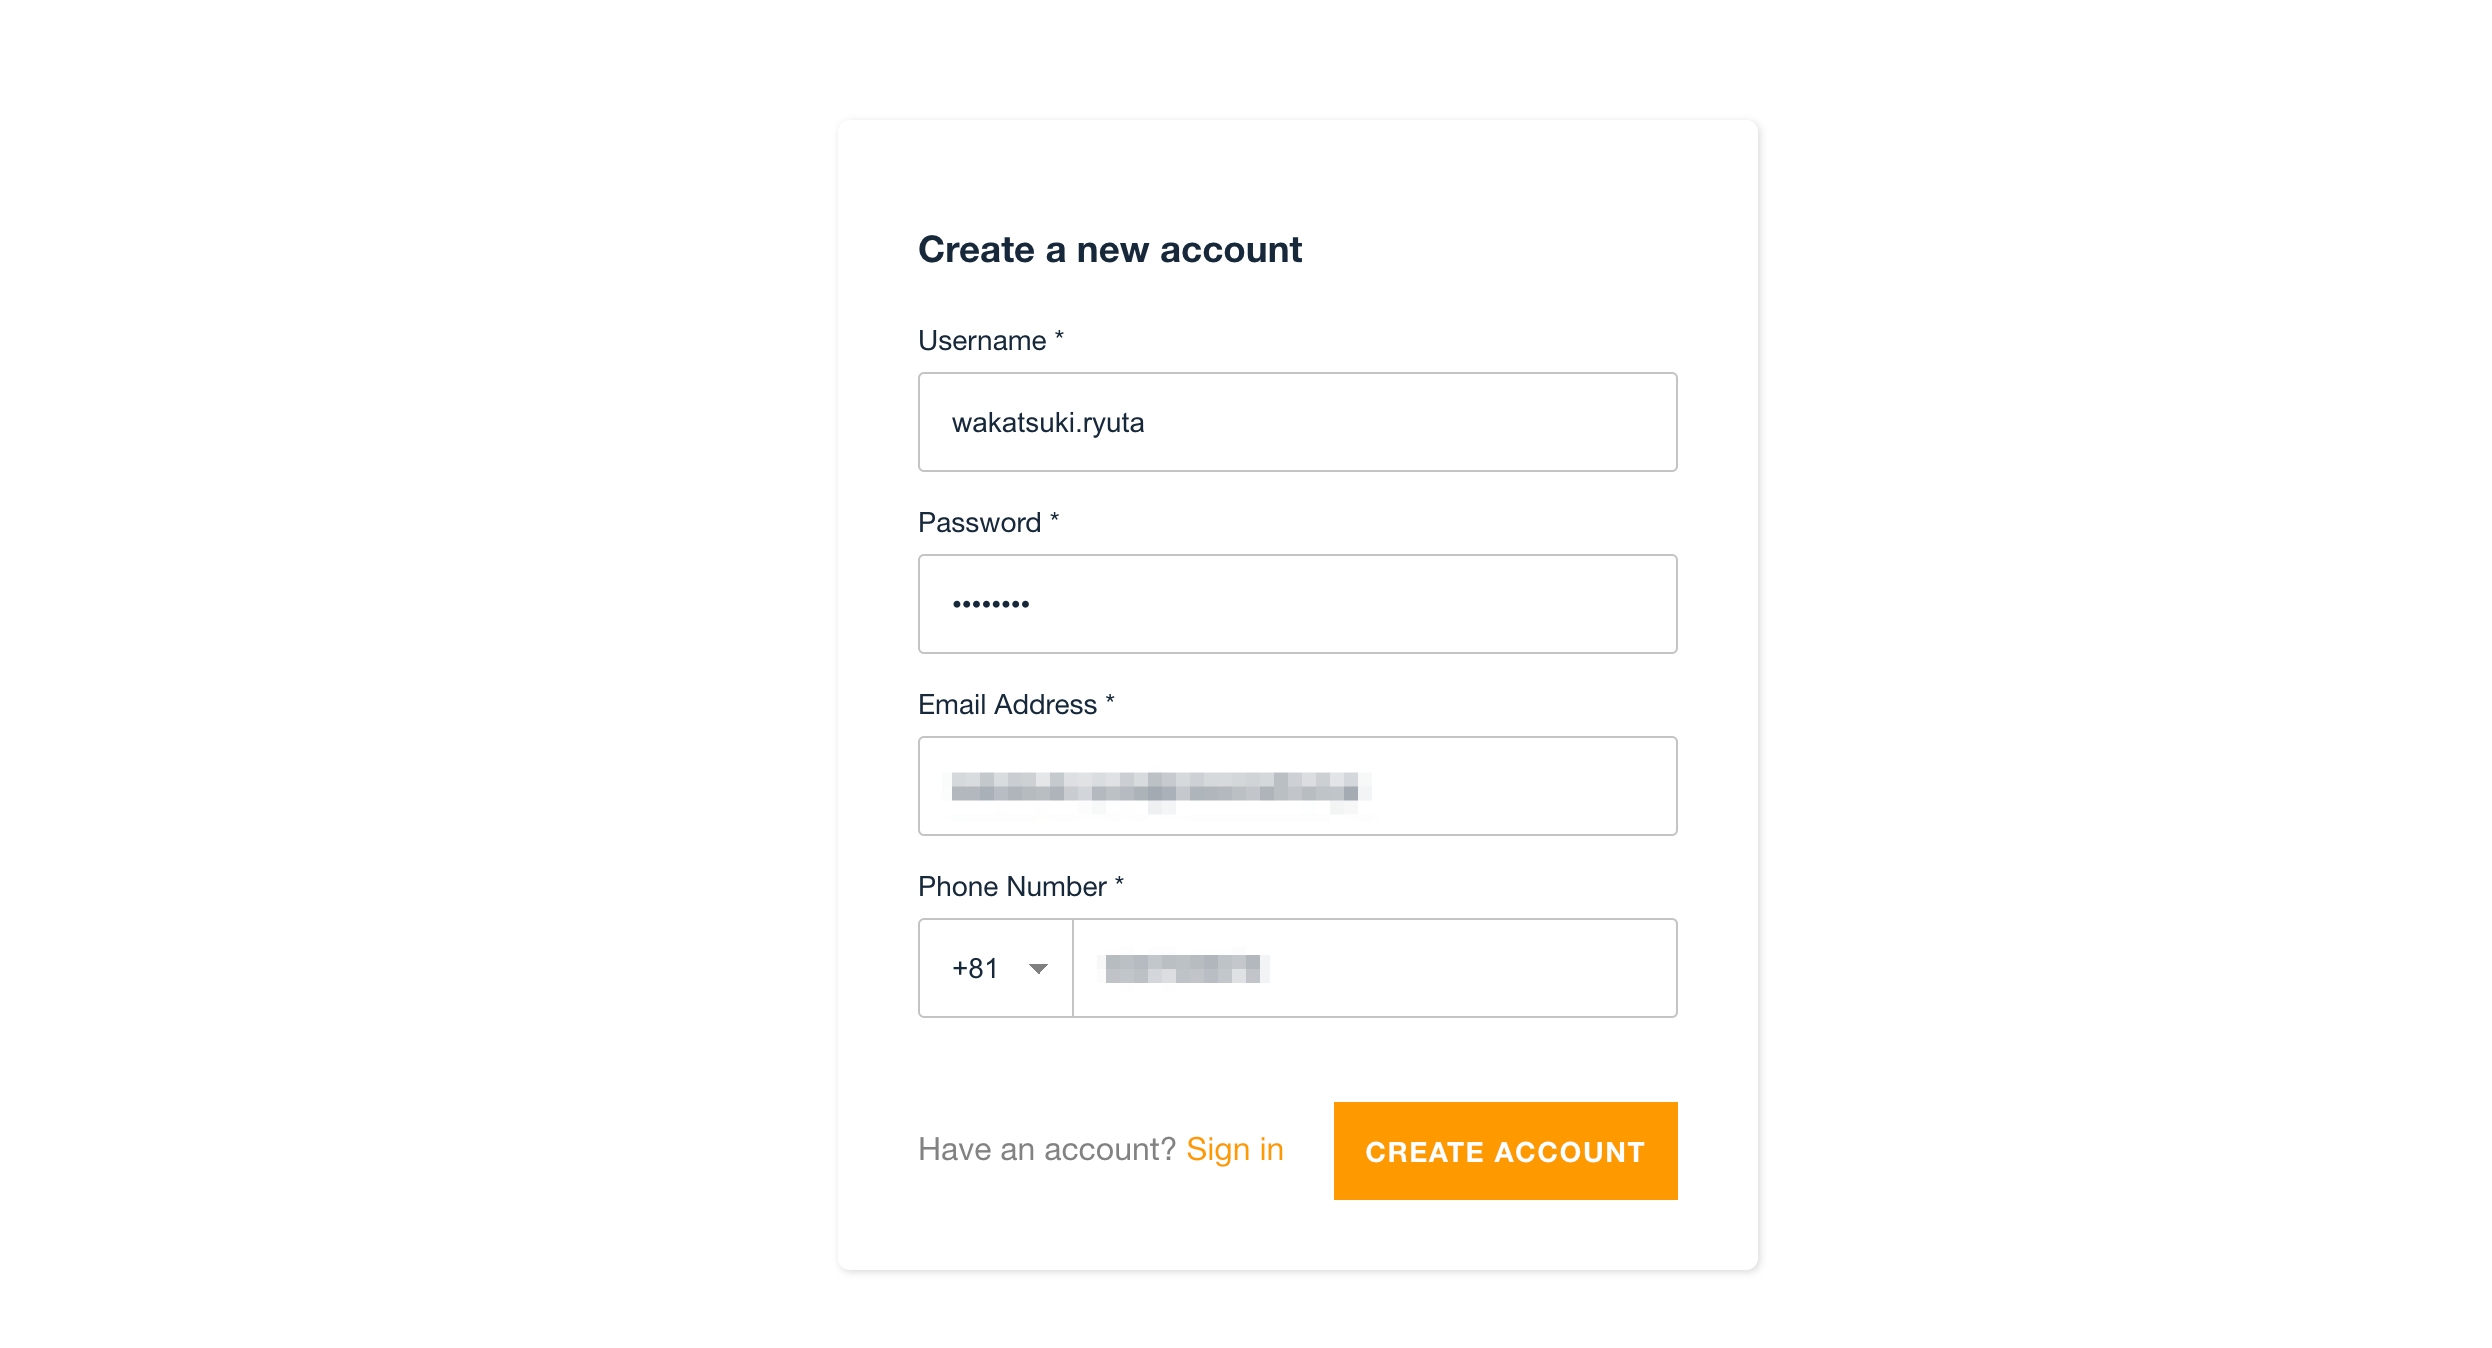
メールアドレスに確認コードが届くのでConfirmします。
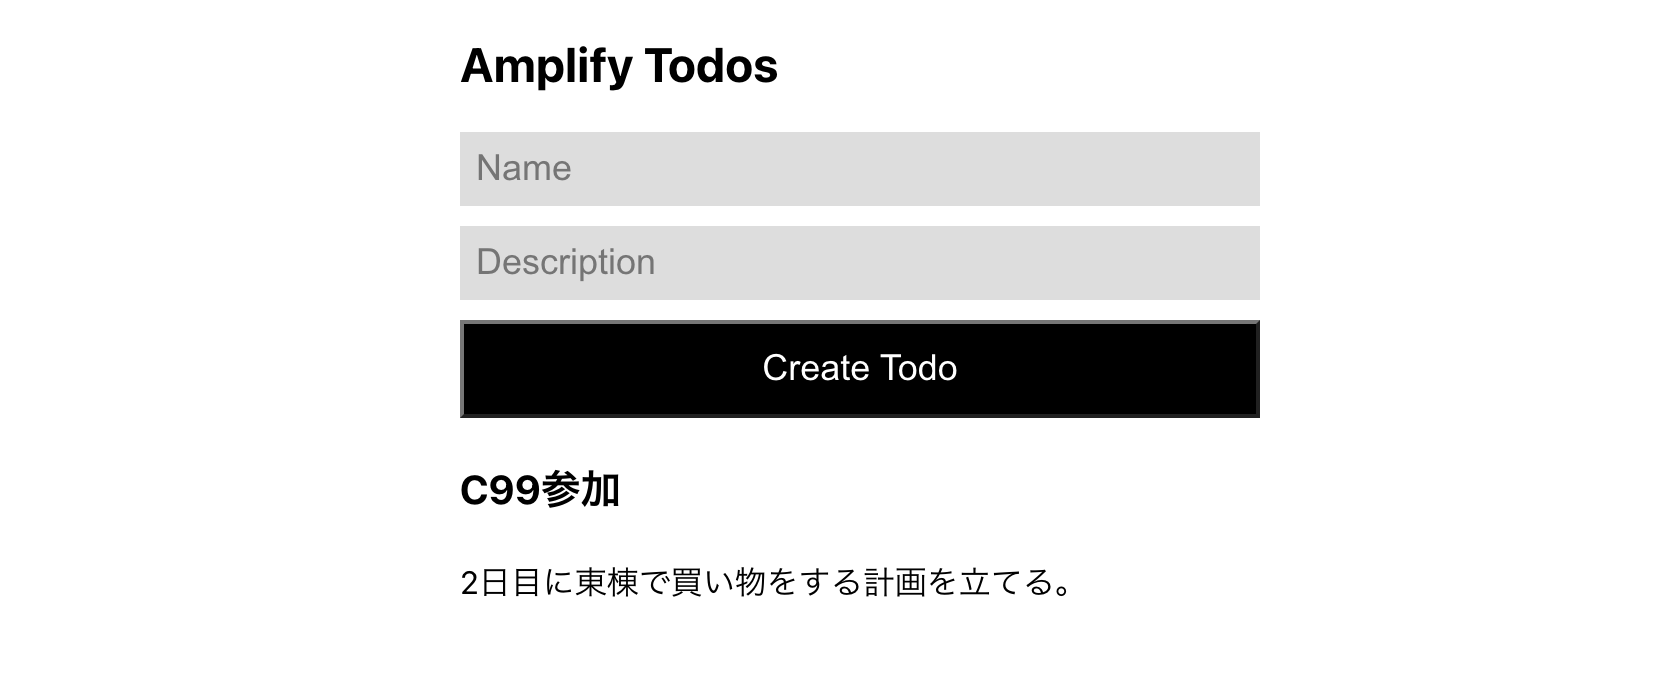
登録したユーザーでサインインしたら、ToDoリストの作成コンソールが表示できました!
ToDoを登録してみます。
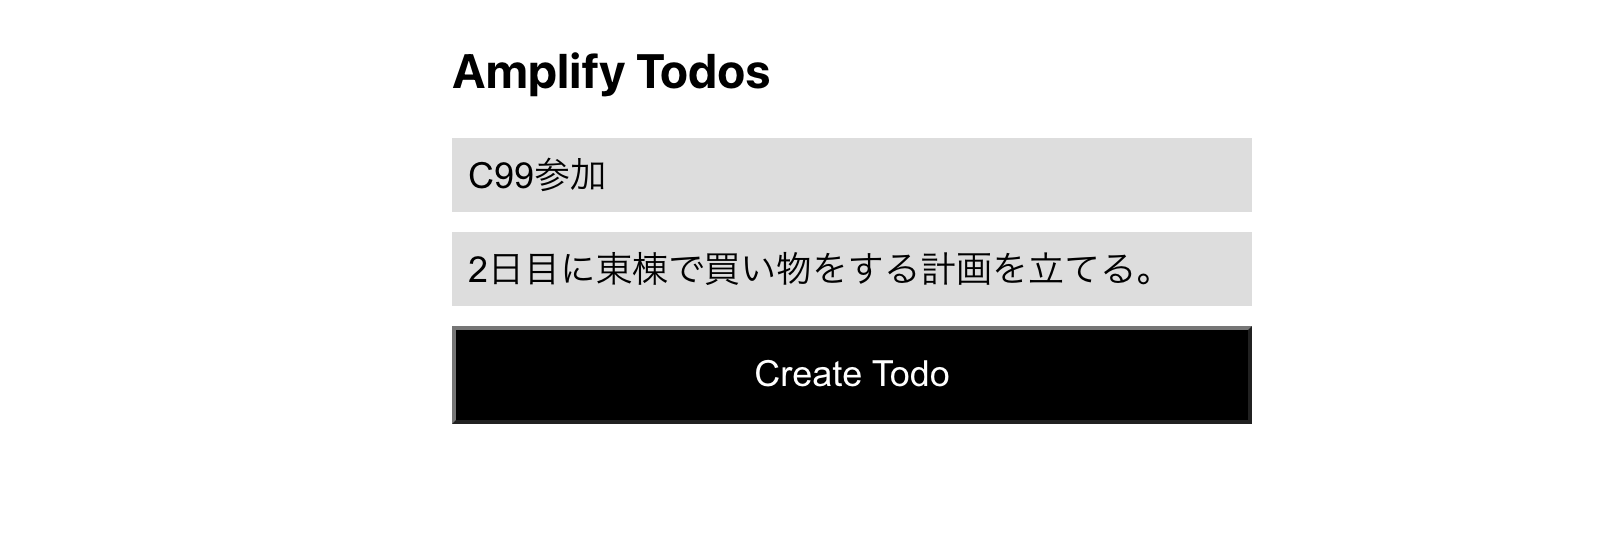
登録できました!画面を更新しても登録したToDoはもちろんリスト表示されます!
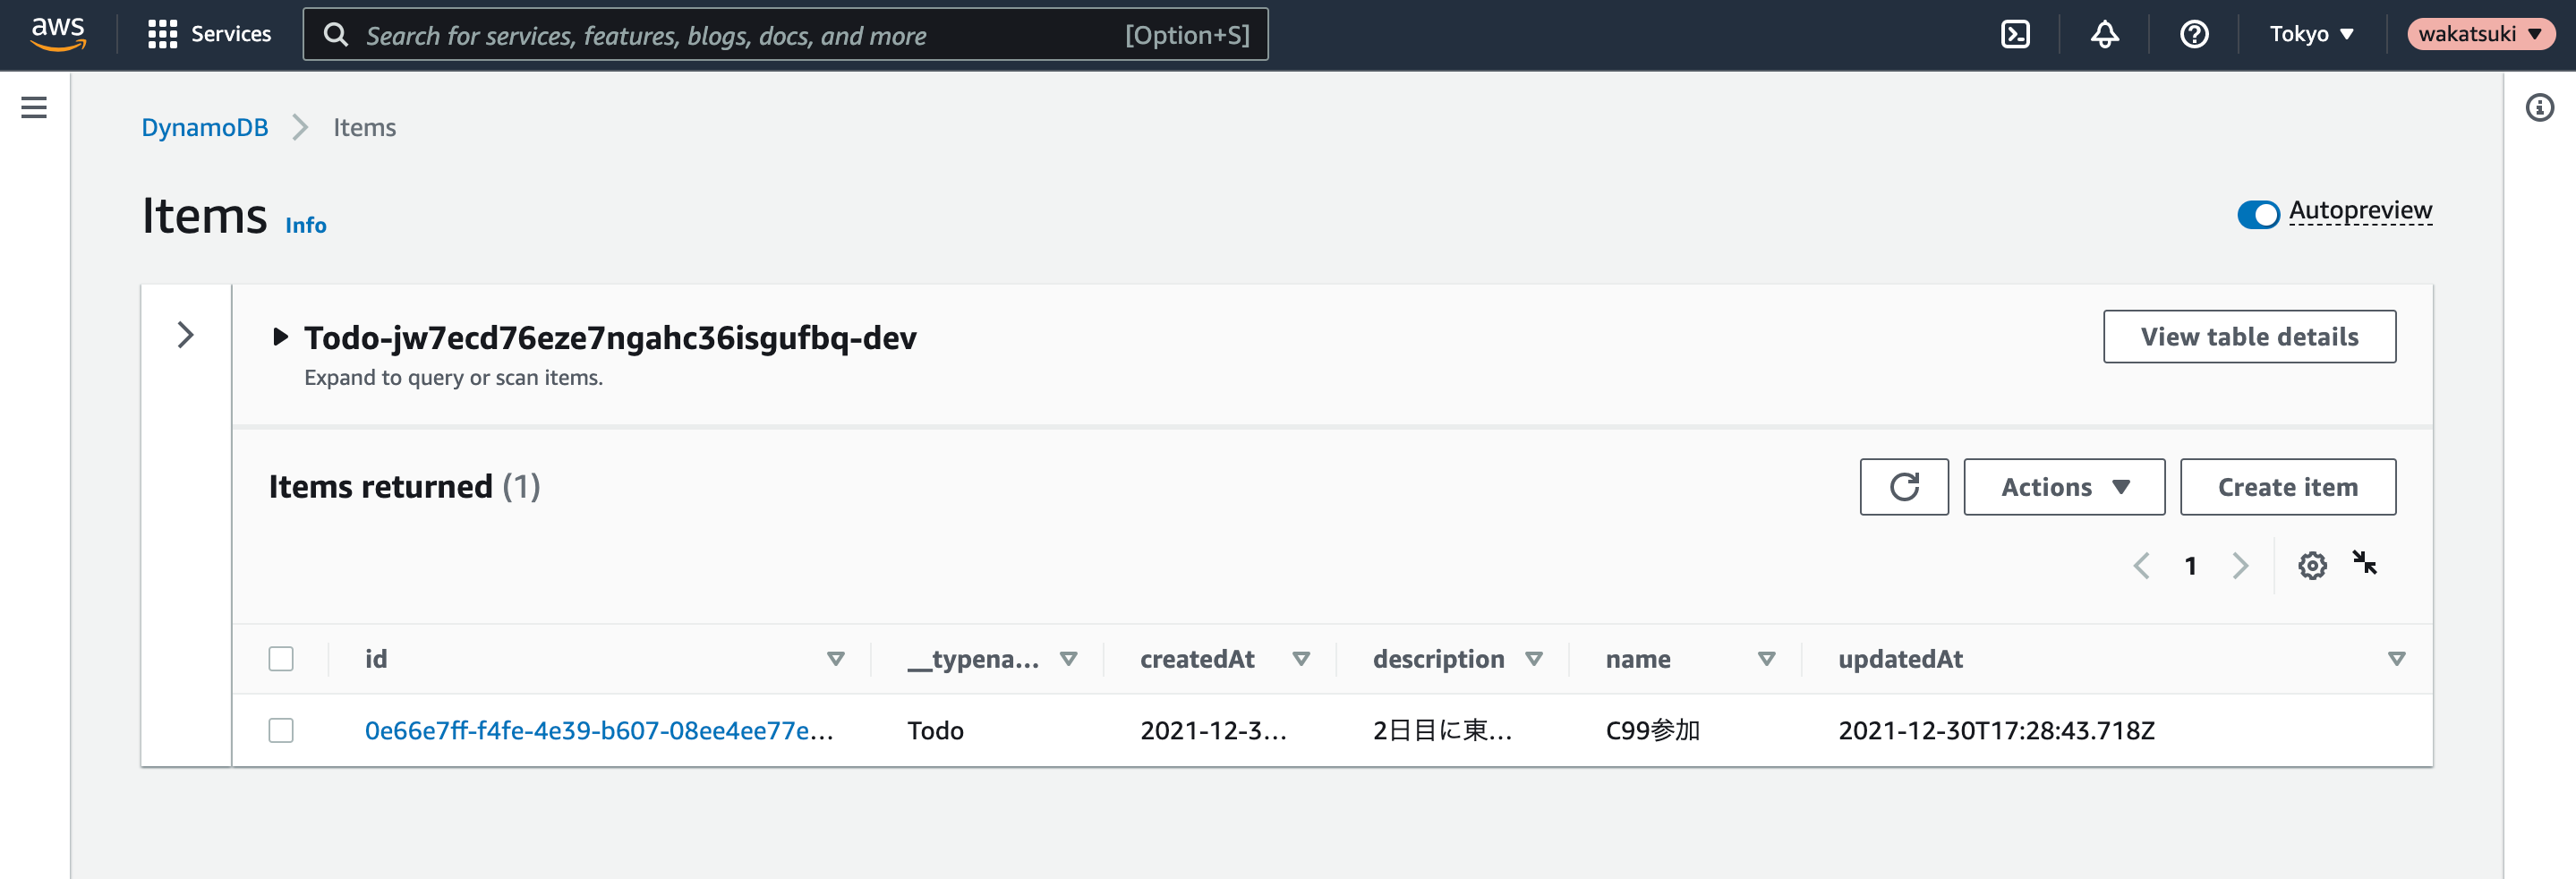
マネジメントコンソールでDynamoDBテーブルを見るとちゃんとToDoが登録されていることが確認できます!
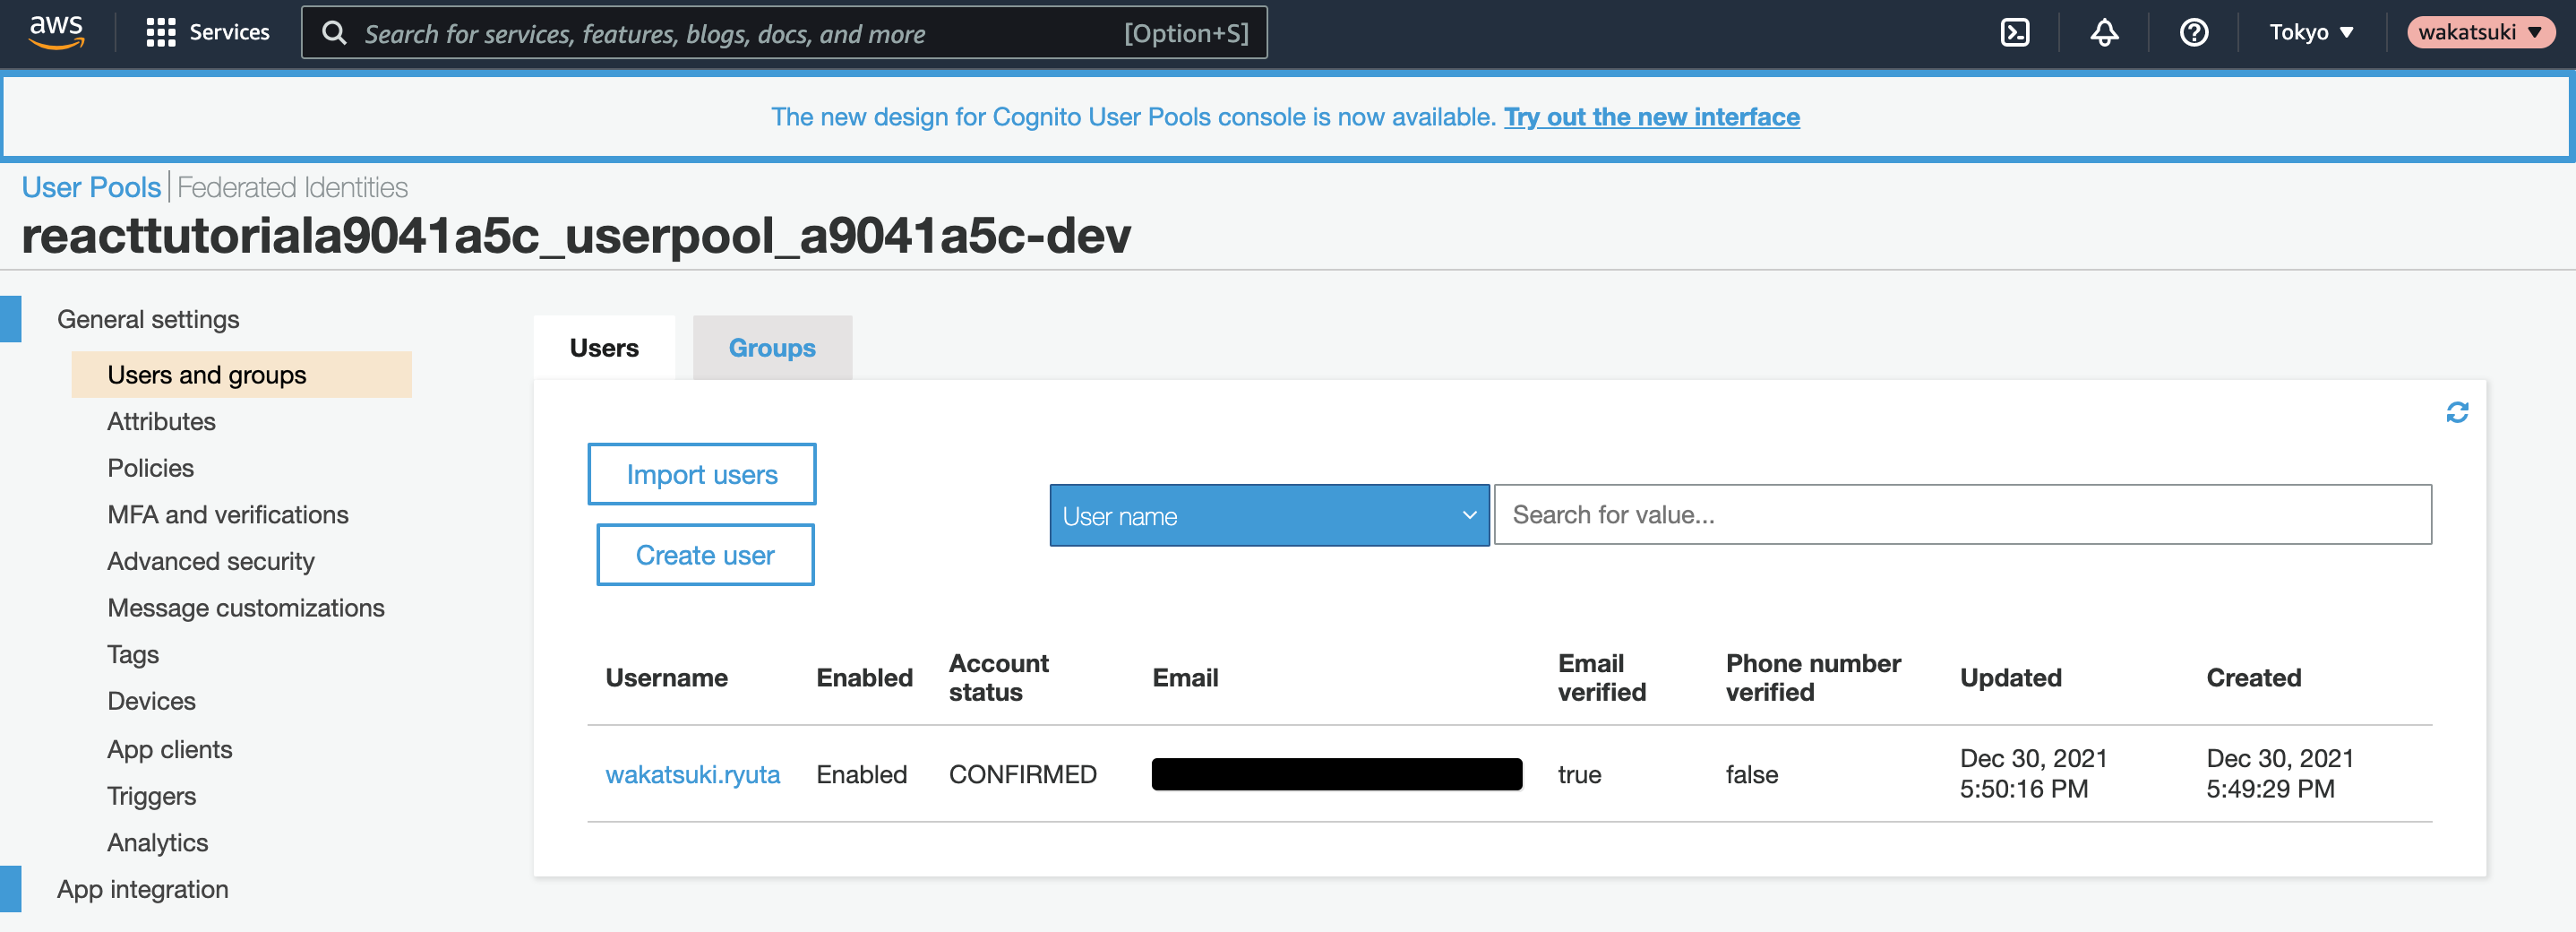
ちなみに認証ではAmazon Cognitoが使われており、Cognitoのコンソールからユーザープールと登録されたユーザーを確認できます。
ハマったところ
amplify pushでTypeScriptを選択したらアプリが起動できなくなった
掲題通りですが、amplify pushコマンド実行時の対話操作でChoose the code generation language targetの箇所でtypescriptを選択したら、アプリケーションの起動でWebpackのエラーが発生して起動できなくなりました。
ERROR in ./src/App.js 9:0-49
Module not found: Error: Can't resolve './graphql/mutations' in '/Users/wakatsuki.ryuta/projects/cm-rwakatsuki/amplify-react-tutorial/react-amplified/src'
resolve './graphql/mutations' in '/Users/wakatsuki.ryuta/projects/cm-rwakatsuki/amplify-react-tutorial/react-amplified/src'
  using description file: /Users/wakatsuki.ryuta/projects/cm-rwakatsuki/amplify-react-tutorial/react-amplified/package.json (relative path: ./src)
ここはチュートリアルの手順の通りjavascriptを選択するべきでした。同じようなハマりをしている人が他にもいました。
しかしamplify pushの修正は、次のように手順がないこともないようですが、少し面倒くさそうでした。
よってそこまで作成したAmplifyプロジェクトを削除してチュートリアルを一からやり直す対応としました。手順はよく読みましょう…。
公式チュートリアルは他にもある
今回試したものの他にもAWS Amplifyのチュートリアルは次のようなものがありました。
中身の精査はしていませんが、今回とは異なり画像を保存できるアプリを作成するようなので、合わせてやってみると更に理解が深められそうです。
APIはREST APIも選択可能
今回はAPIとしてGraphQL(AppSync)を選択しましたが、どうやらREST APIも選択可能のようです。
GraphQLの習熟コストが惜しい場合はREST APIでも良いかもしれません。
おわりに
AWS Amplifyの公式チュートリアルでToDoリストアプリ(React)をデプロイしてみました。
今回Amplifyを初めて触ったので少々ハマりどころはありましたが、そこさえ乗り越えられれば、素早いアプリケーションの立ち上げとフロントエンドへの注力ができるなと思いました。しかしデータ操作をカスタマイズしたい場合はAppSyncに習熟するか、それが難しいならREST API方式を採用する必要もありそうだと感じました。引き続き触ってみたいと思います。
参考
以上


