I tried Animating Mesh Gradients in Figma
2023.06.22
この記事は公開されてから1年以上経過しています。情報が古い可能性がありますので、ご注意ください。
Introduction
This is Pooja from the Alliance Department, this blog summaries my attempt at animating mesh gradient using Figma.
What's Mesh Gradient
A mesh gradient in design refers to a technique where a gradient effect is applied to a design element using a mesh grid.
Design software like Adobe Illustrator or Photoshop often provides tools to create mesh gradients.

Designers can use mesh gradients to achieve realistic shading, contouring, or color blending within a shape, resulting in depth, dimension, and visual interest. Mesh gradients are commonly employed in illustrations, digital paintings, and various forms of digital artwork.
It's worth noting that the specific features and capabilities of mesh gradients may vary depending on the design software used.
Demo
Following are the steps to create an animating mesh gradient:
- Open Figma, create a new file.
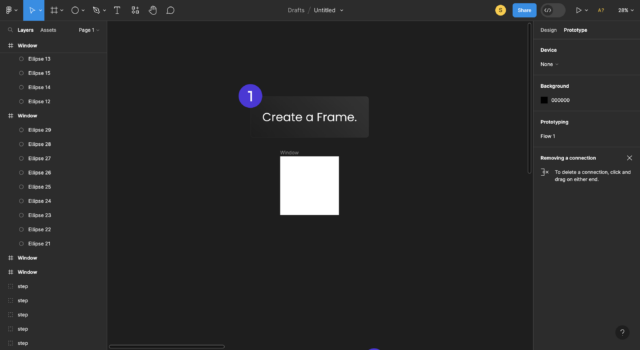
- Create a new Frame.
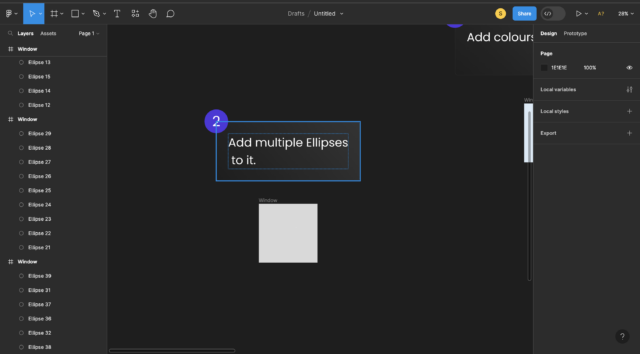
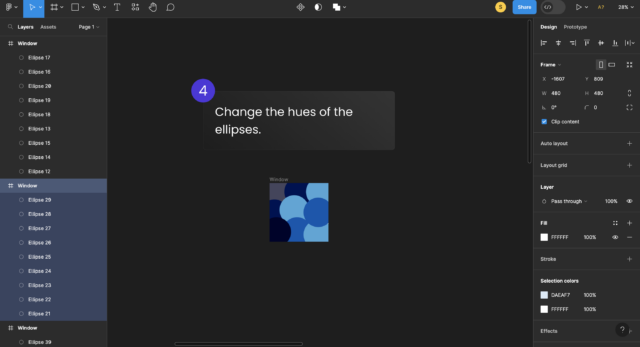
- Add ellipses to the above created frame.
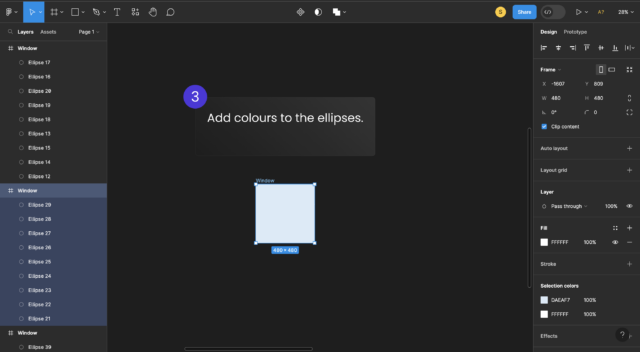
- Select the ellipses and add a background color to them.
- Select the ellipses and accordingly change the hue of these ellipses using the dropper icon in the Fill option, located in the Properties tab.
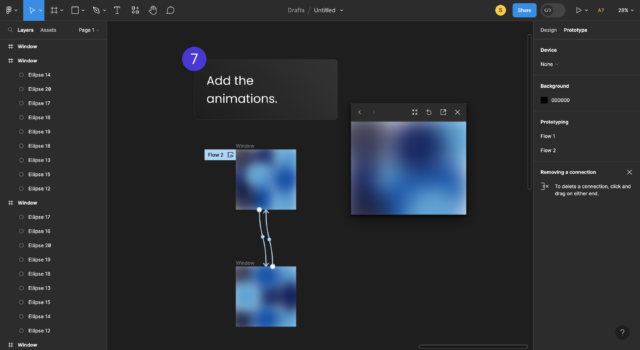
- Add the "Layer Blur" effect to the Frame.

- Duplicate the Frame with the ellipses that have different hues.

- With the original Frame and Duplicate Frame, under the Prototype tab add the necessary animation options shown in the below figures and create a Flow Point on the original Frame.

- Move around the ellipses to create the animated effect.
- When you're satisfied with the color hit the play button and witness the animation that come to life.
- Hit the link("Animated Mesh Gradient") below the image to view the Screen Recording
Conclusion
Mesh gradients offer a versatile tool for creating visually stunning elements that capture attention and engage users. Whether you're designing interfaces, illustrations, or animations, mesh gradients can add an eye-catching touch to your work.
Thank you for joining me on this journey of exploring animating mesh gradients in Figma. I hope this article has provided inspiration and empowered you to create captivating designs.
Thank you from your time and Happy Learning!!!