![[iOS 8]【iOS Developer 向け】iPhone を USB メモリとして使う](https://devio2023-media.developers.io/wp-content/uploads/2014/06/ios81.png)
[iOS 8]【iOS Developer 向け】iPhone を USB メモリとして使う
2014.10.06
この記事は公開されてから1年以上経過しています。情報が古い可能性がありますので、ご注意ください。
設定は1つだけ
常に持ち歩いている iPhone。
これが USB メモリに早変わり。
必要な設定は1つだけ。
四の五の言わずにレッツトライ!
設定
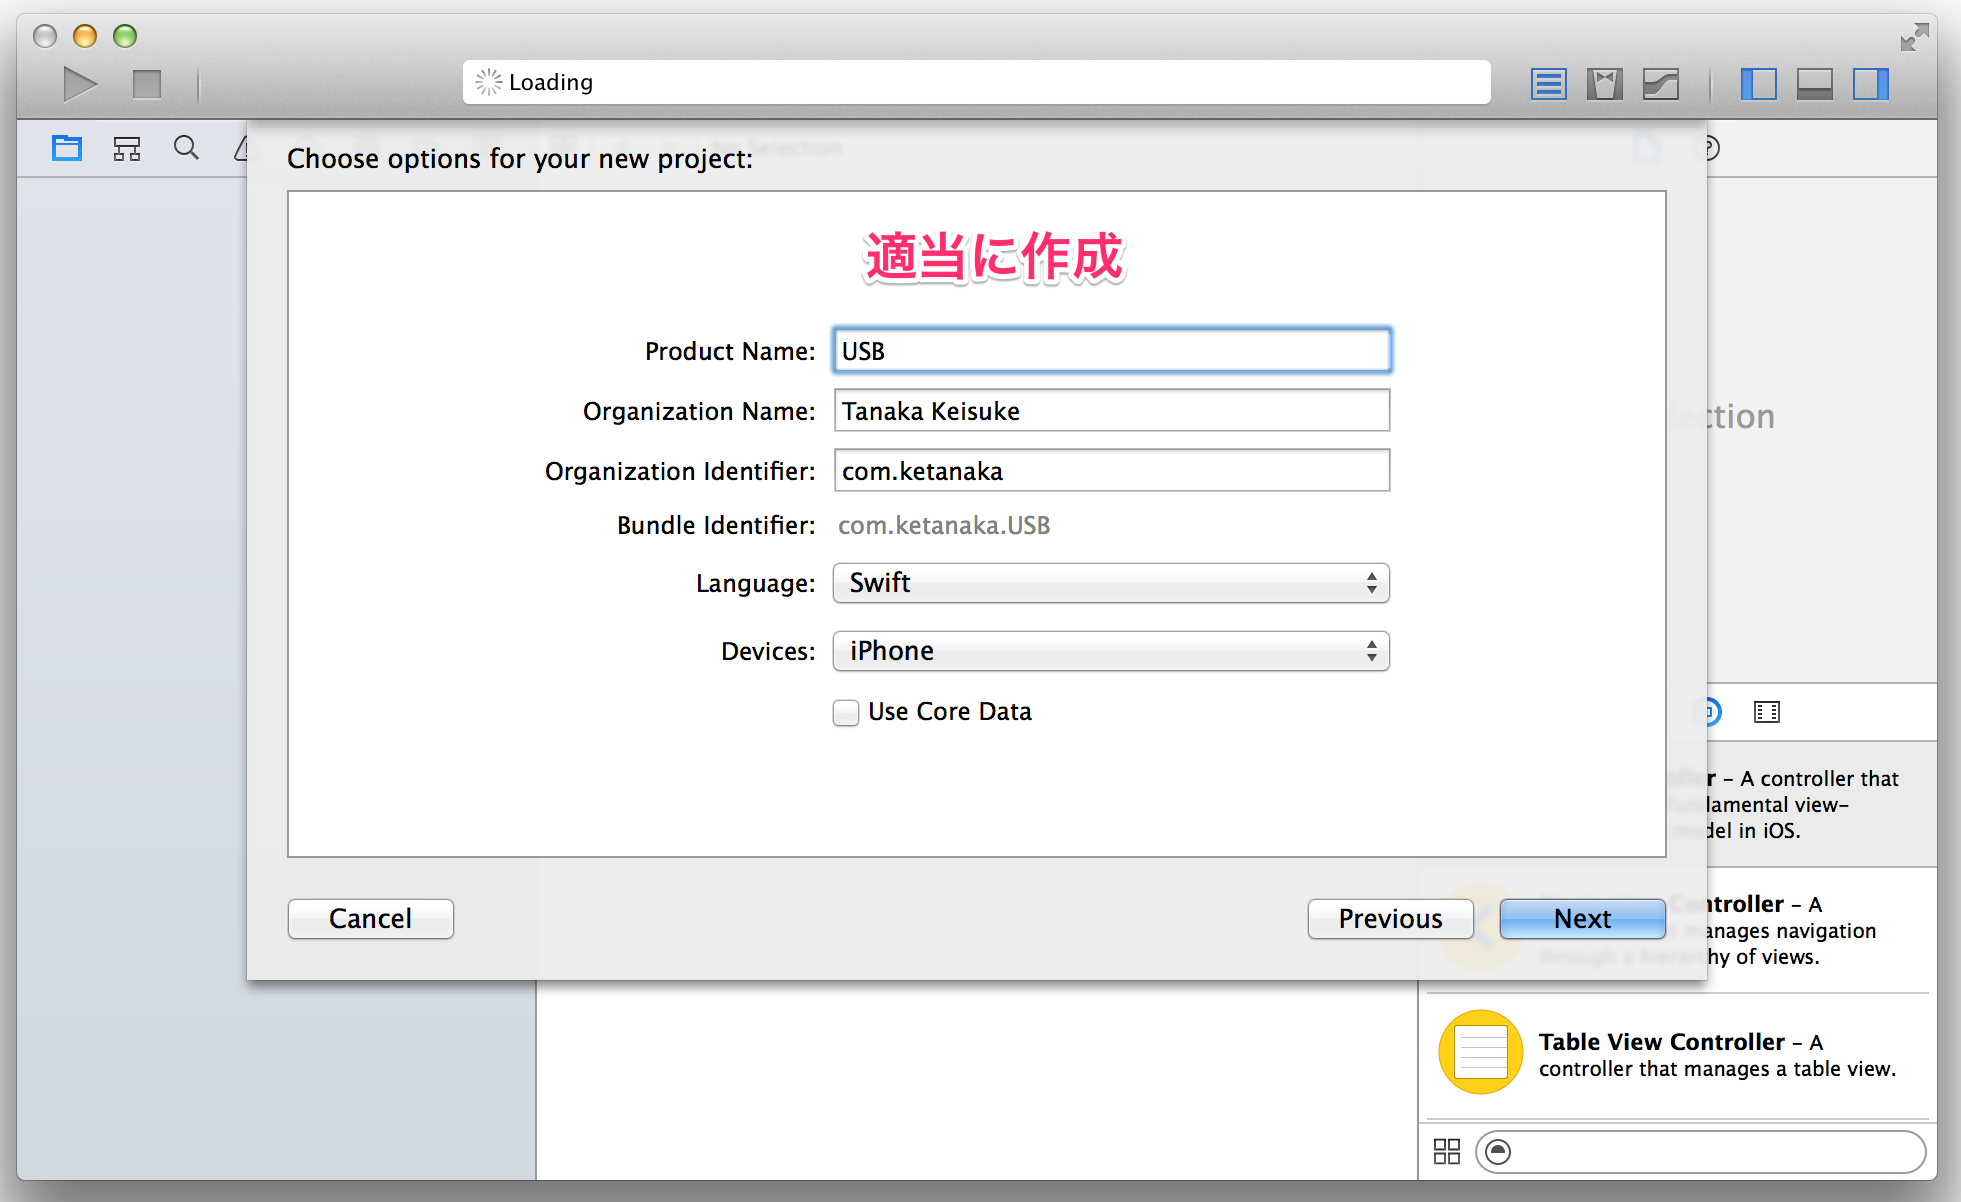
1. 適当なプロジェクトを作成する
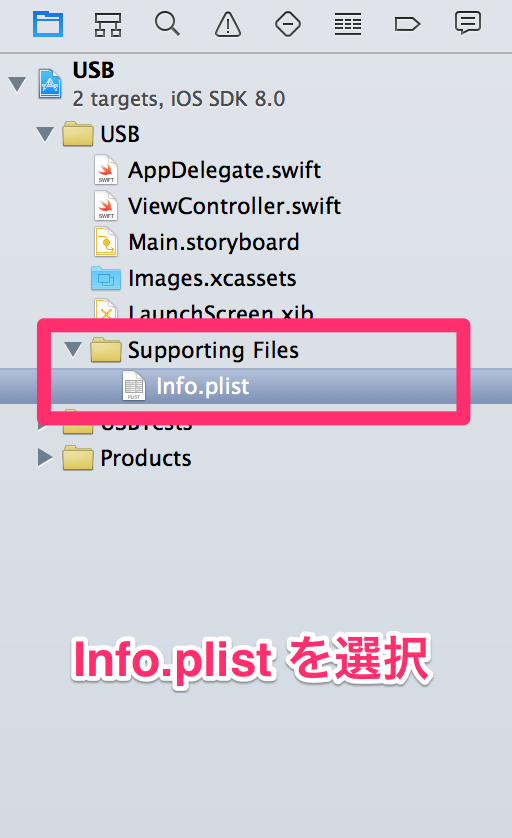
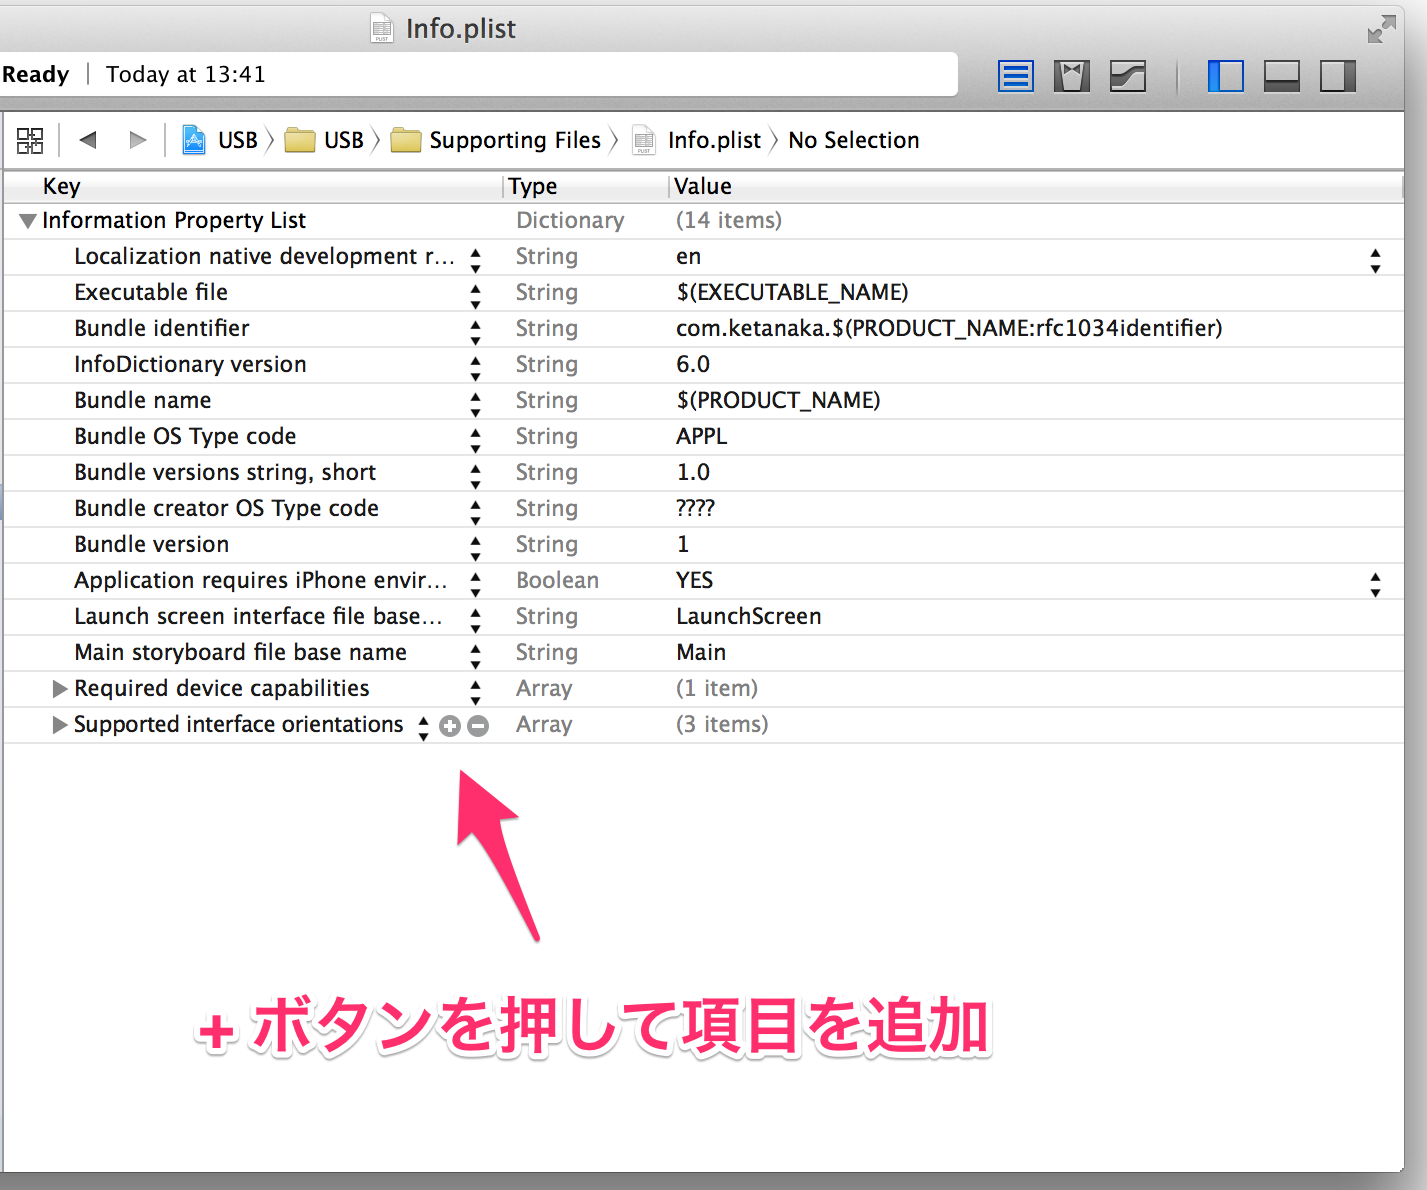
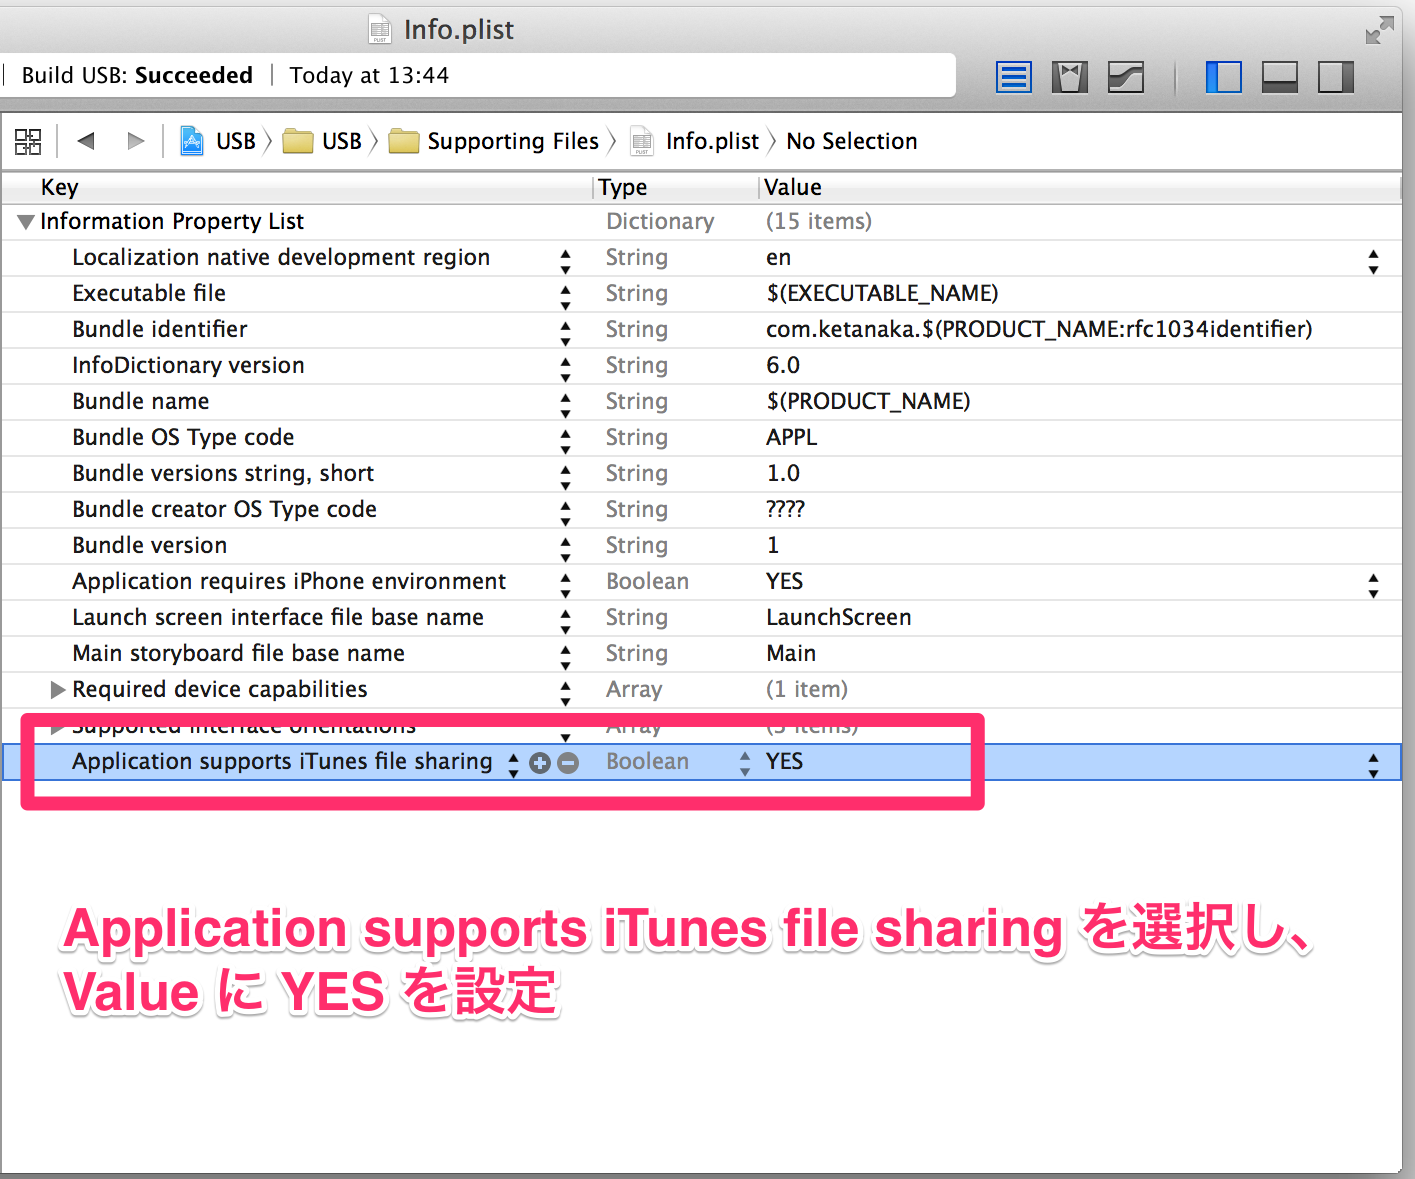
2. Info.plist に Application supports iTunes file sharing の項目を追加する
3. アプリを iPhone にインストールする
これだけです。
使い方
1. iPhone を PC に接続し、PC から iTunes を開く
2. [デバイス] - [App タブ] - [作成したアプリ] を選択する

3. ファイルを転送する
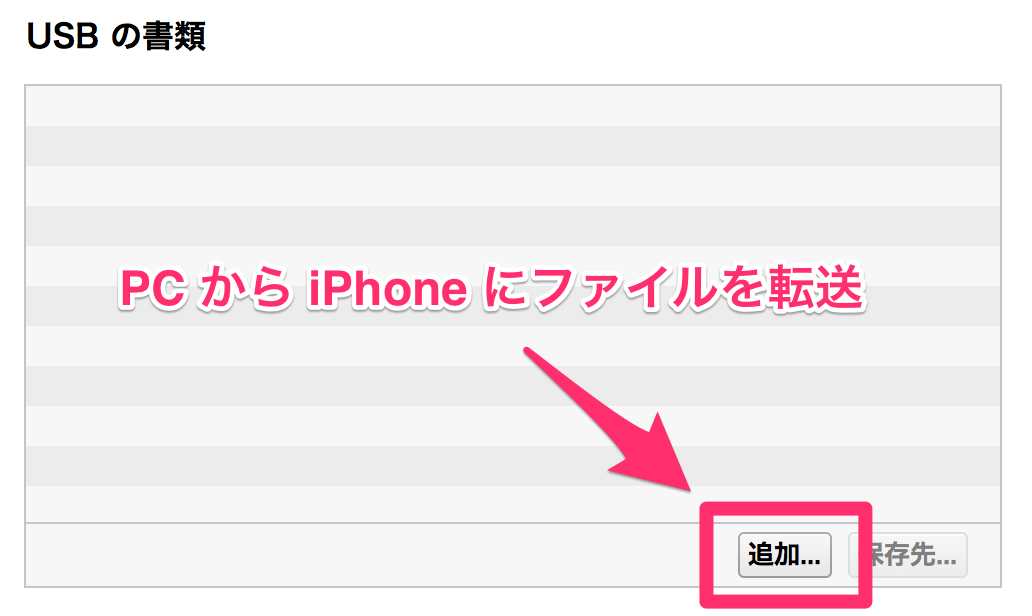

※ドラッグ&ドロップでもOK
まとめ
Application supports iTunes file sharing を YES にするだけで、そのアプリは iTunes からファイルを転送できるようになります。
PC に iTunes がインストールされている必要がありますが、なかなか便利なのでオススメです。
おまけ
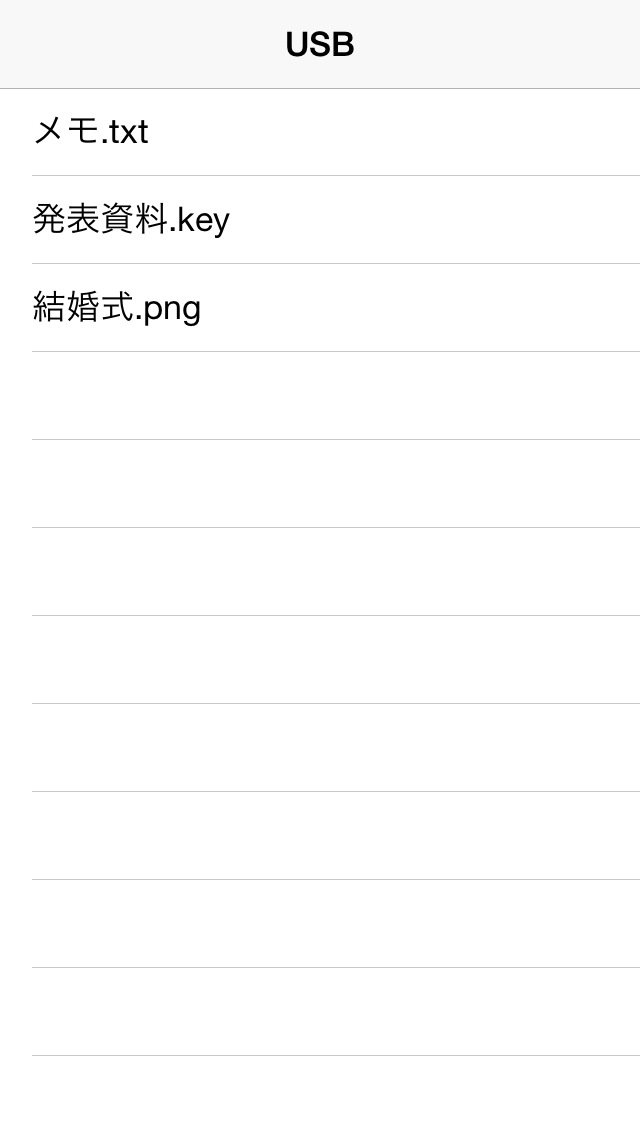
以下のようなコードを書くことで、アプリに保存したファイルの一覧を表示することもできます。
import UIKit

class TableViewController: UITableViewController {

    var contents = [String]()

    override func viewDidLoad() {
        super.viewDidLoad()
        let paths = NSSearchPathForDirectoriesInDomains(.DocumentDirectory, .UserDomainMask, true)
        let documentsDirectoryPath = paths.first as String
        contents = NSFileManager.defaultManager().contentsOfDirectoryAtPath(documentsDirectoryPath, error: nil) as [String]
    }

    override func numberOfSectionsInTableView(tableView: UITableView) -> Int {
        return 1
    }

    override func tableView(tableView: UITableView, numberOfRowsInSection section: Int) -> Int {
        return contents.count
    }

    override func tableView(tableView: UITableView, cellForRowAtIndexPath indexPath: NSIndexPath) -> UITableViewCell {
        let cell = tableView.dequeueReusableCellWithIdentifier("reuseIdentifier", forIndexPath: indexPath) as UITableViewCell
        cell.textLabel?.text = contents[indexPath.row]
        return cell
    }
}
実行画面