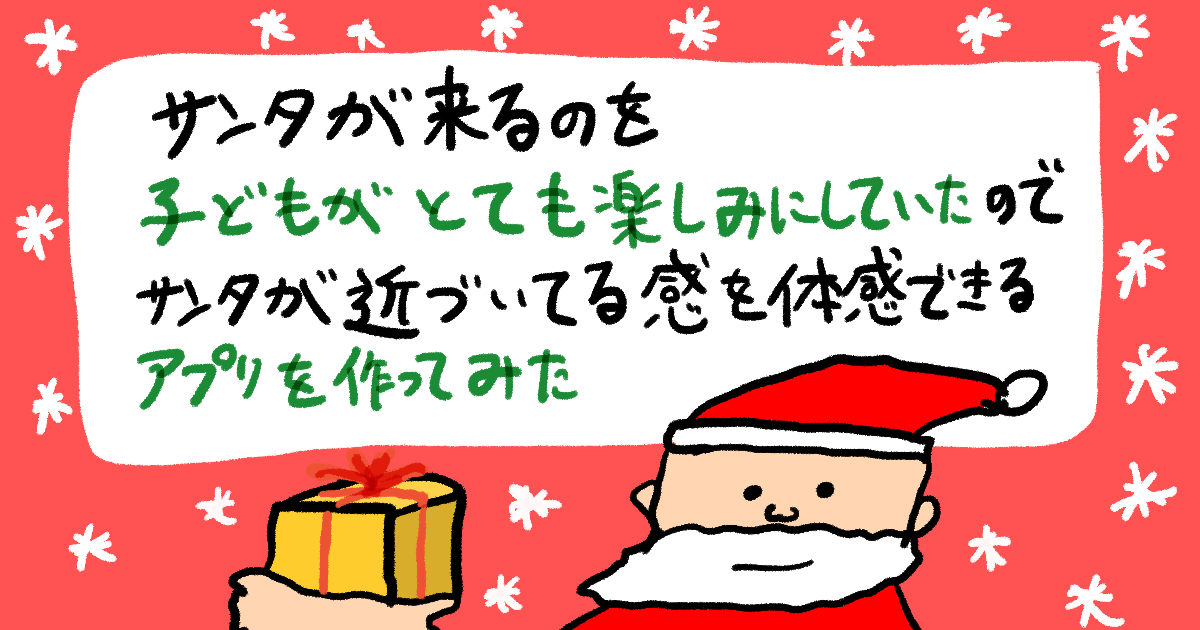
【iOS】サンタが来るのを子どもがとても楽しみにしていたので、サンタが近づいている感を体感できるアプリを作ってみた
この記事は公開されてから1年以上経過しています。情報が古い可能性がありますので、ご注意ください。
メリークリスマス!
我が家には無事にサンタさんがプレゼントを運んでくれました。お忙しい中、ありがとうございました。
我が家の子どもたちはサンタが家に来るのをとても楽しみにしていた為、サンタの現在位置を可視化しサンタが近づいている感を体感させることで更に気持ちを盛り上げたいと思い、サンタが近づいている感を体感できるアプリを作ってみることにしました。
はじめに
実際に作り始めたのがクリスマスイブの早朝で制作時間が限られていた為、細かいことを考えず、子どもたちが楽しめたらそれでいいという基準で作成しました。
作ったもの
サンタさんが目的地に向かって進んでいるように見えるアプリです。アプリ起動中はジングルベルが流れて、クリスマス感を高めてくれます。
目的地の緯度経度を取得
Google マップで目的地を検索して、対象の箇所で右クリックを押すと、目的地の緯度経度が表示されます。そのままクリップボードへのコピーも行えます。
今回は仮にサンタの目的地を広島駅しています。

サンタさんのデフォルトの座標として、フィンランド・サンタクロース村の緯度経度も取得しておきます。

実装
Constant
目的地の座標とサンタクロースの座標をConstantクラスに記述しておきます。
import MapKit

class Constant {

    // 家の座標(仮に広島駅の座標)
    static var homeCoordinate = CLLocationCoordinate2D(latitude: 34.39783518267202,
                                                       longitude: 132.47571119130762)

    // フィンランド・サンタクロース村の座標
    static var santaClausTownCoordinate = CLLocationCoordinate2D(latitude: 66.54369554169479,
                                                                 longitude: 25.847604995753933)
}
MapView
SwiftUIにMapというViewはあるのですが、今回はMKMapViewを使用することにしたので、MKMapViewをラップしたMapViewを作成しました。
import SwiftUI
import MapKit

struct MapView: UIViewRepresentable {

    @Binding var currentSantaCoordinate: CLLocationCoordinate2D?
    @State private var santaAnnotation = MKPointAnnotation()

    private let homeAnnotationData = AnnotationData(title: "ホーム",
                                                    coordinate: Constant.homeCoordinate,
                                                    imageName: "house.circle.fill")

    private let santaAnnotationData = AnnotationData(title: "サンタ",
                                                     // 初期位置はフィンランド サンタクロース村
                                                     coordinate: Constant.santaClausTownCoordinate,
                                                     imageName: "img_santa")

    // 最初に表示する地域、目的地の周辺
    private var defaultRegion: MKCoordinateRegion {
        return MKCoordinateRegion(center: homeAnnotationData.coordinate,
                                  span: MKCoordinateSpan(latitudeDelta: 0.01,
                                                         longitudeDelta: 0.01))
    }

    func makeUIView(context: Context) -> MKMapView {
        let mapView = MKMapView()
        // Delegateの設定
        mapView.delegate = context.coordinator
        // 表示する地域を設定
        mapView.setRegion(defaultRegion, animated: false)

        // 家のアノテーションを追加
        let homeAnnotation = MKPointAnnotation()
        homeAnnotation.title = homeAnnotationData.title
        homeAnnotation.coordinate = homeAnnotationData.coordinate
        mapView.addAnnotation(homeAnnotation)

        // サンタのアノテーションを追加
        santaAnnotation.coordinate = santaAnnotationData.coordinate
        santaAnnotation.title = santaAnnotationData.title
        mapView.addAnnotation(santaAnnotation)

        return mapView
    }

    func updateUIView(_ mapView: MKMapView, context: Context) {
        guard let currentSantaCoordinate else {
            // サンタの座標がnilの場合は、サンタのアノテーションを削除
            mapView.removeAnnotation(santaAnnotation)
            return
        }

        // サンタの座標を更新
        santaAnnotation.coordinate = currentSantaCoordinate
    }

    func makeCoordinator() -> Coordinator {
        return Coordinator(self)
    }

    class Coordinator: NSObject, MKMapViewDelegate {

        init(_ parent: MapView) {
            self.parent = parent
        }

        private let parent: MapView

        func mapView(_ mapView: MKMapView, viewFor annotation: MKAnnotation) -> MKAnnotationView? {

            // HomeAnnotationの場合
            if annotation.title == parent.homeAnnotationData.title {

                let annotationView = MKMarkerAnnotationView(annotation: annotation,
                                                            reuseIdentifier: parent.homeAnnotationData.title)
                annotationView.glyphImage = UIImage(systemName: parent.homeAnnotationData.imageName)
                return annotationView
            }

            // SantaAnnotationの場合
            if annotation.title == parent.santaAnnotationData.title {
                let annotationView = MKAnnotationView(annotation: annotation,
                                                      reuseIdentifier: parent.santaAnnotationData.title)
                annotationView.image = UIImage(named: parent.santaAnnotationData.imageName)
                return annotationView
            }

            return nil
        }
    }
}
AnnotationData
MapKitで特定の場所にインジケータや詳細を追加する時にAnnotationを作成します。そのAnnotationのデータ用の構造体を作っておきました。
extension MapView {

    struct AnnotationData {
        let title: String
        let coordinate: CLLocationCoordinate2D
        let imageName: String
    }
}
- title: タイトル
- coordinate: 座標(緯度経度)
- imageName: Annotationで使用する画像の名前
makeUIView
MapViewが生成される時に呼び出されるメソッドで、マップ上に最初に表示する地域の設定や、MKMapViewにアノテーションを追加しています。サンタのアノテーションに関しては、座標の値が変わるのでインスタンス変数で宣言しているものを追加しています。
func makeUIView(context: Context) -> MKMapView {
    let mapView = MKMapView()
    // Delegateの設定
    mapView.delegate = context.coordinator
    // 表示する地域を設定
    mapView.setRegion(defaultRegion, animated: false)

    // 家のアノテーションを追加
    let homeAnnotation = MKPointAnnotation()
    homeAnnotation.title = homeAnnotationData.title
    homeAnnotation.coordinate = homeAnnotationData.coordinate
    mapView.addAnnotation(homeAnnotation)

    // サンタのアノテーションを追加
    santaAnnotation.coordinate = santaAnnotationData.coordinate
    santaAnnotation.title = santaAnnotationData.title
    mapView.addAnnotation(santaAnnotation)

    return mapView
}
updateUIView
MapViewが更新される度に呼び出されるメソッドで、バインディングで受け取ったサンタの座標がnilの場合は、サンタのアノテーションを削除して、値がある場合は、その座標にサンタのアノテーションの座標を変更させています。
func updateUIView(_ mapView: MKMapView, context: Context) {
    guard let currentSantaCoordinate else {
        // サンタの座標がnilの場合は、サンタのアノテーションを削除
        mapView.removeAnnotation(santaAnnotation)
        return
    }

    // サンタの座標を更新
    santaAnnotation.coordinate = currentSantaCoordinate
}
mapView(_:viewFor:)
Coordinatorクラス内で呼んでいるMKMapViewDelegateのメソッドで、アノテーションのViewを返すメソッドです。
func mapView(_ mapView: MKMapView, viewFor annotation: MKAnnotation) -> MKAnnotationView? {

    // HomeAnnotationの場合
    if annotation.title == parent.homeAnnotationData.title {

        let annotationView = MKMarkerAnnotationView(annotation: annotation,
                                                    reuseIdentifier: parent.homeAnnotationData.title)
        annotationView.glyphImage = UIImage(systemName: parent.homeAnnotationData.imageName)
        return annotationView
    }

    // SantaAnnotationの場合
    if annotation.title == parent.santaAnnotationData.title {
        let annotationView = MKAnnotationView(annotation: annotation,
                                              reuseIdentifier: parent.santaAnnotationData.title)
        annotationView.image = UIImage(named: parent.santaAnnotationData.imageName)
        return annotationView
    }

    return nil
}
家のアノテーションの場合は、MKMarkerAnnotationViewで表示して、glyphImageに家の画像を設定しています。
サンタのアノテーションの場合は、マーカーのような形状ではなく画像のみで表示したかった為、MKAnnotationViewで表示してサンタの画像を設定しています。
JingleBellsPlayer
ジングルベルを再生する為だけのプレイヤーです。
import AVFoundation

class JingleBellsPlayer {

    init() {
        guard let url = Bundle.main.url(forResource: "jingle_bells", withExtension: "mp3"),
              let player = try? AVAudioPlayer(contentsOf: url)
        // 気持ちを高めるためにジングルベルは必須要素なので生成出来ない場合はfatalError
        else { fatalError("音楽を再生出来ません") }

        player.numberOfLoops = -1
        self.player = player
    }

    private let player: AVAudioPlayer

    func play() {
        if player.isPlaying { return }
        player.play()
    }
}
player.numberOfLoops = -1でジングルベルが無限ループされるようにしています。
また再生用のplay()メソッドも用意しました。
ContentView
import SwiftUI
import MapKit

struct ContentView: View {

    @State private var currentSantaCoordinate: CLLocationCoordinate2D? = Constant.santaClausTownCoordinate

    private let player = JingleBellsPlayer()
    private let timer = Timer.publish(every: 1, on: .main, in: .common).autoconnect()

    /// サンタが到着するDate
    private let santaArriveDate: Date? = {
        let formatter = ISO8601DateFormatter()
        formatter.timeZone = TimeZone(identifier: "Asia/Tokyo")

        let santaArriveDateSting = "2022-12-24T23:00:00+09:00"

        return formatter.date(from: santaArriveDateSting)
    }()

    var body: some View {
        MapView(currentSantaCoordinate: $currentSantaCoordinate)
            .ignoresSafeArea()
            .onReceive(timer) { _ in
                moveSanta()
            }
            .onAppear {
                player.play()
            }
    }
}
MapViewにサンタの現在の座標をバインディング出来るように@State変数を用意しています。あまり関係はないですが、デフォルトはサンタクロース村の座標を設定しています。
santaArriveDateは、我が家ではクリスマスイブの23時に到着することになっているので、2022-12-24T23:00:00+09:00をDate型に変換してものにしています。
今回はTimerを使用して、1秒毎にonRevieveの処理を実行出来るようにしました。onRecieve内ではサンタの位置を移動させるmoveSanta()メソッドを呼ぶようにしています。
また、Viewが表示されたonAppearのタイミングでジングルベルが流れるようにしています。
moveSanta
サンタの座標を移動させる為の処理です。
// MARK: - Private Function
extension ContentView {

    private func moveSanta() {

        guard let santaArriveDate else { return }
        // 現在のDate
        let currentDate = Date()
        // 現在Dateとサンタ到着Dateの差分(秒)
        let remainingTimeSeconds = santaArriveDate.timeIntervalSince(currentDate)

        guard remainingTimeSeconds >= 0 else {
            // サンタが到着したのでサンタの座標をnilにする
            // この時間には子どもは起きていないので深く考えない
            currentSantaCoordinate = nil
            return
        }

        // 残り時間(秒)を10000で割ったものを目的地までの残り角度とする
        // 目的地まで近づいた感が出せれば良いので深く考えない
        let movingDegrees = remainingTimeSeconds / 10000

        let currentSantaLatitude = Constant.homeCoordinate.latitude - movingDegrees
        let currentSantaLongitude = Constant.homeCoordinate.longitude - movingDegrees

        currentSantaCoordinate = CLLocationCoordinate2D(latitude: currentSantaLatitude,
                                                        longitude: currentSantaLongitude)
    }
}
現在のDateとサンタ到着Dateの差分の秒を計算しています。差分が0未満の場合は、すでに到着したとみなして、currentSantaCoordinateをnilにしています。
差分が0以上の場合は、差分の秒を10000で割った値をサンタの目的地までの残り角度として、目的地の緯度経度から減算しています。
最終的に計算されたサンタの緯度経度をcurrentSantaCoordinateに渡しています。
これでサンタが目的地に向かって進んでいるように見えるアプリが出来ました。
おわりに
子どもが喜べばいいので、細かいことは気にせずに作成しました。
サンタとメッセージのやり取りできたら面白いだろうなとか子どもがわがまま言うたびにサンタを後退させることの出来る機能があれば面白そうとか思ったりしました。
このアプリで無事に子どもの気持ちを盛り上げることに成功しました!
サンタさん、また来年も子どもに笑顔を届けてください。よろしくお願い致します。