How to use the Optional Input Fields in Alteryx Macro
この記事は公開されてから1年以上経過しています。情報が古い可能性がありますので、ご注意ください。
Introduction:
When using a macro in Alteryx, you may have noticed that the input data fields should be mapped accurately to the macro input for an error free execution. Sometimes, if the input data fields cannot be matched due to changed schema or changed data types, then the macro may throw an error message and won’t be executed any further until the error is resolved.
There is a simple trick which will allow any optional macro input data fields, often users are unaware of using this trick. This trick will work for any incoming data, even if it has a different schema or different column names or different data types, and the macro will be executed as planned. In this post, users can learn how to configure the macro so as to allow optional innput fields for an error free execution.
How to Achieve it
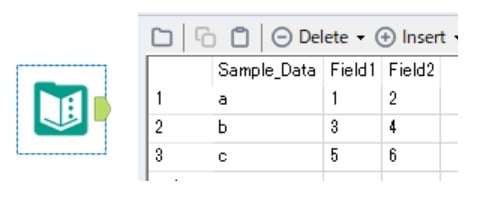
As an example, let us consider a sample input data set as shown below.
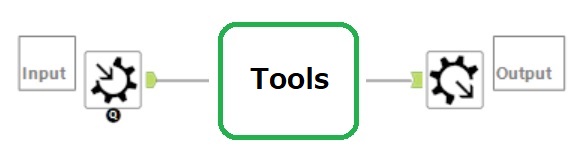
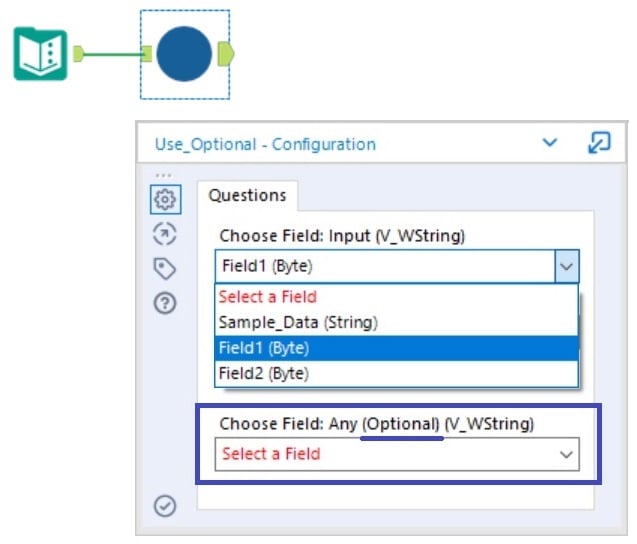
A macro can be built on a new canvas with the macro input configured as shown below. It is important to enable the “Show Field Map” options. Next, click on the “Edit Data” button and add the desired fields. The most important task is to add the desired field name with “(Optional)” as the suffix word in the field name as shown below.

Here, “Any” is a random name chosen as a column name in this example, and it should be followed by “(Optional)” in order to work properly. The column name can be designated as “Any (Optional)” or without whitespace as, “Any(Optional)”. Point to remember here, letter “O” should be capitalized and the rest of the text should be small letters. So “Any (optional)” or “Any(optional)” or “Any ( Optional)” or “Any( Optional)” will not work. The rest of the macro may contain other tools and finally followed by an Output tool.
By adding this macro in the original workflow, users can see that only the necessary fields need input selection from the drop down menu, however the optional field can be left untouched and still the workflow can be executed.

Summary:
In this post, users can understand this simple trick for how to use optional fields in a macro input.