![[SwiftUI] NavigationStackで画面遷移したり、NavigationBarの見た目も設定したい](https://images.ctfassets.net/ct0aopd36mqt/wp-thumbnail-291ab56731465588aade0a1c471324b7/8ec78a461f25144ed01585a448b8974b/swift-ui-eyecatch.png?w=3840&fm=webp)
[SwiftUI] NavigationStackで画面遷移したり、NavigationBarの見た目も設定したい
2024.08.28
この記事は公開されてから1年以上経過しています。情報が古い可能性がありますので、ご注意ください。
こんにちは。きんくまです。
SwiftUI勉強中です。
つくったもの
動画
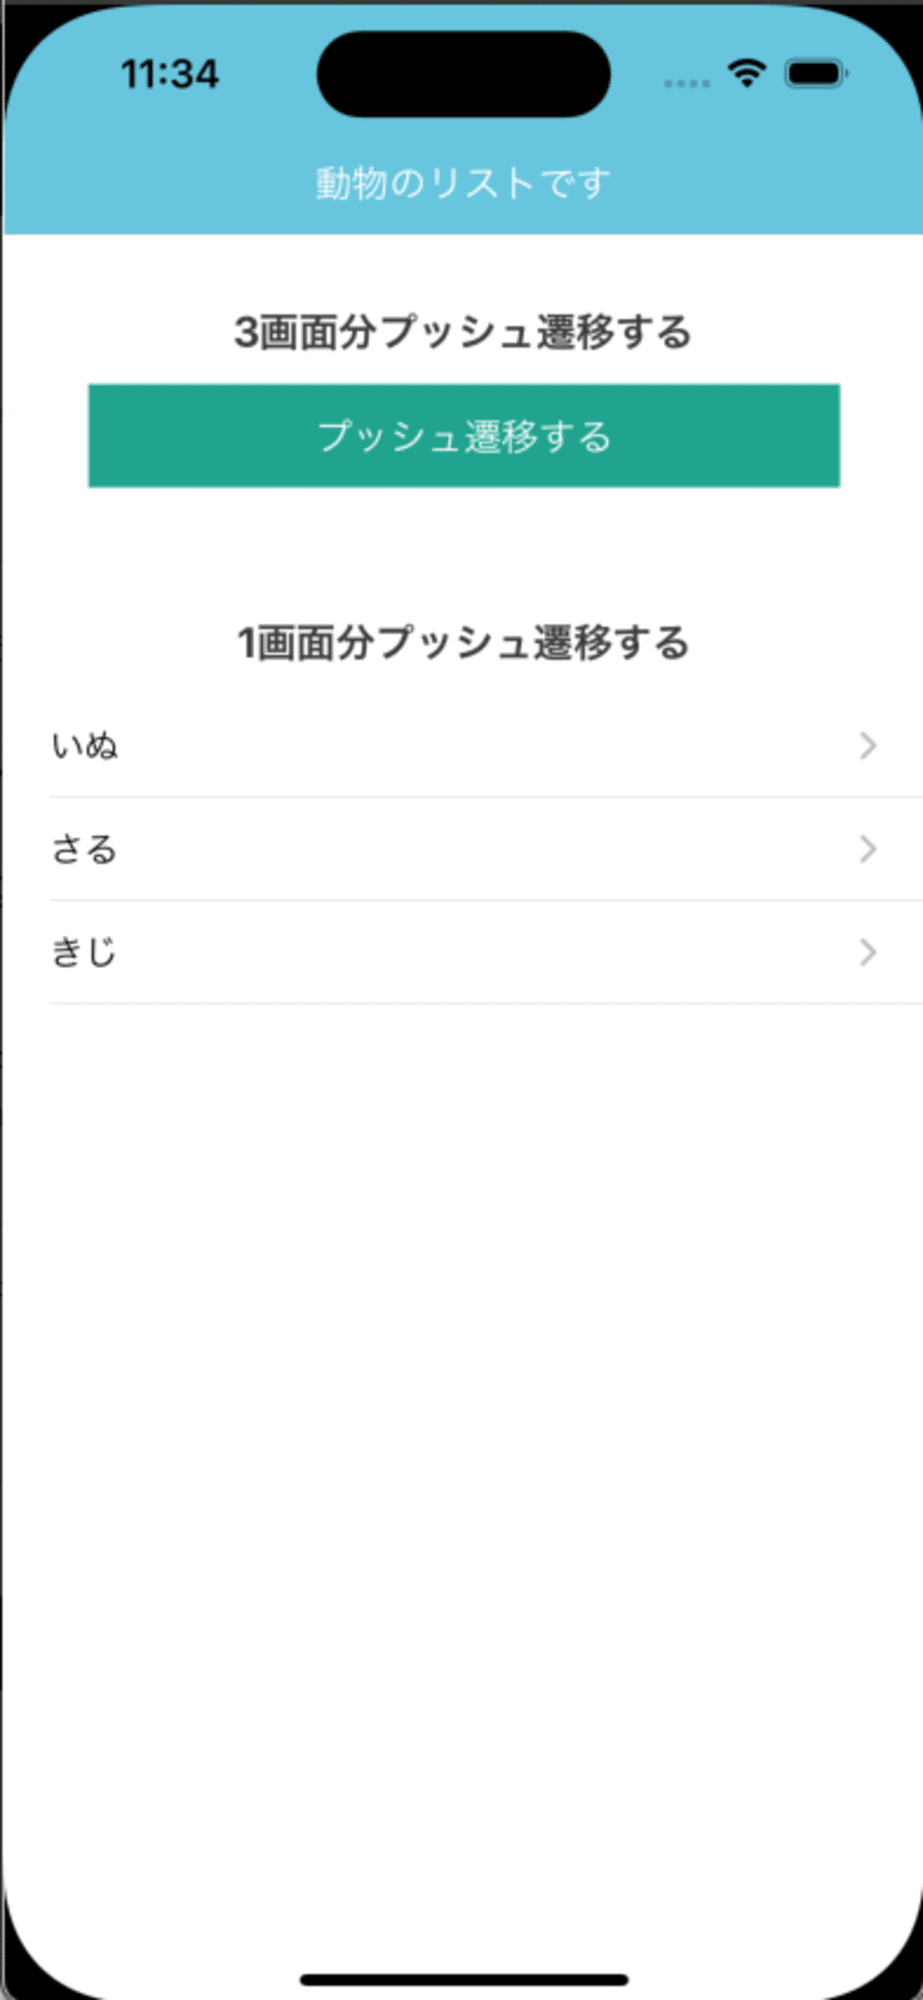
最初の画面
- 3画面分プッシュ遷移するボタンで、一気に3画面分遷移します
- 1画面分プッシュ遷移するリストの項目を選択すると1画面分遷移します
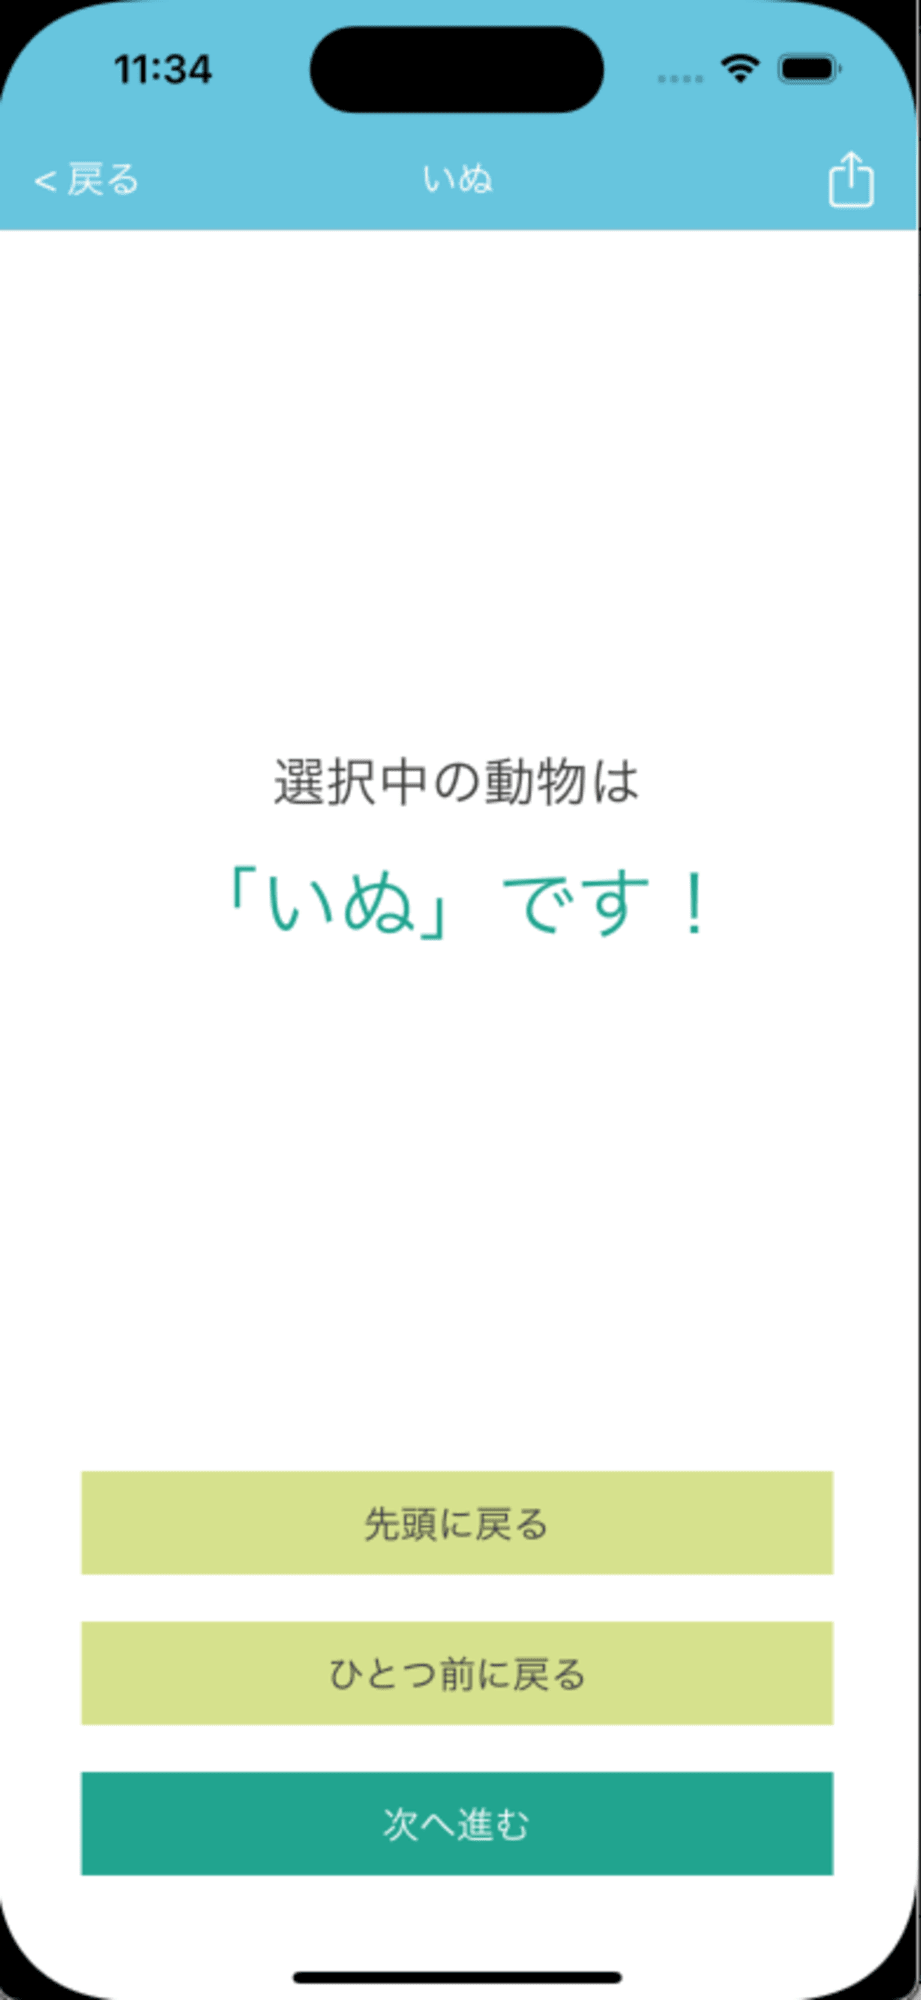
詳細画面
- 選択中の動物の名前を表示します
- 先頭に戻るボタンで、遷移が複数回行われても最初の画面まで戻ります
- ひとつ前に戻るボタンで、一つ前の画面に戻って遷移します
- 次へ進むボタンで、さらに次の画面へ遷移します
ソースコード
ナビゲーションバーの設定
extension Color {
    static var customSkyBlue: Color {
        Color(red: 103 / 255, green: 197 / 255, blue: 222 / 255)
    }

    static var customGeen: Color {
        Color(red: 33 / 255, green: 164 / 255, blue: 143 / 255)
    }

    static var customYellowGreen: Color {
        Color(red: 214 / 255, green: 225 / 255, blue: 141 / 255)
    }

    static var customPink: Color {
        Color(red: 244 / 255, green: 175 / 255, blue: 207 / 255)
    }

    static var customGray: Color {
        Color(red: 60 / 255, green: 60 / 255, blue: 60 / 255)
    }
}

extension View {

    private func baseCustomNavigationBar(title: String) -> some View {
        self
            .toolbar {
                ToolbarItem(placement: .principal) {
                    Text(title)
                        .foregroundColor(Color.white)
                }
            }
            .navigationBarTitleDisplayMode(.inline)
            .toolbarBackground(Color.customSkyBlue, for: .navigationBar)
            .toolbarBackground(.visible, for: .navigationBar)
    }

    @ViewBuilder
    func customNavigationBar(title: String, withBackButton: Bool = true) -> some View {
        if withBackButton {
            baseCustomNavigationBar(title: title).modifier(CustomNavigationBackButton())
        } else {
            baseCustomNavigationBar(title: title)
        }
    }
}

struct CustomNavigationBackButton: ViewModifier {
    @Environment(\.dismiss) var dismiss

    func body(content: Content) -> some View {
        content
            .navigationBarBackButtonHidden(true)
            .toolbar {
                ToolbarItem(placement: .topBarLeading) {
                    Button {
                        dismiss()
                    } label: {
                        Text("< 戻る")
                            .tint(Color.white)
                    }
                }
            }
    }
}
- toolbarを使ってナビゲーションのタイトルやボタンを設定しました。
- 戻るボタンを独自実装したかったです。@Environmentのdismissを使うために、ViewModifierで書きました
- カスタムmodifierは、Viewのextensionか、ViewModifierで実装できますが、ViewModifierだと@Stateなどを使えることが違いのようです
最初の画面
@Observable class ContentViewModel {
    var animalNames: [String]

    init() {
        animalNames = [
            "いぬ", "さる", "きじ"
        ]
    }
}

struct ContentView: View {
    @State private var contentViewModel = ContentViewModel()
    @State private var pagePath: [String] = []

    var body: some View {
        NavigationStack(path: $pagePath) {
            VStack(alignment: .center, spacing: 0) {
                Spacer()
                    .frame(height: 20)

                Text("3画面分プッシュ遷移する")
                    .frame(height: 44)
                    .font(.system(size: 18))
                    .fontWeight(.bold)
                    .foregroundColor(Color.customGray)

                Button{
                    pushThreeAnimalPaths()
                } label: {
                    Text("プッシュ遷移する")
                        .frame(minWidth: 320)
                        .frame(height: 44)
                        .background(Color.customGeen)
                        .tint(Color.white)
                }
                .padding(.bottom, 44)

                Text("1画面分プッシュ遷移する")
                    .frame(height: 44)
                    .font(.system(size: 18))
                    .fontWeight(.bold)
                    .foregroundColor(Color.customGray)

                List(contentViewModel.animalNames, id: \.self) { animalName in
                    NavigationLink(value: animalName) {
                        Text(animalName).font(.system(size: 16))
                    }
                }
                .navigationDestination(for: String.self) { animalName in
                    DetailView(
                        pagePath: $pagePath,
                        animalName: animalName
                    )
                }
                .listStyle(.plain)
            }
            .customNavigationBar(title: "動物のリストです", withBackButton: false)
        }
    }

    func pushThreeAnimalPaths() {
        pagePath = ["ねこ", "インコ", "ワニ"]
    }
}
- @Stateでページ管理用の、配列を用意(pagePath)
- NavigationStack(path: $pagePath)で設定
- .navigationDestination(for: T.self) { xxxx in でNavigationLinkから送られてきたデータを取得。画面遷移を行う。ここでさらに別の型もチェーンでつなげてもOKみたい。ここがいわゆる画面のRouterになるんだと思います
- func pushThreeAnimalPaths()で、pathにデータを追加して一気に3画面分遷移可能
詳細画面
struct DetailView: View {
    @Binding var pagePath: [String]
    let animalName: String

    var body: some View {
        VStack(spacing: 0) {

            Spacer()

            Text("選択中の動物は")
                .font(.system(size: 24))
                .foregroundColor(Color.customGray)
                .padding(.bottom, 16)

            Text("「\(animalName)」です!")
                .containerRelativeFrame(.horizontal, alignment: .center)
                .font(.system(size: 36))
                .foregroundColor(Color.customGeen)
                .multilineTextAlignment(.center)

            Spacer()

            Button {
                pagePath.removeAll()
            } label: {
                Text("先頭に戻る")
                    .frame(minWidth: 320)
                    .frame(height: 44)
                    .background(Color.customYellowGreen)
                    .tint(Color.customGray)

            }

            Spacer()
                .frame(height: 20)

            Button {
                if pagePath.count > 0 {
                    pagePath.removeLast()
                }
            } label: {
                Text("ひとつ前に戻る")
                    .frame(minWidth: 320)
                    .frame(height: 44)
                    .background(Color.customYellowGreen)
                    .tint(Color.customGray)
            }

            Spacer()
                .frame(height: 20)

            Button {
                pagePath.append("チュパカブラ")
            } label: {
                Text("次へ進む")
                    .frame(minWidth: 320)
                    .frame(height: 44)
                    .background(Color.customGeen)
                    .tint(Color.white)
            }

            Spacer()
                .frame(height: 20)
        }
        .toolbar {
            ToolbarItem(placement: .navigationBarTrailing) {
                Button {
                    print("右のボタンが押されたよ!")
                } label: {
                    Image(systemName: "square.and.arrow.up")
                }
                .foregroundColor(Color.white)

            }
        }
        .customNavigationBar(title: animalName)
    }
}
- 親からpagePathを@Bindingで受け取る
- 各ボタンでpagePathの中身を操作することで、画面遷移を行う
- カスタムナビゲーションバーを設定(.customNavigationBar)しつつ、さらに右上に独自ボタンを設置(.toolbar)
感想とか
- VStackのspacingを0にすれば、デフォルトで入っている余白をリセットできることを知りました
- ナビゲーションバーの設定に苦労しました
- 少しSwiftUIに慣れてきた気がします