Python(Pillow、OpenCV)でスクリーンショットを取得して物体検出をしてみた
この記事は公開されてから1年以上経過しています。情報が古い可能性がありますので、ご注意ください。
こんにちは、CX事業本部 IoT事業部の若槻です。
以前のエントリではOpenCVを使用して物体検出をしてみました。
今回は、Python(Pillow、OpenCV)を使用して、スクリーンショットを取得し、そのスクリーンショット画像に対して物体検出をしてみました。
やってみた
インストール
OpenCVとPillowをインストールします。
```sh
$ pip install opencv-python Pillow
### トライ・アンド・エラー

最初にトライ・アンド・エラーの様子を記載し、最終的なスクリプトを末尾にまとめています。

#### Pillowで取得した画像は変換が必要

OpenCV単体ではスクリーンショットを取得できないので、**Pillow**を使って取得します。

- [Pillow — Pillow (PIL Fork) 9.0.1 documentation](https://pillow.readthedocs.io/en/stable/index.html)

しかし`ImageGrab.grab()`により取得した画像はMatではないのでOpenCVではそのまま扱えず、numpy arrayへの変換が必要なようです。

```python
from PIL import ImageGrab
import cv2

# スクリーンショット取得
img = ImageGrab.grab()

# ファイルに保存
cv2.imwrite('img.jpg', img)
# Traceback (most recent call last):
#   File "<stdin>", line 1, in <module>
# cv2.error: OpenCV(4.5.5) :-1: error: (-5:Bad argument) in function 'imwrite'
# > Overload resolution failed:
# >  - img is not a numpy array, neither a scalar
# >  - Expected Ptr<cv::UMat> for argument 'img'
探してみると下記で紹介されている変換スクリプトが良さそうだったので拝借します。
import numpy as np
import cv2

def pil2cv(image):
    ''' PIL型 -> OpenCV型 '''
    new_image = np.array(image, dtype=np.uint8)
    if new_image.ndim == 2:  # モノクロ
        print('モノクロ')
        pass
    elif new_image.shape[2] == 3:  # カラー
        print('カラー')
        new_image = cv2.cvtColor(new_image, cv2.COLOR_RGB2BGR)
    elif new_image.shape[2] == 4:  # 透過
        print('透過')
        new_image = cv2.cvtColor(new_image, cv2.COLOR_RGBA2BGRA)
    return new_image

from PIL import ImageGrab

img = ImageGrab.grab()

# スクリーンショットをMAT型に変換
new_img = pil2cv(img)
## 透過

# ファイルに保存
cv2.imwrite('new_img.jpg', new_img)
保存されたファイルです。スクリーンショットが取得できていますね。

またImageGrab.grab()により取得した画像は**透過あり(アルファチャンネル付き)**のデータとなるようです。
アルファチャンネルはこれに追加されるデータで、その画素がどのくらい透けているかを表す「アルファ値」(alpha value)を格納する。アルファ値の高低で完全な透明(背後にある画素の色がその画素の色になる)から完全な不透明(背後の色を全く通さない)まで指定できる。
テンプレート画像も透過に対応できるように変換が必要
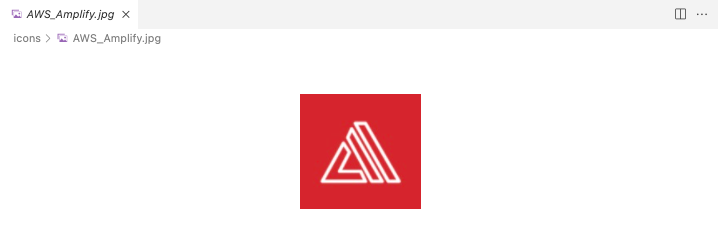
あらかじめ取得しておいたテンプレート用の画像です。
このテンプレート画像をスクリーンショット画像に対してmatchTemplate()を使用しようとするとエラーとなってしまいます。
# テンプレート画像の取得
template = cv2.imread('icons/AWS_Amplify.jpg')

# スクリーンショット画像から物体検出
result = cv2.matchTemplate(new_img, template, cv2.TM_CCORR_NORMED)
# Traceback (most recent call last):
#   File "<stdin>", line 1, in <module>
# cv2.error: OpenCV(4.5.5) /Users/runner/work/opencv-python/opencv-python/opencv/modules/imgproc/src/templmatch.cpp:1164: error: (-215:Assertion failed) (depth == CV_8U || depth == CV_32F) && type == _templ.type() && _img.dims() <= 2 in function 'matchTemplate'
cvtColor()でCOLOR_RGB2RGBAを指定してテンプレート画像をアルファチャネルを含むように変換してみます。するとmatchTemplate()が正常に実行できました。
new_template = cv2.cvtColor(template, cv2.COLOR_RGB2RGBA)

result = cv2.matchTemplate(new_img, new_template, cv2.TM_CCORR_NORMED)
matchTemplate()で指定する画像は、形状(img.shape)や次元数(img.ndim)をあらかじめ揃えることを意識したいですね。
最終的なスクリプト
ここまでのトライ・アンド・エラーを踏まえて次のようなスクリプトを作りました。スクリーンショットからアルファチャネルは削除するようにしました。
import numpy as np
import cv2
from PIL import ImageGrab

# スクリーンショット取得
img = ImageGrab.grab()

# MATへ変換(透過は削除)
new_img = cv2.cvtColor(np.array(img, dtype=np.uint8), cv2.COLOR_RGBA2BGR)

# テンプレート取得
template = cv2.imread('icons/AWS_Amplify.jpg')

# スクリーンショットからテンプレートを検出
result = cv2.matchTemplate(new_img, template, cv2.TM_CCORR_NORMED)

# 検出結果の最大値を取得
_, max_val, _, max_loc = cv2.minMaxLoc(result)

# スクリーンショット内のテンプレート位置を計算
w, h, _ = template.shape
top_left = max_loc
bottom_right = (top_left[0] + w, top_left[1] + h)

# スクリーンショット内にテンプレート位置を長方形で描画
cv2.rectangle(new_img, top_left, bottom_right, (255, 255, 0), 2)

# 画像保存
cv2.imwrite('new_img.jpg', new_img)
実行すると、AWS Amplifyのロゴの位置がちゃんと物体検出できています!

参考
以上