
Building VPC and EC2 from scratch and connecting to the server using the Management Console
This page has been translated by machine translation. View original
Purpose and Background of This Article
AWS offers various services, but EC2 is relatively easy for AWS beginners to handle.
The reason is that EC2 is similar to a rental server service, and if you are familiar with operating server OS, you can fulfill many of your requirements using existing knowledge after setting up EC2.
However, it is not a simple service lacking in functionality. I believe VPC and EC2 are services with great potential for integration with other services.
I wrote this article as a foothold for those who want to start using EC2.
What We Will Create
In this article, we will set up VPC and EC2.
We will use the management console for the setup.
VPC (Virtual Private Cloud) is a virtual private network built on AWS. It allows you to configure IP address ranges, subnets, security settings, etc. Servers like EC2, which we'll discuss later, will run on this VPC.
EC2 (Elastic Compute Cloud) is a virtual server service available on AWS. You can launch servers with necessary specifications when needed, and freely select CPU, memory, and storage.
Building a VPC
First, we'll create a VPC, which is the network where EC2 will run.
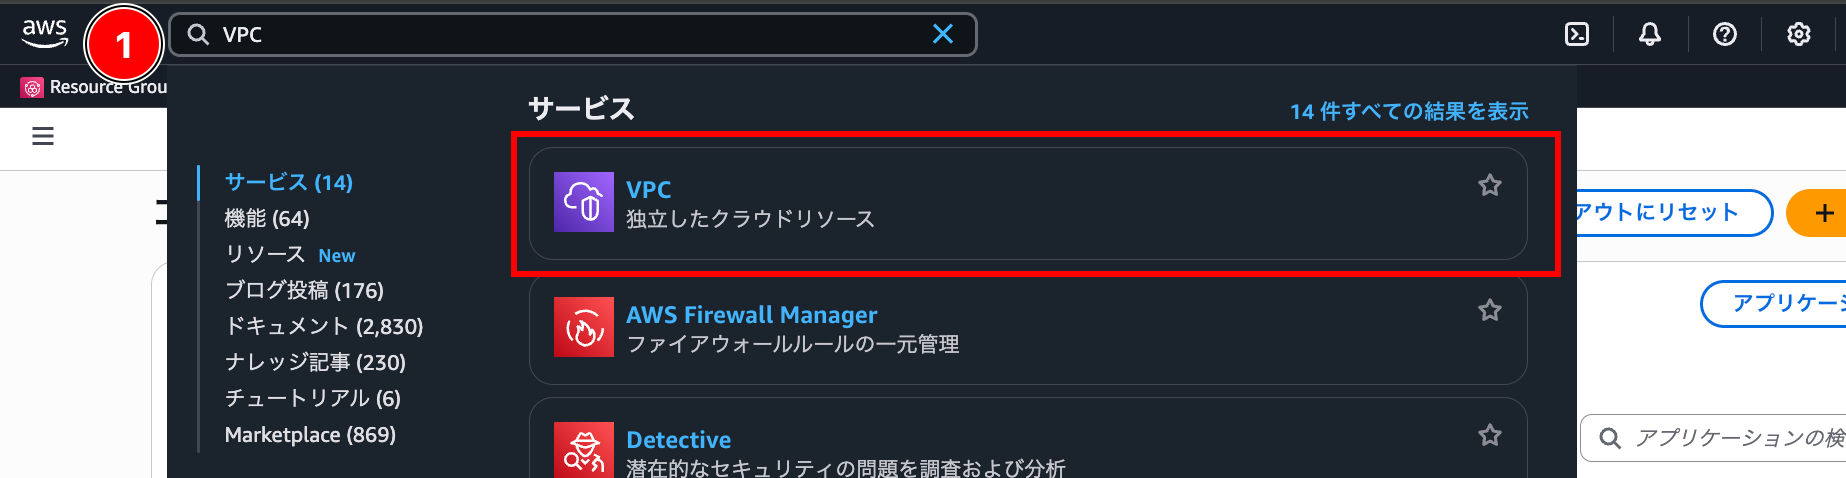
After accessing the management console, type "VPC" in the search bar at the top of the screen.
You should see "VPC" under services, so click on it.
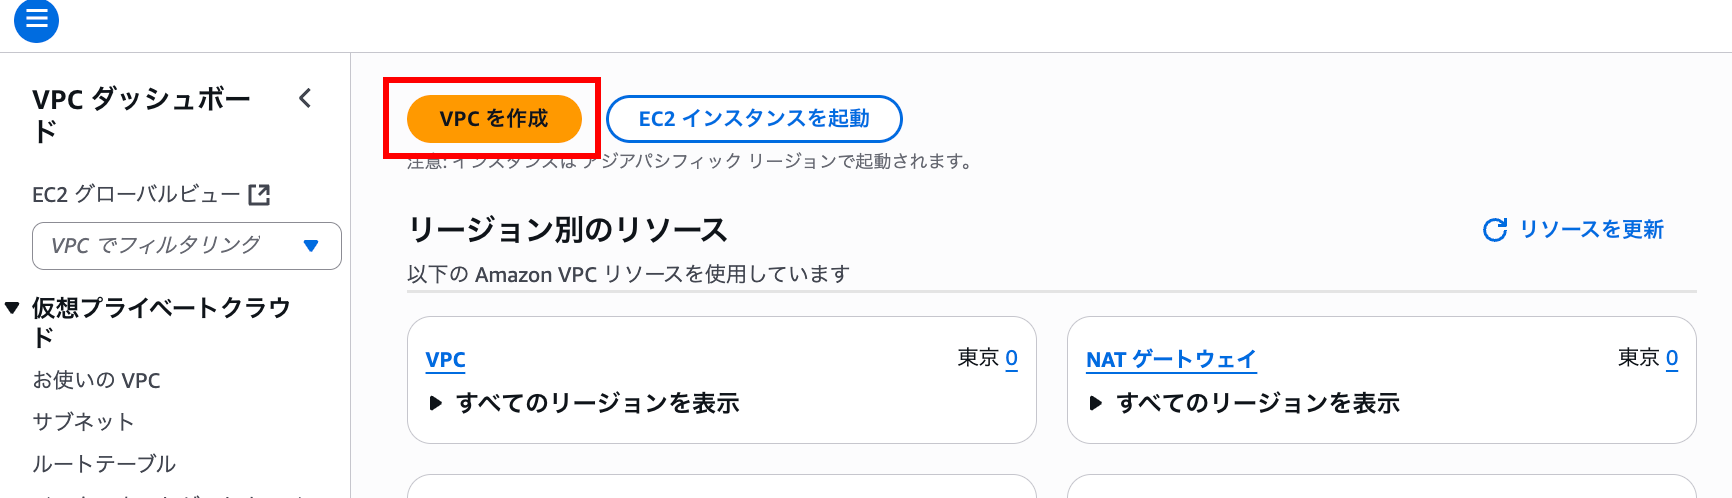
From the VPC dashboard, click "Create VPC."
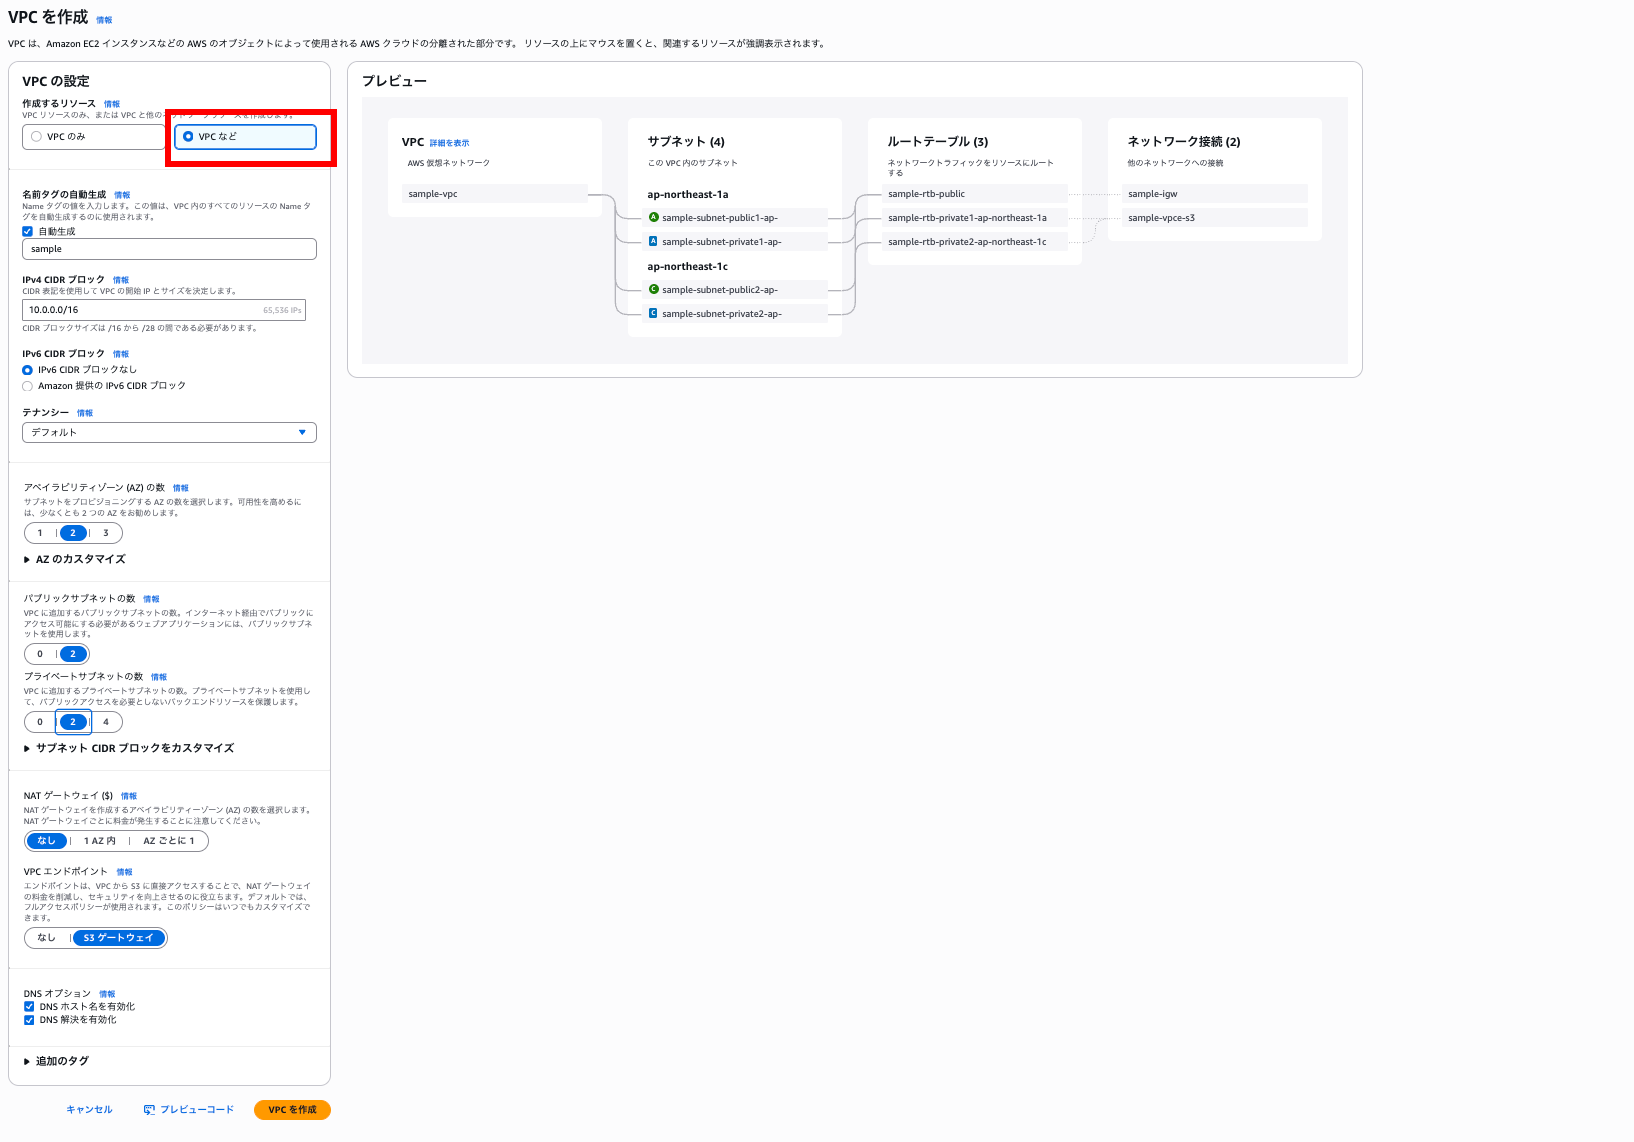
While creating just a VPC is possible, we'll select "VPC and more" since we'll be creating other resources as well.
We'll proceed with the default settings for this exercise.
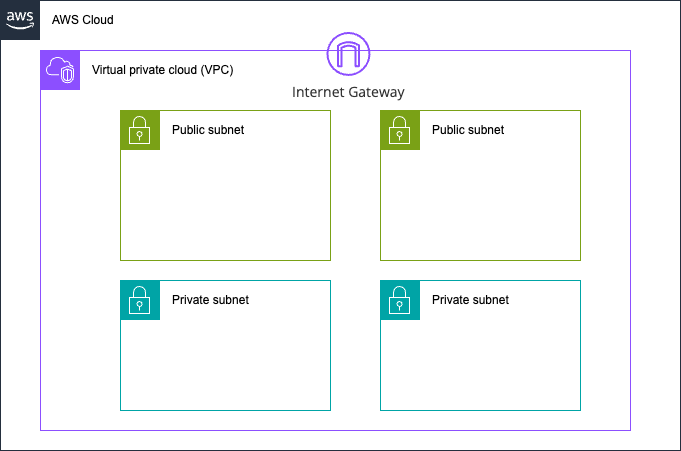
The complete network we're creating will look like this:
Here's a simple table explaining some of the less obvious settings:
| Setting | Description |
|---|---|
| Auto-generate name tags | Sets names for the virtual network and related resources you're creating |
| IPv4 CIDR block | Determines the IP address range used in your virtual network. Be careful not to overlap with other networks if you plan to connect them. It's better to specify a private IP range if connecting to the internet. |
| IPv6 CIDR block | Choose whether to use IPv6 addresses (new IP address format). If used, Amazon will allocate IPv6 addresses. |
| Tenancy | Choose whether to share servers with other users or have dedicated ones. Default is fine unless you have specific requirements. |
| Number of Availability Zones | Select how many different data centers to distribute resources across (2 or more recommended for fault tolerance) |
| Number of public subnets | Set the number of network segments accessible from the internet (used for websites, etc.) |
| Number of private subnets | Set the number of secure network segments isolated from the internet (used for databases, etc.) |
| NAT Gateway | Select the number of relay devices that enable private subnets to connect to the internet. Not necessary if private subnets don't need internet access. |
| VPC Endpoints | Creates a connection point to Amazon S3 (file storage service) within your VPC. Can save costs if you use both NAT Gateway and connect to S3. |
| DNS Options (Enable DNS hostnames) | Option for AWS to automatically assign public DNS hostnames to instances with public IPs. |
| DNS Options (Enable DNS resolution) | Option to use Amazon's DNS servers for name resolution within the VPC. |
Click "Create VPC" to begin building.
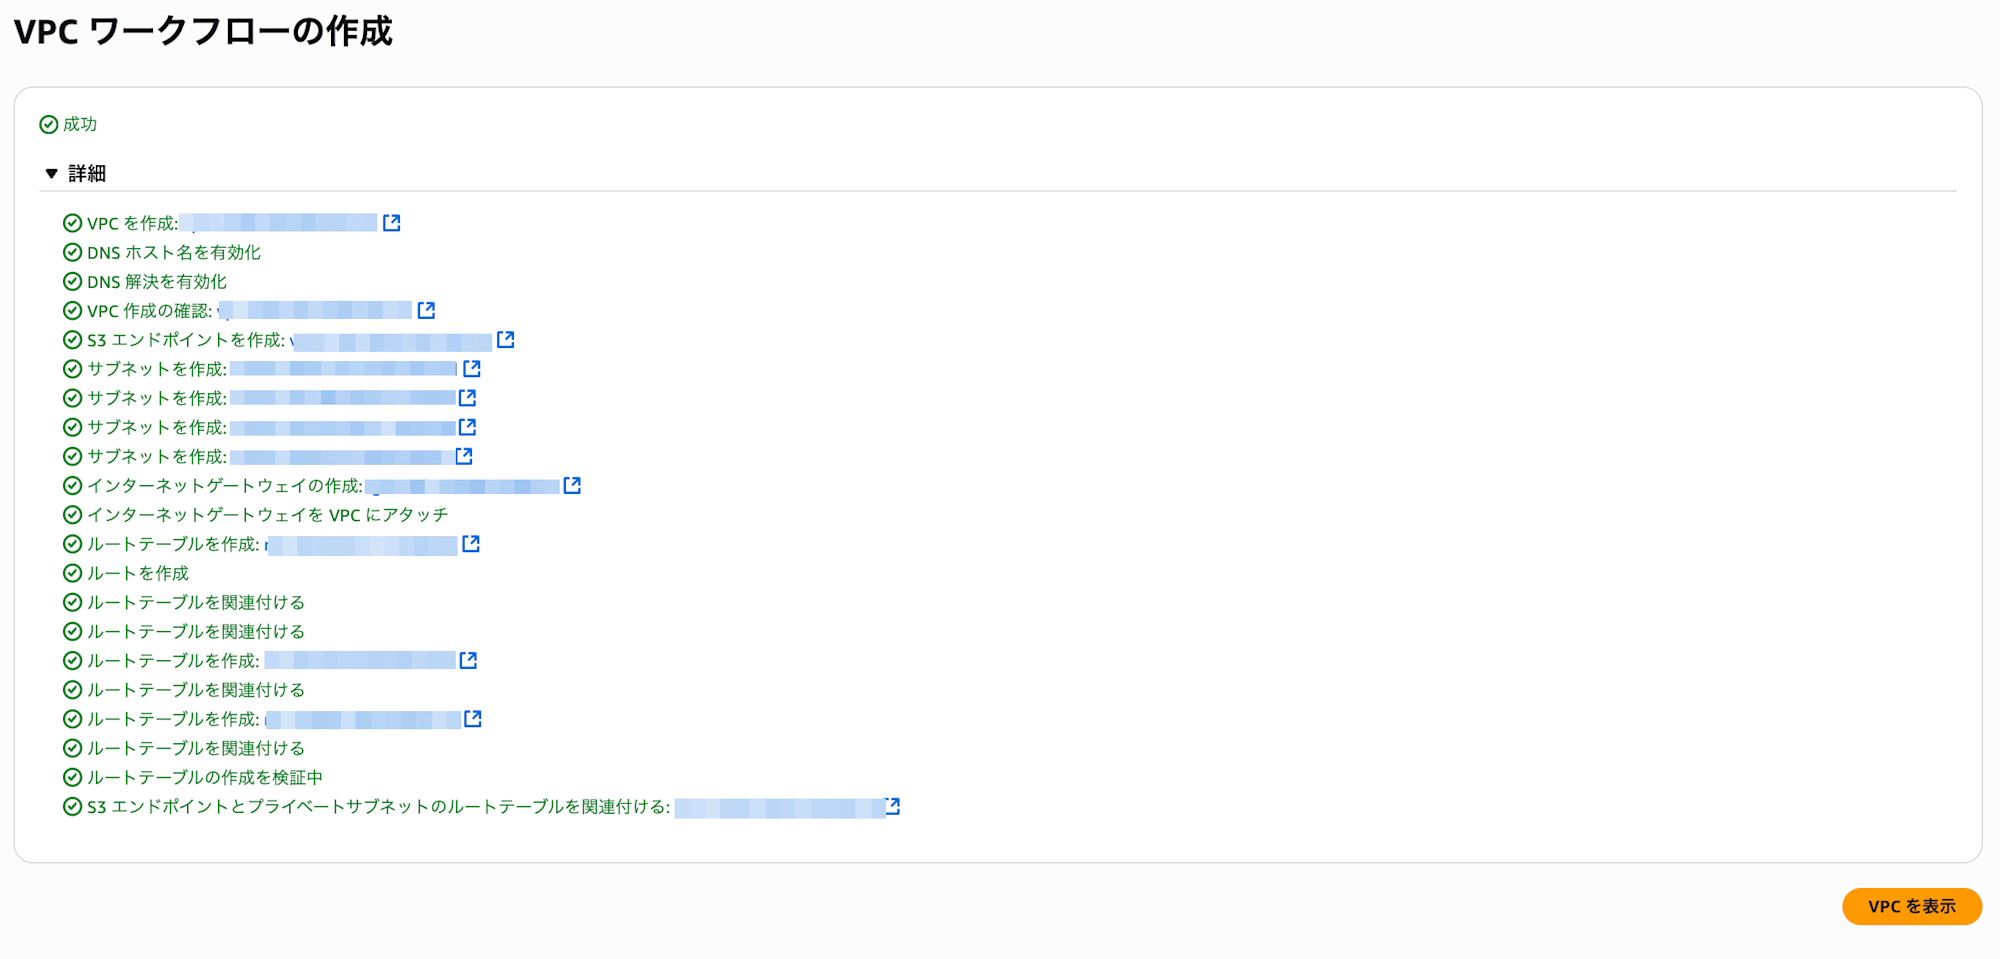
If all items show "Success," there are no issues.
Here's a list of AWS resources we've created so far:
| Resource Name | Description | Familiar Analogy |
|---|---|---|
| VPC (Virtual Private Cloud) |
Your own dedicated network space on AWS | Entire office building A building dedicated to you, completely separated from other companies |
| Subnet | A network area that further divides the VPC | Different floors in the office Like 3rd floor for development, 4th floor for sales - spaces divided by purpose |
| Internet Gateway | The entrance/exit connecting VPC and the internet | Building's main entrance The gate where external people enter the building and employees go outside |
| Route Table | A configuration table that determines network communication paths | Building directory Directions like "Go to 4th floor for sales" or "Use 1st floor exit to go outside" |
| VPC Endpoint | A dedicated path to access AWS services without going through the internet | Direct underground passage A dedicated passage to go to the adjacent building (AWS service) without getting wet in the rain |
Setting up EC2
Now that we've completed setting up the VPC network where the EC2 application server will run, let's move on to setting up EC2.
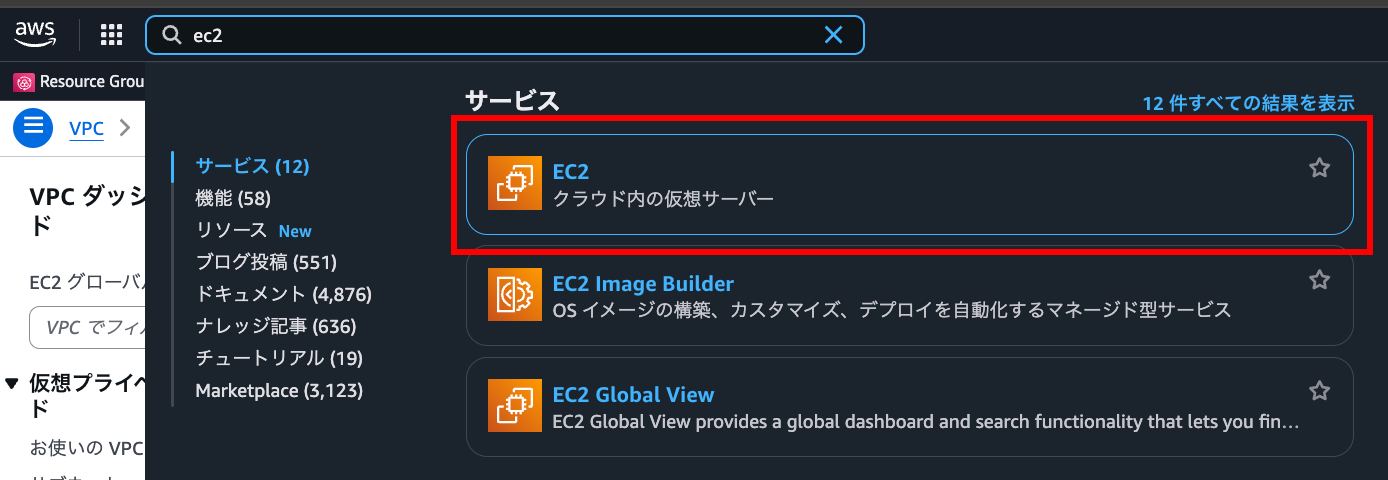
First, type "EC2" in the management console search bar and go to the EC2 page.
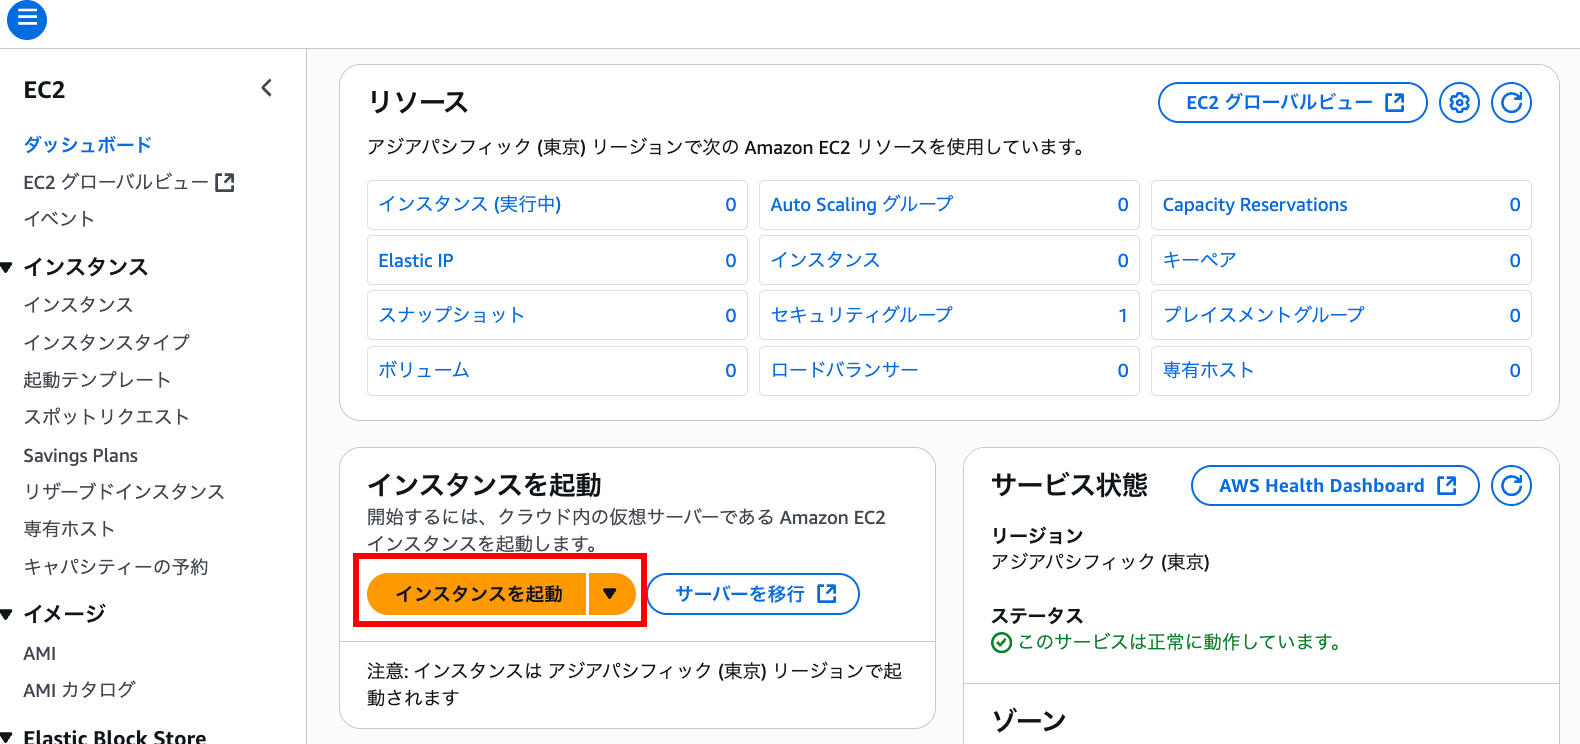
Click "Launch EC2" on the dashboard.
There are quite a few settings, so I'll explain them section by section.
Name and Tags

This is the name for your EC2 instance.
You can also set other tags here that are useful for instance management.
Application and OS Image (Amazon Machine Image)
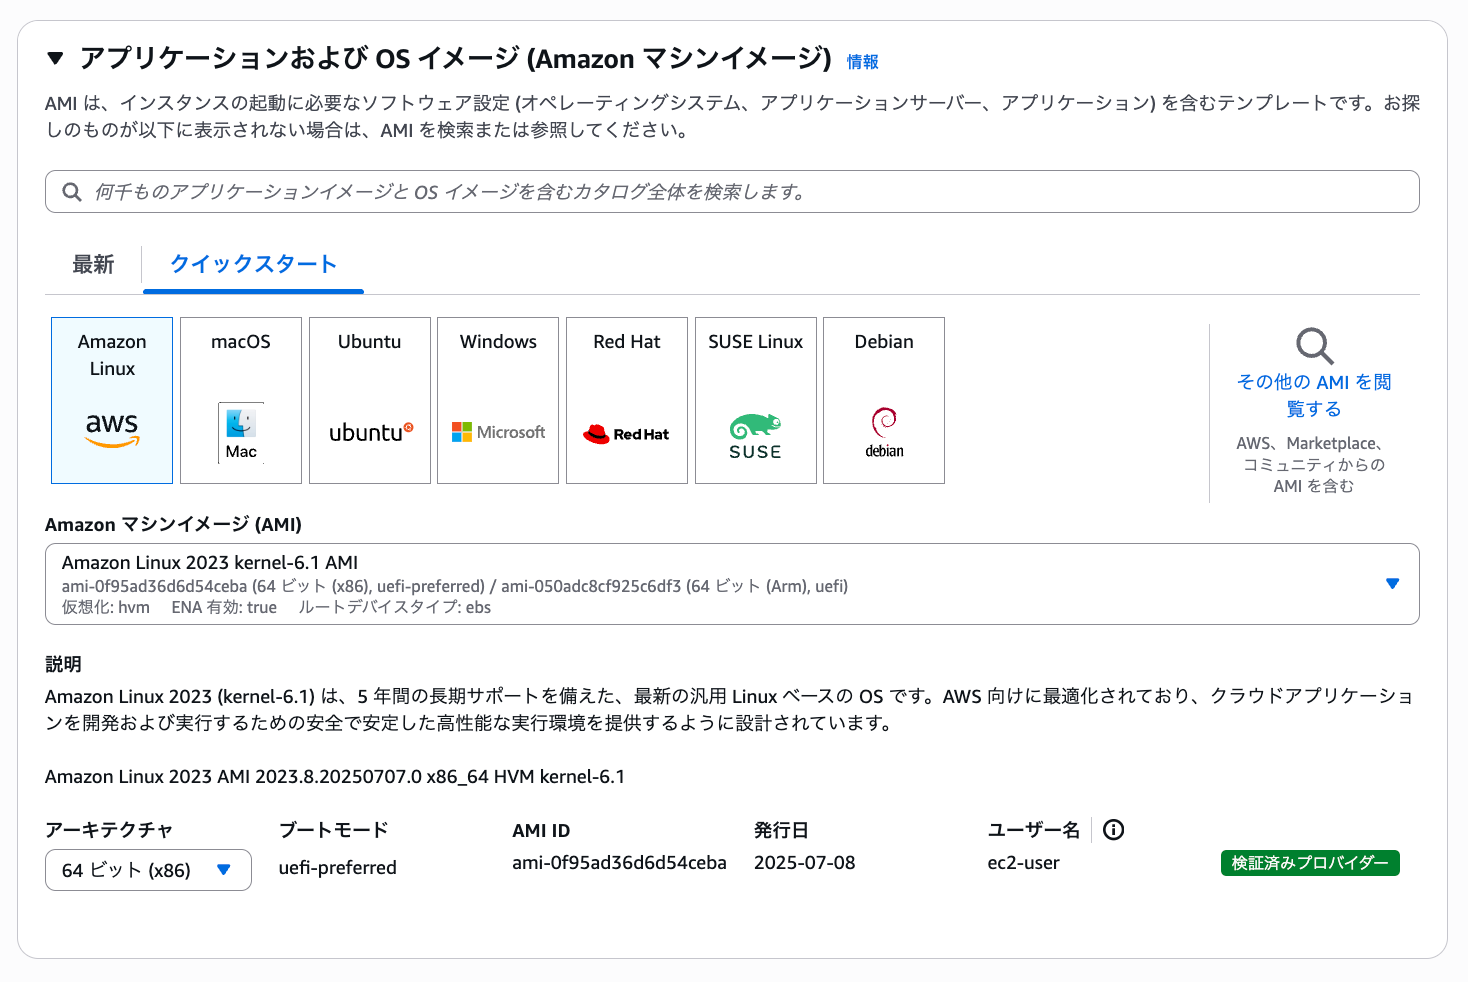
Select the OS you want to use. Be aware that some images (like Windows) incur additional machine image usage fees.
We'll use the free Amazon Linux 2023 for this example.
You can choose between x86 and Arm architectures.
Confirm that your application supports your chosen architecture.
Also, there are machine images that come pre-installed with GPU drivers or deep learning packages, not just the OS.
Choosing the appropriate one for your use case may save you initial setup time.
Instance Type
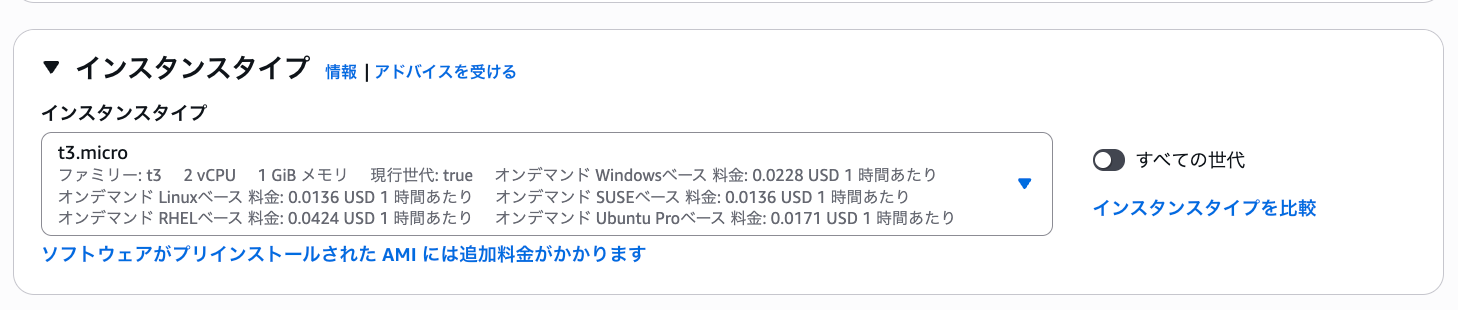
Select the hardware configuration for your server.
In EC2, you choose from instance types with predefined hardware configurations provided by Amazon.
You can select the number of vCPUs, memory size, presence of GPU, etc. here.
The following article may be helpful when considering instance types:
Note that the architecture of the machine image and the instance type must match.
For example, you cannot run an x86 image on Arm architecture.
Key Pair (Login)

This is the key pair used to access the server via SSH or RDP.
Pressing "Create new key pair" allows you to create a key pair right away.
If you already have a key pair and want to reuse it, select it from the list.
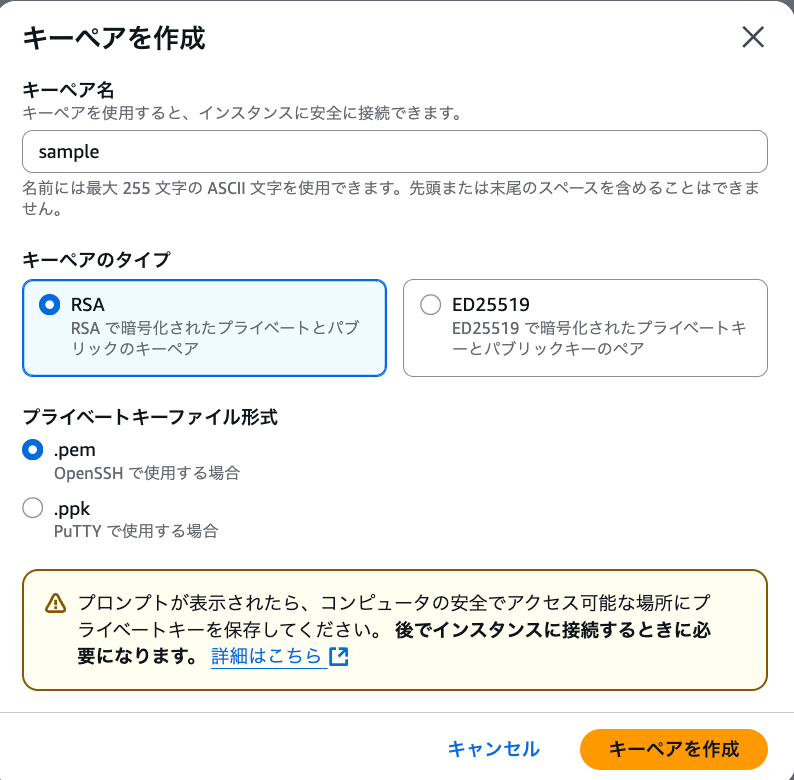
We'll create a new one for this example.
When you click "Create key pair," the private key will start downloading.
Store it properly and don't lose it. You cannot download it again.
Network Settings
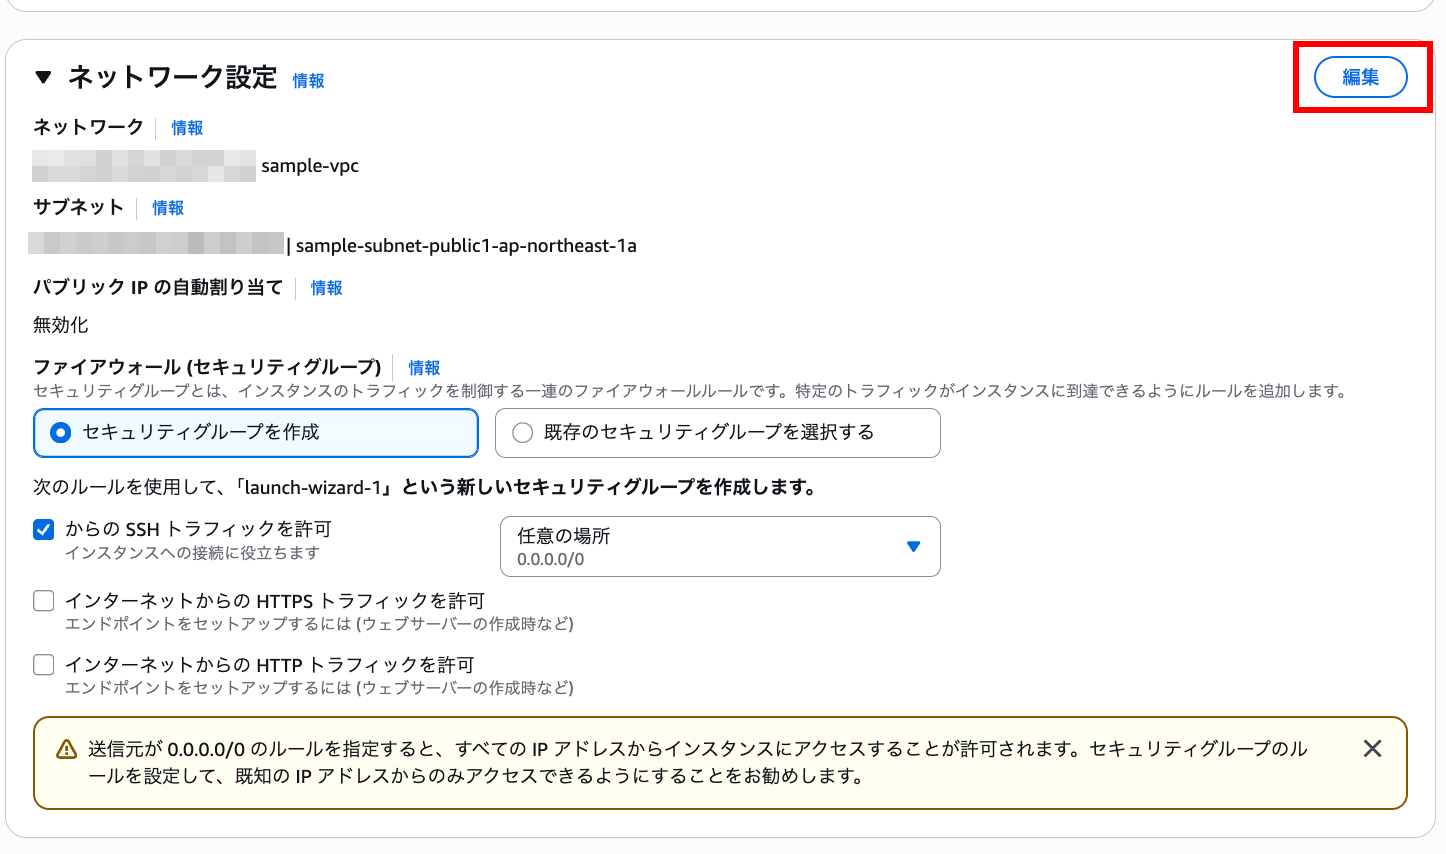
Here you can configure which subnet to place the EC2 in and set up security groups (like firewalls).
Press "Edit" in the upper right for more detailed settings.
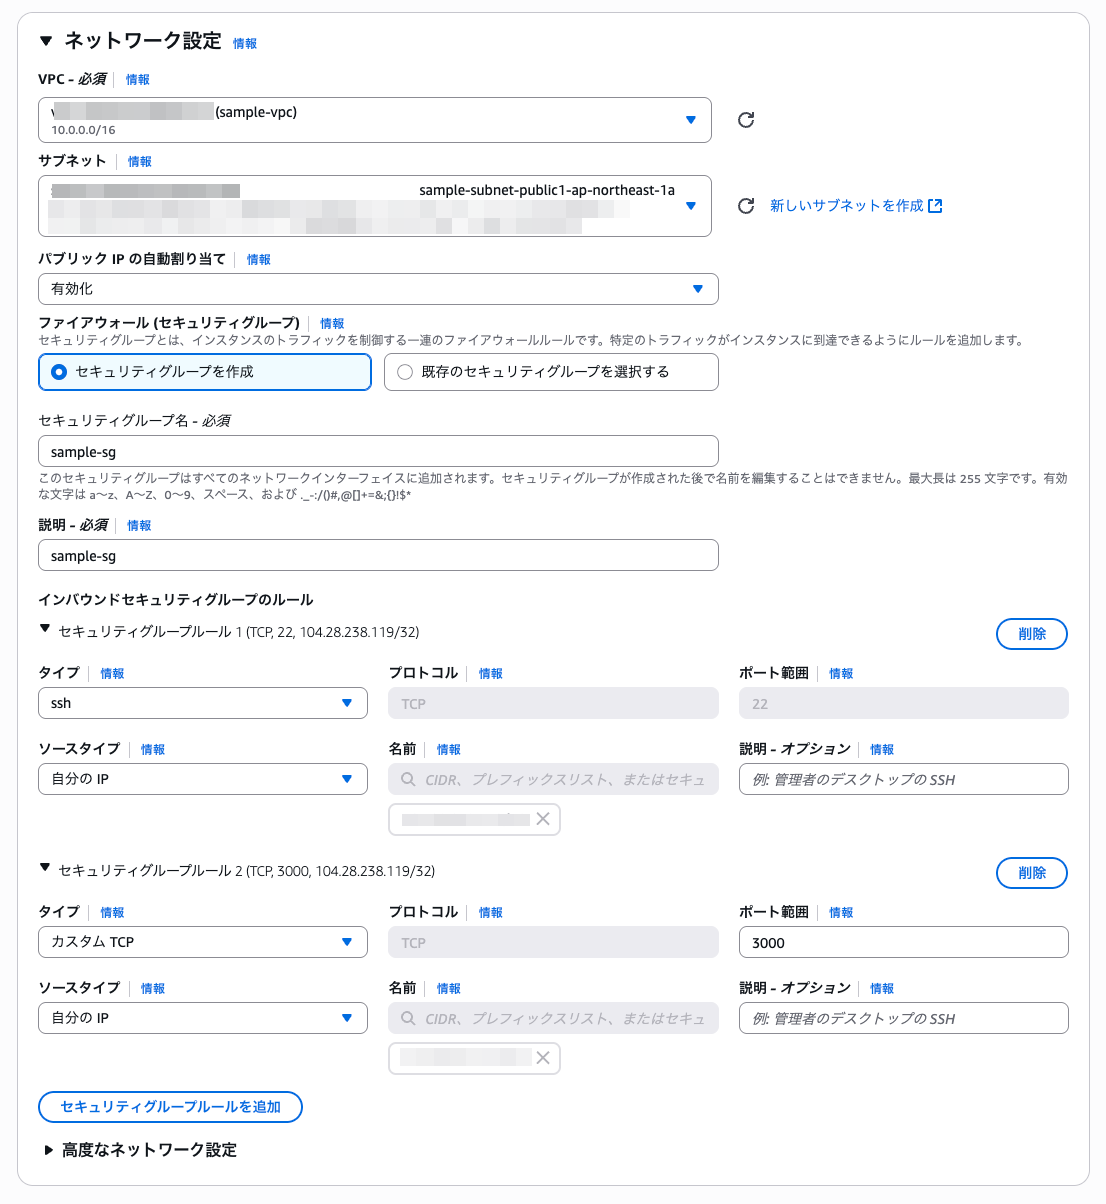
We'll configure these settings ourselves.
- VPC: We'll use the VPC created earlier
- Subnet: We'll use a public subnet. Public subnets have a route to the internet, so you can connect directly via SSH.
- Auto-assign public IP: When enabled, a public IP is automatically assigned. If disabled, you need to acquire and assign an IP address (EIP) yourself. Since the IP is released when the instance terminates (but not while running), disable this and assign a separate IP address if you want a fixed IP.
- Security Group: This controls access to EC2. While OS-level control is possible, security groups are more convenient. For this example, we've opened SSH and TCP port 3000. Adjust as needed. For better security, it's advisable to restrict access to specific IP addresses like your company's IP.
Configure Storage
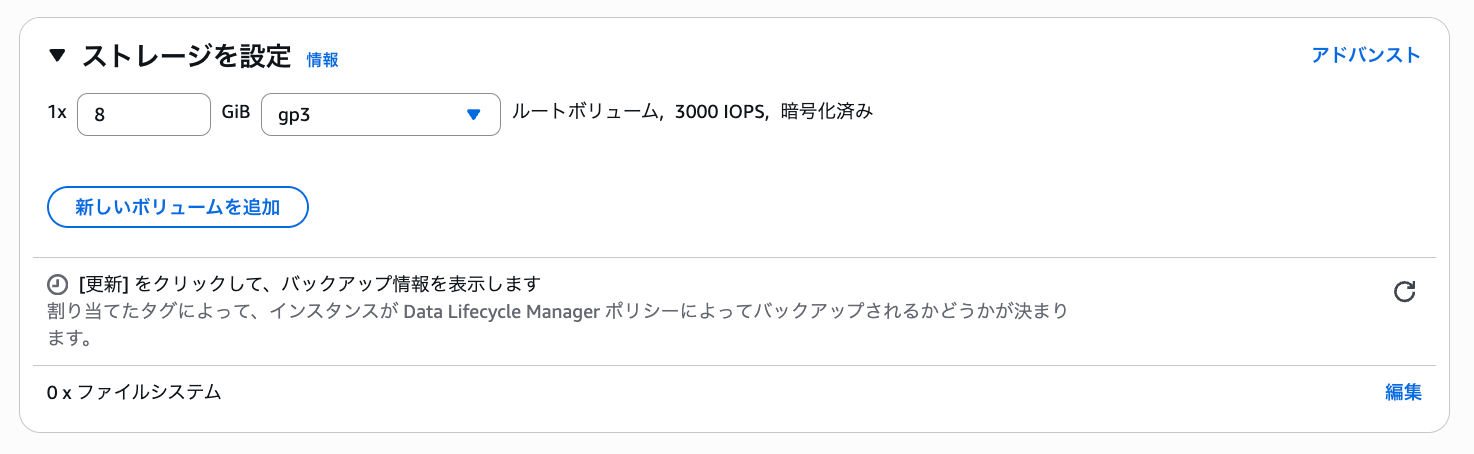
You can set the storage size and type here.
Storage can be expanded later.
There are several storage types, but gp3 is generally a good choice unless you have special requirements.
Note that storage costs are incurred regardless of whether the instance is running or not.
Launching the Instance
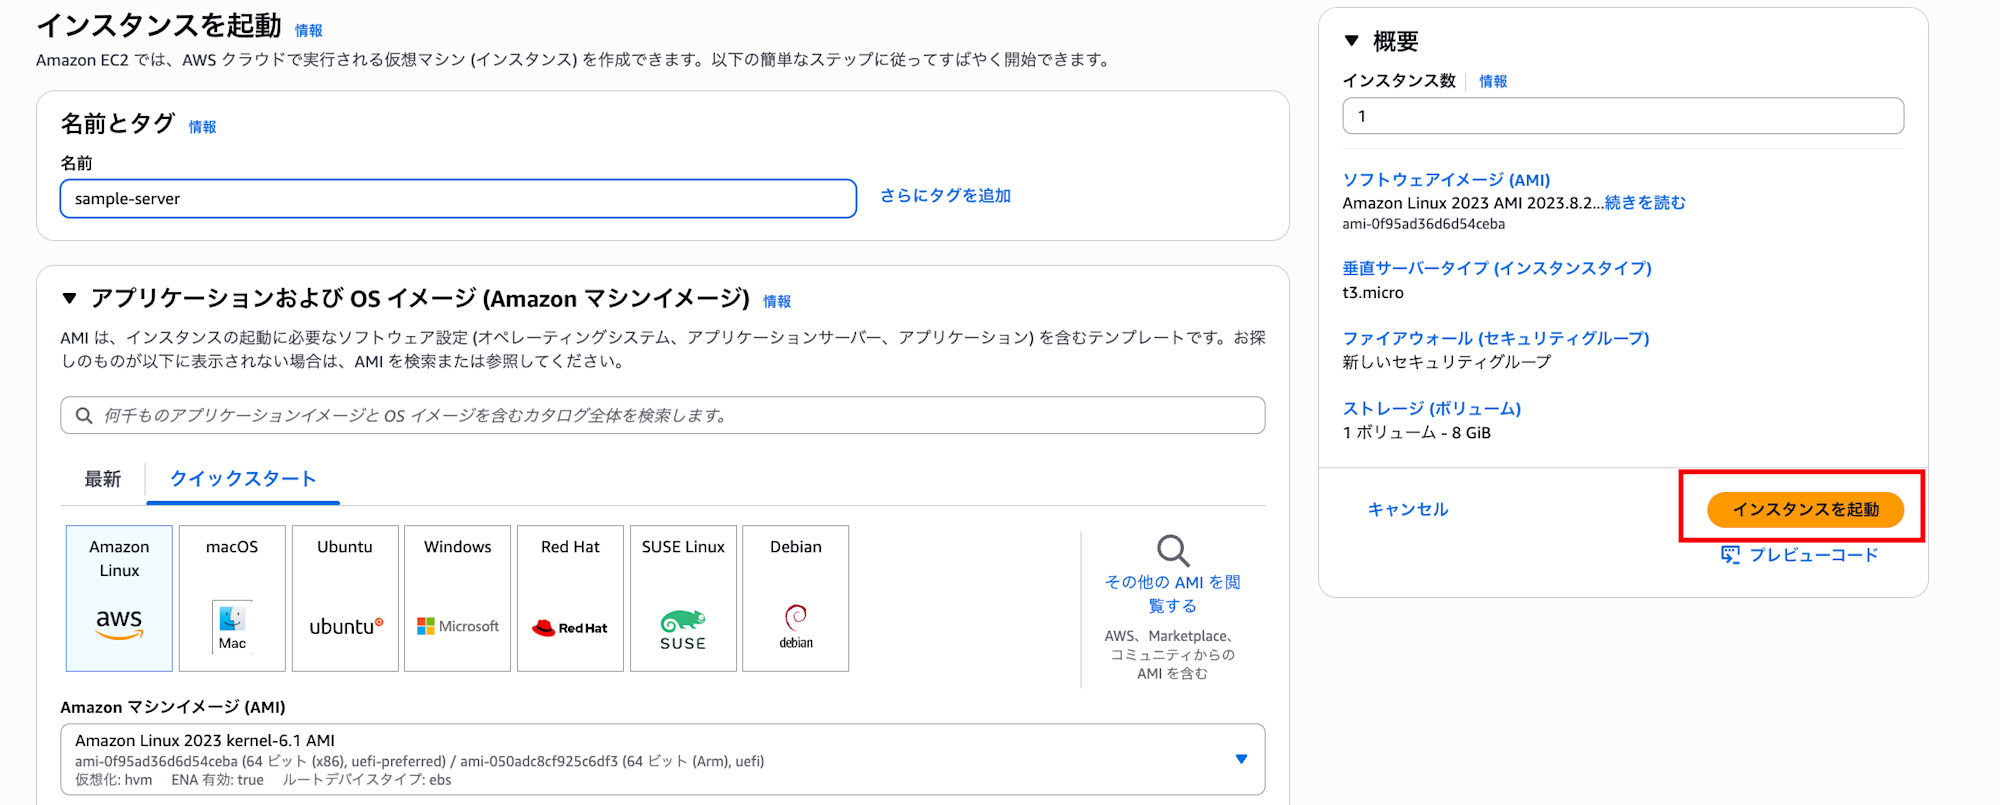
After all settings are completed, click "Launch instance" on the right side of the screen to start the instance.
Connecting to the EC2 Instance
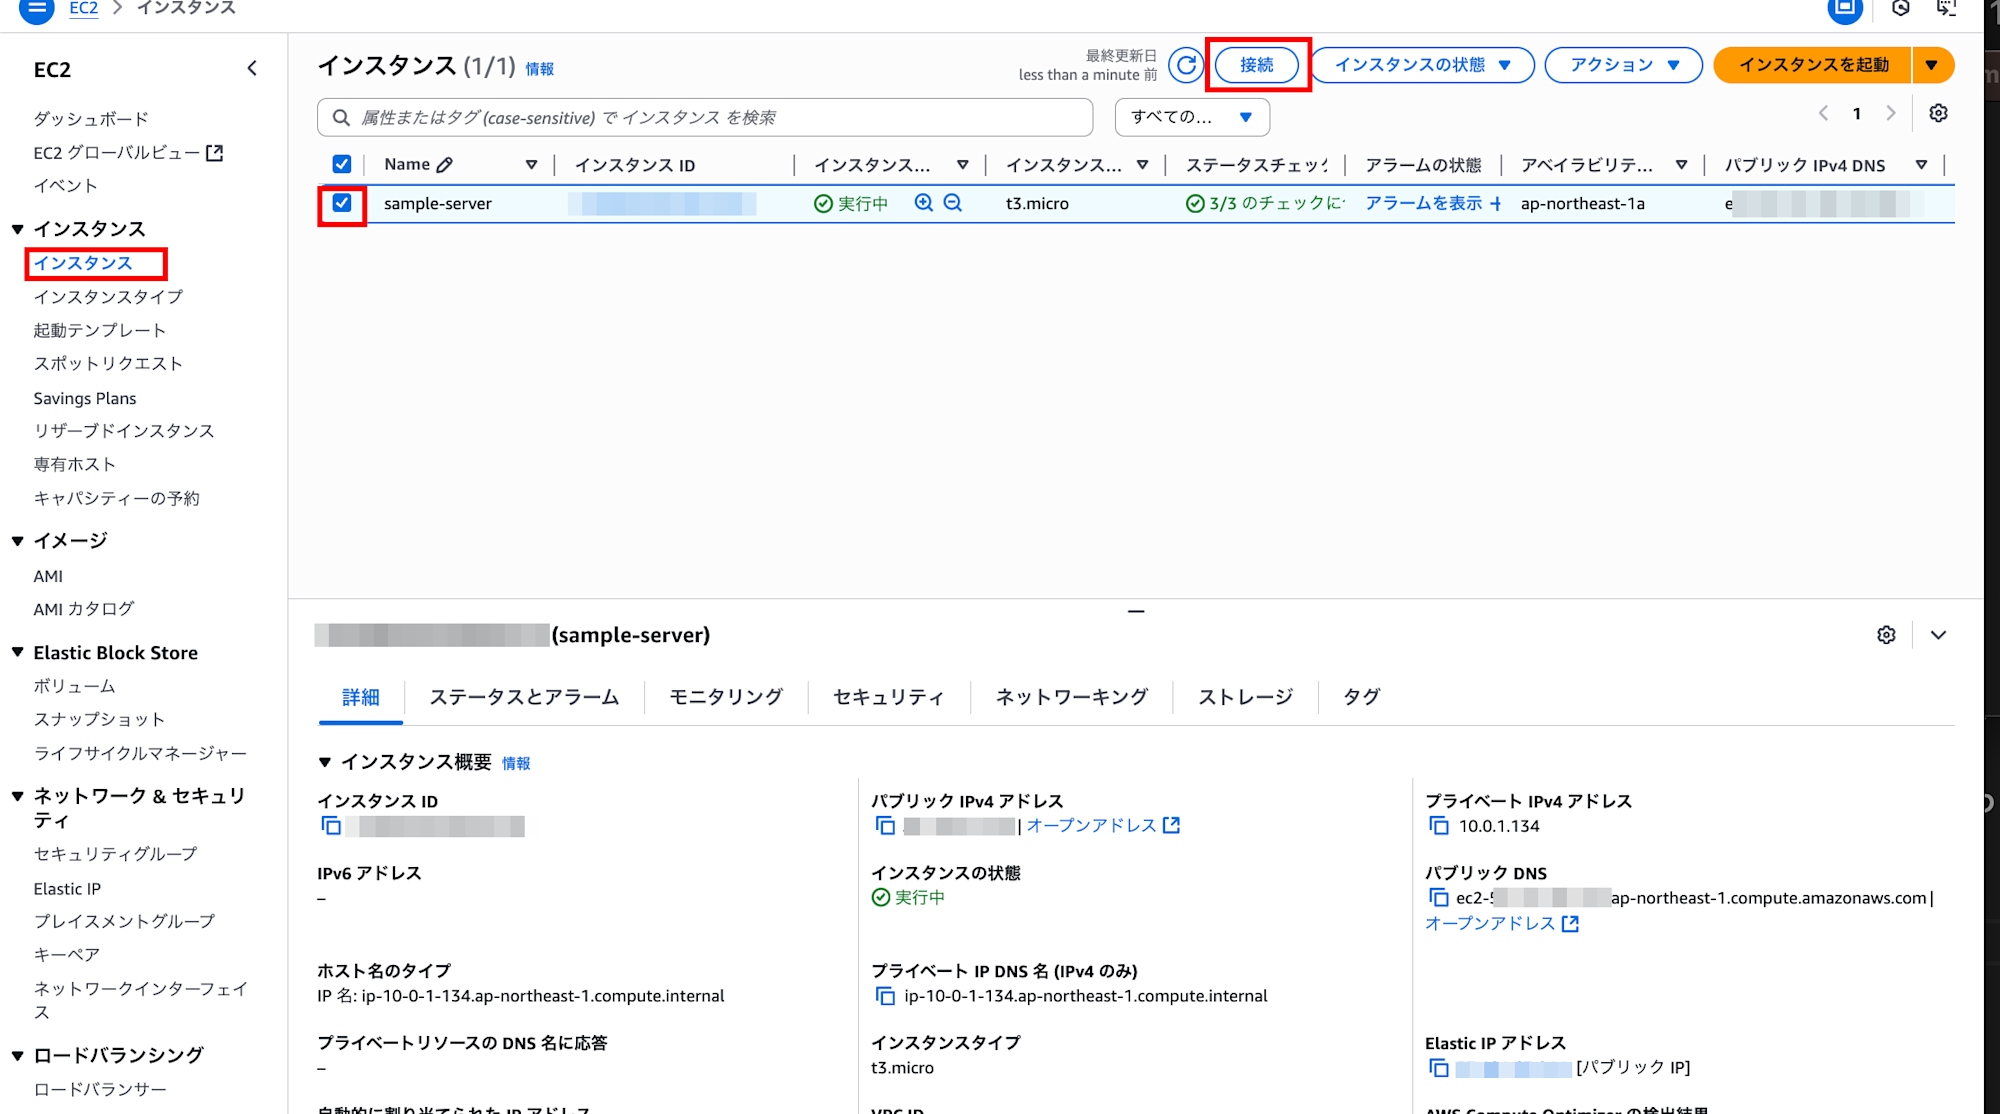
Let's connect to the EC2 instance.
From the instance list screen, check the box next to the relevant instance and press the "Connect" button.
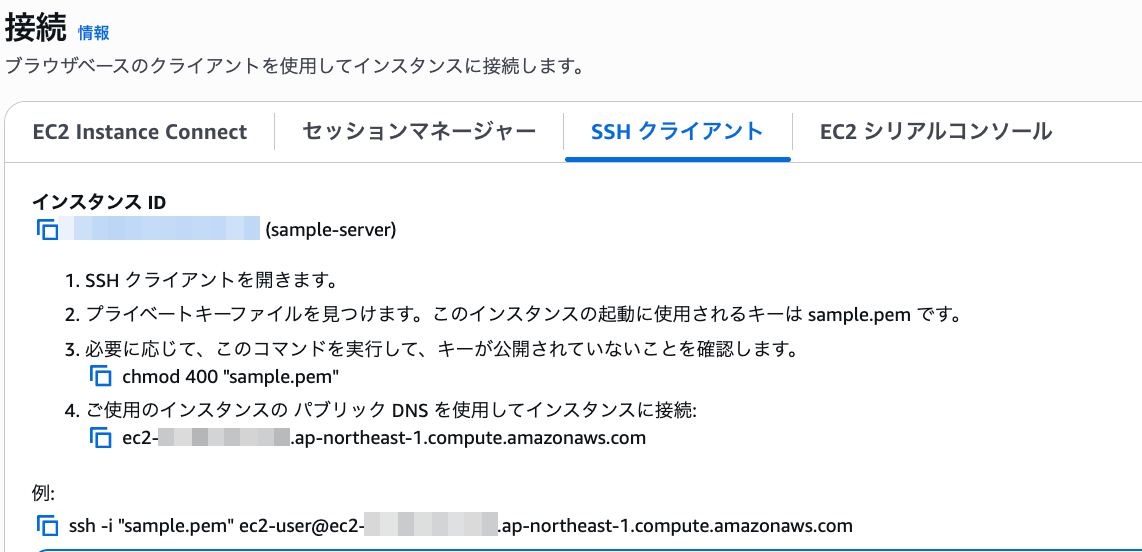
Follow the displayed instructions to connect.
If you encounter the following error when connecting via SSH, the permissions on your private key are too open:
ssh -i "key-pair-filename" ec2-user@ec2-xxx-xxx-xxx-xxx.ap-northeast-1.compute.amazonaws.com
> Permissions 0644 for 'key-pair-filename' are too open.
> It is required that your private key files are NOT accessible by others.
> This private key will be ignored.
> Load key "key-pair-filename": bad permissions
Fix the permissions as described on the page:
chmod 400 "key-pair-filename"
For Amazon Linux 2023, if the connection is successful, you should see text like this:
ssh -i "key-pair-filename" ec2-user@ec2-xxx-xxx-xxx-xxx.ap-northeast-1.compute.amazonaws.com
   ,     #_
   ~\_  ####_        Amazon Linux 2023
  ~~  \_#####\
  ~~     \###|
  ~~       \#/ ___   https://aws.amazon.com/linux/amazon-linux-2023
   ~~       V~' '->
    ~~~         /
      ~~._.   _/
         _/ _/
       _/m/'
Stopping and Terminating Instances

Stopping or terminating instances when not in use can help reduce costs.
From the instance list screen, check the instance you want to operate on, and click "Instance state" to see the menu.
Pressing "Stop instance" will stop the server, but it will remain in the list screen and can be restarted. Choose this if you plan to use it again.
Pressing "Terminate instance (delete)" will stop the server, and after a while, it will disappear from the list screen. You cannot restart it in this case. Choose this if you no longer need the instance.
Conclusion
This completes the setup of VPC and EC2.
There are many other useful services that run on VPC, such as ALB (Application Load Balancer) and RDS, which is convenient for RDB operations.
Additionally, for more advanced content, there are fields like IaC (Infrastructure as Code) for managing infrastructure through code rather than the management console.
I hope this article serves as a starting point for using AWS.