![[iOS 8] UIAlertView と UIActionSheet が deprecated になった](https://devio2023-media.developers.io/wp-content/uploads/2014/06/ios81.png)
[iOS 8] UIAlertView と UIActionSheet が deprecated になった
2014.09.18
この記事は公開されてから1年以上経過しています。情報が古い可能性がありますので、ご注意ください。
UIAlertController
iOS8 からは UIAlertView, UIActionSheet が deprecated となり、替わりに UIAlertController という新規のクラスを使うことが推奨されました。
これらの違いを一言で説明すると、
ボタンがタップされた時の処理を
- UIAlertView, UIActionSheet はデリゲートメソッドで実装する
- UIAlertController はブロックで実装する
となっています。
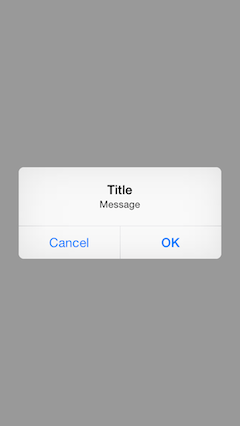
サンプルコード(アラート)
実行時の画面
従来のコードで記述
アラート表示処理
[[[UIAlertView alloc] initWithTitle:@"Title"
                            message:@"Message"
                           delegate:self
                  cancelButtonTitle:@"Cancel"
                  otherButtonTitles:@"OK", nil] show];
ボタンタップ時の処理
// UIAlertViewDelegate
- (void)alertView:(UIAlertView *)alertView clickedButtonAtIndex:(NSInteger)buttonIndex {
    if (buttonIndex == alertView.cancelButtonIndex) {
        NSLog(@"Cancel button tapped.");
    } else {
        NSLog(@"OK button tapped.");
    }
}
UIAlertController で記述
// コントローラを生成
UIAlertController * ac =
    [UIAlertController alertControllerWithTitle:@"Title"
                                        message:@"Message"
                                 preferredStyle:UIAlertControllerStyleAlert];

// Cancel用のアクションを生成
UIAlertAction * cancelAction =
    [UIAlertAction actionWithTitle:@"Cancel"
                             style:UIAlertActionStyleCancel
                           handler:^(UIAlertAction * action) {
                               // ボタンタップ時の処理
                               NSLog(@"Cancel button tapped.");
                           }];

// OK用のアクションを生成
UIAlertAction * okAction =
    [UIAlertAction actionWithTitle:@"OK"
                             style:UIAlertActionStyleDefault
                           handler:^(UIAlertAction * action) {
                               // ボタンタップ時の処理
                               NSLog(@"OK button tapped.");
                           }];

// コントローラにアクションを追加
[ac addAction:cancelAction];
[ac addAction:okAction];

// アラート表示処理
[self presentViewController:ac animated:YES completion:nil];
preferredStyle に UIAlertControllerStyleAlert を指定するとアラートが表示されます。
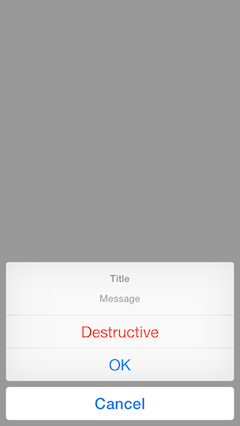
サンプルコード(アクションシート)
実行時の画面
従来のコードで記述
アクションシート表示処理
[[[UIActionSheet alloc] initWithTitle:@"Title"
                             delegate:self
                    cancelButtonTitle:@"Cancel"
               destructiveButtonTitle:@"Destructive"
                    otherButtonTitles:@"OK", nil] showInView:self.view];
ボタンタップ時の処理
// UIActionSheetDelegate
- (void)actionSheet:(UIActionSheet *)actionSheet clickedButtonAtIndex:(NSInteger)buttonIndex {
    if (buttonIndex == actionSheet.cancelButtonIndex) {
        NSLog(@"Cancel button tapped.");
    } else if (buttonIndex == actionSheet.destructiveButtonIndex) {
        NSLog(@"Destructive button tapped.");
    } else {
        NSLog(@"OK button tapped.");
    }
}
UIAlertController で記述
// コントローラを生成
UIAlertController * ac =
    [UIAlertController alertControllerWithTitle:@"Title"
                                        message:@"Message"
                                 preferredStyle:UIAlertControllerStyleActionSheet];

// Cancel用のアクションを生成
UIAlertAction * cancelAction =
    [UIAlertAction actionWithTitle:@"Cancel"
                             style:UIAlertActionStyleCancel
                           handler:^(UIAlertAction * action) {
                               // ボタンタップ時の処理
                               NSLog(@"Cancel button tapped.");
                           }];

// Destructive用のアクションを生成
UIAlertAction * destructiveAction =
    [UIAlertAction actionWithTitle:@"Destructive"
                             style:UIAlertActionStyleDestructive
                           handler:^(UIAlertAction * action) {
                               // ボタンタップ時の処理
                               NSLog(@"Destructive button tapped.");
                           }];

// OK用のアクションを生成
UIAlertAction * okAction =
    [UIAlertAction actionWithTitle:@"OK"
                             style:UIAlertActionStyleDefault
                           handler:^(UIAlertAction * action) {
                               // ボタンタップ時の処理
                               NSLog(@"OK button tapped.");
                           }];

// コントローラにアクションを追加
[ac addAction:cancelAction];
[ac addAction:destructiveAction];
[ac addAction:okAction];

// アクションシート表示処理
[self presentViewController:ac animated:YES completion:nil];
preferredStyle に UIAlertControllerStyleActionSheet を指定するとアクションシートが表示されます。
感想
表示処理とボタンタップ時の処理がひとまとまりになったことと、if 文が無くなったことによって可読性が上がった気がしました。
いいと思います。
ただ、ボタンをタップしてから「ボタンタップ時の処理」が実行されるまでの時間が、UIAlertController で記述したほうが従来のコードに比べて長いように感じました。
これはそのうち短くなることを期待します。
なお動作確認したところ、UIAlertController のブロック処理部分はメインスレッドで実行されていたので、ブロック内で UI 操作を行っても大丈夫でしょう。
おまけ
Swift で UIAlertController
var ac = UIAlertController(title: "Title", message: "Message", preferredStyle: .Alert)

let cancelAction = UIAlertAction(title: "Cancel", style: .Cancel) { (action) -> Void in
    println("Cancel button tapped.")
}

let okAction = UIAlertAction(title: "OK", style: .Default) { (action) -> Void in
    println("OK button tapped.")
}

ac.addAction(cancelAction)
ac.addAction(okAction)

presentViewController(ac, animated: true, completion: nil)