![[iOS] UICollectionView のレイアウトクラスを作成して「左右のアイテムをチラ見せするレイアウト」を実現する](https://devio2023-media.developers.io/wp-content/uploads/2015/01/ios_ui.png)
[iOS] UICollectionView のレイアウトクラスを作成して「左右のアイテムをチラ見せするレイアウト」を実現する
この記事は公開されてから1年以上経過しています。情報が古い可能性がありますので、ご注意ください。
はじめに
こんにちは。モバイルアプリサービス部の平屋です。本記事では UICollectionView のレイアウトのカスタマイズに関する情報をご紹介します。
以下の gif 画像のように「スクロール可能なビューをアイテムごとにスクロールさせる画面」を実装する機会がありまして、今回は UICollectionView と UICollectionViewFlowLayout の サブクラス を組み合わせて実現しました。
開発環境
開発環境は下記の通りです。
- OS X 10.10.5(14F27)
- Xcode Version 6.4 (6E35b) / iOS SDK 8.4
- development target: iOS 8.0
実現したい動作
今回実現したい動作についてもう少し詳しく見ていきます。以下の2つの要件を満たすように実装します。
アイテムを左右にフリックした場合
フリック方向の隣のアイテムまでスクロールさせます。
アイテムをドラッグした後に指を離した場合
指を離したタイミングで近かった方のアイテムまでスクロールさせます。
実装
ビューコントローラ作成
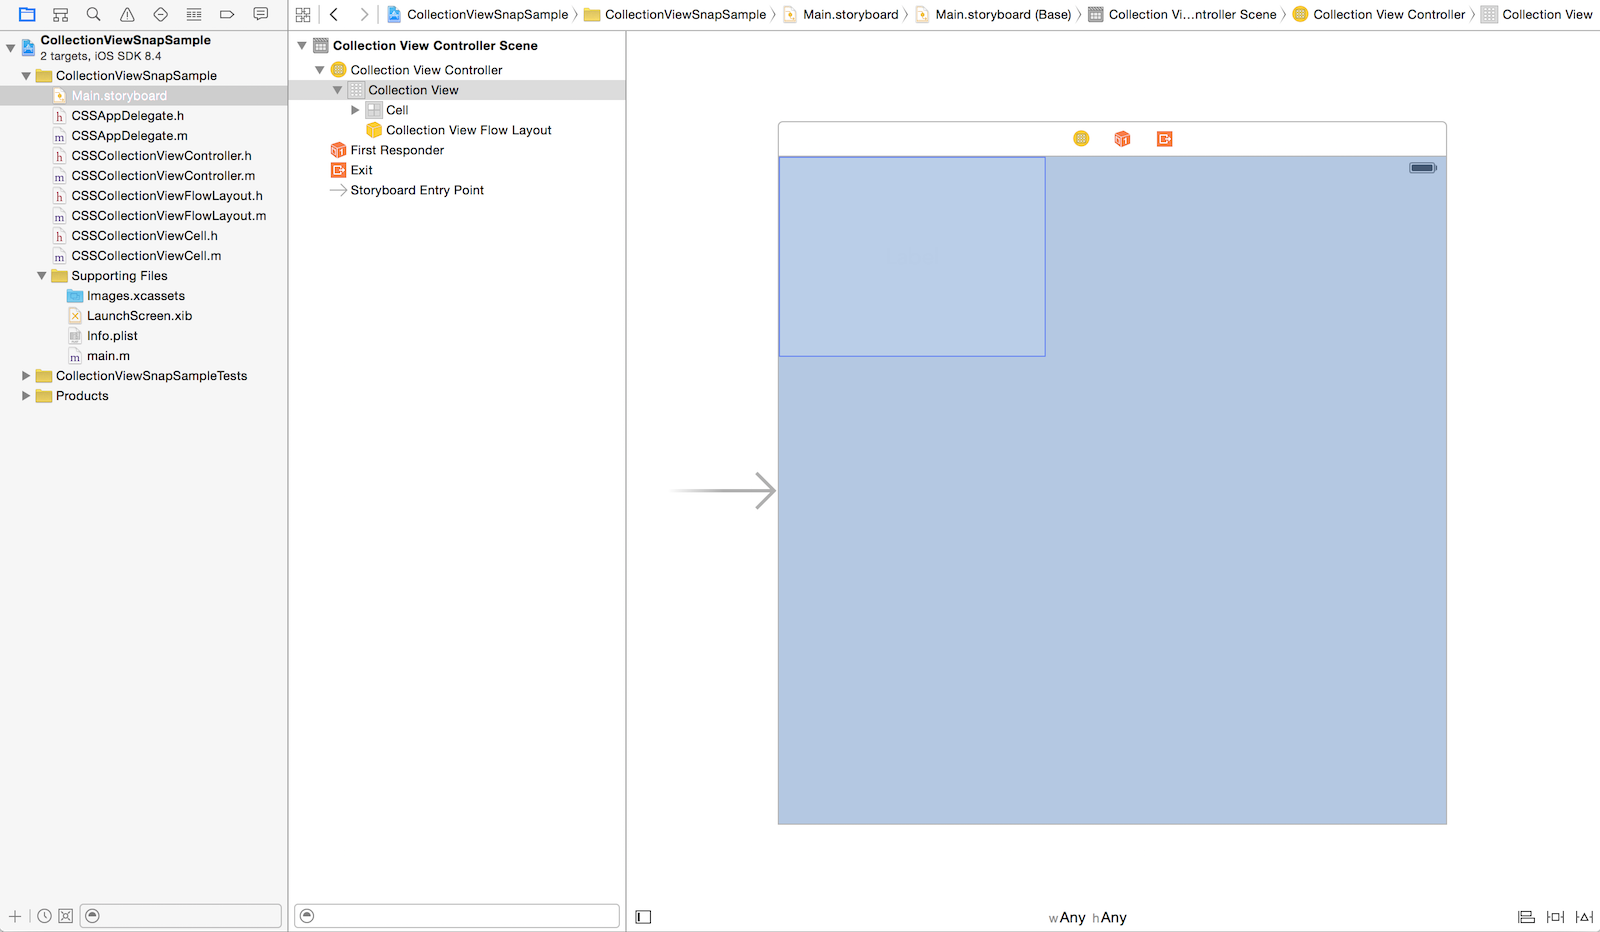
今回は UICollectionViewController のサブクラスを作成して使用しました。UICollectionViewController は内部に UICollectionView をもつビューコントローラですね。スクリーン全体に UICollectionView が表示されます。
@interface CSSCollectionViewController : UICollectionViewController

@end
CSSCollectionViewController の実装内容は省略します。(見出し「まとめ」のほうで紹介しているサンプルプロジェクトを参照してください)
レイアウトクラス作成
UICollectionViewFlowLayout のサブクラスを作成します。
@interface CSSCollectionViewFlowLayout : UICollectionViewFlowLayout

@end
UICollectionView のレイアウトのクラスとして CSSCollectionViewFlowLayout を指定します。

セルのサイズ、マージン等を指定
CSSCollectionViewFlowLayout を実装していきます。
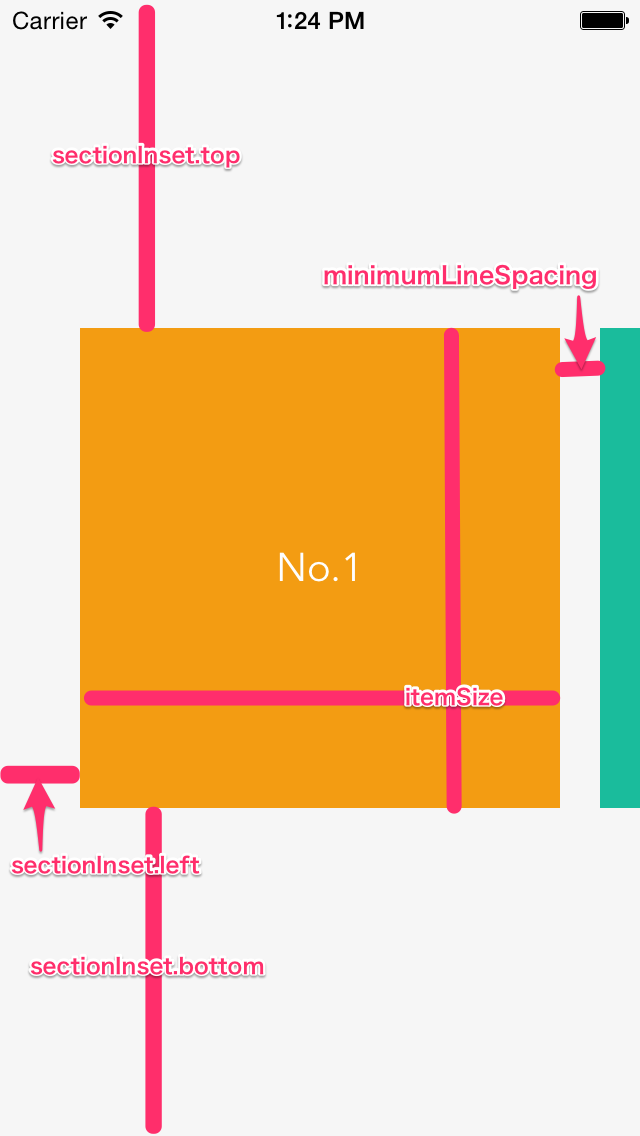
セルのレイアウト自体は UICollectionViewFlowLayout のプロパティに値をセットして実現します。
- minimumLineSpacing
- itemSize
- scrollDirection
- sectionInset
static CGFloat const kMinimumInteritemSpacing = 20.0f;
static CGFloat const kItemLength = 240.0f;

- (void)awakeFromNib
{
[super awakeFromNib];

self.itemSize = CGSizeMake(kItemLength, kItemLength);
self.minimumLineSpacing = kMinimumInteritemSpacing;
self.scrollDirection = UICollectionViewScrollDirectionHorizontal;

CGFloat horizontalInset = ([UIScreen mainScreen].bounds.size.width - kItemLength) / 2;
CGFloat verticalInset = ([UIScreen mainScreen].bounds.size.height - kItemLength) / 2;

self.sectionInset = UIEdgeInsetsMake(verticalInset,
horizontalInset,
verticalInset,
horizontalInset);
}
スクロール後の停止位置を指定
デフォルトの動作
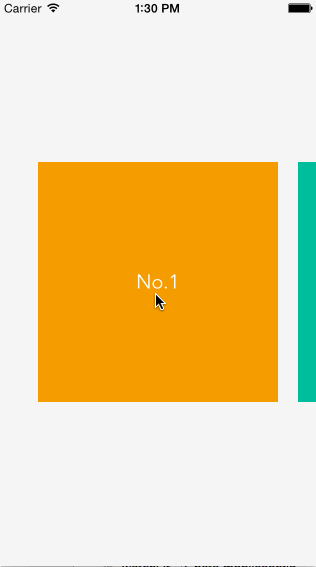
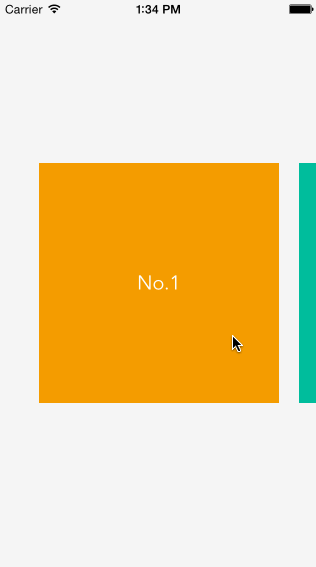
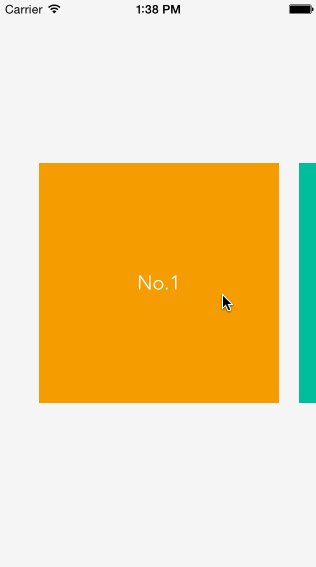
UICollectionViewFlowLayout をそのまま使用した場合、スクロール後の停止位置 は以下の gif 画像のようになります。UICollectionView の幅 ごとにスクロールされてしまい、これでは要件を満たすことができません。
UICollectionViewLayout のメソッドを実装
targetContentOffsetForProposedContentOffset:withScrollingVelocity: メソッド
UICollectionViewLayout の targetContentOffsetForProposedContentOffset:withScrollingVelocity: メソッドを実装すれば スクロール後の停止位置 を指定できます。
- (CGPoint)targetContentOffsetForProposedContentOffset:(CGPoint)proposedContentOffset
withScrollingVelocity:(CGPoint)velocity;
このメソッドの定義は以下の通りです。
- Parameters
- proposedContentOffset
- The proposed point (in the collection view’s content view) at which to stop scrolling. This is the value at which scrolling would naturally stop if no adjustments were made. The point reflects the upper-left corner of the visible content.
- velocity
- The current scrolling velocity along both the horizontal and vertical axes. This value is measured in points per second.
- Return Value
- The content offset that you want to use instead. This value reflects the adjusted upper-left corner of the visible area. The default implementation of this method returns the value in the proposedContentOffset parameter.
- Discussion
- If you want the scrolling behavior to snap to specific boundaries, you can override this method and use it to change the point at which to stop. For example, you might use this method to always stop scrolling on a boundary between items, as opposed to stopping in the middle of an item.
「Discussion」項目は「スクロールの振る舞いを特定の位置に『スナップする』ようにしたいなら、このメソッドをオーバーライドしてね」っていう感じの内容です。停止させたい位置 (contentOffset、型は CGPoint) を返却すれば、その位置でスクロールが止まるようになります。
CSSCollectionViewController に UIScrollViewDelegate のメソッドを実装してログを確認しながら動かすと、targetContentOffsetForProposedContentOffset:withScrollingVelocity: メソッドは、scrollViewWillBeginDragging: と scrollViewWillEndDragging:withVelocity:targetContentOffset: メソッドとの間のタイミングで呼ばれることがわかりました。指を離したぐらいのタイミングで呼ばれていることになります。
実装内容
targetContentOffsetForProposedContentOffset:withScrollingVelocity: メソッドを CSSCollectionViewFlowLayout に実装して スクロール後の停止位置 を指定するようにしましょう。
見出し「実現したい動作」で説明した以下の2つの要件それぞれに対して、スクロール後の停止位置を計算して返却します。
- アイテムを左右にフリックした場合
- フリック方向の隣のアイテムまでスクロールさせる
- アイテムをドラッグした後に指を離した場合
- 指を離したタイミングで近かった方のアイテムまでスクロールさせる
static CGFloat const kFlickVelocityThreshold = 0.2;

#pragma mark - UICollectionViewLayout

/**
* スクロール後の停止位置を返却する
*
* @param proposedContentOffset スクロールの早さから推測される停止位置
* @param velocity 1秒あたりの移動距離 (単位:ポイント)
*
* @return proposedContentOffset の代わりの contentOffset
*/
- (CGPoint)targetContentOffsetForProposedContentOffset:(CGPoint)proposedContentOffset
withScrollingVelocity:(CGPoint)velocity
{
// 指を離したタイミングでのページ番号
CGFloat currentPage = self.collectionView.contentOffset.x / self.pageWidth;

if (fabs(velocity.x) > kFlickVelocityThreshold) {
// velocity.x が閾値より大きい場合 (アイテムを左右にフリックした場合)

// velocity.x が正の場合は、currentPage を切り上げた値を「スクロール先のページ番号」とする (負の場合はその逆)
CGFloat nextPage = (velocity.x > 0.0) ? ceil(currentPage) : floor(currentPage);

// 「スクロール先のページ番号」と「ページ幅」を掛けて contentOffset.x を計算する
// contentOffset.y は proposedContentOffset.y をそのまま設定
return CGPointMake((nextPage * self.pageWidth), proposedContentOffset.y);
} else {
// velocity.x が閾値以下の場合 (アイテムをドラッグした後に指を離した場合)

// currentPage を四捨五入して「スクロール先のページ番号」とする
// contentOffset は「velocity.x が閾値より大きい場合」と同様に計算
return CGPointMake((round(currentPage) * self.pageWidth), proposedContentOffset.y);
}
}

#pragma mark - Private

// ページ幅を返却
- (CGFloat)pageWidth
{
return self.itemSize.width + self.minimumLineSpacing;
}
まとめ
今回は UICollectionViewFlowLayout のサブクラス を作成して「左右のアイテムをチラ見せするレイアウト」を実装する例を解説しました。予想してたよりも実装量が少なくてビックリしました。
今回作成したサンプルプロジェクトはGitHub にアップしてます。同じようなことをやりたい方のためになれば幸いです。