
Amazon SageMakerによる機械学習モデルの構築からデプロイまでの10分間チュートリアルをやってみた
この記事は公開されてから1年以上経過しています。情報が古い可能性がありますので、ご注意ください。
こんにちは、CX事業本部 IoT事業部の若槻です。
Amazon SageMakerをいい加減ちゃんとやらねばと初心者向けのコンテンツを探していたところ、次の公式ドキュメントに行き当たりました。
10分間のチュートリアルをこなせばSageMakerによる機械学習モデルの構築、トレーニング、デプロイを学習できるとのことです。
実際にやってみたところ10分以内とまでは言いませんが(本記事を書きながらだったので)、短時間で特に詰まらずにデプロイしたモデルを使った予測の実施やモデルの性能評価まで行うことができました。本記事ではその中でやってみた内容を書き残しておきます。
やってみた
データ準備用のリソース作成
まずデータ前処理などの準備する環境としてSageMakerノートブックインスタンスのリソースを作成します。
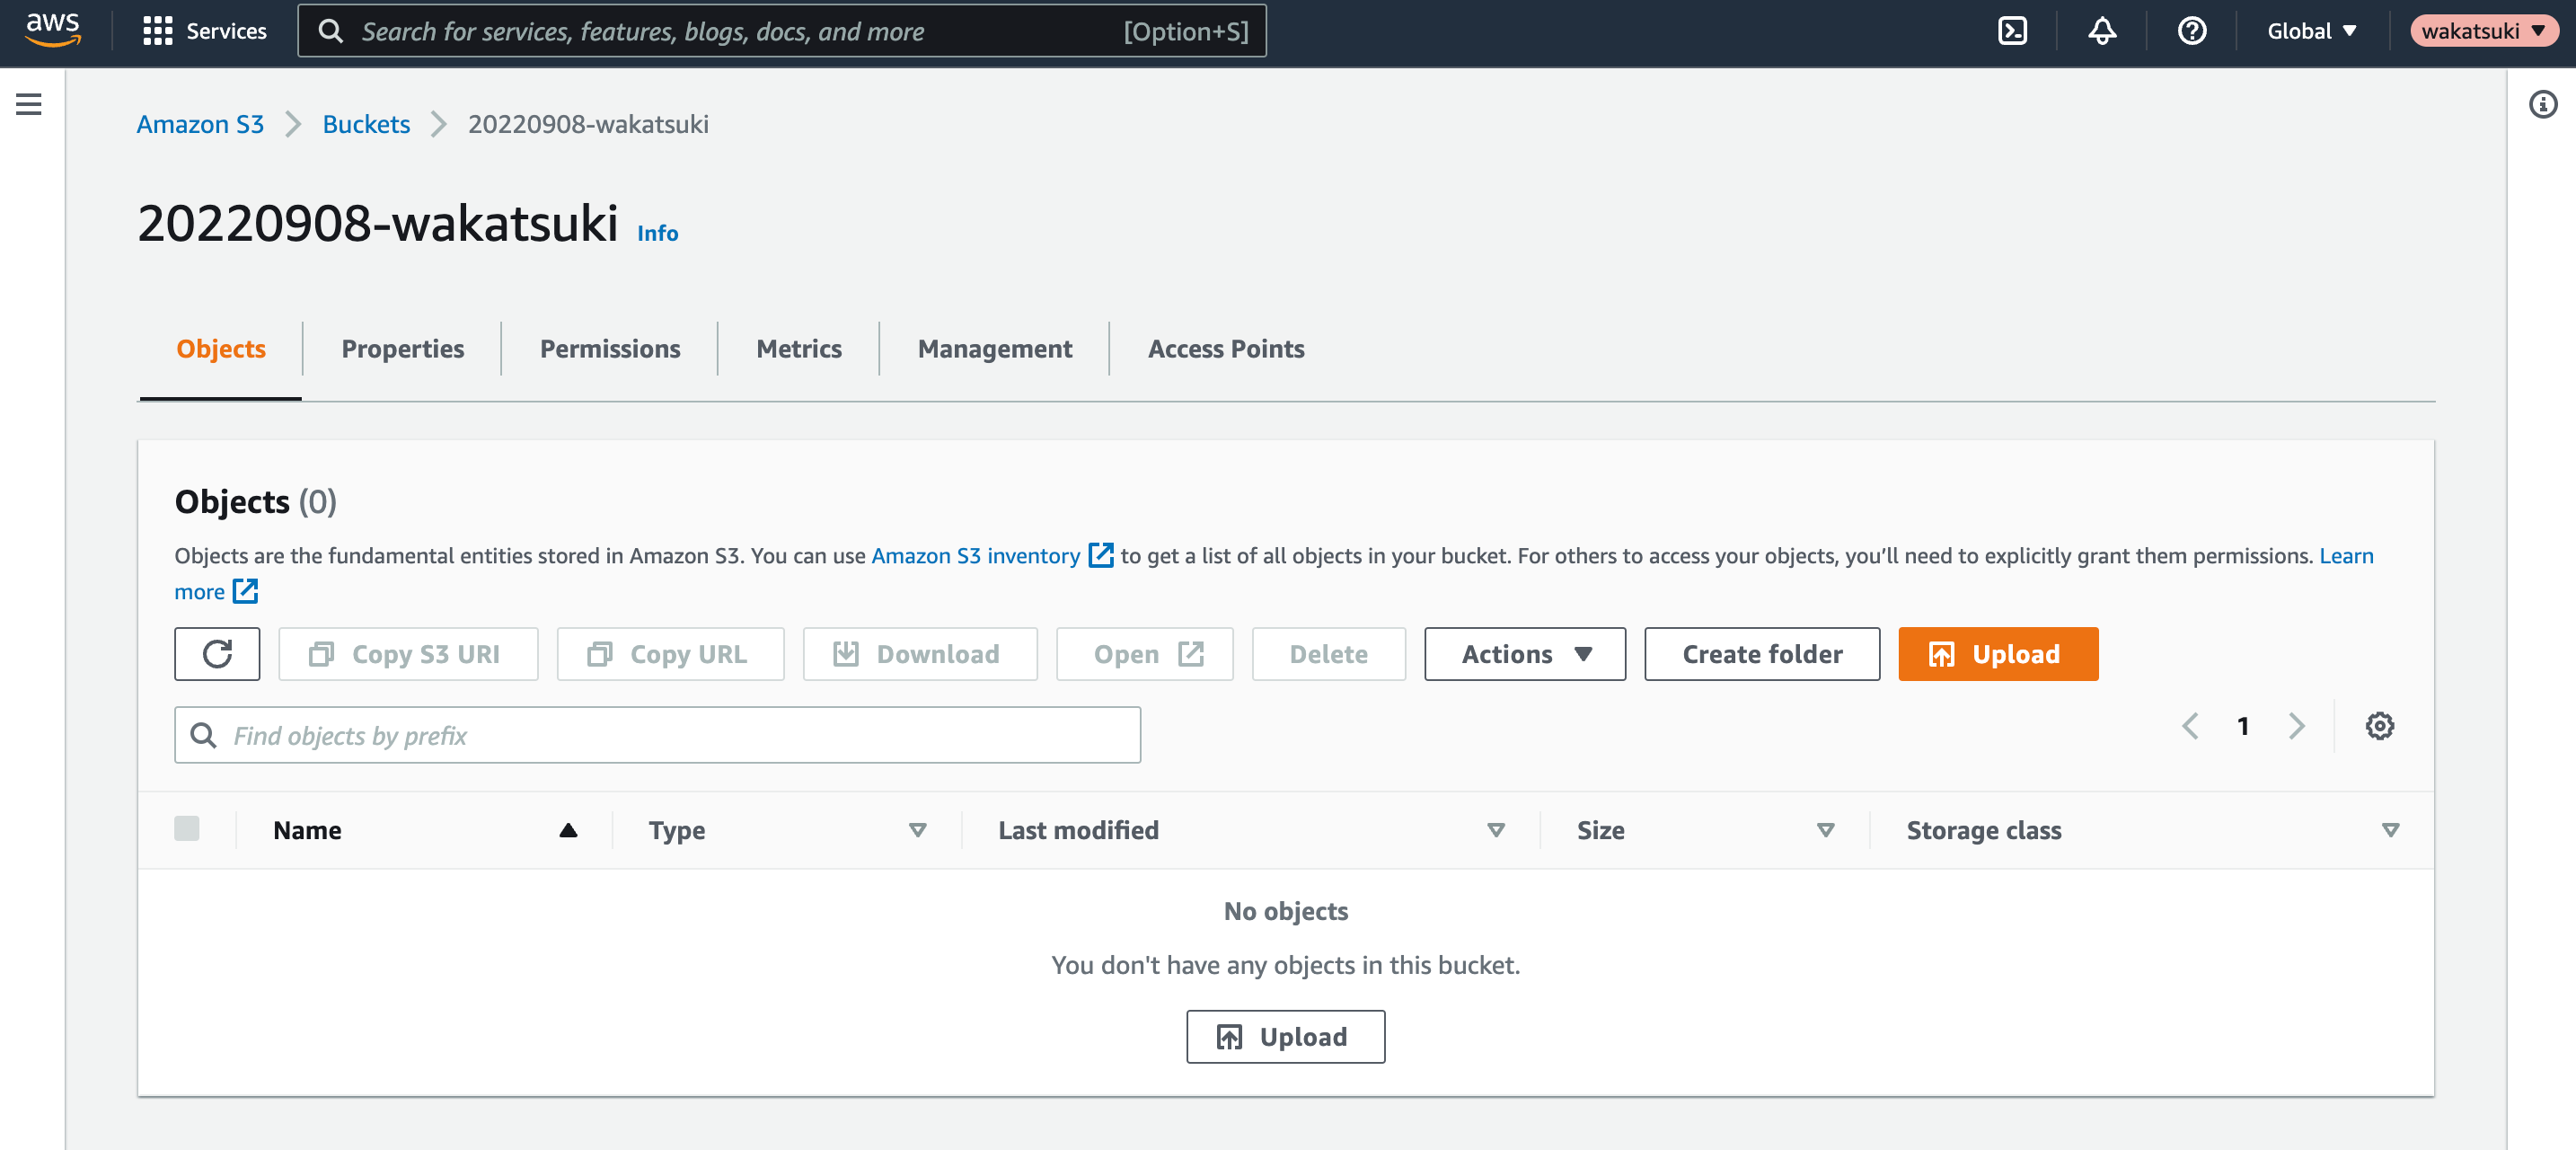
最初にSageMakerノートブックインスタンスがデータを保存するS3 Bucketを作成しておきます。
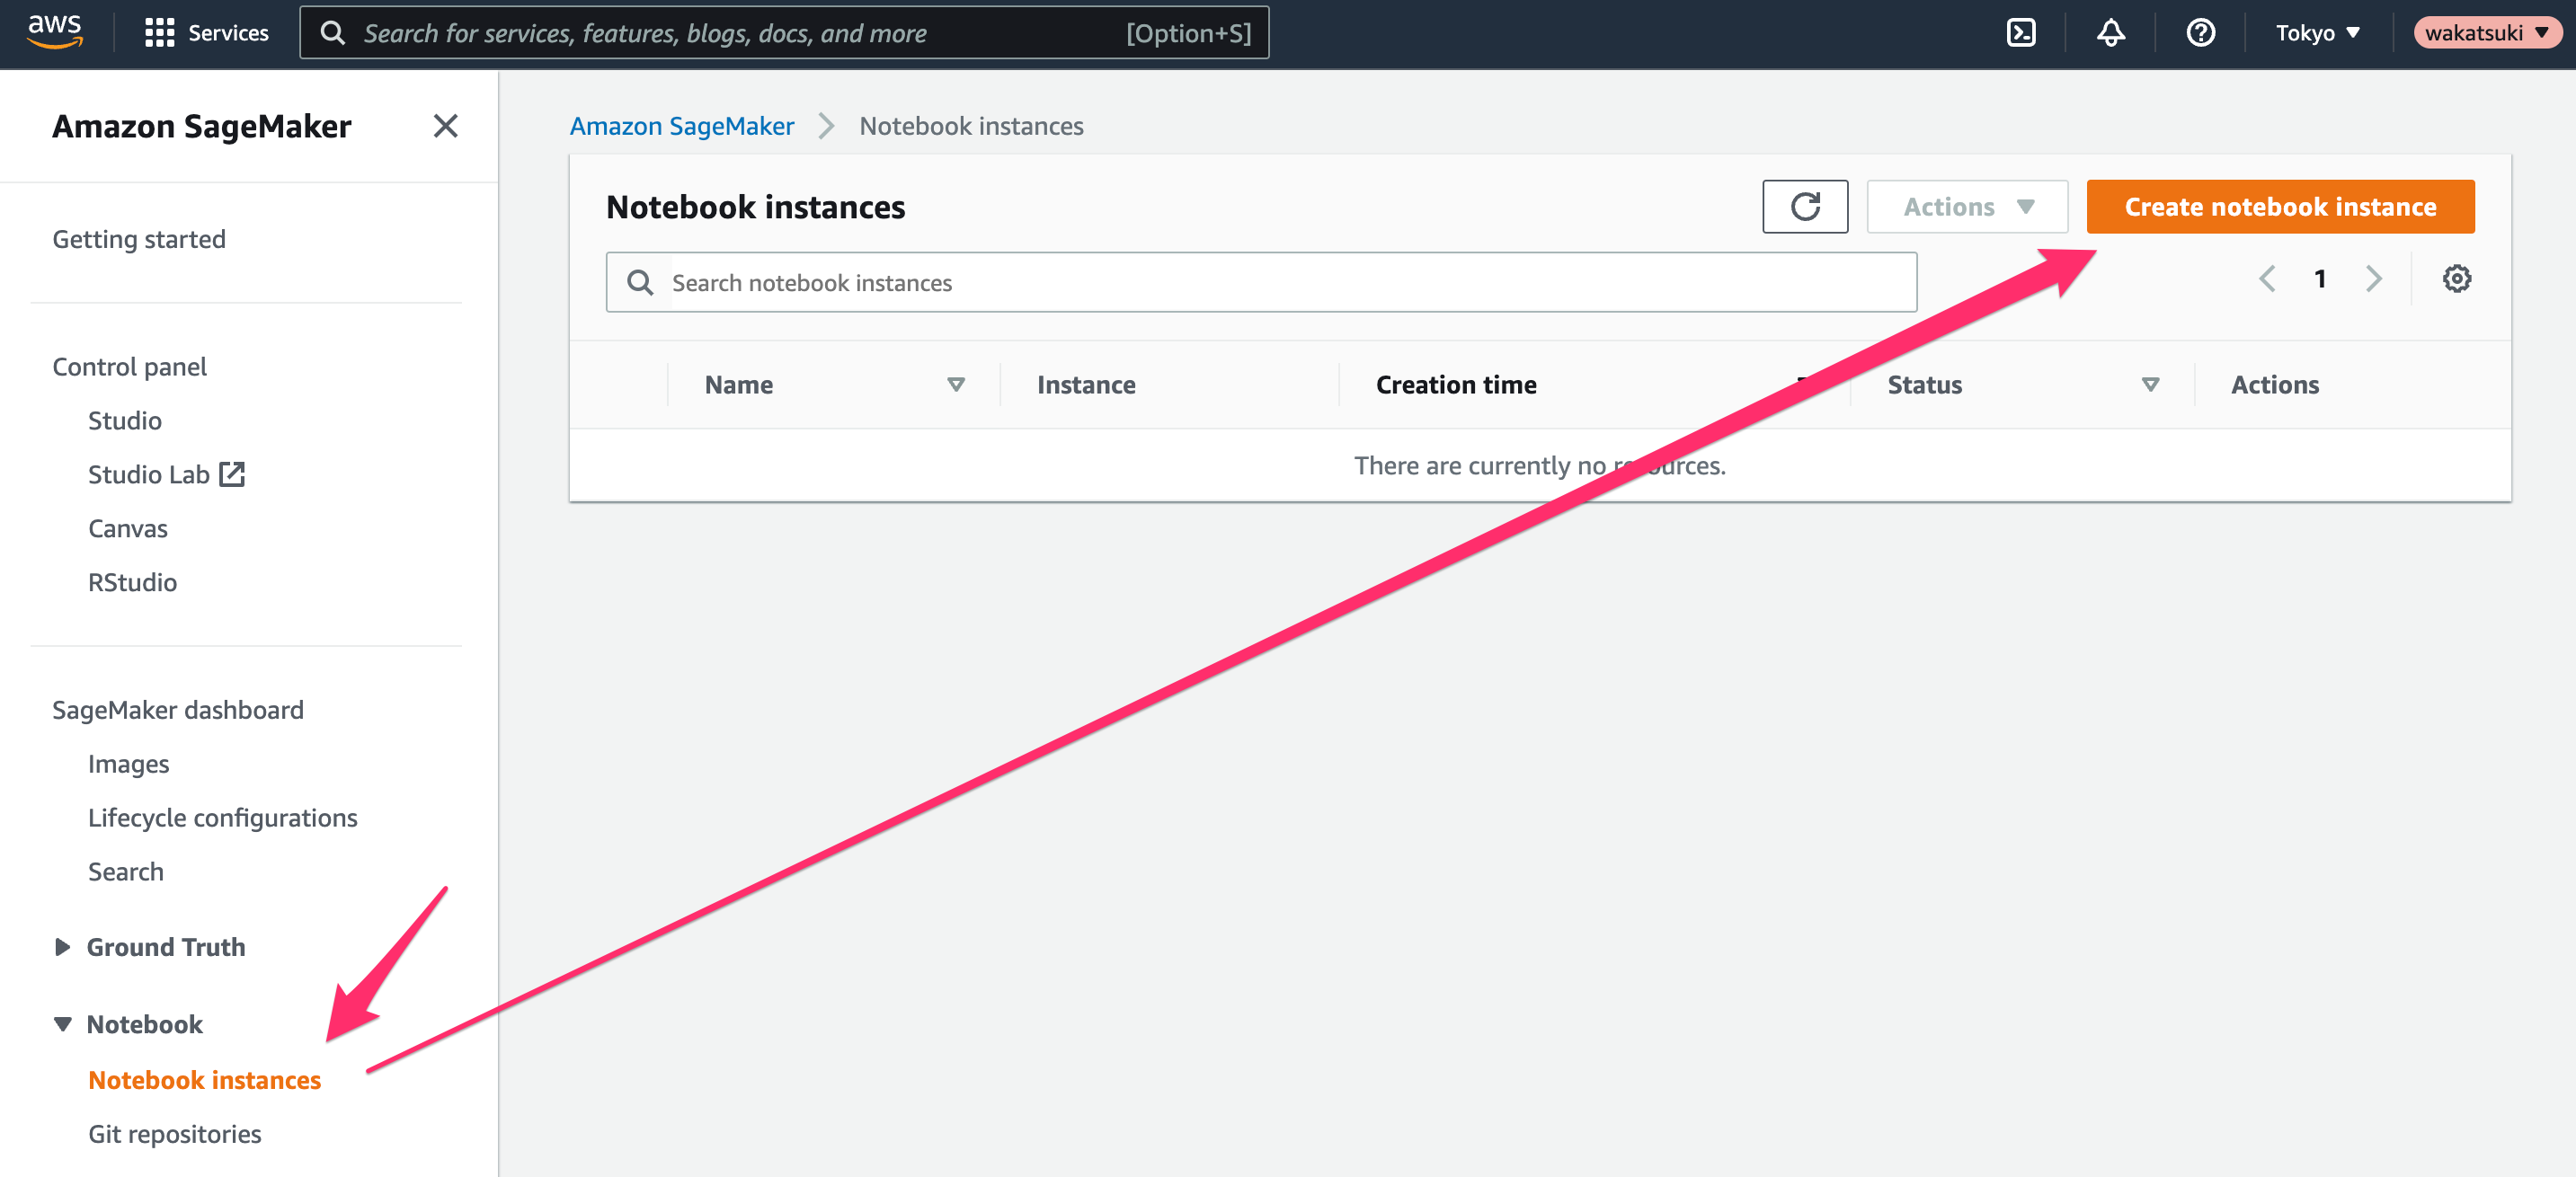
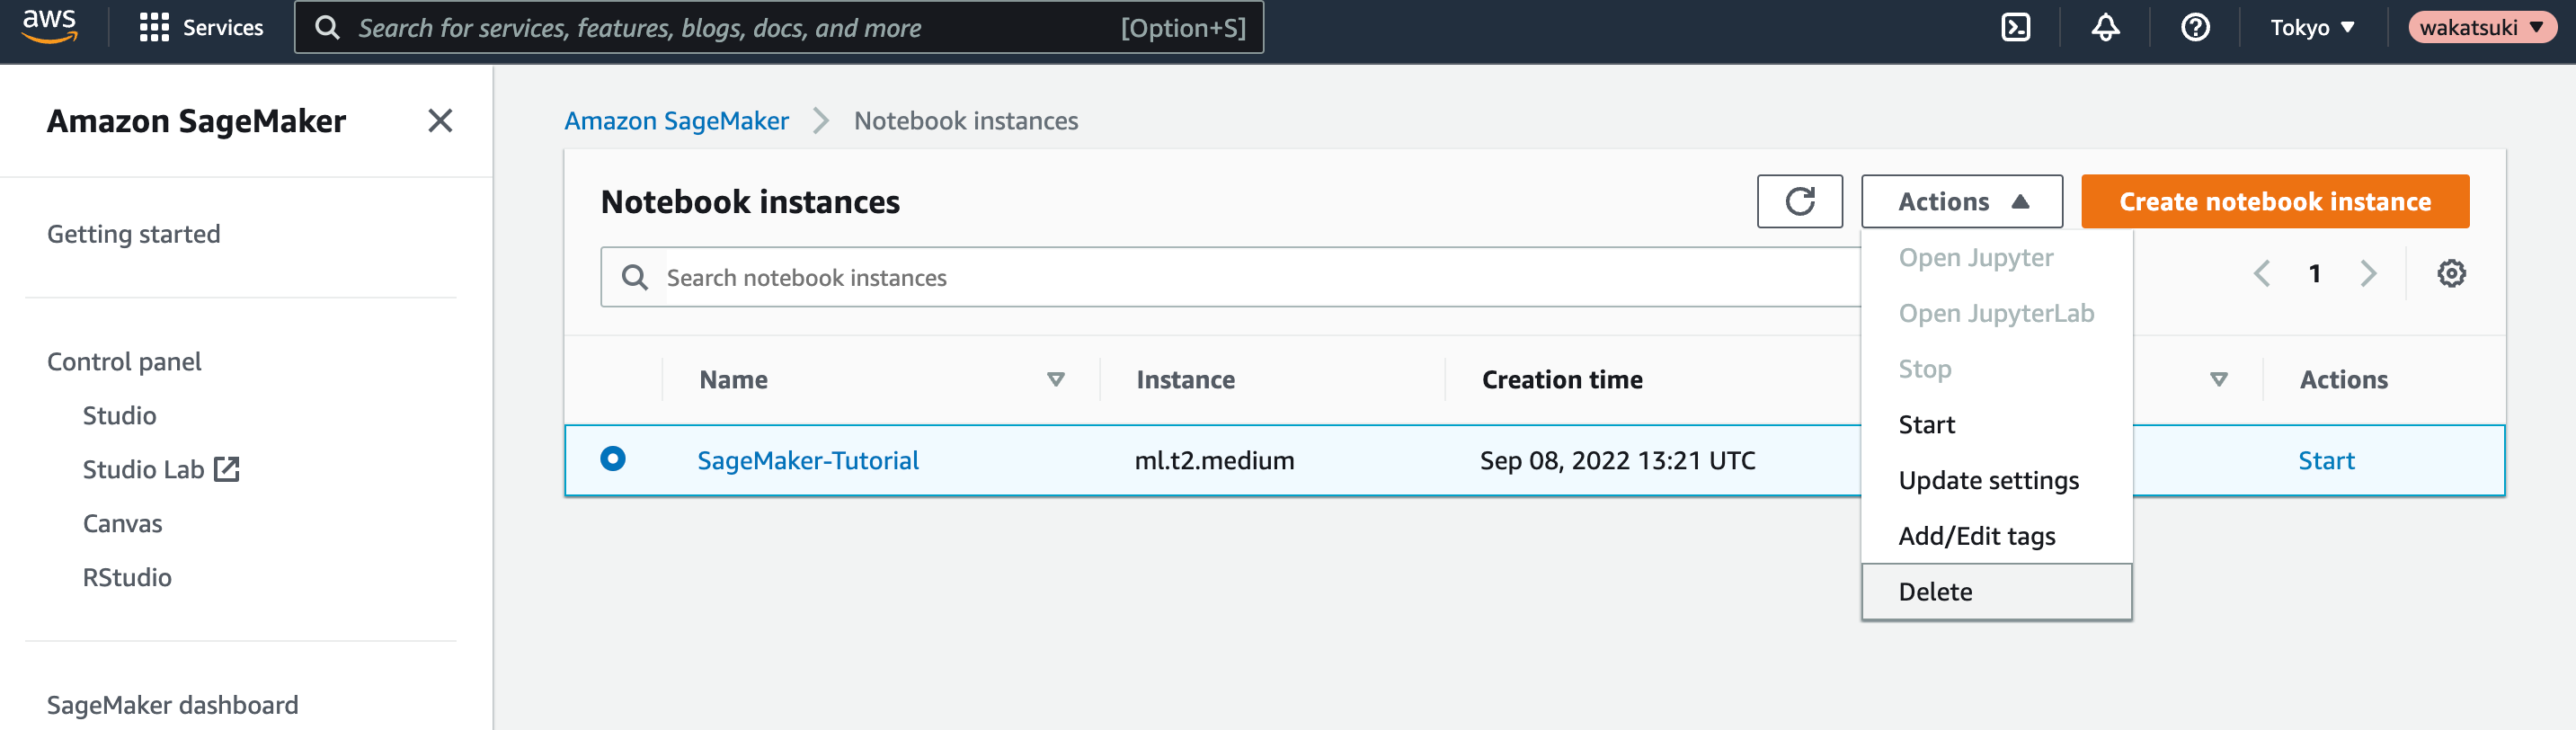
Amazon SageMakerコンソールにアクセスします。
[Notebook > Notebook instances]で[Create notebook instance]をクリック。
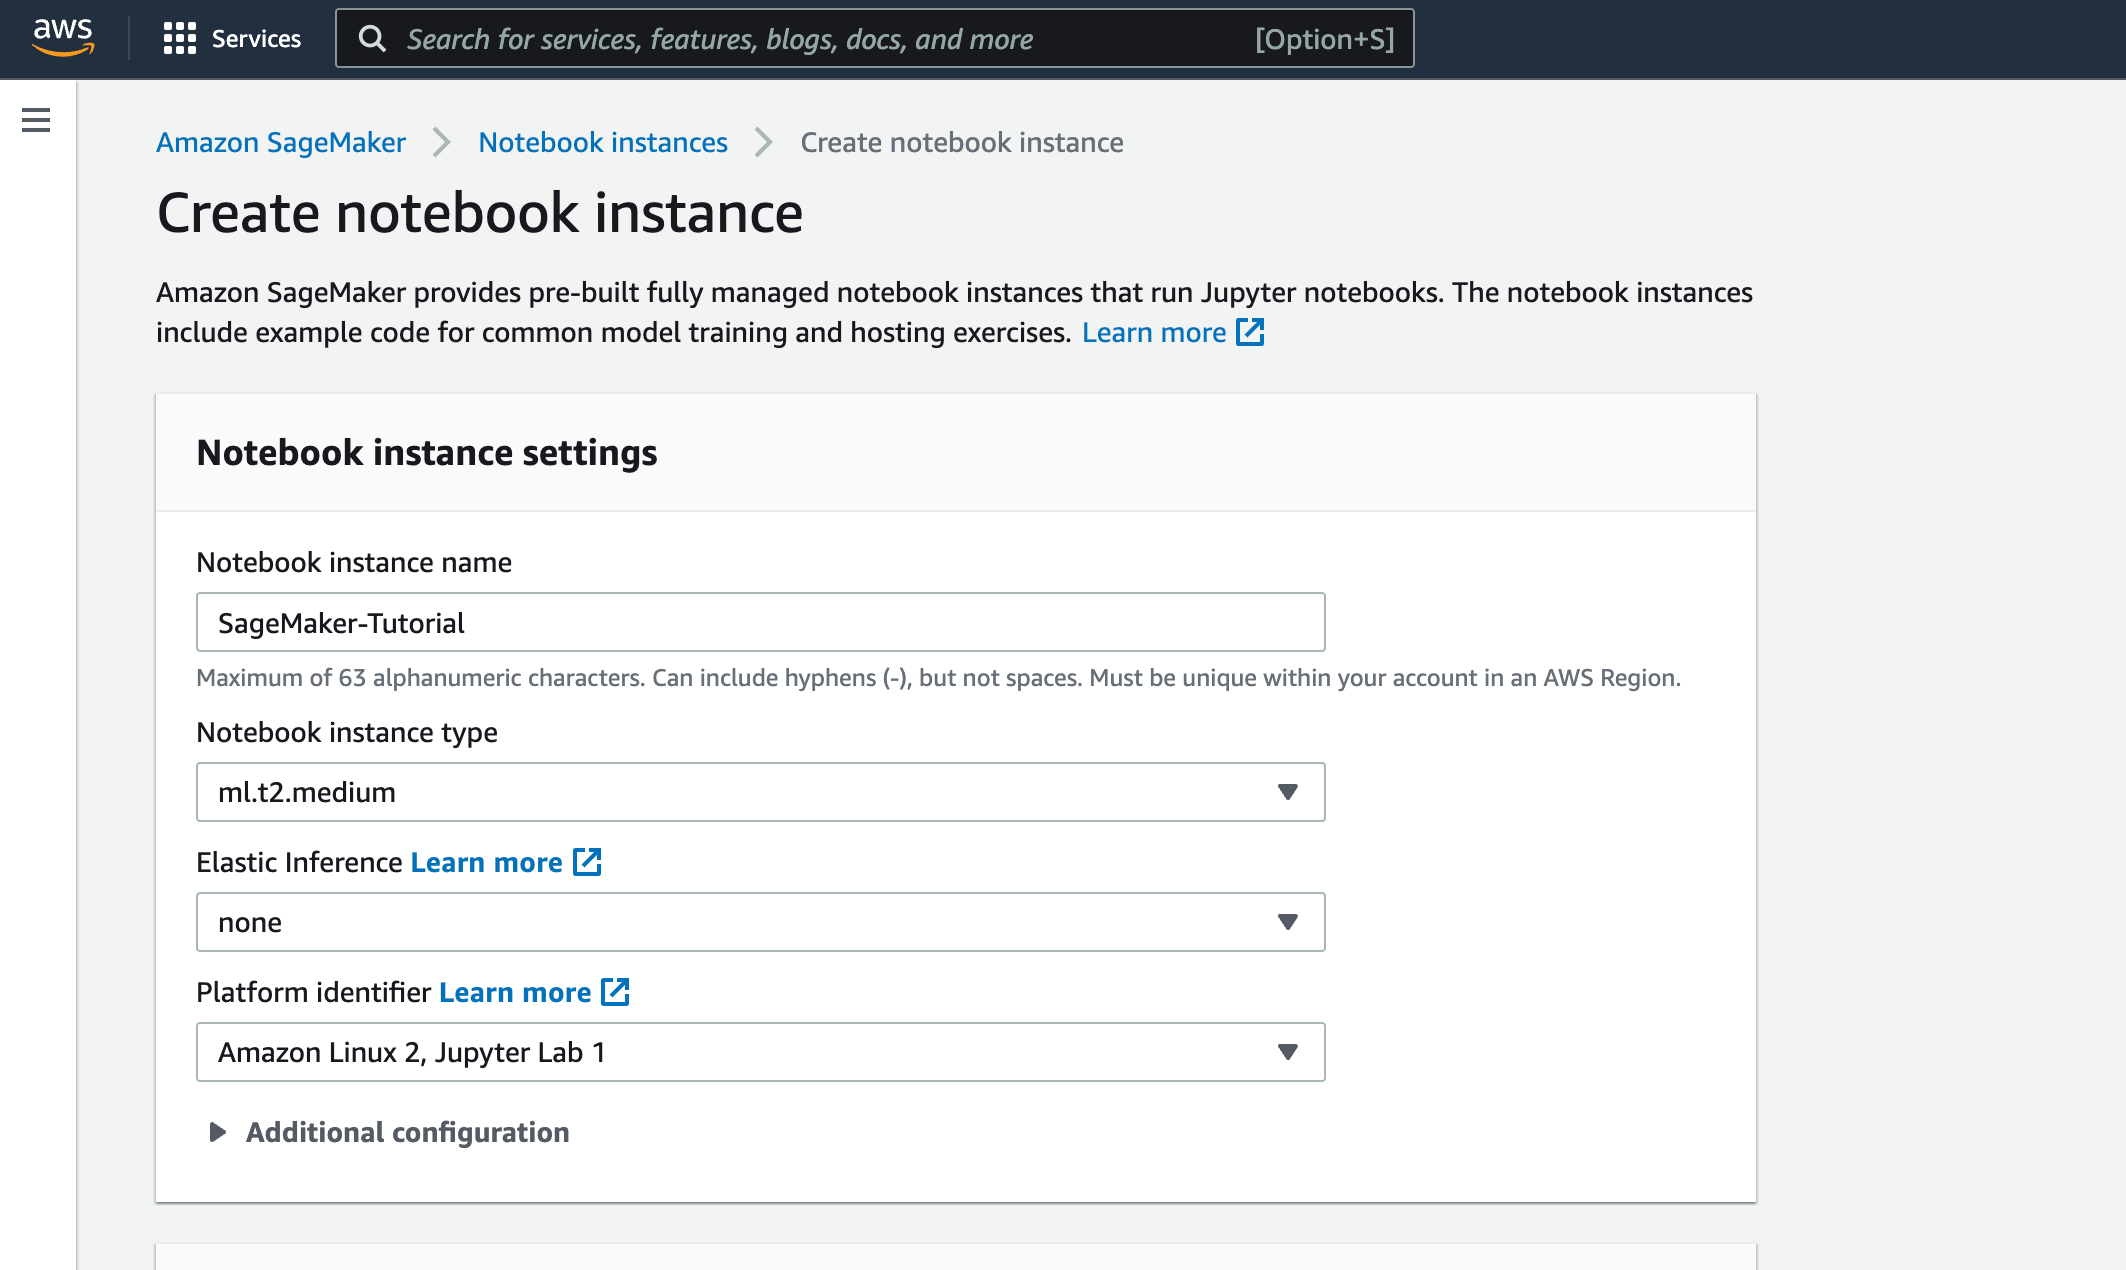
[Notebook instance settings]で、次のように設定します。
- [Notebook instance name]:
SageMaker-Tutorial - [Notebook instance type]:
ml.t2.medium(現状で使える最小インスタンスタイプ)
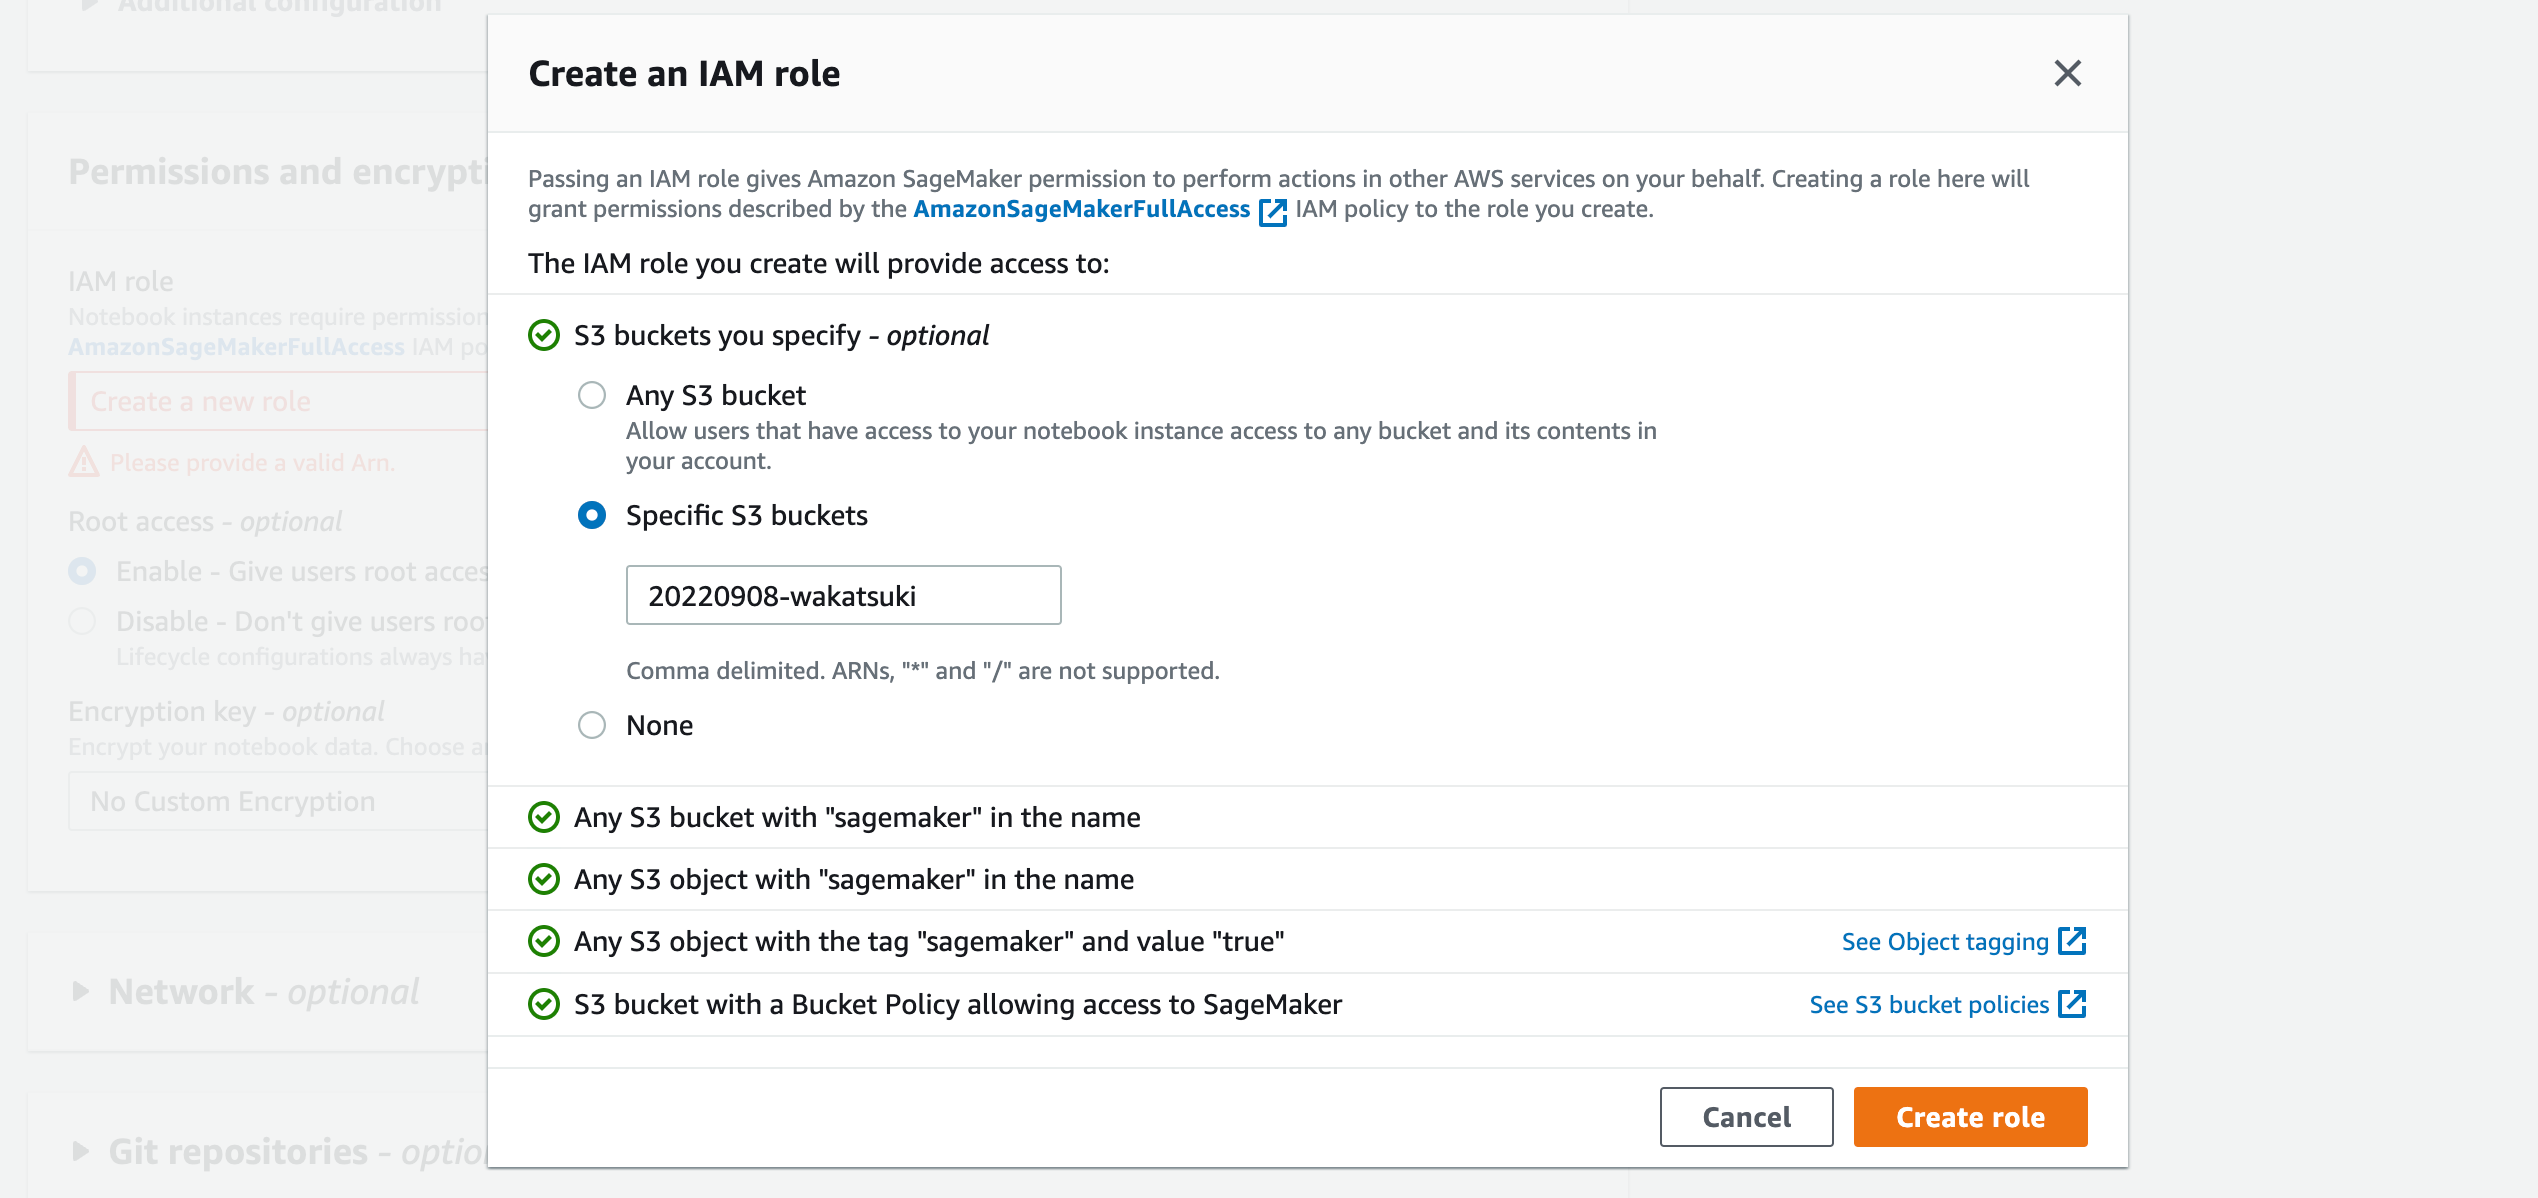
[Permissions and encryption]でノートブックインスタンスがSageMakerおよびS3 BucketにアクセスするためのIAM Roleを作成します。
[Permissions and encryption]で[Create a new role]をクリック。
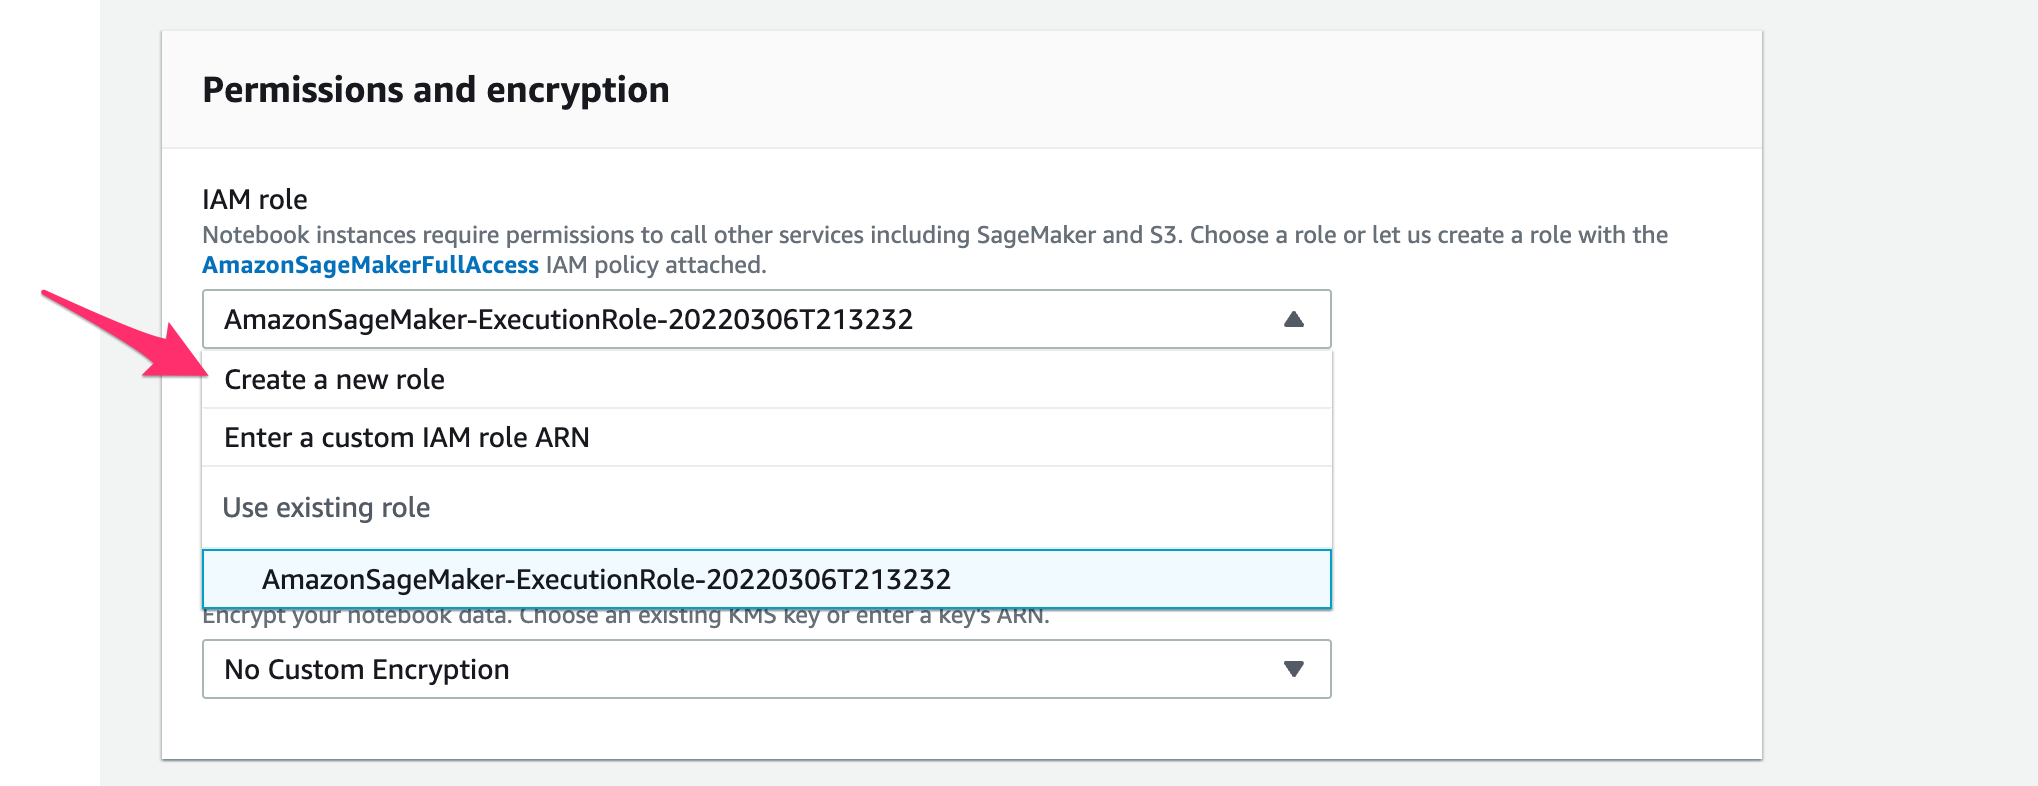
[S3 buckets you specify]で冒頭で作成したS3 Bucket名を指定して[Create role]をクリック。
IAM Roleが作成できました。[Create notebook instance]をクリック。
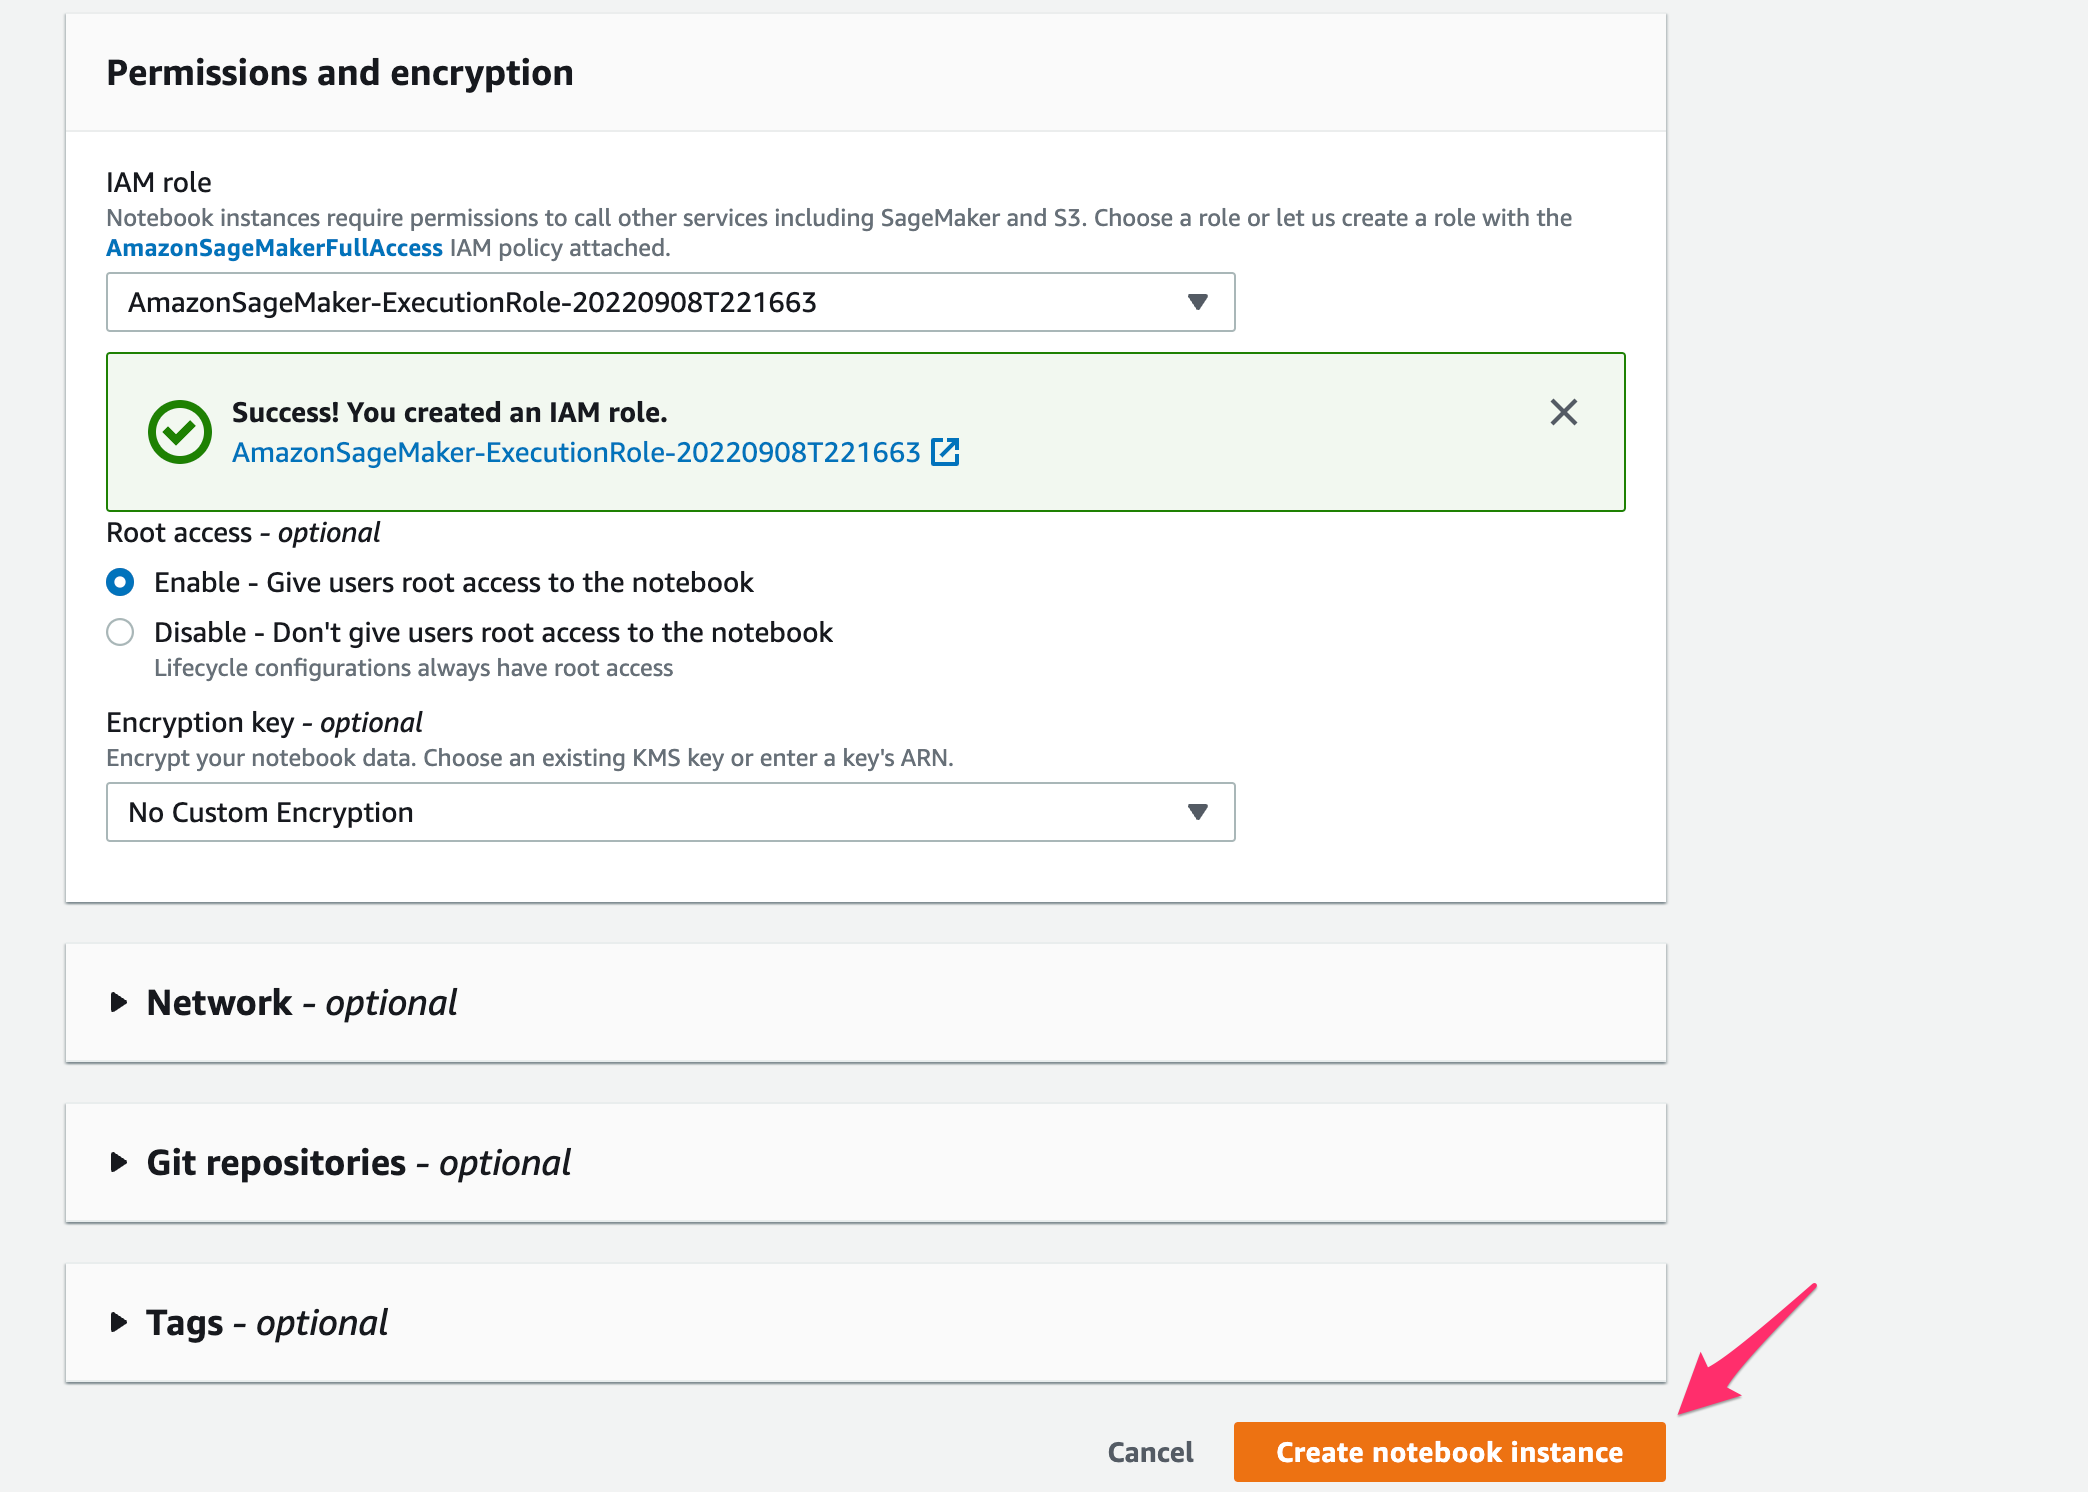
インスタンスの起動が開始されます。

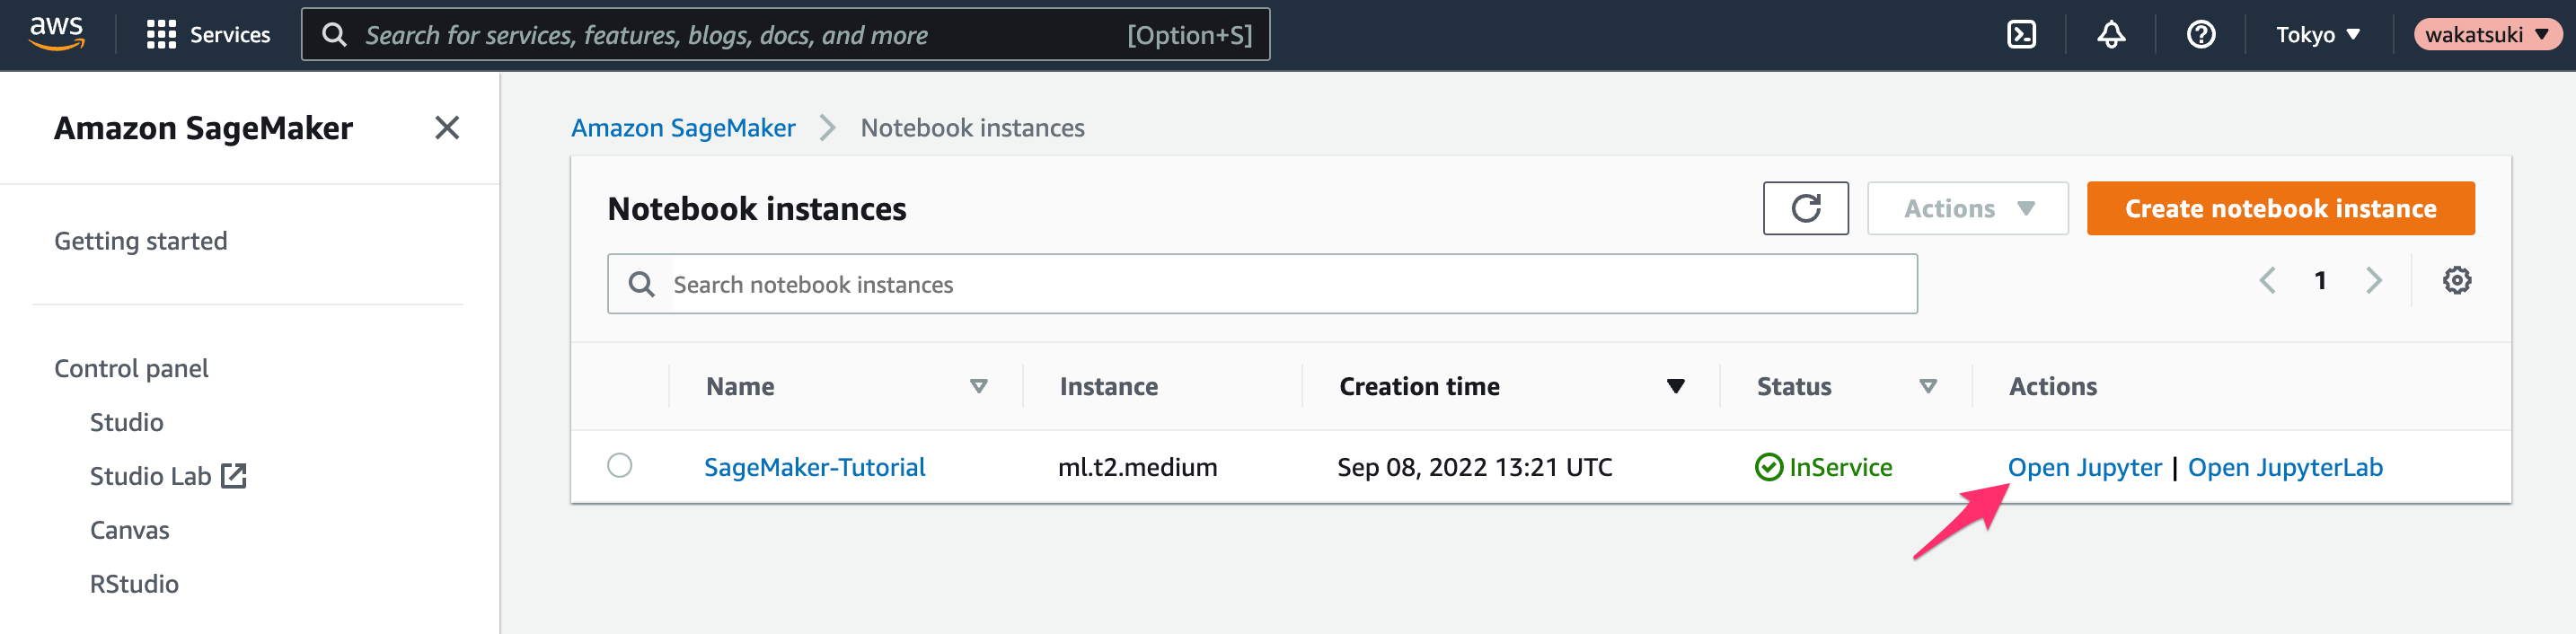
[Status]がInServiceとなり利用可能となりました。

データの準備
前節で作成したリソースを使用して機械学習モデルのトレーニングに必要なデータを準備します。
ノートブックインスタンスの[Open Jupyter]をクリック。
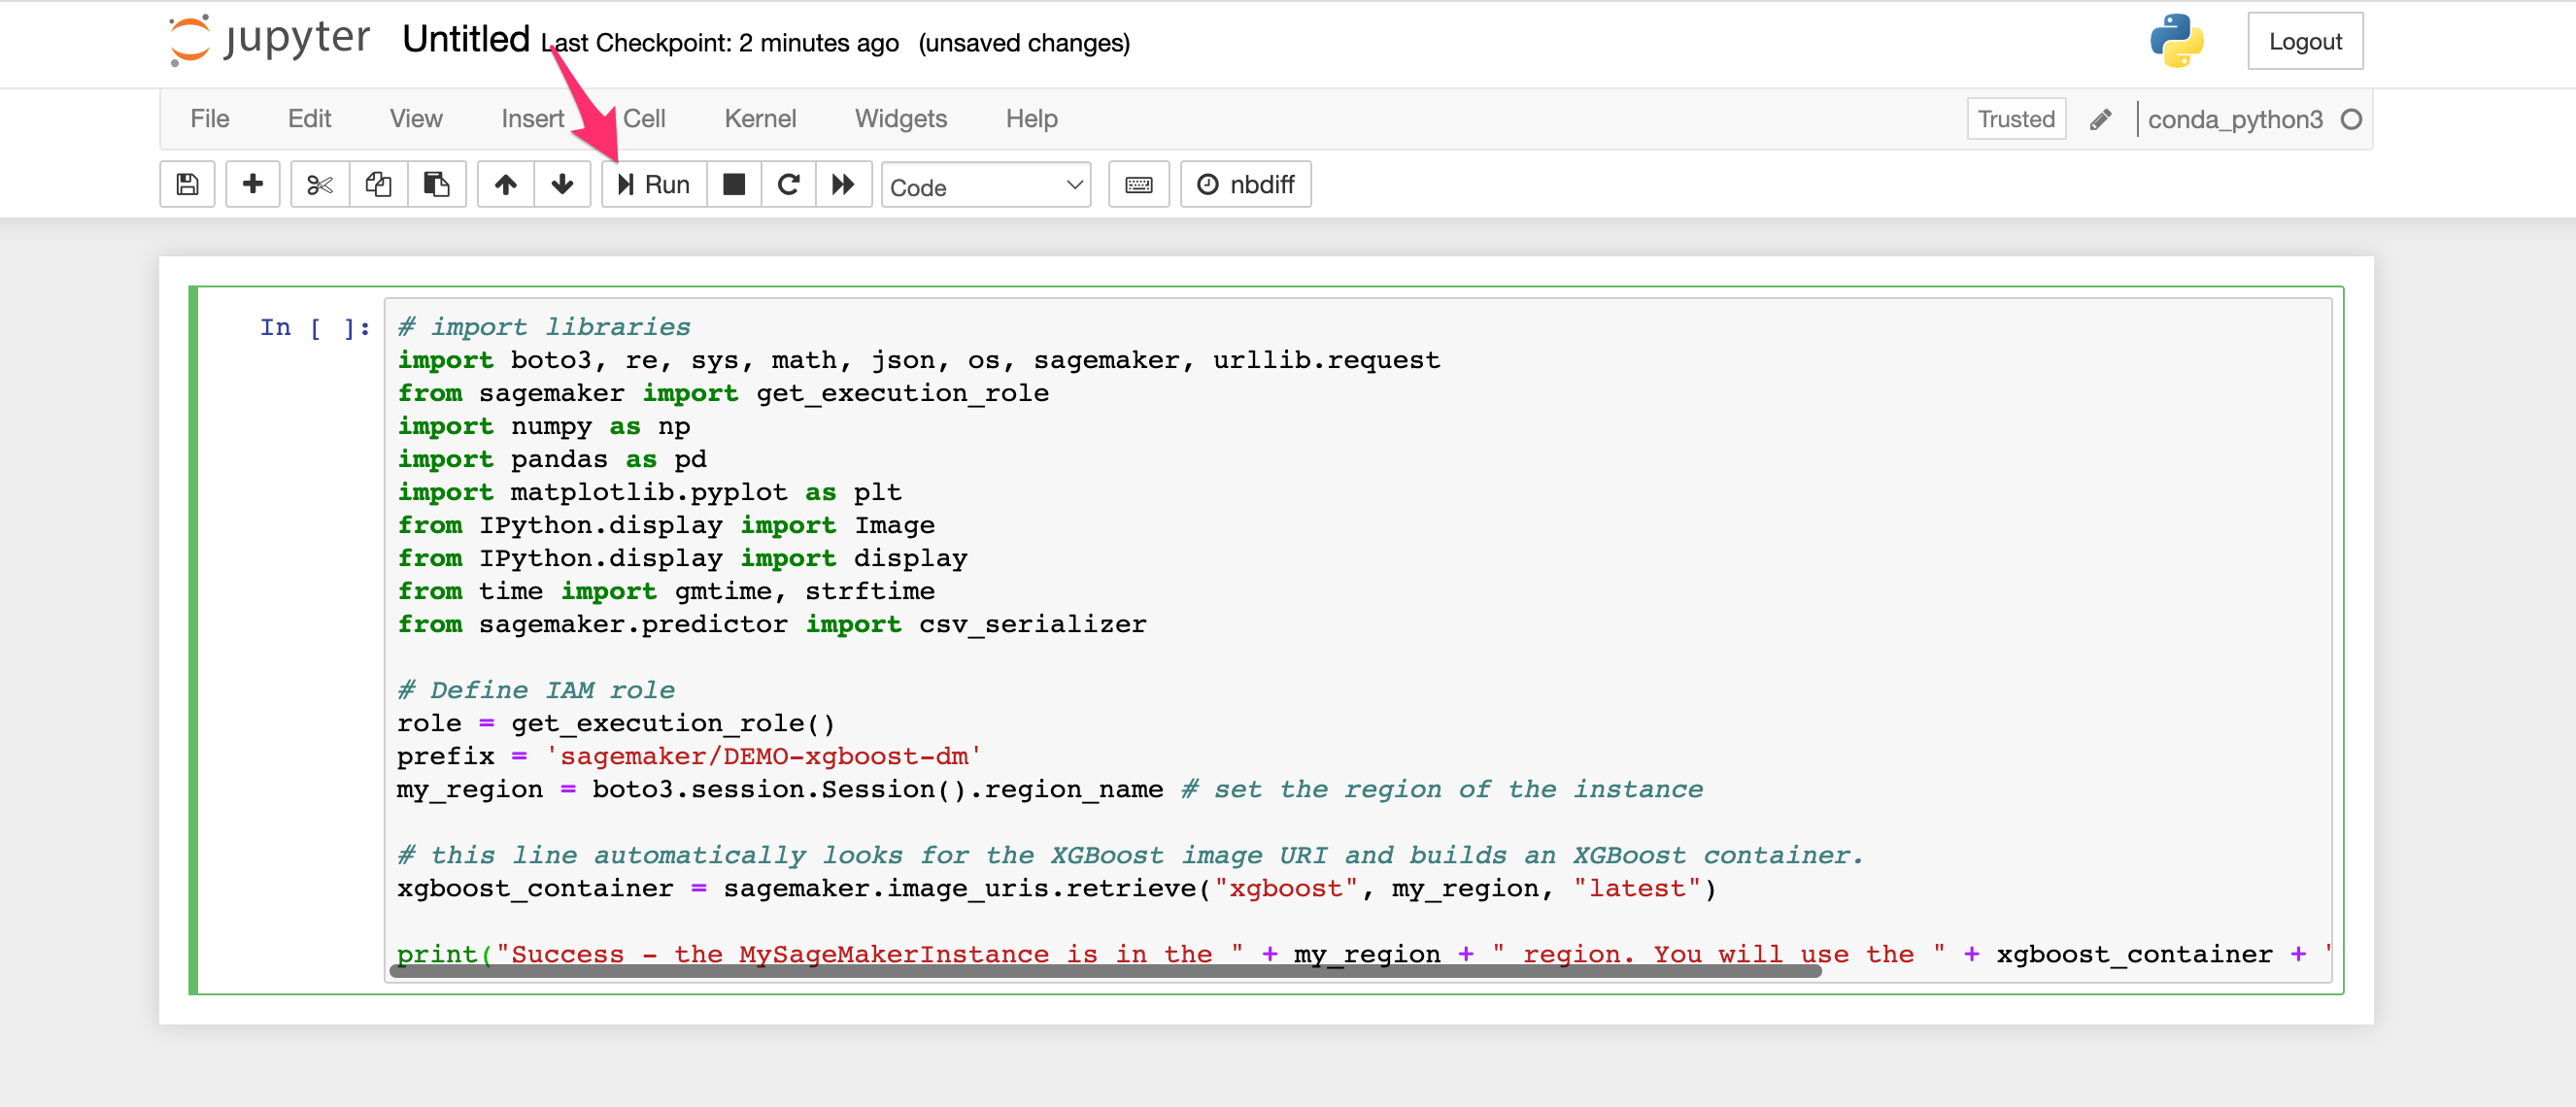
jupyterのホーム画面が開きます。[New]でconda_python3を選択してPythonを実行可能なコンソールを表示します。
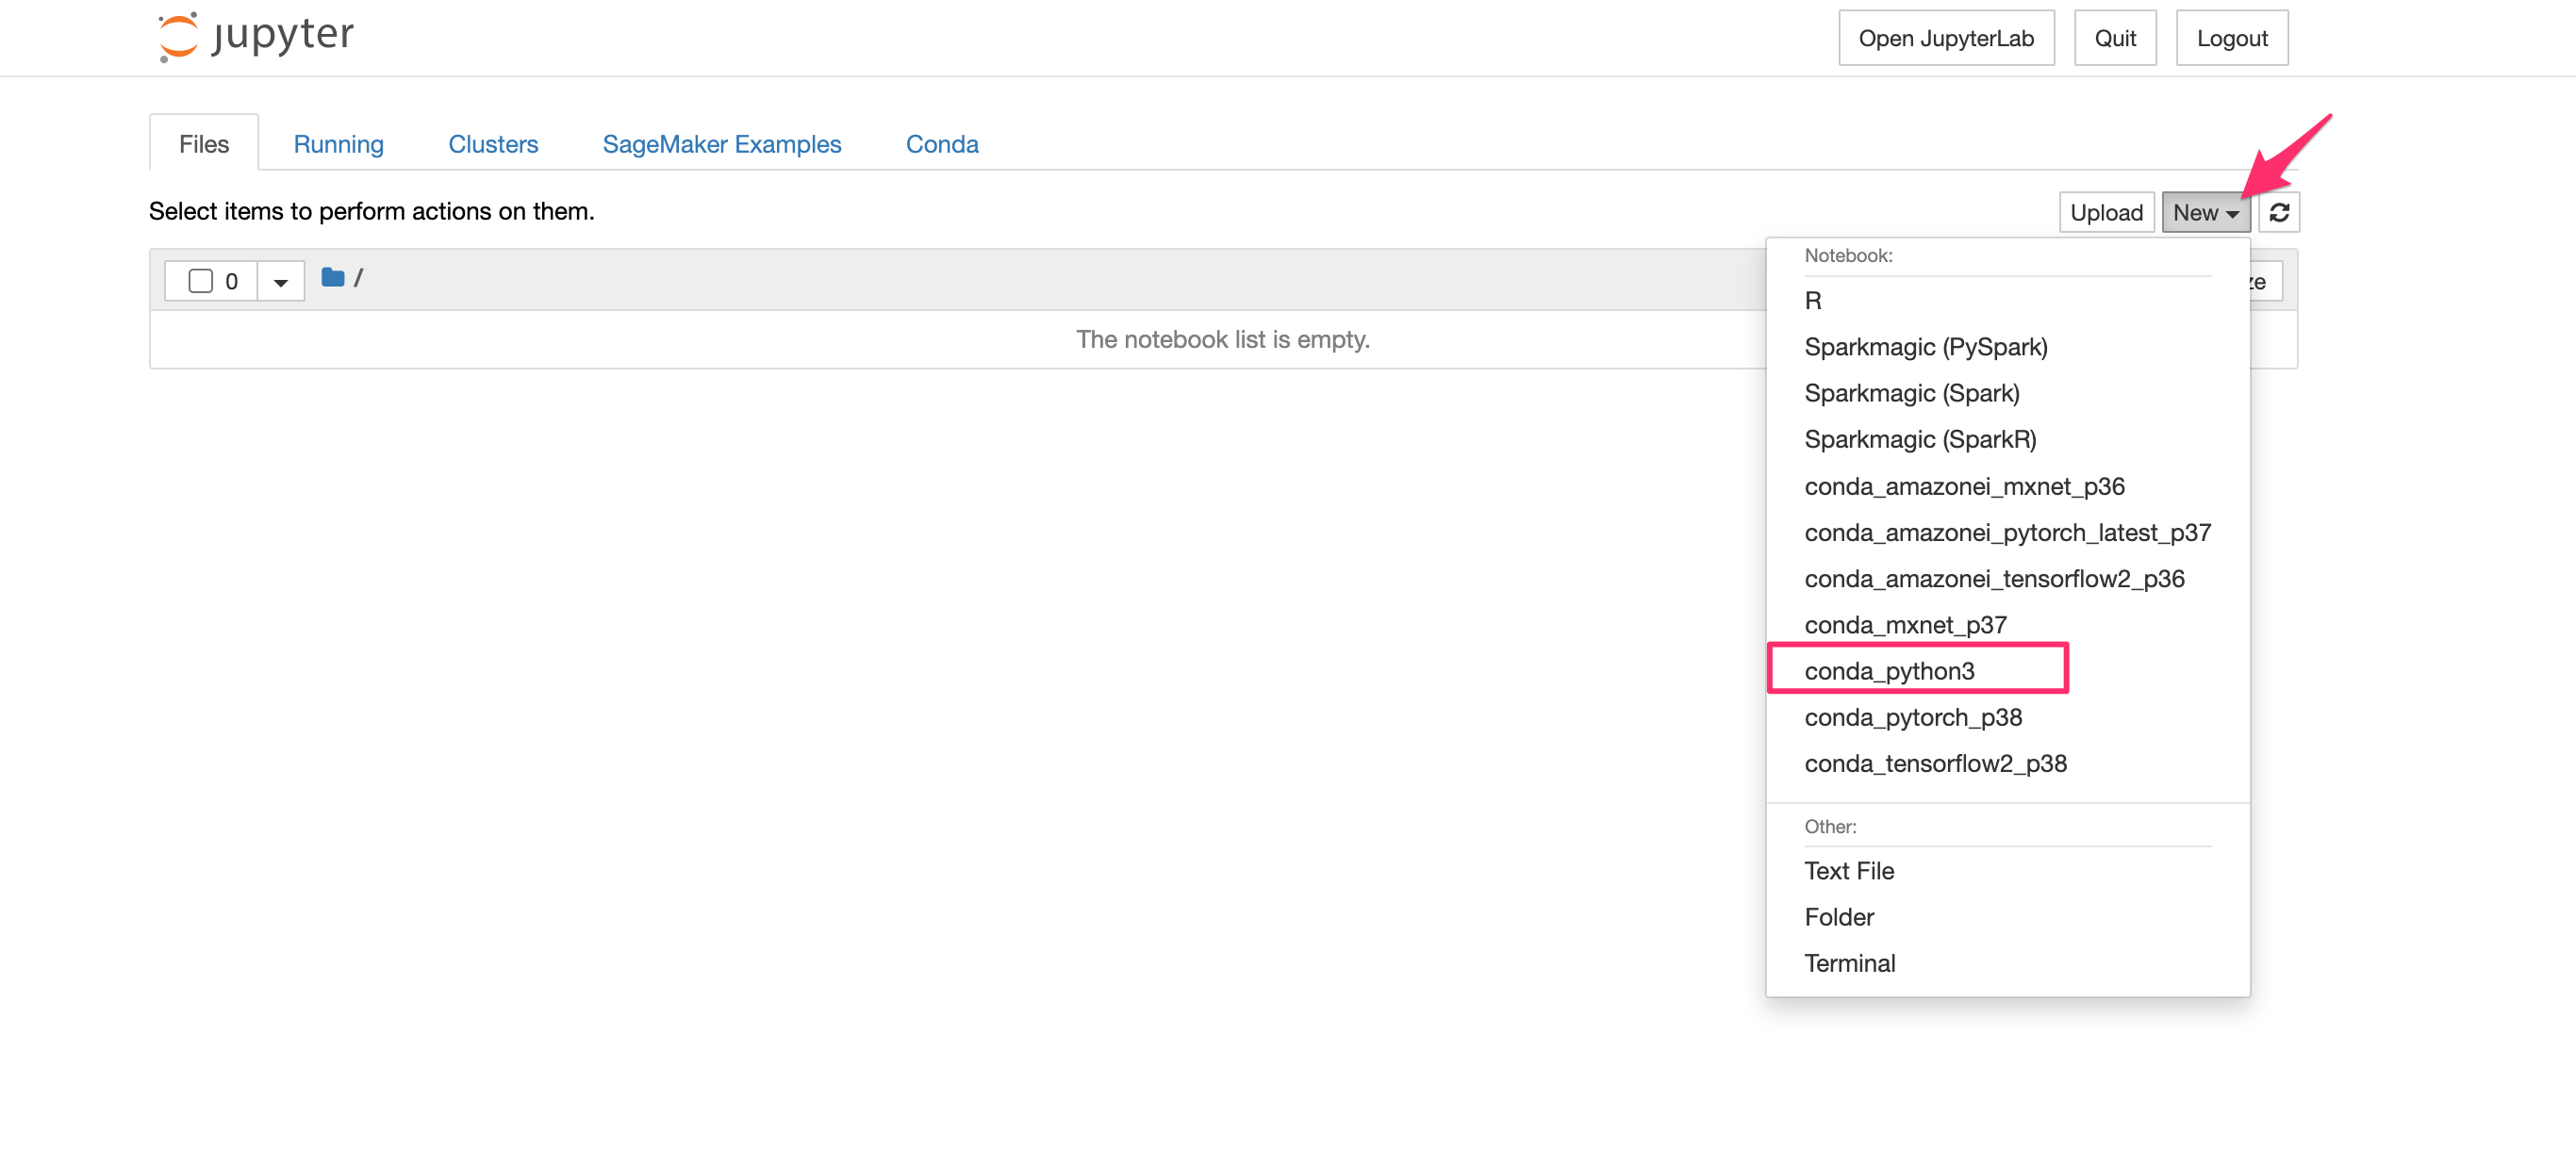
以下のコードをコンソールに貼り付けて[Run]をクリックして実行します。これにより必要な環境変数を定義します。
# import libraries
import boto3, re, sys, math, json, os, sagemaker, urllib.request
from sagemaker import get_execution_role
import numpy as np
import pandas as pd
import matplotlib.pyplot as plt
from IPython.display import Image
from IPython.display import display
from time import gmtime, strftime
from sagemaker.predictor import csv_serializer
# Define IAM role
role = get_execution_role()
prefix = 'sagemaker/DEMO-xgboost-dm'
my_region = boto3.session.Session().region_name # set the region of the instance
# this line automatically looks for the XGBoost image URI and builds an XGBoost container.
xgboost_container = sagemaker.image_uris.retrieve("xgboost", my_region, "latest")
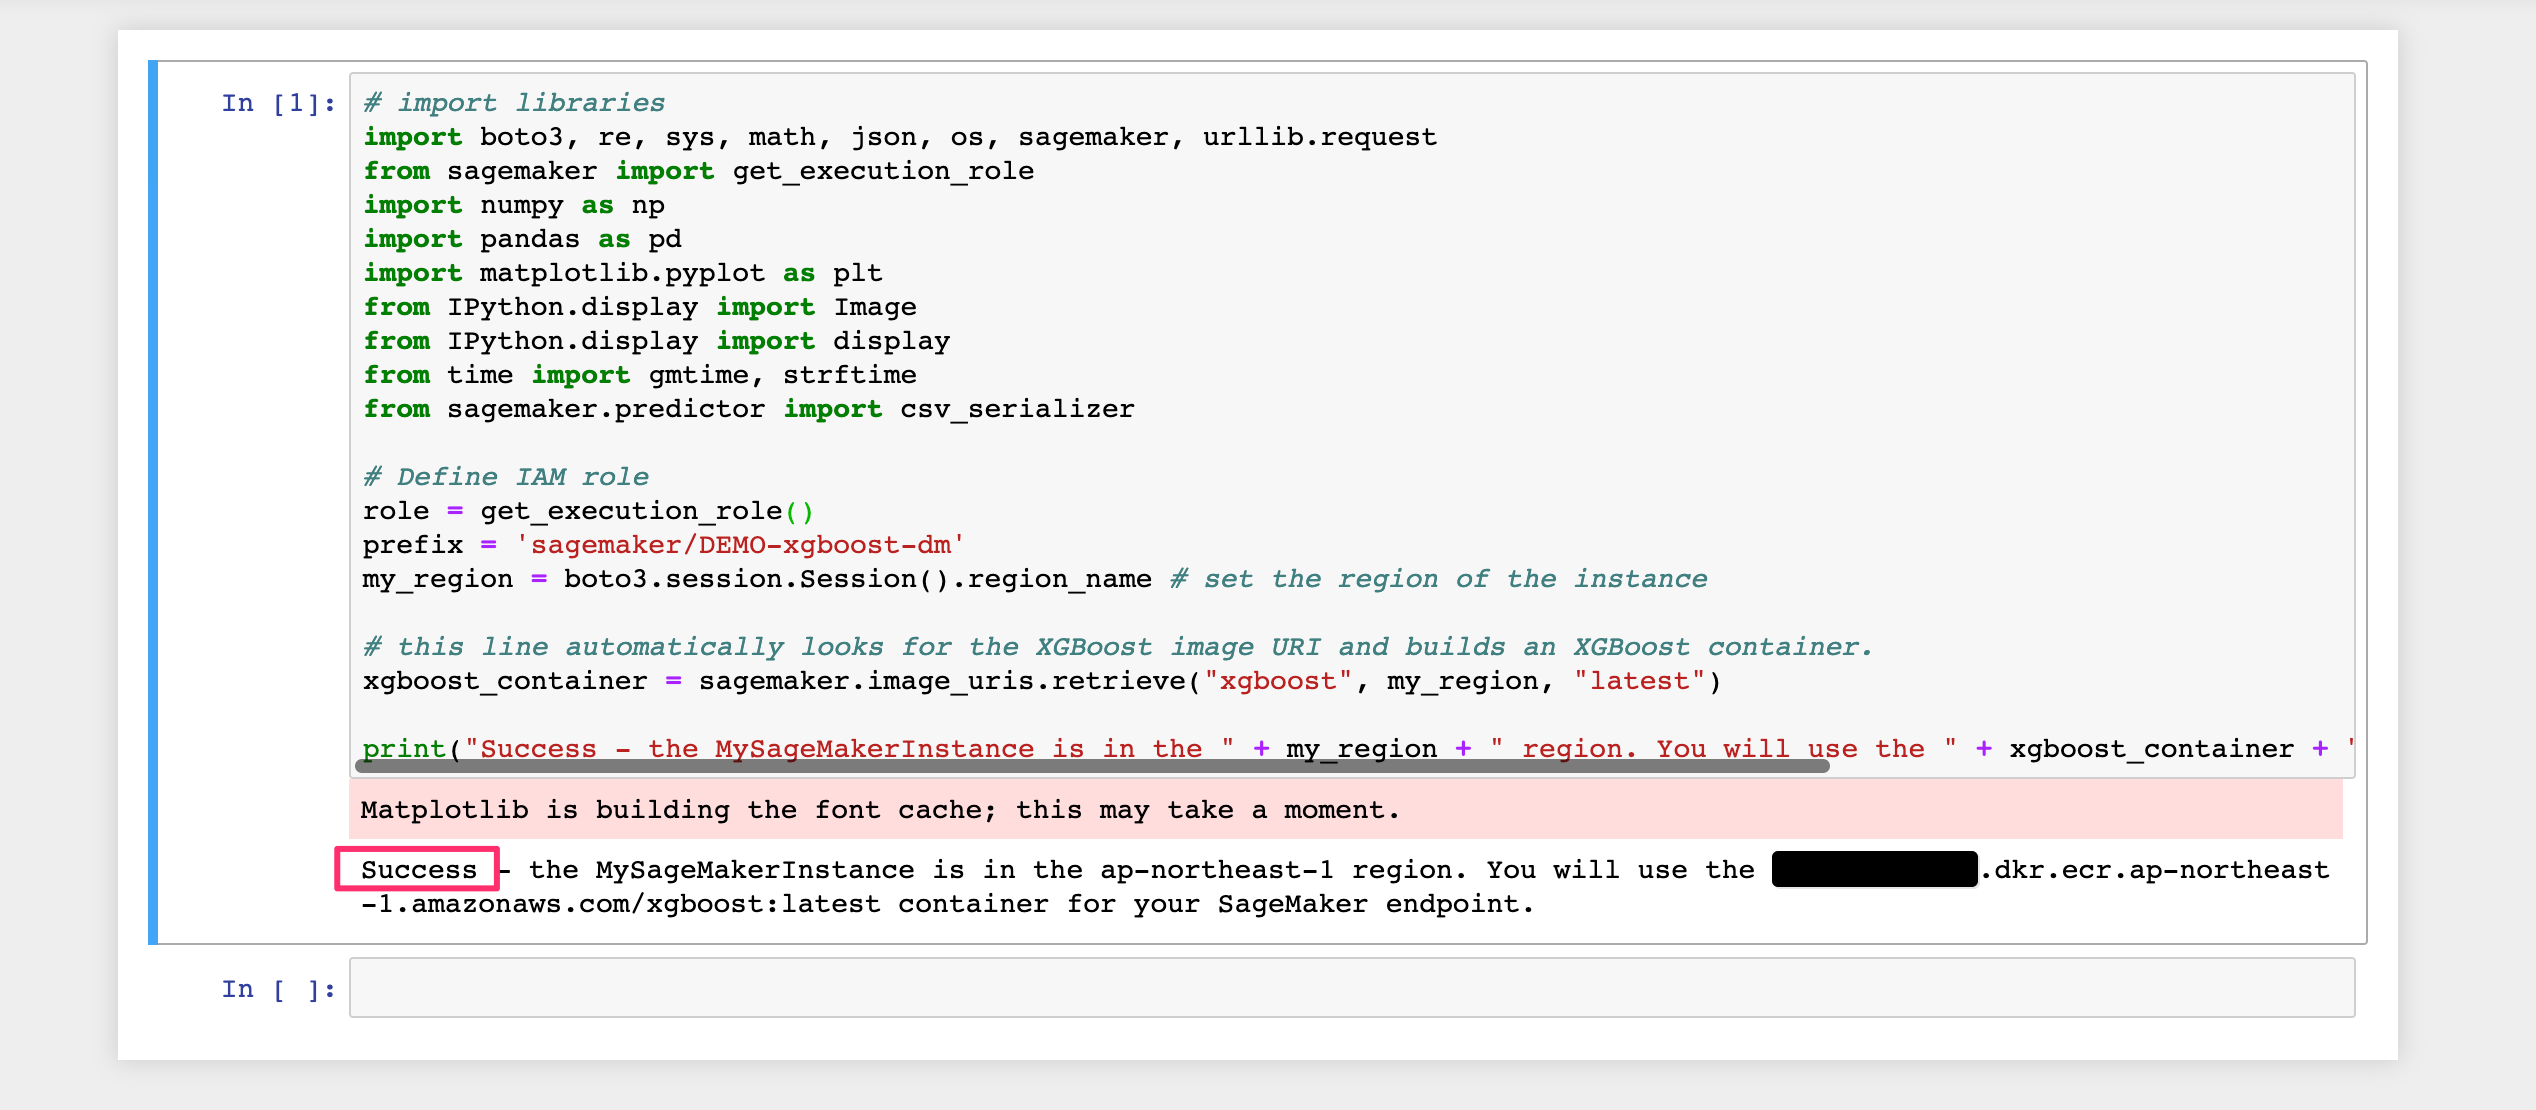
print("Success - the MySageMakerInstance is in the " + my_region + " region. You will use the " + xgboost_container + " container for your SageMaker endpoint.")
少し警告のようなものが出ましたがSuccessとあるので問題無さそうです。
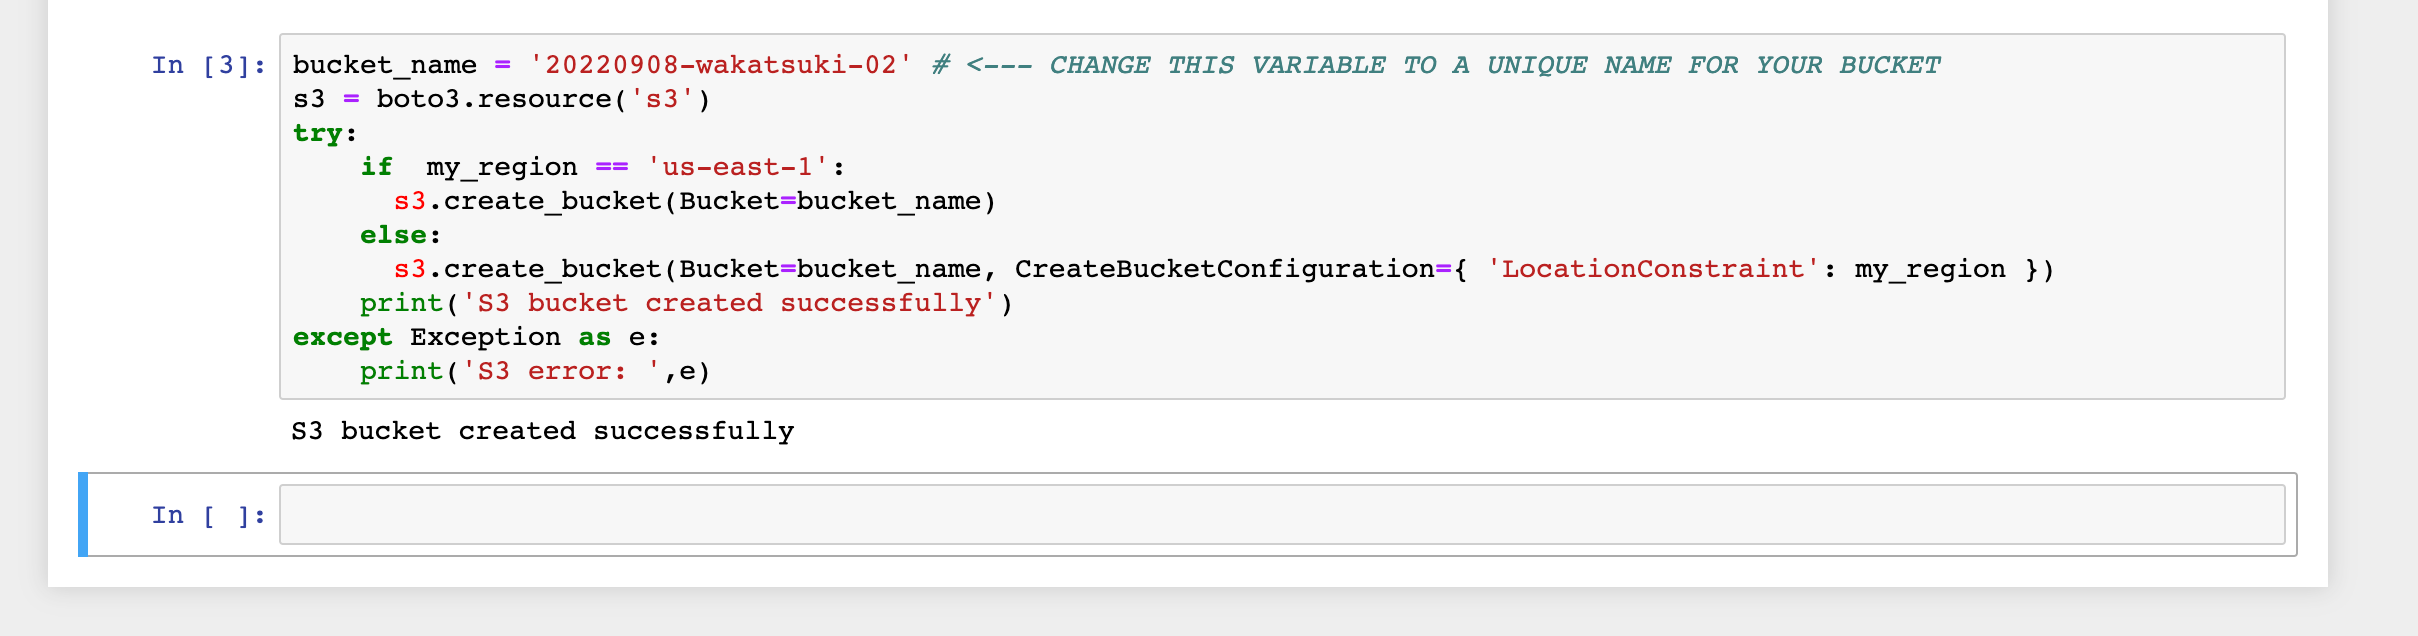
以下のコードをコンソールに貼り付けます。your-s3-bucket-nameの箇所は(冒頭で作成したBucket名とは異なるもの)コード実行により作成される任意のBucketの名前に置き換えます。[Run]をクリックして実行します。
bucket_name = 'your-s3-bucket-name' # <--- CHANGE THIS VARIABLE TO A UNIQUE NAME FOR YOUR BUCKET
s3 = boto3.resource('s3')
try:
    if  my_region == 'us-east-1':
      s3.create_bucket(Bucket=bucket_name)
    else:
      s3.create_bucket(Bucket=bucket_name, CreateBucketConfiguration={ 'LocationConstraint': my_region })
    print('S3 bucket created successfully')
except Exception as e:
    print('S3 error: ',e)
すでに自分が作成済みのBucket名と重複する場合は次のようなエラーとなります。その場合は名前を変えて再実行します。
S3 error: An error occurred (BucketAlreadyOwnedByYou) when calling the CreateBucket operation: Your previous request to create the named bucket succeeded and you already own it.

以下のコードをコンソールで実行します。トレーニングおよび予測に使用するサンプルデータをインスタンスにダウンロードし、Pandasのデータフレームにロードします。
try:
  urllib.request.urlretrieve ("https://d1.awsstatic.com/tmt/build-train-deploy-machine-learning-model-sagemaker/bank_clean.27f01fbbdf43271788427f3682996ae29ceca05d.csv", "bank_clean.csv")
  print('Success: downloaded bank_clean.csv.')
except Exception as e:
  print('Data load error: ',e)

try:
  model_data = pd.read_csv('./bank_clean.csv',index_col=0)
  print('Success: Data loaded into dataframe.')
except Exception as e:
    print('Data load error: ',e)

ちなみにダウンロードされるデータは下記のような銀行顧客の属性と商品に申し込みを行ったかどうかを表すサンプルデータ(レコード数が4万強のCSV)
,age,campaign,pdays,previous,no_previous_contact,not_working,job_admin.,job_blue-collar,job_entrepreneur,job_housemaid,job_management,job_retired,job_self-employed,job_services,job_student,job_technician,job_unemployed,job_unknown,marital_divorced,marital_married,marital_single,marital_unknown,education_basic.4y,education_basic.6y,education_basic.9y,education_high.school,education_illiterate,education_professional.course,education_university.degree,education_unknown,default_no,default_unknown,default_yes,housing_no,housing_unknown,housing_yes,loan_no,loan_unknown,loan_yes,contact_cellular,contact_telephone,month_apr,month_aug,month_dec,month_jul,month_jun,month_mar,month_may,month_nov,month_oct,month_sep,day_of_week_fri,day_of_week_mon,day_of_week_thu,day_of_week_tue,day_of_week_wed,poutcome_failure,poutcome_nonexistent,poutcome_success,y_no,y_yes
0,56,1,999,0,1,0,0,0,0,1,0,0,0,0,0,0,0,0,0,1,0,0,1,0,0,0,0,0,0,0,1,0,0,1,0,0,1,0,0,0,1,0,0,0,0,0,0,1,0,0,0,0,1,0,0,0,0,1,0,1,0
1,57,1,999,0,1,0,0,0,0,0,0,0,0,1,0,0,0,0,0,1,0,0,0,0,0,1,0,0,0,0,0,1,0,1,0,0,1,0,0,0,1,0,0,0,0,0,0,1,0,0,0,0,1,0,0,0,0,1,0,1,0
2,37,1,999,0,1,0,0,0,0,0,0,0,0,1,0,0,0,0,0,1,0,0,0,0,0,1,0,0,0,0,1,0,0,0,0,1,1,0,0,0,1,0,0,0,0,0,0,1,0,0,0,0,1,0,0,0,0,1,0,1,0
3,40,1,999,0,1,0,1,0,0,0,0,0,0,0,0,0,0,0,0,1,0,0,0,1,0,0,0,0,0,0,1,0,0,1,0,0,1,0,0,0,1,0,0,0,0,0,0,1,0,0,0,0,1,0,0,0,0,1,0,1,0
以下のコードをコンソールで実行します。シャッフルしたデータをNumpyを使ってトレーニングデータとテストデータに7:3の割合で分割します。
train_data, test_data = np.split(model_data.sample(frac=1, random_state=1729), [int(0.7 * len(model_data))])
print(train_data.shape, test_data.shape)

MLモデルのトレーニング
トレーニングデータに対してトレーニングJobを実行し、予測に使用できるMLモデルを作成します。
以下のコードをコンソールで実行します。トレーニングデータをCSV形式でS3 Bucketにアップロードした上で、SageMakerのトレーニングJobで使用できるようにロードします。
pd.concat([train_data['y_yes'], train_data.drop(['y_no', 'y_yes'], axis=1)], axis=1).to_csv('train.csv', index=False, header=False)
boto3.Session().resource('s3').Bucket(bucket_name).Object(os.path.join(prefix, 'train/train.csv')).upload_file('train.csv')
s3_input_train = sagemaker.inputs.TrainingInput(s3_data='s3://{}/{}/train'.format(bucket_name, prefix), content_type='csv')

以下のコードをコンソールで実行します。XGBoostモデルによる推論を行うためのインスタンスを作成し、モデルのハイパーパラメータを定義します。XGBoost (eXtreme Gradient Boosting) は広く使われるツリーアルゴリズムのオープンソース実装です。
sess = sagemaker.Session()
xgb = sagemaker.estimator.Estimator(xgboost_container,role, instance_count=1, instance_type='ml.m4.xlarge',output_path='s3://{}/{}/output'.format(bucket_name, prefix),sagemaker_session=sess)
xgb.set_hyperparameters(max_depth=5,eta=0.2,gamma=4,min_child_weight=6,subsample=0.8,silent=0,objective='binary:logistic',num_round=100)

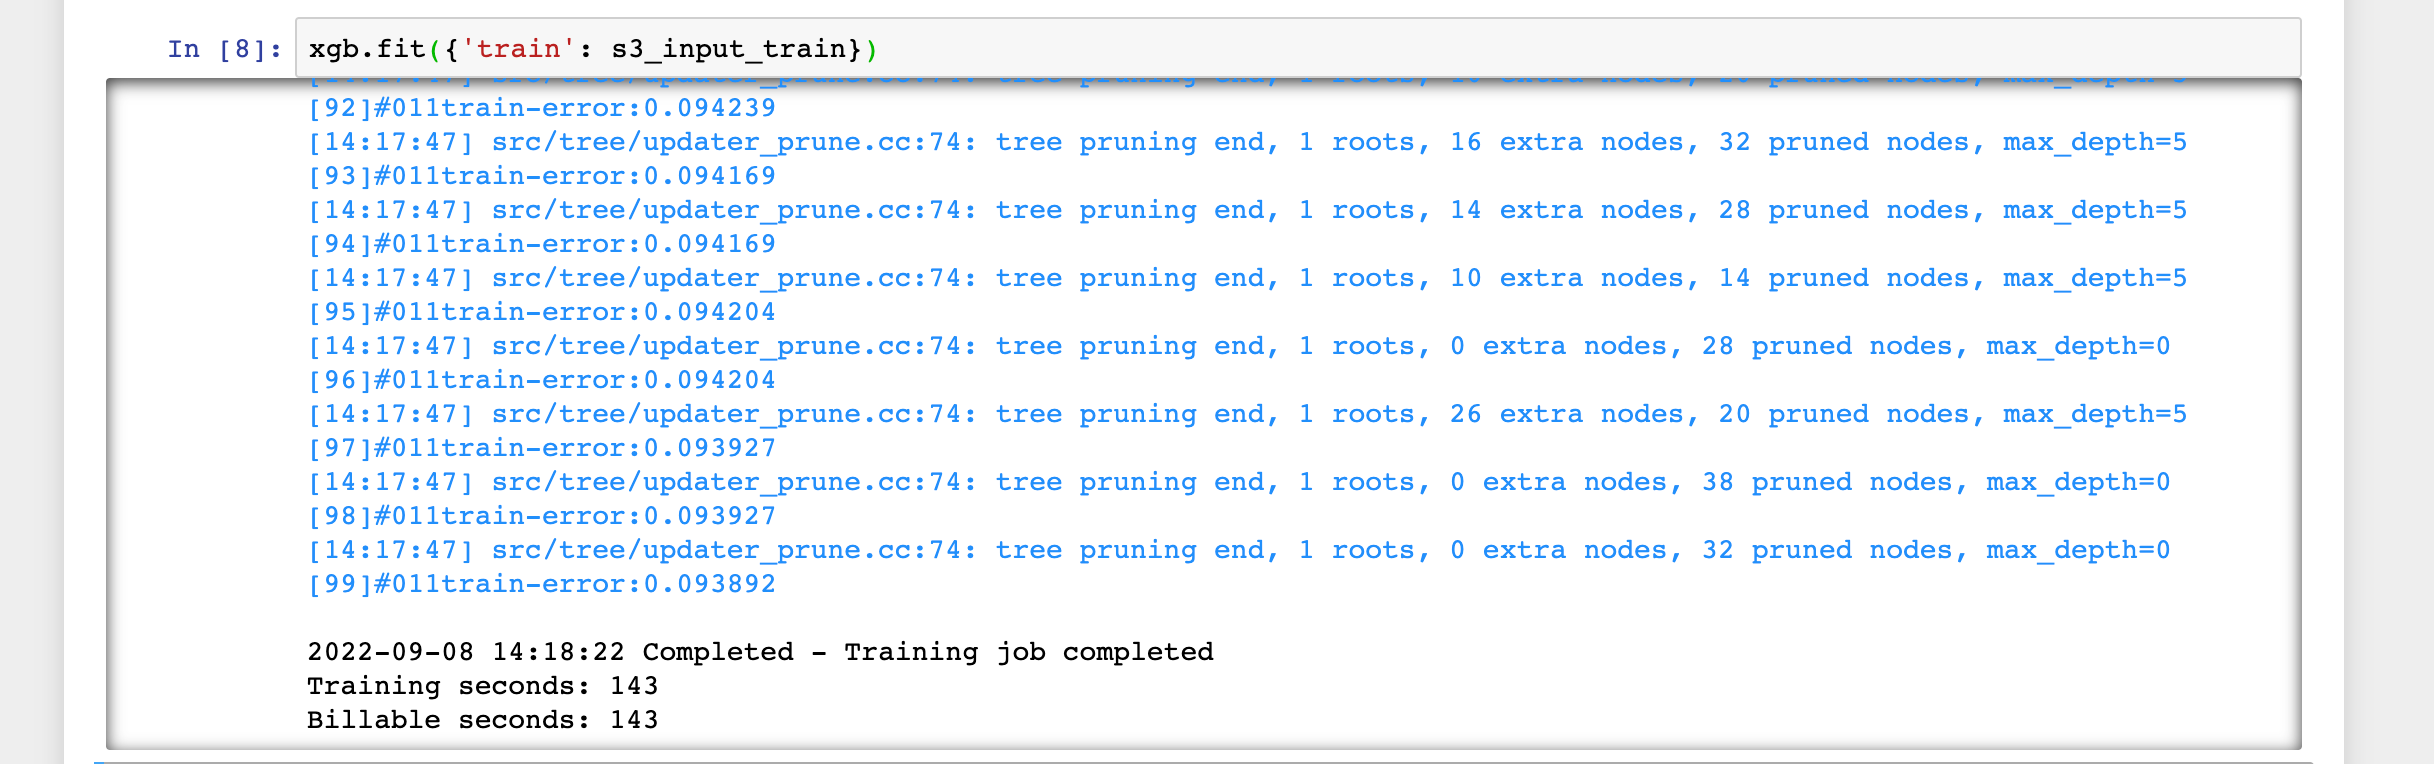
以下のコードをコンソールで実行してトレーニングJobを開始します。
xgb.fit({'train': s3_input_train})

Jobが開始されました。
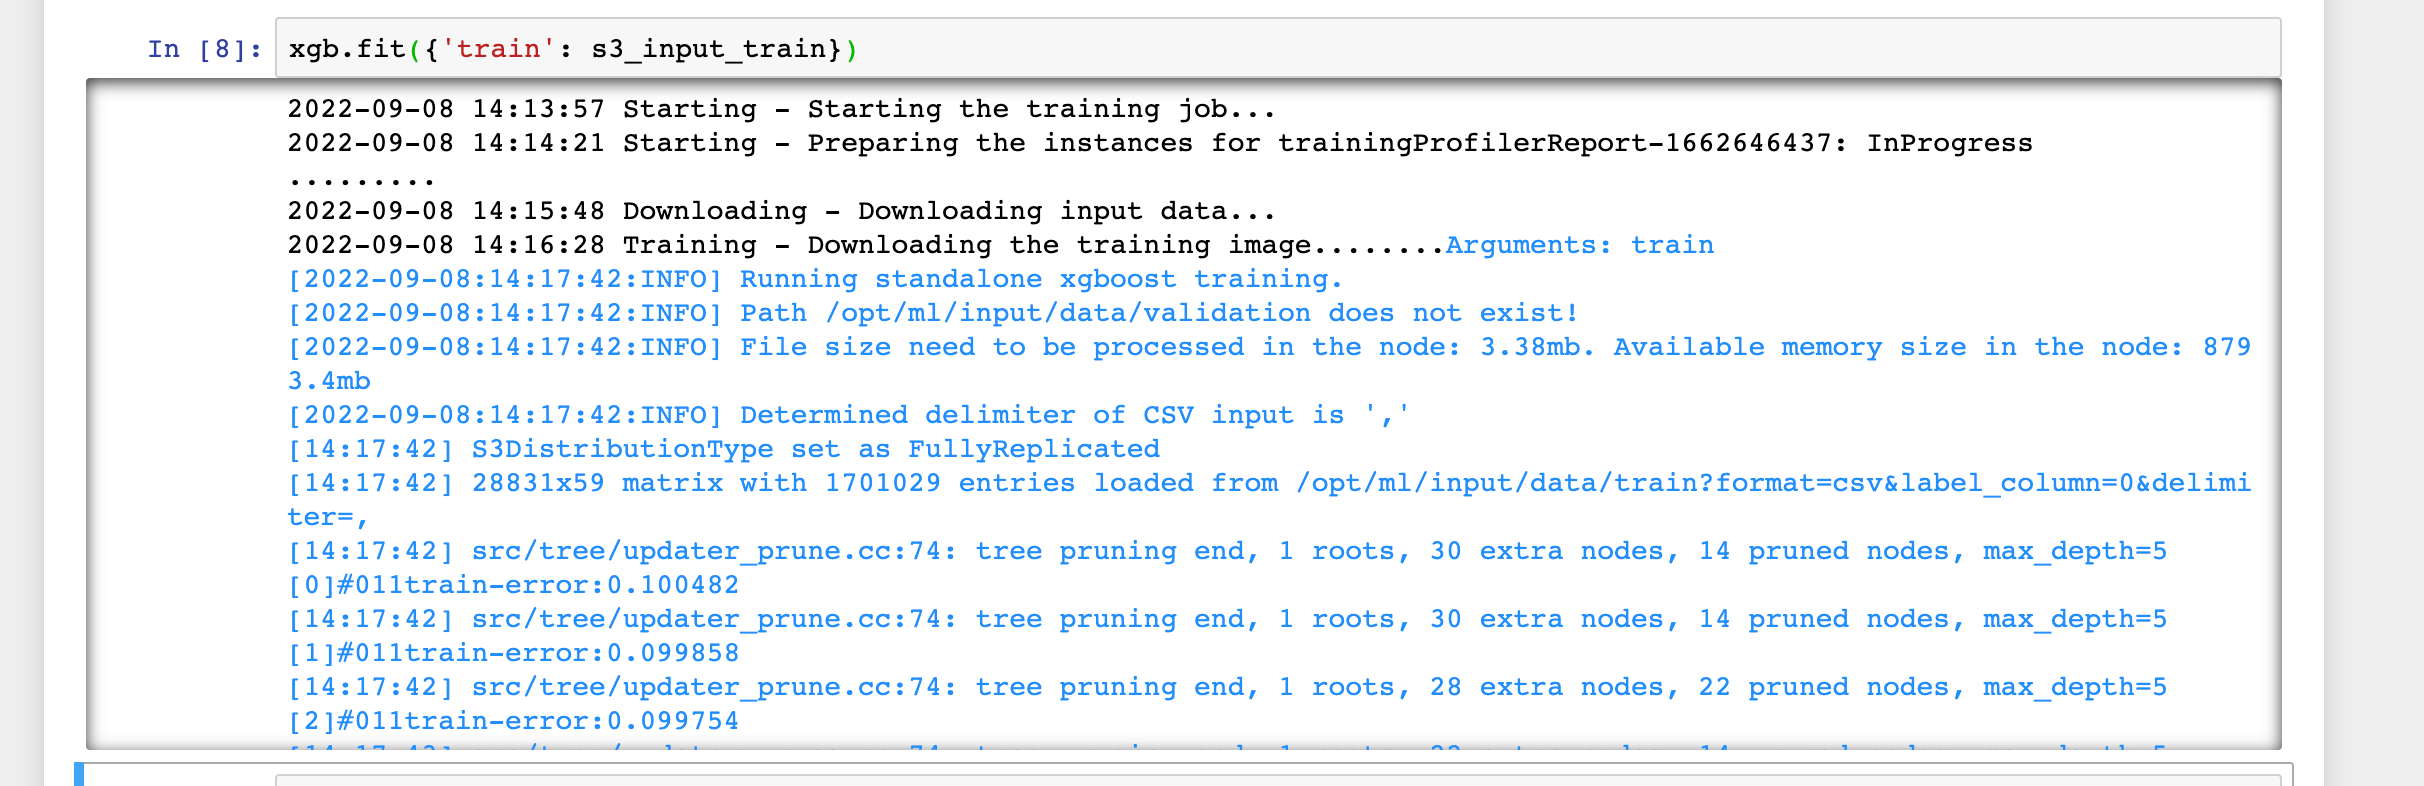
2,3分ほど待つと完了しました。
モデルのデプロイと予測実施
以下のコードをコンソールで実行し、MLモデルをデプロイしてSageMakerエンドポイントを作成します。SageMakerエンドポイントはリアルタイムで予測実施が可能であり、スケーラブルでマネージドなREST APIエンドポイントです。
xgb_predictor = xgb.deploy(initial_instance_count=1,instance_type='ml.m4.xlarge')
デプロイの完了までに2,3分を要します。

下記のように------!と出力されればデプロイは完了です。

デプロイしたエンドポイントを使って、テストデータから各顧客が商品に申し込んだかどうかの予測を実施します。テストデータからは申し込んだかどうかを表す列(y_noおよびy_yes)を予測実施前に削除しておきます。
from sagemaker.serializers import CSVSerializer

test_data_array = test_data.drop(['y_no', 'y_yes'], axis=1).values #load the data into an array
xgb_predictor.serializer = CSVSerializer() # set the serializer type
predictions = xgb_predictor.predict(test_data_array).decode('utf-8') # predict!
predictions_array = np.fromstring(predictions[1:], sep=',') # and turn the prediction into an array
print(predictions_array.shape)

モデルの性能評価
以下のコードをコンソールで実行し、実際の値と予測値を比較してモデルの性能評価を行います。
cm = pd.crosstab(index=test_data['y_yes'], columns=np.round(predictions_array), rownames=['Observed'], colnames=['Predicted'])
tn = cm.iloc[0,0]; fn = cm.iloc[1,0]; tp = cm.iloc[1,1]; fp = cm.iloc[0,1]; p = (tp+tn)/(tp+tn+fp+fn)*100
print("\n{0:<20}{1:<4.1f}%\n".format("Overall Classification Rate: ", p))
print("{0:<15}{1:<15}{2:>8}".format("Predicted", "No Purchase", "Purchase"))
print("Observed")
print("{0:<15}{1:<2.0f}% ({2:<}){3:>6.0f}% ({4:<})".format("No Purchase", tn/(tn+fn)*100,tn, fp/(tp+fp)*100, fp))
print("{0:<16}{1:<1.0f}% ({2:<}){3:>7.0f}% ({4:<}) \n".format("Purchase", fn/(tn+fn)*100,fn, tp/(tp+fp)*100, tp))
テストデータ中の89.5%の顧客データに対して、申込みをしなかった場合は90%、申込みを行った場合は63%の精度で予測ができたとの性能評価結果を得ることができました。

クリーンアップ
以下のコードをコンソールで実行し、SageMakerエンドポイントを削除します。
xgb_predictor.delete_endpoint(delete_endpoint_config=True)
ノートブックインスタンスを停止し、削除します。
おわりに
Amazon SageMakerによる機械学習モデルの構築からデプロイまでを実施できる10分間チュートリアルをやってみました。
SageMakerによるMLモデルによる予測実施の基本的な手順を一通りこなせたかと思います。トレーニングに予測にはもっと時間を要するものだという思い込みがありましたが、それぞれ数分で実施できたのは助かりました。
参考
以上


