ALB 配下の Amazon Linux 2023 に GitLab をインストールする
はじめに
GitLab のセルフホスト版の検証環境を用意する機会があったので、設定手順を記事にしました。
過去にも同様の手順での記事がありますので、あわせてご参照ください。
また、メール設定に関しては以下の記事を参考とさせていただきました。
前提条件
以下の環境を使用しています。
- GitLab Self-Managed:Enterprise Edition をインストール
- EC2 インスタンス
- OS:Amazon Linux 2023
- インスタンスタイプ:t3.large
- ネットワーク
- プライベートサブネットに構築
- 前段に ALB を用意し、SSL オフロードにより HTTPS 要求は ALB で終了し、HTTP 経由で GitLab インスタンスと通信を行う
- ACMで証明書を取得済み
- ALB などのリソースは作成済み
- Route53 にて検証用 DNS ホストゾーンを作成済み
各種参考情報は以下の通りです。
サポートされるプラットフォーム
要件
Amazon Linux 2023へのインストール手順
インストール
EC2インスタンスを作成後、サーバーに接続し以下を実行しました。
#パッケージの更新確認・アップデート
sudo dnf upgrade --releasever=latest
sudo dnf check-upgrade --releasever=latest
GitLab をインストールするために、パッケージのダウンロード元となるリポジトリをシステムに登録します。
curl "https://packages.gitlab.com/install/repositories/gitlab/gitlab-ee/script.rpm.sh" | sudo bash
リポジトリの登録後、GitLab の本体をインストールします。
sudo dnf install -y gitlab-ee
以下のようになれば問題ありません。
$ sudo dnf install -y gitlab-ee
Last metadata expiration check: 0:03:03 ago on Wed Aug 27 11:49:42 2025.
Dependencies resolved.
=============================================================================================================================================================
 Package                          Architecture                  Version                                        Repository                               Size
=============================================================================================================================================================
Installing:
 gitlab-ee                        x86_64                        18.3.0-ee.0.amazon2023                         gitlab_gitlab-ee                        1.5 G

Transaction Summary
=============================================================================================================================================================
Install  1 Package

Total download size: 1.5 G
Installed size: 3.7 G
Downloading Packages:
gitlab-ee-18.3.0-ee.0.amazon2023.x86_64.rpm                                                                                  117 MB/s | 1.5 GB     00:12
-------------------------------------------------------------------------------------------------------------------------------------------------------------
Total                                                                                                                        117 MB/s | 1.5 GB     00:12
gitlab_gitlab-ee                                                                                                              27 kB/s | 3.1 kB     00:00
Importing GPG key 0x51312F3F:
 Userid     : "GitLab B.V. (package repository signing key) <packages@gitlab.com>"
 Fingerprint: F640 3F65 44A3 8863 DAA0 B6E0 3F01 618A 5131 2F3F
 From       : https://packages.gitlab.com/gitlab/gitlab-ee/gpgkey
Key imported successfully
gitlab_gitlab-ee                                                                                                              60 kB/s | 7.0 kB     00:00
Importing GPG key 0xF27EAB47:
 Userid     : "GitLab, Inc. <support@gitlab.com>"
 Fingerprint: DBEF 8977 4DDB 9EB3 7D9F C3A0 3CFC F9BA F27E AB47
 From       : https://packages.gitlab.com/gitlab/gitlab-ee/gpgkey/gitlab-gitlab-ee-3D645A26AB9FBD22.pub.gpg
Key imported successfully
gitlab_gitlab-ee                                                                                                              43 kB/s | 3.8 kB     00:00
Importing GPG key 0x82DD593D:
 Userid     : "GitLab, Inc. <support@gitlab.com>"
 Fingerprint: 98BF DB87 FCF1 0076 416C 1E0B AD99 7ACC 82DD 593D
 From       : https://packages.gitlab.com/gitlab/gitlab-ee/gpgkey/gitlab-gitlab-ee-CB947AD886C8E8FD.pub.gpg
Key imported successfully
Running transaction check
Transaction check succeeded.
Running transaction test
Transaction test succeeded.
Running transaction
  Preparing        :                                                                                                                                     1/1
  Running scriptlet: gitlab-ee-18.3.0-ee.0.amazon2023.x86_64                                                                                             1/1
  Installing       : gitlab-ee-18.3.0-ee.0.amazon2023.x86_64                                                                                             1/1
  Running scriptlet: gitlab-ee-18.3.0-ee.0.amazon2023.x86_64                                                                                             1/1
It looks like GitLab has not been configured yet; skipping the upgrade script.
         .                        ..
        :c:                      ,cc'
       :ccc:                    'cccc.
      :ccccc,                   cccccc
     .ccccccc                  :cccccc:
     cccccccc:                .cccccccc'
    :ccccccccc;..............'cccccccccc'
   cccccccccccccccccccccccccccccccccccccc'
  :ooolccccccccccccccccccccccccccccccllooo
  ooooooollccccccccccccccccccccccclooooooo
  ;ooooooooollcccccccccccccccccloooooooool
   oooooooooooolccccccccccccloooooooooooo.
    .ooooooooooooolcccccclloooooooooooo;
       cooooooooooooolllooooooooooooo.
          loooooooodxkkxddoooooooo.
            .ooodxkkkkkkkkxdooo;
               .kkkkkkkkkkkk:
                  ;kkkkkkx
                     :d

Thank you for installing GitLab!
GitLab was unable to detect a valid hostname for your instance.
Please configure a URL for your GitLab instance by setting `external_url`
configuration in /etc/gitlab/gitlab.rb file.
Then, you can start your GitLab instance by running the following command:
  sudo gitlab-ctl reconfigure

For a comprehensive list of configuration options please see the Omnibus GitLab readme
https://gitlab.com/gitlab-org/omnibus-gitlab/blob/master/README.md

Help us improve the installation experience, let us know how we did with a 1 minute survey:
https://gitlab.fra1.qualtrics.com/jfe/form/SV_6kVqZANThUQ1bZb?installation=omnibus&release=18-3

  Verifying        : gitlab-ee-18.3.0-ee.0.amazon2023.x86_64                                                                                             1/1

Installed:
  gitlab-ee-18.3.0-ee.0.amazon2023.x86_64

Complete!
GitLab の初期ユーザーは「root」の名称で作成されます。初期パスワードは以下のファイルに記載されているので、控えておきます。
$ sudo cat etc/gitlab/initial_root_password
# WARNING: This value is valid only in the following conditions
#          1. If provided manually (either via `GITLAB_ROOT_PASSWORD` environment variable or via `gitlab_rails['initial_root_password']` setting in `gitlab.rb`, it was provided before database was seeded for the first time (usually, the first reconfigure run).
#          2. Password hasn't been changed manually, either via UI or via command line.
#
#          If the password shown here doesn't work, you must reset the admin password following https://docs.gitlab.com/ee/security/reset_user_password.html#reset-your-root-password.

Password: <パスワード>

# NOTE: This file will be automatically deleted in the first reconfigure run after 24 hours.
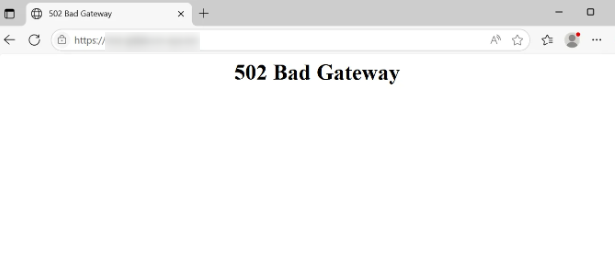
この時点で HTTPS 経由でアクセスすると下図の表示となります。
リバースプロキシまたはロードバランサーでSSLターミネーションを構成する
今回は前段に ALB を配置し、 HTTPS 要求は ALB で終了し、HTTP 経由で GitLab インスタンスと通信を行います。
この場合、以下に記載がある設定が必要です。
GitLab のインストール後、特定の機能を有効にするために設定ファイル(/etc/gitlab/gitlab.rb)を編集します。
ここでは以下のように関連項目を編集しました。
registry_external_url 'https://<GitLabへのFQDN>'

registry_nginx['listen_port'] = 80
registry_nginx['listen_https'] = false
設定ファイルを編集、保存後、以下のコマンドを実行して変更を GitLab に反映させます。
sudo gitlab-ctl reconfigure
この状態で再度アクセスすると下図のようになりました。
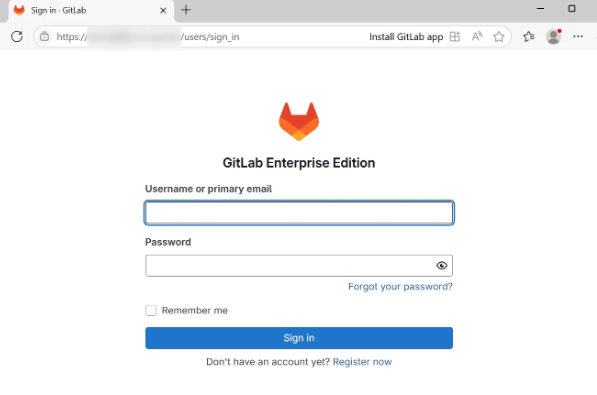
初期ユーザーでログインします。
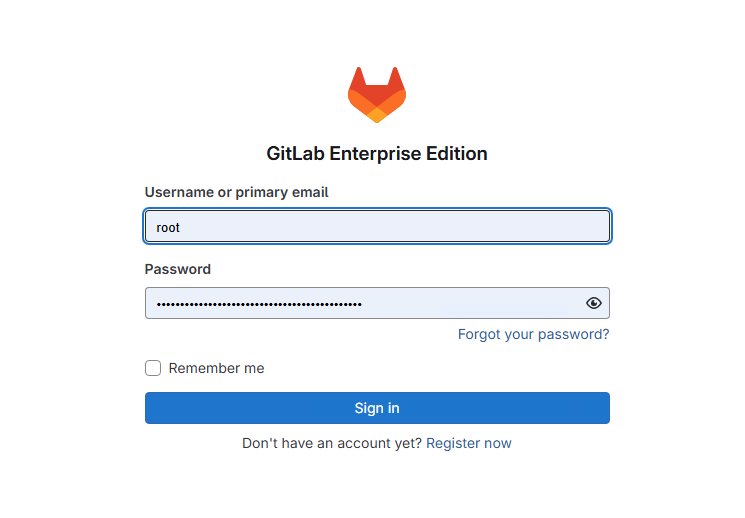
ログインできました。

SMTP 設定
ユーザー追加時など、メール通知の送信のための構成を行います。
Amazon SES を使用できるのでこちらを使用します。
ここではドメイン認証ではなく、簡単にメールアドレス認証を行います。事前に AWS 側でメールアドレスを検証し、SMTP 認証情報として以下を取得しておきます。
- SMTPユーザー名
- SMTPパスワード
GitLab 側では先と同様に/etc/gitlab/gitlab.rbを編集します。ドキュメントを参考に以下の項目を編集しました。
gitlab_rails['smtp_enable'] = true
gitlab_rails['smtp_address'] = "email-smtp.us-east-1.amazonaws.com"
gitlab_rails['smtp_port'] = 587
gitlab_rails['smtp_user_name'] = "<SMTPユーザー名>"
gitlab_rails['smtp_password'] = "SMTPパスワード"
gitlab_rails['smtp_authentication'] = "login"
gitlab_rails['smtp_enable_starttls_auto'] = true
さらに以下の項目を検証したメールアドレスに設定します。
gitlab_rails['gitlab_email_from'] = 'SESで検証したメールアドレス'
gitlab_rails['gitlab_email_reply_to'] = 'SESで検証したメールアドレス'
設定の変更後、反映します。
sudo gitlab-ctl reconfigure
sudo gitlab-ctl restart
設定が正しく適用されたことを確認するために、GitLab のコンソールからテストメールを送信できます。
sudo gitlab-rails console
上記のコマンドでコンソールに入った後、以下を実行します。
Notify.test_email('任意の送信先メールアドレス', 'Message Subject', 'Message Body').deliver_now
問題なければ下図のようなメールが届きます。

GitLab 上でユーザーを追加
メール設定後、ルートユーザーでログインしユーザーを追加しました。
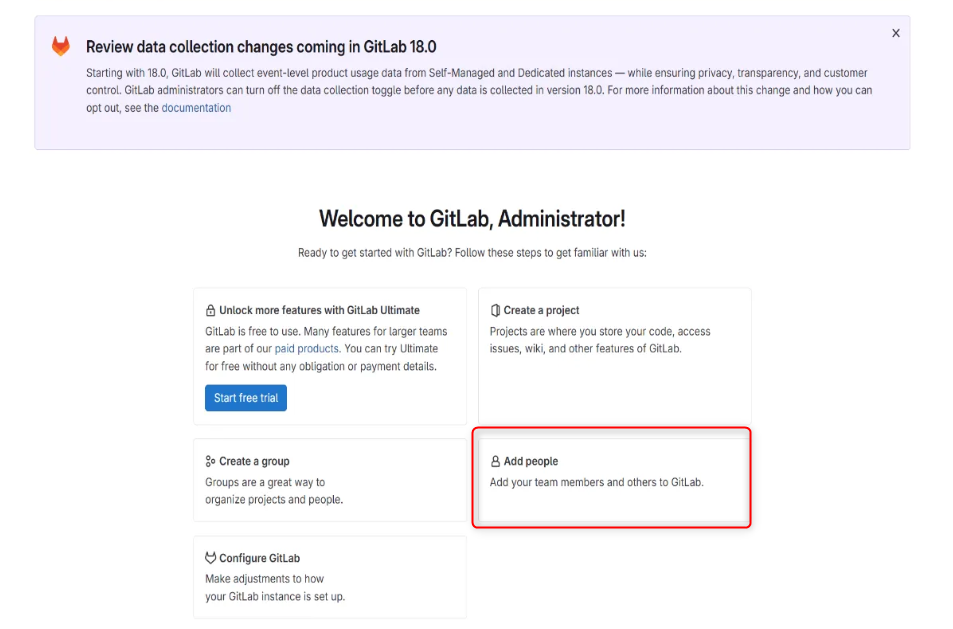
「Add Peopele」をクリックすると、下図の表示となるので、任意のユーザー名とメールアドレスを指定します。
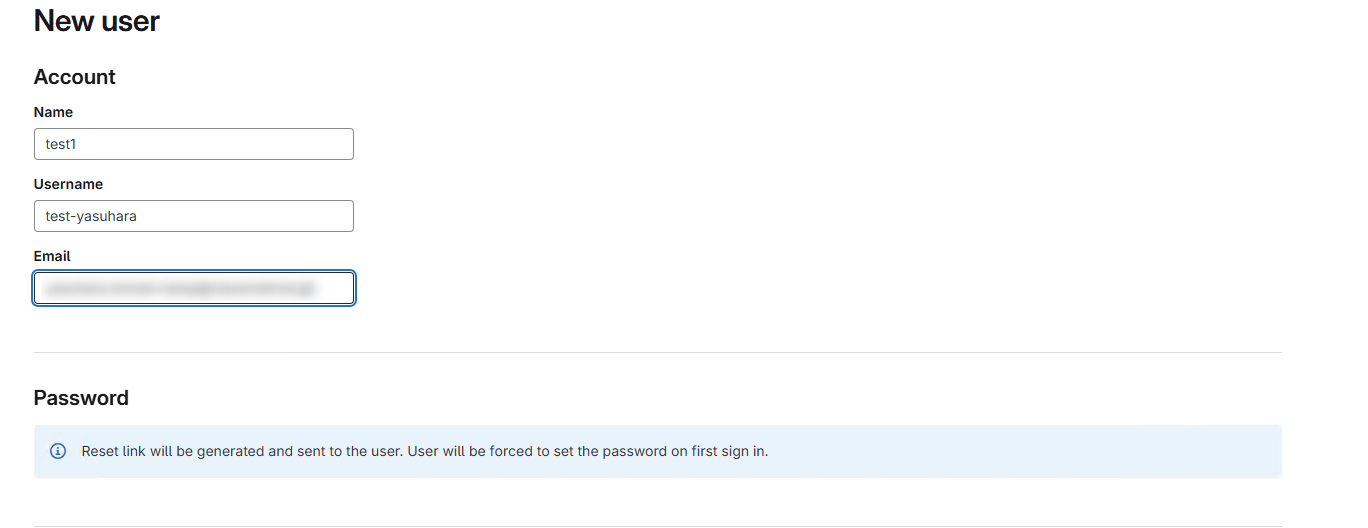
指定のメールアドレスにアカウント作成のメールが届きます。
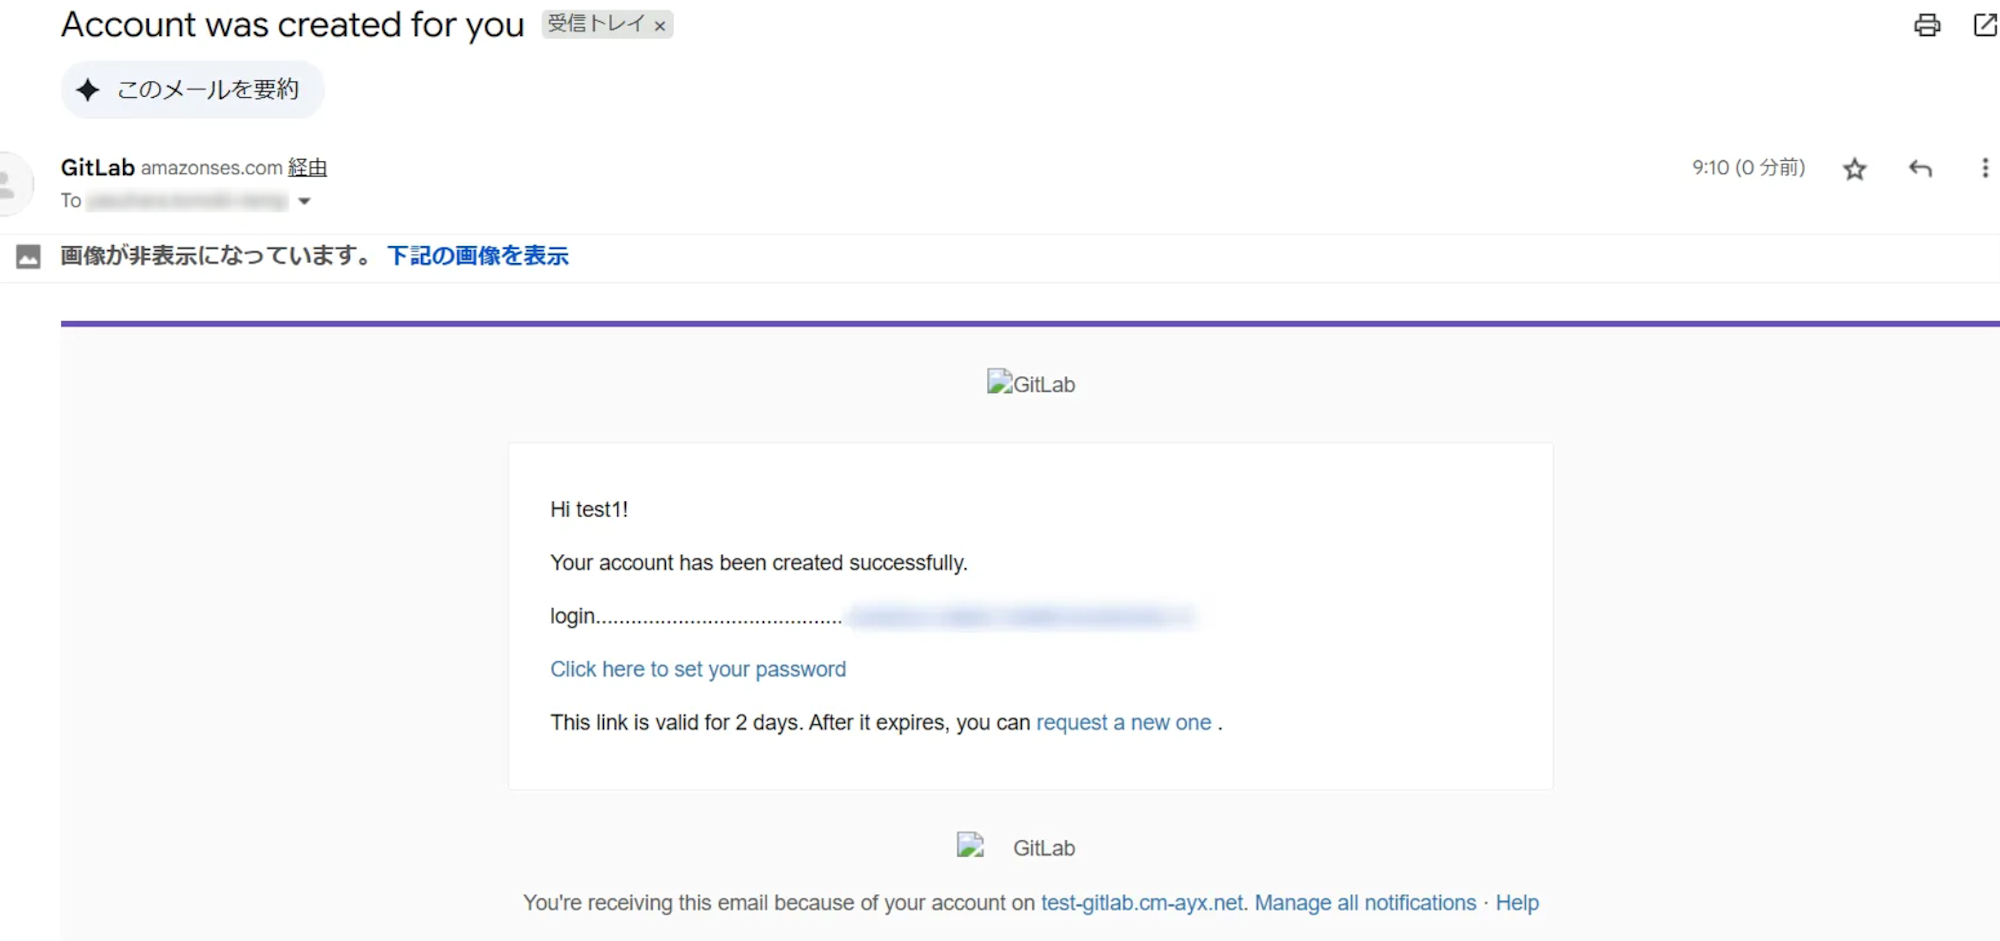
記載の URL からログインするとパスワードをリセットできます。
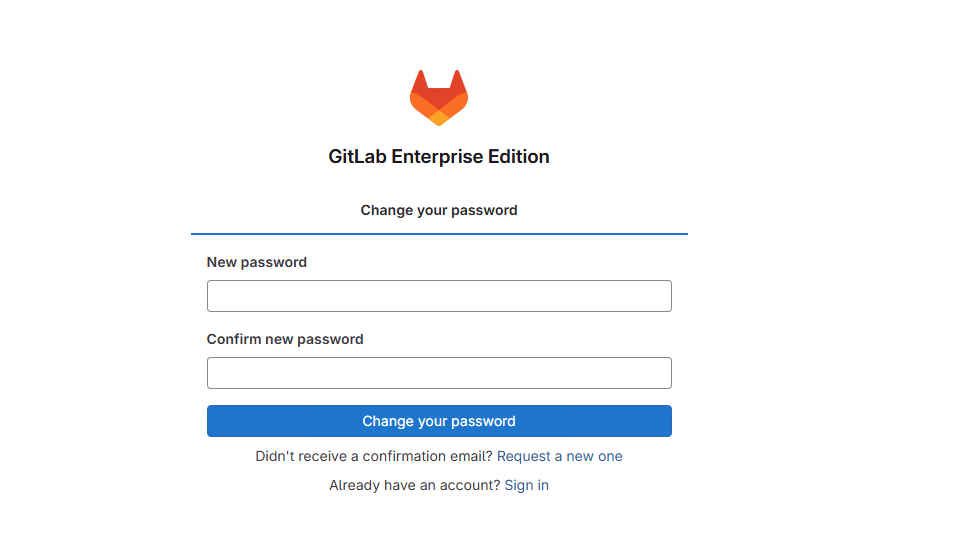
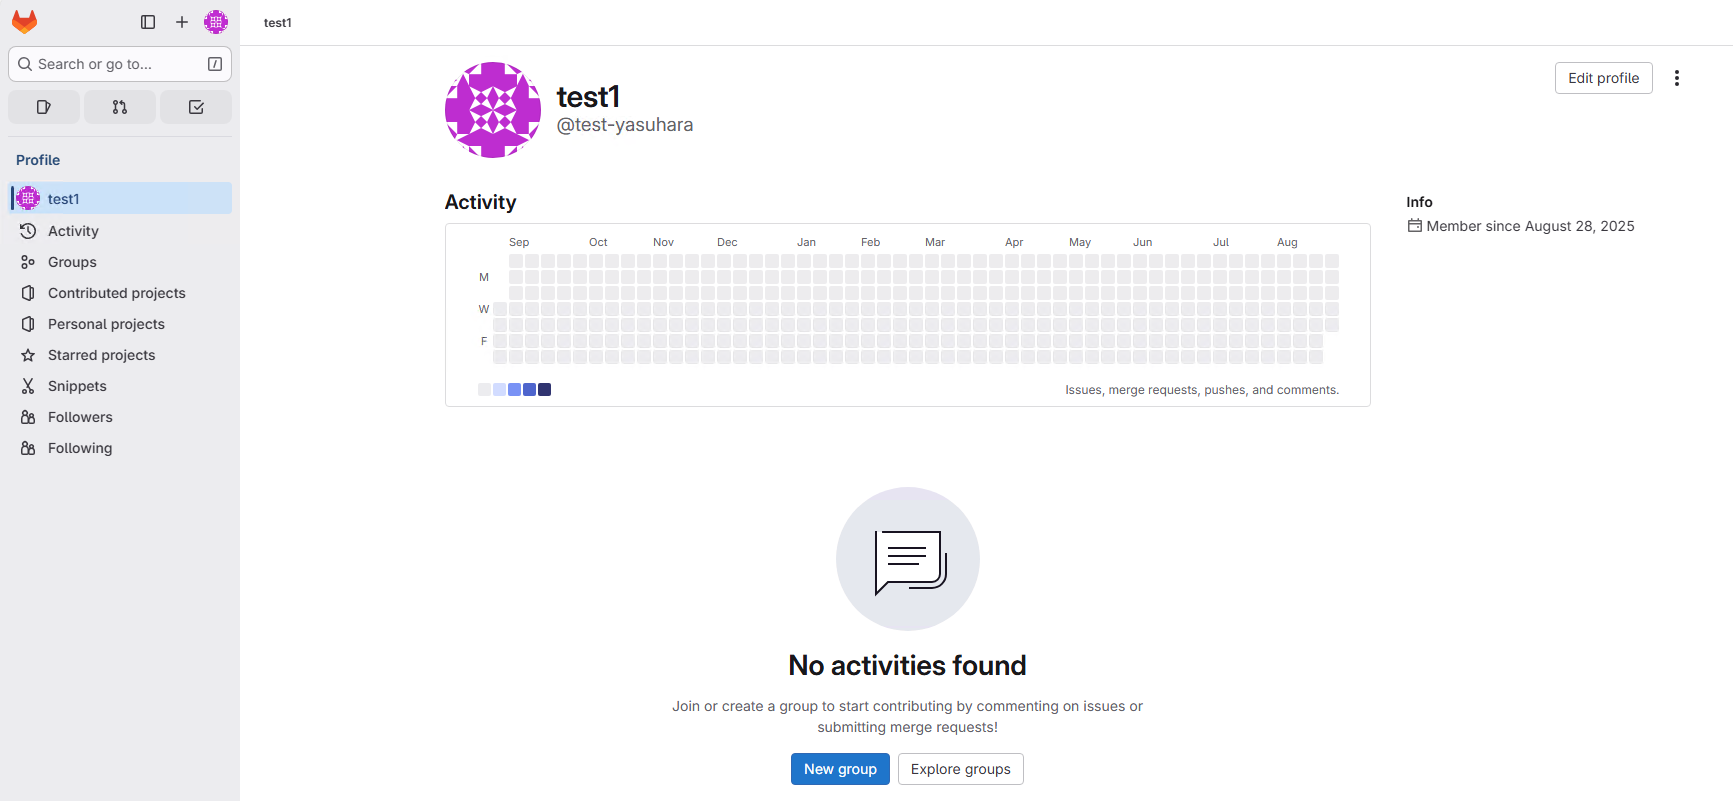
その後、新たに設定したパスワードでログインできました。
さいごに
ALB 配下に GttLab をインストールし、SSLターミネーションやメールに関する構成を試してみました。
こちらの内容が何かの参考になれば幸いです。