Amazon CodeCatalyst で Amazon Q に Issue 対応をさせてみた
この記事は公開されてから1年以上経過しています。情報が古い可能性がありますので、ご注意ください。
こんにちは、森田です。
Amazon CodeCatalyst では、 Amazon Q を使った便利な機能がいくつも搭載されています。
今回は、その中の1つである Amazon Q による Issue 対応を実際にやってみました。
Amazon Q による Issue 対応
Amazon CodeCatalyst の Issue で Amazon Q を担当者にアサインすると Issue に記載された指示に従って、コード生成を行います。
また、コード生成だけではなく、Pull Request(PR)の作成といった作業まで行ってくれる非常に便利な機能です。
やってみた
前提条件
事前にスペースは作成済みとします。
また、以下のようにスペースの設定で Generative AI を有効化済みにしておきます。
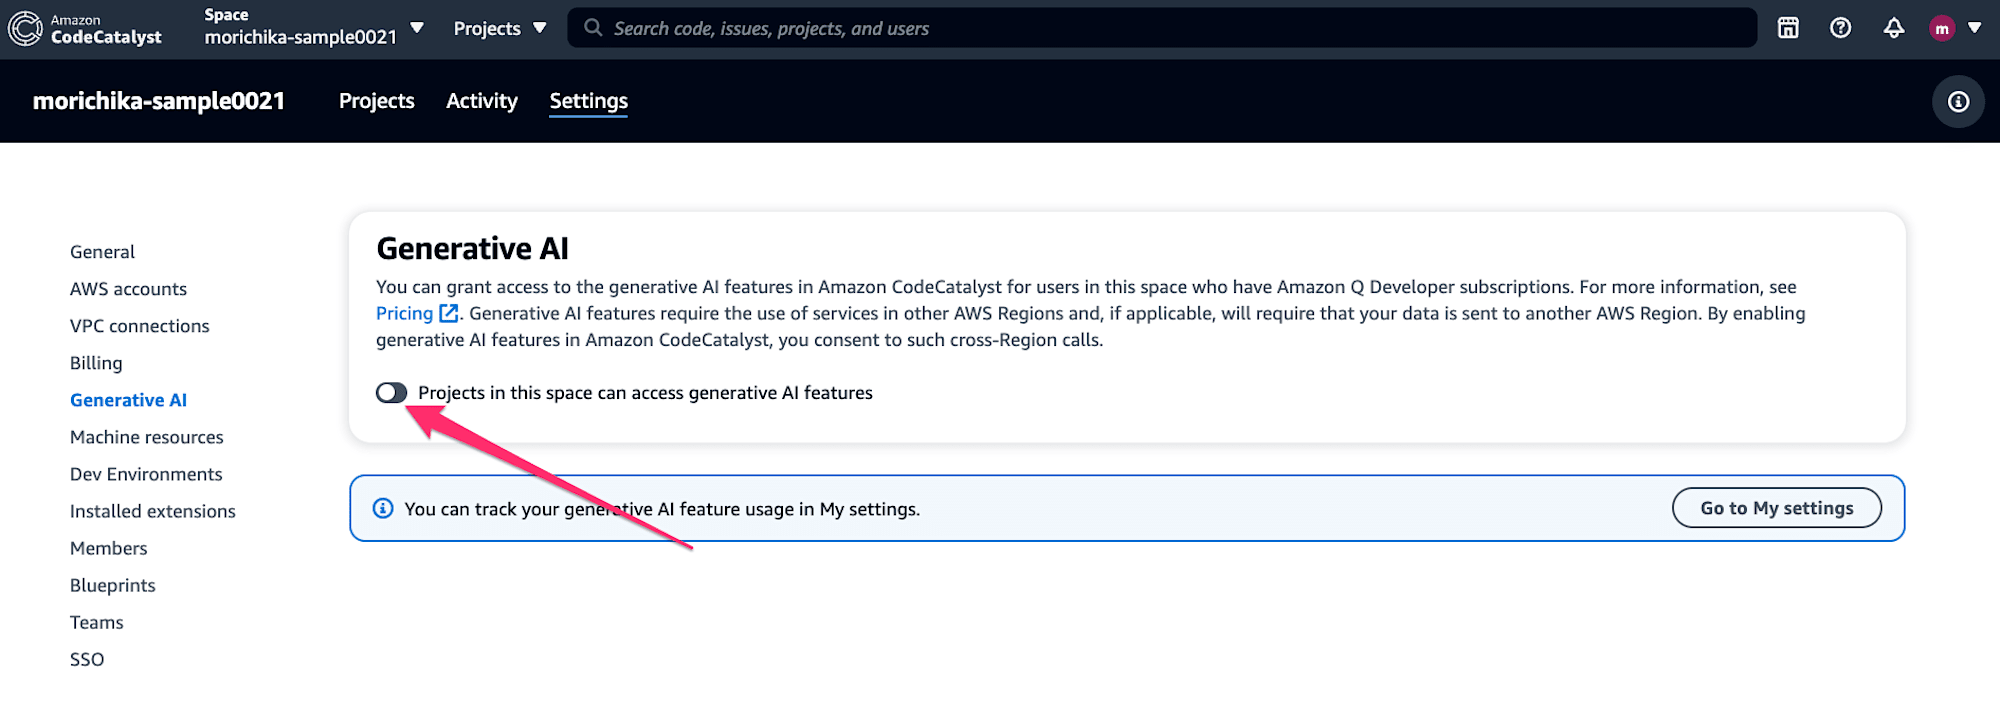
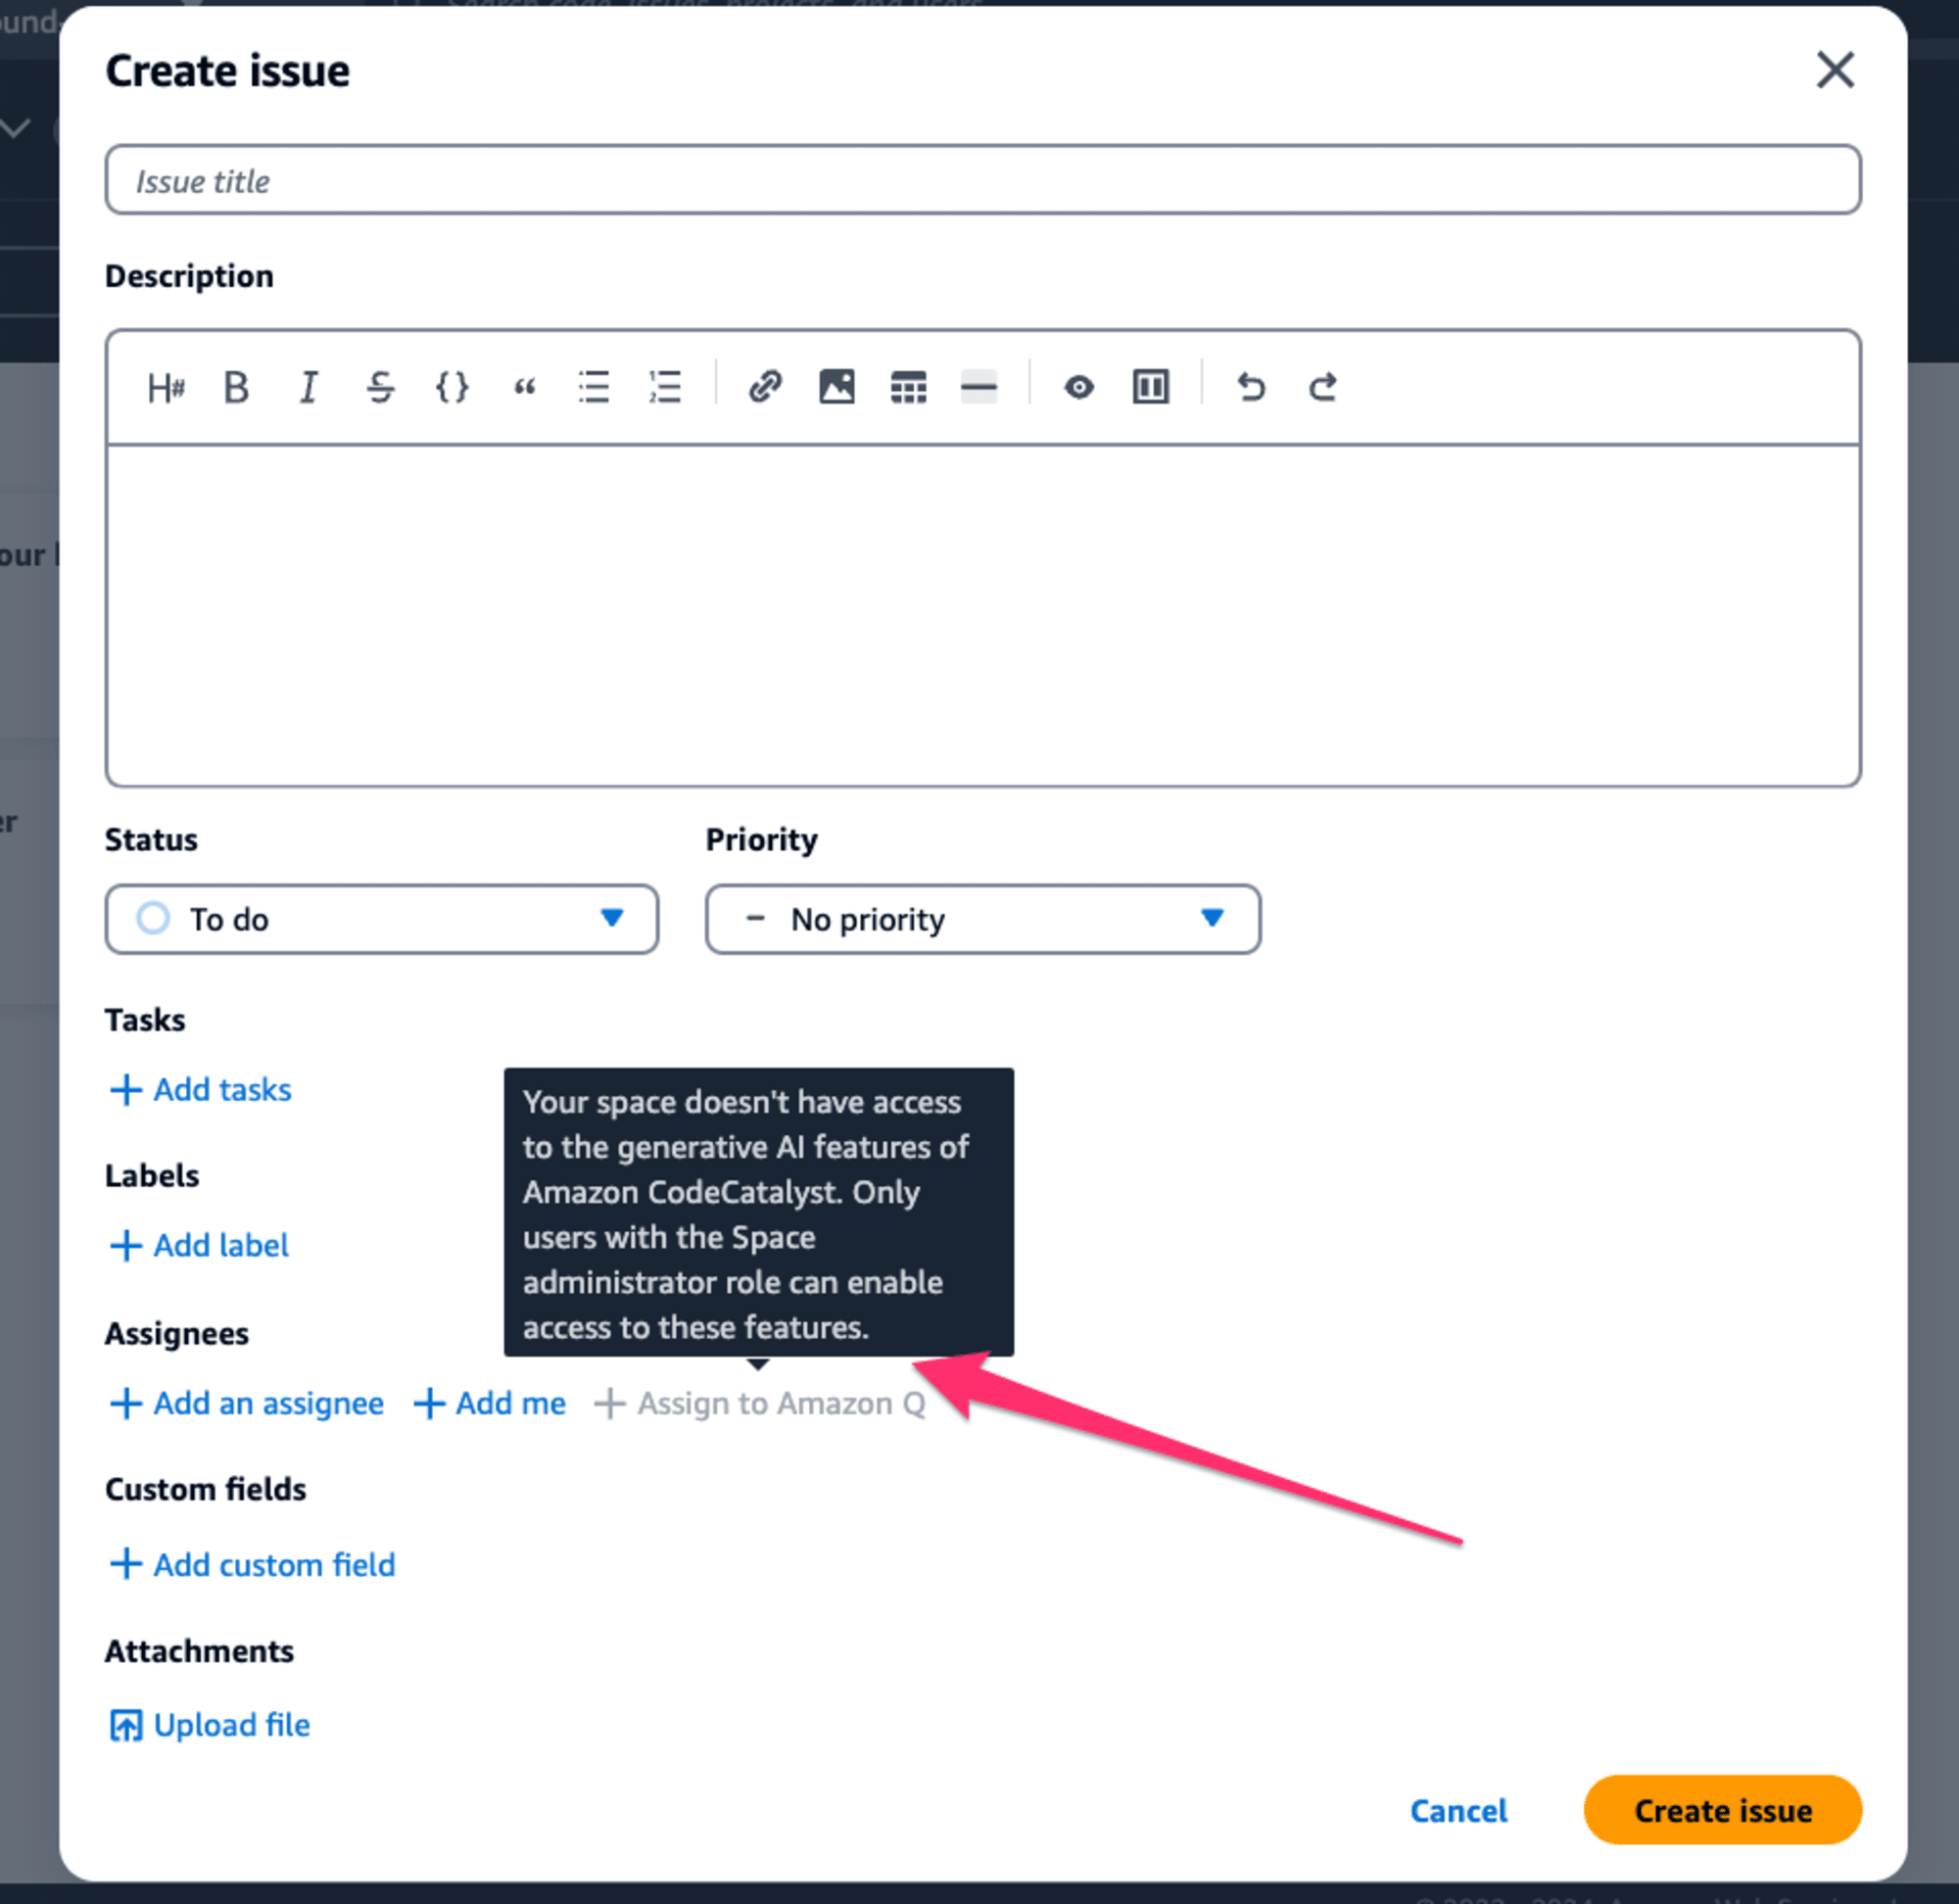
有効化済みにしていないと以下のように Amazon Q へのアサインができません。
プロジェクトの作成
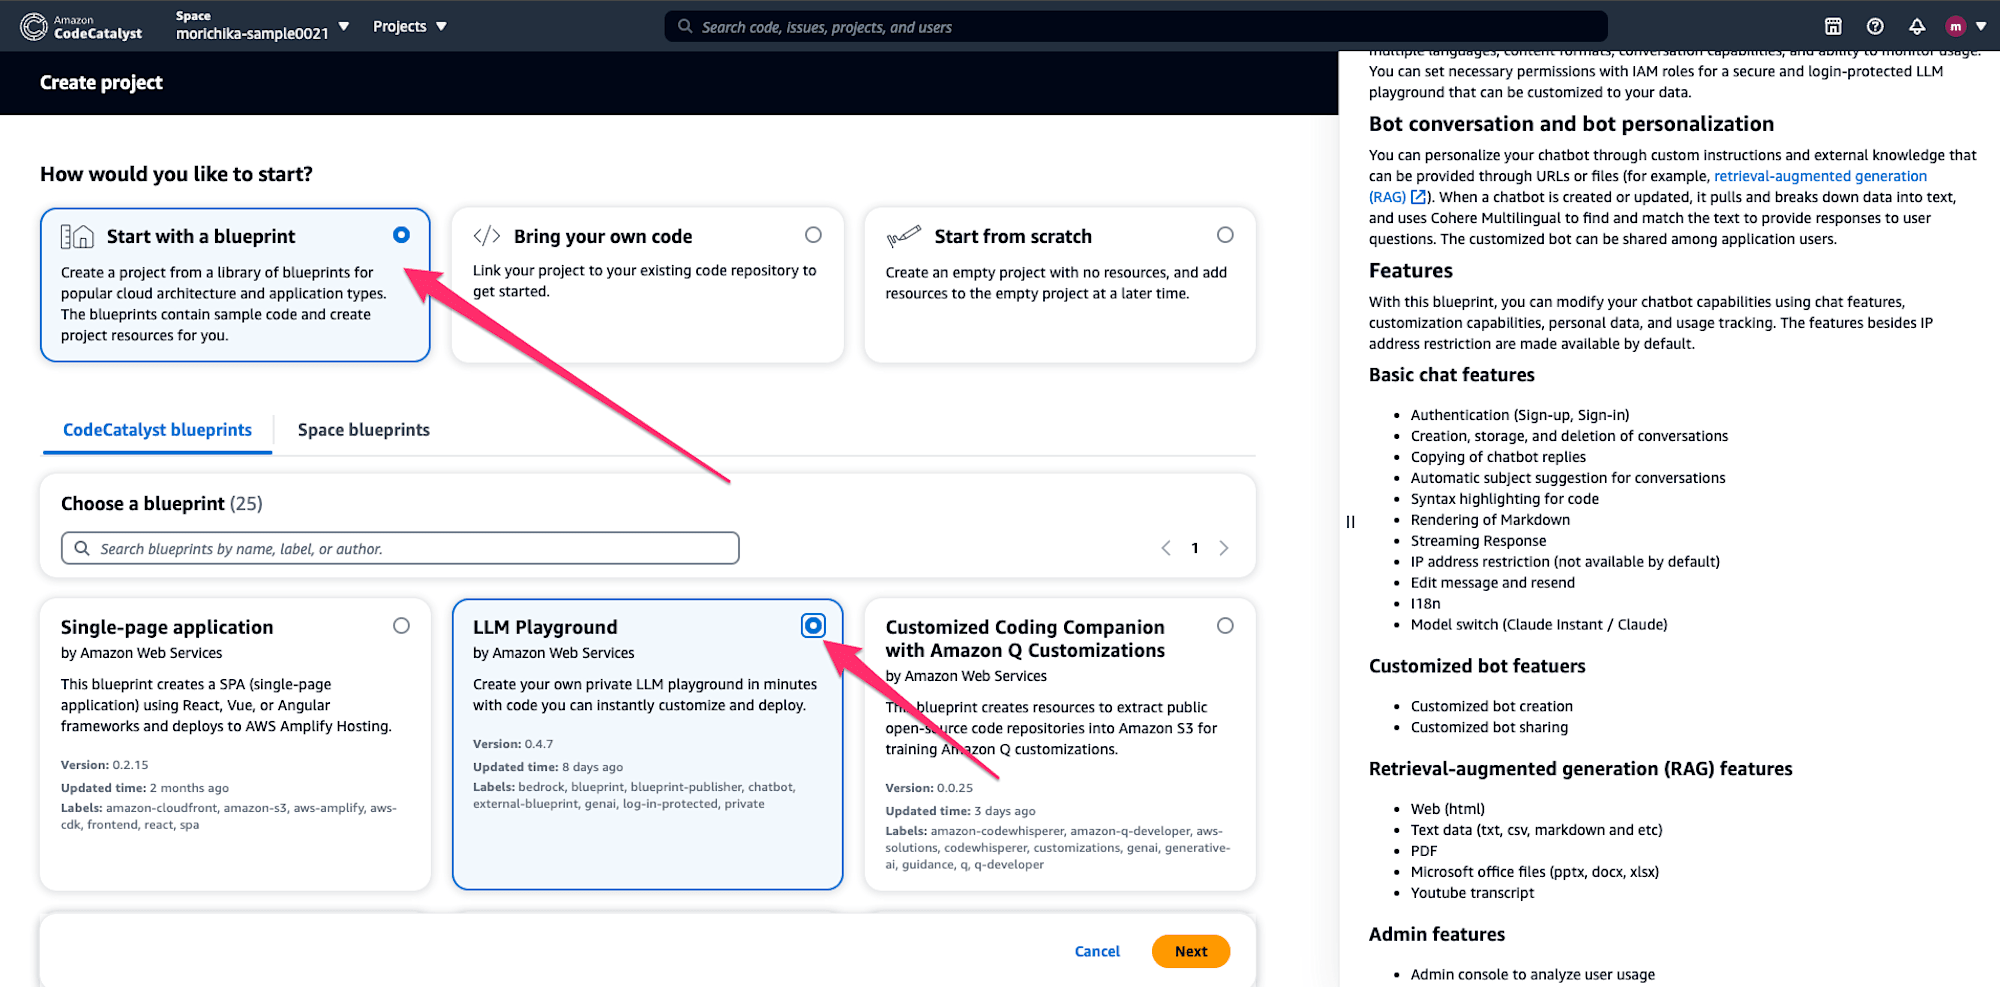
まずは、プロジェクトの作成を行います。
ゼロからのプロジェクトでも良いですが、せっかくですので、ブループリントを使って既存のプロジェクトに対しての作業をおこなってみます。
Issue の作成
プロジェクトの作成が完了したら、実際に Issue を作成して、Amazon Q へのアサインを行います。
今回は以下のような Issue を作成します。
Added CDK project overview to README.md.
Please add an overview of the CDK project to README.md.

In particular, please clearly explain the relationship between the AWS services you use and each stack.
今回は、英語で作成していますが、日本語でも問題なく動作するようでした。
Assigneeには、Amazon Qを選択し、 Require Amazon Q to stop after each step and await review of its work(各ステップの後に Amazon Q を停止し、作業のレビューを待つことを要求する) を選択して、Issue の作成を完了させます。
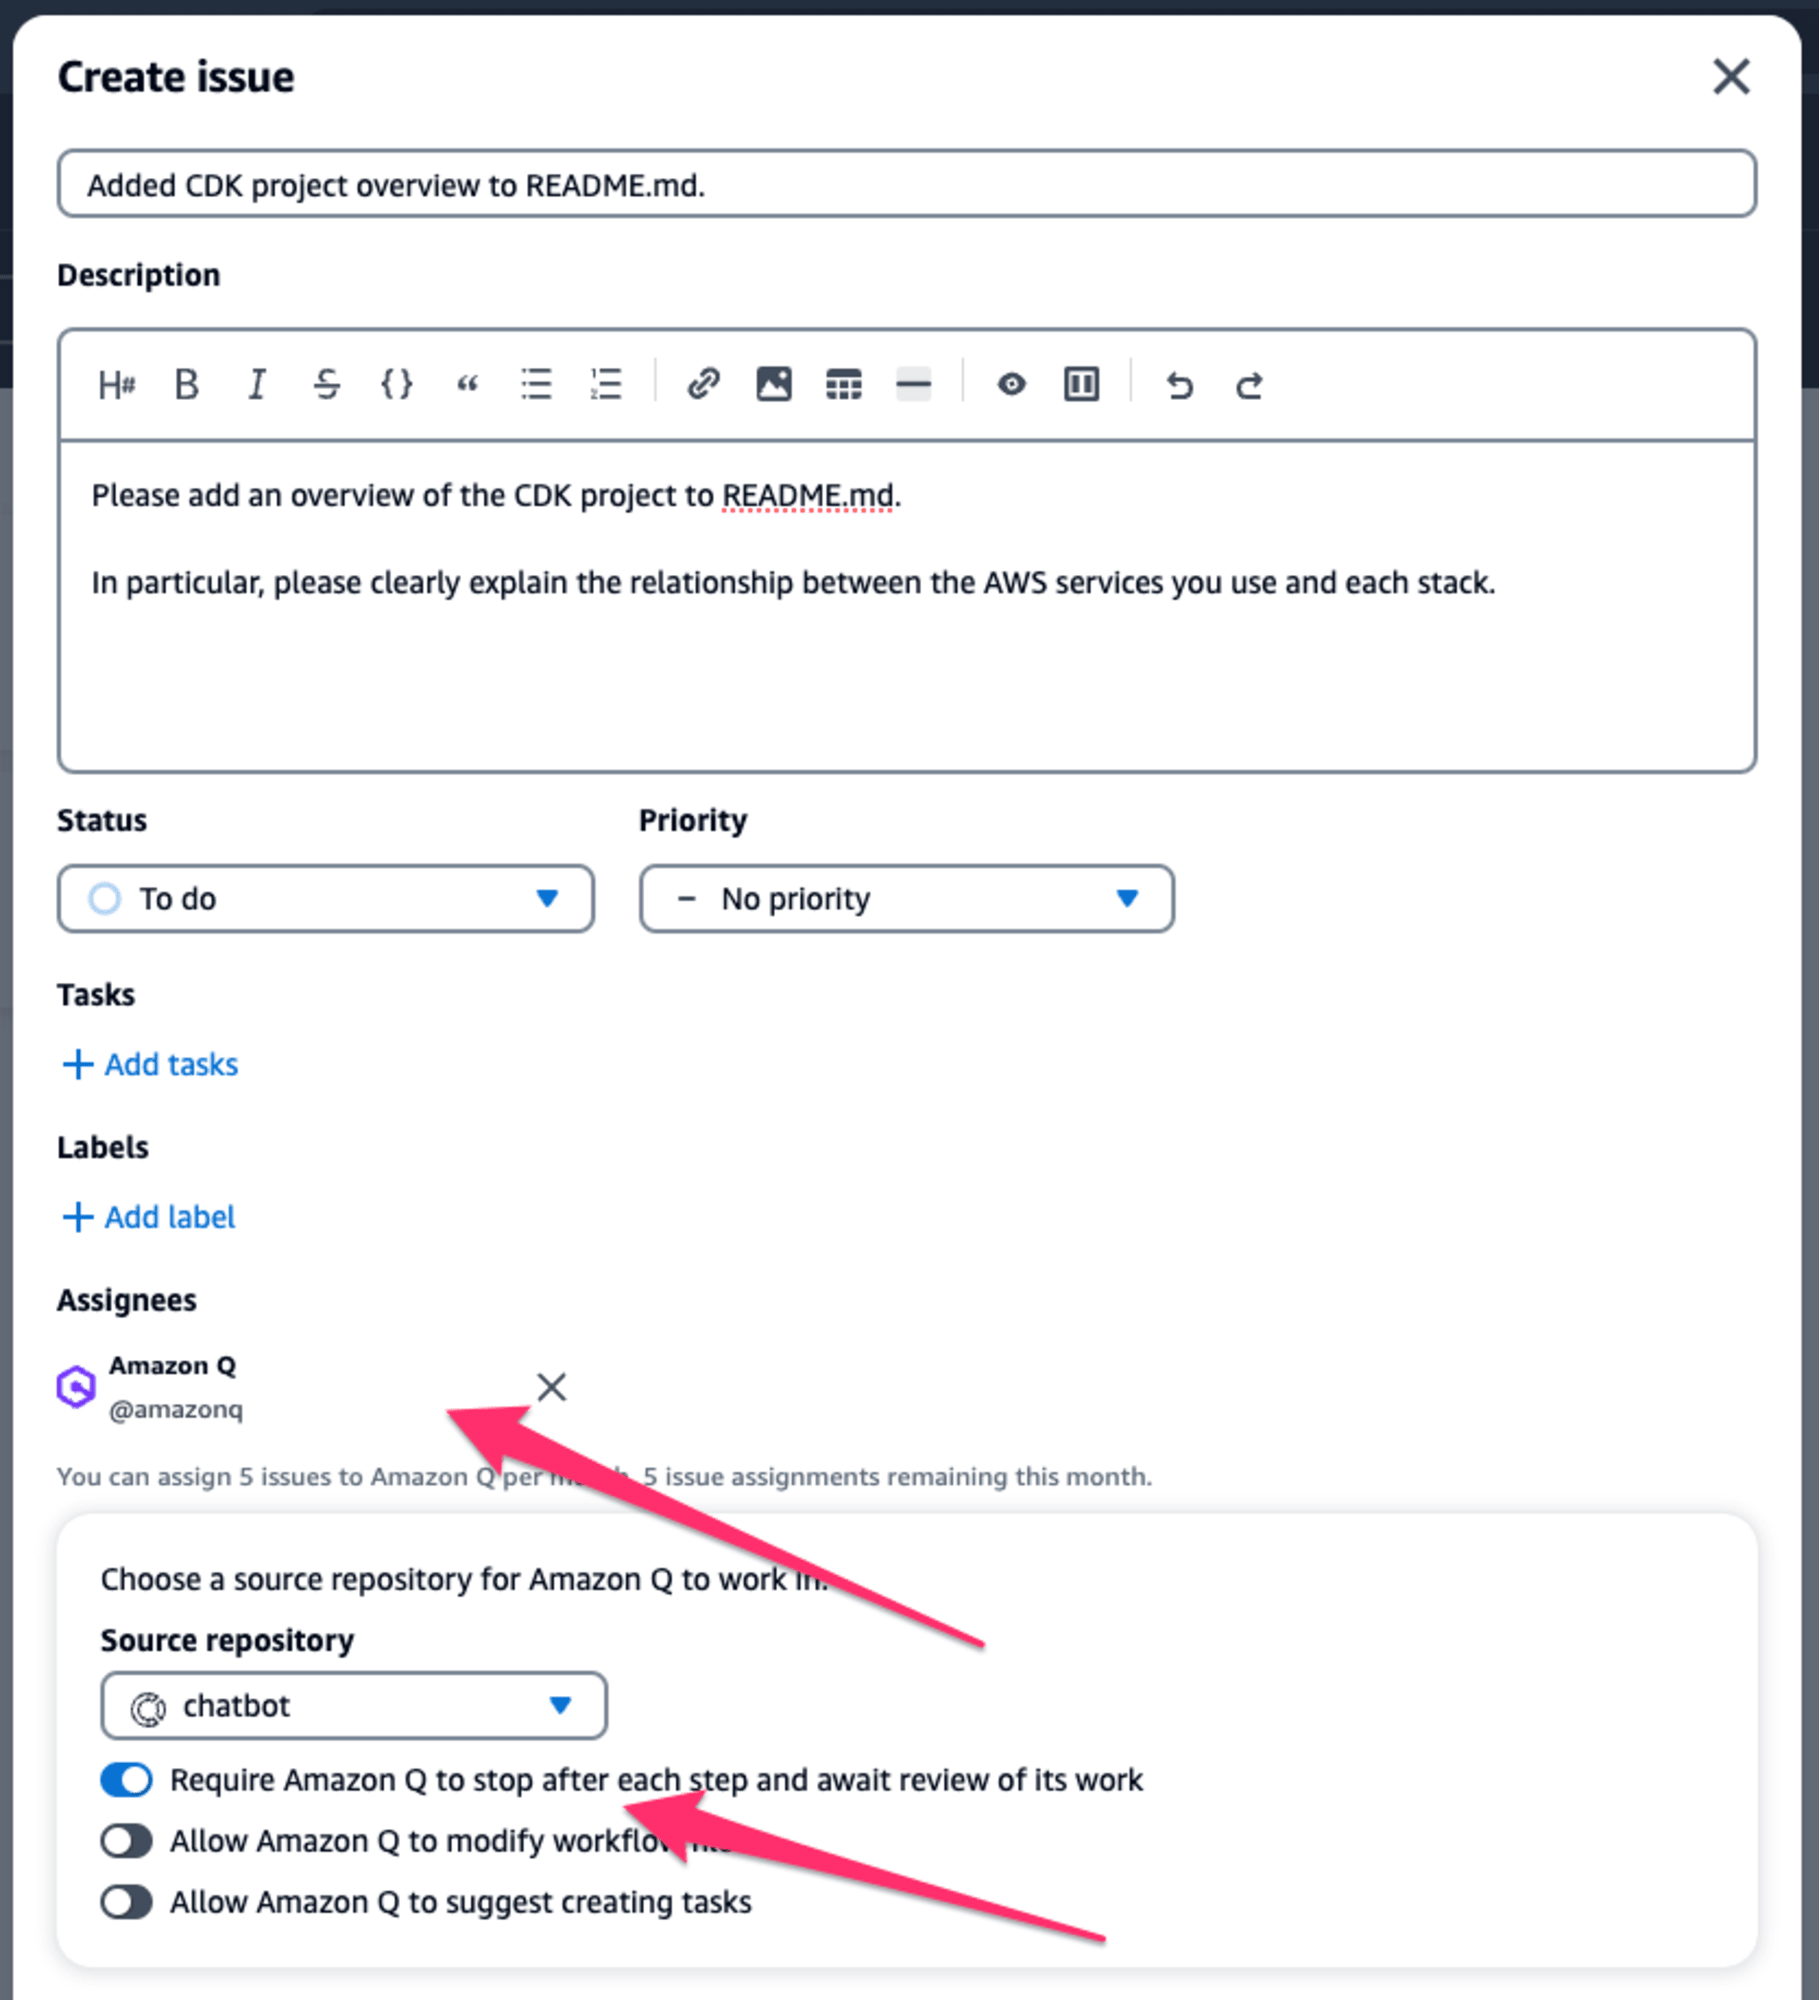
ここで3項目のトグルがありますが、それぞれ Amazon Q にどのような作業を行わせたいかによって有効化の可否を決めます。
例えば、コードの変更を行う場合であれば、Require Amazon Q to stop after each step and await review of its work は基本有効化しておくべきです。
この有効化を行っていない場合は、Amazon Qがコードの作成まで進めますが、実際に開発者が意図していない変更を提案してくる可能性があり、その場合は、再度コードの変更を Amazon Q へ依頼する必要があります。
提案内容の確認
Issue の作成後、しばらくすると、Amazon Q から提案内容が示されます。
提案内容
To accomplish the task of adding a CDK project overview to the README.md file, the following steps can be taken:

Update the README.md file:

File path: README.md
Code change:
Add a new section titled "CDK Project Overview" after the "Architecture" section.
In this new section, provide a high-level explanation of the CDK project, including the following information:
Describe the purpose and functionality of each stack in the CDK project:
chatbot-genai-cdk-stack.ts: This is the main stack that sets up the overall infrastructure for the Bedrock Claude Chat application, including the frontend, backend API, authentication, database, embedding, usage analysis, and WebSocket functionality.
api-publishment-stack.ts: This stack is responsible for the deployment and management of the published API, including the API Gateway, Lambda function, and associated resources.
frontend-waf-stack.ts: This stack sets up the CloudFront distribution and the associated Web Application Firewall (WAF) for the frontend application.
Explain how the different AWS services are utilized within each stack, such as:
DynamoDB for data storage
Cognito for user authentication
API Gateway and Lambda for the backend API
CloudFront and S3 for the frontend application
Aurora Serverless PostgreSQL for the vector store
Fargate and EventBridge Pipes for the embedding functionality
Athena and Glue for usage analysis
Mention any key dependencies or relationships between the stacks, such as the frontend stack relying on the resources created in the main stack.
Testing:

Review the updated README.md file to ensure the CDK project overview is clear and accurately reflects the functionality of the different stacks.
Testing scenarios:
Verify that the overview provides a high-level understanding of the purpose and functionality of each stack.
Ensure the explanations of the AWS services used within each stack are accurate and comprehensive.
Check that the relationships and dependencies between the stacks are clearly explained.
By following these steps, you can add a comprehensive CDK project overview to the README.md file, which will help users understand the overall structure and functionality of the Bedrock Claude Chat application.
提案内容の下部に以下のような「Proceed」と「Reply」のボタンが表示されますので、今回は、「Proceed」を選択してみます。
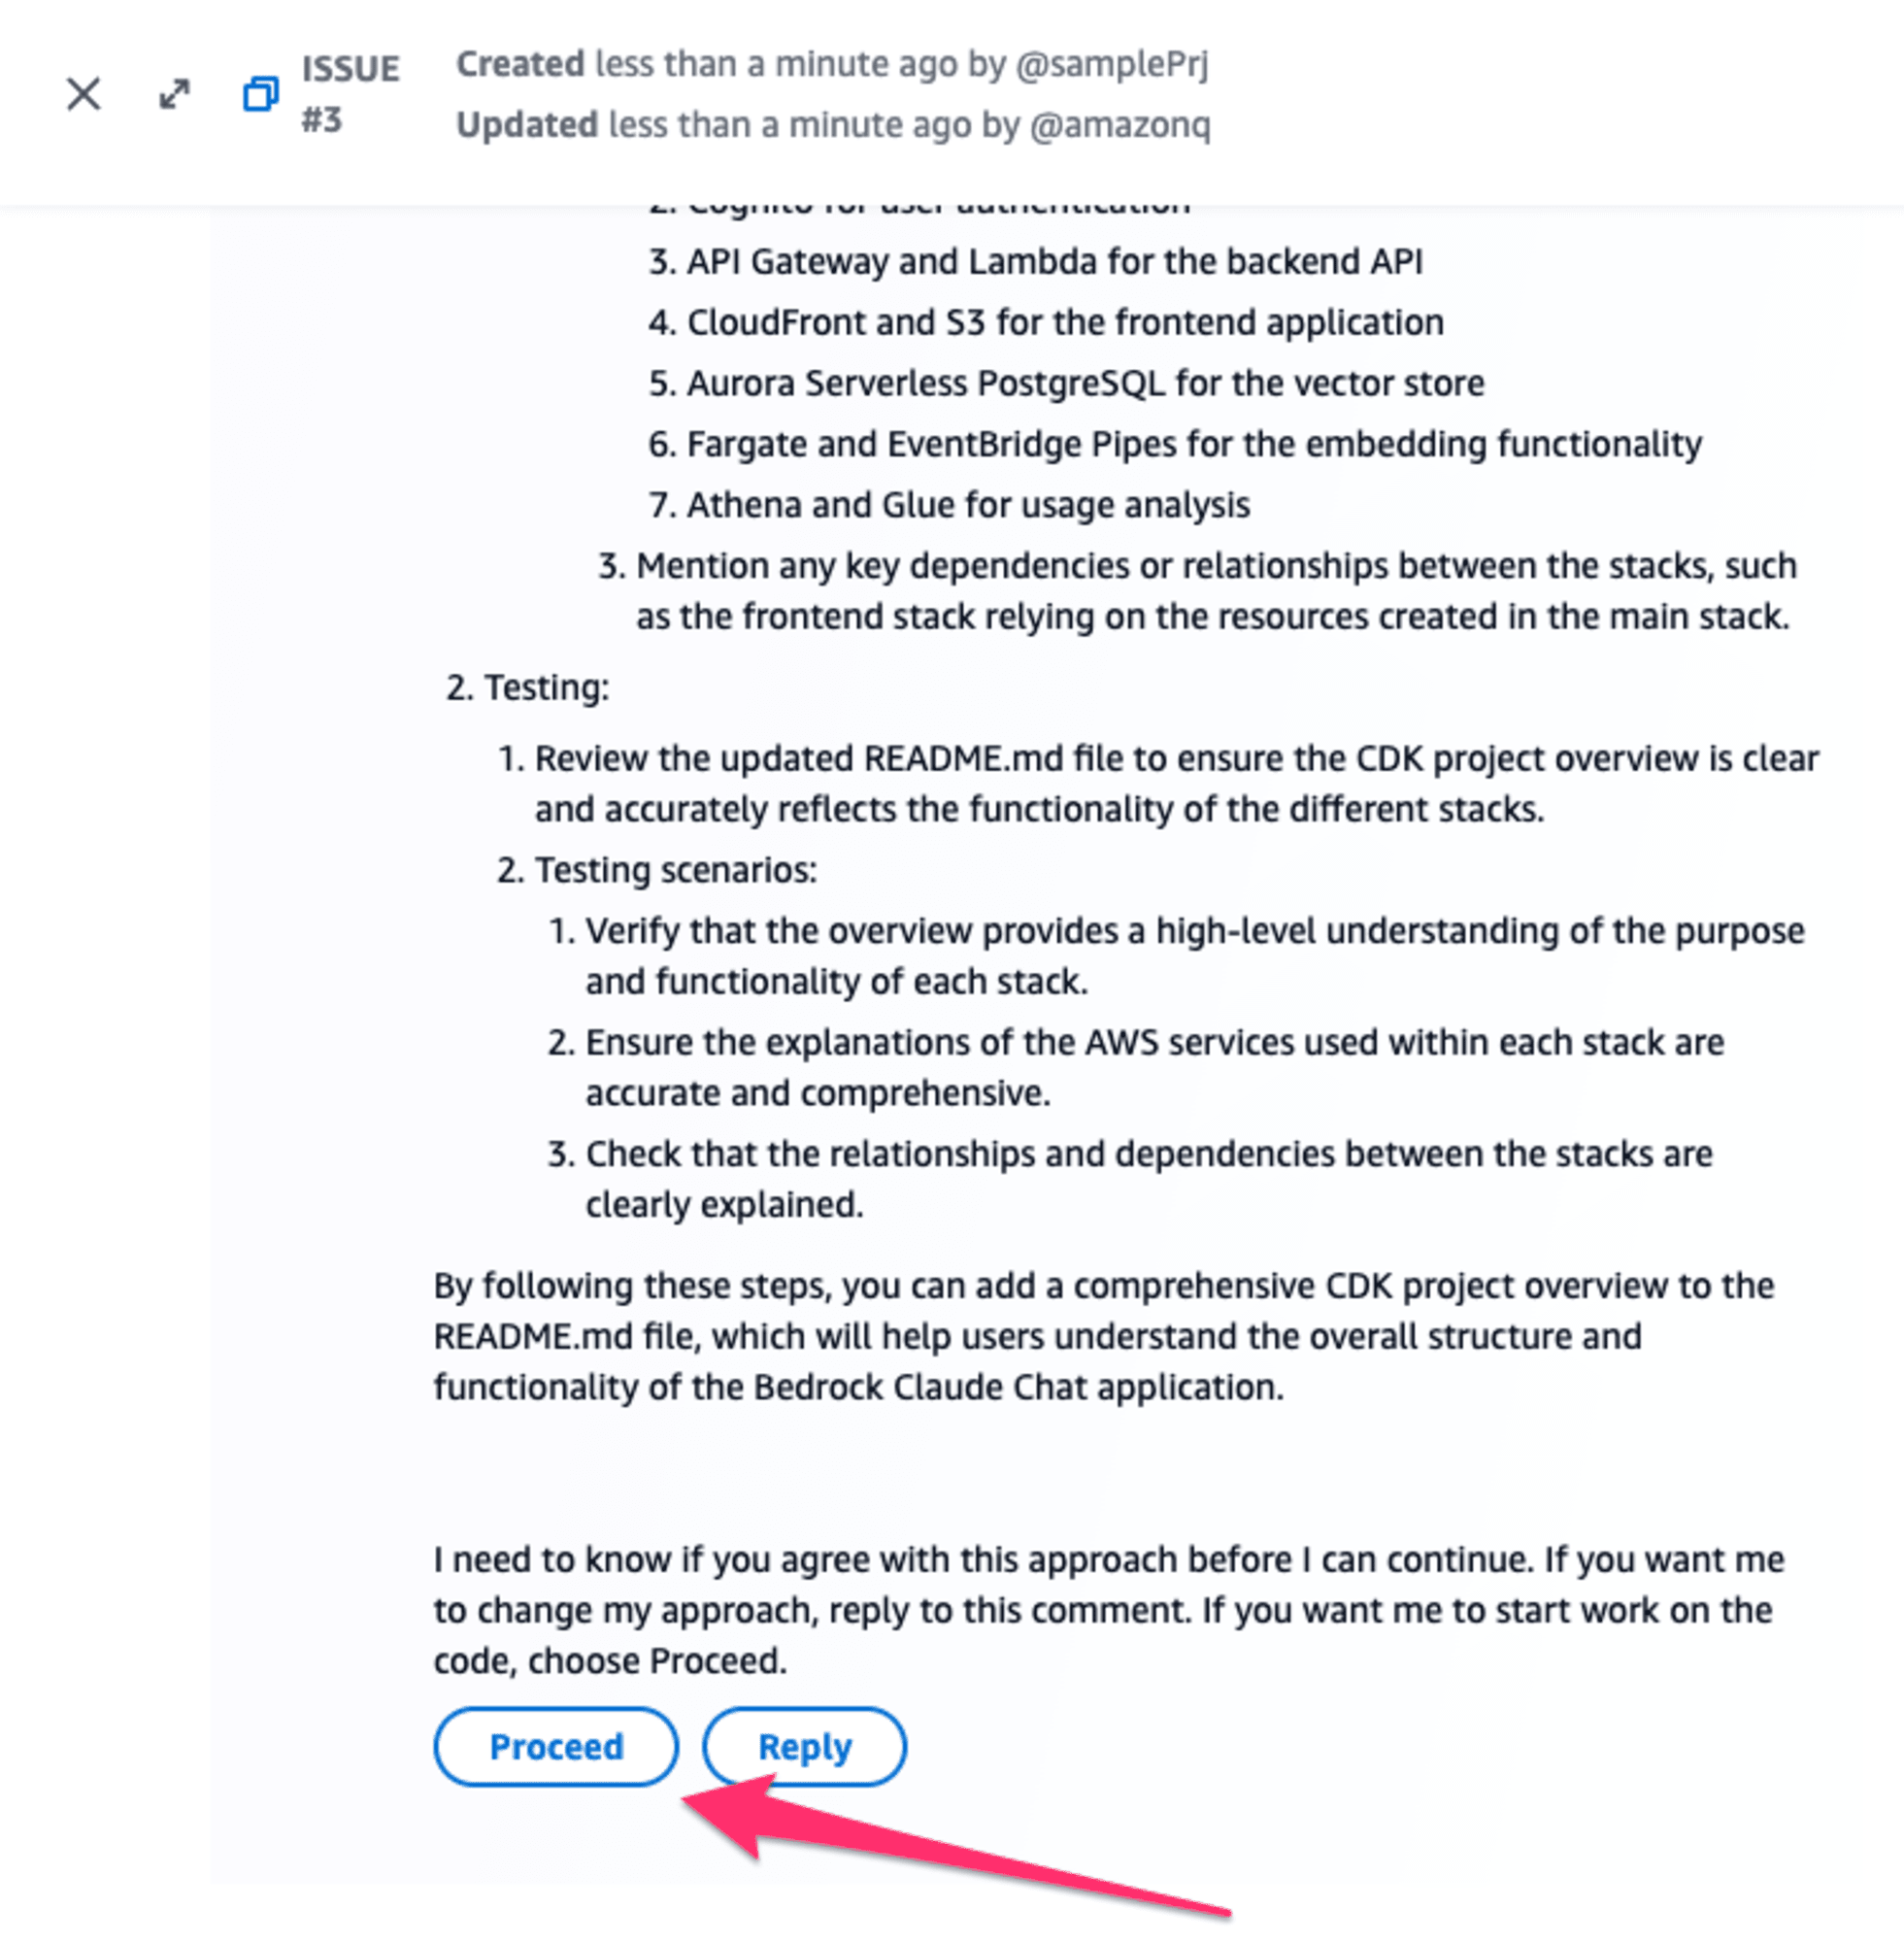
「Proceed」を選択すると、そのままコードの作成に進みますが、「Reply」を選択するとAmazon Qの提案に対してユーザがコメントをして、より良い提案に繋げることができます。
Pull Request(PR)の確認
「Proceed」を選択後、しばらく待つと以下のようにコード生成が終わり、PRが作成されます。
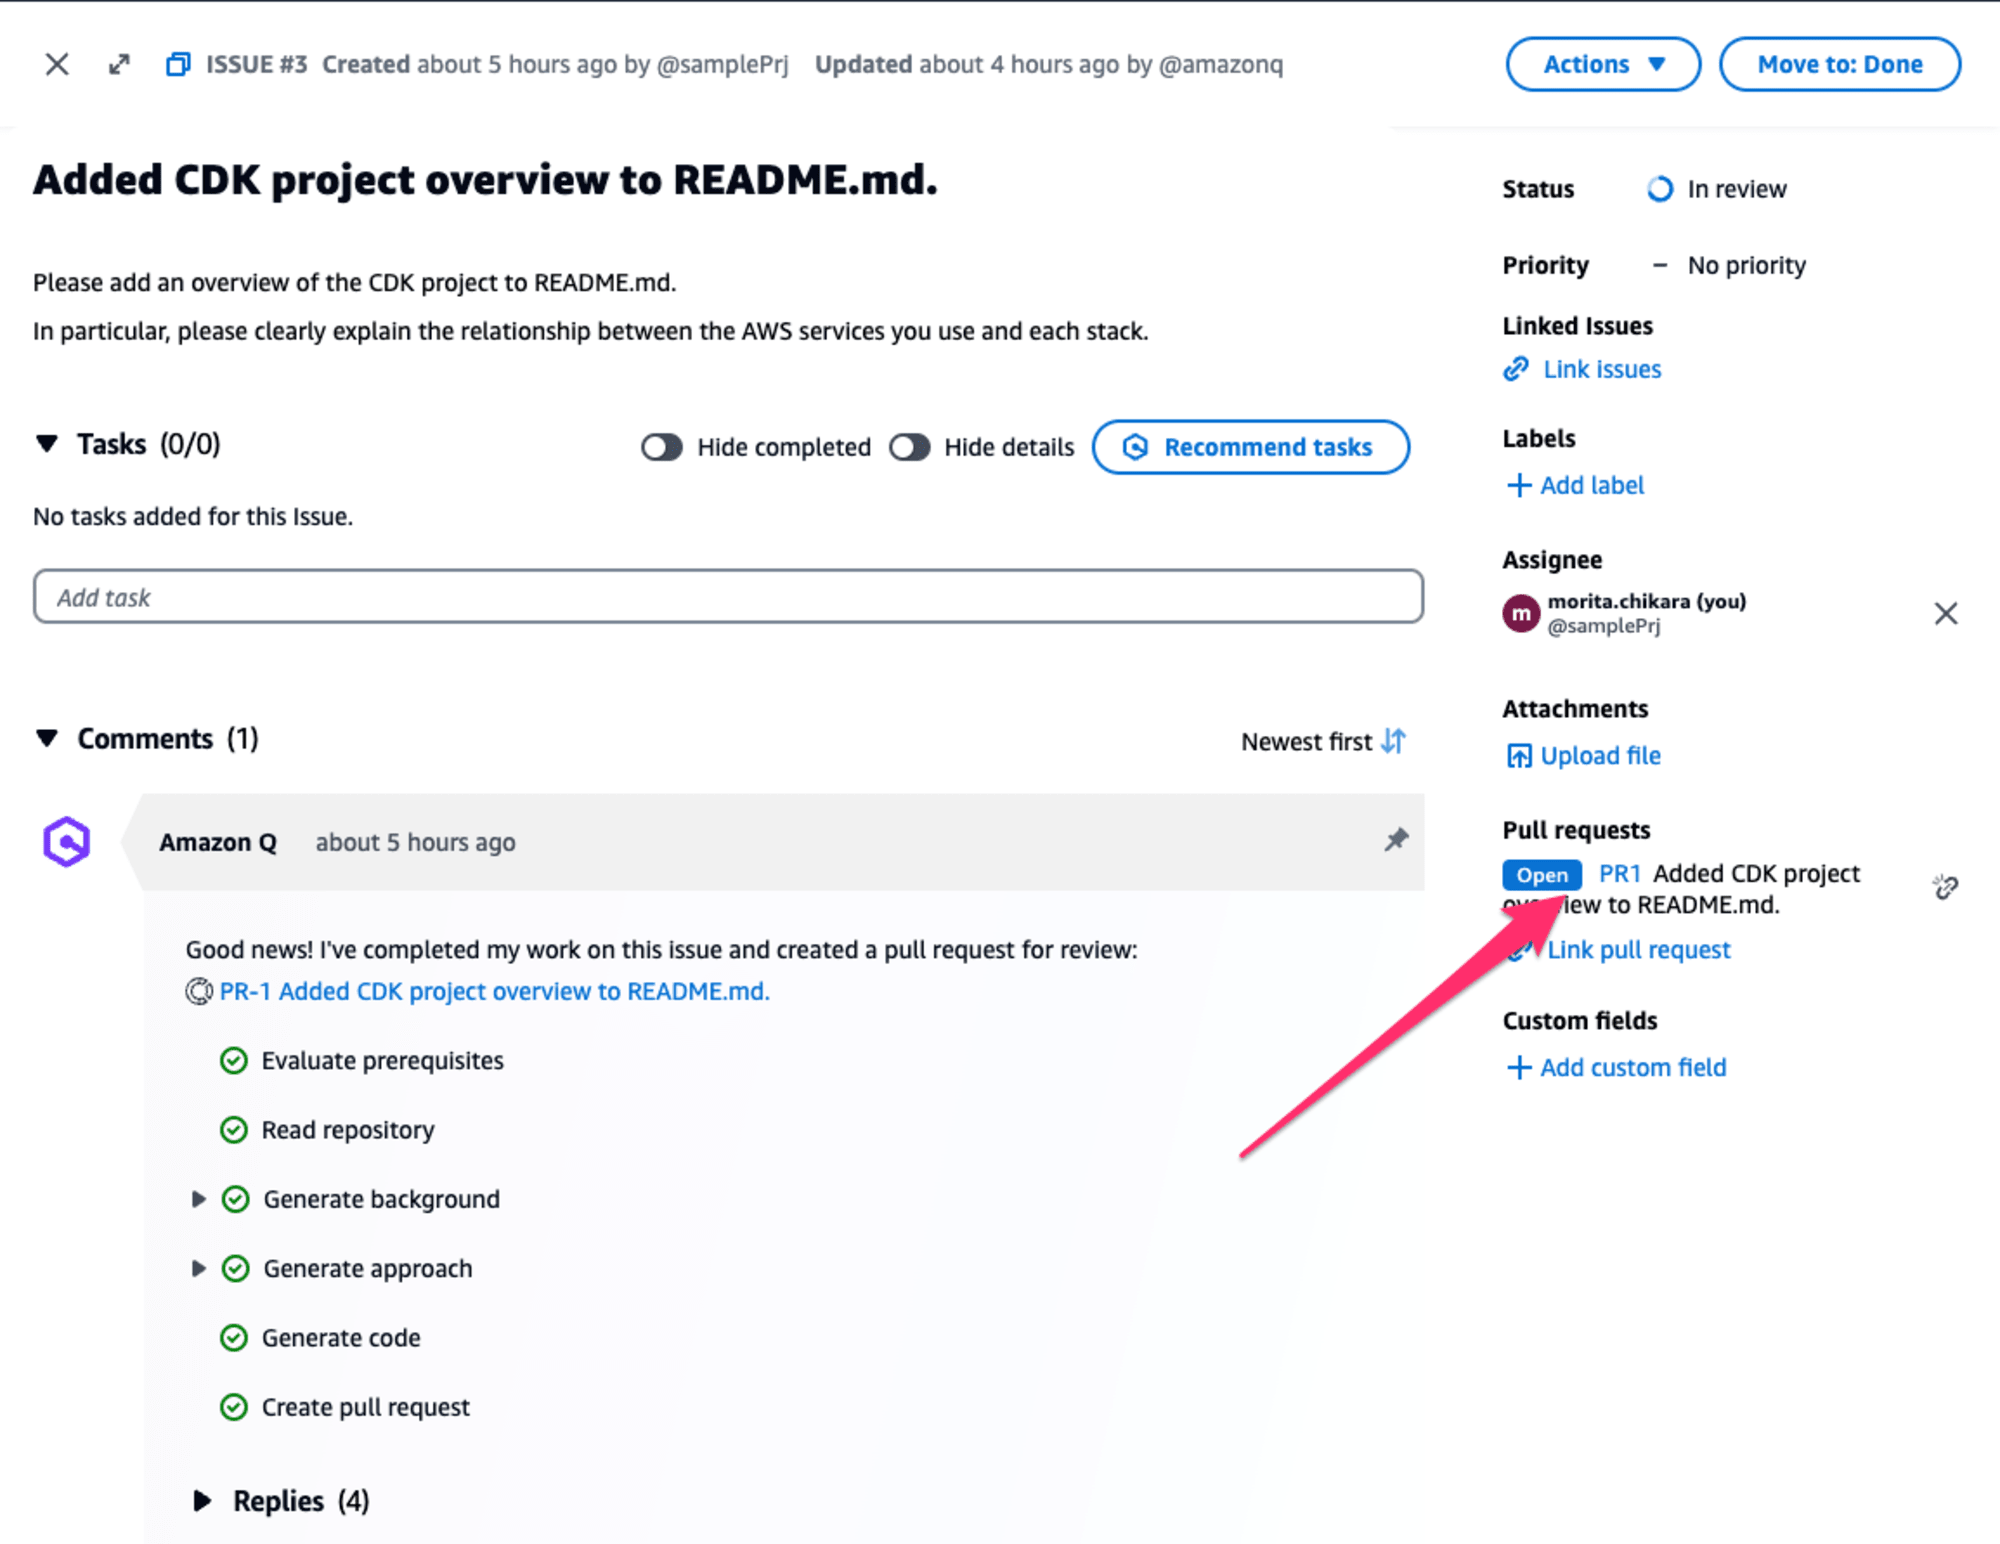
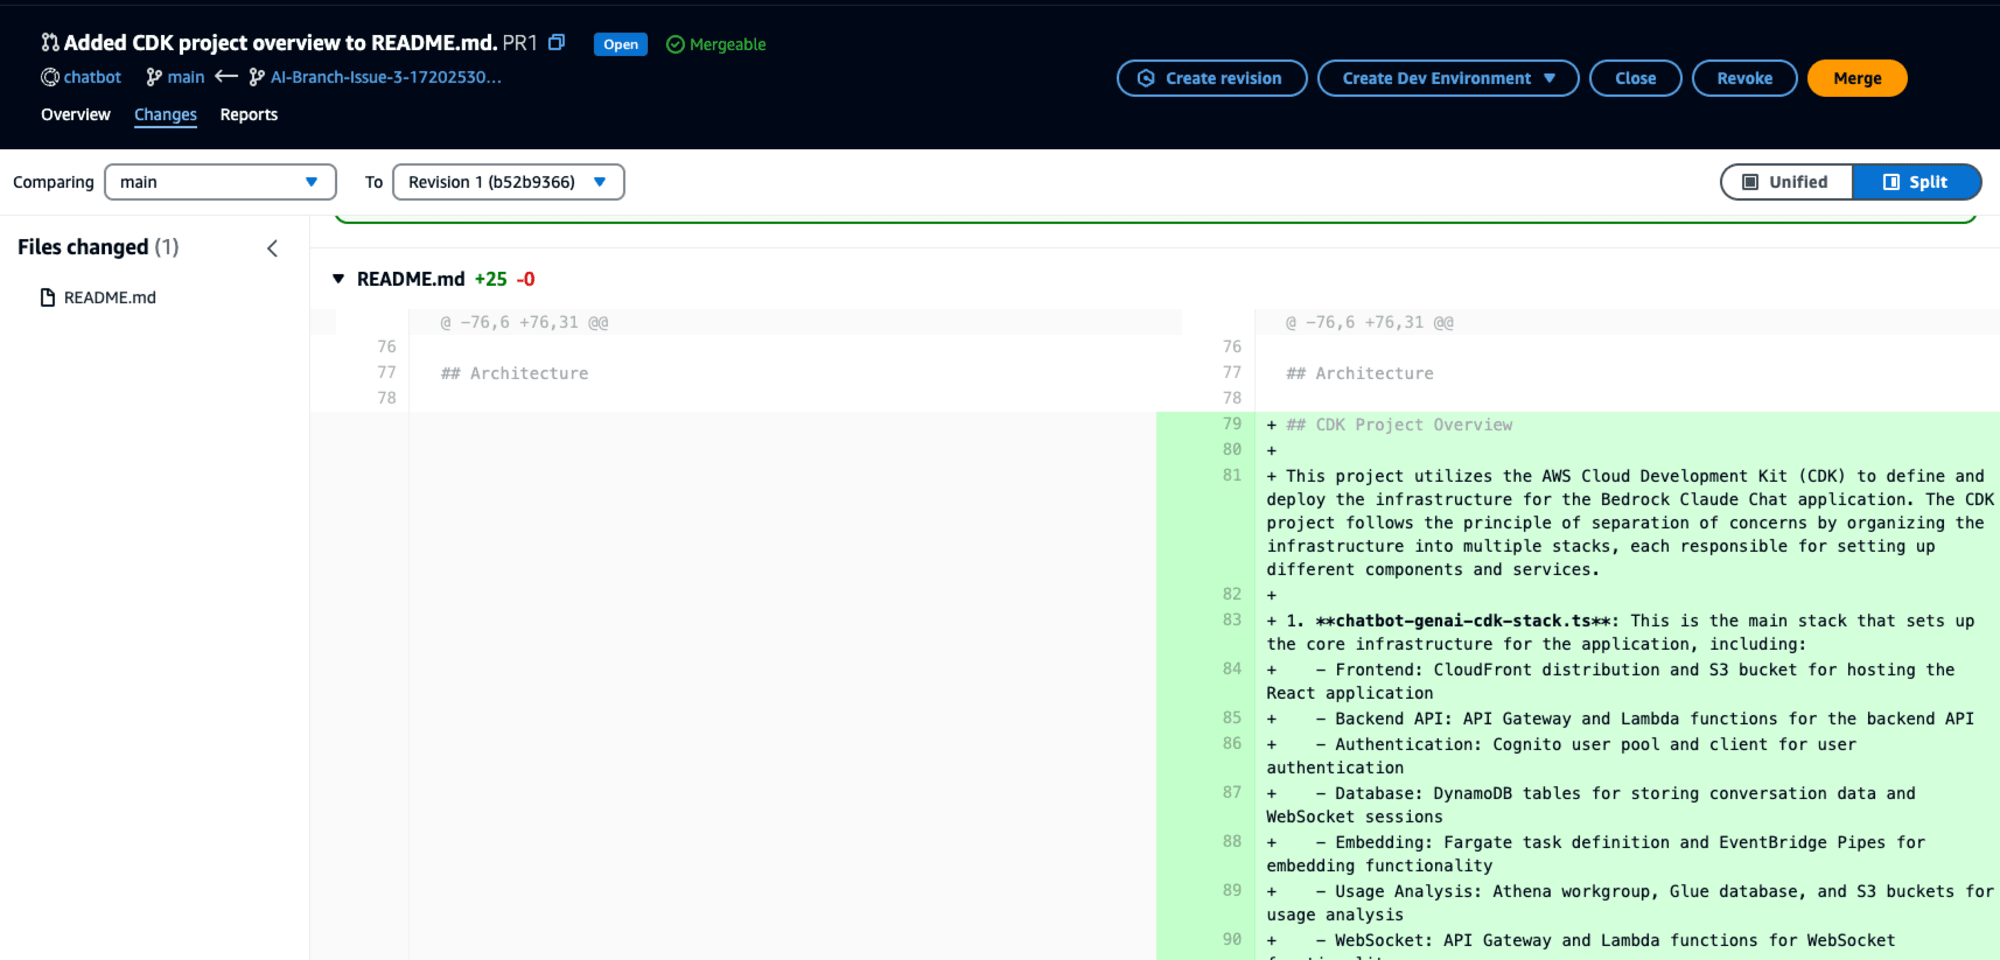
PRの中身を確認すると、以前の提案内容に従ってコードの変更が行われています。
今回は、READMEの変更なので、レビューを厳しく行う必要はありませんが、アプリケーションコードの変更などの場合は、提案通りの内容であっても意図しない変更を行う可能性はゼロではありませんので、人間の目によるレビューを推奨します。
コード変更が問題なければ、あとはPRをマージすると、プロジェクト上に Amazon Q の生成したコードが反映されます。
さいごに
Amazon Q では、開発者用の生成AI機能を提供していますが、「本当に便利なのか分からない」や「セットアップ面倒そう」と思っている方は、一度 Amazon CodeCatalyst を使ってみると一通りの機能を体感できると思います。
今回ご紹介した機能以外にも多くの生成AI機能がありますので、ぜひ皆さんも触ってみてください。