
Anthropic의 Model Context Protocol(MCP)로 폴더 정리하기
この記事は公開されてから1年以上経過しています。情報が古い可能性がありますので、ご注意ください。
2024년 11월 26일 Claude로 유형한 Anthropic에서 Model Context Protocol(MCP)을 오픈소스로 공개했습니다.
MCP가 무엇인지 알아보고 직접 MCP를 통해 로컬 컴퓨터의 폴더를 정리해 보겠습니다.
MCP란?
MCP는 Model Context Protocol의 약자로 LLM과 다른 어플리케이션을 연결시키는 프로토콜입니다.
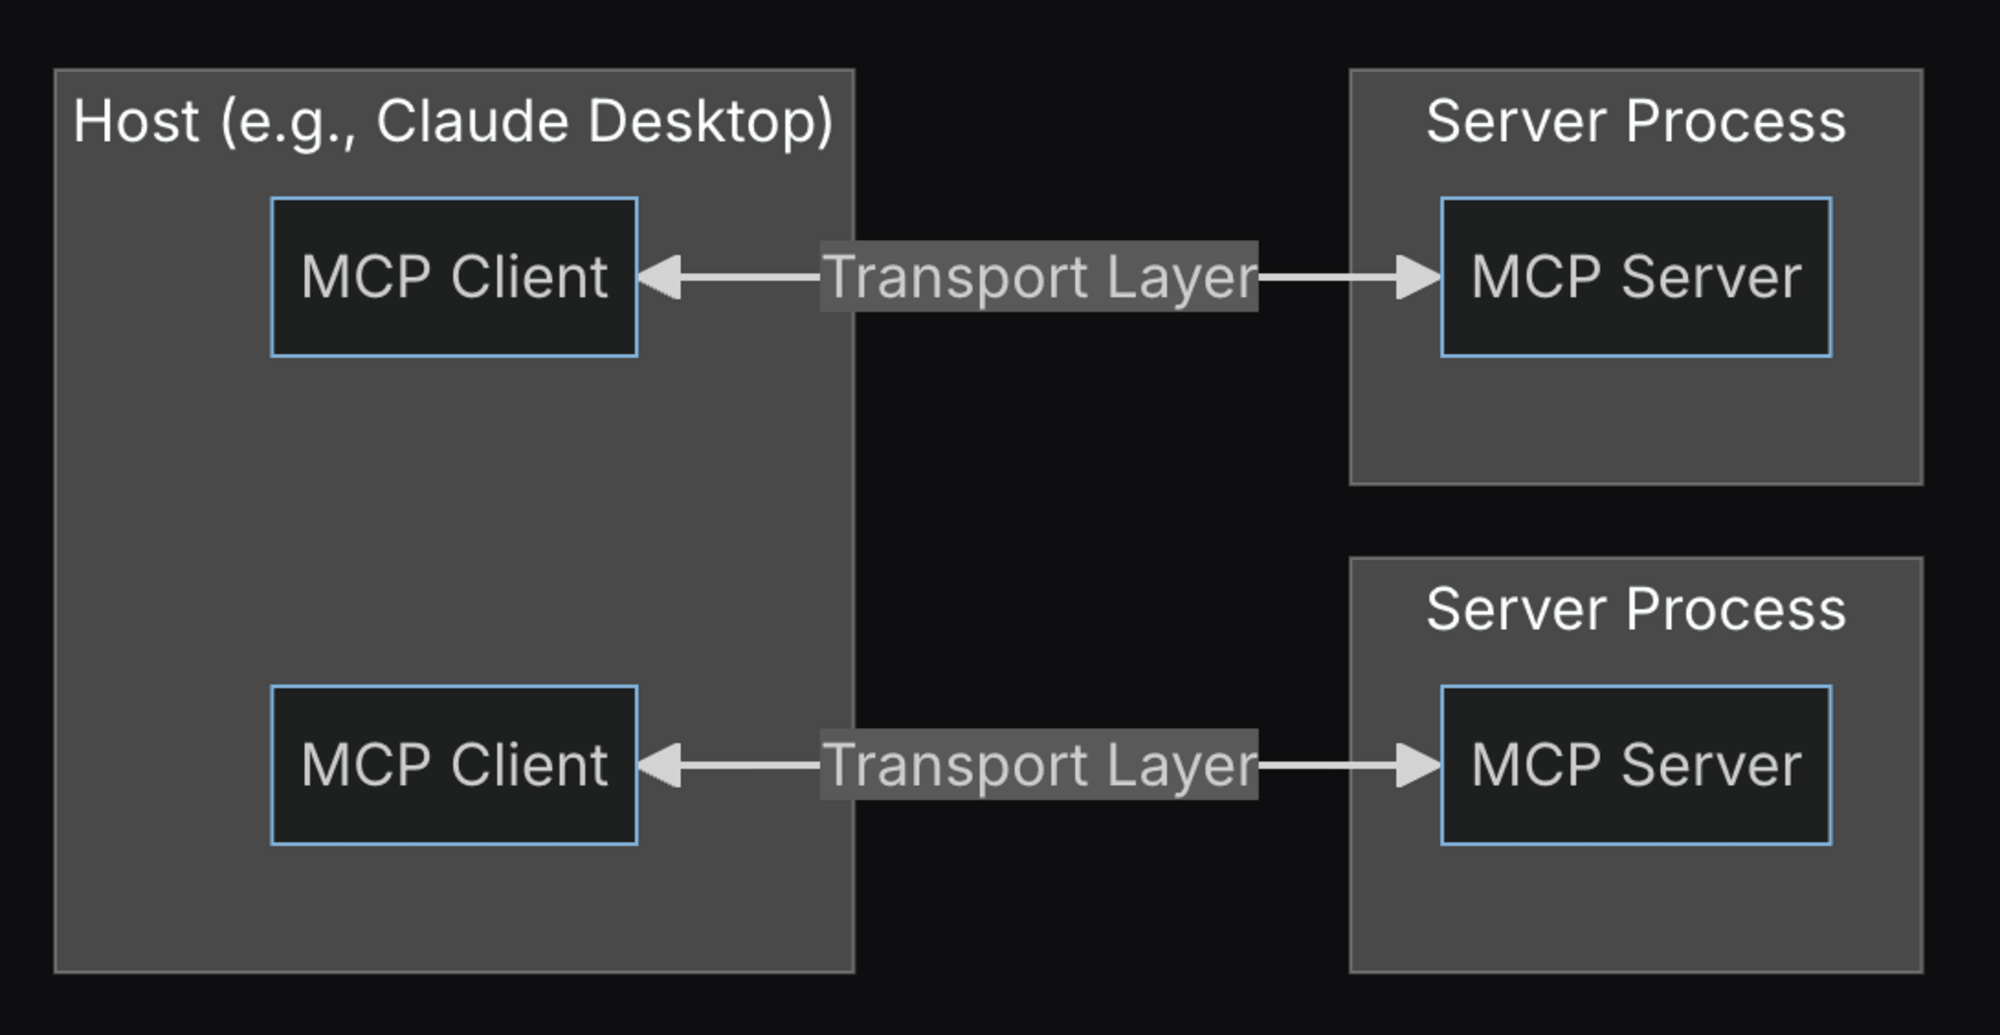
사진처럼 MCP를 따르는 호스트(Claude Desktop 같이)는 MCP를 따르는 서버를 이용할 수 있습니다.
이러한 MCP 서버를 구현하면, 예를 들어 Claude Desktop에서 LLM을 통해 자신의 로컬 컴퓨터의 파일, 어플리케이션 혹은 외부 서비스와 연계해 사용할 수 있습니다.
MCP 서버 설정하기
MCP는 몇 가지 서버들이 예시로 공개되어 있습니다. 이번에는 아래의 파일 시스템 서버를 사용해 보겠습니다.
Claude Desktop의 경우 아래처럼 해당 서버를 사용하겠다고 알려주기 위한 설정이 필요합니다.
맥의 경우 /Users/<사용자이름>/Library/Application Support/Claude 경로의 claude_desktop_config.json 파일에 아래 내용을 추가해 주세요.
{
  "filesystem": {
    "command": "npx",
    "args": ["-y", "@modelcontextprotocol/server-filesystem", "/Users/<username>/<allow_dir>", "/path/to/other/allowed/dir"]
  }
}
/Users 다음에는 컴퓨터의 사용자명과 Claude Desktop에서 접근할 경로를 설정해 주세요.
이후에 Claude Desktop가 이미 켜져있었다면 재시동해 주세요.
그러면 아래처럼 입력창 아래의 아이콘이 생기게 됩니다.

클릭해 보면 사용 가능한 기능들을 확인할 수 있습니다.
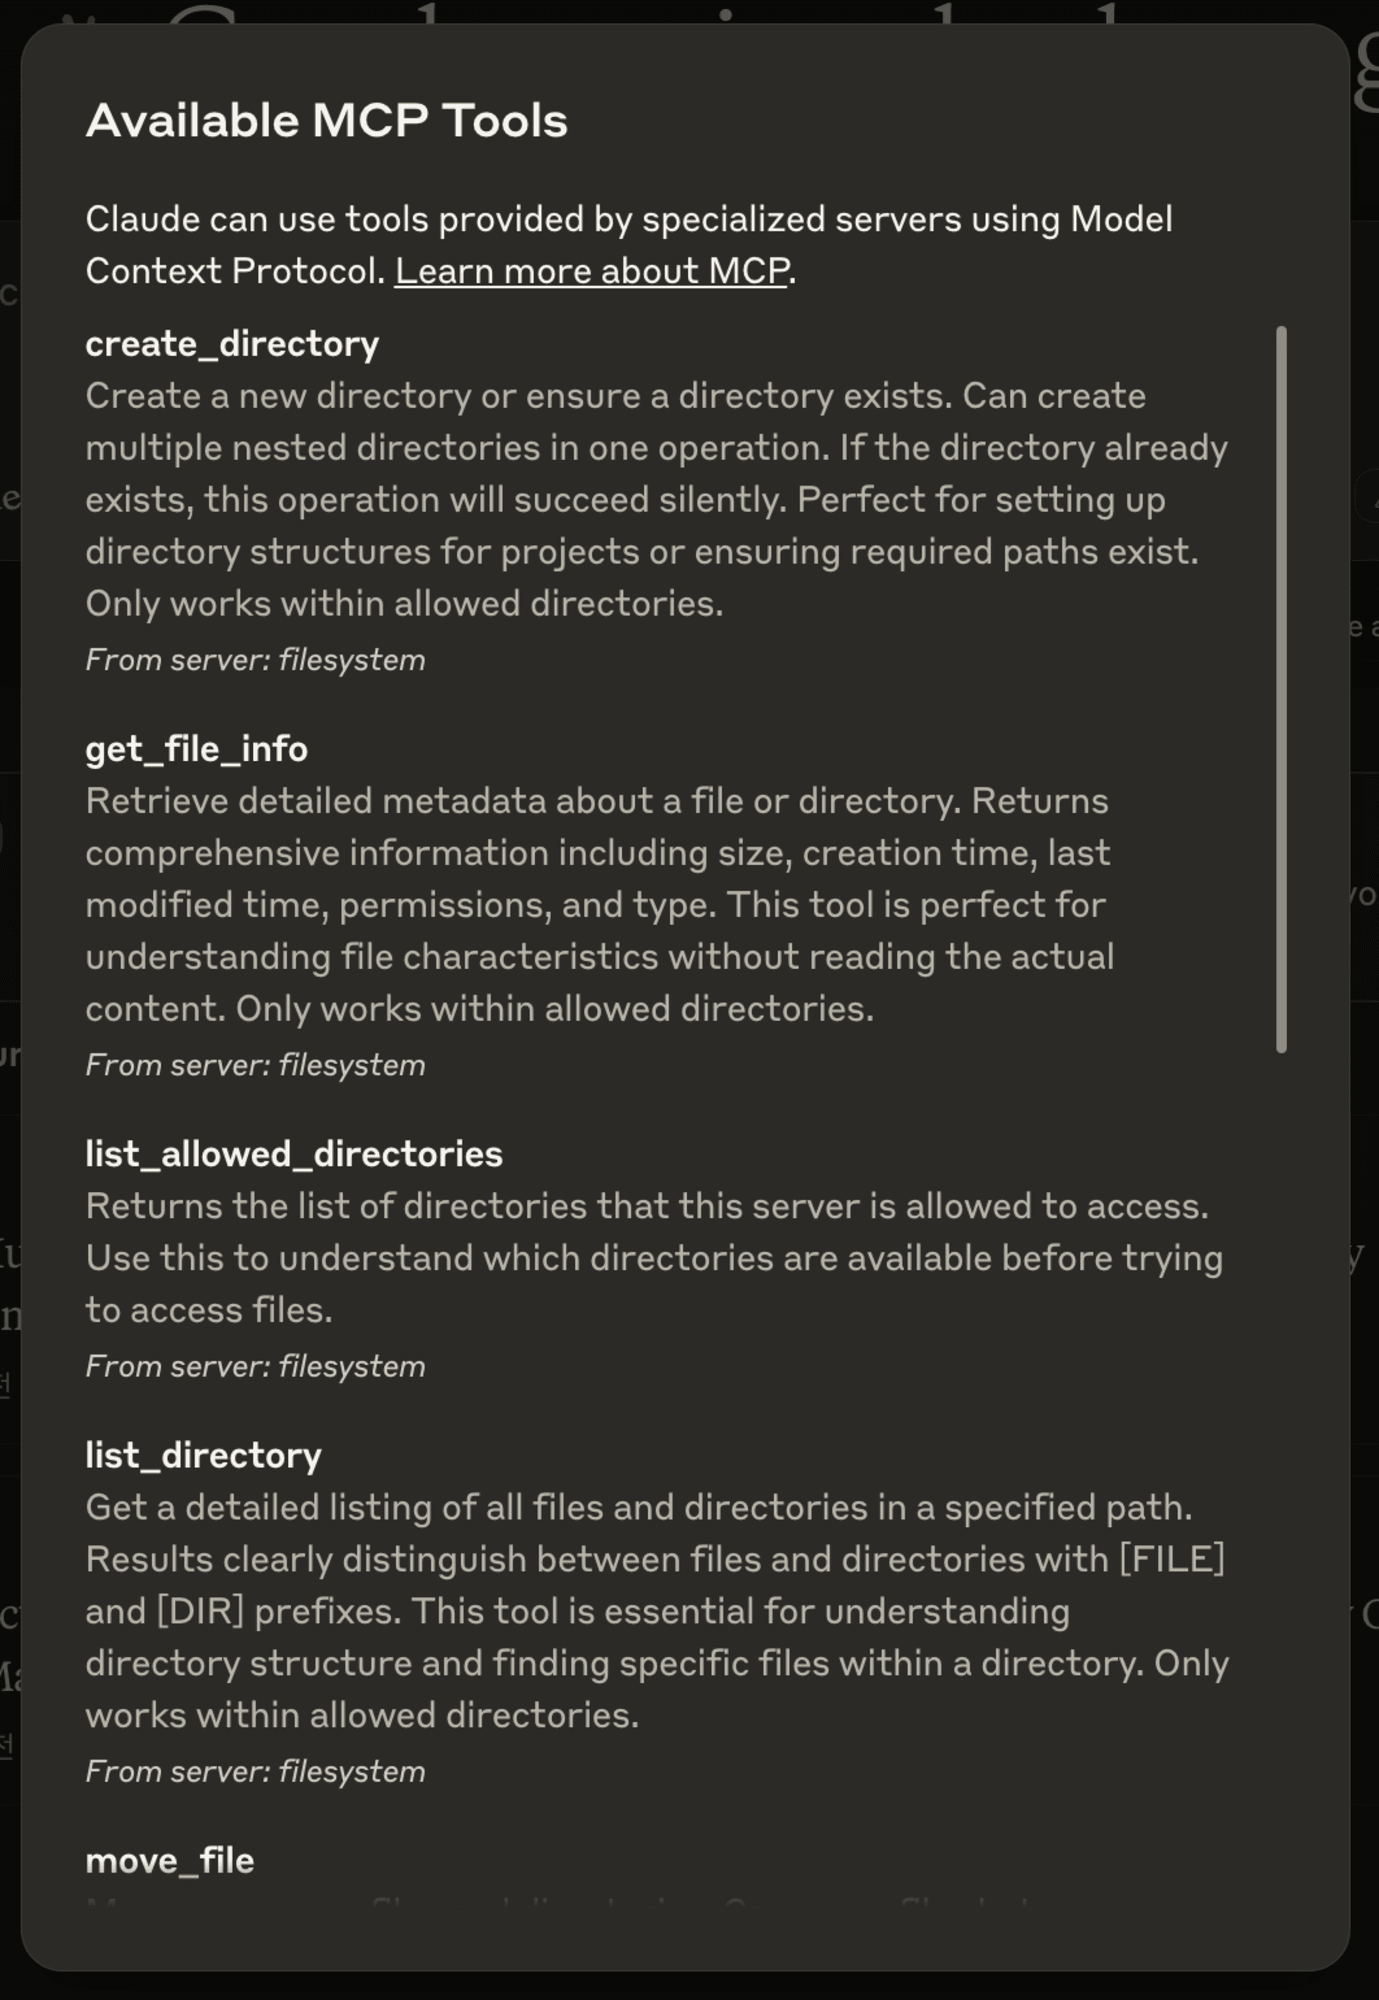
MCP 서버 사용해 보기
폴더를 정리를 요청하면 아래처럼 권한을 요청하게 됩니다.
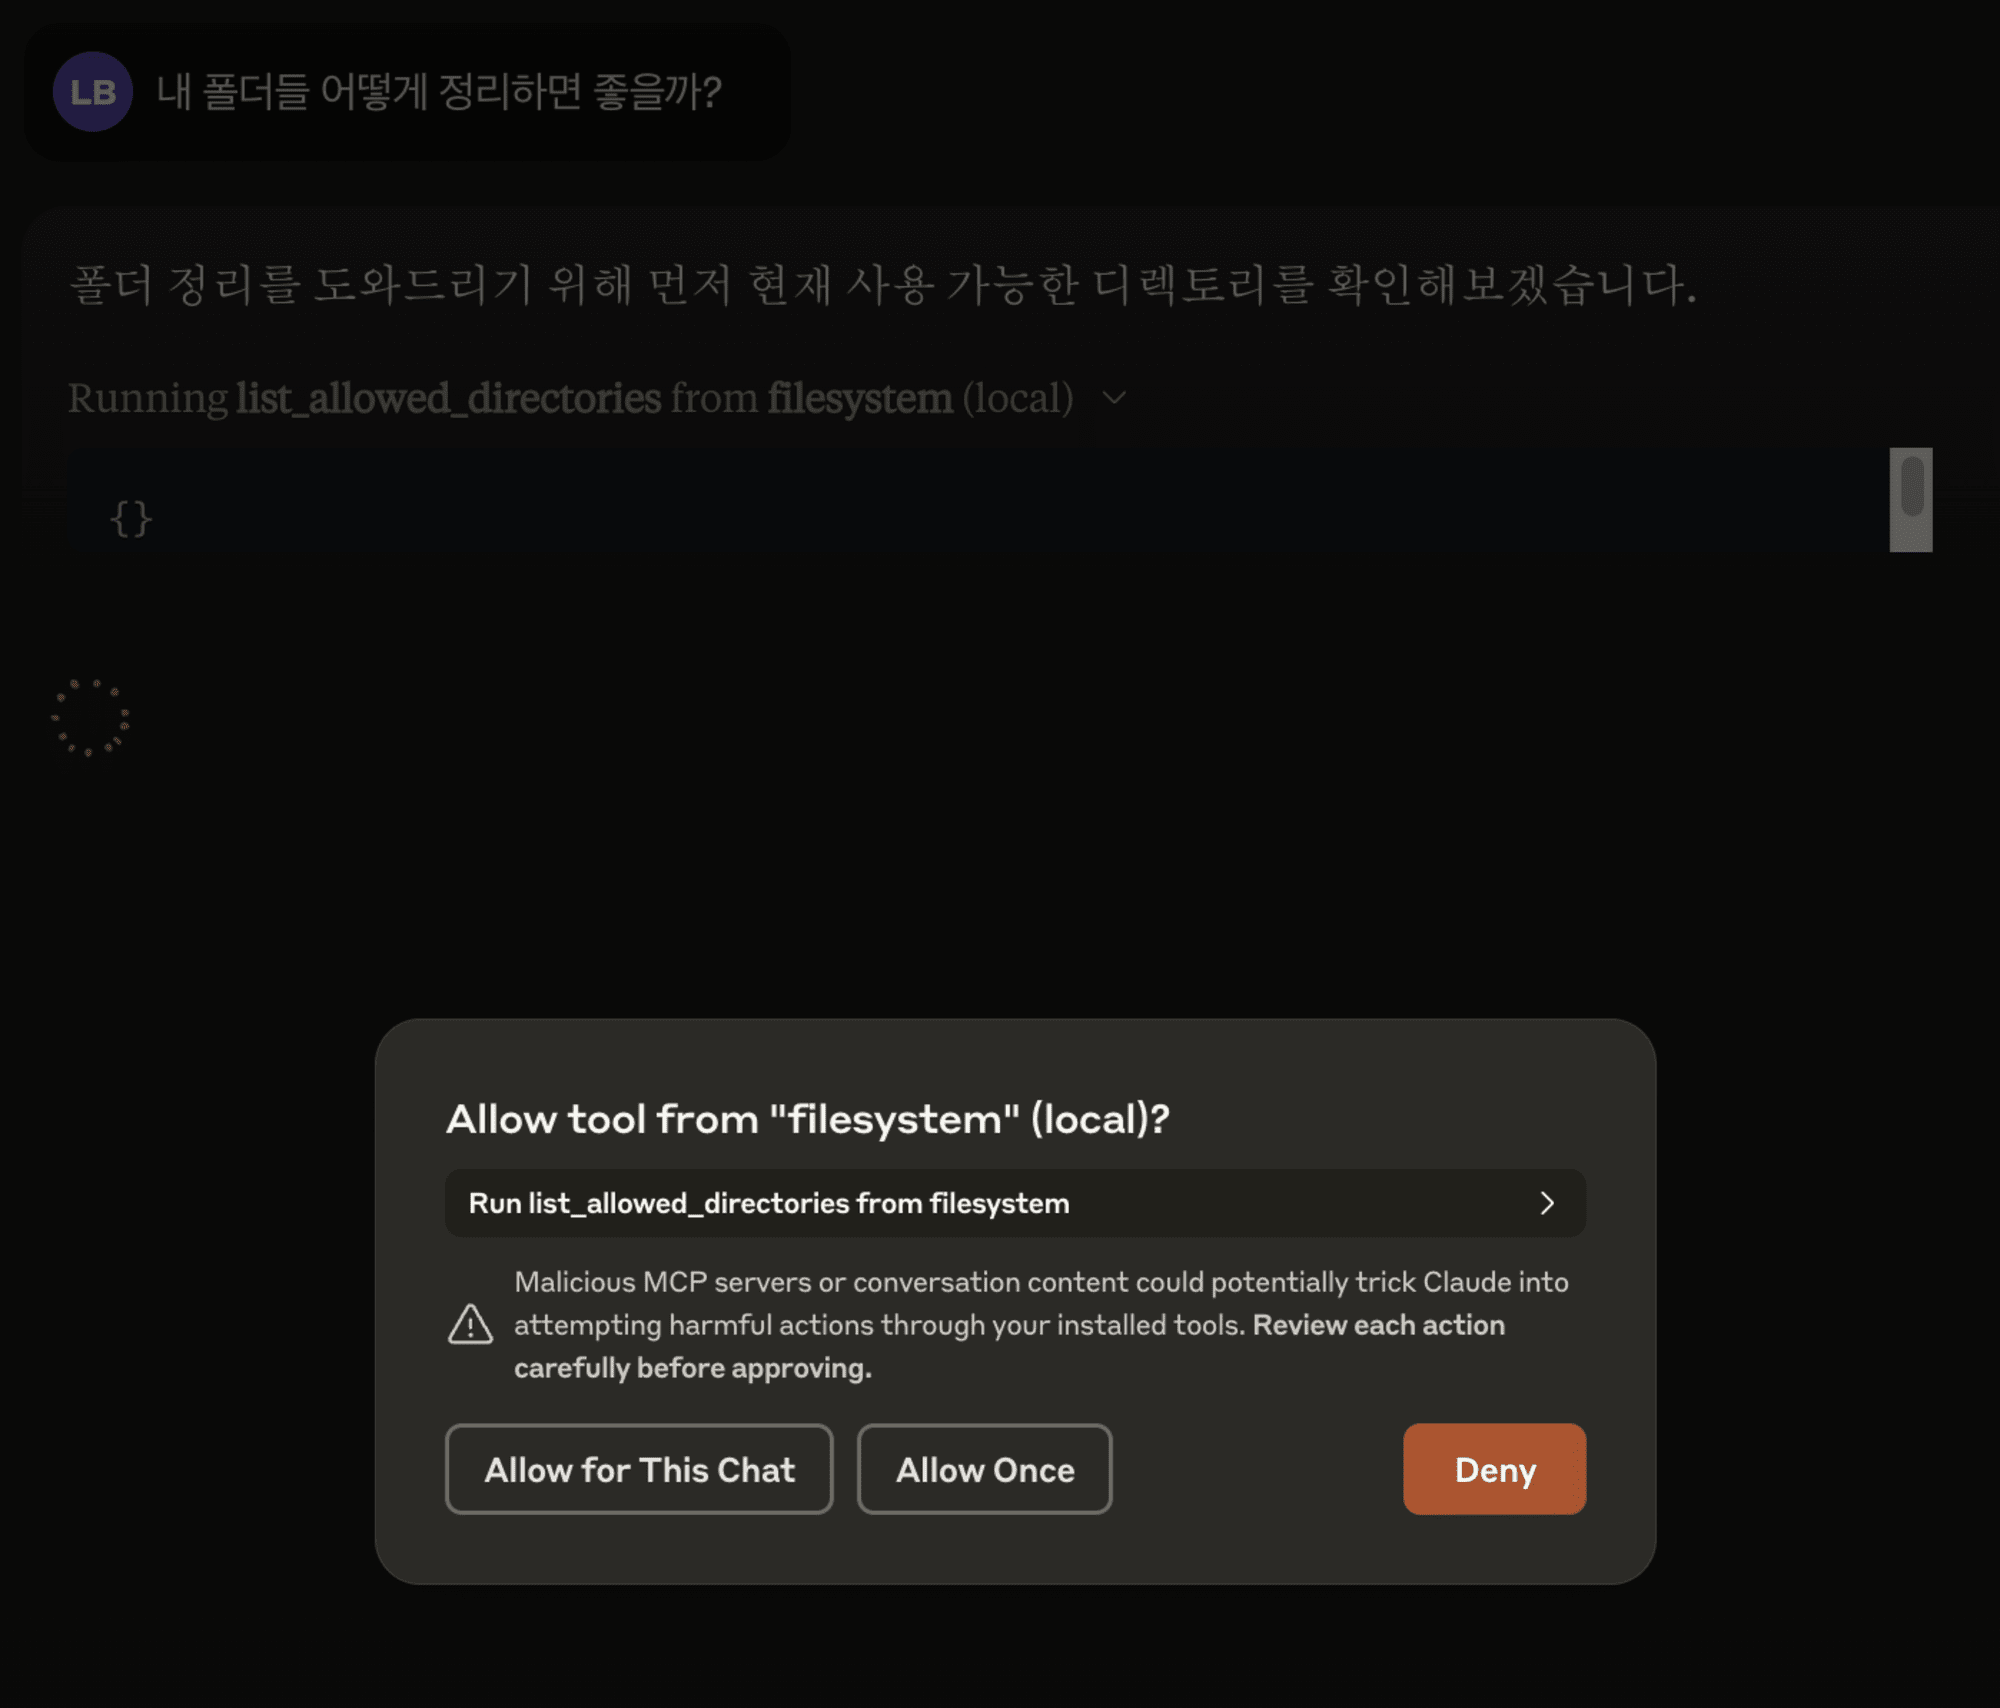
내용을 확인하고 허가를 눌러줍시다.
그러면 아래처럼 해당 경로의 폴더와 파일들을 LLM이 확인할 수 있게 됩니다.
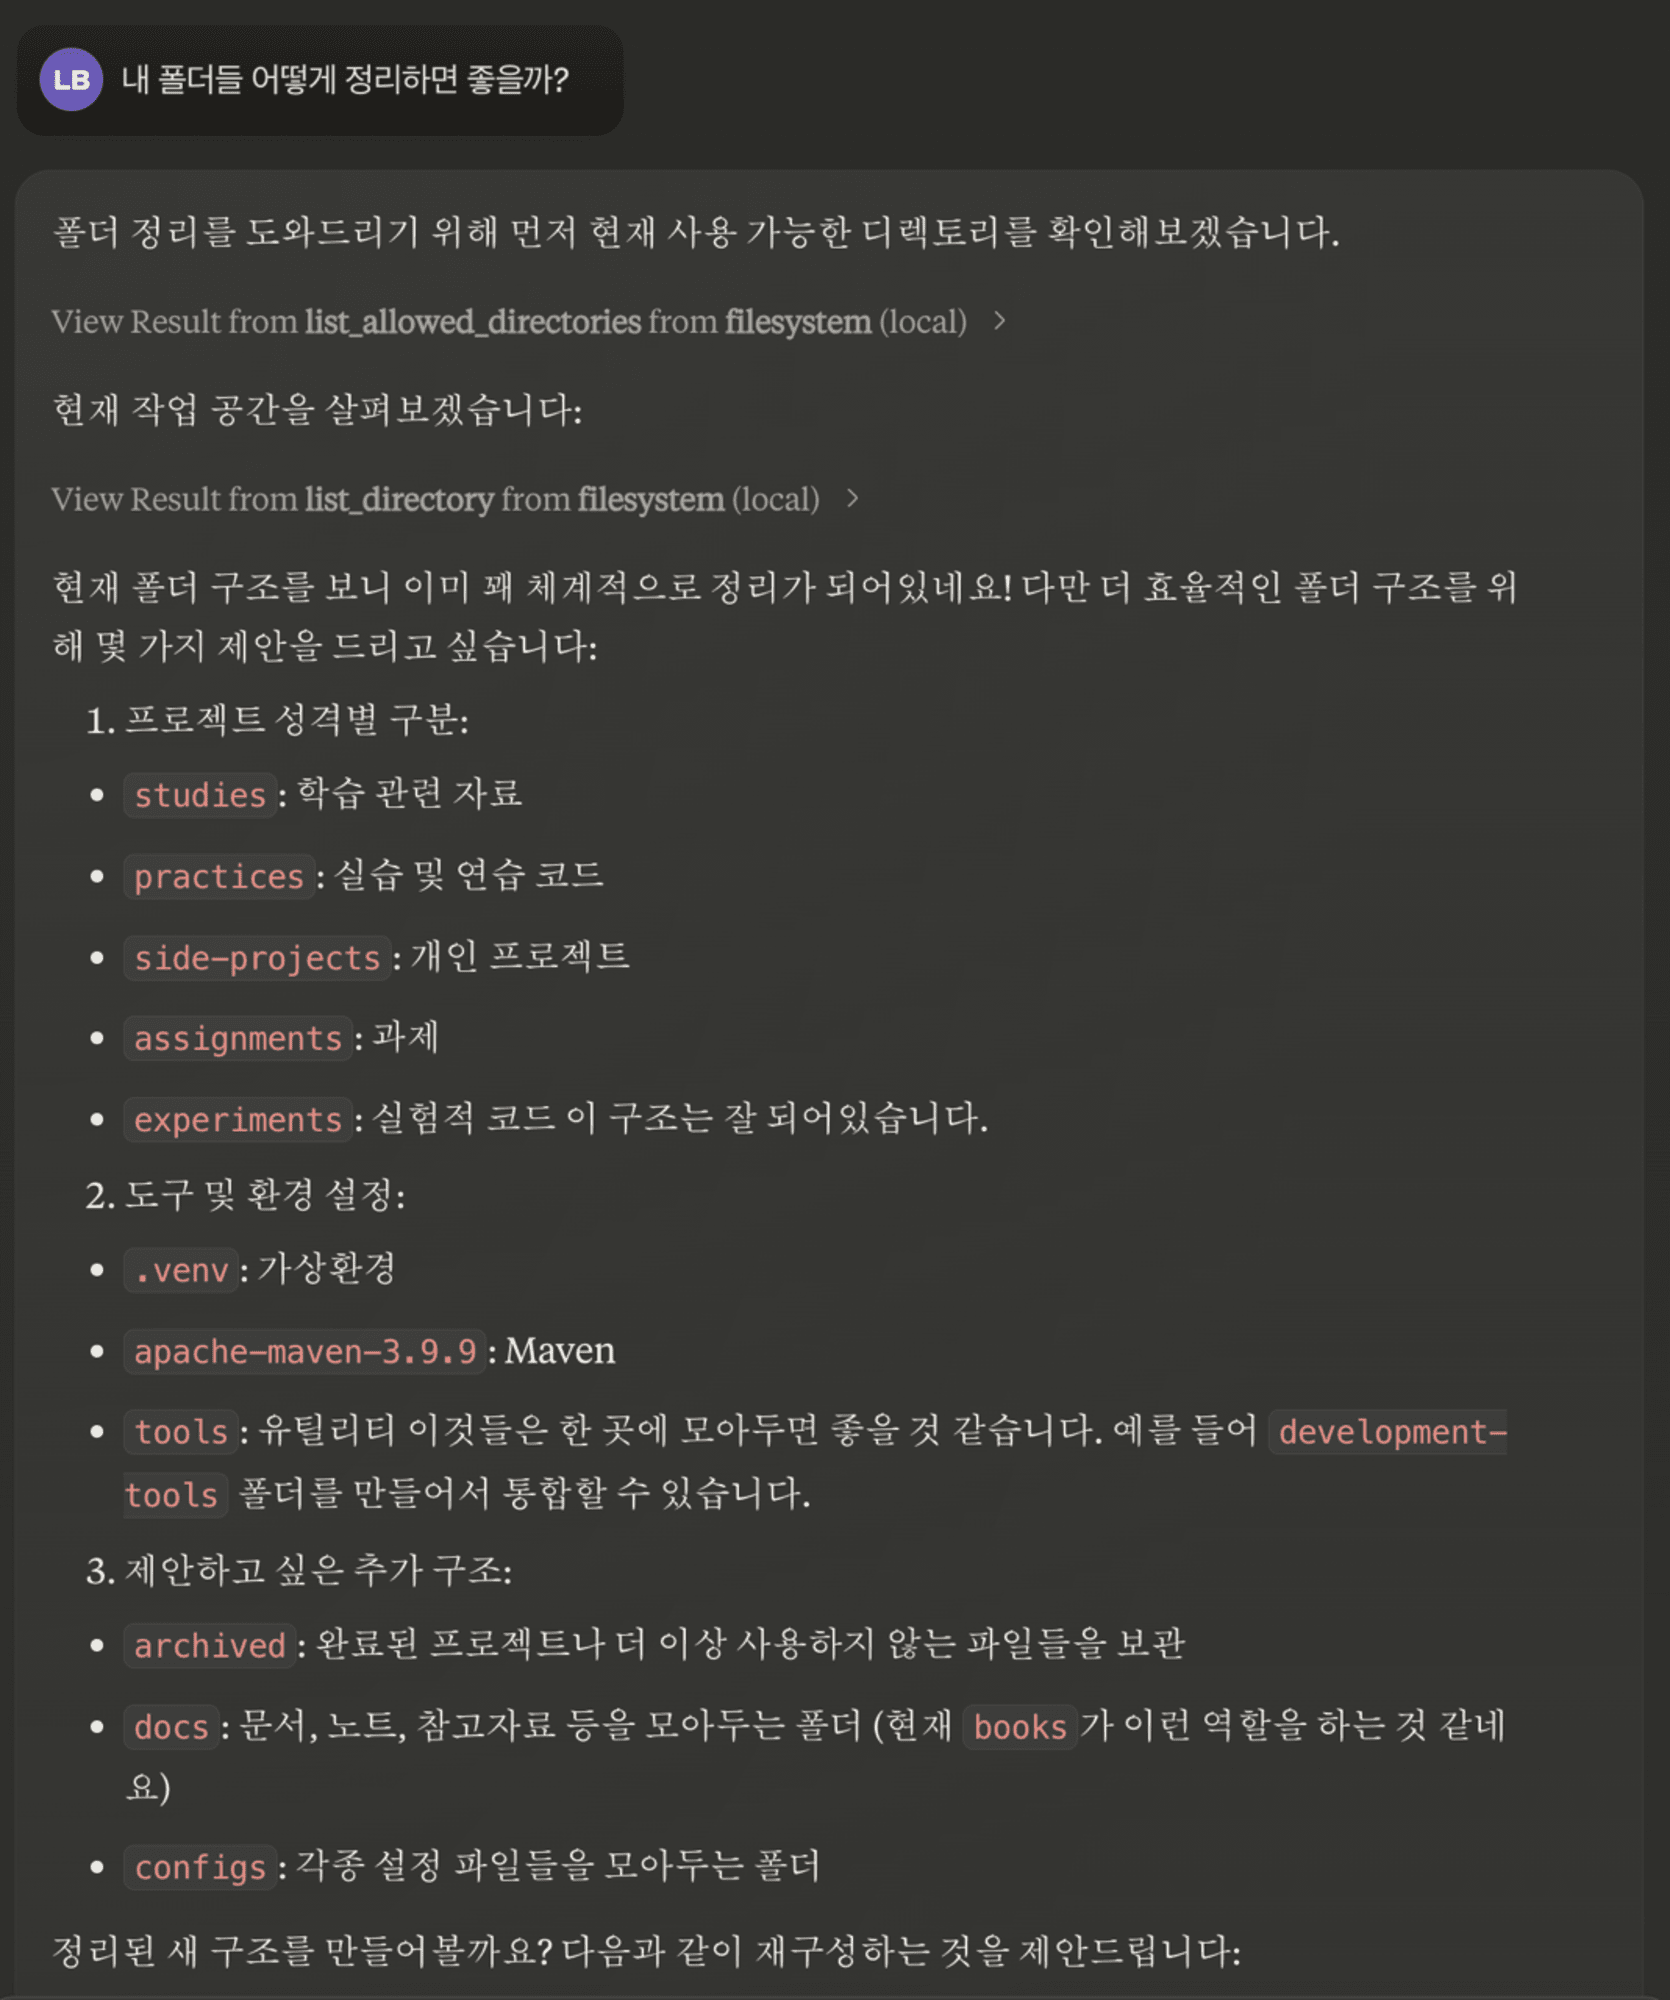
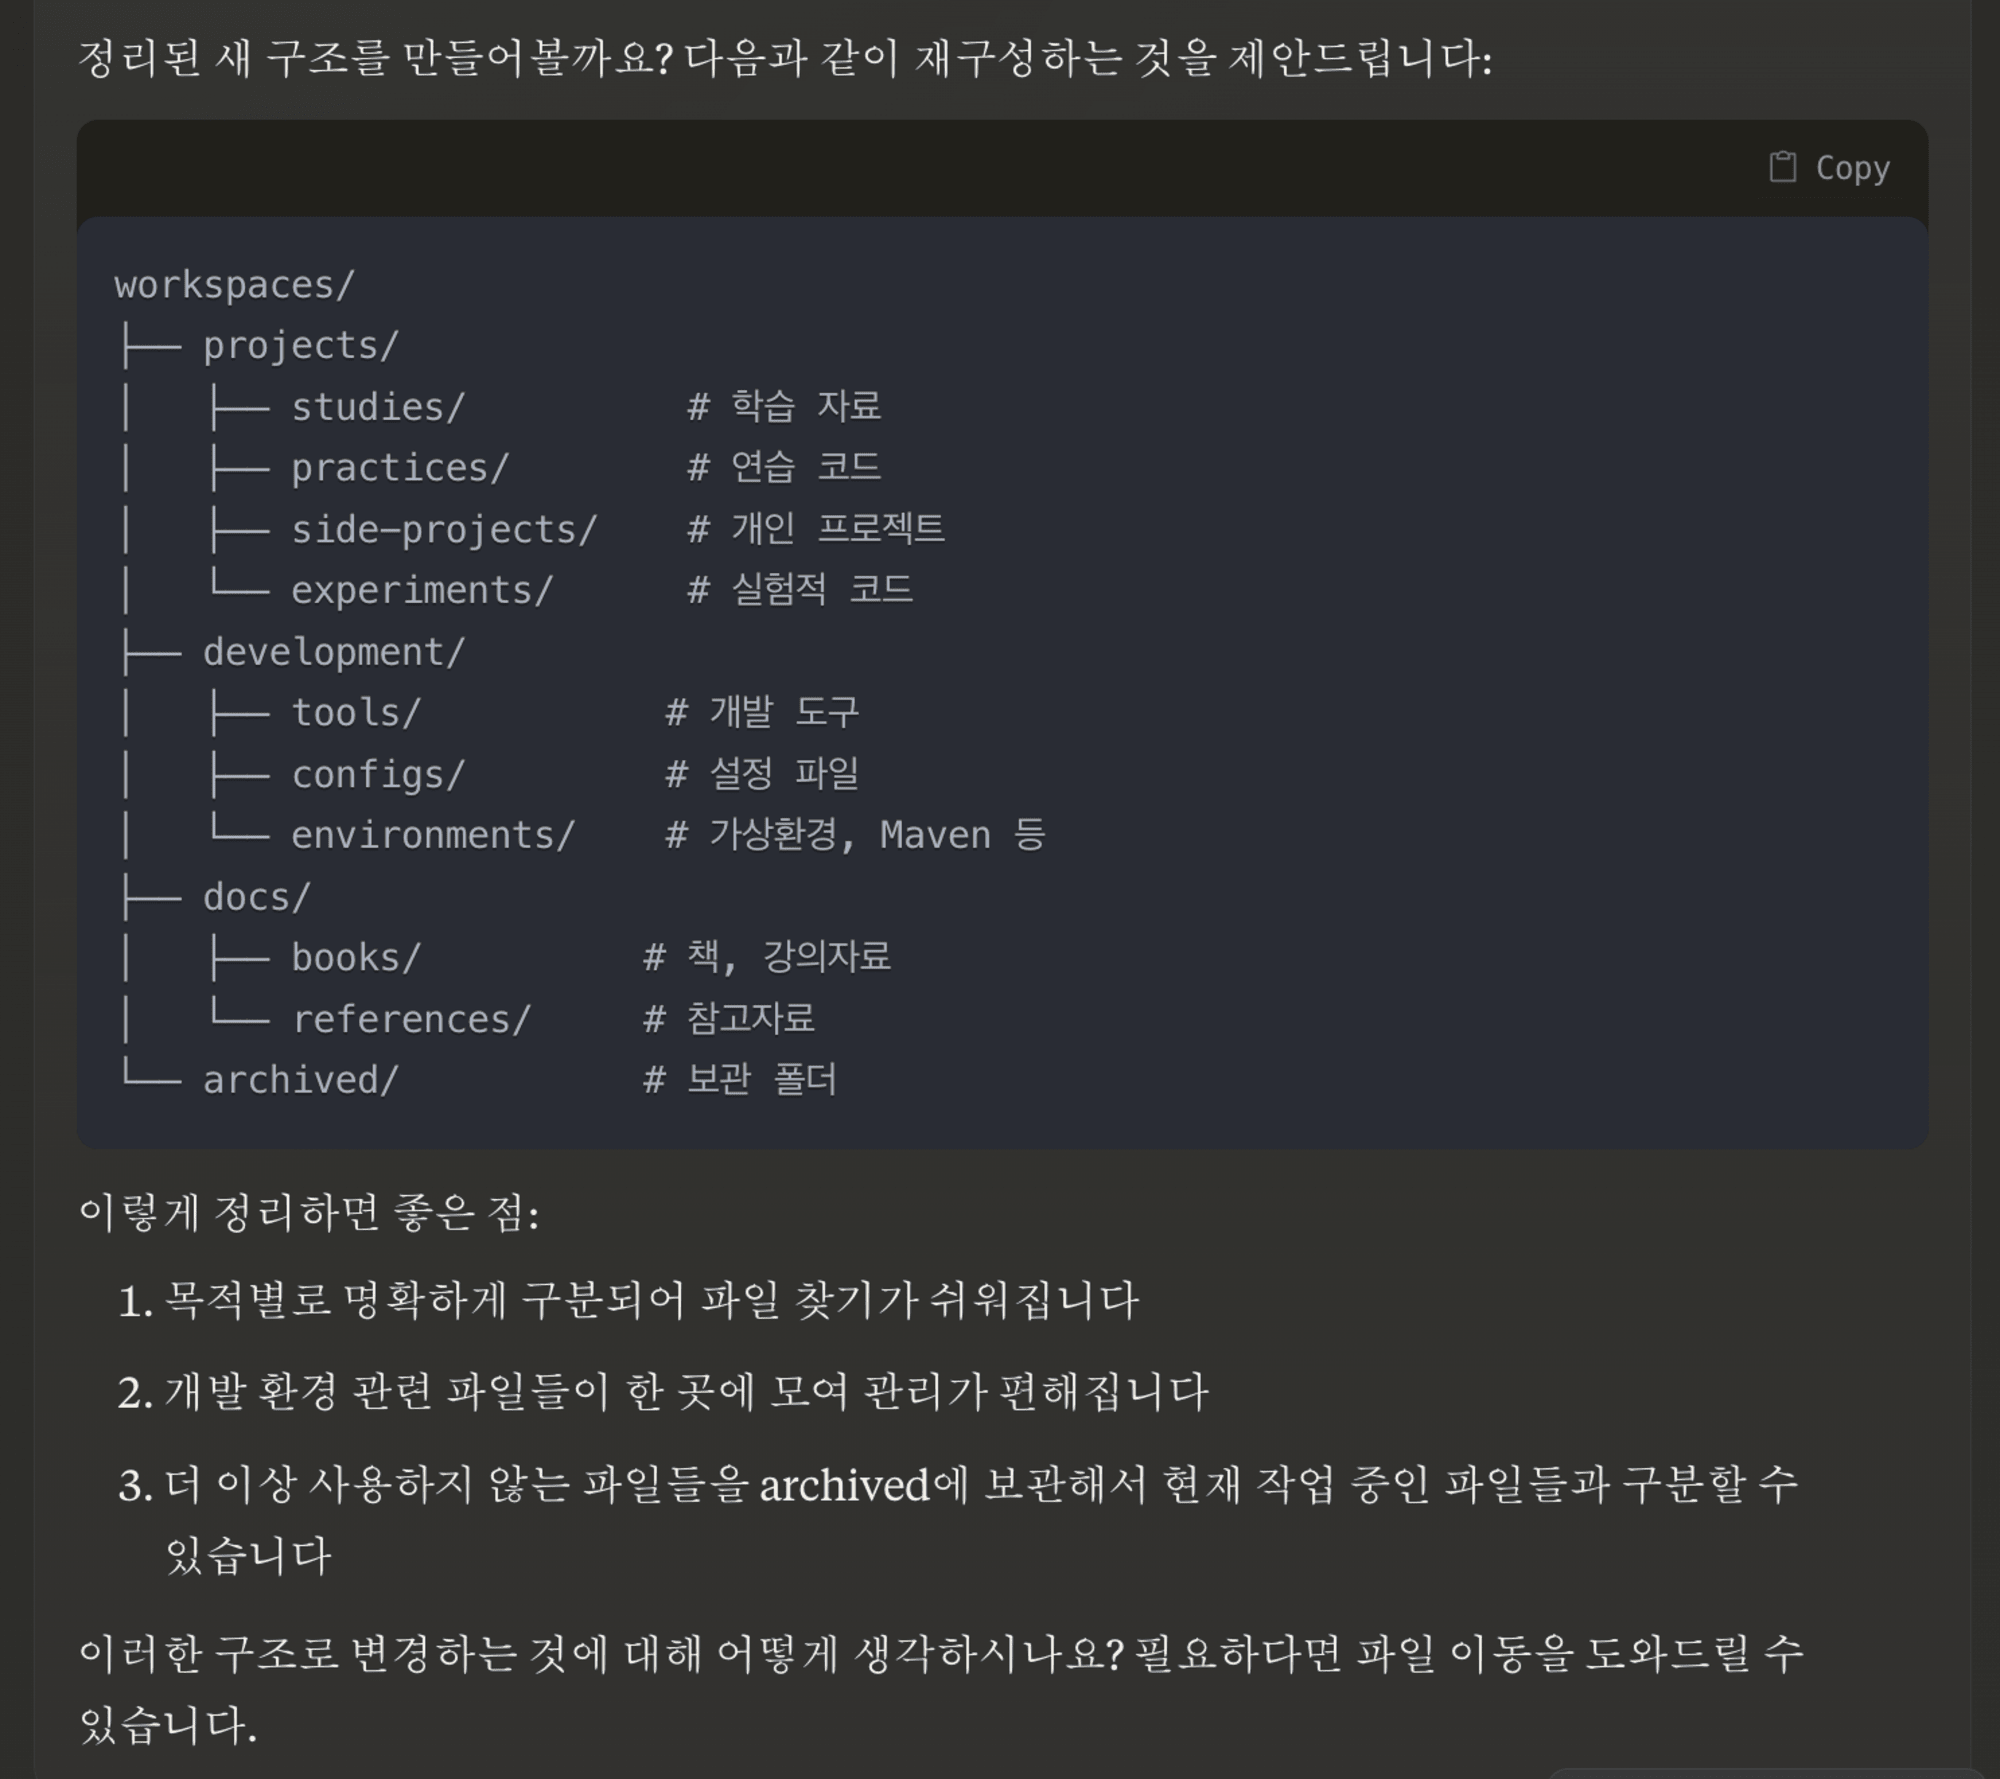
확인한 경로에서 어떤 식으로 할지 제안도 해주네요.
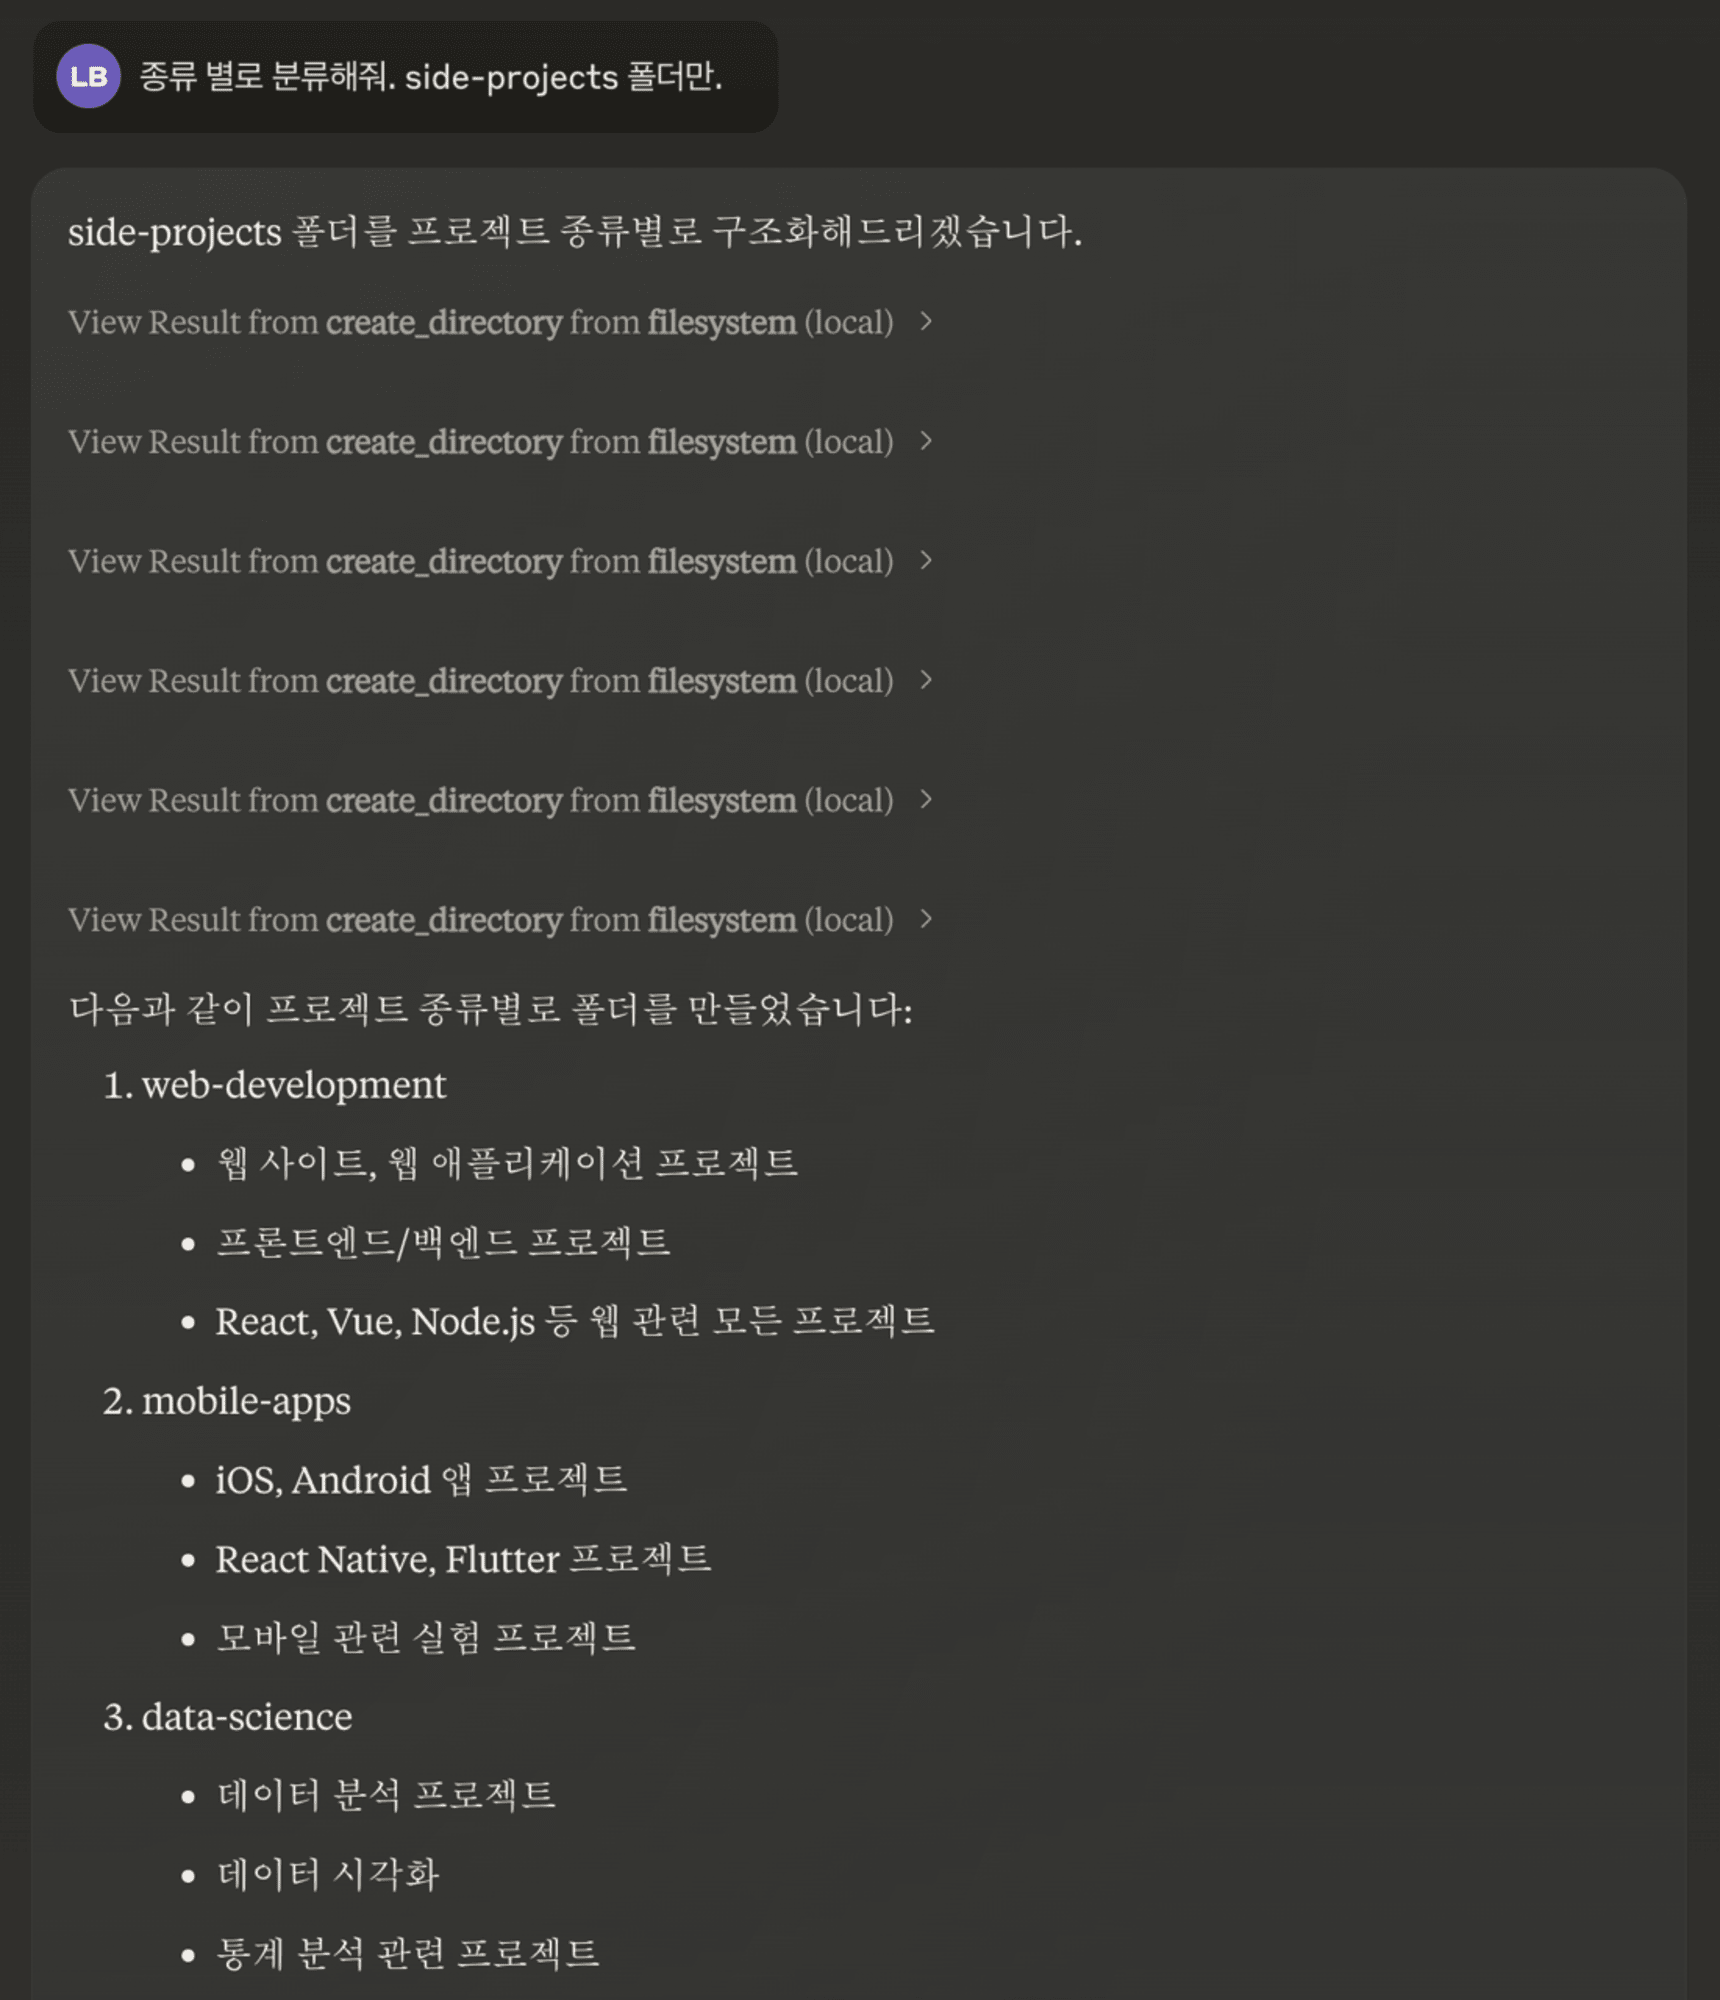
특정 폴더 안에서의 내부 폴더만 정리하도록 부탁해 보겠습니다.
❯ ls Projects
 automation-scripts   experiments        mobile-apps
 data-science         machine-learning   web-development
실제로 폴더를 만드는 것까지 확인할 수 있었습니다. 👀
어떻게 동작하는 걸까?
이번에 사용한 기능은 Tool 입니다. Tool은 LLM이 사용자의 요청에 따라 이미 정의해둔 동작을 실행시킬 수 있게 됩니다.
실제 코드로 확인해 보겠습니다.
아래 코드는 어떤 툴을 사용할 수 있는지 알려주는 리스팅하는 핸들러입니다. LLM은 사용자의 요청을 보고 사용할 수 있는 툴이 있다면 위의 리스트에서 선택하게 됩니다.
아까의 질문에서 폴더를 정리하라는 요청을 받고 경로를 확인하거나 폴더를 만들었는데, 이 리스트에 그런 동작을이 정의되어있었기에 LLM이 선택할 수 있게 된 것입니다.
// Tool handlers
server.setRequestHandler(ListToolsRequestSchema, async () => {
  return {
    tools: [
      {
        name: "read_file",
        description:
          "Read the complete contents of a file from the file system. " +
          "Handles various text encodings and provides detailed error messages " +
          "if the file cannot be read. Use this tool when you need to examine " +
          "the contents of a single file. Only works within allowed directories.",
        inputSchema: zodToJsonSchema(ReadFileArgsSchema) as ToolInput,
      },
      {
        name: "read_multiple_files",
        description:
          "Read the contents of multiple files simultaneously. This is more " +
          "efficient than reading files one by one when you need to analyze " +
          "or compare multiple files. Each file's content is returned with its " +
          "path as a reference. Failed reads for individual files won't stop " +
          "the entire operation. Only works within allowed directories.",
        inputSchema: zodToJsonSchema(ReadMultipleFilesArgsSchema) as ToolInput,
      },
      {
        name: "write_file",
        description:
          "Create a new file or completely overwrite an existing file with new content. " +
          "Use with caution as it will overwrite existing files without warning. " +
          "Handles text content with proper encoding. Only works within allowed directories.",
        inputSchema: zodToJsonSchema(WriteFileArgsSchema) as ToolInput,
      },

      ...
그러면 실제 동작하는 코드 쪽을 확인해 봅시다. 리스트에 정의해둔 Tool 들을 어떻게 동작할지 정의하고 있습니다. Tool의 이름과 사용자의 입력에서 받은 arguments를 이용하여 서버에서 동작하는 방식으로 이루어져 있습니다.
server.setRequestHandler(CallToolRequestSchema, async (request) => {
  try {
    const { name, arguments: args } = request.params;

    switch (name) {
      case "read_file": {
        const parsed = ReadFileArgsSchema.safeParse(args);
        if (!parsed.success) {
          throw new Error(`Invalid arguments for read_file: ${parsed.error}`);
        }
        const validPath = await validatePath(parsed.data.path);
        const content = await fs.readFile(validPath, "utf-8");
        return {
          content: [{ type: "text", text: content }],
        };
      }

      case "read_multiple_files": {
        const parsed = ReadMultipleFilesArgsSchema.safeParse(args);
        if (!parsed.success) {
          throw new Error(`Invalid arguments for read_multiple_files: ${parsed.error}`);
        }
        const results = await Promise.all(
          parsed.data.paths.map(async (filePath: string) => {
            try {
              const validPath = await validatePath(filePath);
              const content = await fs.readFile(validPath, "utf-8");
              return `${filePath}:\n${content}\n`;
            } catch (error) {
              const errorMessage = error instanceof Error ? error.message : String(error);
              return `${filePath}: Error - ${errorMessage}`;
            }
          }),
        );
        return {
          content: [{ type: "text", text: results.join("\n---\n") }],
        };
      }

      case "write_file": {
        const parsed = WriteFileArgsSchema.safeParse(args);
        if (!parsed.success) {
          throw new Error(`Invalid arguments for write_file: ${parsed.error}`);
        }
        const validPath = await validatePath(parsed.data.path);
        await fs.writeFile(validPath, parsed.data.content, "utf-8");
        return {
          content: [{ type: "text", text: `Successfully wrote to ${parsed.data.path}` }],
        };
      }
만약 직접 이런 Tool의 동작을 직접 처리해야 했다면 LLM에서 Tool 리스트를 얻고 찾고 선택해서 사용하고 데이터를 받아 다시 전해주는 일련의 과정이 필요했겠지만, MCP는 그런 과정을 추상화하여 위의 핸들러에서 정의만 해주면 자동으로 처리가 되는 편리한 구조를 가졌습니다. 🫨
마무리
아직 공개 초기이다 보니 UX/DX 적으로 개선될 수 있는 점들이 있는 것 같지만, LLM이 Tool을 사용할 수 있게 하는 과정이 매우 직관적이고 사용하기 쉬워진 것 같습니다.
작성해야 하는 코드도 복잡하지 않기 때문에 프레임워크로써도 매우 훌륭한 것 같습니다.
아직 여러 어플리케이션을 연결하기 위해서는 오픈소스를 통해 많은 사람들의 기여가 필요할 것 같습니다.
Tool 이외에도 여러 기능이 있고 앞으로도 계속해서 다양한 기능이 공개될 예정이다 보니 주의 깊게 바라볼 만한 프로젝트인 것 같습니다.


