
「Astro + shadcn/ui + Lucia Auth(v3) + Prisma + Supabase」で遊ぶ
この記事は公開されてから1年以上経過しています。情報が古い可能性がありますので、ご注意ください。
こんにちは、こんばんわ。 「ゴルフバカエンジニアです。」 どうも、@札幌の hiro です。
今回は「Astro + shadcn/ui +Lucia Auth(v3) + Prisma + Supabaseで遊ぶ」です。
はじめに
Supabaseを除いて触ってみたかった技術を使用して、ログイン機能付きブログサイトを構築した実践例をご紹介します。
以下のように、ログインしてブログ画面に遷移する感じです。
パスワードを簡単なものにしていたので、Chromeに怒られています。すみません
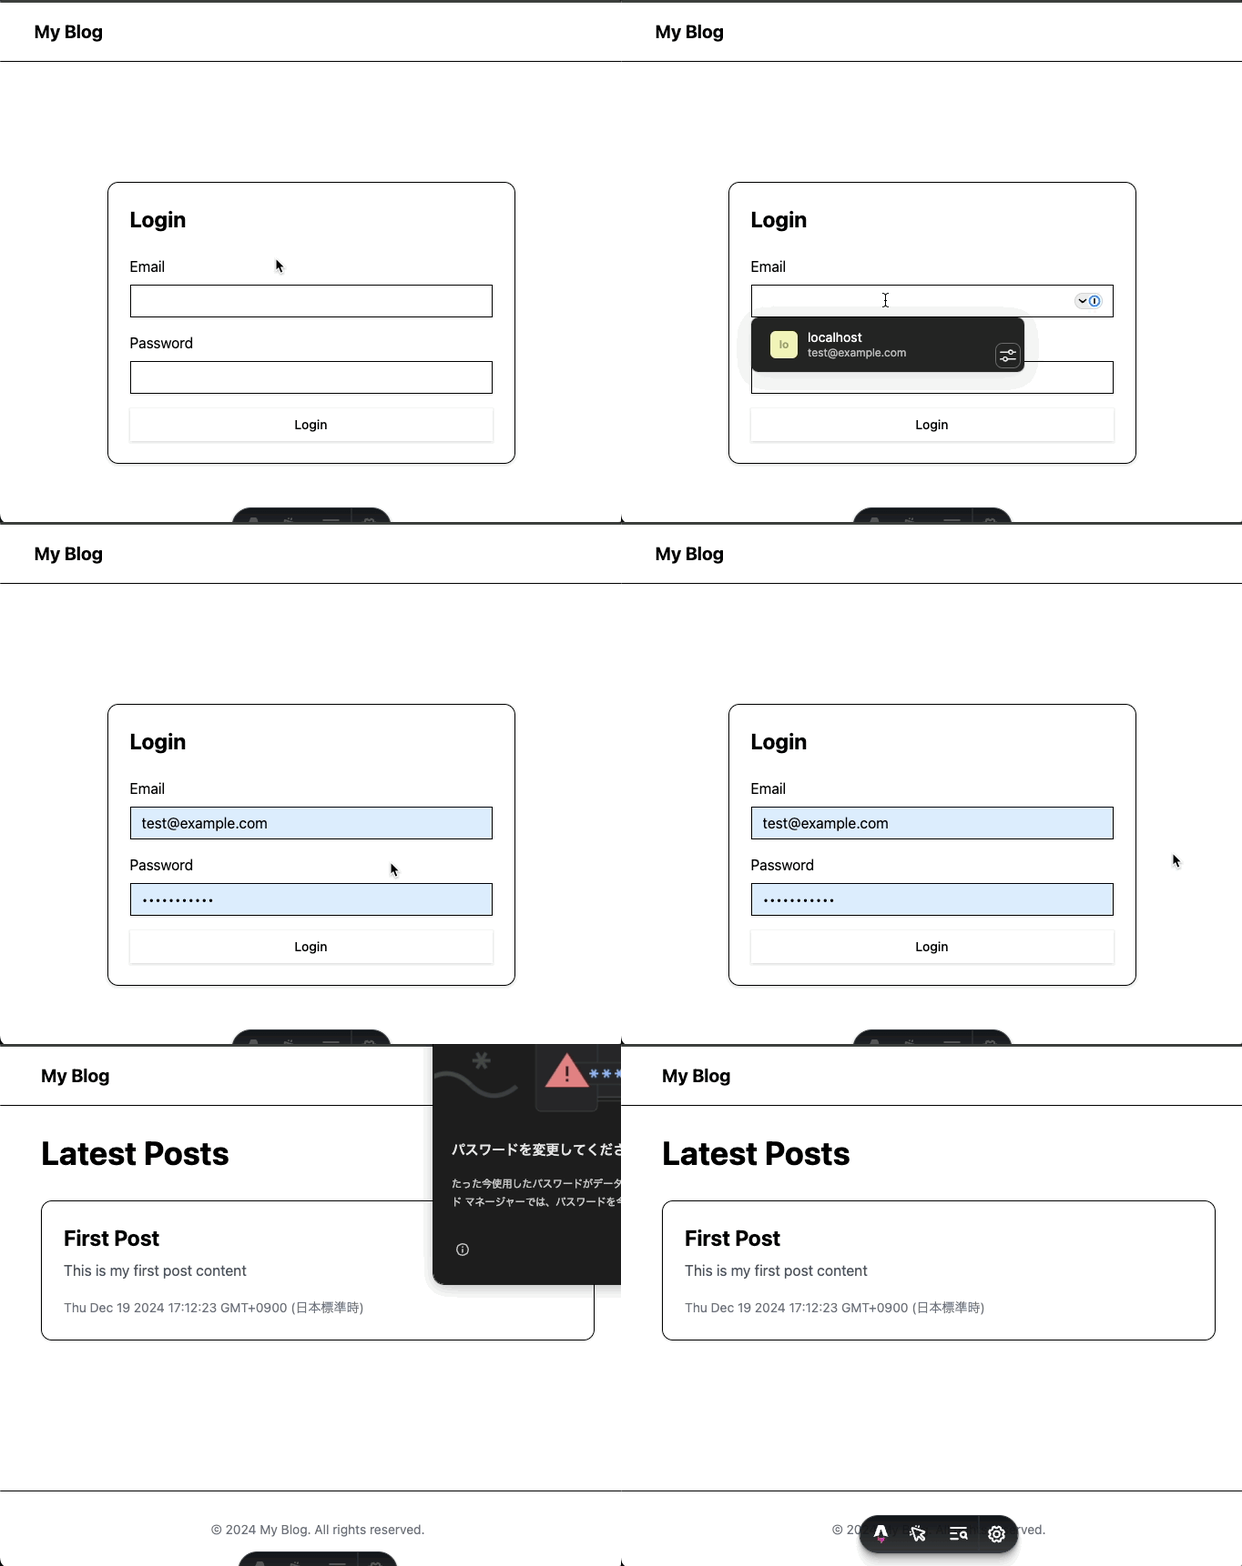
事前準備と動作確認
使用技術の概要
Astroとは
stroは高パフォーマンスな静的サイトジェネレーターです。
以下の特徴があります:
- コンテンツ重視のWebサイトに最適化
- 必要な JavaScript のみを配信する「アイランドアーキテクチャ」採用
- React、Vue、Svelteなど複数のUIフレームワークとの互換性
詳細は、弊社記事で記載されているのをご確認ください。
shadcn/uiとは
shadcn/uiは、再利用可能なReactコンポーネントのコレクションです。
特徴として:
- コピー&ペーストで利用可能なコンポーネント
- Radix UIとTailwind CSSをベースにした高度なカスタマイズ性
- アクセシビリティを考慮した設計
詳細は、弊社記事で記載されているのをご確認ください。
Lucia Authとは
Lucia Authは、TypeScript優先の認証ライブラリです。
特徴として:
- シンプルなAPI設計
- セッションベースの認証
- 複数のデータベースとフレームワークのサポート
詳細は以下よりご確認ください。
Prismaとは
Prismaは、Node.js/TypeScript向けの次世代ORMです。
特徴として:
- 型安全なデータベースクライアント
- 直感的なスキーマ定義言語
- マイグレーション管理の自動化
- 複数のデータベース(PostgreSQL、MySQL、SQLite等)をサポート
詳細は以下よりご確認ください。
環境構築
プロジェクトのセットアップ
まず、Astroプロジェクトを作成します。
$ npm create astro@latest
色々聞かれますが、以下などを参考に構築したい環境でセットアップします。
Astroでは、ReactやVue、Svelteなどのフレームワークもサポートしているでのここも自分がセットアップしたい環境に合わせます。
$ npx astro add react
shardcn/uiやTailwindのインストールと設定
shardcn/uiやTailwindを利用するために、以下を実施。
$ npx astro add tailwind
インテグレーション管理やSSR有効化などで利用するための設定ファイルに、astro.config.mjsがあるので、一旦reactとtailwind内容を記述します。
import { defineConfig } from 'astro/config';
import react from "@astrojs/react";
import tailwind from "@astrojs/tailwind";

// https://astro.build/config
export default defineConfig({
  integrations: [react(), tailwind()]
});
shadcn/uiをinitしていく。ここも諸々聞かれますが、ここでは割愛します。
npx shadcn-ui@latest init
また、Tailwind CSSの基本スタイルの適用方法を制御するためのオプションなどを設定していきます。
export default defineConfig({
  integrations: [
    tailwind({
      applyBaseStyles: false,
    }),
  ],
})
Astroコンポーネント内のTailwindクラスも適切に処理して欲しいので、tailwind.config.mjsにも以下を追加します。
content: ["./src/**/*.{astro,html,js,jsx,md,mdx,svelte,ts,tsx,vue}"]
globals.cssファイルにTailwindの3つの主要なレイヤーを配置していきます。
@tailwind base;
@tailwind components;
@tailwind utilities;
globals.cssファイルを読み込んでもらうために、Layout.astroで読み込み設定をします。配置するディレクトリはよしなに対応してください。端折って記述しています。
---
import '@/styles/globals.css';
---

<!DOCTYPE html>
<html>
  <head>
  <body>
   <slot />
  </body>
</html>
tsconfig.jsonファイルをパス解決のために設定します。
{
  "compilerOptions": {
    // ...
    "baseUrl": ".",
    "paths": {
      "@/*": [
        "./src/*"
      ]
    }
    // ...
  }
}
詳細は、shadcn公式を確認してください。
PrismaやSupabaseのインストールと設定
次に、PrismaやLucia Authなどを入れていきます。
$ npm install @lucia-auth/adapter-prisma @prisma/client lucia
$ npm install -D prisma
Prismaのスキーマを後程記載するので、事前にSupabaseのinitを行っておく。
Supabaseの管理画面での設定方法など弊社記事で紹介している方がたくさんいますので、参考にしてください。またSupabaseはローカルでも実行できるので、お好みで。
$ npm install @supabase/supabase-js
$ npx supabase init
prismaの話に戻ります。
$ npx prisma init
Supabaseのデータベースを指定します。
DATABASE_URL="postgresql://postgres.[プロジェクトID]:[パスワード]@aws-0-ap-northeast-1.pooler.supabase.com:6543/postgres??pgbouncer=true&connection_limit=1"
DIRECT_URL="postgresql://postgres.[プロジェクトID]:[パスワード]@aws-0-ap-northeast-1.pooler.supabase.com:5432/postgres"
Transaction poolerを指定して接続数を1にしています。詳細は以下より確認できます。
Lucia Authのインストールと設定
Luciaを入れていきます。今回はv3を利用しています。
adapter-prismaの部分は、接続するデータベースによって変わるので注意してください。
$ npm install @lucia-auth/adapter-prisma lucia
astro.config.mjsファイルで、SSRへの変更を行なっておきます。
import { defineConfig } from 'astro/config';

// https://astro.build/config
export default defineConfig({
  output: 'server',
});
やってみた
とてもセットアップが長かったですが、やっと本題です。
一旦フロントに諸々情報を表示する前に、テーブル定義やテストデータなどを流しておきます。
テーブル定義やテストデータなど準備
スキーマ定義
prisma/schema.prismaにスキーマができるので、やりたいことに合わせて設定。
今回は画面ではログインと記事だけを確認する感じですが、User/Session/Postなどのmodelを作っておきます。
generator client {
  provider = "prisma-client-js"
}

datasource db {
  provider  = "postgresql"
  url       = env("DATABASE_URL")
  directUrl = env("DIRECT_URL")
}

model User {
  id             String    @id
  email          String    @unique
  hashedPassword String
  createdAt      DateTime  @default(now())
  updatedAt      DateTime  @updatedAt
  posts          Post[]
  sessions       Session[]
}

model Session {
  id             String @id
  userId         String¥
  expiresAt DateTime
  user           User   @relation(fields: [userId], references: [id])

  @@index([userId])
}

model Post {
  id        String   @id @default(cuid())
  title     String
  content   String
  published Boolean  @default(false)
  authorId  String
  createdAt DateTime @default(now())
  updatedAt DateTime @updatedAt
  author    User     @relation(fields: [authorId], references: [id])

  @@index([authorId])
}
Seedの準備
prisma/seed.tsファイルを作って事前にユーザやブログ記事を投稿しておきます。
import { PrismaClient } from "@prisma/client";
import { createId } from "@paralleldrive/cuid2"; // cuid2を使用
import { Argon2id } from "oslo/password";

const prisma = new PrismaClient();

async function main() {
  try {
    const hashedPassword = await new Argon2id().hash("password123");

    const user = await prisma.user.create({
      data: {
        id: createId(),
        email: "test@example.com",
        hashedPassword,
        posts: {
          create: [
            {
              id: createId(),
              title: "First Post",
              content: "This is my first post content",
              published: true,
            },
          ],
        },
      },
    });
  } catch (error) {
    console.error("Error seeding data:", error);
    throw error;
  }
}

main()
  .catch((e) => {
    console.error(e);
    process.exit(1);
  })
  .finally(async () => {
    await prisma.$disconnect();
  });
Supabaseにテーブル定義、およびSeedを流し込む
$ npx prisma migrate dev --name init
数分待っていると、Supabase管理画面で定義した内容が確認できます。
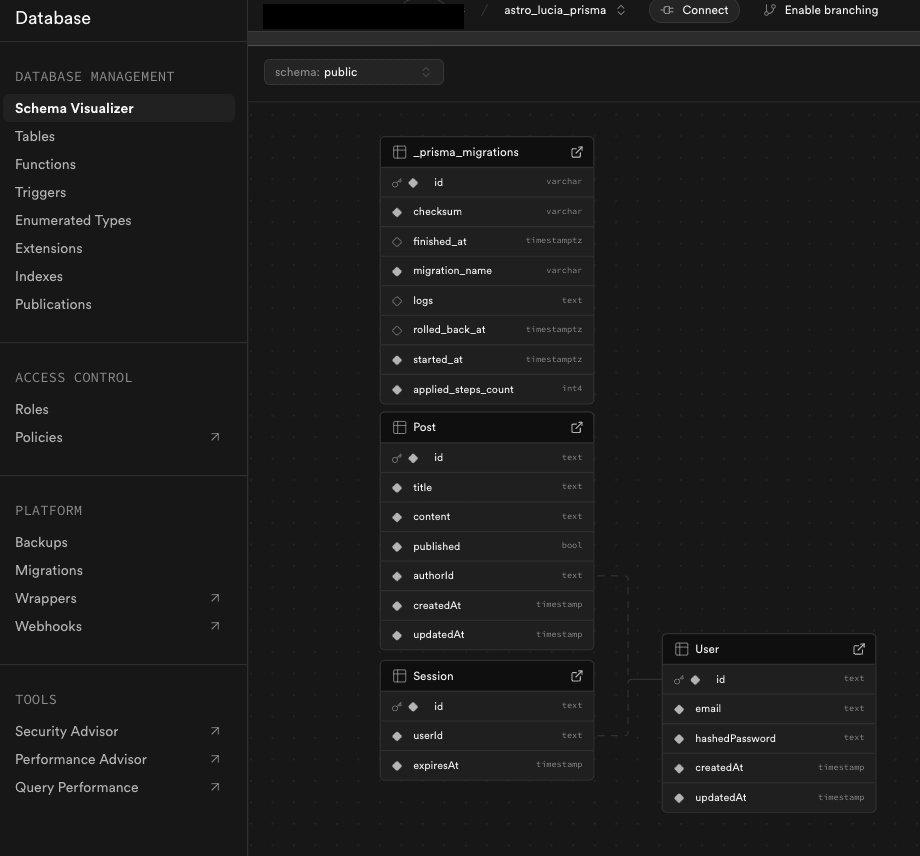
prismaのstudioでもテーブル情報を確認
$ npx prisma studio
上記コマンドを打つと、localhostのURLが吐き出されるので、アクセスするとテーブルの一覧やデータを確認できます。
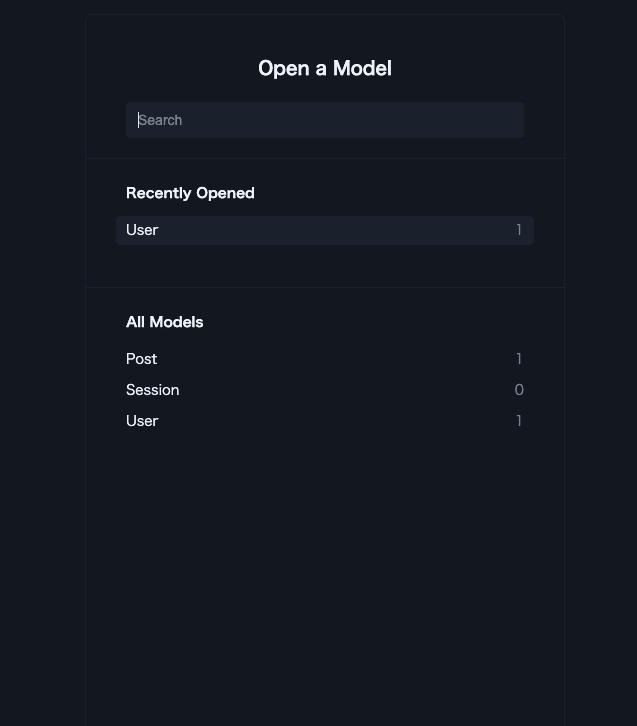
データも問題なさそうです。


型情報やクライアントコードを生成
TypeScriptの型定義を含むクライアントコードを作成するために、以下を実施しておきます。
node_modules/.prisma/clientに型情報などが定義されます。
$ npx prisma generate
ログインからポスト画面
src/pages/index.astroでログインページに飛ばすようにして、ログインができていたときにブログ一覧画面へ遷移するようにさせる。
---
  import { PostList } from '@/components/posts/PostList';
import { getSession } from '@/lib/session';
import { PrismaClient } from "@prisma/client";
import Layout from '../layouts/Layout.astro';

// 認証チェック
const session = await getSession(Astro);
if (!session) {
  return Astro.redirect('/auth/login');
}
const prisma = new PrismaClient();
// 投稿データの取得
const posts = await prisma.post.findMany({
  where: { published: true },
  orderBy: { createdAt: 'desc' }
});
---

<Layout title="My Blog">
  <main class="container mx-auto px-4 py-8">
    <h1 class="text-4xl font-bold mb-8">Latest Posts</h1>
    <PostList posts={posts} client:load/>
  </main>
</Layout>
土台のLayoutは適当に以下のように設定。
---
import Footer from '@/components/layouts/static/Footer.astro';
import Header from '@/components/layouts/static/Header.astro';
import '@/styles/globals.css';

---

<!DOCTYPE html>
<html lang="en">
  <head>
    <meta charset="UTF-8" />
    <meta name="viewport" content="width=device-width" />
    <link rel="icon" type="image/svg+xml" href="/favicon.svg" />
    <title>blog</title>
    <meta name="description" content="blog" />
  </head>
  <body class="min-h-screen bg-background">
    <div class="flex flex-col min-h-screen">
      <Header />
      <slot />
      <Footer />
    </div>
  </body>
</html>
session管理
src/lib/session.tsでセッションの管理をする。セッション名などはよしなに。
import type { AstroGlobal } from "astro";
import { lucia } from "./auth";

export async function getSession(Astro: AstroGlobal) {
  const sessionId = Astro.cookies.get("auth_session")?.value ?? null;

  if (!sessionId) {
    return null;
  }

  try {
    const { session } = await lucia.validateSession(sessionId);

    if (!session) {
      return null;
    }
    if (session && session.fresh) {
      const sessionCookie = lucia.createSessionCookie(session.id);
      Astro.cookies.set(
        sessionCookie.name,
        sessionCookie.value,
        sessionCookie.attributes
      );
    }
    if (!session) {
      const sessionCookie = lucia.createBlankSessionCookie();
      Astro.cookies.set(
        sessionCookie.name,
        sessionCookie.value,
        sessionCookie.attributes
      );
    }
    return session ?? null;
  } catch {
    return null;
  }
}
ログイン画面へ遷移
src/pages/auth/login.astroに遷移させていたので、ログインフォームへ飛ぶようにルーティング。
---
import { LoginForm } from '@/components/auth/LoginForm';
import AuthLayout from '@/layouts/AuthLayout.astro';
import { getSession } from '@/lib/session';

// すでにログインしている場合はリダイレクト
const session = await getSession(Astro);
if (session) {
  return Astro.redirect('/');
}
---

<AuthLayout>
  <LoginForm client:load />
</AuthLayout>
ログインフォームへルーティングする。
フロント部分が長くなるので、fetchでAPI叩く部分だけ抜粋します。
export const LoginForm = () => {
    const handleSubmit = async (e: React.FormEvent) => {
    e.preventDefault();
    setError(null);

    try {
      const response = await fetch("/api/auth/login", {
        method: "POST",
        body: JSON.stringify({ email, password }),
        headers: {
          "Content-Type": "application/json",
        },
      });

      if (!response.ok) {
        const data = await response.json();
        throw new Error(data.message || "Login failed");
      }

      // 成功時はリダイレクト
      window.location.href = "/";
    } catch (err) {
      setError(err instanceof Error ? err.message : "An error occurred");
    }
  };

  // 省略
  return(
  )
}
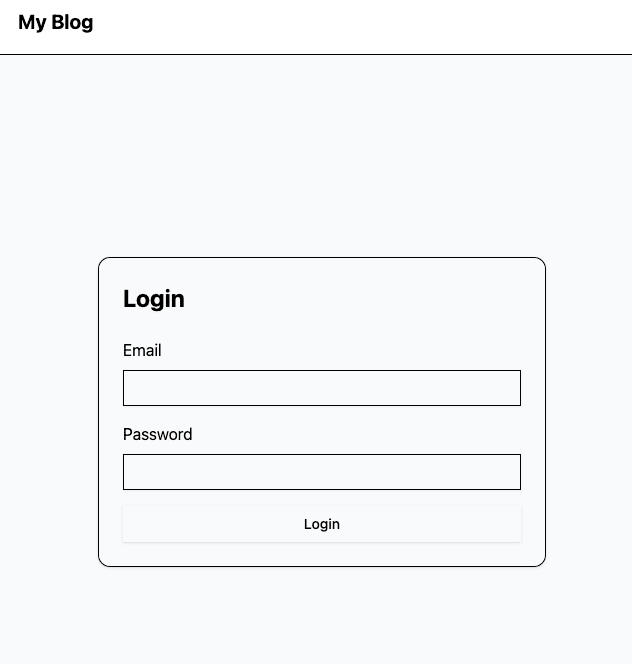
サーバーにprisma経由で諸々情報を投げる。
export const POST: APIRoute = async ({ request, cookies }) => {
  try {
    const body = await request.json();
    const { email, password } = body;

    // バリデーションはよしなに

    // ユーザーの検索
    const existingUser = await prisma.user.findUnique({
      where: { email: email.toLowerCase() }
    });

    if (!existingUser) {
      return new Response(JSON.stringify({ error: "Invalid credentials" }), {
        status: 400
      });
    }

    // パスワードの検証
    const validPassword = await new Argon2id().verify(
      existingUser.hashedPassword,
      password
    );

    if (!validPassword) {
      return new Response(JSON.stringify({ error: "Invalid credentials" }), {
        status: 400
      });
    }

    // セッションの作成
    const session = await prisma.session.create({
      data: {
        id: crypto.randomUUID(),
        userId: existingUser.id,
        expiresAt: new Date(Date.now() + 7 * 24 * 60 * 60 * 1000), // 7日後
      },
    });

    // セッションクッキーの設定
    const sessionCookie = lucia.createSessionCookie(session.id);
    cookies.set(
      sessionCookie.name,
      sessionCookie.value,
      sessionCookie.attributes
    );

    return new Response(null, {
      status: 302,
      headers: { Location: "/" }
    });
  } catch (error) {
    return new Response(JSON.stringify({ error: "An error occurred" }), {
      status: 500
    });
  }
};
session情報をテーブルに保存しながら、ユーザに入力された情報でログインができます。
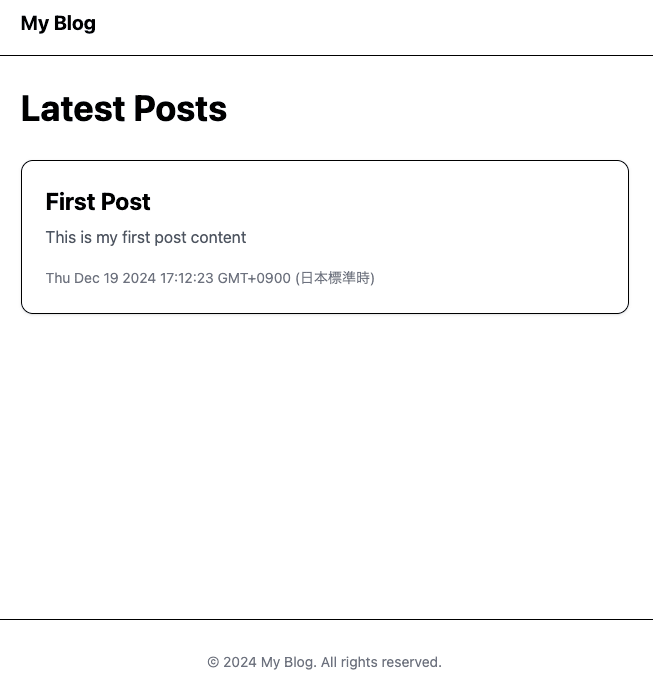
src/pages/index.astroで定義されていたpostsをテーブルから受け取って、src/components/posts/PostList.tsxに流して表示します。
import { Card } from "@/components/ui/card";
import type { Post } from "@prisma/client";

type Posts = Omit<Post, "published, authorId">;

export const PostList = (props: { posts: Posts[] }) => {
  const { posts } = props;
  return (
    <div className="grid gap-6 md:grid-cols-2 lg:grid-cols-3">
      {posts.map((post) => (
        <Card key={post.id}>
          <div className="p-6">
            <h2 className="text-2xl font-bold mb-2">{post.title}</h2>
            <p className="text-gray-600 mb-4">{post.content}</p>
            <time className="text-sm text-gray-500">
              {post.updatedAt.toString()}
            </time>
          </div>
        </Card>
      ))}
    </div>
  );
};
これで、seedで流したデータが閲覧できるようになっていると思います。
$ npm run dev
prisma studioでセッション情報なども確認できます。

躓いたところ
「No import alias found in your tsconfig.json file.」でnpx shadcn@latest initができない
tsconfig.jsonのpathsの書き方を気付かぬうちに変更してしまっていた影響で、うまく入ってくれませんでした。
以下を参考に解消しました。
Lucia Authの記事でv2とv3の書き方が乱立していて、Prismaスキーマ定義でSessionのmodelの書き方ミスした
Prismaのスキーマ定義でSession部分と取り扱い方で、active_expiresとidleExpiresの2つのフィールドを定義し、BigIntが利用されているケースがあるが、Lucia Auth(v3)ではexpiresAtフィールドを定義して型をDateTimeにしましょう。
以下公式の通りSessionのmodelを設定します。
astro.config.mjsでoutput: 'server'指定しないと「Astro.request.headers` is not available in "static"...」で怒られる
[WARN] `Astro.request.headers` is not available in "static" output mode. To enable header access: set `output: "server"` or `output: "hybrid"` in your config file.
上記でoutputを設定することを失念していたので怒られていました。
しっかりドキュメントを見ましょうということですね。
Prismaのデータベースを設定する際に、SupabaseのURI設定でDirect connectionを指定しても「Error: P1001 Can't reach database server at db.hoge.supabase.co:5432」で接続ができない
こちらもしっかり公式に記述されていました。ドキュメントを確認しましょうということです。
最後に
Supabase以外、「Astro + shadcn/ui + Lucia Auth(v3) + Prisma」で遊ぶのは初めてでしたが、諸々の触り心地は悪くない感じでした。
Astroは、正直最初慣れませんでした。ただ慣れると使いやすい印象です。コンポーネントの管理などが大事な気がしました。
shadcn/uiは、さすが人気なだけあってaddするだけである程度揃ってしまうのが「お〜!」という驚きがありました。
Prismaは、ORMを触るのは実はEloquent ORMぶりでかなり久しぶりだったので懐かしかったです。とても触りやすいですし、Supabaseとの相性もかなりいい感じでした。
Lucia Auth(v3)は、OAuthで他の連携するときもかなり楽そうなのでいいなーという感じでした。
一気に触りたかった技術を触れたので満足です。年末年始の宿題予定ですがやってしまったので、他の技術を年末年始は触ろうと思います。ありがとうございました。
では、「ゴルフバカエンジニア」 @札幌の hiro でした。

