
Auth0でSAML NameIDのドメインマッピングを行い、Google WorkspaceにSSOログインしてみた
Auth0 を IdPとして Google Workspace に SAML SSO する際、Auth0 のユーザーメールアドレスのドメインと Google Workspace のドメインが異なるケースがあります。
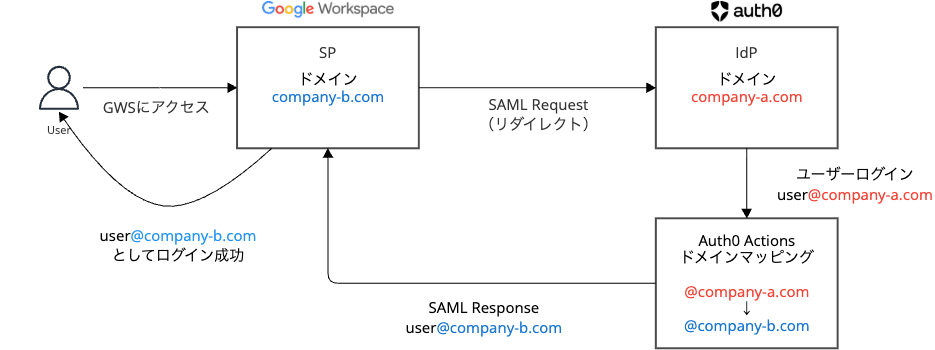
例えば、Auth0 側のユーザーが user@company-a.com で、Google Workspace 側のアカウントが user@company-b.com の場合、通常は SSO ログインできません。SAML の NameID(ユーザー識別子)が一致しないためです。
本記事では、Auth0 Actions を使って SAML Response の NameID を動的に書き換え、ドメインの異なるユーザー間で SSO ログインを実現する方法を検証します。
前提条件
以下のAuth0テナント,GWSドメイン,ユーザーが作成済であること
| 項目 | 値 |
|---|---|
| Auth0 テナント | <your-tenant-domain>.auth0.com |
| Auth0 ユーザー | user@company-a.com |
| Google Workspace ドメイン | company-b.com |
| GWS ユーザー | user@company-b.com |
また、GWSに組織部門を作成しておりGWSユーザーがそこに所属していることを前提としています。
GWS の SSO プロファイルについて
GWS には SSO 設定方法が2種類あります。本記事では SSO プロファイルを使用します。
| Legacy SSO プロファイル | SSO プロファイル | |
|---|---|---|
| 概要 | 以前からの方式。GWS の組織全体に適用 | 2022年に追加。複数 IdP 対応、OU/グループ単位で割当可能 |
| IdP 数 | 1つのみ | 複数可 |
| 適用範囲 | 組織全体(OU/グループで除外は可能) | OU/グループ単位で割り当て |
| ACS URL | https://www.google.com/a/{domain}/acs |
https://accounts.google.com/samlrp/{profile-id}/acs |
やりたいこと
Auth0 に user@company-a.com でログインすると、SAML Response の NameID が user@company-b.com に変換され、Google Workspace に user@company-b.com として SSO ログインできるようにします。
SAML SSO の基本フロー
SAML SSO には SP-Initiated(Google 側から開始)と IdP-Initiated(Auth0 側から開始)の2つのフローがあり、どちらでも動作します。ここでは SP-Initiated フローを例に説明します。
ポイントは ステップ ⑤と⑥ です。Auth0 Actions を使って、SAMLResponse に含まれる NameID を書き換えます。
設定手順
手順1. Auth0 アプリケーションの作成
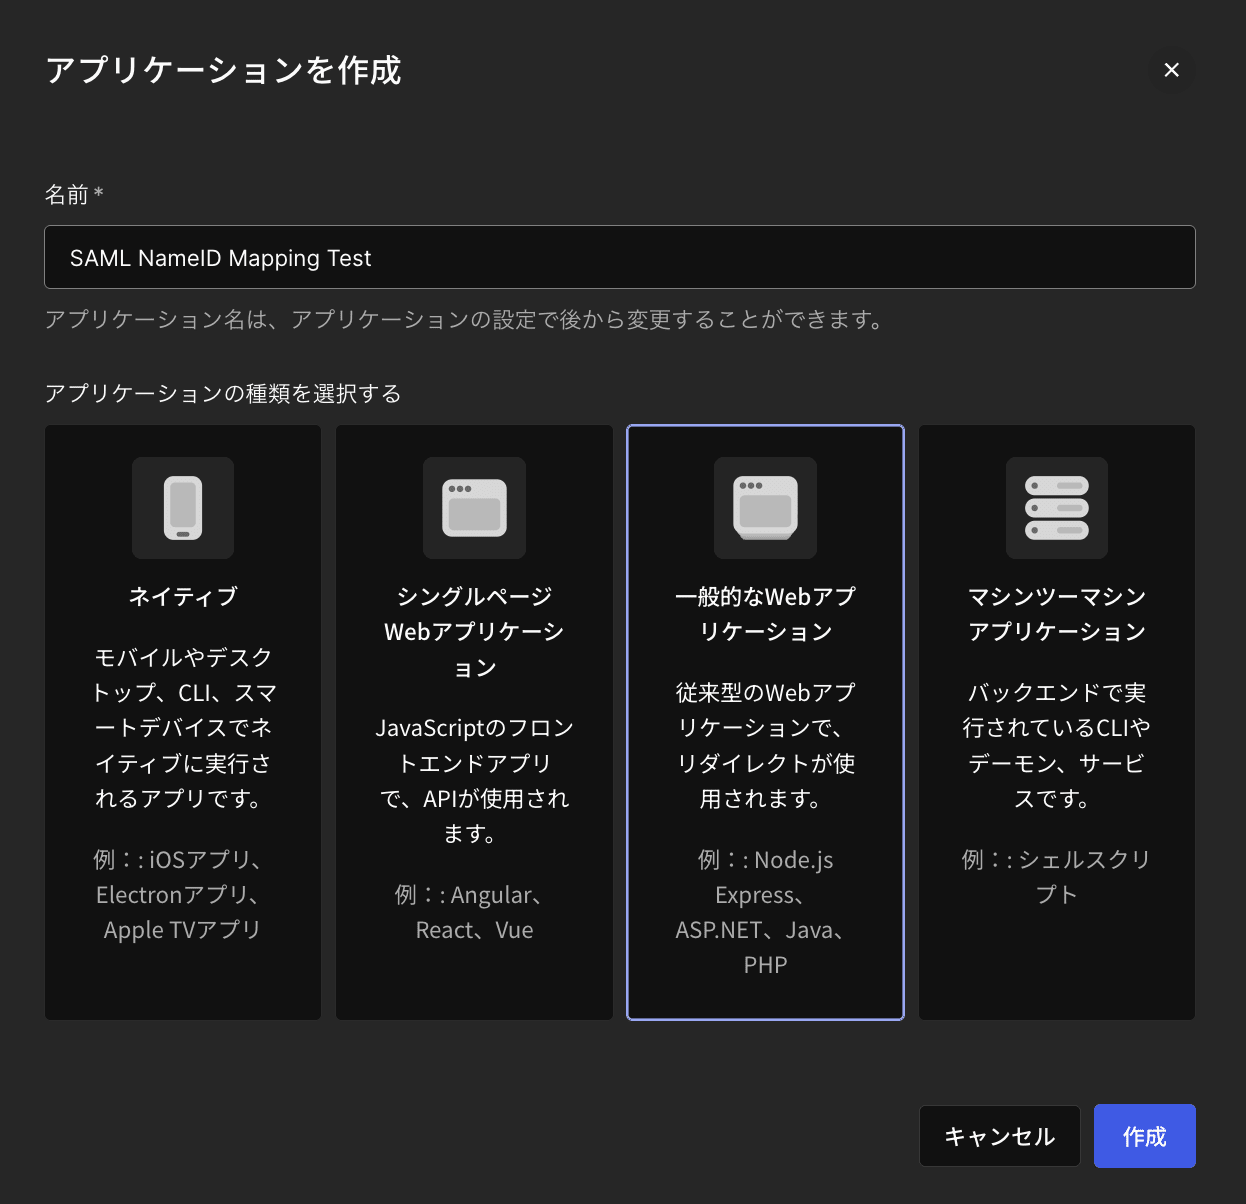
Auth0 Dashboard でアプリケーションを作成します。
- Applications > Applications > Create Application
- Name: 任意(例:
Google Workspace SSO) - Type:
Regular Web Application - Create
さいごまで試していませんが Regular Web Application 以外の Type でも SAML Addon は有効化できるので、本記事の動作は可能だと思います。
手順2. SAML Addon の有効化
作成したアプリケーションの Addons タブで SAML2 Web App を有効化します。
- Addons タブを開く
- SAML2 Web App をオンにする

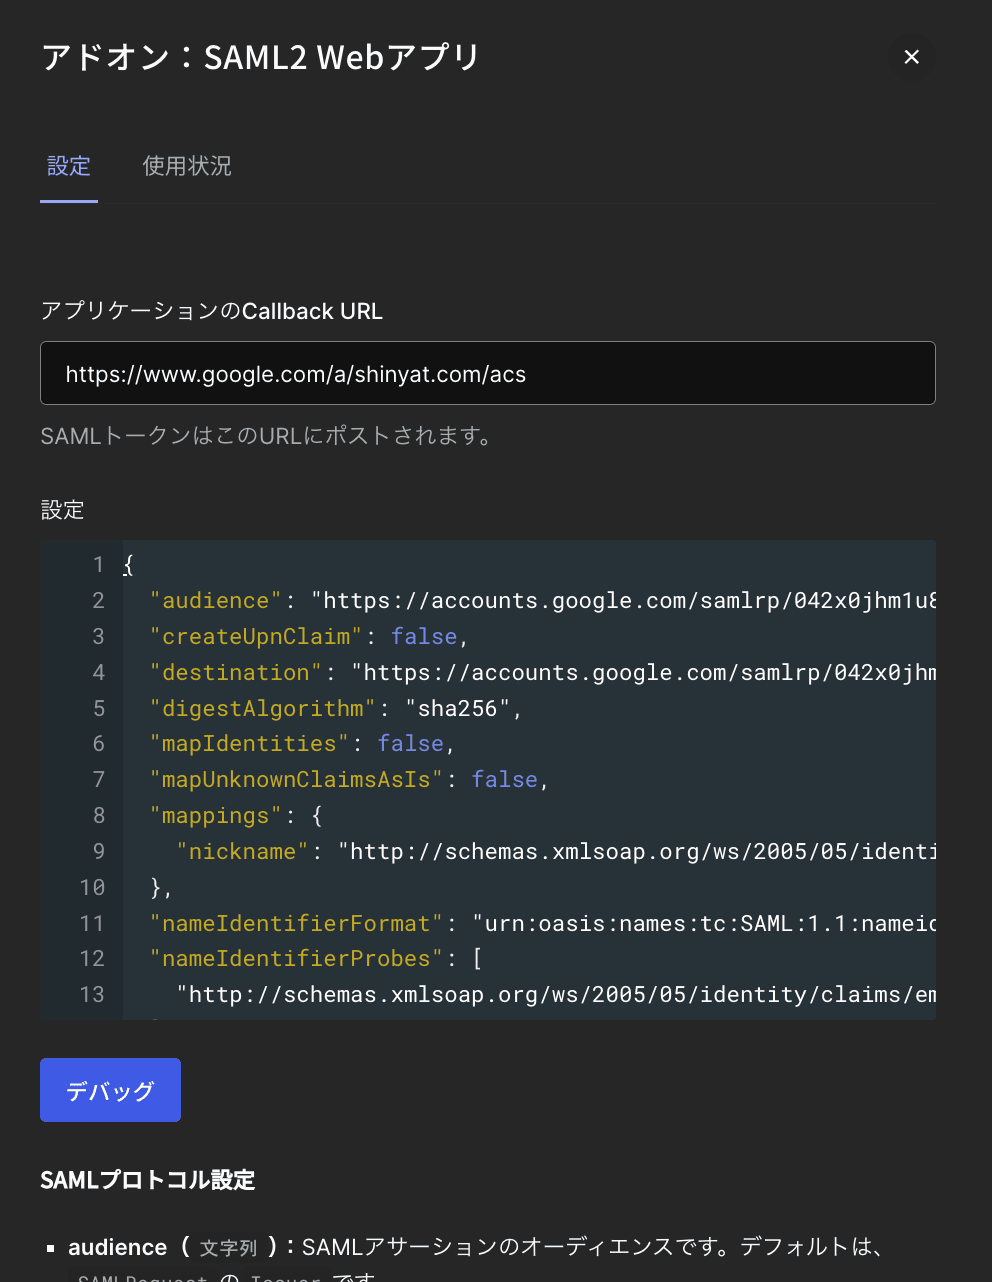
手順3. SAML Addon の設定
Application Callback URL
https://accounts.google.com/samlrp/{SSO-PROFILE-ID}/acs
※ {SSO-PROFILE-ID} は後の GWS 設定(手順 5)で取得します。先に GWS 側でプロファイルを作成してから戻ってきてください。
Settings JSON
{
  "audience": "https://accounts.google.com/samlrp/{SSO-PROFILE-ID}",
  "recipient": "https://accounts.google.com/samlrp/{SSO-PROFILE-ID}/acs",
  "destination": "https://accounts.google.com/samlrp/{SSO-PROFILE-ID}/acs",
  "nameIdentifierFormat": "urn:oasis:names:tc:SAML:1.1:nameid-format:emailAddress",
  "nameIdentifierProbes": [
    "http://schemas.xmlsoap.org/ws/2005/05/identity/claims/emailaddress"
  ],
  "signatureAlgorithm": "rsa-sha256",
  "digestAlgorithm": "sha256",
  "createUpnClaim": false,
  "mapUnknownClaimsAsIs": false,
  "passthroughClaimsWithNoMapping": false,
  "mapIdentities": false
}
この JSON は以下の2つのドキュメントを元に構成しています。
- Google: SSO assertion requirements — Google が SAMLResponse に求める要件
- Auth0: Configure Auth0 as IdP for Google Workspace — Auth0 公式の SAML 設定 JSON
これらの記載(期待している SAML Response の構造)には差異があります。
| 設定項目 | Auth0 公式に記載 | Google SSO Requirements に記載 |
|---|---|---|
audience |
あり | あり |
recipient |
なし | あり |
destination |
なし | あり |
nameIdentifierFormat |
あり | あり(Example 内) |
nameIdentifierProbes |
あり | なし |
signatureAlgorithm |
あり | なし |
digestAlgorithm |
あり | なし |
mappings |
あり | なし |
createUpnClaim 等 |
あり | なし |
Google側の期待値に加えてAuth0公式に記載されている項目を足し合わせて、上記のJSONを完成させました。
nameIdentifierFormat について
Google の SSO assertion requirements では、NameID の Format として urn:oasis:names:tc:SAML:1.1:nameid-format:emailAddress が Example に示されています。
Auth0 のデフォルト値は urn:oasis:names:tc:SAML:2.0:nameid-format:email ですが、この形式では Google にログインできません。
必ず、Google側に記載されている SAML 1.1 の emailAddress 形式を指定してください。
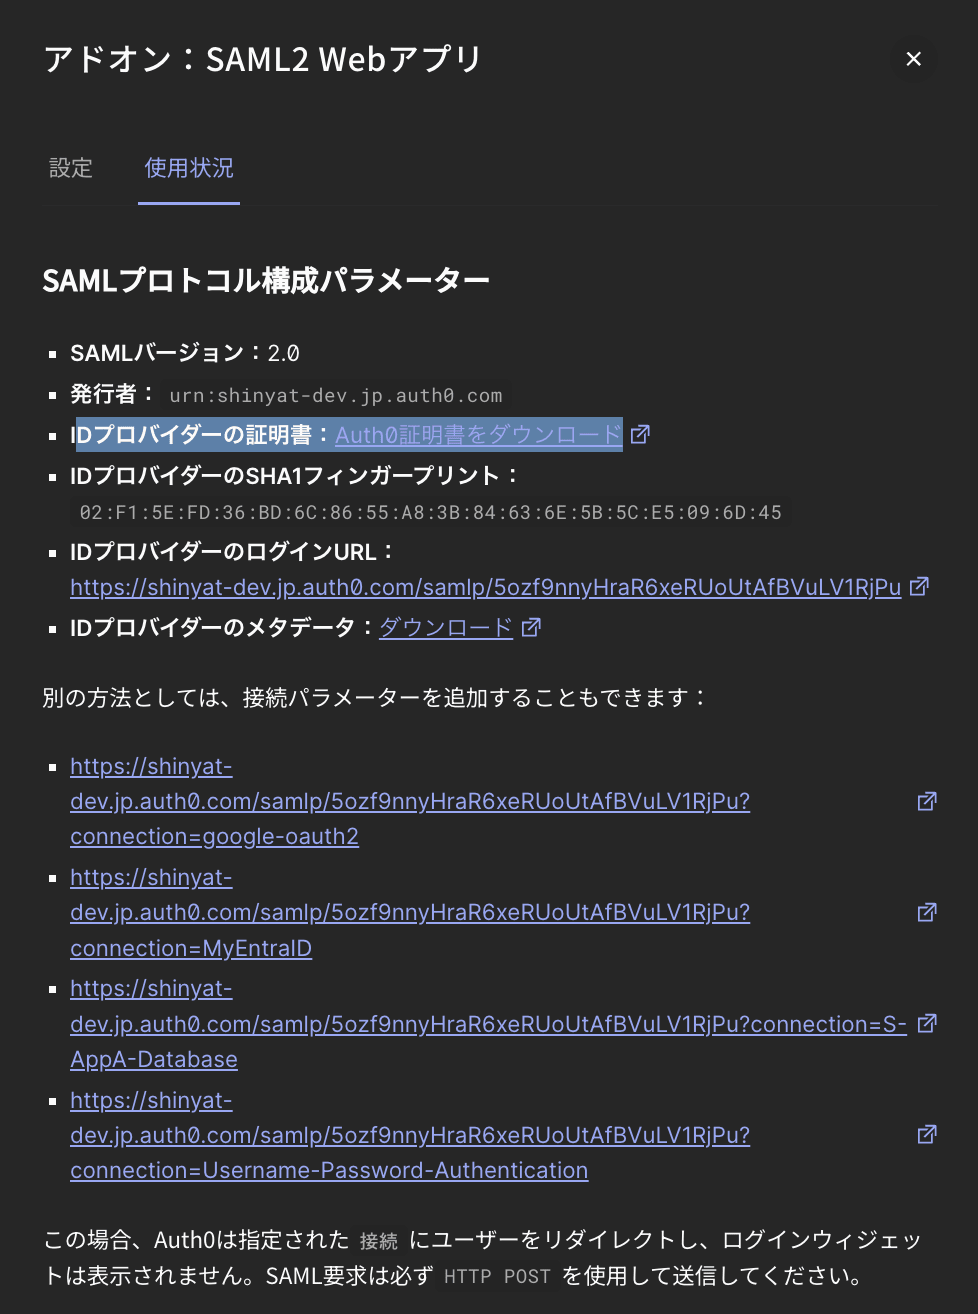
手順4. Auth0 の証明書をダウンロード
SAML Addon の設定画面下部、または以下の URL から証明書をダウンロードします。
https://<your-tenant-domain>.auth0.com/pem
この証明書は Google Workspace 側にアップロードします。
手順5. Google Workspace で SSO プロファイルを作成
Google Workspace 管理コンソールで SSO プロファイルを作成します。
- 管理コンソール > セキュリティ > 認証 > サードパーティの IdP による SSO
- SAML プロファイルを追加 をクリック
- プロファイル名を入力(例:
Auth0 SAML SSO)

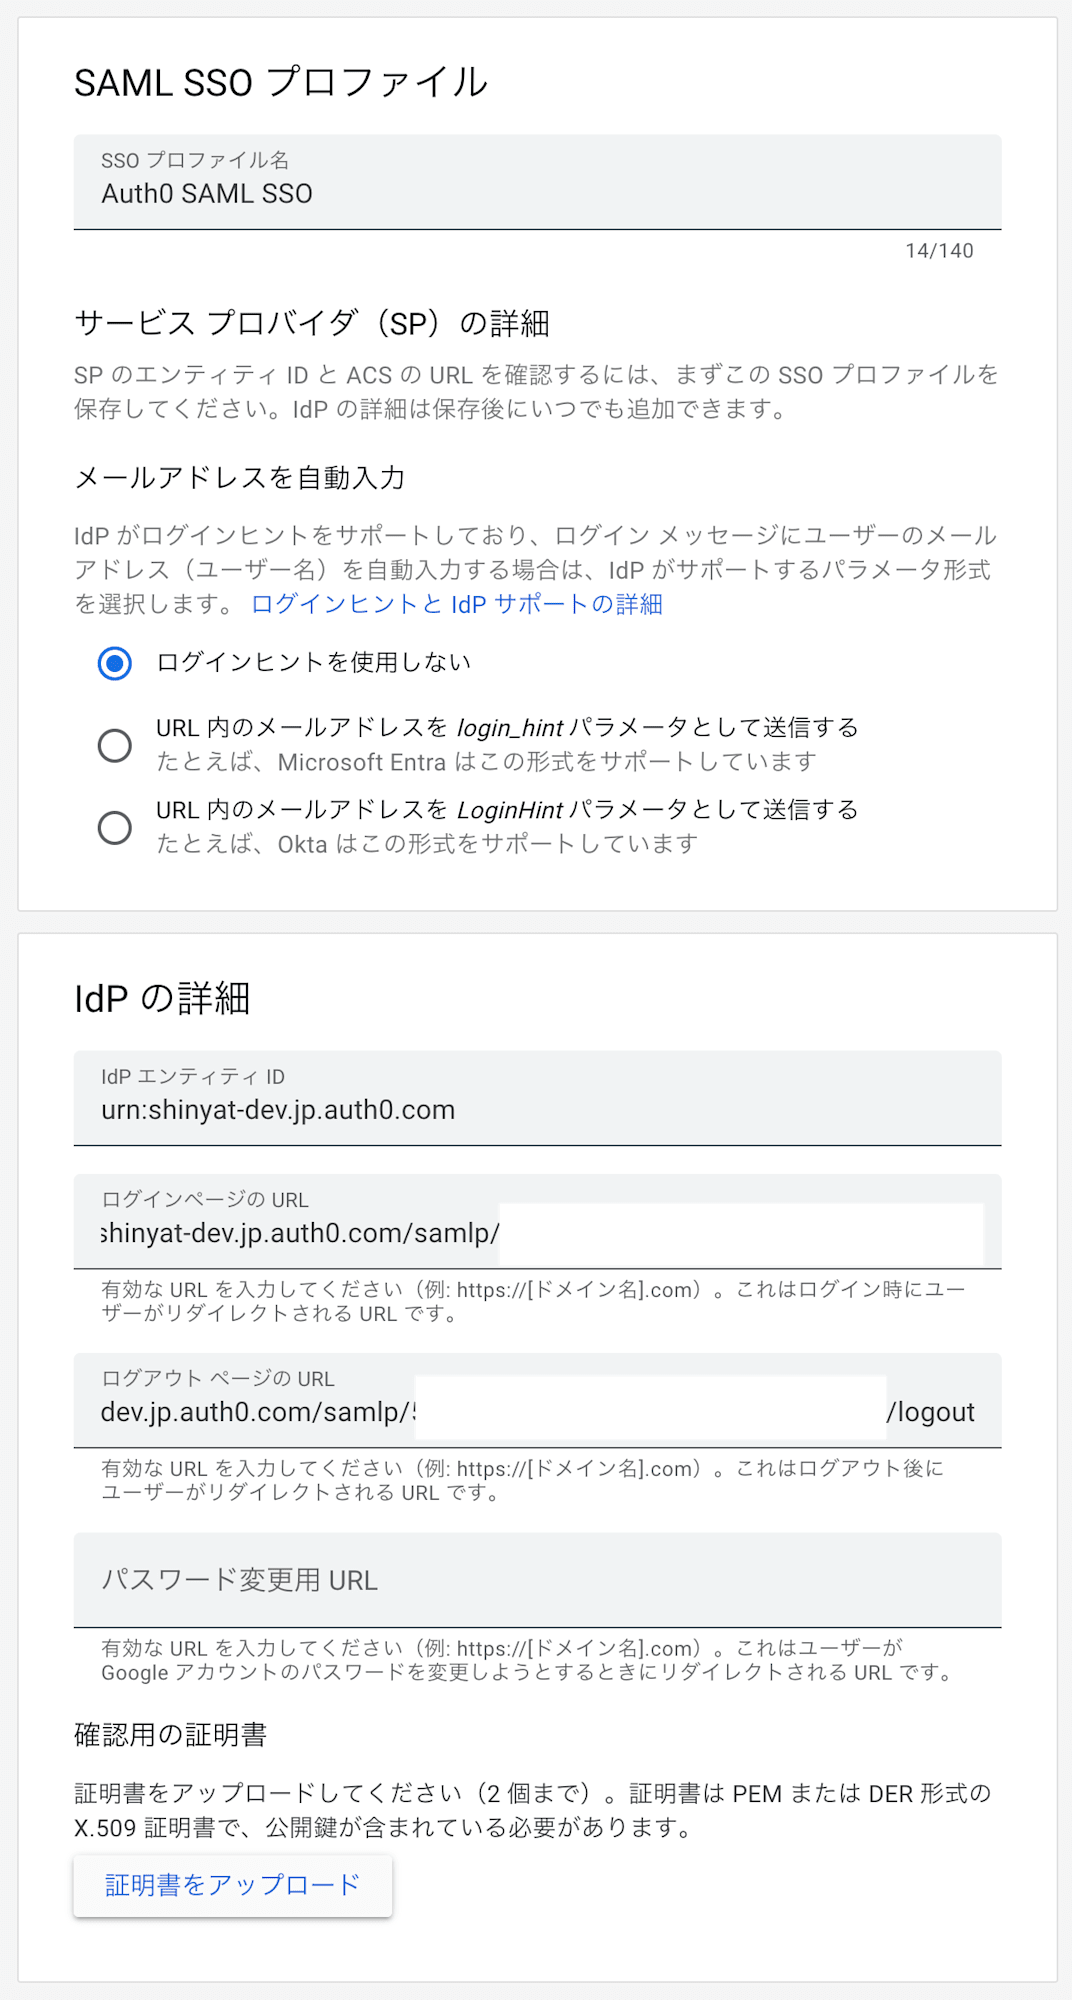
以下の値を設定します。
| 設定項目 | 値 |
|---|---|
| IdP エンティティ ID | urn:<your-tenant-domain>.auth0.com |
| ログインページ URL | https://<your-tenant-domain>.auth0.com/samlp/{CLIENT-ID} |
| ログアウトページ URL | https://<your-tenant-domain>.auth0.com/samlp/{CLIENT-ID}/logout |
| パスワード変更用 URL | (空欄でOK) |
| 確認用の証明書 | 手順 4 でダウンロードした証明書をアップロード |
- 保存 をクリック
- 保存後に表示される SP の詳細 セクションから以下をメモします:
- エンティティ ID — Auth0 の
audienceに設定 - ACS URL — Auth0 の
recipient、destination、Callback URL に設定
- エンティティ ID — Auth0 の
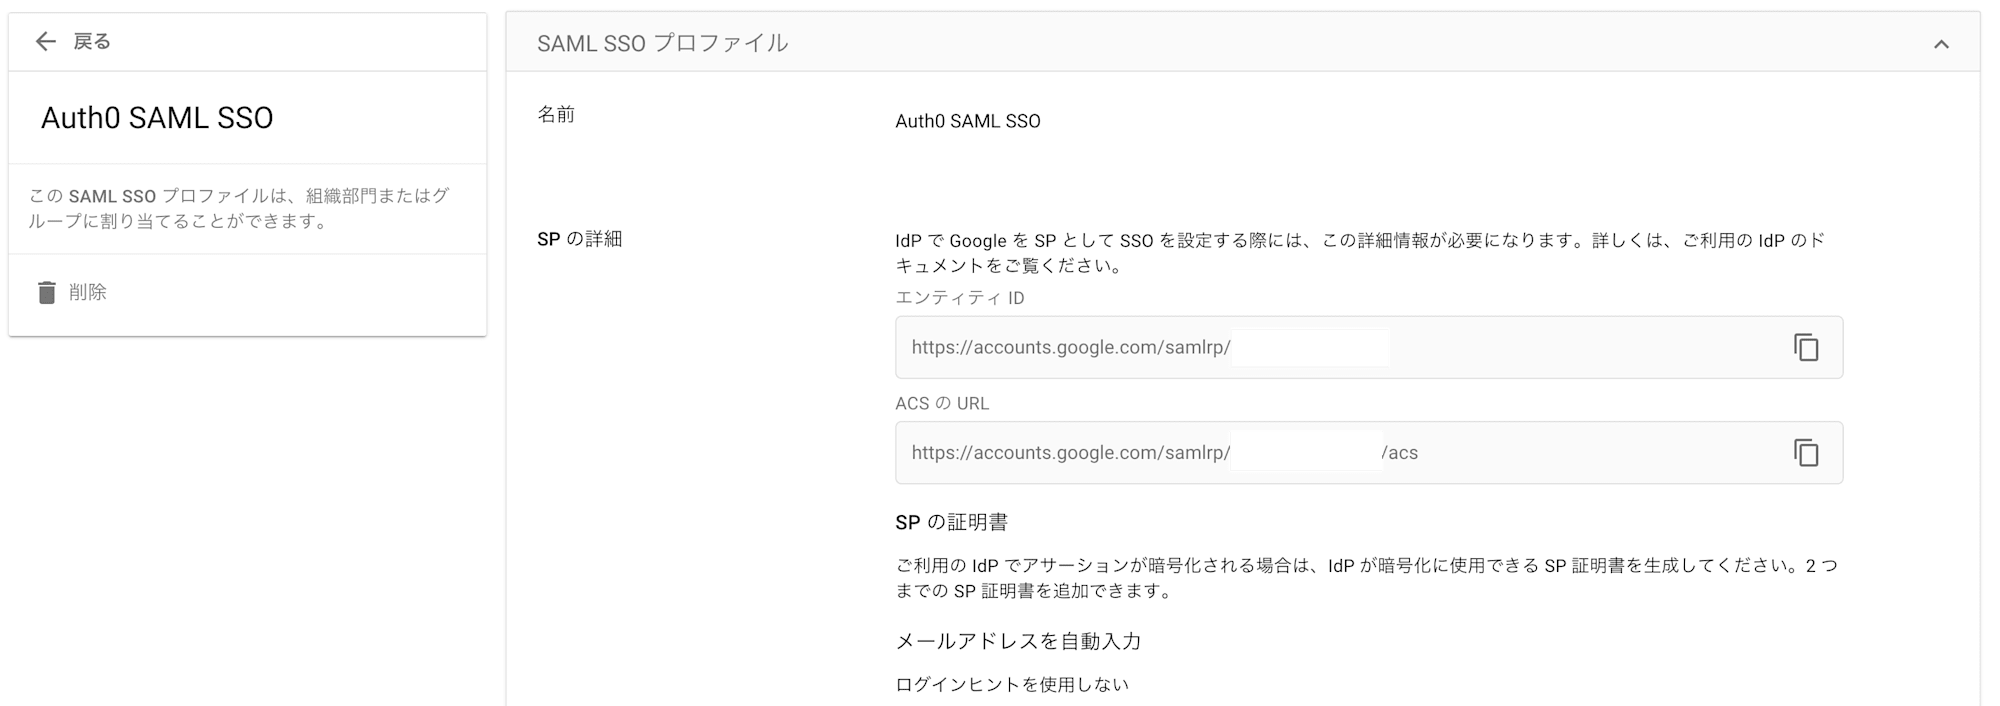
SP の詳細 の値を Auth0 側に設定する必要があるため、手順 3 の Auth0 SAML Addon 設定に戻って値 {SSO-PROFILE-ID} を入力してください。
{SSO-PROFILE-ID} は samlrp/ のあとに続く文字列です。
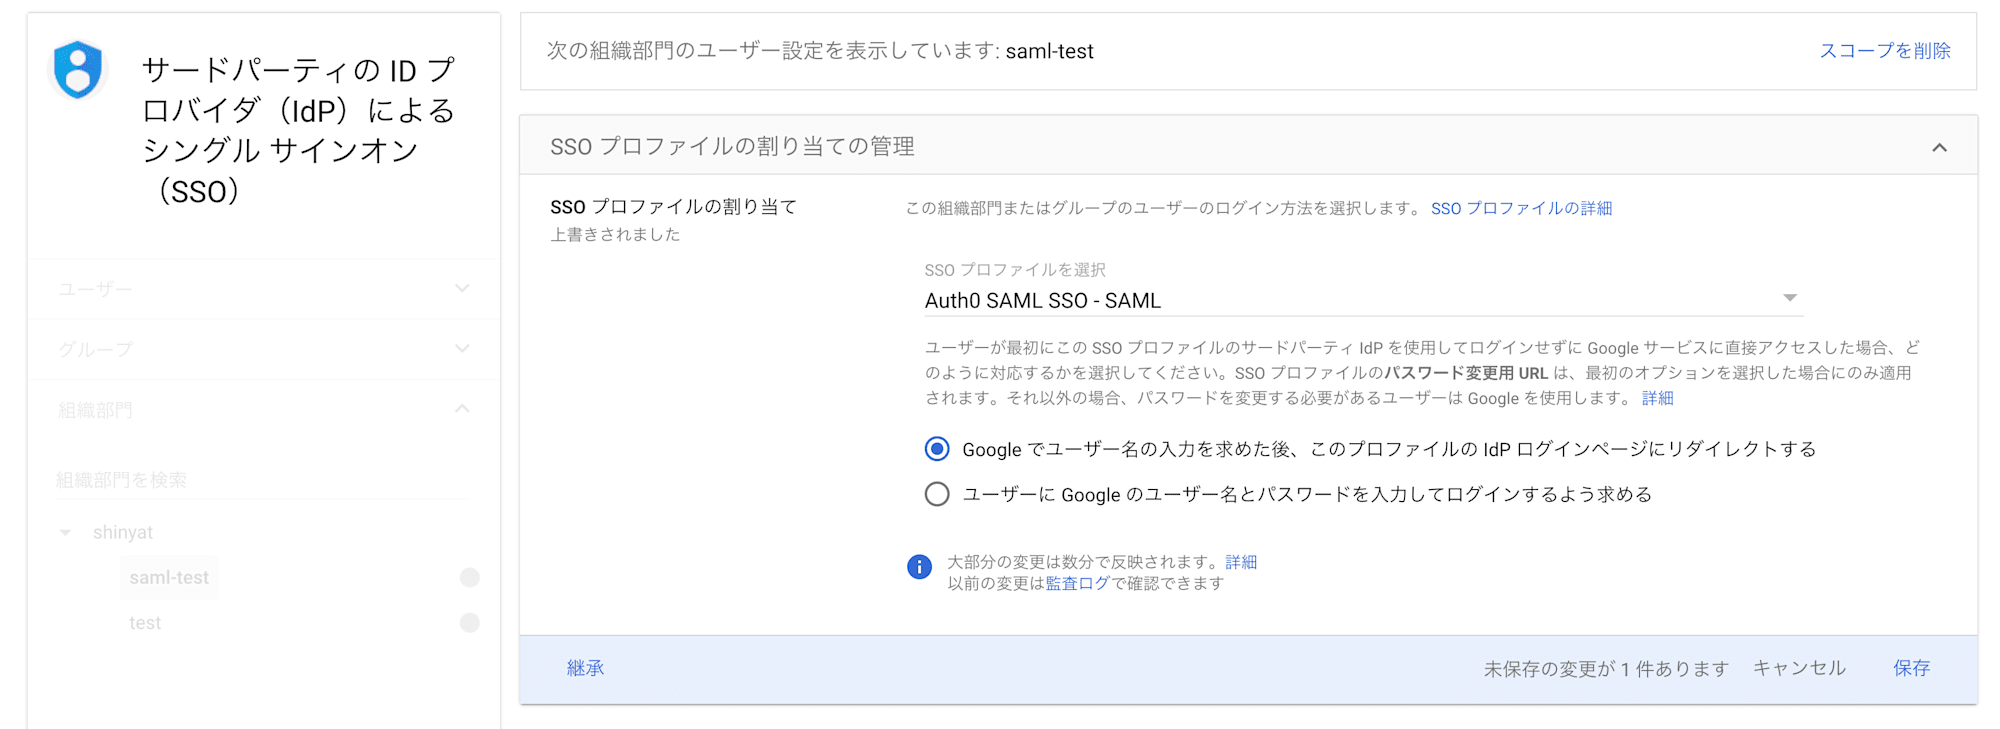
手順6. SSO プロファイルを組織部門に割り当て
- サードパーティの IdP による SSO > SSO プロファイルの割り当ての管理 > 管理
- SSO を適用したい組織部門を選択
- 作成した SSO プロファイルを割り当て
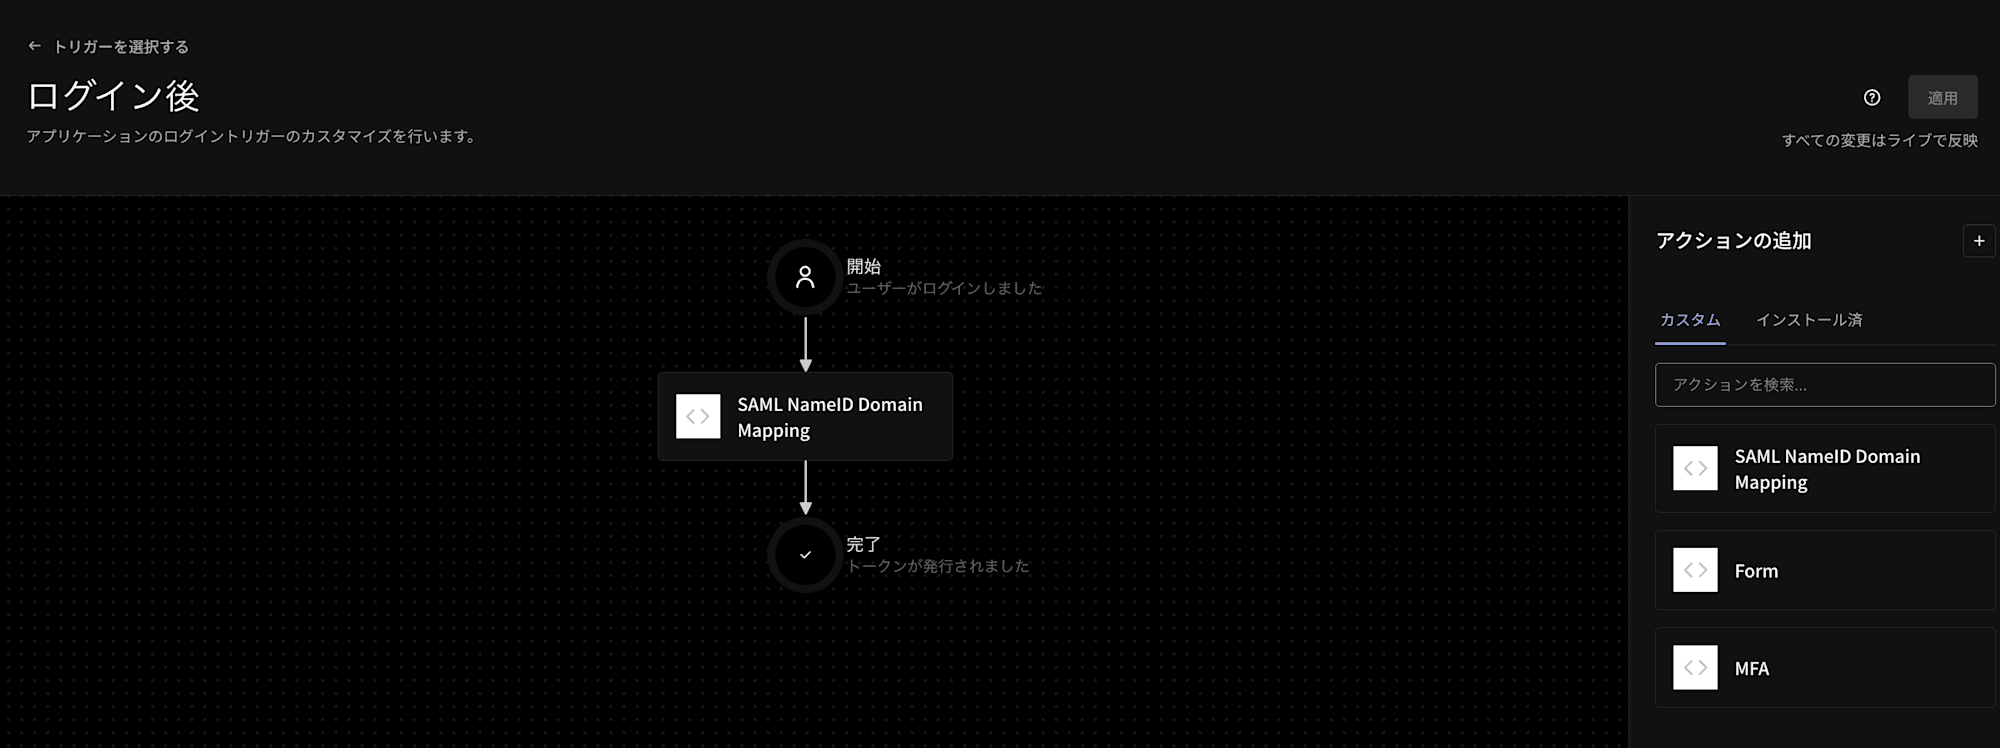
手順7. Auth0 Action の作成(NameID ドメインマッピング)
Auth0 Actions で SAML Response の NameID を書き換えます。
Action のコード
- Auth0 Dashboard > アクション > ライブラリー > アクションを作成(はじめから作成する)
- 名前:
SAML NameID Domain Mapping - トリガー:
Login / Post Login - ランタイム: (推奨ランタイム)
以下のコードを入力します
exports.onExecutePostLogin = async (event, api) => {
  // SAML プロトコル以外(OAuth, OIDC 等)の場合はスキップ
  // api.samlResponse は SAML フローでしか使えないため
  if (event.transaction?.protocol !== 'samlp') return;

  // マッピング定義: 変換元ドメイン → 変換先ドメイン
  const domainMapping = {
    'company-a.com': 'company-b.com'
  };

  const email = event.user.email;
  if (!email) return;

  const [localPart, domain] = email.split('@');
  const targetDomain = domainMapping[domain];

  if (targetDomain) {
    const newEmail = `${localPart}@${targetDomain}`;

    // emailaddress 属性を書き換えることで NameID を変更する
    api.samlResponse.setAttribute(
      'http://schemas.xmlsoap.org/ws/2005/05/identity/claims/emailaddress',
      newEmail
    );
  }
};
- デプロイ をクリック
- アクション > トリガー > post-login に作成した Action をドラッグ&ドロップ
NameID を直接変更しない理由
Google Workspace は SAML Response の NameID でユーザーを特定します。ドメインが異なるユーザーで SSO するには、NameID を書き換える必要があります。
しかし、Auth0 の Post Login Action API(api.samlResponse)には NameID の値を直接変更するメソッドが用意されていません。
ではどうやって NameID を変更するのか
Auth0 が生成する SAML Response の構造を見ます。
<saml:Assertion>
  <saml:Subject>
    <saml:NameID Format="urn:oasis:names:tc:SAML:1.1:nameid-format:emailAddress">
      user@company-a.com ← (A)Google はここでユーザーを特定、Auth0はここを直接書き換えられない
    </saml:NameID>
  </saml:Subject>

(中略)

  <saml:AttributeStatement>
    <saml:Attribute Name="http://schemas.xmlsoap.org/ws/2005/05/identity/claims/emailaddress">
      <saml:AttributeValue>user@company-a.com</saml:AttributeValue> ← (B)Action で書き換え可能な項目
    </saml:Attribute>
  </saml:AttributeStatement>
</saml:Assertion>
(A)と(B)は別々の値ですが、SAML Addon の nameIdentifierProbes がこの 2 つを連動させます。
{
  "audience": "https://accounts.google.com/samlrp/{SSO-PROFILE-ID}",
  "recipient": "https://accounts.google.com/samlrp/{SSO-PROFILE-ID}/acs",
  "destination": "https://accounts.google.com/samlrp/{SSO-PROFILE-ID}/acs",
  "nameIdentifierFormat": "urn:oasis:names:tc:SAML:1.1:nameid-format:emailAddress",
  これ → "nameIdentifierProbes": [
    "http://schemas.xmlsoap.org/ws/2005/05/identity/claims/emailaddress"
  ],
  "signatureAlgorithm": "rsa-sha256",
  "digestAlgorithm": "sha256",
  "createUpnClaim": false,
  "mapUnknownClaimsAsIs": false,
  "passthroughClaimsWithNoMapping": false,
  "mapIdentities": false
}
「(A)の値は(B)からコピーする」という意味。つまり(B)を書き換えれば(A)が連動して同じ値になる。
書き換え後の SAML Response
Action のコード:
api.samlResponse.setAttribute(
  'http://schemas.xmlsoap.org/ws/2005/05/identity/claims/emailaddress',
  newEmail ← 'user@company-b.com'
);
差分:
  <saml:NameID Format="urn:oasis:names:tc:SAML:1.1:nameid-format:emailAddress">
-   user@company-a.com
+   user@company-b.com ← (A)も自動で連動
  </saml:NameID>

  <saml:Attribute Name="http://schemas.xmlsoap.org/ws/2005/05/identity/claims/emailaddress">
-   <saml:AttributeValue>user@company-a.com</saml:AttributeValue>
+   <saml:AttributeValue>user@company-b.com</saml:AttributeValue> ← (B)がAction で書き換え
  </saml:Attribute>
これで NameID = user@company-b.com の SAML Response がGoogleに送られ、Google Workspace にログインできるようになります。
これで設定は完了です。
動作確認
Auth0ユーザー user@company-a.com で Google Workspace にログインできることを確認します。
※今回の動作確認は、実際に有効なドメインである必要があるため、 company-a.com → classmethod.jp, company-b.com → shinyat.com で検証しています
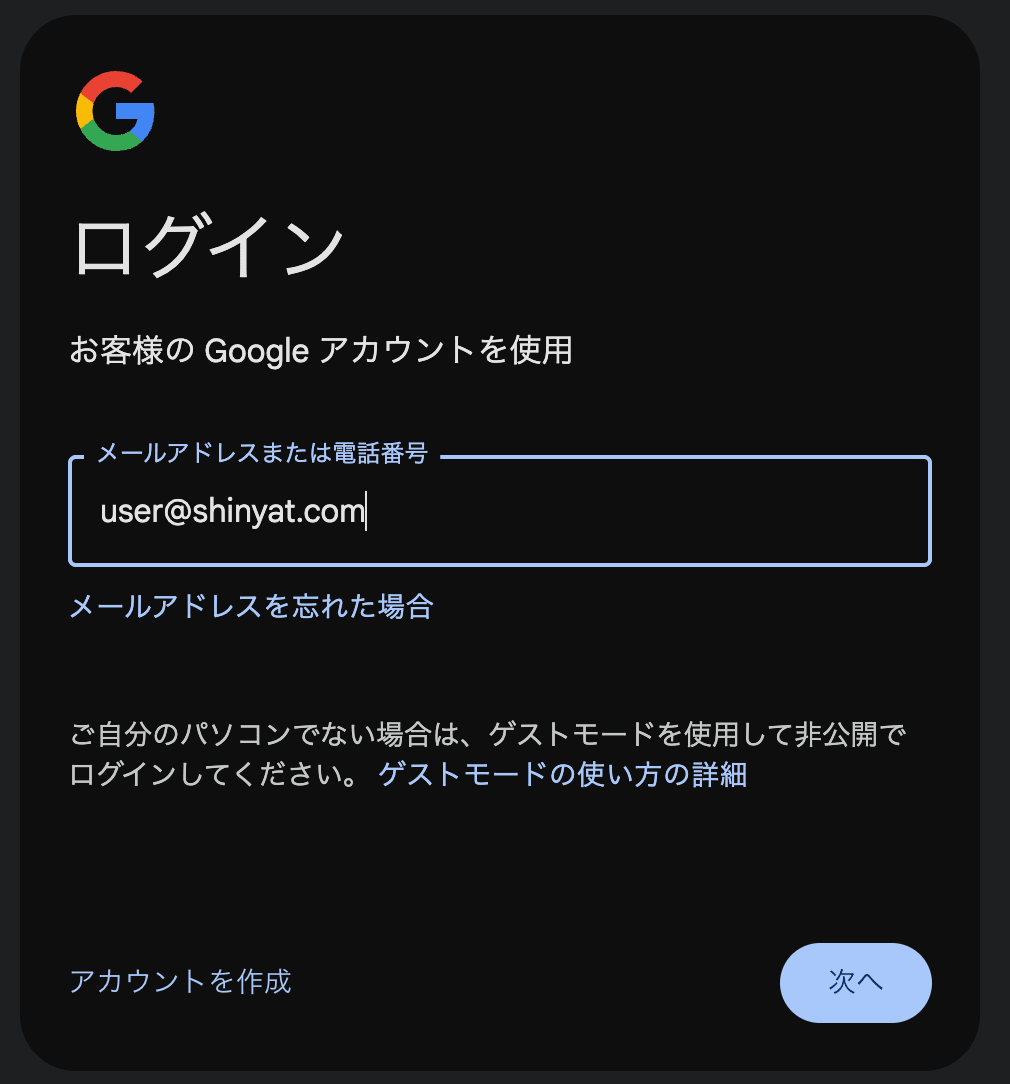
- シークレットウィンドウで
https://accounts.google.comにアクセス user@shinyat.comを入力して「次へ」- Auth0 にリダイレクトされる
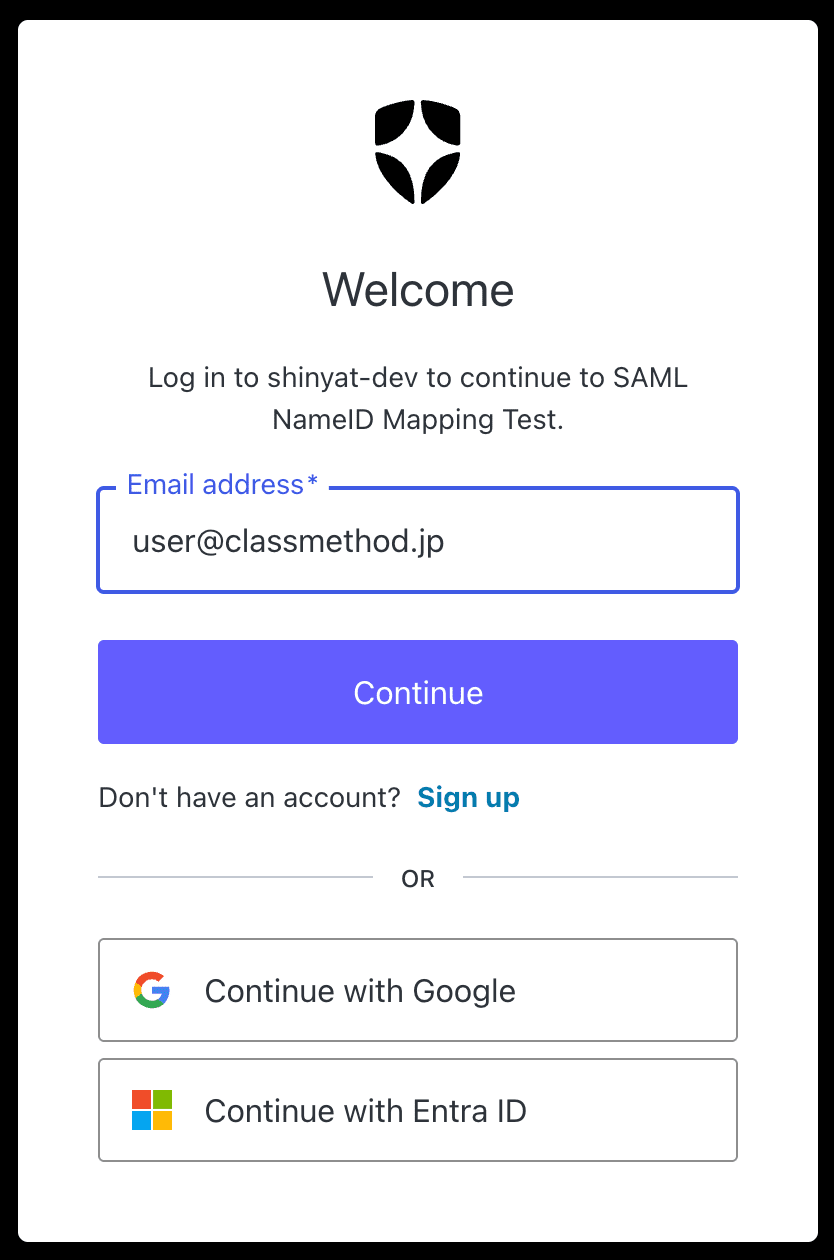
- Auth0 で
user@classmethod.jpでログイン - Action が NameID を
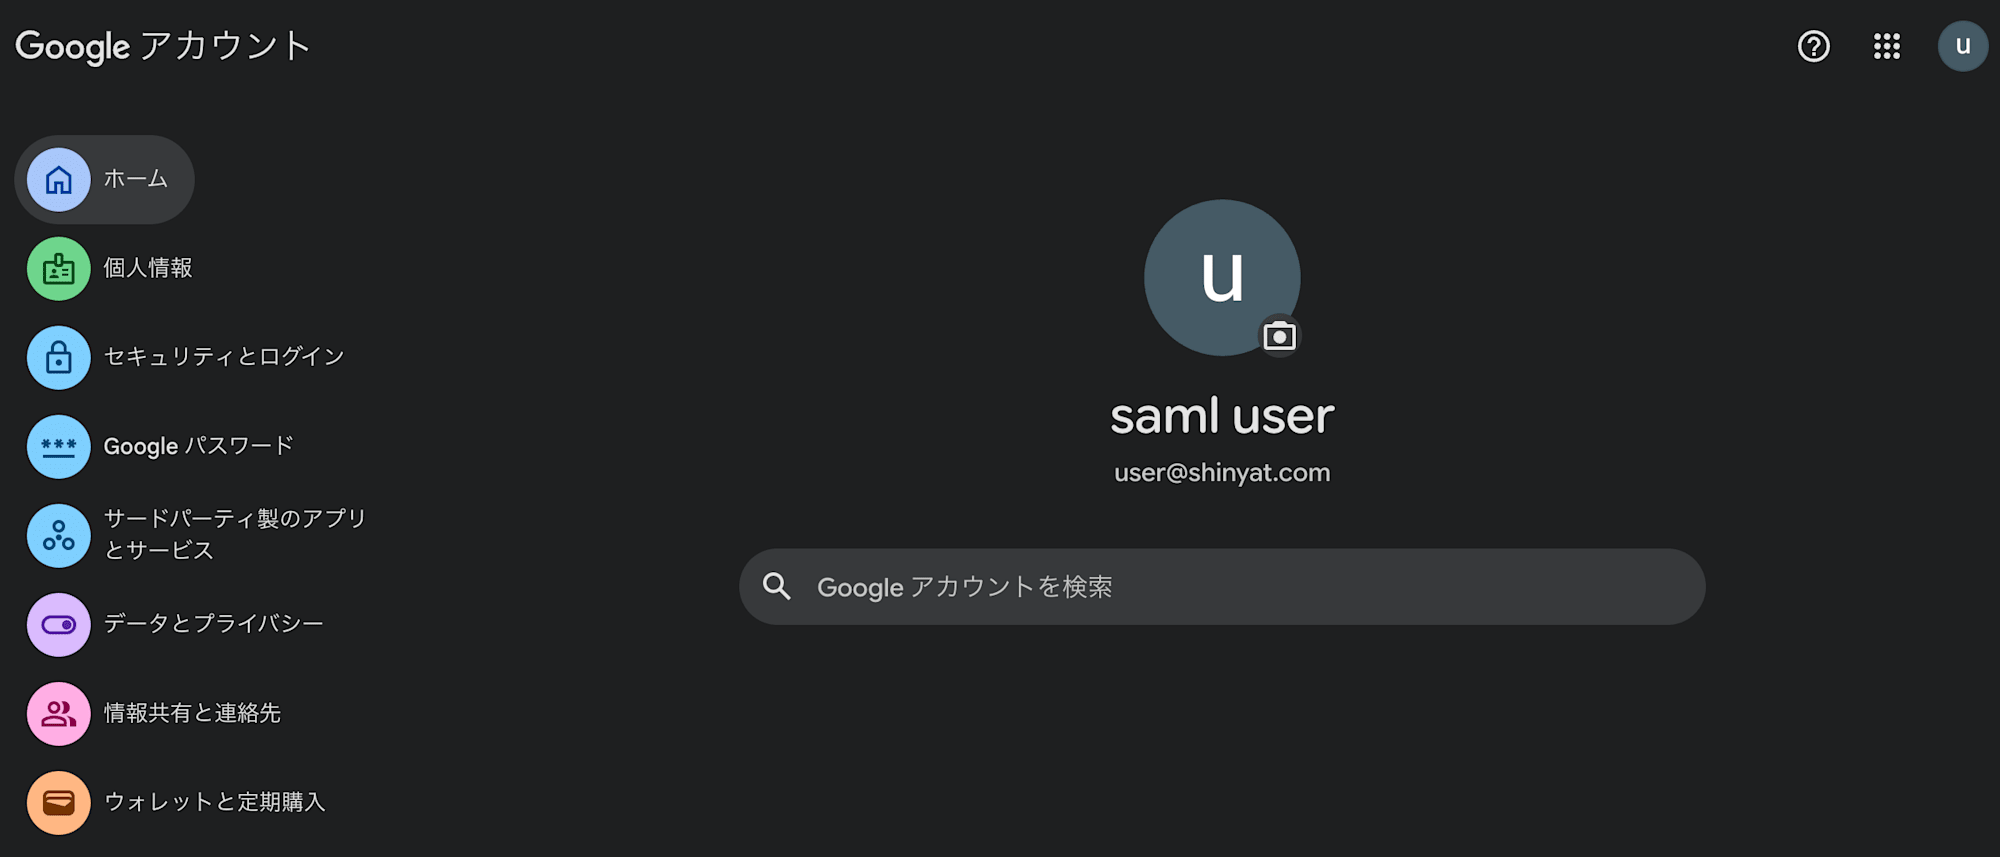
user@classmethod.jp→user@shinyat.comに変換 - Google Workspace に
user@shinyat.comとしてログイン成功
ハマりポイント
ハマり1. Auth0 Actions には SAML Response の NameID を直接書き換える API が存在しない
検証を始めた当初、「Okta や Entra ID なら GUI でドメインマッピングを設定できるので、Auth0にも setNameID() のようなメソッドがあるだろう」と思っていました。
で、Auth0 Actionsの実装しながら Post Login Action API(api.samlResponse)のリファレンスを眺めていたら...
api.samlResponse の主なメソッド
| メソッド | 用途 |
|---|---|
setAttribute(attribute, value) |
SAML 属性を設定 |
setAudience(audience) |
Audience を変更 |
setRecipient(recipient) |
Recipient を変更 |
setDestination(destination) |
Destination を変更 |
setNameIdentifierFormat(format) |
NameID の Format を変更 |
setNameIdentifierProbes(probes) |
NameID の値の参照元(属性)を変更 |

なので、SAML Addon の nameIdentifierProbes で指定した属性を setAttribute で書き換えることで、間接的に NameID を変換するアプローチを採用しました。
「NameID を書き換えたい」と素直に検索しても直接的な答えに辿り着きにくく、nameIdentifierProbes の挙動と組み合わせて理解する必要があったため、ここが1つ目のハマりポイントでした。
ハマり2. GWSが要求している SAML Response の NameID Format は Example に書いてあるだけなのに必須だった
Auth0の SAML Addon のデフォルト nameIdentifierFormat は urn:oasis:names:tc:SAML:2.0:nameid-format:email です。
{
  "audience": "https://accounts.google.com/samlrp/{SSO-PROFILE-ID}",
  "recipient": "https://accounts.google.com/samlrp/{SSO-PROFILE-ID}/acs",
  "destination": "https://accounts.google.com/samlrp/{SSO-PROFILE-ID}/acs",
  ここの話をしています → "nameIdentifierFormat": "urn:oasis:names:tc:SAML:1.1:nameid-format:emailAddress",
  "nameIdentifierProbes": [
    "http://schemas.xmlsoap.org/ws/2005/05/identity/claims/emailaddress"
  ],
  "signatureAlgorithm": "rsa-sha256",
  "digestAlgorithm": "sha256",
  "createUpnClaim": false,
  "mapUnknownClaimsAsIs": false,
  "passthroughClaimsWithNoMapping": false,
  "mapIdentities": false
}
一方、Google の SSO assertion requirements には NameID の要件として以下のように書かれています:
Description: NameID identifies the subject which is the user's primary email address. It is case-sensitive.
nameIdentifierFormat についてはExampleの中でのみ Format="urn:oasis:names:tc:SAML:1.1:nameid-format:emailAddress" と示されています。
つまり、Auth0側とGoogle側で書かれている内容が違っているのですが
結果↓
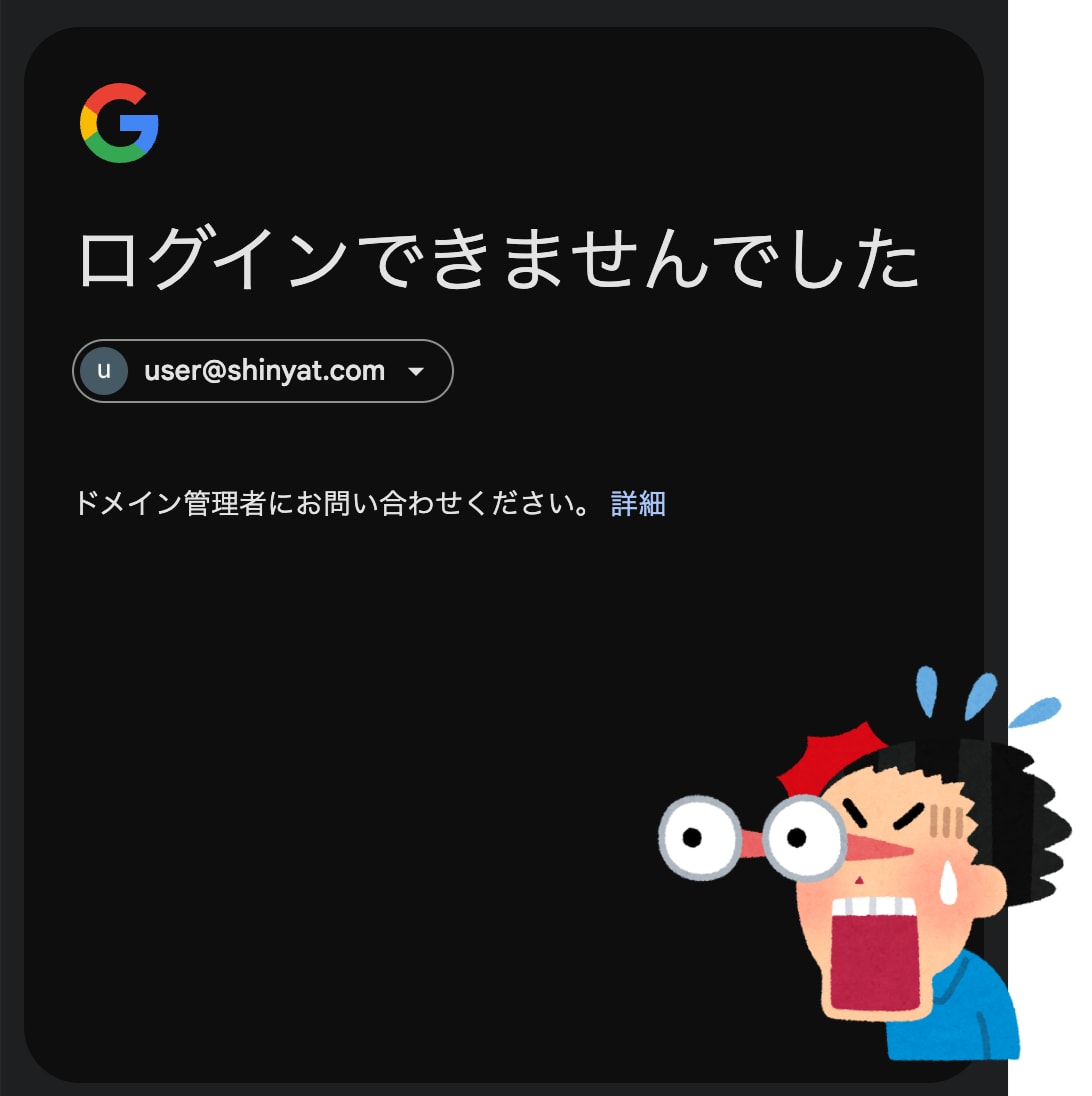
なんかエラーになる...!なんでだ...!!
しかもエラーメッセージは「ログインできませんでした。ドメイン管理者にお問い合わせください。」とだけ表示され、GWS の監査ログにも具体的な原因は記録されませんでした。
要するに nameIdentifierFormat は
| 値 | 結果 | |
|---|---|---|
| Auth0 デフォルト(公式) | urn:oasis:names:tc:SAML:2.0:nameid-format:email |
NG |
| Google の Example 通り | urn:oasis:names:tc:SAML:1.1:nameid-format:emailAddress |
OK |
こういうことだったのですが、ここまでたどり着くのが長かった....
まとめ
Auth0 を SAML IdP として Google Workspace に SSO する構成で、Auth0 Actions を使ったドメインの異なるユーザー間の SSO ログインを実現できました。
組織統合やドメイン移行など、IdP 側と SP 側でメールアドレスのドメインが異なるケースは実務でもあり得ると思います。
OktaやEntra ID等では、ドメインマッピングは機能として提供されていて、GUIで設定できると思いますが、Auth0でもActionsを使えば出来ることが確認できました。