
AWS CodePipeline : CD pipeline with s3!
この記事は公開されてから1年以上経過しています。情報が古い可能性がありますので、ご注意ください。
In this series of
Build Better CI CD Pipelineswe are going to understand concepts around CI CD and build pipelines by actually making it.This will be a continuous series where I will be adding blogs with different CI CD tools and deploying various services on AWS using the pipeline.
In This blog we are going to create our first CD ( continuous deployment ) pipeline which is triggered by uploading on an s3 bucket ( source location ) and deploying a static website on another s3 bucket ( production bucket ).
Prerequisites
- Basic knowledge of AWS fundamental services like s3, ec2, and cloud formation.
- Fundamental knowledge of CI-CD concepts. You can read my previous blog where I have covered CI CD 101 with GitLab.
Why do we need deployment automation
- Manual process involves human effort, prone to errors.
- To get reviews early from the customer.
- To achieve the standard, test, and repeatable process
What is CI CD?
- Developers changes code frequently, several times a day, and push to the central repository.
- In every code submission, automatic builds ( if it is needed) and unit tests are run.
- CI starts with the source stage and finishes with the build stage.
- Outcome(aim): To merge code as soon as possible so that integration errors are detected earlier and fixed before deployment.
- Then CD comes and is deployed to staging( depending on the project ) for review ( here more e2e and other types of tests can occur ) and then it is manually approved.
- After approval, the code is deployed to production. This is continuous delivery.
- When no manual approval is required, it is known as continuous deployment.
What is CodePipeline?
- CD service of AWS
- Could be continuos deployment or continuous delivery
- Integrates with 3rd party tools like Jenkins or add custom actions with lambda
- Basically an orchestrator of CI/CD workflow because it helps in integrating various other services ( CodeBuild, CodeDeploy) within it.
Concepts around CodePipeline
- source revision: source change that triggers pipeline.
- stages: group of one or more actions. There can be multiple stages like the source stage, and the build stage. At a time only one source revision is processed, even if there are more source revisions.
- action: task performed such as running test, building code. could be sequentially or in parallel.
- transition: connection b/w 2 stages, describes the flow between them. We can enable or disable it.
- artifact: file or set of files produced as a result of action which is consumed by later action in the same stage or different stage.
- pipeline execution: each execution has its own id. Triggered by commit or manual release of the latest commit.
Let's Build the pipeline
Note: In this blog, we are going to use AWS Console so that everyone is on the same page.
1. Create a source bucket
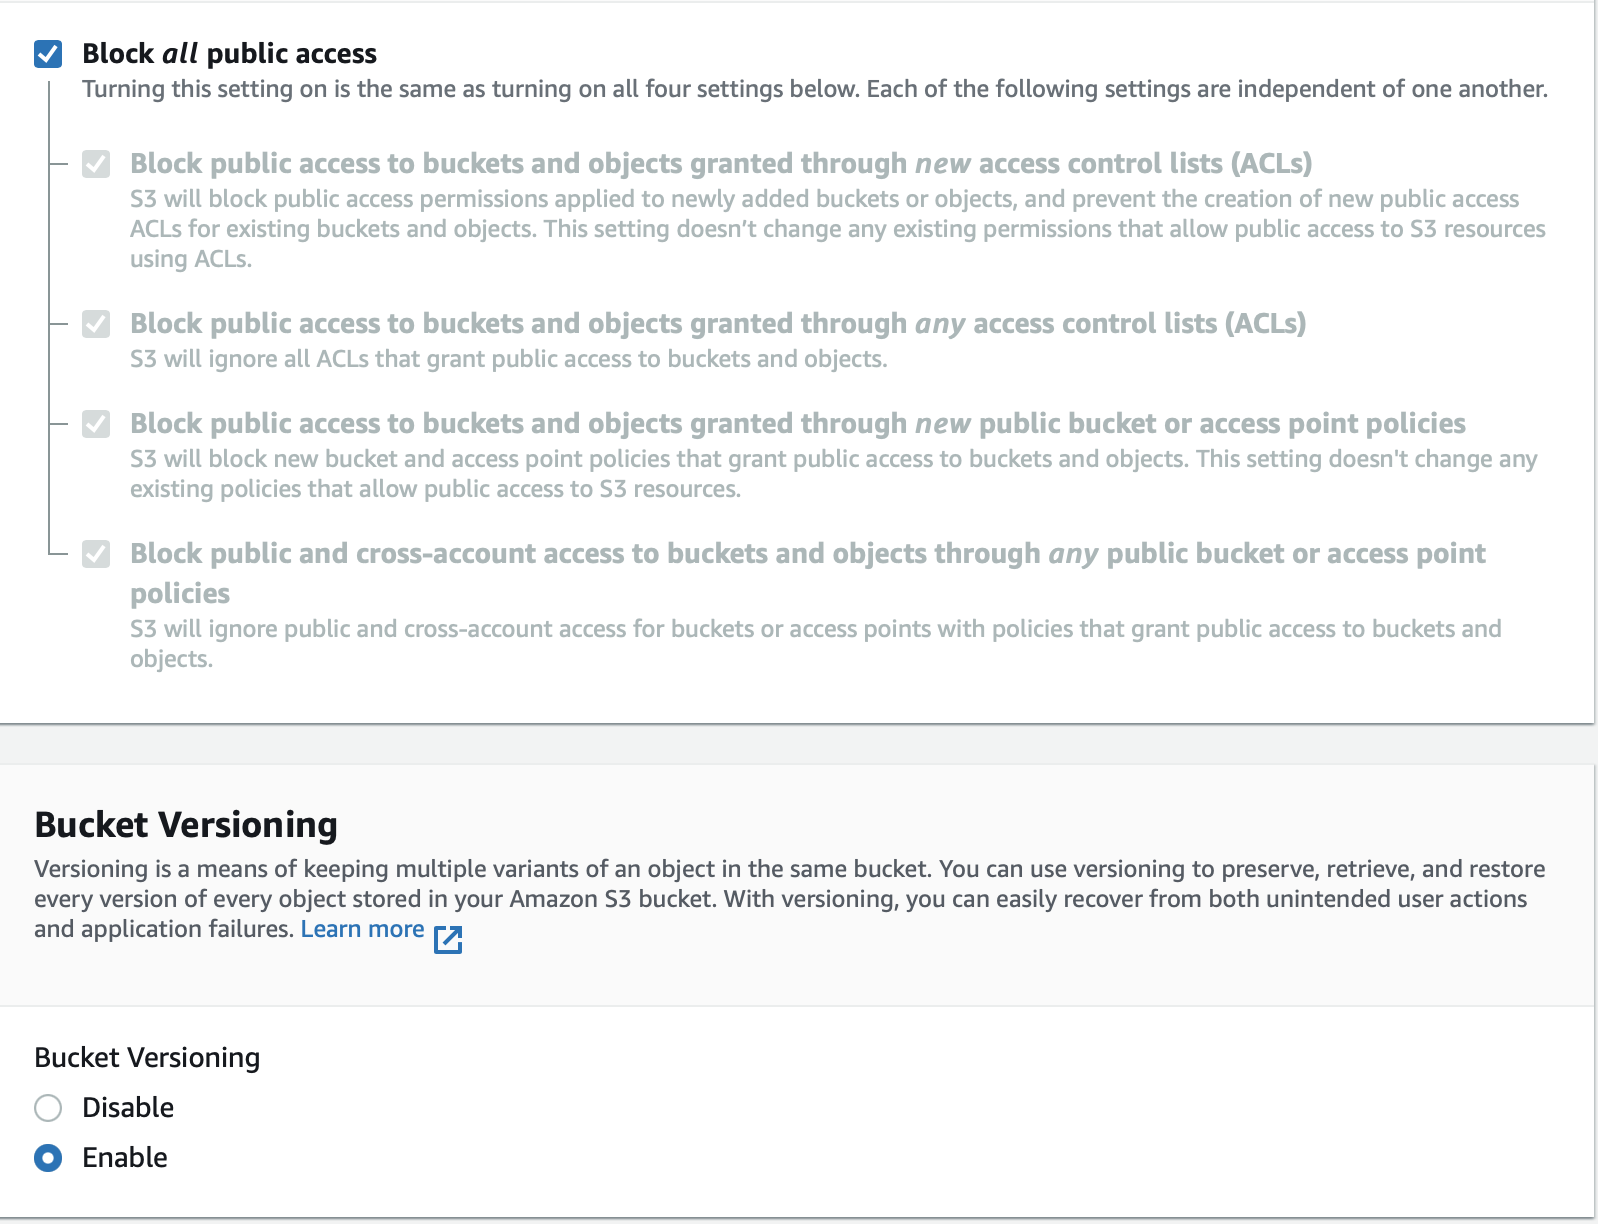
- Create a bucket called
blog-pipeline-source, with versioning enabled and keeping other options as default. -
s3 versioning should be enabled as the pipeline will detect source revisions by s3 version IDs.

2. Upload Artifact to Source Bucket
- We are simply going to upload
index.htmlanderror.htmlfiles as zip to the source bucket. - Note: Make sure both the files are NOT under the subfolder, they should be under the root, otherwise in the production bucket they can't be directly accessed.
The command for creating a zip on Linux/Mac
zip -r blog-website.zip error.html index.html
- The index.html and error.html are available on this gist.

3. Create a production bucket
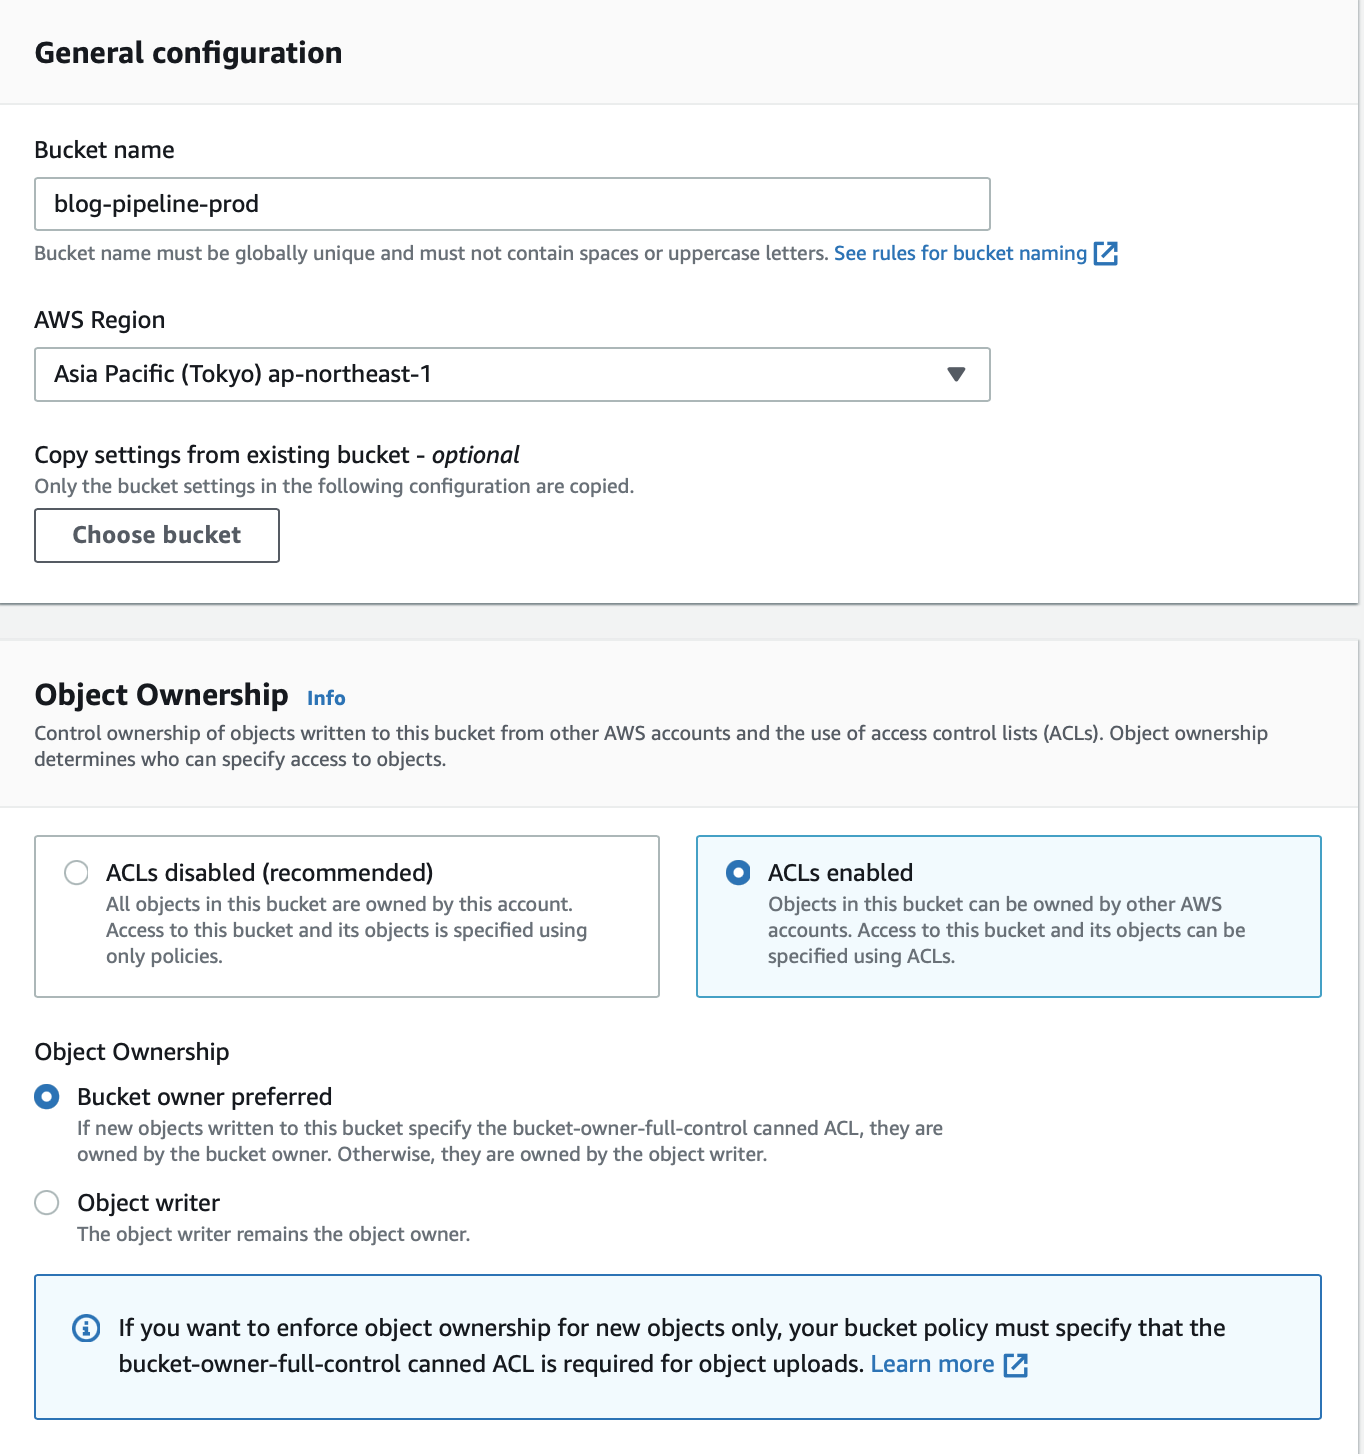
- Create a bucket
blog-pipeline-production. - This bucket can be in a different region or the same region as opposed to the pipeline and source bucket.
- ACL should be enabled because CodePipeline will use ACL to make objects public then only the pipeline will succeed.
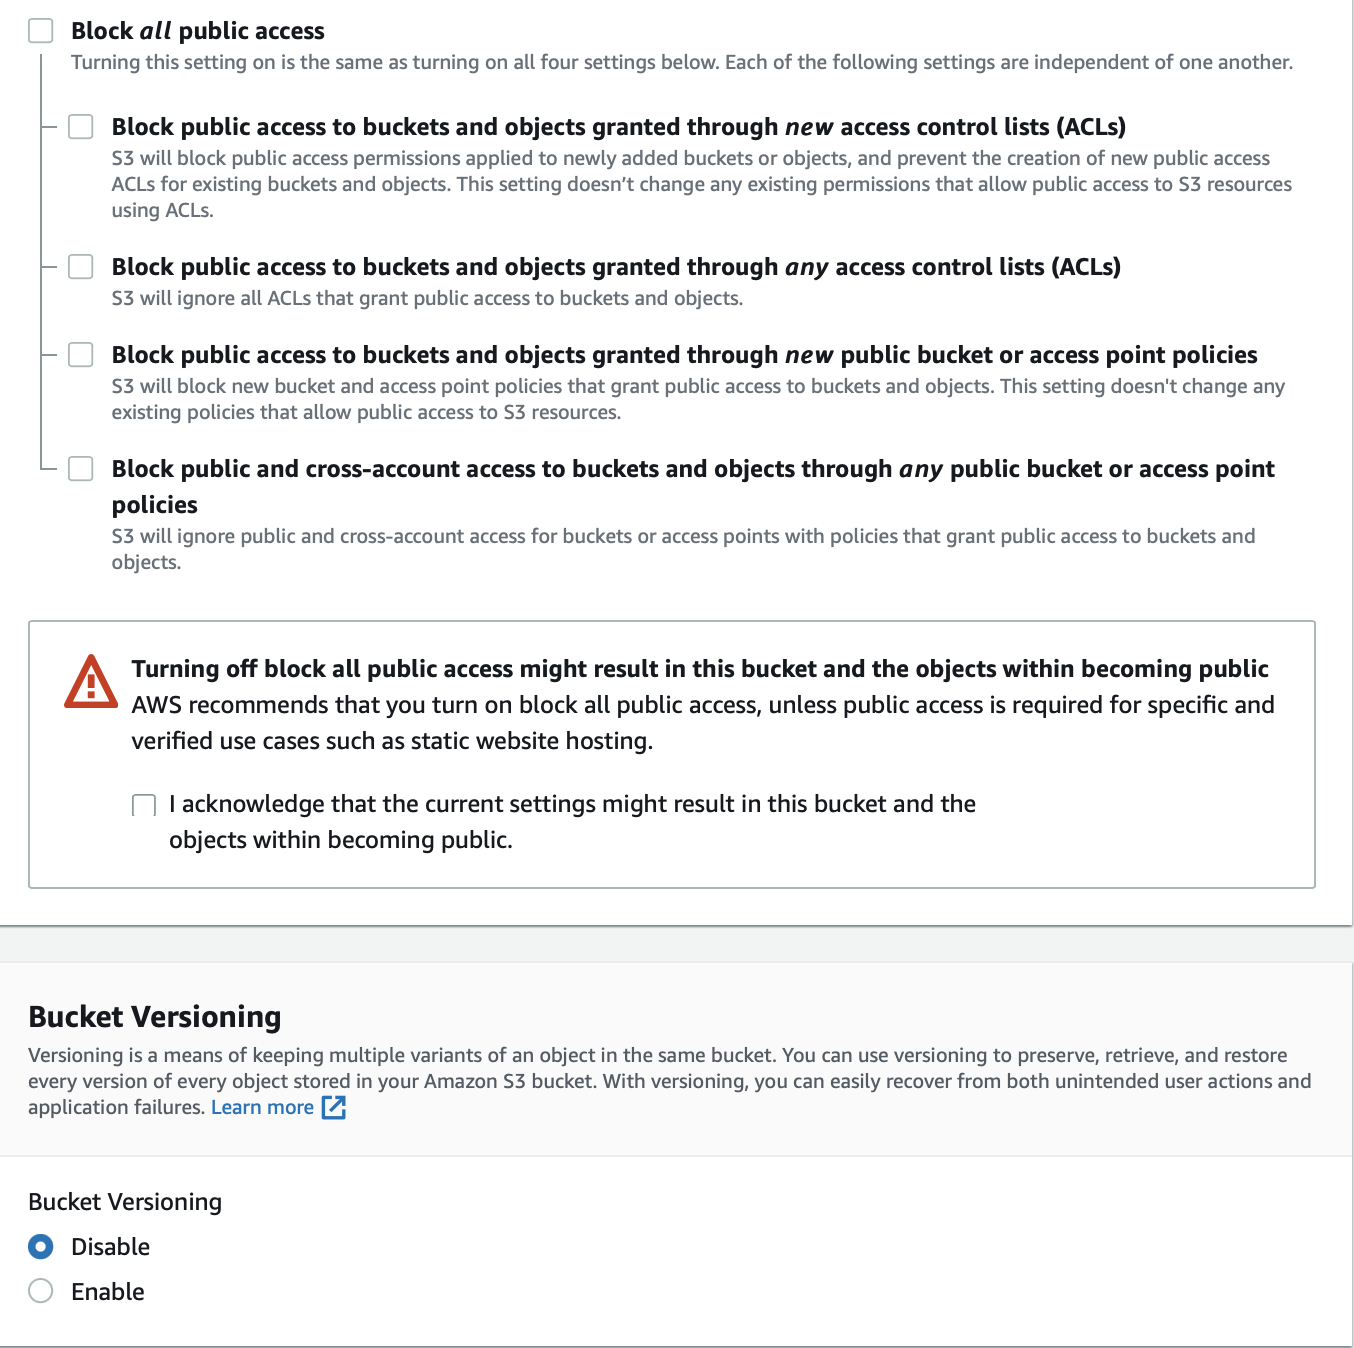
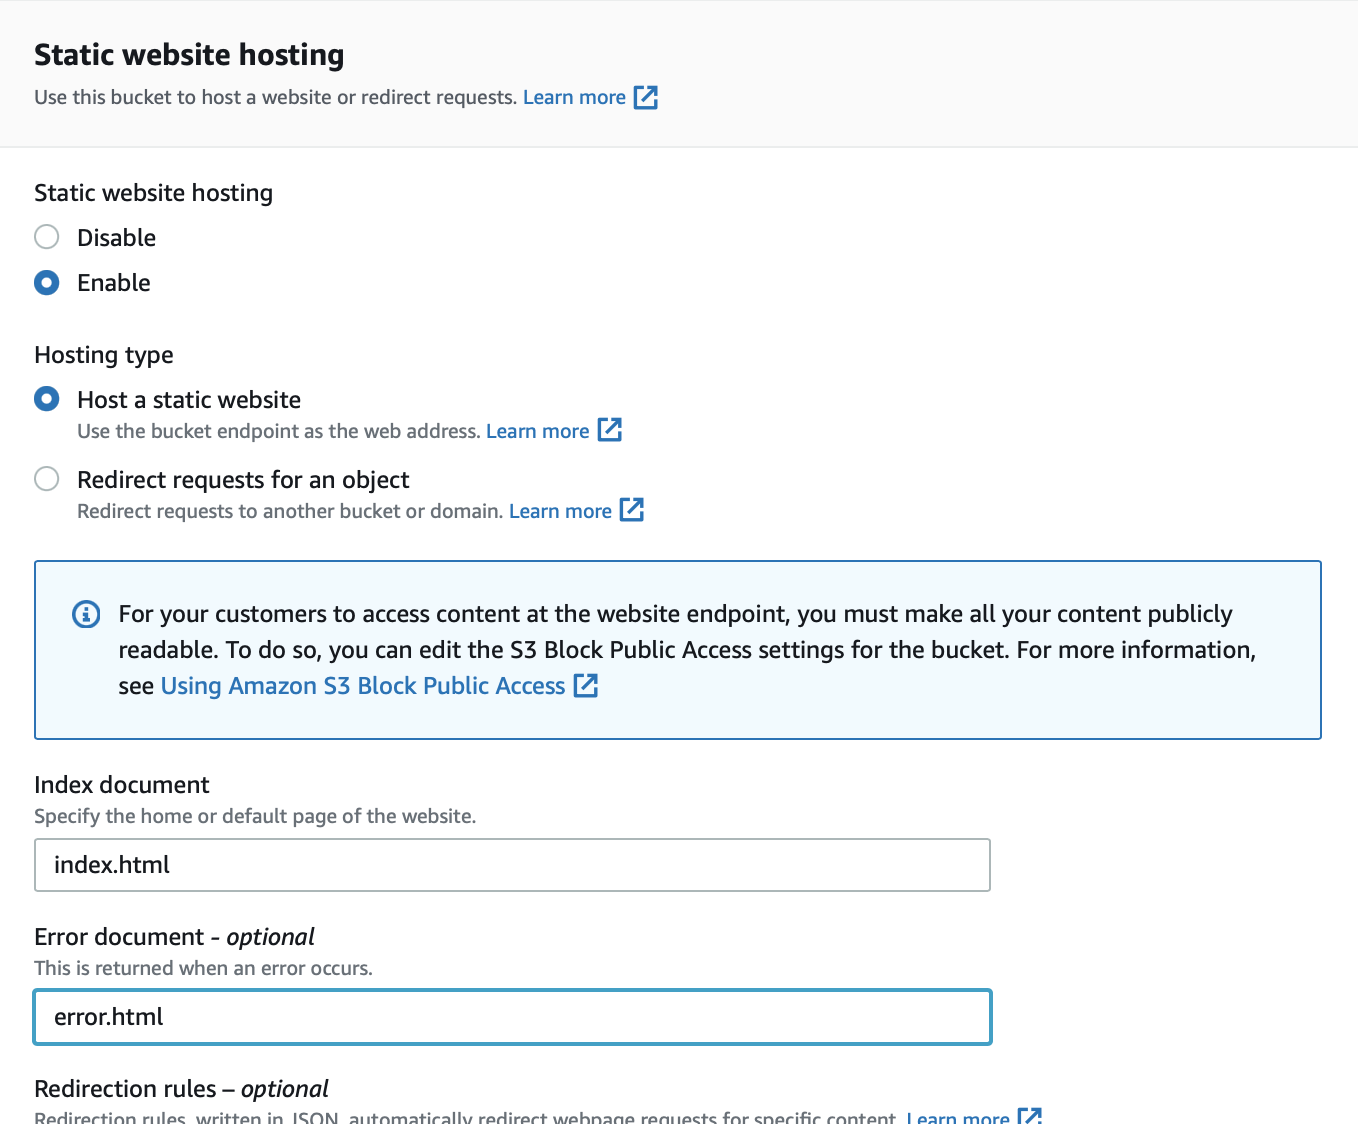
- Since this bucket will be used for bucket hosting, we need to uncheck block public access and enable static website hosting option.
4. Create a CD pipeline
Note: Pipeline and the source bucket should be in the same region.
- Pipeline needs a service role. It is needed for permissions; To access the object in the source and deploy objects in the prod bucket.
- Artifacts are stored in an s3 bucket in the same region, usually, CodePipeline will create a single bucket for all the pipelines or you can create your own bucket for storing artifacts.

- In the next step, select the source for the pipeline as an s3 provider with a source bucket.
- s3 object key should have the name of the zip file we are going to upload.
- Change detection event helps to trigger the pipeline. Cloudwatch events are in real-time unlike making pipeline checks periodically.
- In this blog, we are not going to build anything so we can skip the step, but we have the option to integrate Jenkins or CodeBuild.
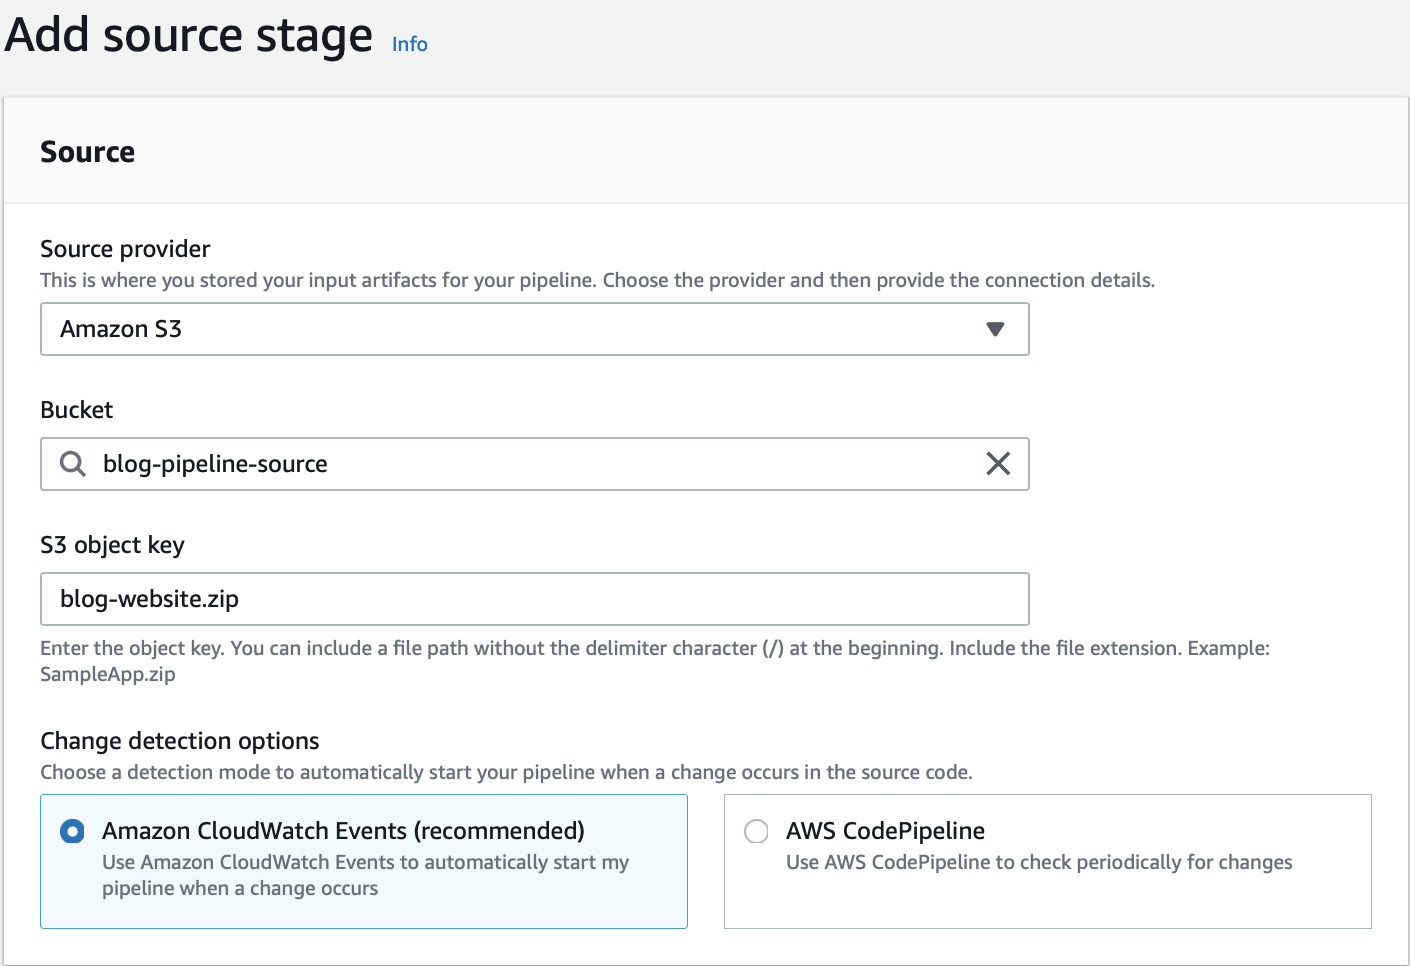
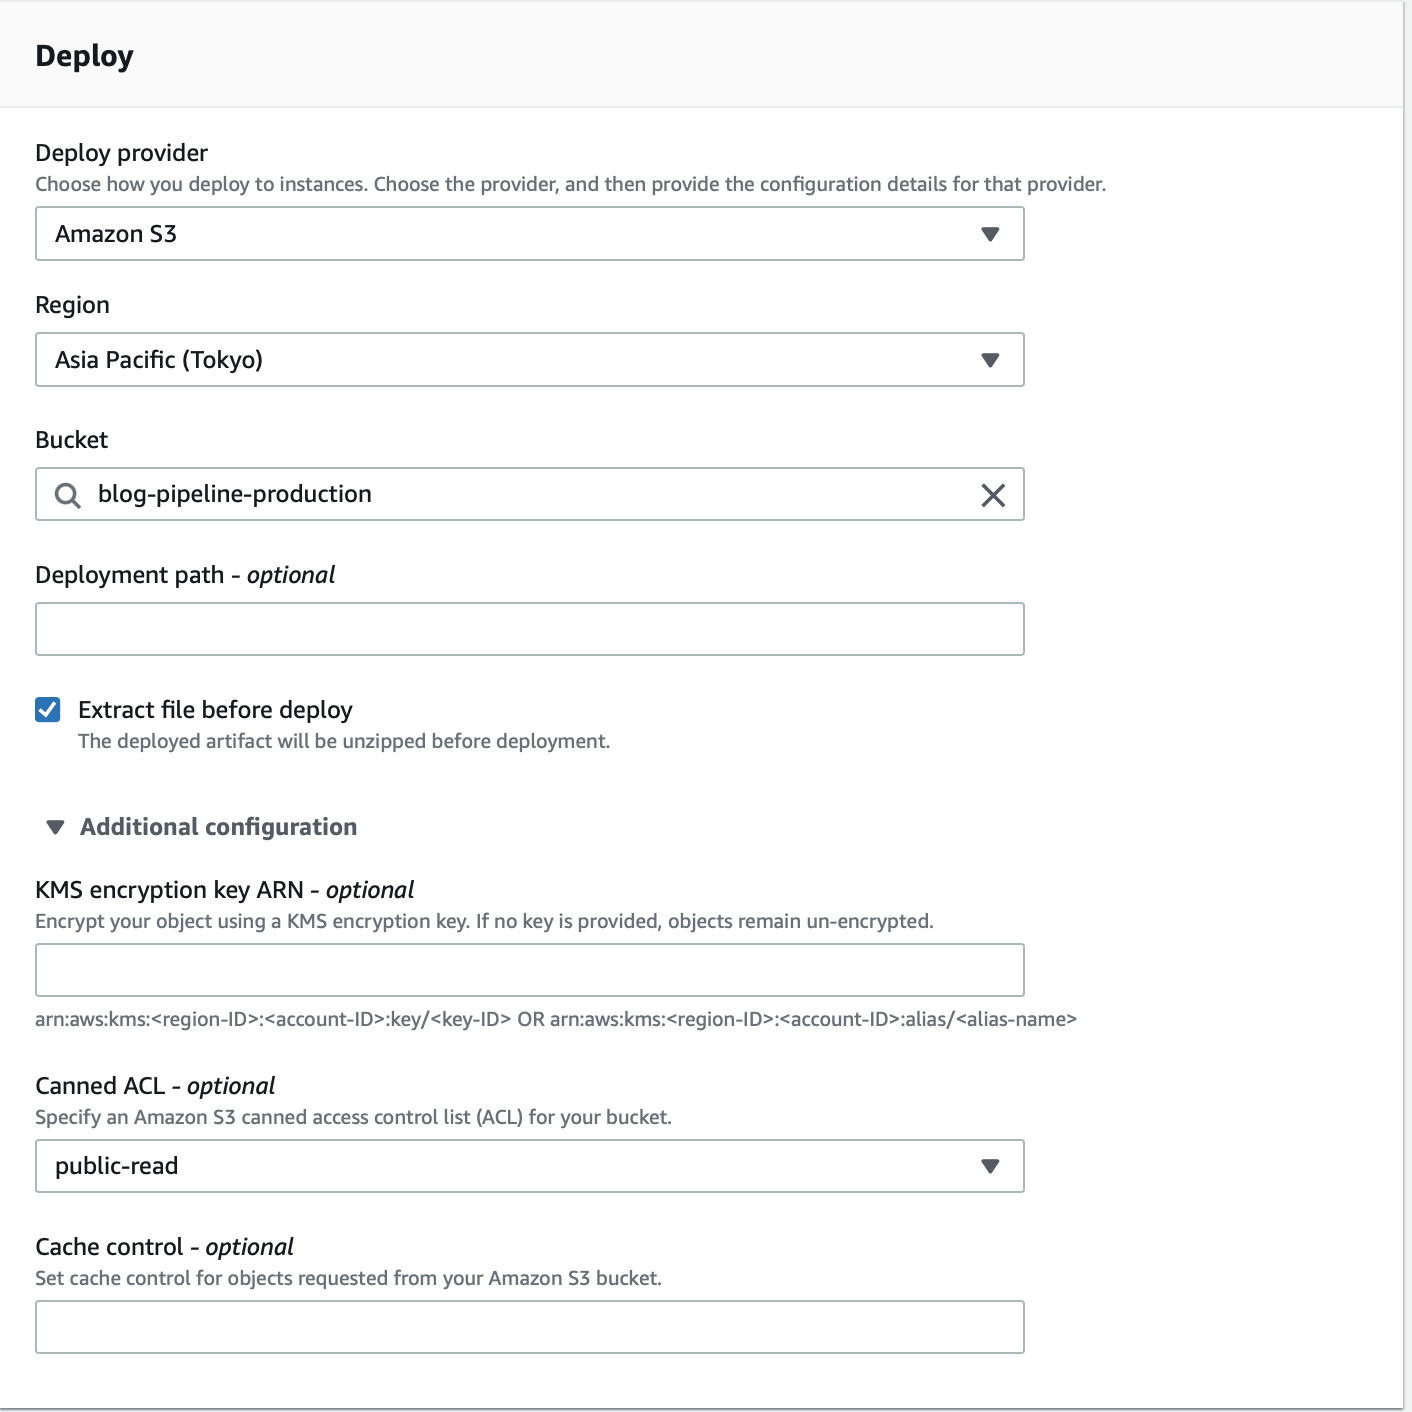
- In the next step we are going to set deployer options with the deploy provider being s3 and the production bucket as the target.
- Extract file before deployment is important to set so that pipeline unzips the artifact before deployment.
- We are going to set cannel ACL as public-read so that our file ( index.html) is available for the public to read since we are hosting it as a static website.
- Note: CodePipeline deploys all objects to s3 buckets as private.
- There is an option to encrypt production bucket objects too for extra security, if no kms-key is provided there are going to be unencrypted.
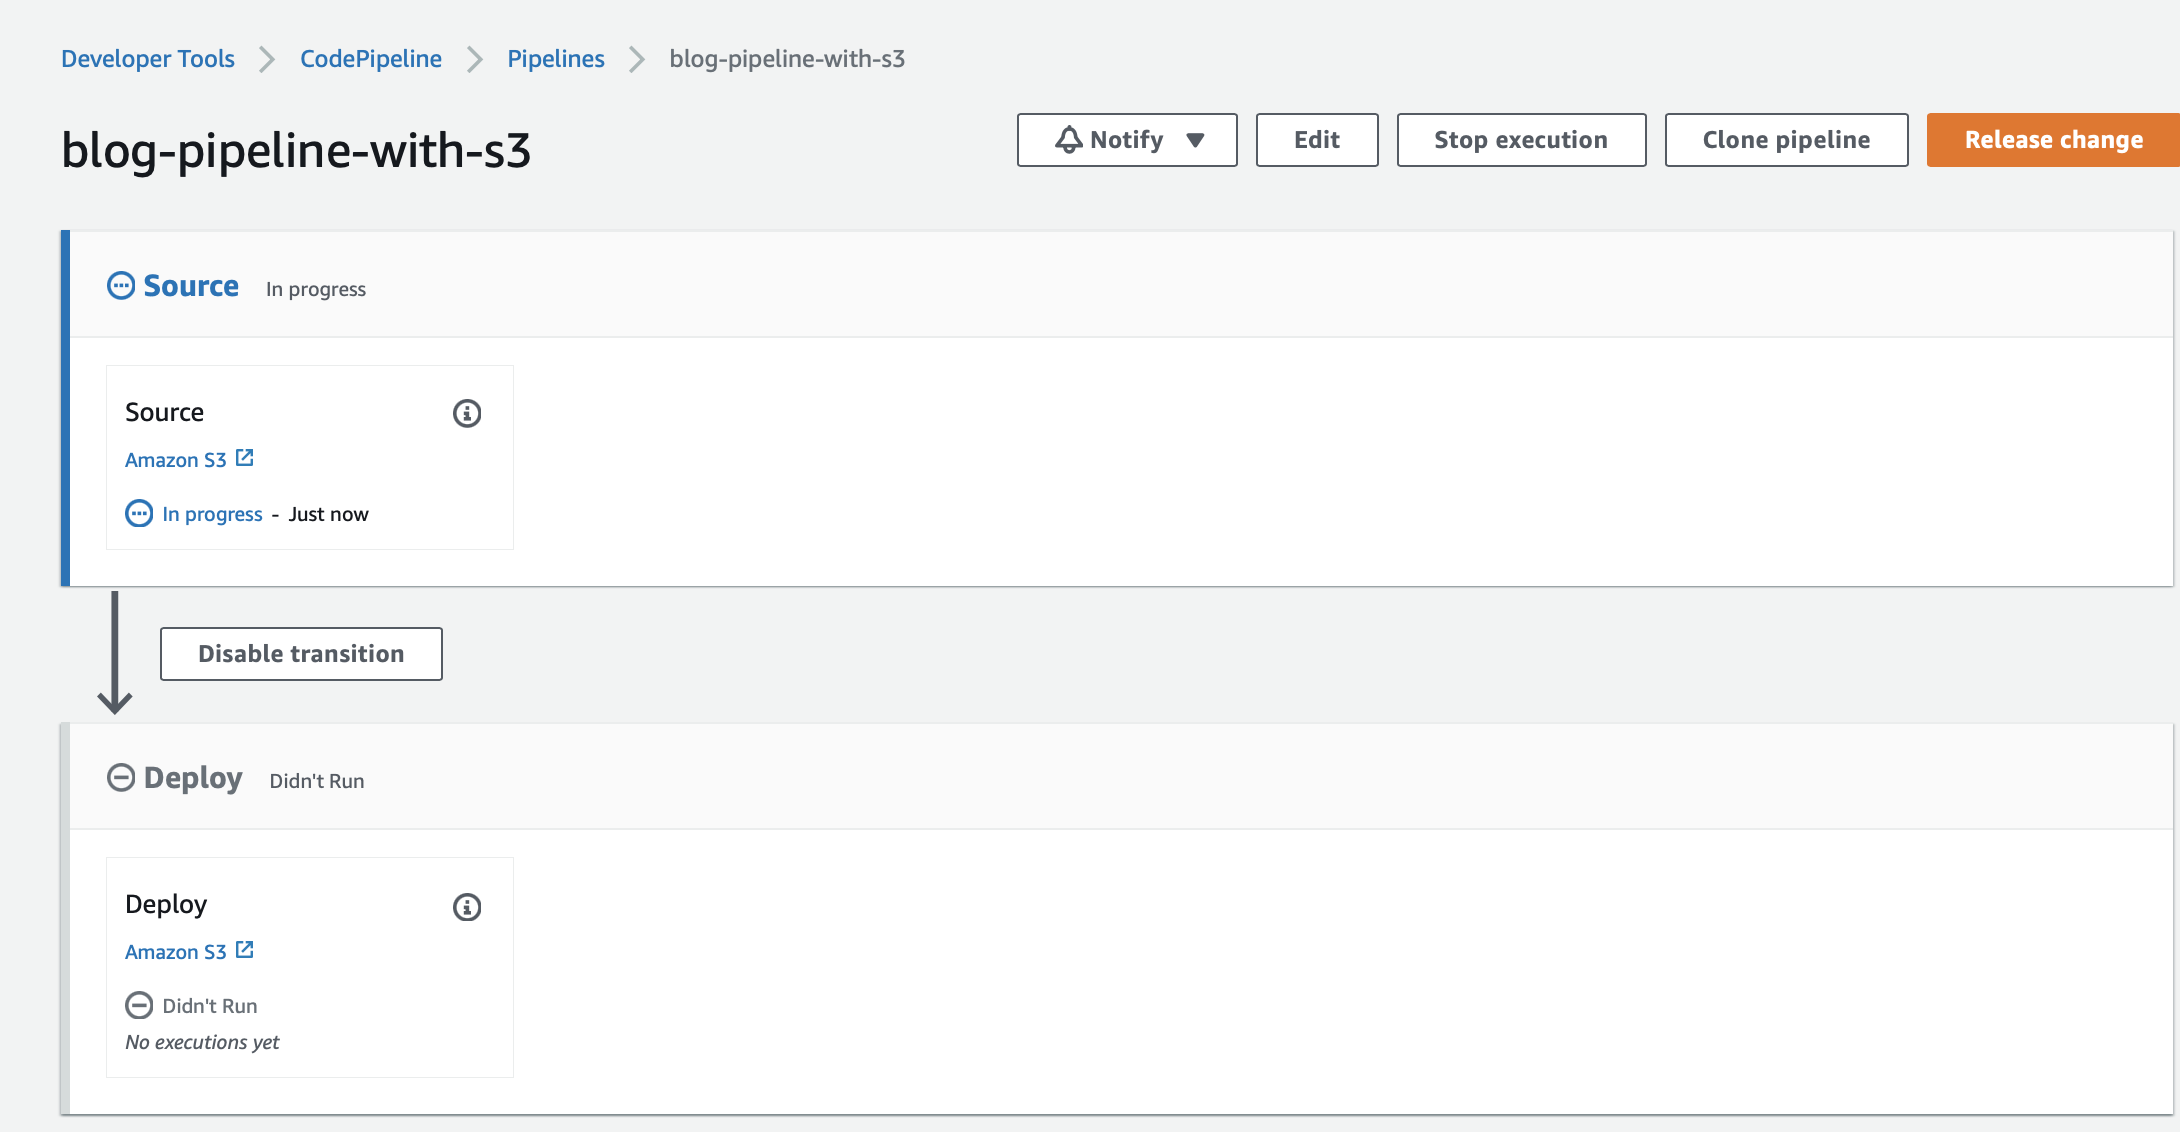
- After creation, the pipeline automatically runs for the first time.
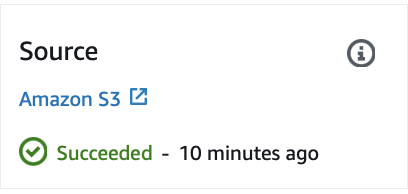
- Go to production bucket and under properties, -> static website hosting -> copy the website bucket endpoint

- Access the website by the endpoint URL, Wohoo, you just automated your website with CodePipeline.

5. Automatically trigger on uploading bucket.
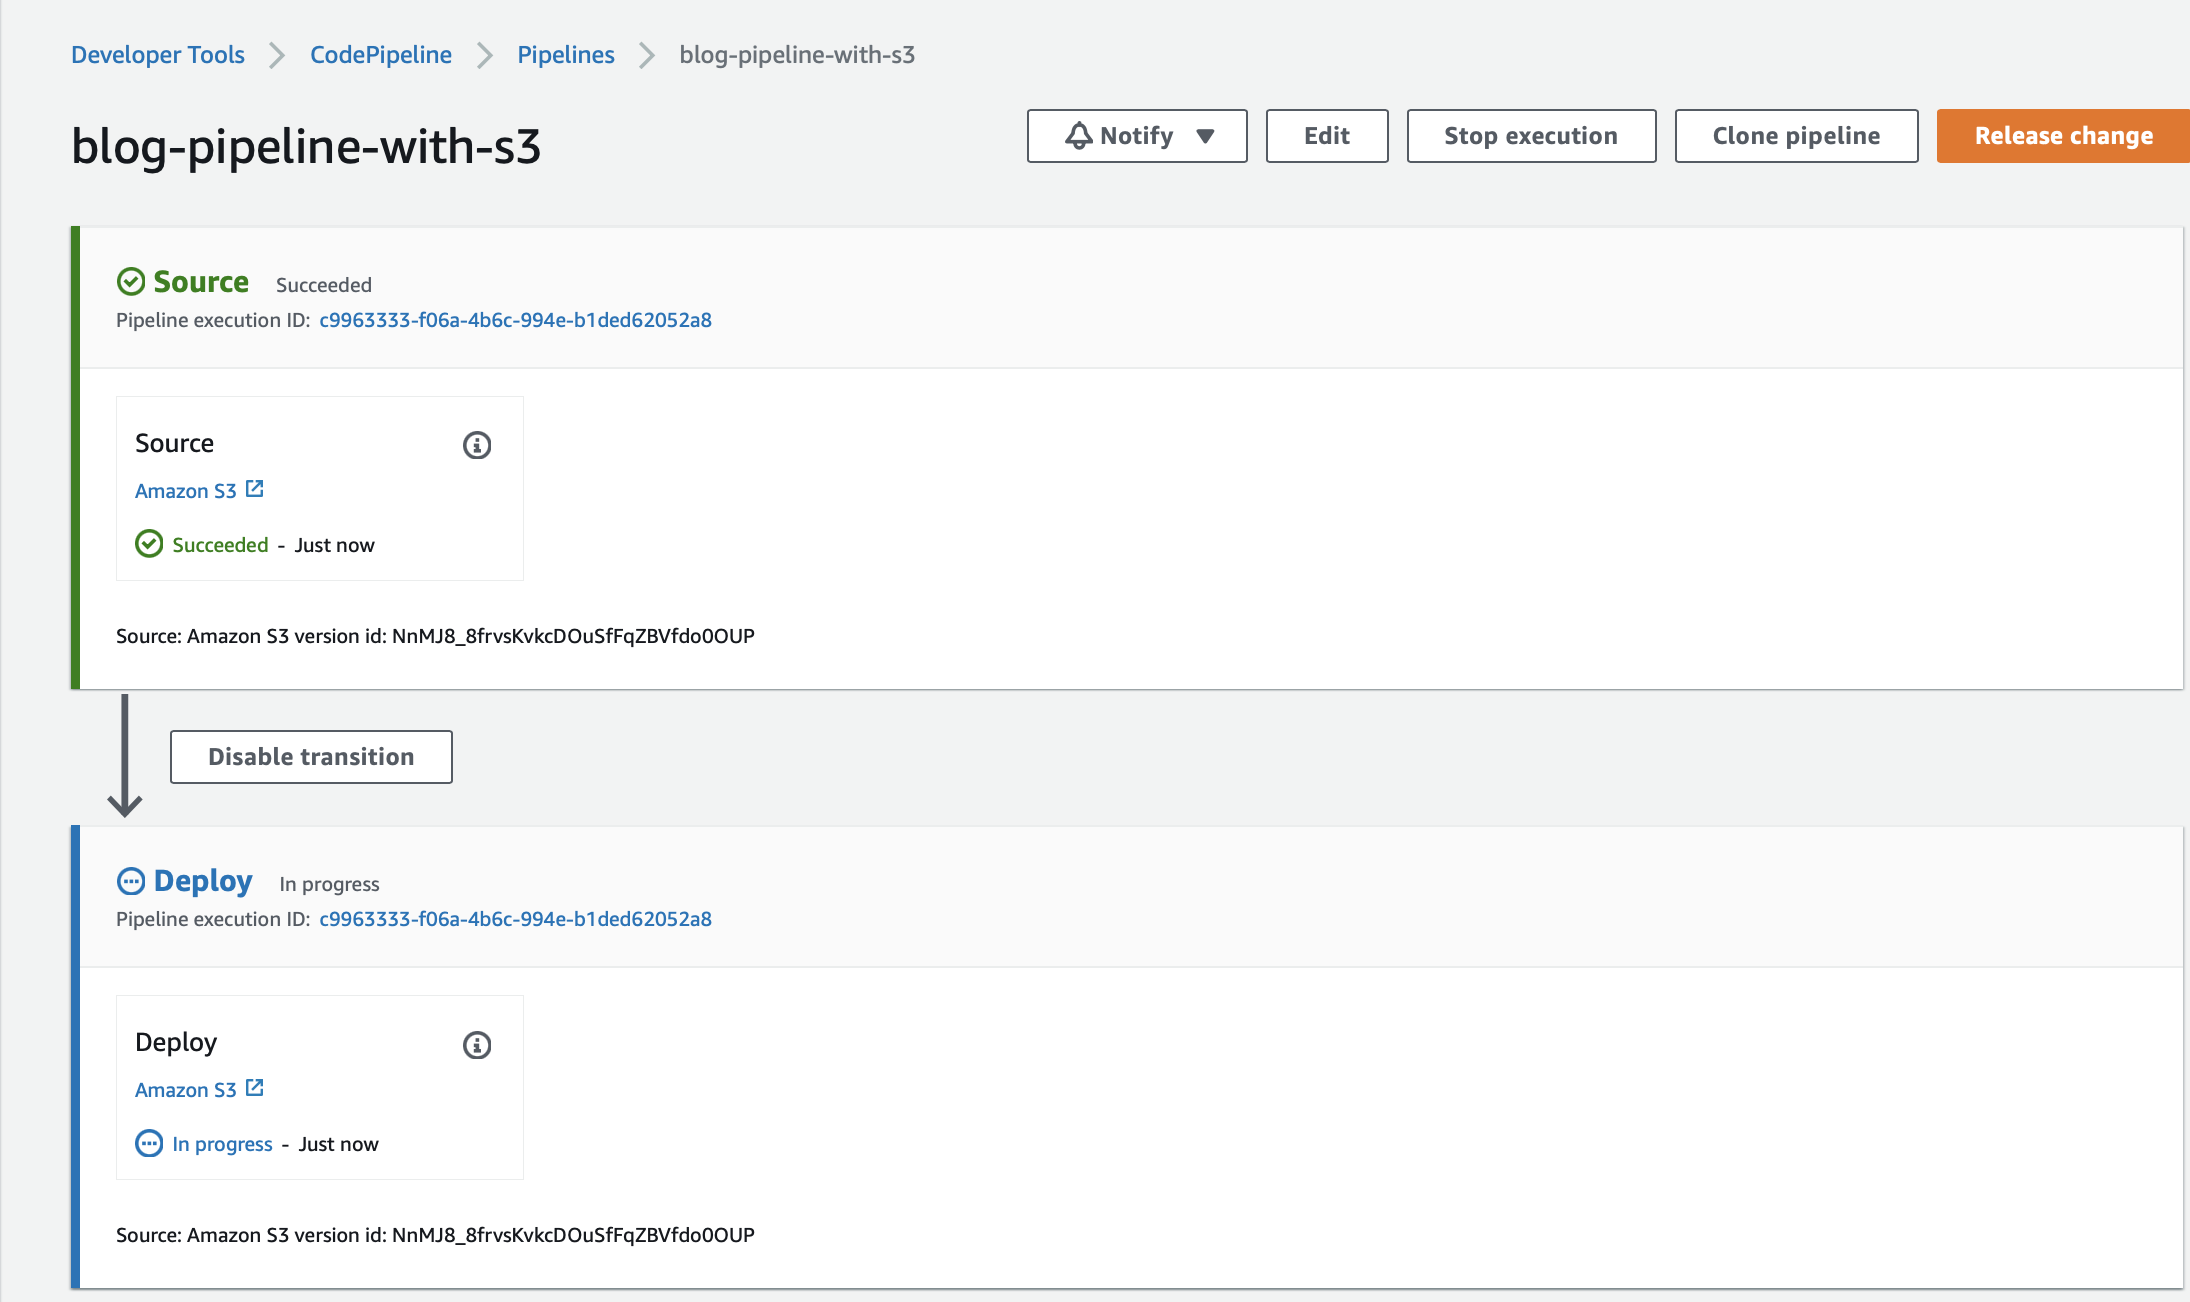
What is a stage?
- Stages hist the action, here for our pipeline we have 2 stages called
SourceandDeploy

What is an Action?
- Action by the name, is a step that performs some operations.
What are Transitions?
- They connect stages.
- By default, all transitions are enabled.
- We can disable transition.
- Stages run fast because we use source and deploy buckets in the same region.
- Each pipeline has a unique execution ID, A successful transition means execution IDs are passed from one stage to another hence they both have the same execution ID.
-
Let's say we want to update our website and trigger the pipeline automatically, all we have to do is just upload the updated zip package to s3.
-
Let's make some changes to
index.html. Adding v2 to to h1.
<html>
    <head>
        <title>Static Website for CodePipeline Blog v2</title>
    </head>
    <body style="text-align:center;font-family:Verdana;margin:1%;">
        <h1 style="color:rgb(128, 55, 0)">This is deployed by CD pipeline! V2</h1>
        <hr>
        <p>Automate anything and everything!!!</p>
        <h2>Made by Jatin Mehrotra!</h2>
    </body>
</html>
- Run the zip command again.
zip -r blog-website.zip error.html index.html
- Upload to s3, and the Pipeline will be triggered again with a different execution ID.
- Confirm the changes on the website too.

Add new action and trigger manually.
Note: Adding actions to the existing pipeline does not trigger the pipeline automatically as it was triggered automatically upon creation. Therefore we need to trigger the pipeline manually.
- In the new action we will :
- Deploy buckets can be in other AWS regions.
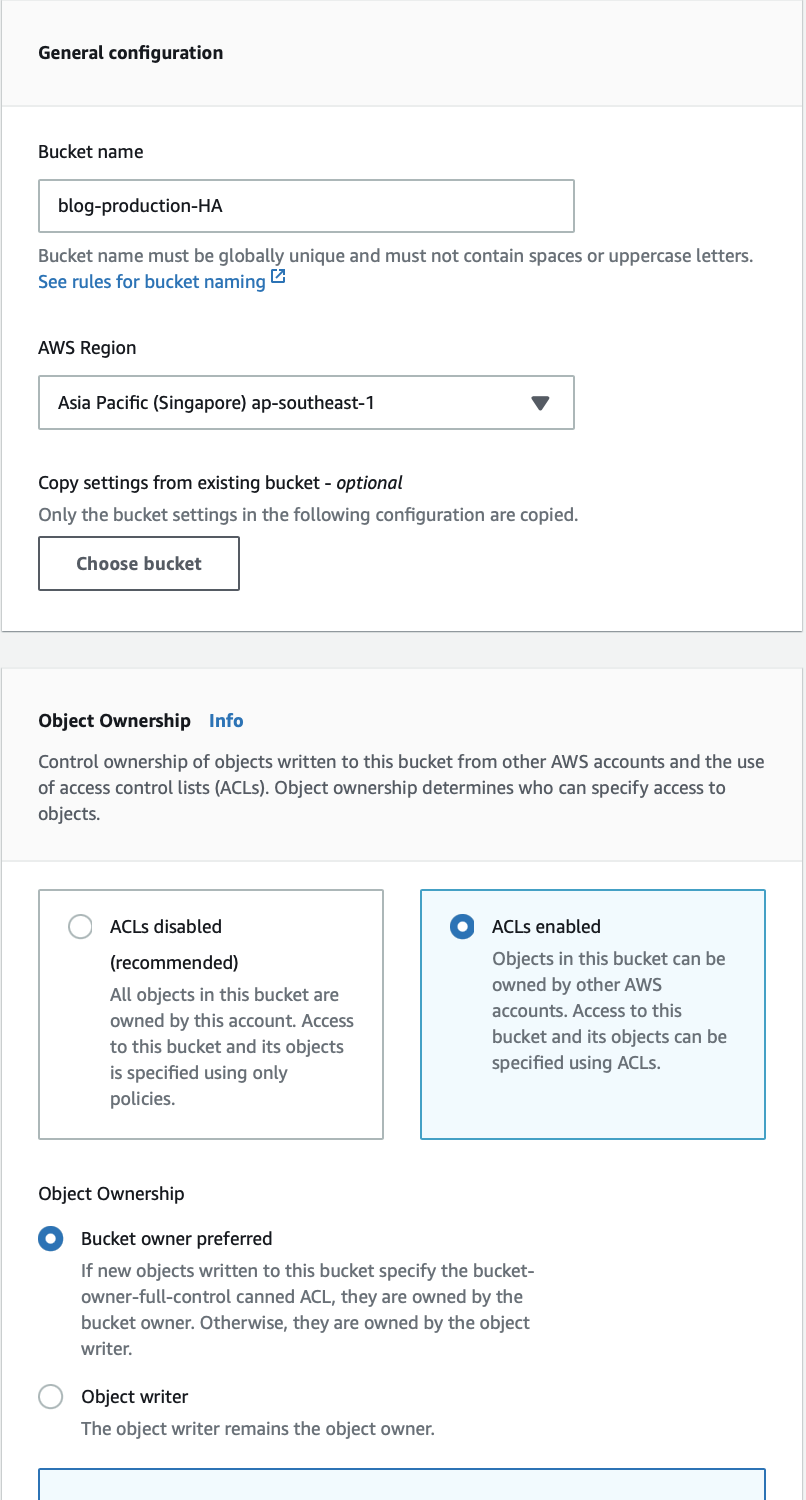
- Create a bucket in another region and deploy the website to it for higher availability. This new bucket will be in Singapore as opposed to the Tokyo region like other buckets.
- All the bucket configuration remains like the production bucket except for the name and region.
- Don't forget to enable website bucket hosting.
- To add the action, we need to edit the pipeline

- Edit the Deploy stage since we are adding action to deploy in the production bucket.

- As I mentioned earlier, actions can be executed sequentially or in parallel. The position of
add action groupis critical because the box before the deploy action symbolizes execution sequentially before the deploy action. Action group beside deploy action group tells execute the action in parallel. The box of add action group below deploy action means to add an action that will run sequentially after deploying action.
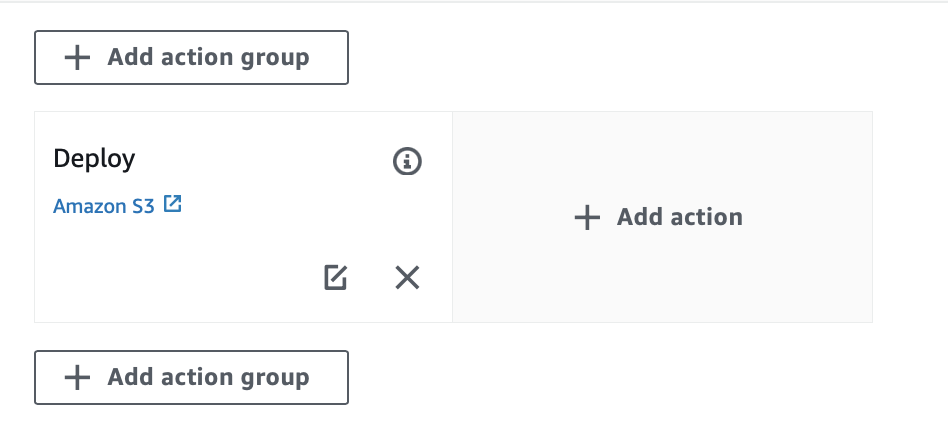
- We are adding action in parallel so we will choose to add action beside the deploy action.

- Define action provider as deploy s3.
- Define input artifact, in this case, it is coming from
sourceArtifactdefined by source.
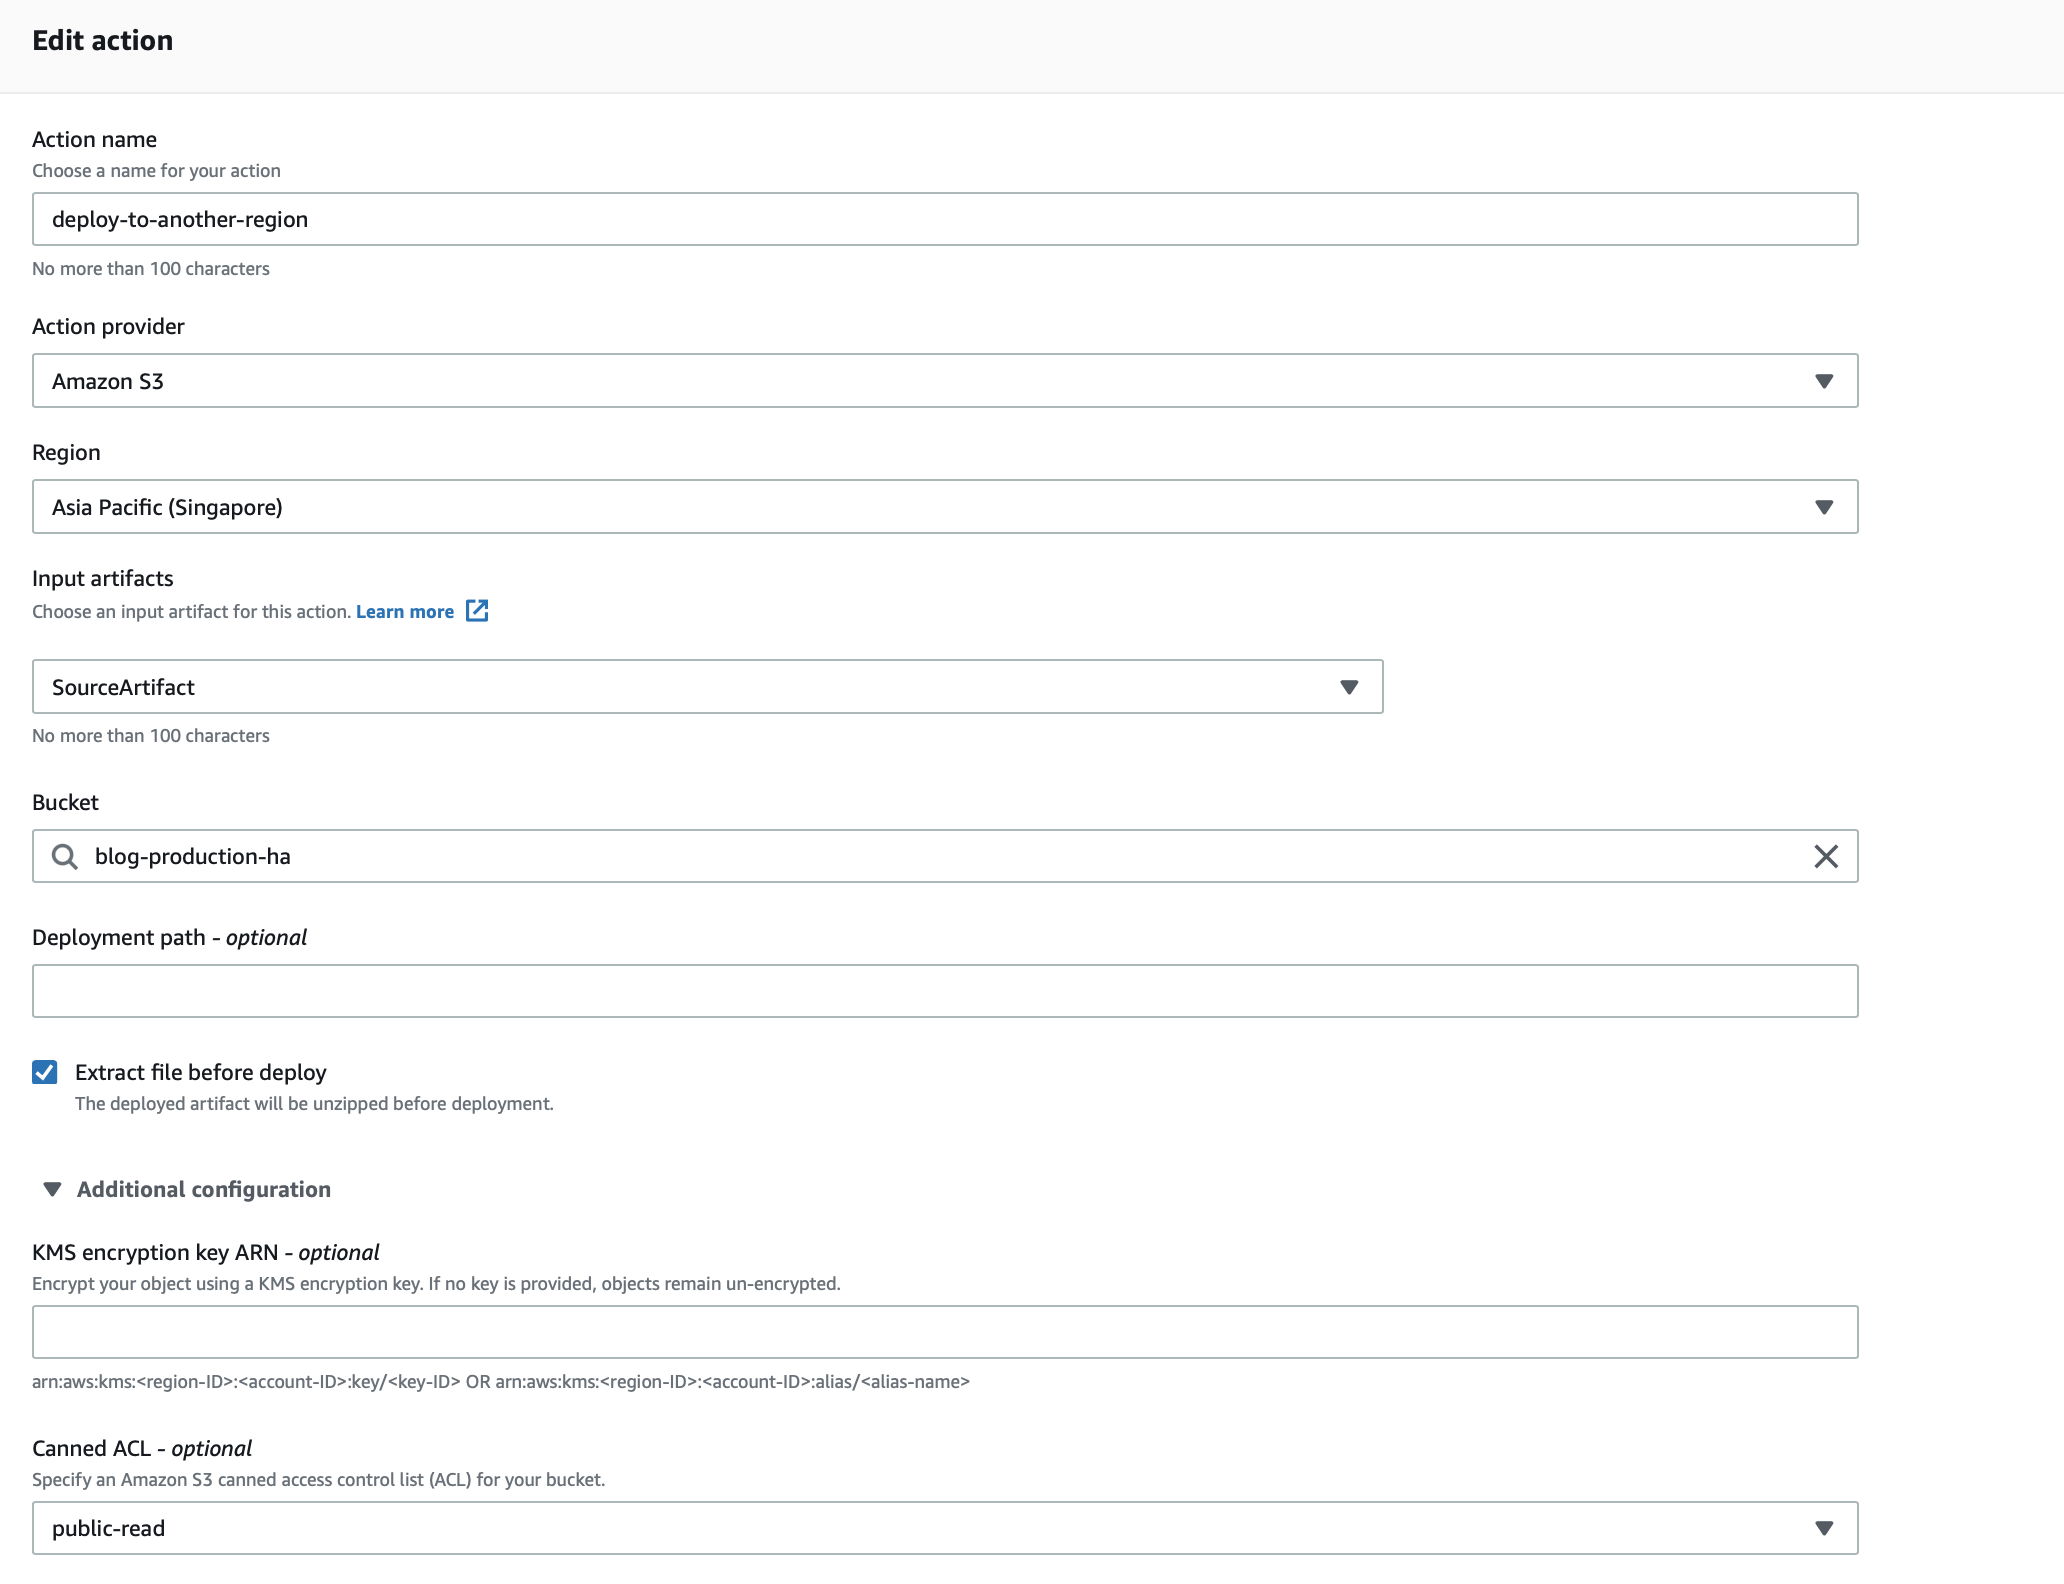
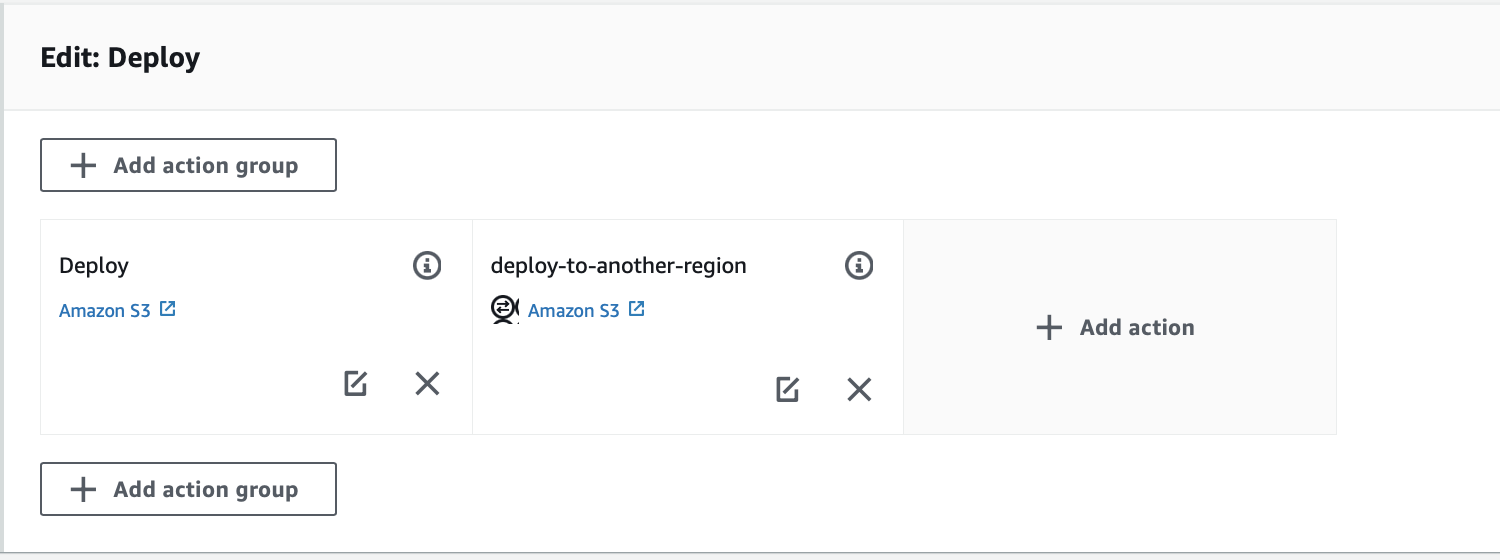
- Save pipeline changes.
How to trigger manually without uploading to an s3 bucket
 - Click on release change.
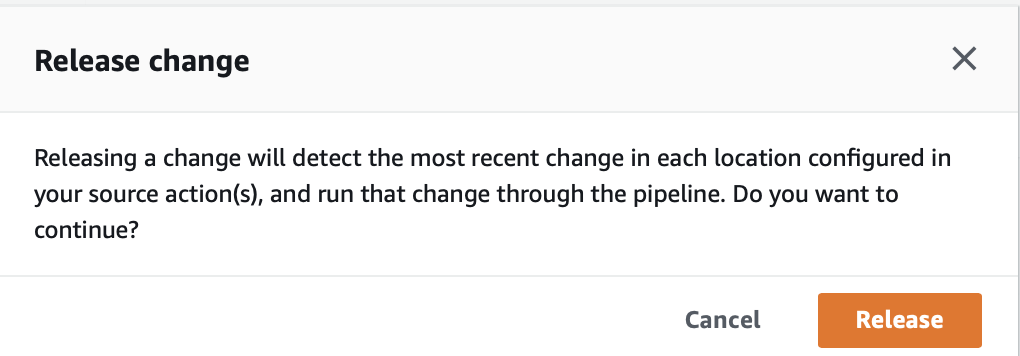 - We can see the start pipeline execution trigger.

Clearing the environment.
- Deleting code pipeline does not delete a source, deployment, and artifact buckets.
- Artifact bucket will be used by all pipelines so no need to delete it.
- Roles are not deleted, even the policies created by roles.
- Different roles for different policies are the best practice.
From DevOps Perspective.
- We have successfully achieved the automation of deploying static website using s3 as a source bucket with our first CD pipeline using CodePipeline.
- We did achieve automation, however, there were still manual process elements like creating s3 which can be further automated using Terraform.
Till then, Happy Learning !!!
Feel Free to post any comments or questions.


