CloudFormationで使い捨てEC2環境をお手軽に構築してみる
この記事は公開されてから1年以上経過しています。情報が古い可能性がありますので、ご注意ください。
こんにちは。中村です。
突然ですが、使い捨てのEC2環境は欲しくありませんか?
はじめに
「使い捨てられるリソースを使うのは当たり前ではないか?」
「AWS CloudShellがあるじゃないか!」
という声が聞こえてくるような気がします。
はい。仰る通りです。
しかし私は、ローカルからSSH接続をしたり、今後の作業での柔軟性を考慮して、
CloudShellではなく、EC2を構築したいと思うことがあります。
それも簡単に作って、簡単にお掃除したいなと思うのです。
例えば、勉強会に参加するとき。
使い捨て環境を構築して、ハンズオンをやってみる。
場合によっては、一時的にサーバーとして公開してみよう。とか。
そういったニーズにもお答えすべく、今回はCloudFormationでお手軽に構築してみました。
環境情報
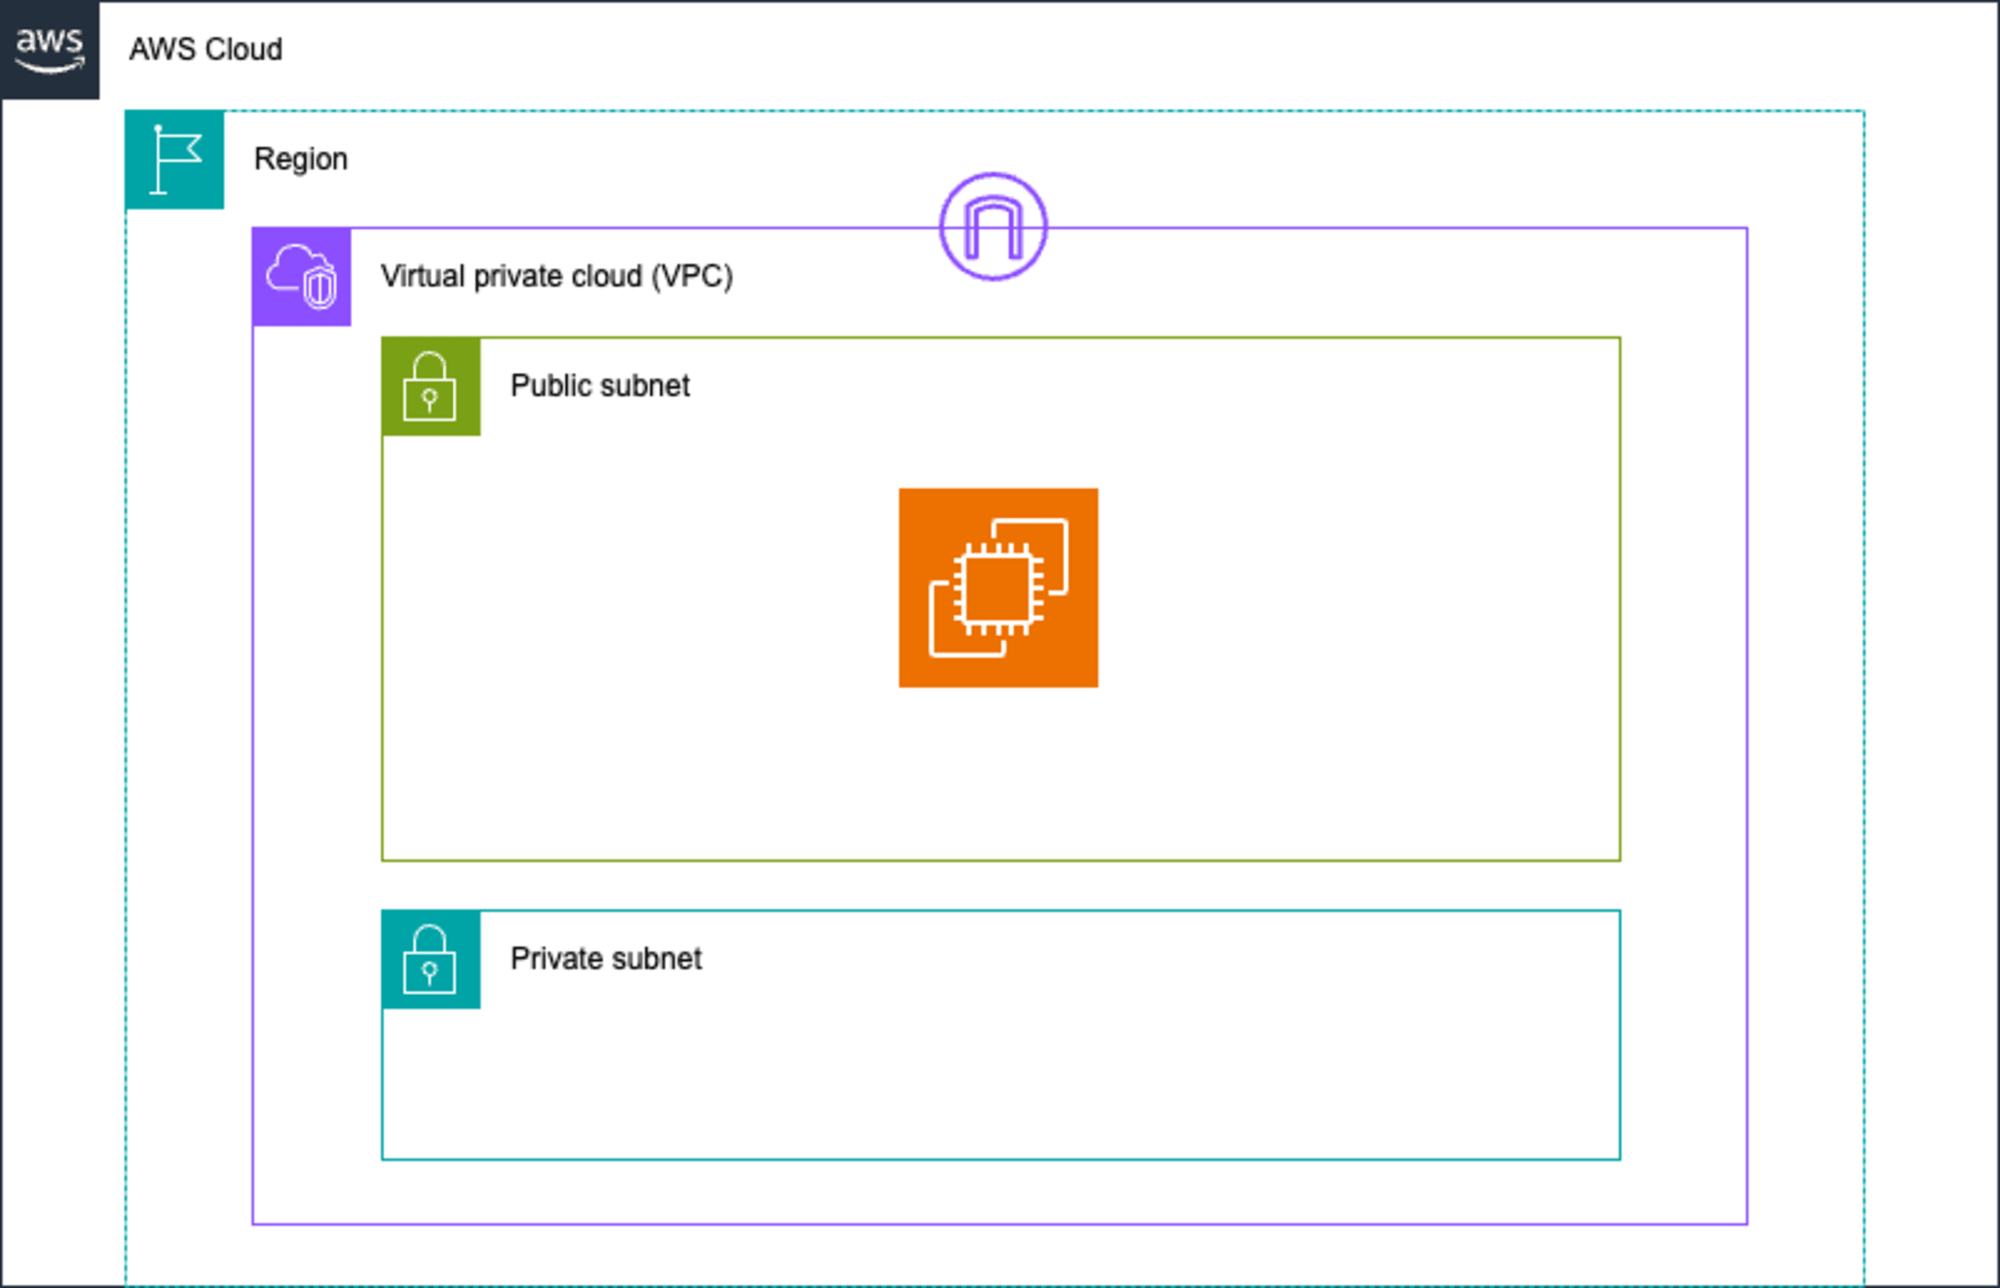
構成図
パブリックサブネットにEC2インスタンスを1台起動するシンプルな構成を作成してみます。

テンプレート
(ec2-playground.yml)
AWSTemplateFormatVersion: "2010-09-09"

Description: >-
  AWS CloudFormation Template:
  This template make temp EC2.

Metadata:
  AWS::CloudFormation::Interface:
    ParameterGroups:
      -
        Label:
          default: Common Configuration
        Parameters:
          - AppName
          - MyIP
      -
        Label:
          default: EC2 Configuration
        Parameters:
          - KeyName
          - Ec2ImageId
          - Ec2AMIId

Parameters:
  AppName:
    Description: Name of this application.
    Type: String
    Default: ec2-playground
  KeyName:
    Description: Name of an existing EC2 KeyPair to enable SSH access to the host
    Type: AWS::EC2::KeyPair::KeyName
    ConstraintDescription: must be the name of an existing EC2 KeyPair.
  Ec2ImageId:
    Description: Default Instans Image.
    Type: AWS::SSM::Parameter::Value<String>
    Default: /aws/service/ami-amazon-linux-latest/al2023-ami-kernel-default-x86_64
  Ec2AMIId:
    Type: String
    Default: <None>
    AllowedPattern: ami-[0-91-z]{17}|^<None>$
  MyIP:
    Description: IP address allowed to connect
    Type: String

Mappings:
  SubnetConfig:
    VPC:
      CIDR: 10.10.0.0/16
    PrivateSubnet:
      CIDR: 10.10.10.0/24
    PublicSubnet:
      CIDR: 10.10.20.0/24
  EC2Config:
    EC2ForPG:
      InstanceType: t2.micro

Conditions:
  UseEc2ImageId: !Equals
    - !Ref Ec2AMIId
    - <None>

Resources:
# ==========
# VPC
# ==========
  VPC:
    Type: AWS::EC2::VPC
    Properties:
      EnableDnsSupport: true
      EnableDnsHostnames: true
      CidrBlock: !FindInMap [SubnetConfig, VPC, CIDR]
      Tags:
        - Key: Name
          Value: !Sub ${AppName}-VPC
  InternetGateway:
    Type: AWS::EC2::InternetGateway
    Properties:
      Tags:
        - Key: Name
          Value: !Sub ${AppName}-VPC-IGW
  AttachGateway:
    Type: AWS::EC2::VPCGatewayAttachment
    Properties:
      VpcId:
         !Ref VPC
      InternetGatewayId:
         !Ref InternetGateway
# ==========
# Private Subnet
# ==========
  PrivateSubnet:
    Type: AWS::EC2::Subnet
    Properties:
      AvailabilityZone: !Select [0, !GetAZs ""]
      VpcId: !Ref VPC
      CidrBlock: !FindInMap [SubnetConfig, PrivateSubnet, CIDR]
      Tags:
        - Key: Name
          Value: !Sub ${AppName}-VPC-PVTSB
        - Key: Network
          Value: Private
  PrivateRouteTable:
    Type: AWS::EC2::RouteTable
    Properties:
      VpcId: !Ref VPC
      Tags:
        - Key: Name
          Value: !Sub ${AppName}-VPC-PVTRT
        - Key: Network
          Value: Private
  PrivateSubnetRouteTableAssociation:
    Type: AWS::EC2::SubnetRouteTableAssociation
    Properties:
      SubnetId: !Ref PrivateSubnet
      RouteTableId: !Ref PrivateRouteTable
# ==========
# Public Subnet
# ==========
  PublicSubnet:
    Type: AWS::EC2::Subnet
    Properties:
      AvailabilityZone: !Select [0, !GetAZs ""]
      VpcId: !Ref VPC
      CidrBlock: !FindInMap [SubnetConfig, PublicSubnet, CIDR]
      Tags:
        - Key: Name
          Value: !Sub ${AppName}-VPC-PUBSB
        - Key: Network
          Value: Public
  PublicRouteTable:
    Type: AWS::EC2::RouteTable
    Properties:
      VpcId: !Ref VPC
      Tags:
        - Key: Name
          Value: !Sub ${AppName}-VPC-PUBRT
        - Key: Network
          Value: Public
  PublicRoute:
    Type: AWS::EC2::Route
    Properties:
       RouteTableId:
         !Ref PublicRouteTable
       DestinationCidrBlock: 0.0.0.0/0
       GatewayId:
         !Ref InternetGateway
  PublicSubnetRouteTableAssociationA:
    Type: AWS::EC2::SubnetRouteTableAssociation
    Properties:
      SubnetId: !Ref PublicSubnet
      RouteTableId: !Ref PublicRouteTable
# ==========
# EC2
# ==========
  EC2SecurityGroup:
    Type: AWS::EC2::SecurityGroup
    Properties:
      GroupDescription: EC2SecurityGroup
      VpcId: !Ref VPC
      Tags:
        - Key: Name
          Value: !Sub ${AppName}-EC2-SG-ForPG
      SecurityGroupIngress:
        - FromPort: 22
          IpProtocol: tcp
          CidrIp: !Ref MyIP
          ToPort: 22
  EC2Instance:
    Type: AWS::EC2::Instance
    Properties:
      InstanceType: !FindInMap [EC2Config, EC2ForPG, InstanceType]
      KeyName: !Ref KeyName
      ImageId: !If [UseEc2ImageId, !Ref Ec2ImageId, !Ref Ec2AMIId]
      NetworkInterfaces:
        - GroupSet:
            - !Ref EC2SecurityGroup
          AssociatePublicIpAddress: true
          DeviceIndex: '0'
          DeleteOnTermination: true
          SubnetId: !Ref PublicSubnet
      IamInstanceProfile: !Ref EC2InstanceProfile
      Tags:
        - Key: Name
          Value: !Sub ${AppName}-EC2-ForPG
  EC2IAMRole:
    Type: AWS::IAM::Role
    Properties:
      RoleName: !Sub ${AppName}-IAM-Role-ForPG
      AssumeRolePolicyDocument:
        Version: 2012-10-17
        Statement:
          - Effect: Allow
            Principal:
              Service:
                - ec2.amazonaws.com
            Action:
              - sts:AssumeRole
      Path: /
      ManagedPolicyArns:
        - arn:aws:iam::aws:policy/AmazonS3ReadOnlyAccess
  EC2InstanceProfile:
    Type: AWS::IAM::InstanceProfile
    Properties:
      Path: /
      Roles:
        - !Ref EC2IAMRole
      InstanceProfileName: !Sub ${AppName}-IAM-EC2InsProf-ForPG
    DependsOn: EC2IAMRole
(parameter.txt)
#AppName=ec2-playground
KeyName=ec2-playground
#Ec2ImageId=/aws/service/ami-amazon-linux-latest/amzn2-ami-hvm-x86_64-gp2
#Ec2AMIId=ami-xxxxxxxxxx
MyIP=xxx.xxx.xxx.xxx/xx
CloudFormationで読み込むパラメータ情報です。
本記事ではCLIにて構築を試すため、パラメータテキストをご用意しました。
マネジメントコンソールから構築される場合は、コンソール上で直接指定ください。
AppName(任意): 作成するリソースを識別するアプリケーション名
KeyName(必須): 事前作成したキーペアの名前
Ec2ImageId(任意): AMIパブリックパラメータ
Ec2AMIId(任意): 起動したいAMIを直接指定する。Ec2ImageIdよりも優先する。
MyIP(必須): 接続元グローバルIPアドレス
必須項目はご自身の環境に応じて修正ください。
任意のパラメータを利用する場合は、各行先頭の#をコメントアウトしてご利用ください。
やってみる
前提条件
- 各種リソースを構築可能な権限が作業ユーザに付与されていること
本記事ではマネジメントコンソールからではなく、CloudShellを利用して環境を構築してみます!
作成
CloudShellを起動します。
- キーペア作成
ec2-playgroundという名前でキーペアを作成します。
aws ec2 create-key-pair --key-name ec2-playground --query 'KeyMaterial' --output text > ec2-playground.pem
ec2-playground.pemという名前で秘密鍵を取得できるので、ローカル環境にコピーします。
「アクション」から「ファイルのダウンロード」を押下。
ec2-playground.pemの絶対パスを入力して、「ダウンロード」を押下します。
例) /home/cloudshell-user/ec2-playground.pem


- テンプレートアップロード
ローカル環境にec2-playground.ymlとparameter.txtを用意します。
parameter.txt内のパラメータはご自身の環境に応じて修正してください。
次に、「アクション」から「ファイルのアップロード」を押下し、CloudFormationテンプレートとパラメータファイルを各々アップロードします。

アップロードされたファイルを確認します。

- CloudFormationで環境構築
aws cloudformation deploy --template-file ec2-playground.yml --stack-name ec2-playground --parameter-overrides $(cat parameter.txt) --capabilities CAPABILITY_NAMED_IAM
本テンプレートにてIAMロールを作成しているため、下記オプションを付与してIAMロール作成を許可します。
--capabilities CAPABILITY_NAMED_IAM

Successfully created/updated stack - ec2-playground
とスタックの作成が成功していることを確認します。
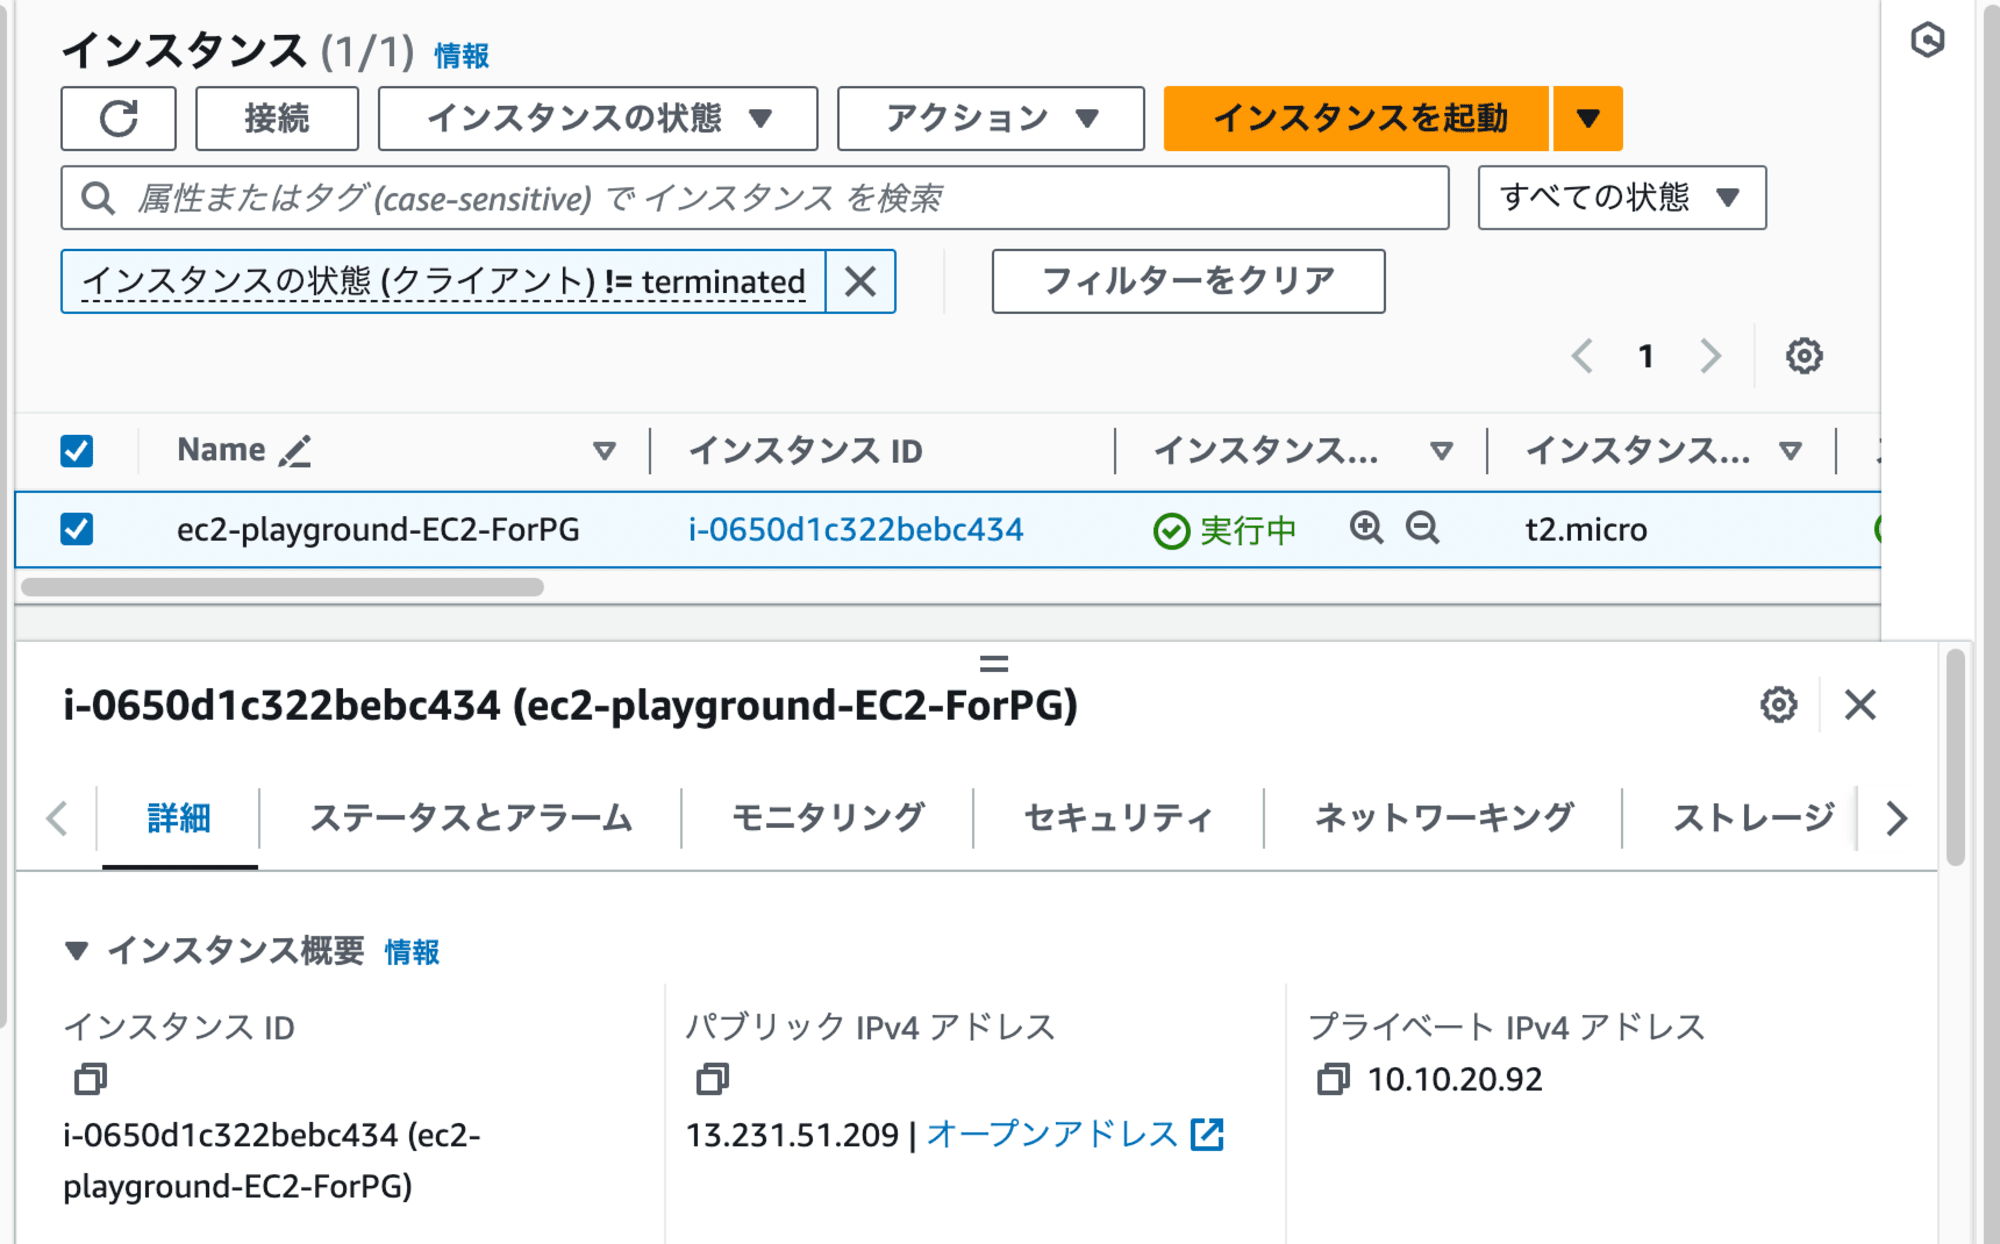
ここでコンソールから、作成したEC2インスタンスのパブリックIPアドレスを確認します。

接続
お使いの環境から接続をします。
注)MyIPに設定したアドレスから接続ください。
ec2-user@xxx.xxx.xxx.xxxの部分には、
直前で確認したEC2のパブリックIPアドレスを入力します。
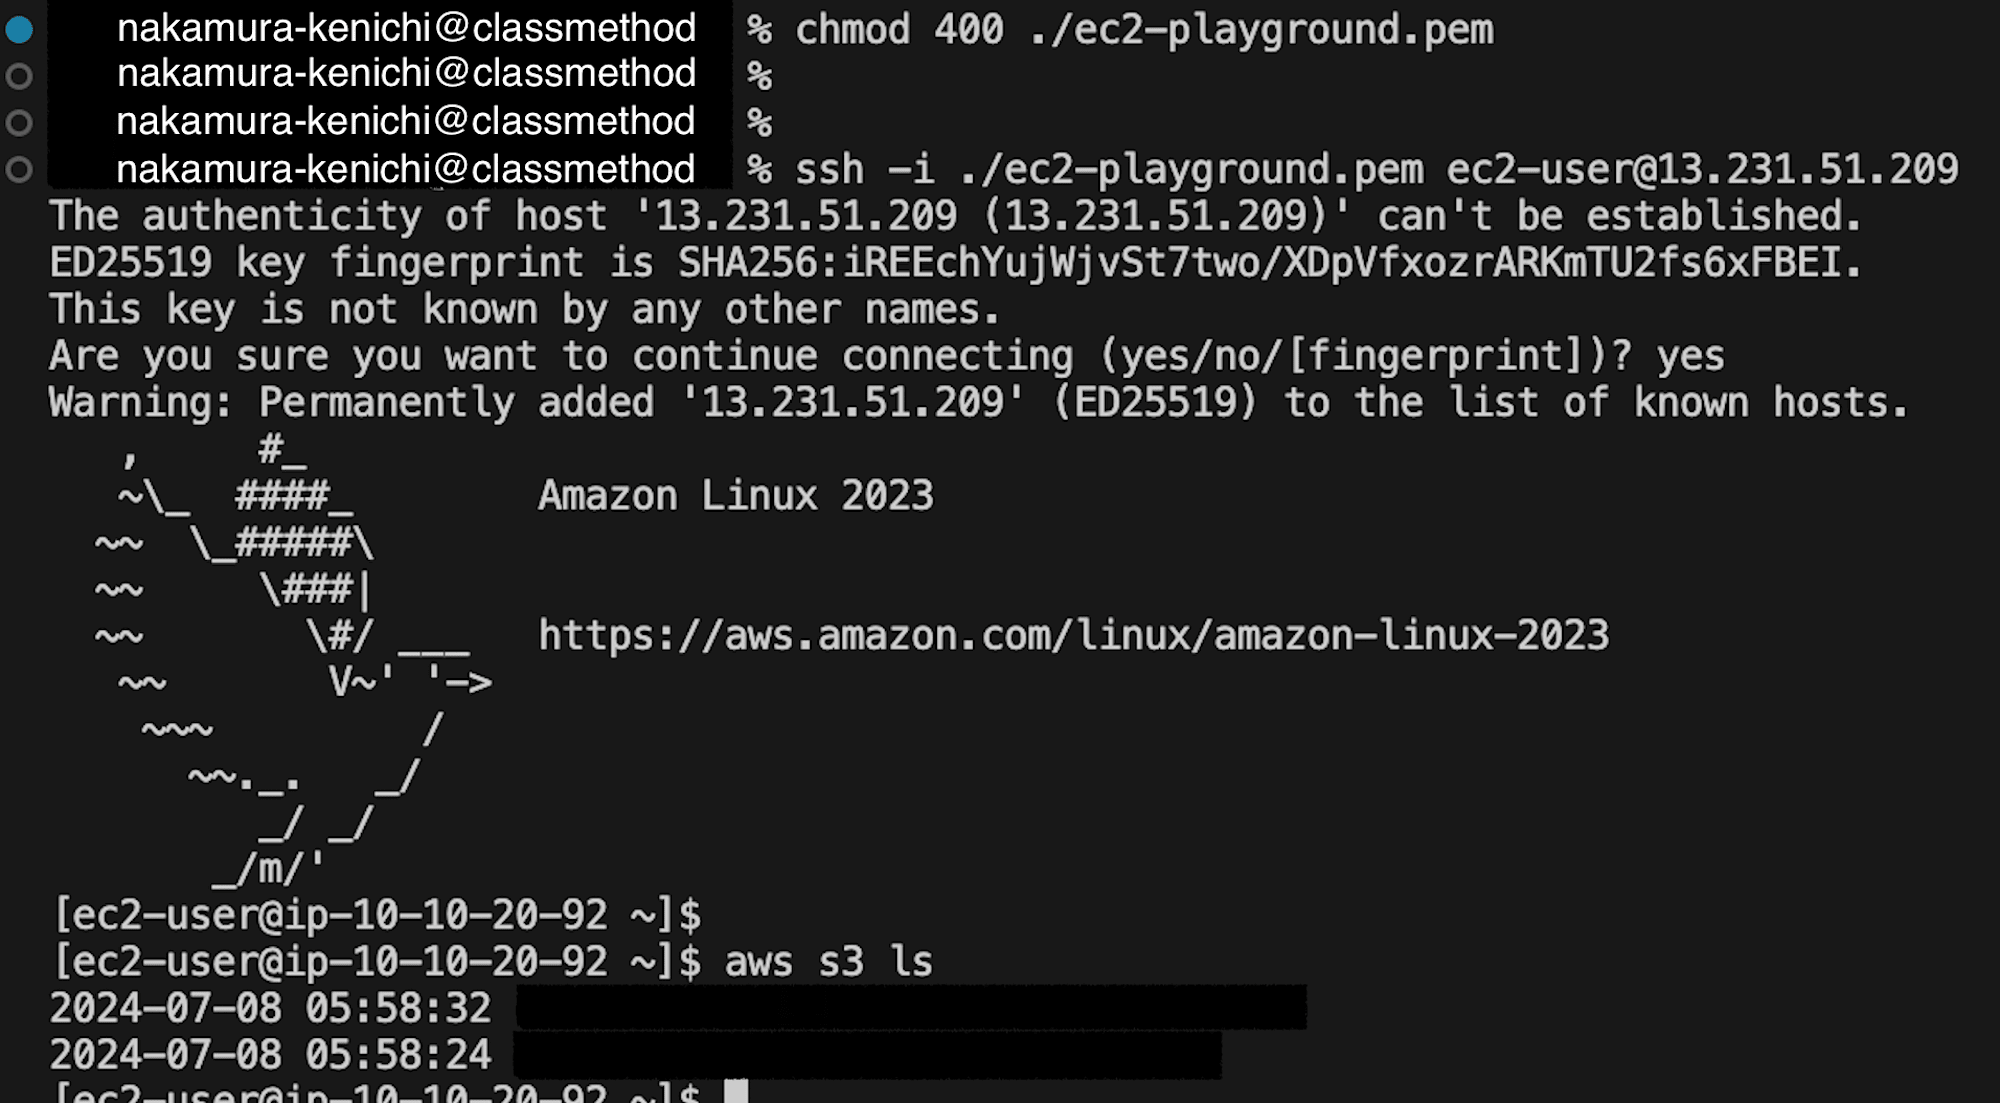
chmod 400 ./ec2-playground.pem
ssh -i ./ec2-playground.pem ec2-user@xxx.xxx.xxx.xxx

接続できました。
テンプレート内で、EC2インスタンスに対してAmazonS3ReadOnlyAccess権限を付与したため、
S3に対してリストできることも確認できました。
ここからは、利用用途に応じてEC2環境をお使いください!
お掃除
CloudShellにて下記コマンドを実行して、作成したリソースを削除します。
aws cloudformation delete-stack --stack-name ec2-playground
# 必要に応じてキーペアを削除する
aws ec2 delete-key-pair --key-name ec2-playground
プラスα
ここで、関連する役立ちそうな記事も合わせて紹介させていただきます。
さいごに
今回はシンプルにEC2環境を構築してみました。
もっとセキュアな構成にしたい場合は、セッションマネージャーを利用してプライベートサブネットにEC2を配置し、SSOにて認証した上でSSH接続をするなどといった別の構成も考えられます。
必要に応じてカスタムし、ご自身が使いやすい環境を構築してみてください!
どなたかのお役に立てば幸いです。
それではまた。


