Creating A Mapping To Handle Non-fatal Errors In IDMC
この記事は公開されてから1年以上経過しています。情報が古い可能性がありますので、ご注意ください。
Introduction
I'm Shiwani from the Data Analytics Division. This time, i tried creating a mapping to handle Non-fatal errors in IDMC. I will use the advance session properties in mapping to define the error log type. IICS allows you to use the Advance Session Properties in mapping task to define error handling methods.
Experiment
- Use Router transformation To routes the employee information based on the condition defined for each output group.
- Create a mapping task and uses the advanced session properties to generate flat file error logs for the mapping.
Prerequisite
- The IICS Secure Agent and VPC has been configured.
- Flat file connection has been created to connect to the Source file.
- Flat file connection has been created to connect to the Target file.
Create Mapping
- Login to IICS and select Data Integration from the My Services.
- Create a new Mapping with the name m_02_ErrorHandling.
- Click the Source transformation and enter the following properties details.
- Source:
- Click New Parameter and Create the new parameter with the name as P_Src_Connection.
- Source Type:
- Select Parameter.
- Parameter:
- Click New Parameter and enter name P_Src_Object.
- Click New Parameter and enter name P_Src_Object.
- Source:
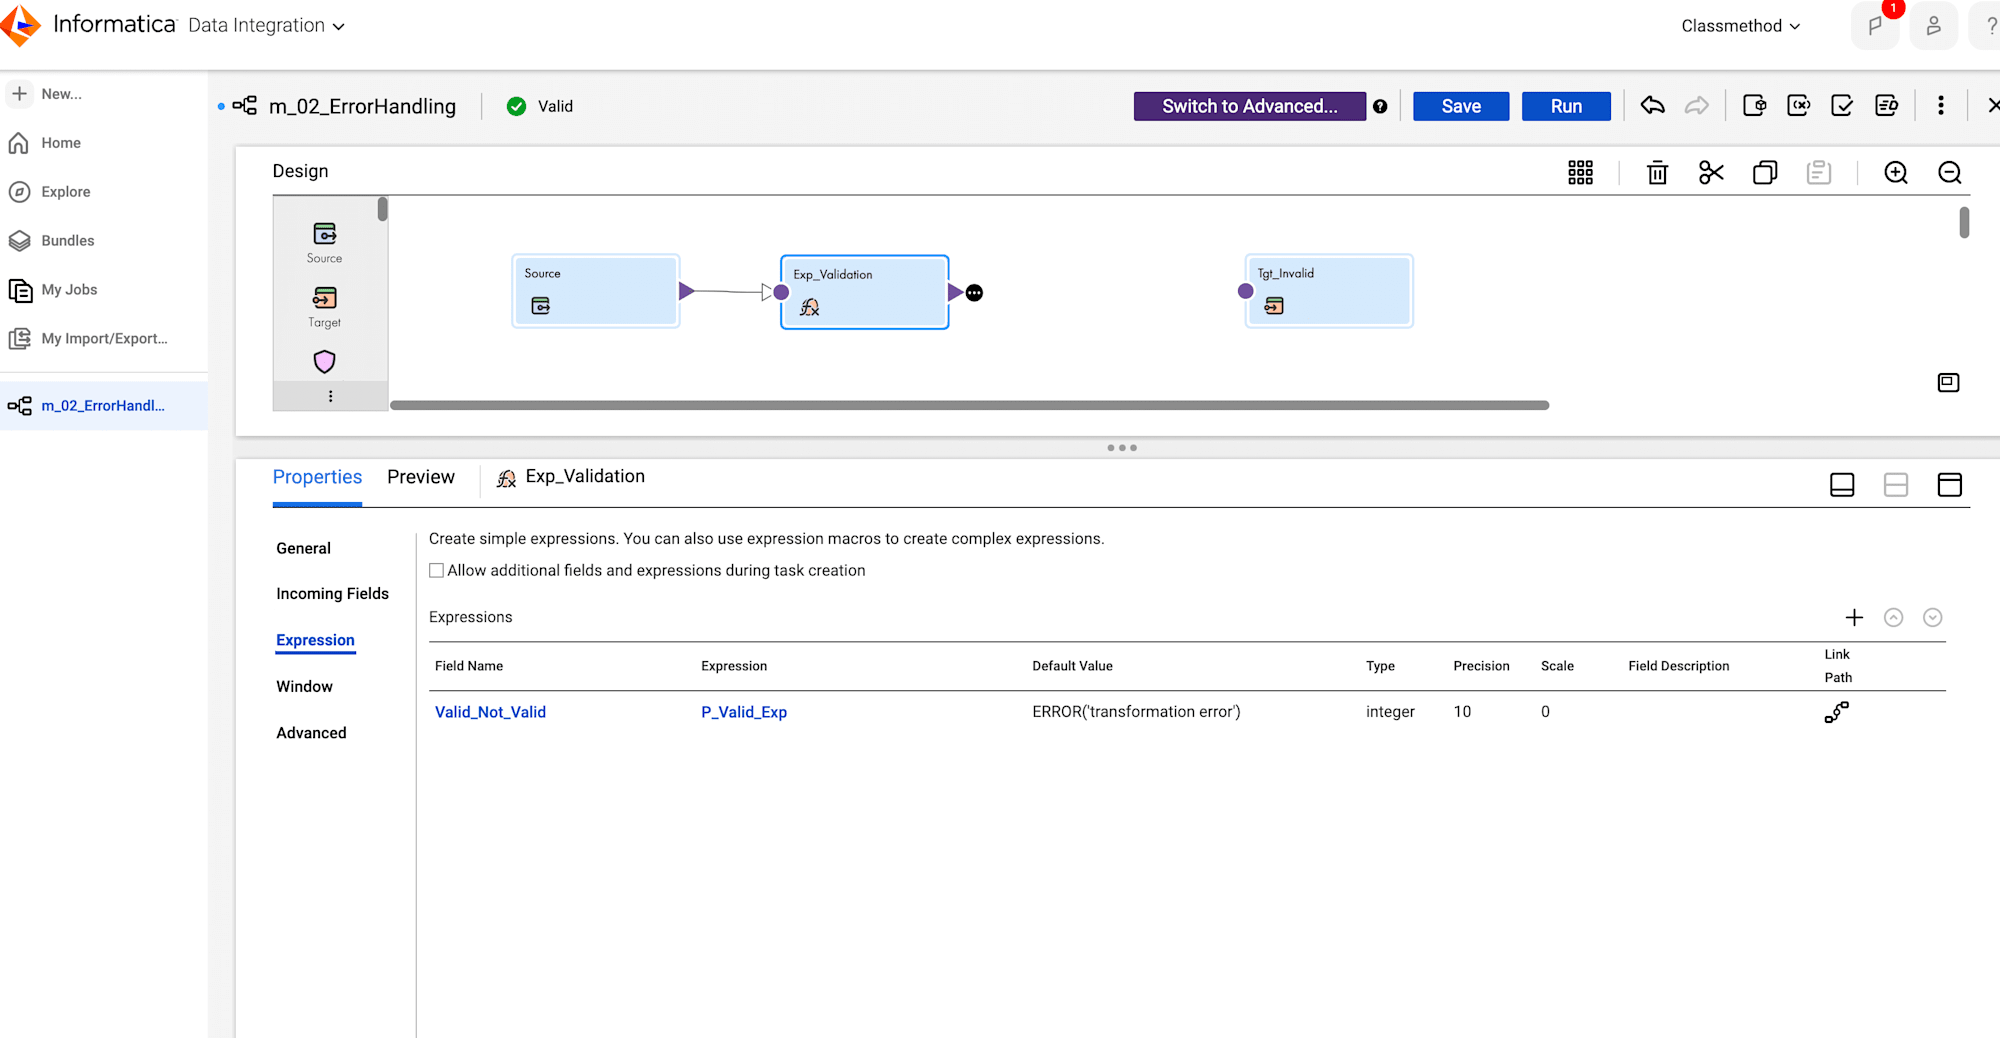
Add Expression Transformation
- Add an Expression transformation between Source and Target.
- Select Expression transformation and enter the following properties details.
-
General:
- Enter the Name as Exp_Validation.
-
Expression
- Click the plus icon and enter the details as shown in table below.
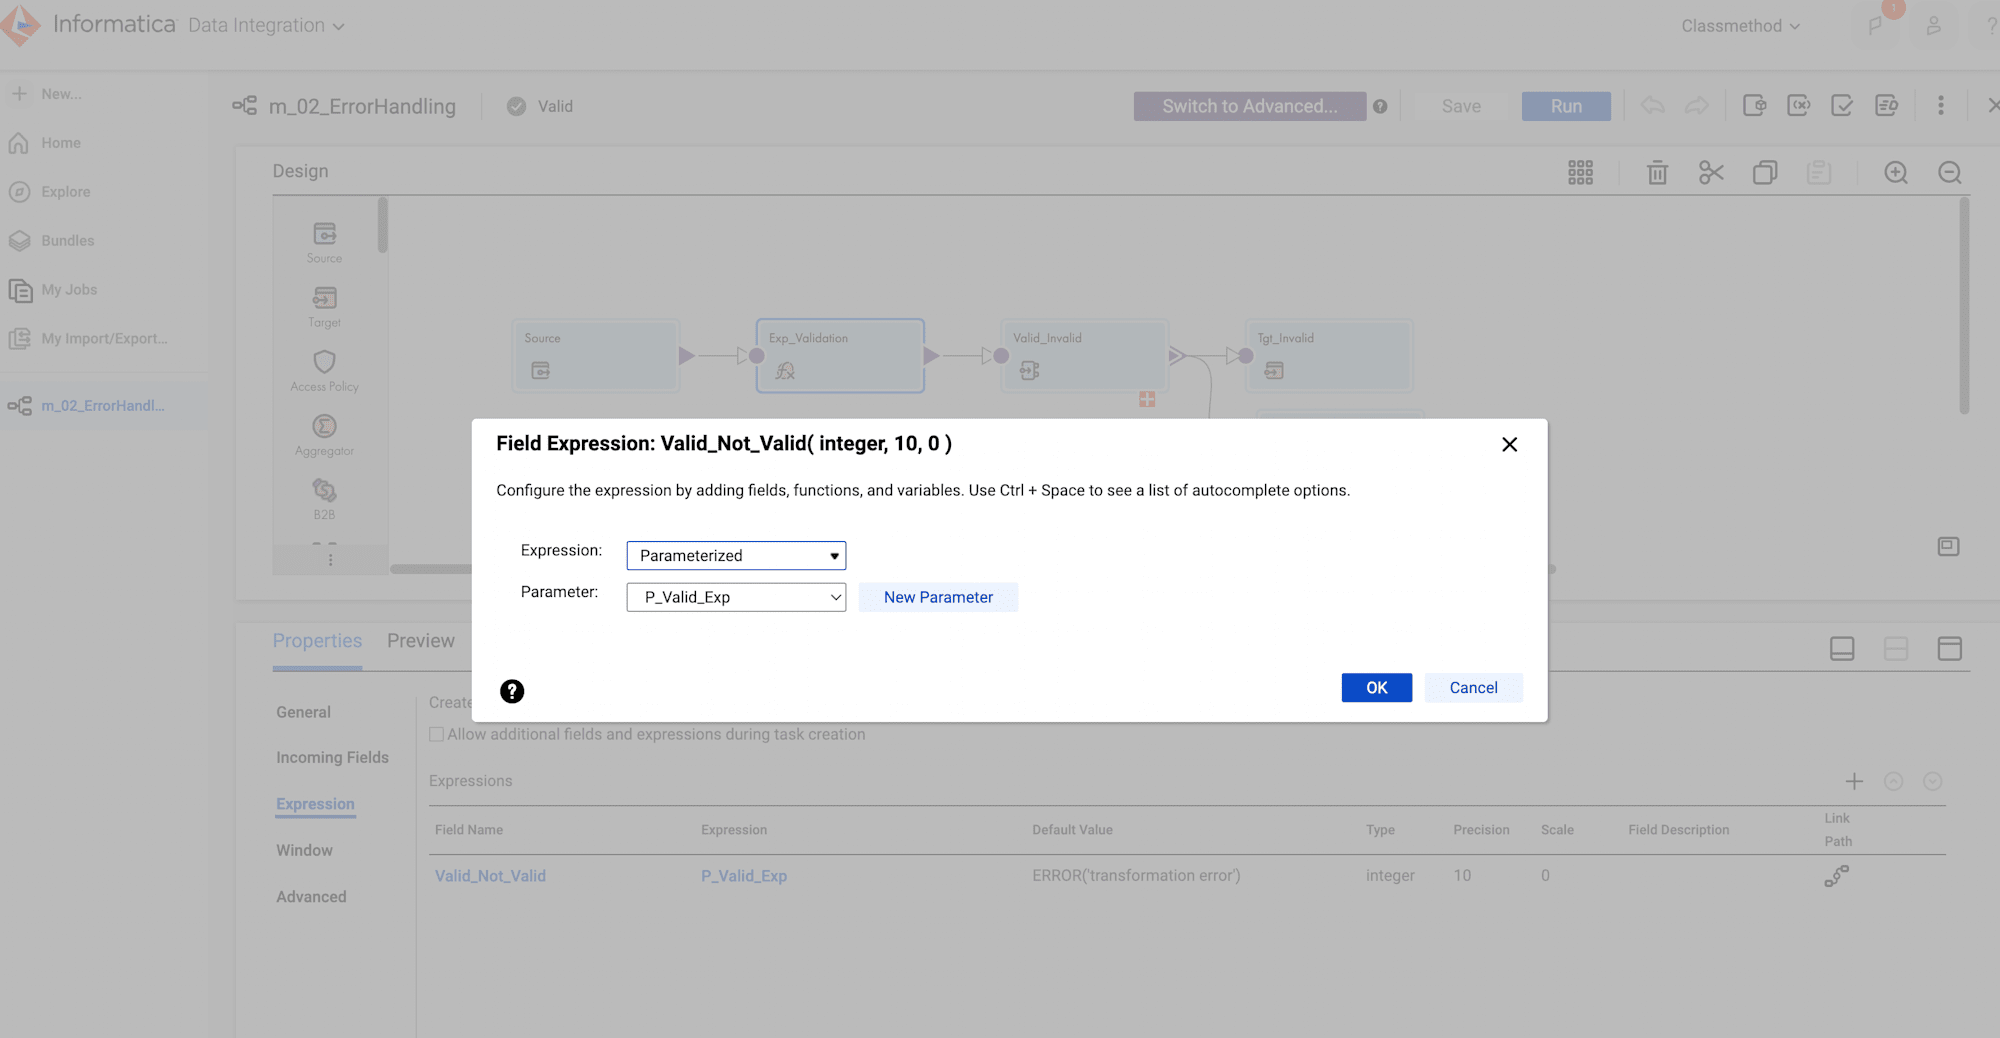
Field Type Name Type Precision Scale Output Field Valid_Not_Valid integer 10 0 
- Click Configure and from the Expression drop-down, select Parameterized.
- Click New Parameter and enter Name as P_Valid_Exp.
-
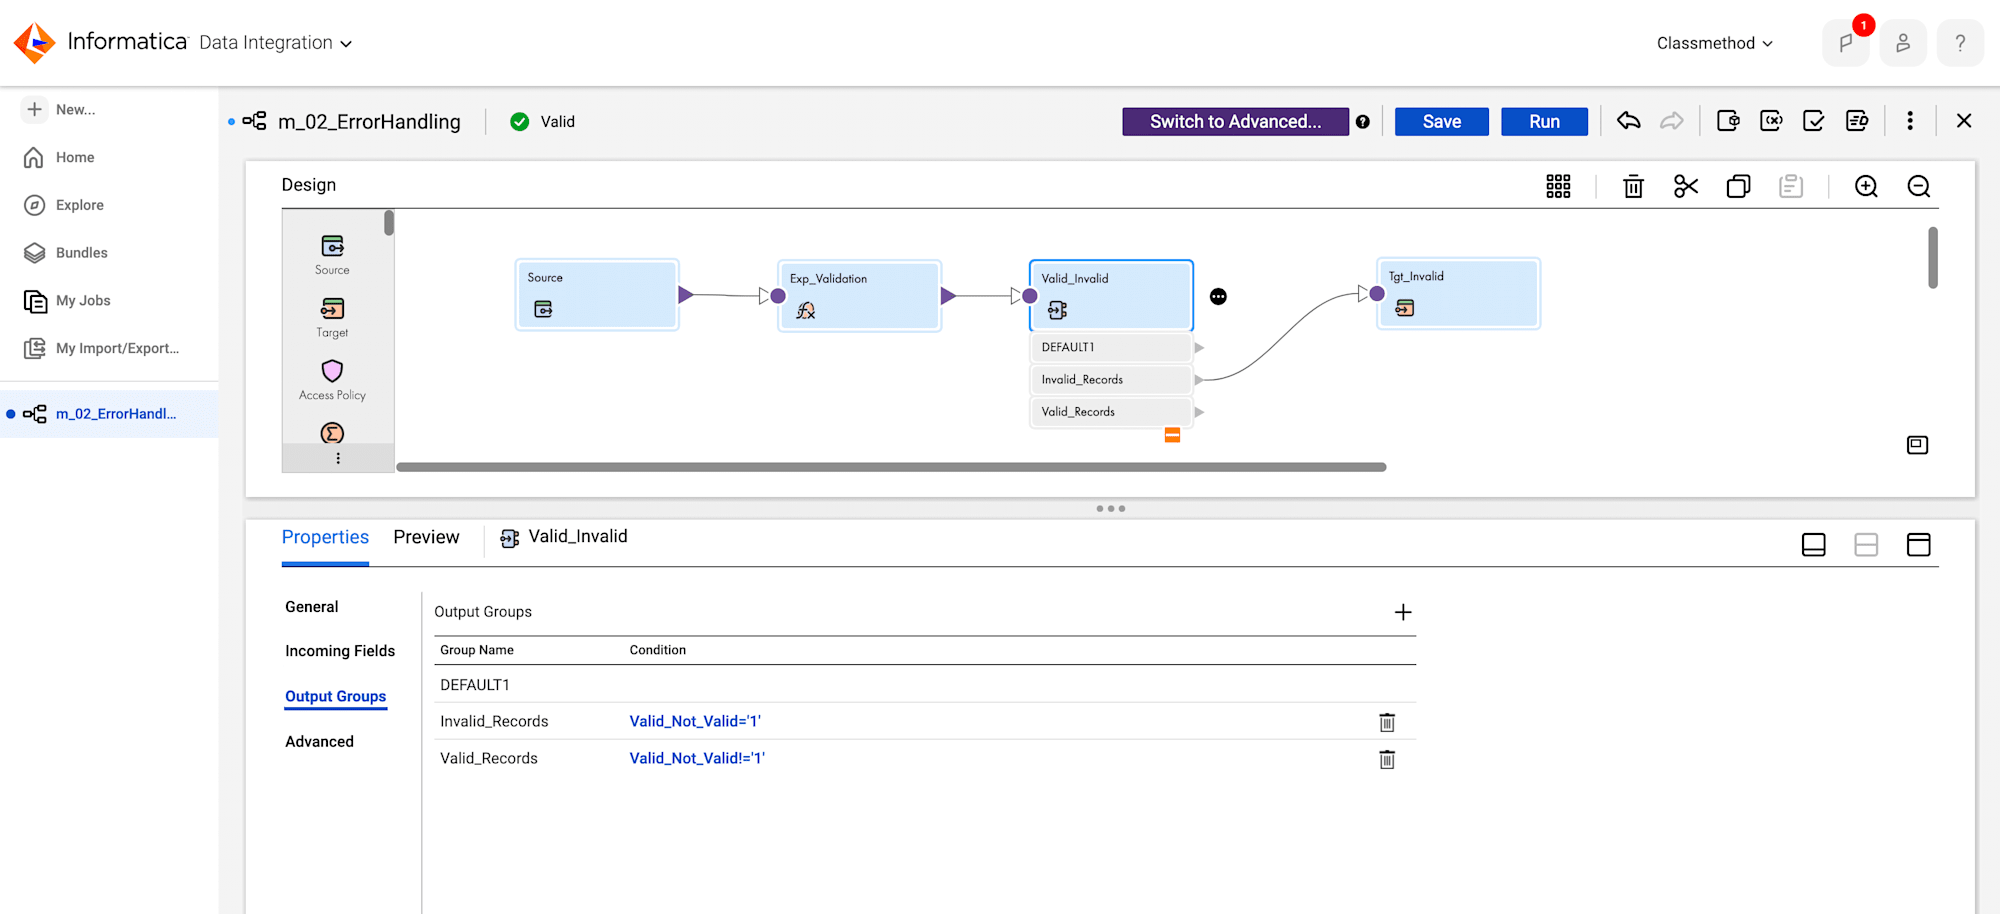
Add a Router Transformation
-
Add Router transformation on the link between Exp_Validation and Target.
-
Select Router transformation and eneter the following properties details.
-
General:
- Enter the Name as Valid_Invalid.
-
Output Groups:
-
To add the group, click the plus icon.
-
Enter the name as Invalid_Records.
-
Click Configure.
- Keep Filter Condition as Simple.
- Click the plus icon and enter filter condition as shown in the table below.
Field Name Operator Value Valid_Not_Valid = 1
-
-
Similarly, Add another output group.
-
Enter another group name as Valid_Records.
-
Click Configure.
- Keep Filter Condition as Simple.
- Click the plus icon and enter filter condition as shown in the table below
Field Name Operator Value Valid_Not_Valid = 1
-
-
-
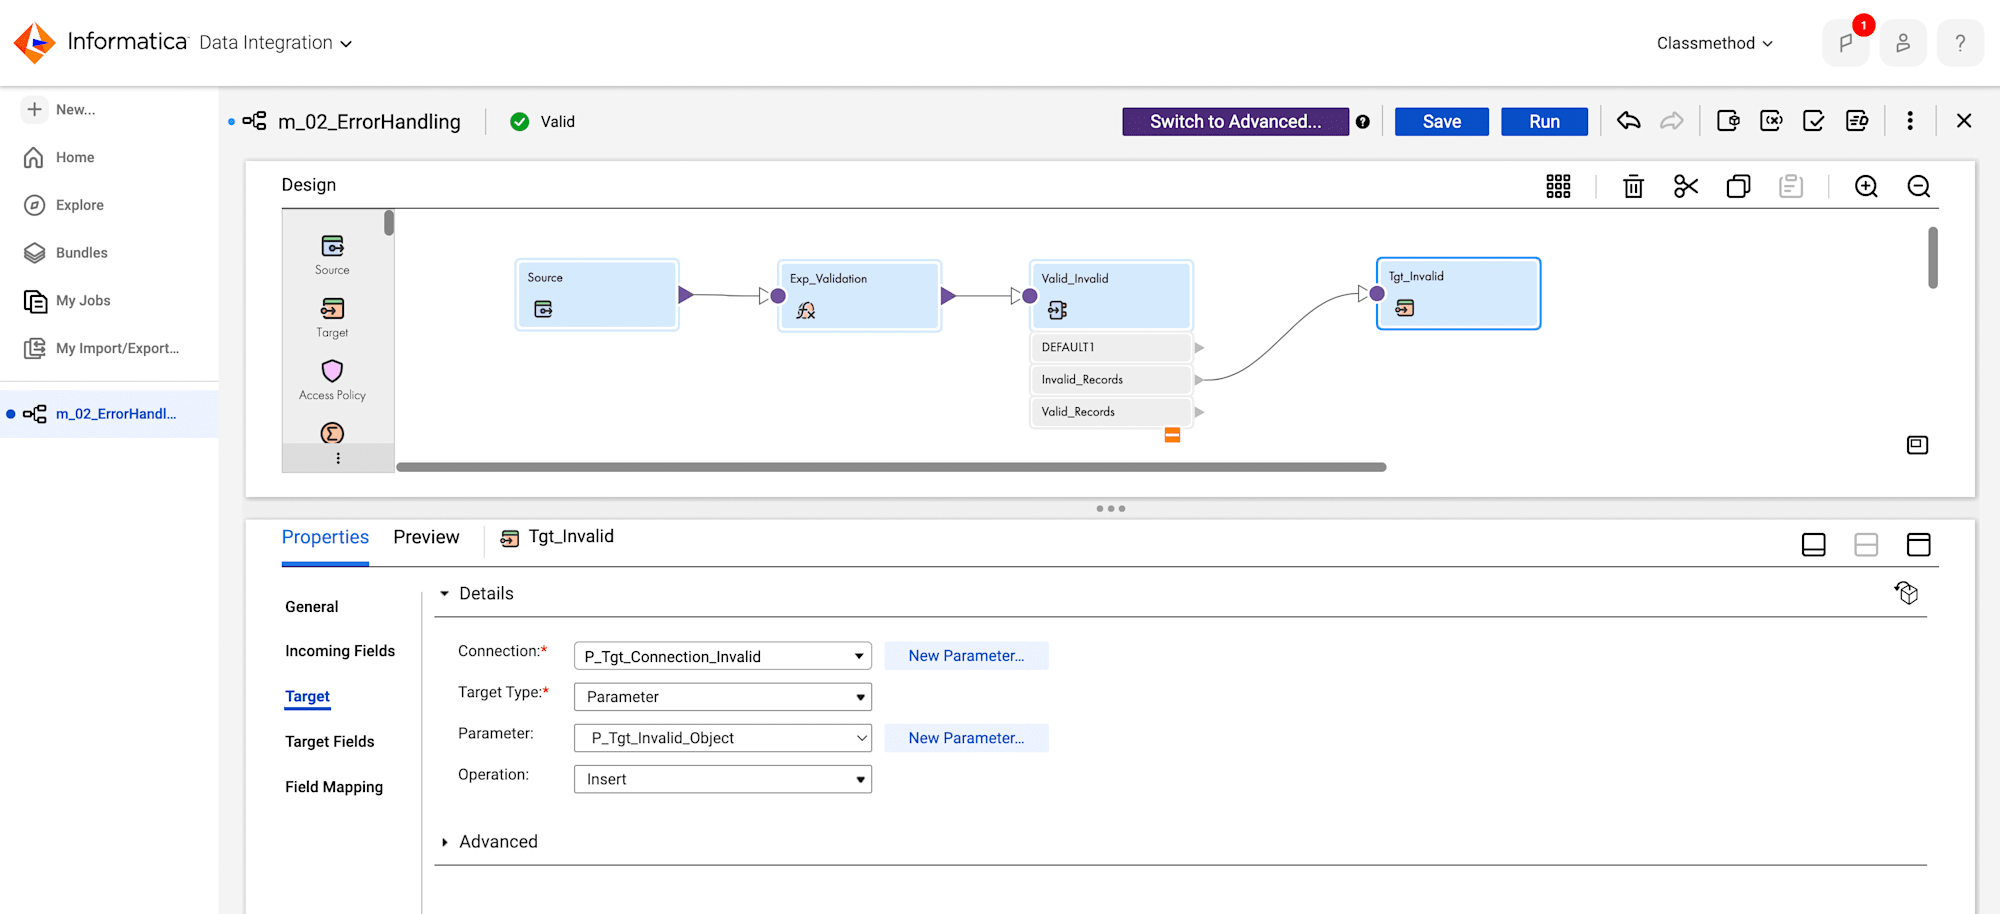
Click the plus icon on router transformation.
-
Link Invalid_Records with the Target transformation.
-
Click the Target transformation and enter the following properties details.
- General:
- Enter Name as Tgt_Invalid.
- Click New Parameter and enter Name as P_Tgt_Connection_Invalid.
- From the Target Type drop-down, select Parameter.
- Click New Parameter and enter Name as P_Tgt_Invalid_Object.
- Field Mapping:
- From the Field map options drop-down, select Completely Parameterized.
- Click New Parameter and enter Name as P_Field_Map_Invalid.
- General:
Add Target Transformation
- Add the Target transformation on to the mapping canvas.
- Click the Target transformation and enter the following properties details.
- General:
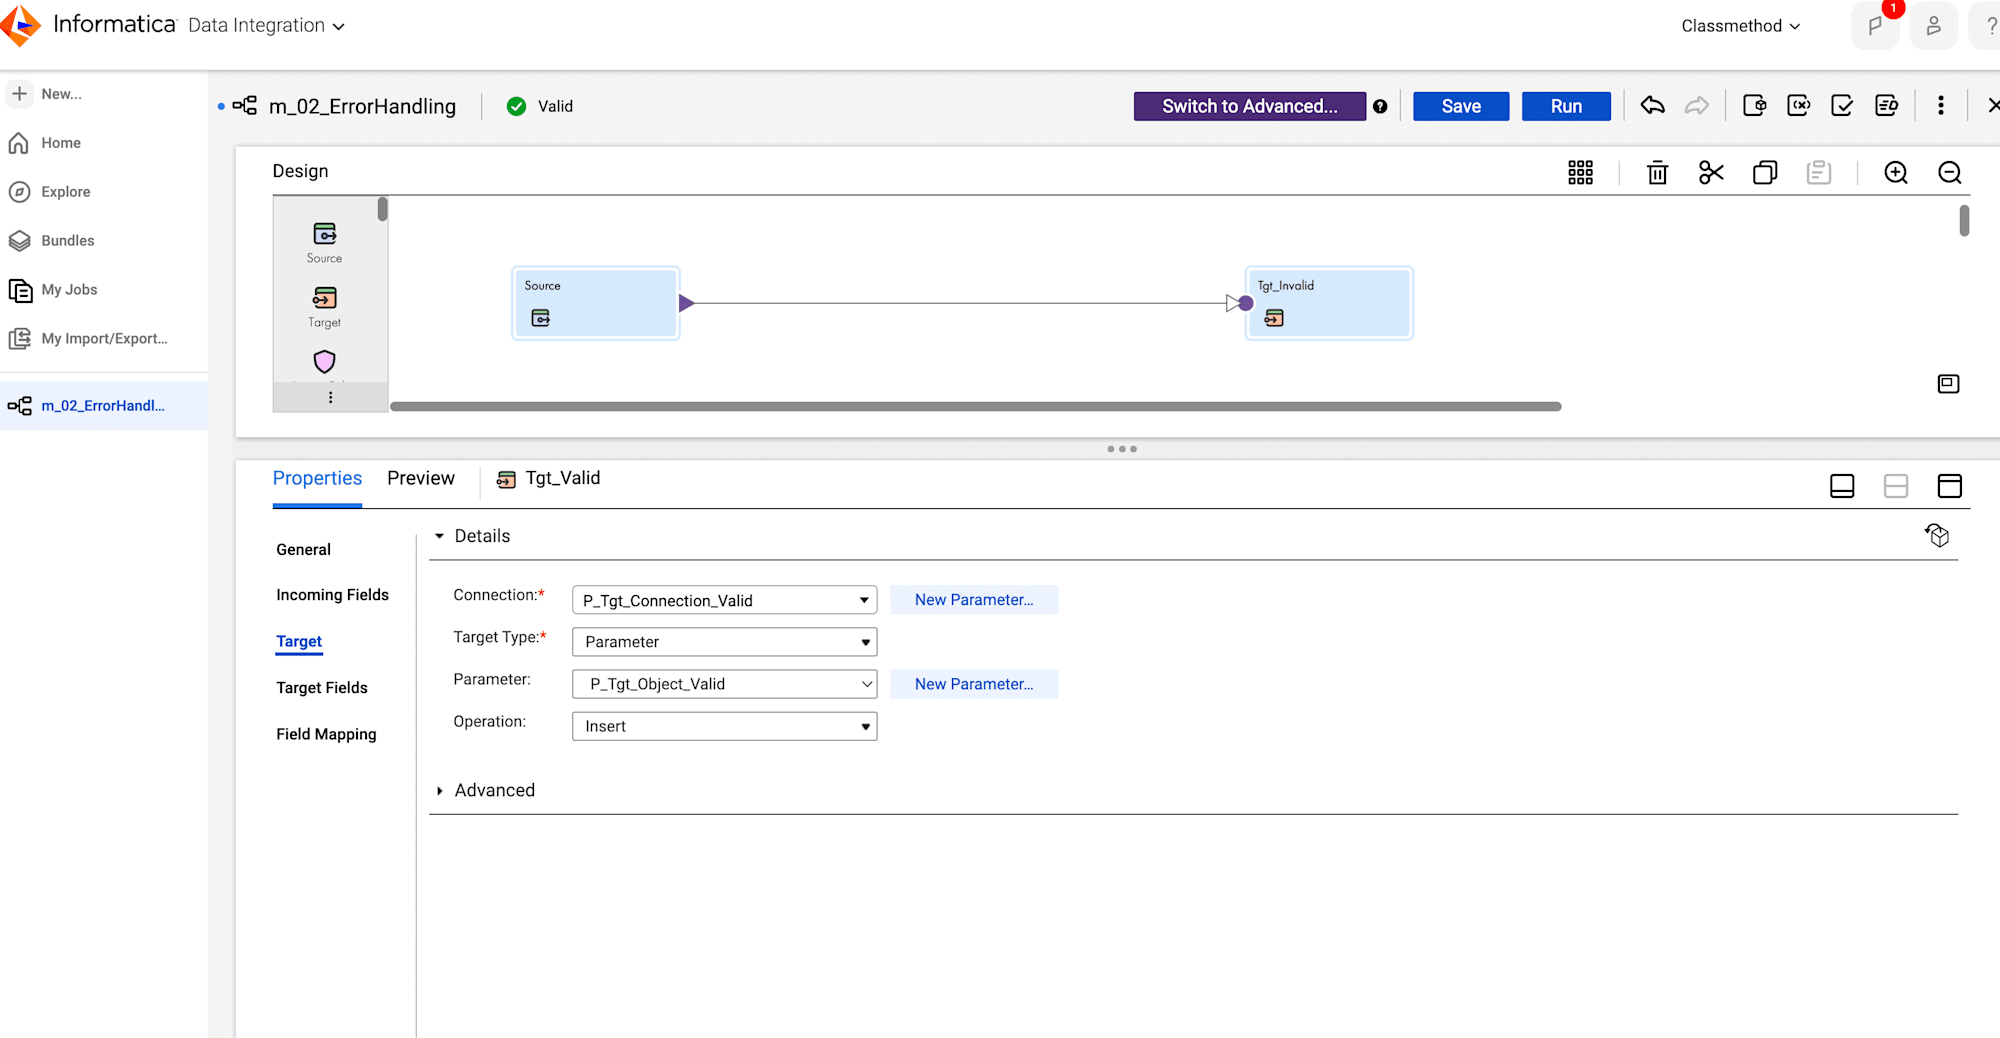
- Enter Name as Tgt_Valid.
- Link Valid_Records with Tgt_Valid.
- Click the Tgt_Valid transformation and enter the following properties details.
- Target:
- Click New Parameter. Enter Name as P_Tgt_Connection_Valid.
- From the Target Type drop-down, select Parameter and Click New Parameter.
- Enter Name as P_Tgt_Object_Valid.
- Field Mapping:
- From the Field map options drop-down, select Completely Parameterized.
- Click New Parameter and enter Name as __P_Field_Map_Valid __.
- Target:
- Save the mapping.
Create Mapping Task
- Create New Mapping Task with the name mt_XX_ErrorHandling_Task.
- Select the Runtime Environment.
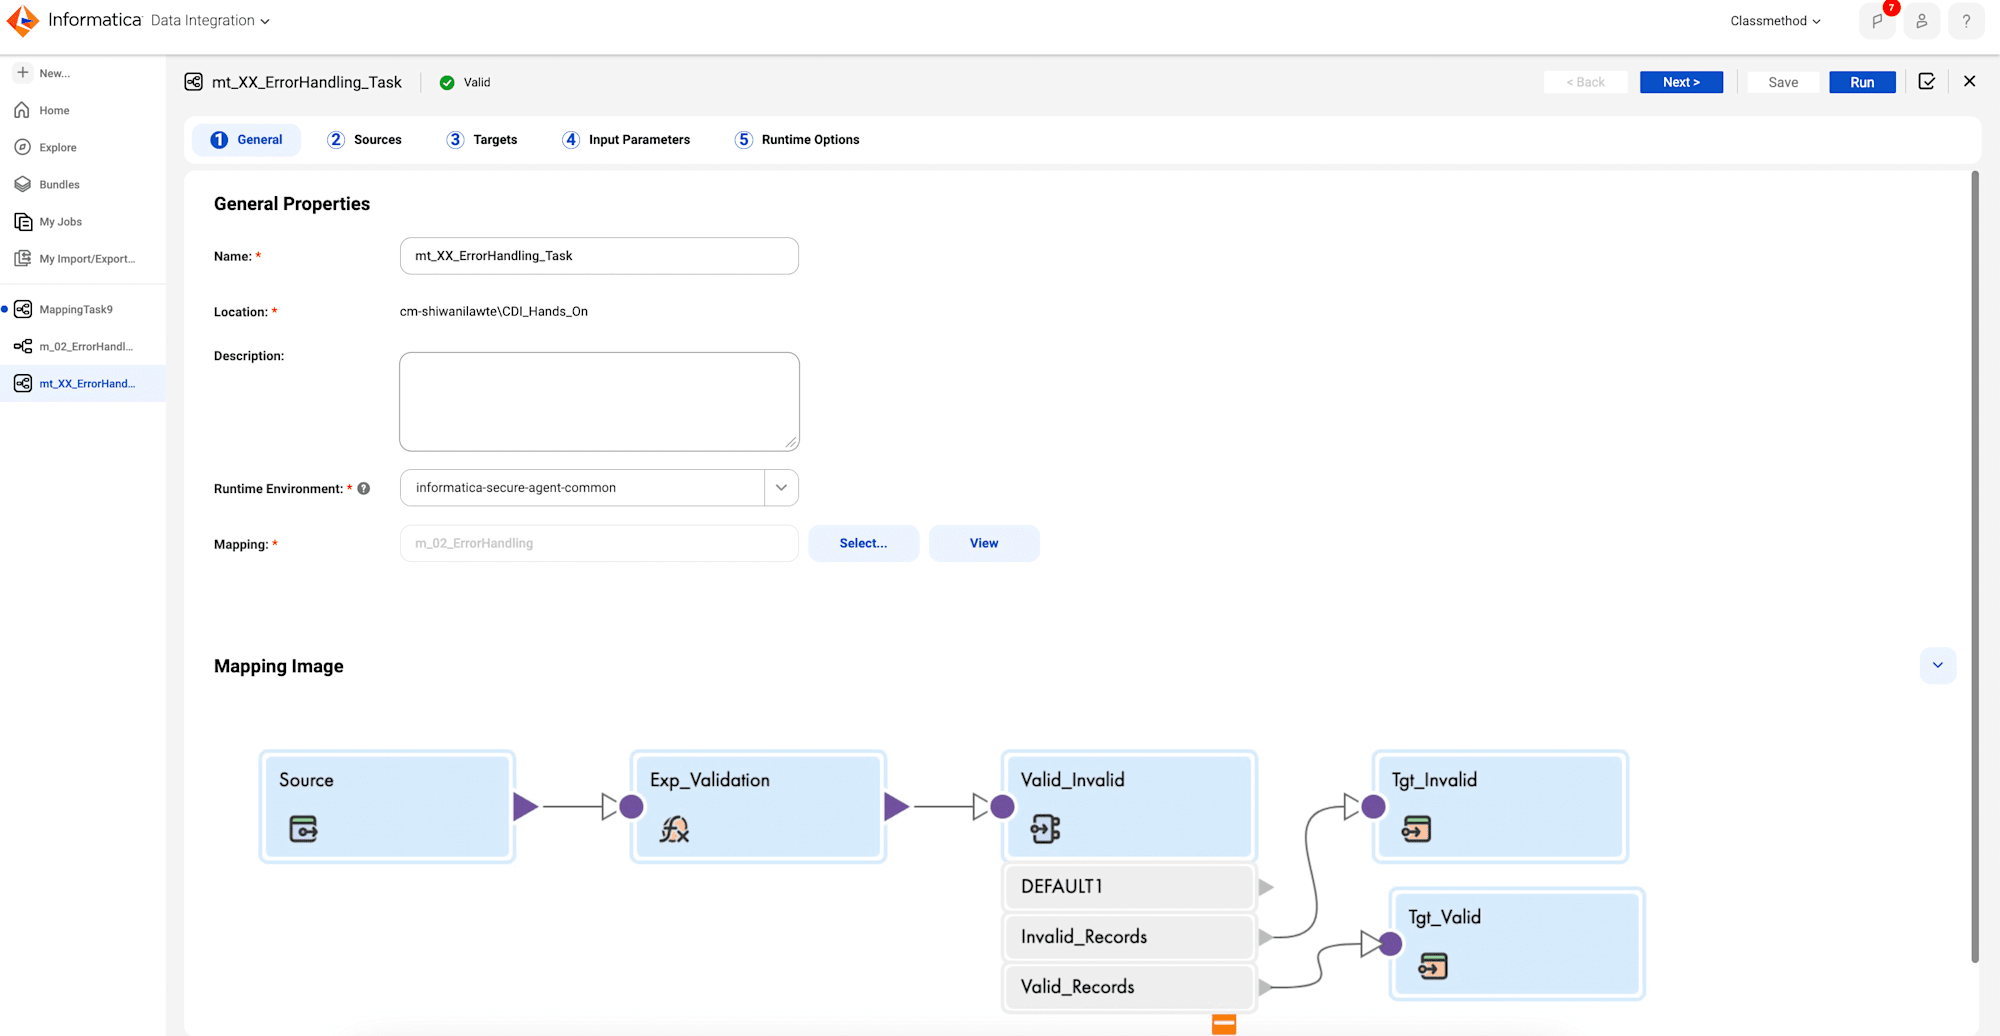
- Click Next.
- From the P_Src_Connection Connection drop-down, select your source flat file connection.
- Select a source object, click select and choose Error Handling.csv.

- Click Next.
- From the P_Tgt_Connection_Invalid Connection drop-down, select your target flat file connection.
- From the P_Tgt_Invalid_Object, click select and choose Invalid_Data.csv.
- From the P_Tgt_Connection_Valid Connection drop-down, select target flat file connection.
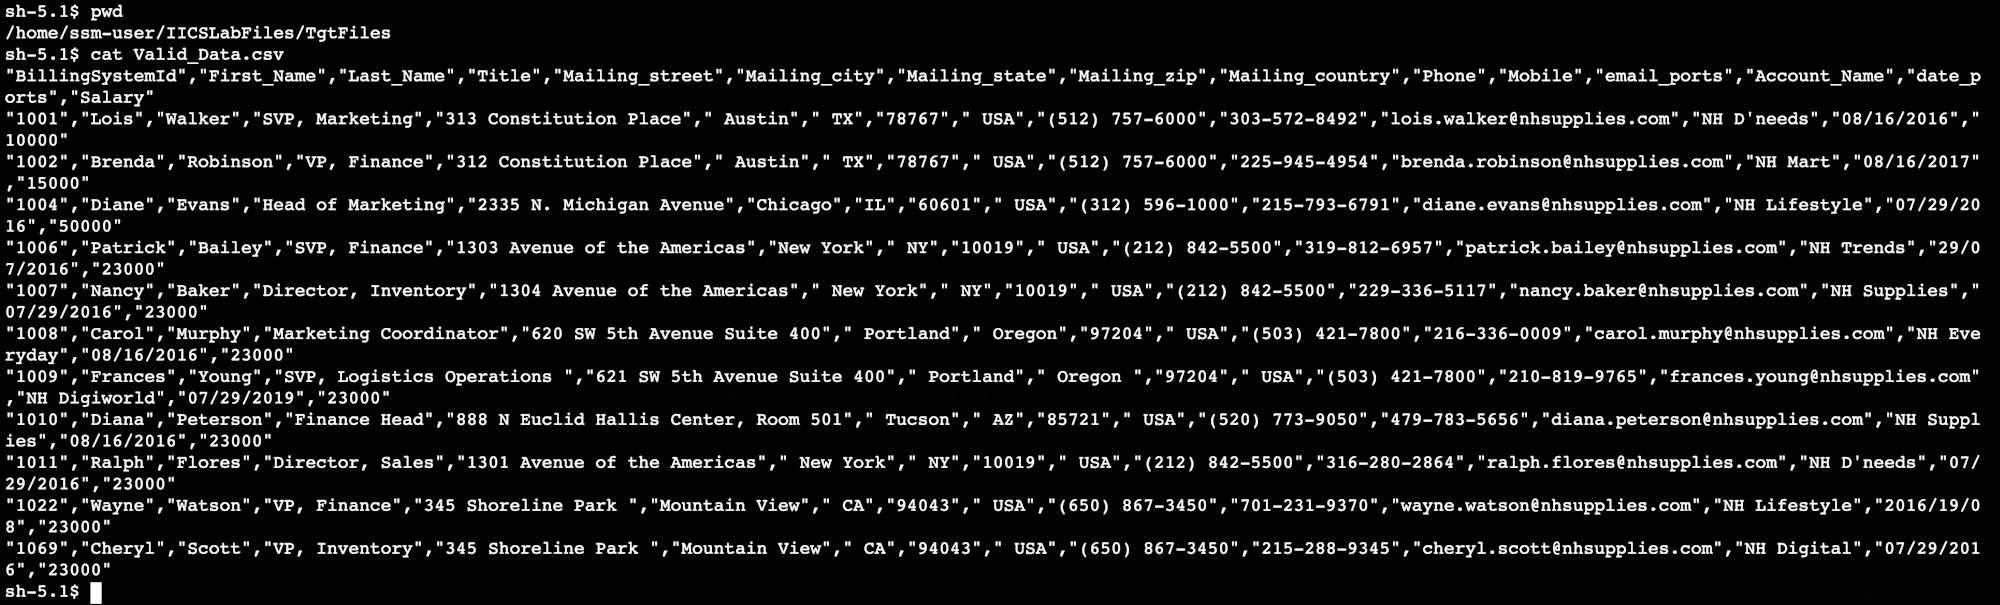
From the P_Tgt_Object_Valid select Valid_Data.csv.
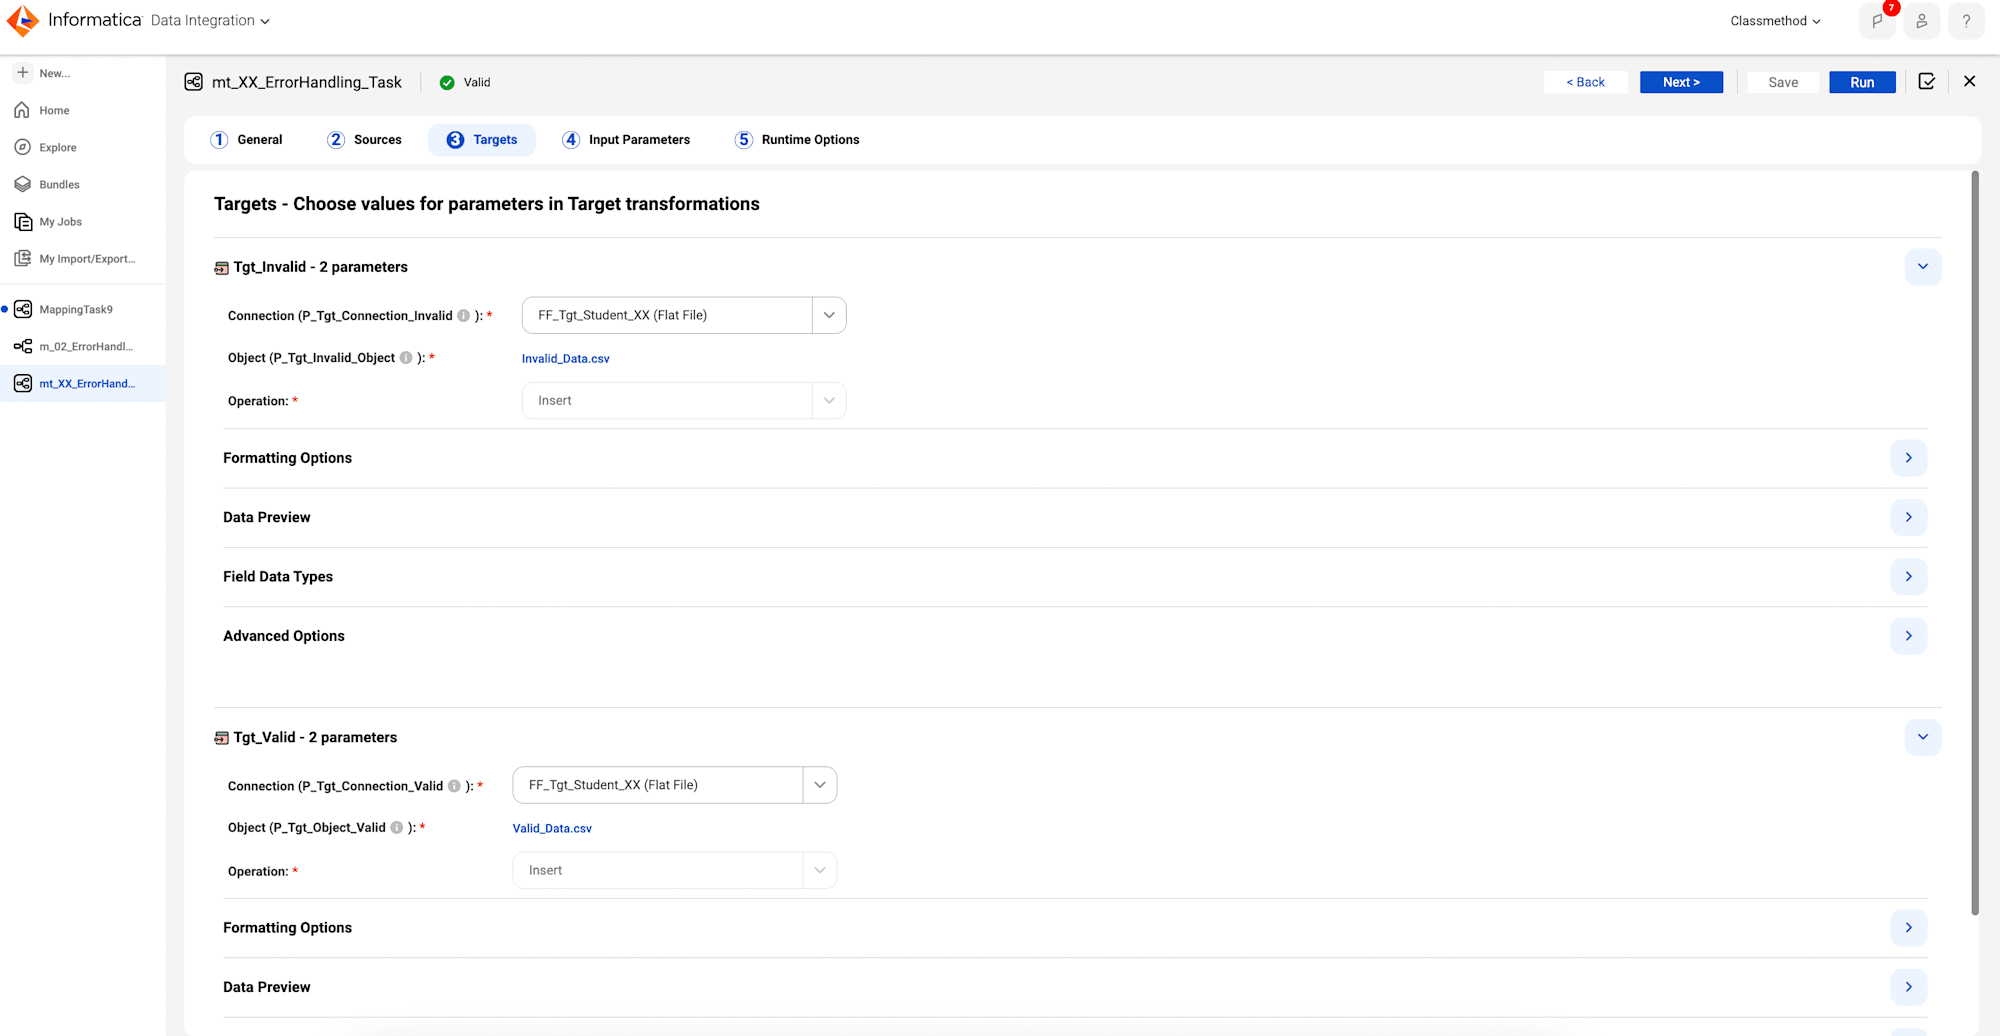
- Click Next.
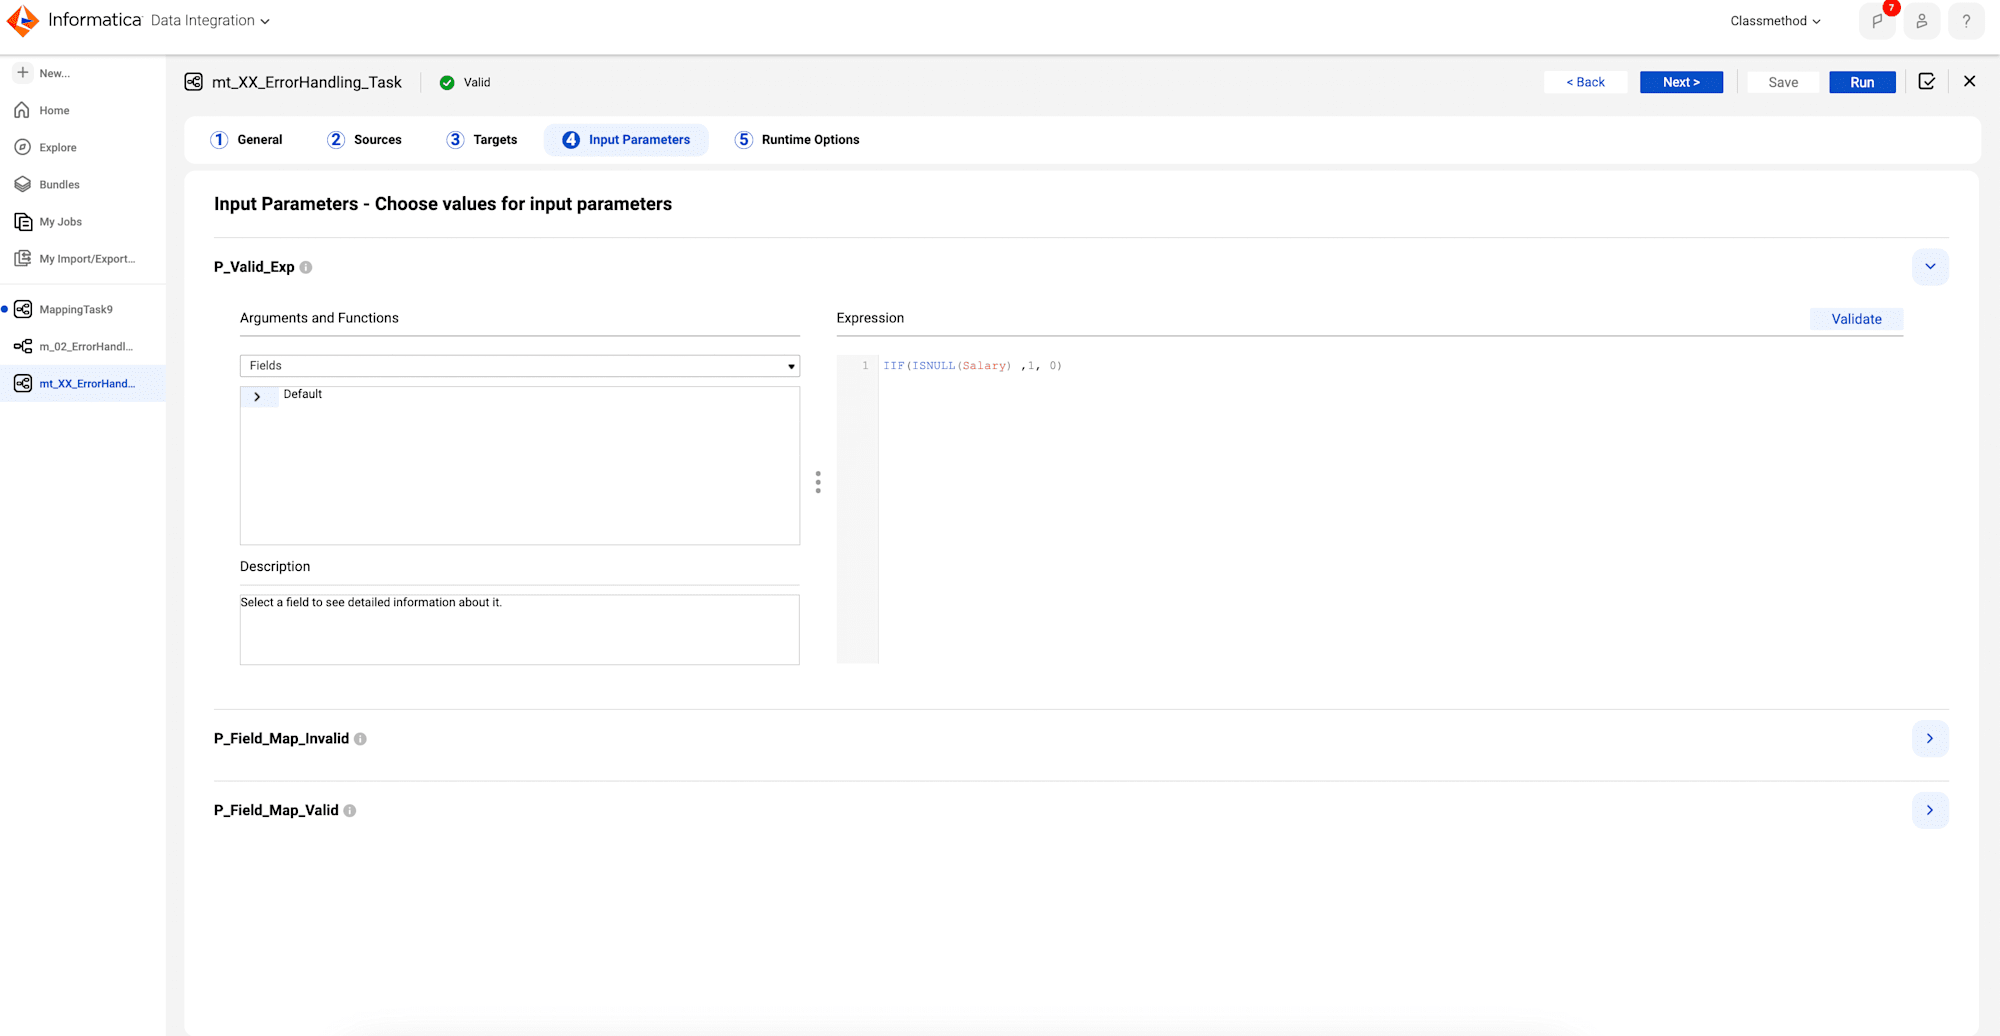
- In the expression field of P_Valid_Exp, enter the following expression:
- IIF(ISNULL(Salary) ,1, 0)
- IIF(ISNULL(Salary) ,1, 0)
- To validate the expression, click Validate.
- Click Next.
- To enable error logging, Go to the Advanced Session Properties
section, click the plus icon.- From the Session Property Name drop-down, select Error Log Type.
- From the Session Property Value drop-down, select Flat File.
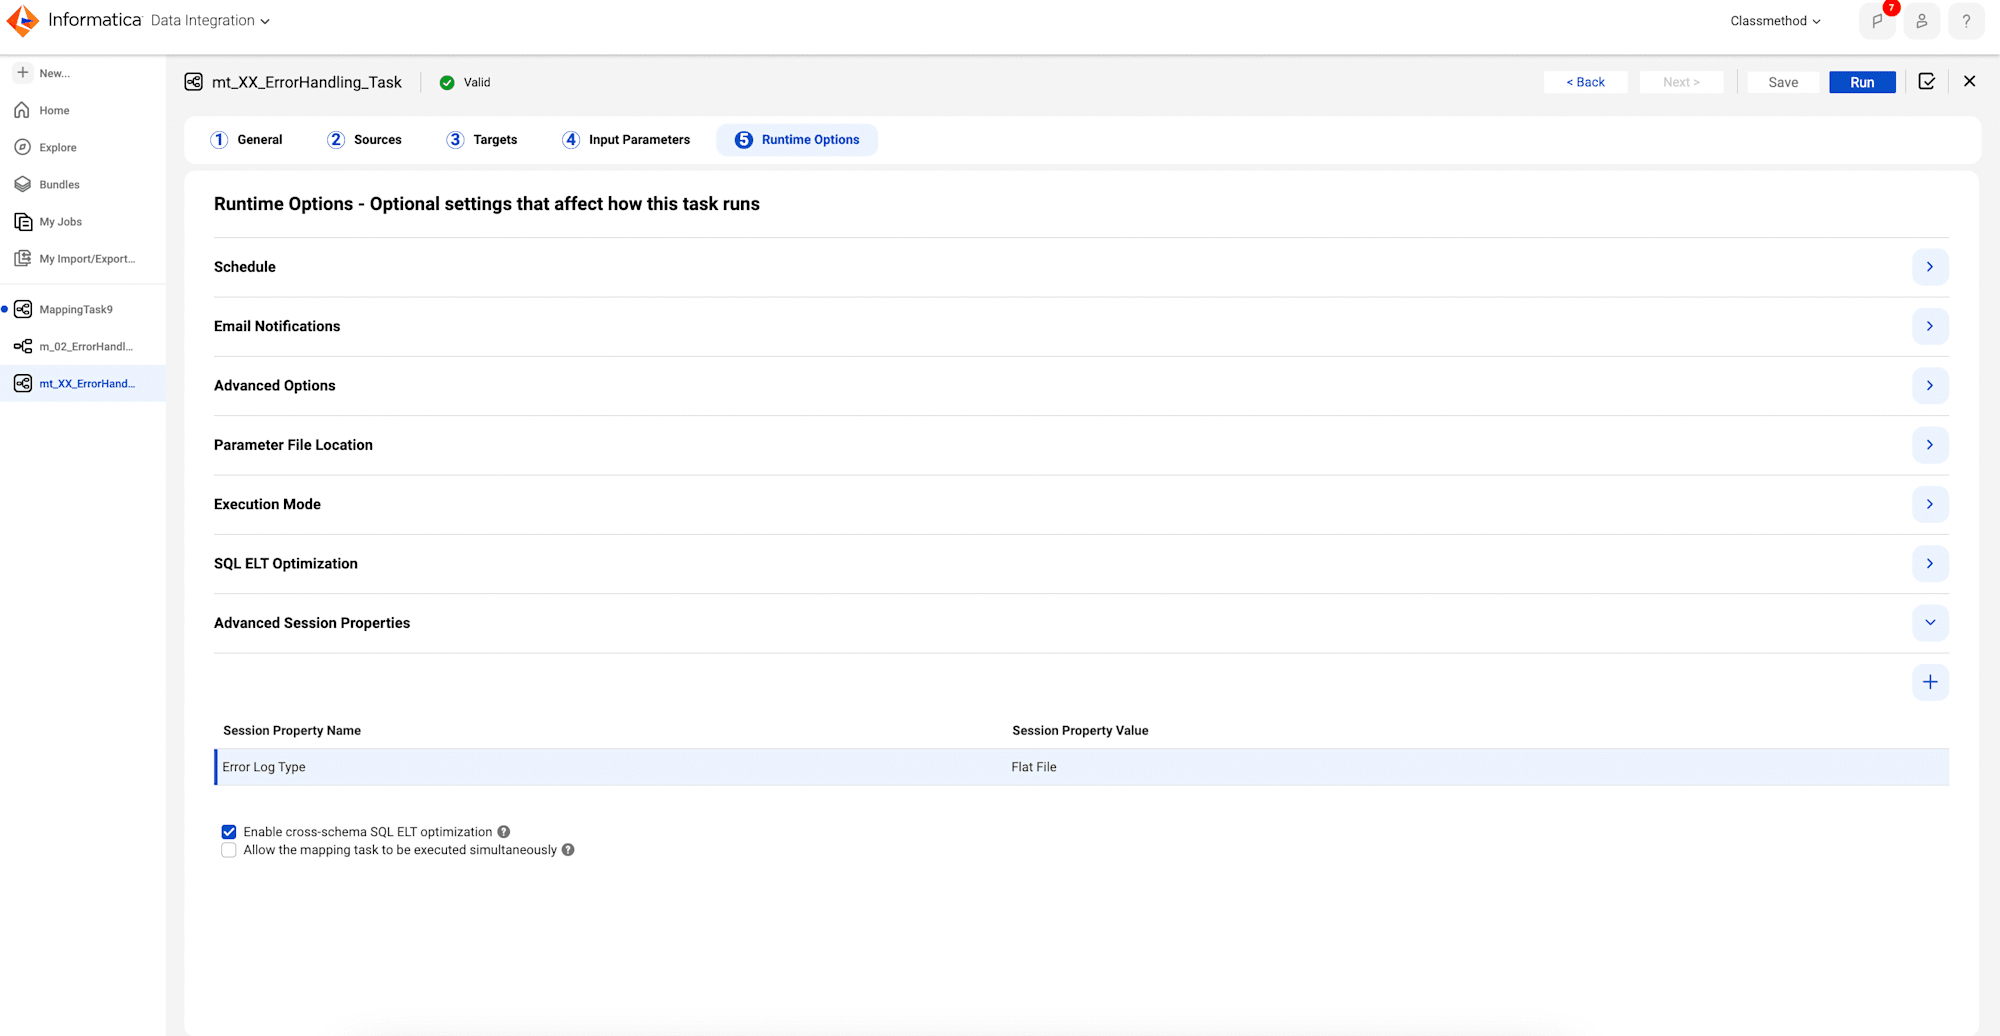
- Finally, click Save and Run the mapping task.
Results
- Click My Jobs and check the execution status of the mapping. When the task completes, the status changes to Success.

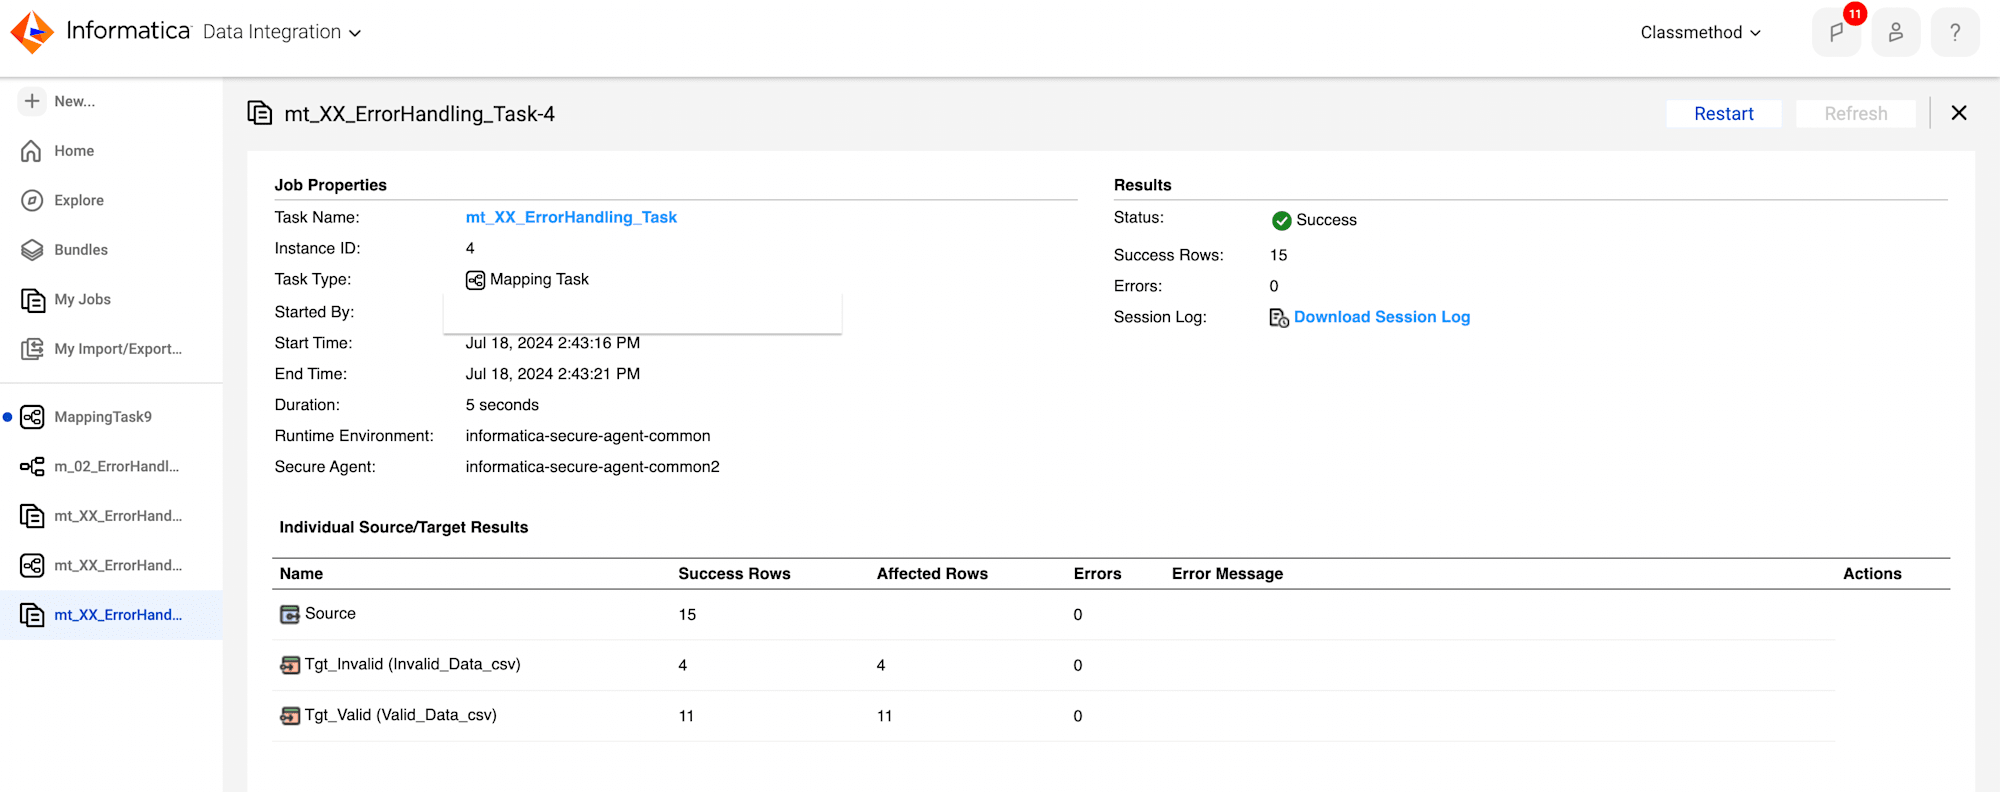
- Verify the data in target file Valid_Data.csv.