
Flutter Webでコンテキストメニューや文字選択などのブラウザ標準機能を実装してみた
この記事は公開されてから1年以上経過しています。情報が古い可能性がありますので、ご注意ください。
こんにちは、ゲームソリューション部のsoraです。
今回は、Flutter Webでコンテキストメニューや文字選択などのブラウザ標準機能を実装してみたことについて書いていきます。
コードの解説
Flutterで作成したコードをWebで実行すると、コンテキストメニューや文字選択などのブラウザ標準機能がデフォルトで無効になっています。
そのため、一般的なWebフロントエンドと比べると機能的にずれがあるため、その部分を可能な限りFlutterで実装していきます。
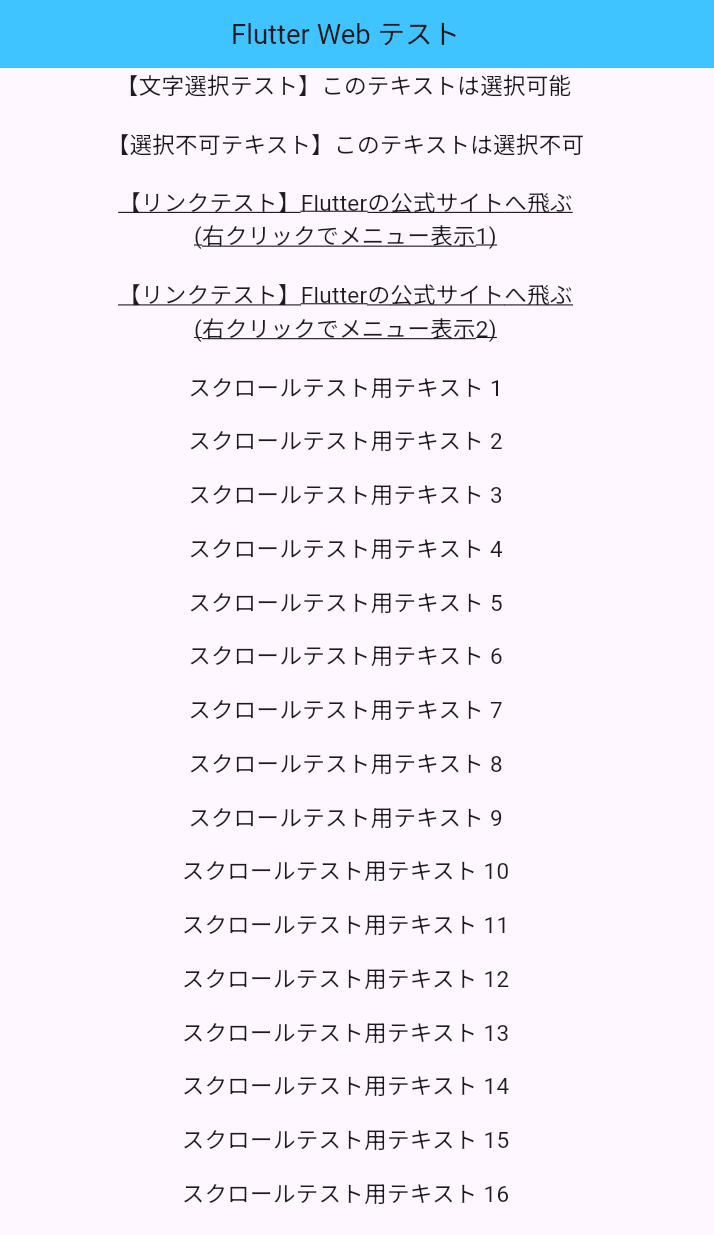
今回実装するのは、文字選択の実装、右クリック時のメニューの表示と動作、マウスホイールを押してのスクロールです。
解説はコード内に記載しております。
右クリック時のメニューについては、Linkを使ったパターンと使わないパターンをそれぞれ書いています。
import 'package:flutter/material.dart';
import 'package:flutter/gestures.dart';
import 'package:url_launcher/url_launcher.dart';
import 'package:url_launcher/link.dart';
import 'package:flutter/services.dart';
void main() {
runApp(const MyApp());
}
class MyApp extends StatelessWidget {
const MyApp({super.key});
Widget build(BuildContext context) {
return MaterialApp(
title: 'Flutter Web Demo',
theme: ThemeData(
primarySwatch: Colors.blue,
),
home: const MyHomePage(),
);
}
}
// スクロールバーの設定
// ドラッグとマウス操作でスクロールを可能にしている
class MyCustomScrollBehavior extends MaterialScrollBehavior {
Set<PointerDeviceKind> get dragDevices => {
PointerDeviceKind.touch,
PointerDeviceKind.mouse,
};
}
class MyHomePage extends StatefulWidget {
const MyHomePage({super.key});
State<MyHomePage> createState() => _MyHomePageState();
}
class _MyHomePageState extends State<MyHomePage> {
// マウスやスクロール制御用
final LayerLink _layerLink = LayerLink();
bool _isScrolling = false;
bool _isAutoScrolling = false;
Offset? _lastPosition;
Offset? _autoScrollOrigin;
final ScrollController _scrollController = ScrollController();
void dispose() {
_scrollController.dispose();
super.dispose();
}
Future<void> _launchUrl(String url, {bool newTab = false}) async {
try {
await launchUrl(
Uri.parse(url),
// 新しいタブで開くか、現在のタブで開くか
mode: newTab ? LaunchMode.externalApplication : LaunchMode.platformDefault,
);
} catch (e) {
debugPrint('Could not launch $url: $e');
}
}
Widget build(BuildContext context) {
return Scaffold(
appBar: AppBar(
title: const Text('Flutter Web テスト'),
centerTitle: true,
backgroundColor: Colors.lightBlueAccent,
),
// マウスやスクロール制御用
body: CompositedTransformTarget(
link: _layerLink,
child: MouseRegion(
cursor: _isAutoScrolling
? SystemMouseCursors.none
: (_isScrolling ? SystemMouseCursors.grabbing : SystemMouseCursors.basic),
child: Listener(
onPointerDown: (event) {
// マウスホイールが押されたとき
if (event.buttons == 4) {
setState(() {
_isAutoScrolling = true;
_isScrolling = false;
_autoScrollOrigin = event.position;
});
}
},
// マウスが動いたとき
onPointerMove: (event) {
if (_isAutoScrolling && _autoScrollOrigin != null) {
// 自動スクロールの処理
final double deltaY = event.position.dy - _autoScrollOrigin!.dy;
final double scrollSpeed = deltaY * 2.0;
final double newOffset = (_scrollController.offset + scrollSpeed).clamp(
0.0,
_scrollController.position.maxScrollExtent,
);
_scrollController.jumpTo(newOffset);
} else if (_isScrolling && _lastPosition != null) {
// 通常のドラッグスクロール処理
final delta = event.position - _lastPosition!;
_scrollController.jumpTo(
(_scrollController.offset - delta.dy).clamp(
0.0,
_scrollController.position.maxScrollExtent,
),
);
setState(() {
_lastPosition = event.position;
});
}
},
// マウスボタンが離されたとき
onPointerUp: (event) {
if (_isScrolling || _isAutoScrolling) {
setState(() {
_isScrolling = false;
_isAutoScrolling = false;
_lastPosition = null;
_autoScrollOrigin = null;
});
}
},
child: Stack(
children: [
// スクロールの設定
ScrollConfiguration(
behavior: ScrollConfiguration.of(context).copyWith(
dragDevices: {
PointerDeviceKind.touch,
PointerDeviceKind.mouse,
},
),
// 縦スクロール可能なWidgetの作成
child: SingleChildScrollView(
controller: _scrollController,
child: Center(
child: Column(
crossAxisAlignment: CrossAxisAlignment.center,
children: [
const SelectableText(
'【文字選択テスト】このテキストは選択可能',
style: TextStyle(fontSize: 18),
textAlign: TextAlign.center,
),
const SizedBox(height: 20),
const Text(
'【選択不可テキスト】このテキストは選択不可',
style: TextStyle(fontSize: 18),
textAlign: TextAlign.center,
),
const SizedBox(height: 20),
// コンテキストメニューの独自実装
MouseRegion(
cursor: SystemMouseCursors.click,
child: GestureDetector(
onTap: () => _launchUrl('https://flutter.dev'),
onSecondaryTapUp: (details) {
final RenderBox overlay = Overlay.of(context)
.context
.findRenderObject() as RenderBox;
final position = RelativeRect.fromRect(
Rect.fromPoints(
details.globalPosition,
details.globalPosition,
),
Offset.zero & overlay.size,
);
showMenu(
context: context,
position: position,
items: [
PopupMenuItem(
child: const Text('新しいタブで開く'),
onTap: () => _launchUrl(
'https://flutter.dev',
newTab: true,
),
),
PopupMenuItem(
child: const Text('リンクをコピー'),
onTap: () {
Clipboard.setData(
const ClipboardData(text: 'https://flutter.dev')
);
},
),
],
);
},
child: const Text(
'【リンクテスト】Flutterの公式サイトへ飛ぶ\n(右クリックでメニュー表示1)',
style: TextStyle(
fontSize: 18,
decoration: TextDecoration.underline,
),
textAlign: TextAlign.center,
),
),
),
const SizedBox(height: 20),
// デフォルトのコンテキストメニューの実装
Link(
uri: Uri.parse('https://flutter.dev'),
target: LinkTarget.blank,
builder: (context, followLink) => InkWell(
onTap: followLink,
child: const Text(
'【リンクテスト】Flutterの公式サイトへ飛ぶ\n(右クリックでメニュー表示2)',
style: TextStyle(
fontSize: 18,
decoration: TextDecoration.underline,
),
textAlign: TextAlign.center,
),
),
),
const SizedBox(height: 20),
...List.generate(
50,
(index) => Padding(
padding: const EdgeInsets.only(bottom: 16),
child: Text(
'スクロールテスト用テキスト ${index + 1}',
style: const TextStyle(fontSize: 18),
textAlign: TextAlign.center,
),
),
),
],
),
),
),
),
// マウスホイールを押したときの見た目の変更
if (_isAutoScrolling && _autoScrollOrigin != null)
  Positioned(
    left: _autoScrollOrigin!.dx,
    // appbarの高さ分ずらしている
    top: _autoScrollOrigin!.dy -56,
    child: Container(
      width: 20,
      height: 20,
      decoration: BoxDecoration(
        shape: BoxShape.circle,
        border: Border.all(color: Colors.blue, width: 2),
      ),
      child: const Center(
        child: Icon(Icons.unfold_more, size: 16),
      ),
    ),
  ),
],
),
),
),
),
);
}
}
動作確認
以下コマンドで実行して画面を見ていきます。
flutter run -d chrome
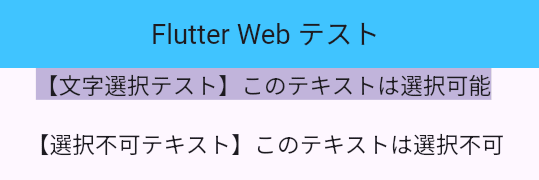
文字選択
文字選択について、SelectableTextを使用した部分については選択が可能となります。
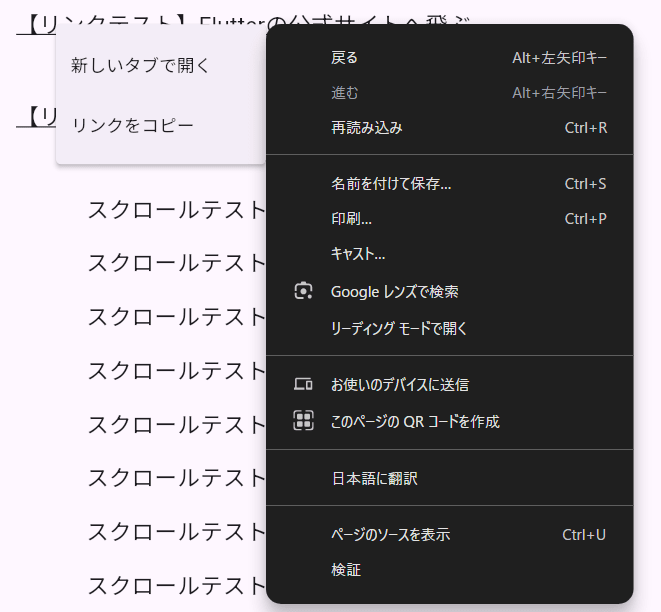
右クリック時のメニュー
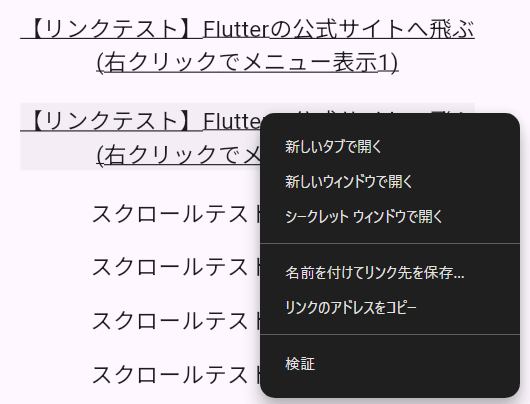
右クリック時のメニューについて、MouseRegionを使用して独自でメニューを実装するパターンと、Linkを使用してメニューを実装するパターンをそれぞれ実装しました。
MouseRegionを使用して独自でメニューを実装するパターンについて、デフォルトの右クリック時のメニューも出てしまっているので、試してはいませんが可能であれば実際に使用する場合は無効化などした方が良いかなと思います。
Linkを使用してメニューを実装するパターンで問題なさそうであれば、こちらの実装の方が楽で良いと思います。
マウスホイールを押してのスクロール
マウスホイールを押してのスクロールについて、結構実装自体が複雑でしたが動作しています。
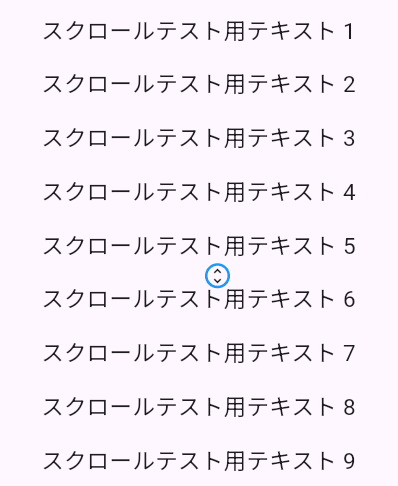
マウスホイールを押した位置でアイコンを表示させる際に、おそらくappbarの分の高さ(56px)がずれていたため、微調整しています。
if (_isAutoScrolling && _autoScrollOrigin != null)
Positioned(
left: _autoScrollOrigin!.dx,
// appbarの高さ分ずらしている
top: _autoScrollOrigin!.dy -56,
child: Container(
width: 20,
height: 20,
decoration: BoxDecoration(
shape: BoxShape.circle,
border: Border.all(color: Colors.blue, width: 2),
),
child: const Center(
child: Icon(Icons.unfold_more, size: 16),
),
),
),
また、スマホでのスクロールのように、左クリックして上下することでのスクロールも可能にしています。
参考
最後に
今回は、Flutter Webでコンテキストメニューや文字選択などのブラウザ標準機能を実装してみたことについて書いていきました。
FlutterでのWeb実装は、一般的なWebフロントエンドと比べるとくせがあったり、ネイティブアプリ用に作ったコードをそのまま使用してWebフロントも簡単にきれいに実装できるみたいなものではないかなと感じました。
ただし、個人的に必要機能は実装できそうかと思いました。
どなたかの参考になると幸いです。


