Google Chrome Extensionを作ってみた-その4-
この記事は公開されてから1年以上経過しています。情報が古い可能性がありますので、ご注意ください。
はじめに
今回はオプションページについてです。
オプションページは必須ではないのですが、それなりに大きなエクステンションを作ろうと思うと、設定保存は必要になると思うので紹介します。
作るもの
- オプションページで、文字列を一つ設定して記憶できる様にする
- ツールバーボタンを押下してポップアップ画面でその文字列を表示する
という簡単なエクステンションを作ります。
作ってみる
まず、オプションページをエクステンションの画面に出すには、manifest.jsonに"options_page"という項目と定義します。今回はオプションのページとして表示するhtmlをoptions.htmlとし、次の様に設定しました。
{
	"name": "OptionSample",
	"version": "1.0",
	"permissions": [
	],
	"browser_action": {
		"default_icon": "icon_128.png",
		"popup": "popup.html"
	},
	"options_page": "options.html"
}
manifest.jsonに"options_page"を設定すると、エクステンションのページに今まで無かったOptionsというリンクが出来ます。("options_page"設定前と設定後)
次にoptions.htmlの実装です。設定を記憶させるには、html5のlocalStorage機能を使います。今回は"message_txt"というキーでテキストを保存します。
次の様にしました。
<html>
<head>
<meta http-equiv="Content-Type" content="text/html; charset=utf-8" />
<title>オプションページ</title>
<script>
function $(id){
	return document.getElementById(id);
}

function init(){
	$("message_txt").value = localStorage["message_txt"] ? localStorage["message_txt"] : "";
}

function save(){
	localStorage["message_txt"] = $("message_txt").value;
}
</script>
</head>
<body onload="init();">
<div><input id="message_txt" type="text" maxLength="20" /></div>
<div><button id="close_btn" onClick="save();">保存</button></div>
</body>
</html>
この段階で、テキストボックスの値を変えてオプションページを開いたり閉じたりすると、値が保存されているのが確認できると思います。
最後に、popup.htmlです。ここではlocalStorageに保存した値を取得して表示させます。
<html>
<head>
<meta http-equiv="Content-Type" content="text/html; charset=utf-8" />
<style>
body {
	min-width:400px;
	overflow-x:hidden;
}
</style>
<script>
function $(id){
	return document.getElementById(id);
}

function init(){
	$("message_txt").innerHTML = localStorage["message_txt"] ? localStorage["message_txt"] : "";
}
</script>
</head>
<body onload="init();">
	<div>保存したメッセージは</div>
	<div id="message_txt"></div>
	<div>です。</div>
</body>
</html>
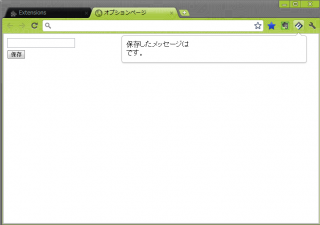
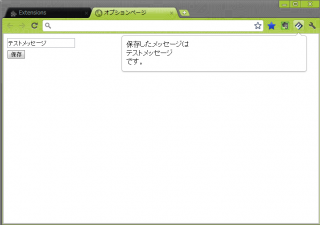
オプションページで保存した値が表示されるのが確認できます。(値を設定する前と設定後)
まとめ
- オプションページを使うには、manifest.jsonで"options_page"の設定を行う
- 設定項目はlocalStorageを使って保存する


