I tried Interactive checkbox in Figma.
2023.06.15
この記事は公開されてから1年以上経過しています。情報が古い可能性がありますので、ご注意ください。
Introduction.
This is Pooja from the Alliance Department. This blog encapsulates on creation of an interactive checkbox.
Interactive Checkbox.
In Figma, interactive checkboxes are UI controls that allow users to select or toggle options in a user interface. They consist of small square or circular shapes accompanied by labels and are commonly used in forms and settings panels. Visually represented through changes in color or the display of a checkmark icon.

In essence, interactive checkboxes in Figma provide users with the ability to select or toggle options, utilizing square or circular shapes with accompanying labels. Components facilitate reusability, while Figma Prototyping feature enables the creation of interactive prototypes for user testing and demonstration purposes.
Demo.
To create an interactive checkbox for selecting a language in Figma, you can follow these steps:
- Open Figma: Launch the Figma application on your computer and open the file or create a new one where you want to add the interactive checkbox.
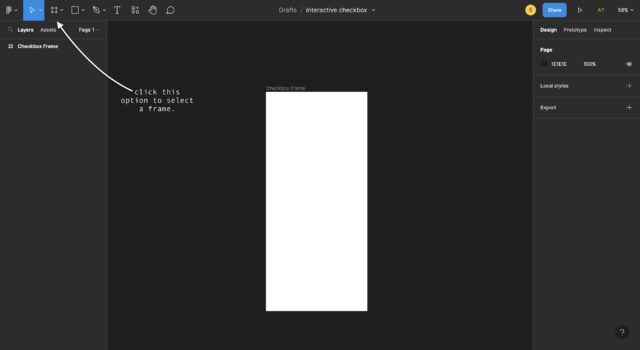
- Create a frame or container: Start by creating a frame or container where you want to place the checkbox. Select the "Frame" or "Rectangle" tool from the toolbar and draw a rectangle on the canvas.
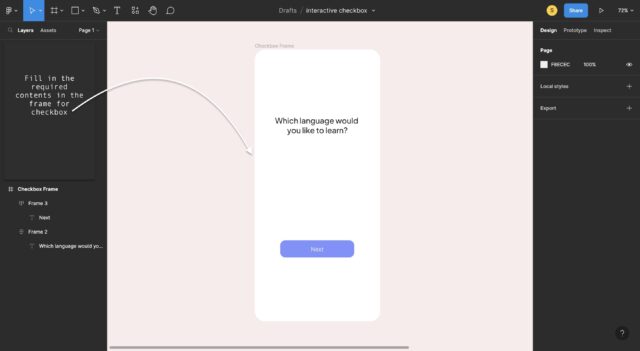
- Add a text element: Select the "Text" tool from the toolbar and click inside the frame or container. Type the name of the language next to the checkbox. You can style the text by changing the font, size, and color.

- Create the checkbox: Select the "Vector" tool from the toolbar, then click and drag to create a small square shape inside the frame or container. Resize it to make it a suitable size for the checkbox. You can adjust the color and border properties to match your design.

- Add interactivity: To make the checkbox interactive, you need to create a component with two states: selected and unselected.

- Create an interactive prototype: Now it's time to create an interactive prototype to demonstrate the checkbox functionality.
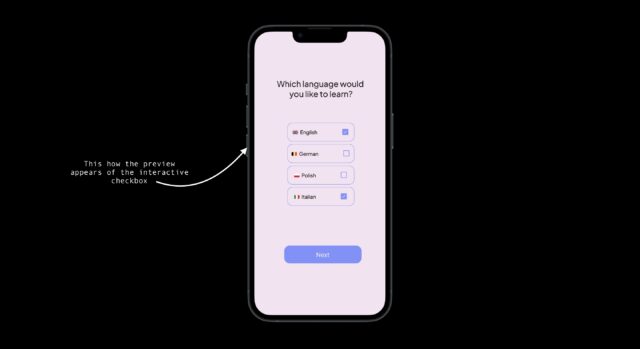
- Preview the prototype: To see the checkbox in action, click on the "Preview" button located in the top right corner of the Figma interface. Interact with the checkbox to verify its functionality.
Conclusion.
Figma's prototyping capabilities allowed us to demonstrate the checkbox's interactivity by creating transitions between the selected and unselected states.
Hope this blog was helpful, thank you for your time.
Happy Learning!!!


