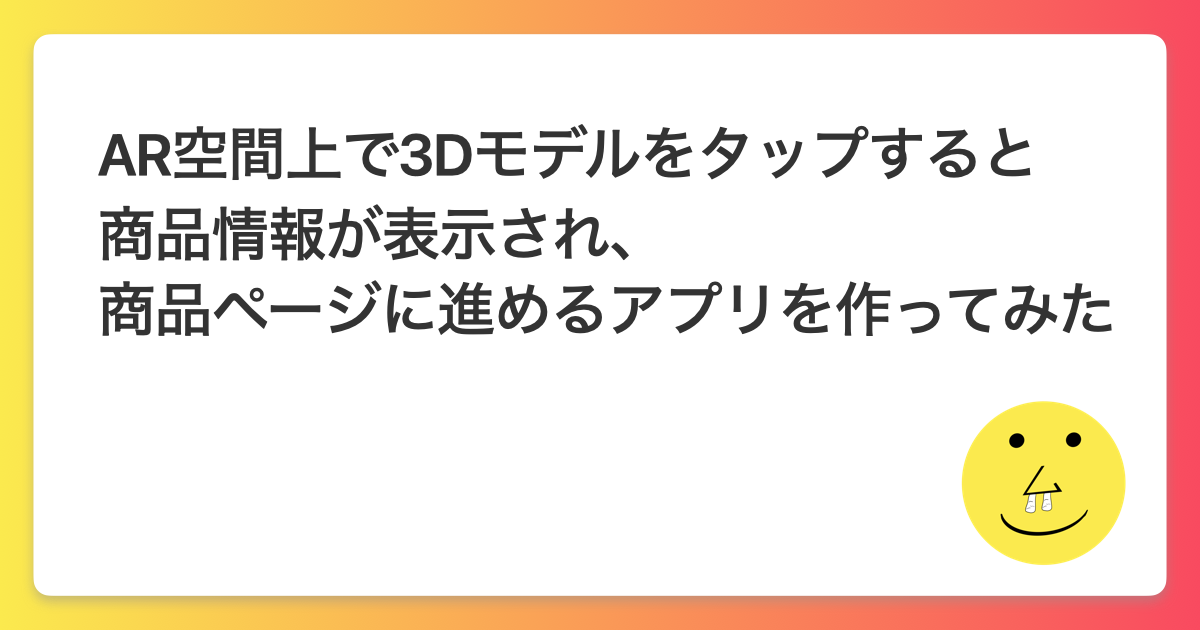
AR空間上で3Dモデルをタップすると商品情報が表示され、商品ページに進めるアプリを作ってみた
この記事は公開されてから1年以上経過しています。情報が古い可能性がありますので、ご注意ください。
これまでAR空間に3Dオブジェクトを配置したり、3Dモデルを画面上にリストで表示し選択できるようにしたりと、色々と試してきました。
今回は、これまでの応用編としてAR空間上に配置した3Dモデルをタップすると商品情報が表示され、商品ページに進めるアプリを作ってみることにしました。
作ったアプリ
ボトルのリストがあり、選択したものをAR空間上に配置できるアプリで、配置したボトルをタップすると、商品情報が表示され、購入するボタンを押すとWebページに遷移します。(今回は例としてAppleのページに遷移しています)
実装
使用する3Dモデルをプロジェクト内に追加
今回はプロジェクト内にResourcesディレクトリを作成し、その中に使用するボトルの3Dモデルをusdz形式のファイルで追加しました。

ボトル情報用のデータを作成
前述でプロジェクト内に保存した各ボトルと紐づくデータを作成します。
import Foundation

enum BottleCollection: String, Identifiable, CaseIterable {

    case bottle01 = "Bottle01"
    case bottle02 = "Bottle02"
    case bottle03 = "Bottle03"
    case bottle04 = "Bottle04"
    case bottle05 = "Bottle05"
    case bottle06 = "Bottle06"

    var id: String { return rawValue }

    var fileName: String {
        return "\(rawValue).usdz"
    }

    var information: Information {
        switch self {
        case .bottle01:
            return Information(name: "ボトル1",
                               description: "とても保温性の高い魔法瓶です",
                               url: URL(string: "https://www.apple.com")!)
        case .bottle02:
            return Information(name: "ボトル2",
                               description: "とても大容量!飲料以外にもピクルスや食べ物の保管に利用できます",
                               url: URL(string: "https://www.apple.com")!)
        case .bottle03:
            return Information(name: "ボトル3",
                               description: "スタイリッシュなボトルが春モデルで登場!",
                               url: URL(string: "https://www.apple.com")!)
        case .bottle04:
            return Information(name: "ボトル4",
                               description: "取手の付いている新しいデザインのタンブラーです",
                               url: URL(string: "https://www.apple.com")!)
        case .bottle05:
            return Information(name: "ボトル5",
                               description: "春色にアップデートされた持ち運びが便利なボトルです",
                               url: URL(string: "https://www.apple.com")!)
        case .bottle06:
            return Information(name: "ボトル6",
                               description: "ナルゲンボトルで様々なシチュエーションでご利用いただけます",
                               url: URL(string: "https://www.apple.com")!)
        }
    }

    struct Information {
        let name: String
        let description: String
        let url: URL
    }
}
ボトル情報を表すための構造体Informationを作成し、それぞれのボトルにnameとdescription、そして遷移先のurlを設定しています。
3Dモデルを画面上にリストで表示する為のSceneViewを作成
SwiftUIでは3D SceneKitコンテンツを表示させるSceneViewというViewがあります。これを使用することでとても簡単にSwiftUIでもSceneKitコンテンツを描画することが可能なのですが、この記事の執筆時点では背景色を透明にしたりすることはできませんでした。
今回は、背景色を透明にしたかった為、SCNViewをラップした独自のViewを作成することにしました。
import SwiftUI
import SceneKit

struct SceneViewWrapper: UIViewRepresentable {

    let fileName: String
    let allowsCameraControl: Bool

    func makeUIView(context: Context) -> SCNView {

        let scnView = SCNView()
        scnView.scene = SCNScene(named: fileName)

        scnView.allowsCameraControl = allowsCameraControl
        scnView.autoenablesDefaultLighting = true
        scnView.backgroundColor = .clear

        return scnView
    }

    func updateUIView(_ uiView: SCNView, context: Context) {
        uiView.allowsCameraControl = allowsCameraControl
    }
}
プレビュー

ボトルの状態を管理するクラスを作成
import SwiftUI

@Observable
class BottleManager {

    /// 選択されたボトル
    private(set) var selectedBottle: BottleCollection = .bottle01

    /// 情報表示中のボトル
    var presentingInfoOfBottle: BottleCollection?

    func selectBottle(_ bottle: BottleCollection) {
        selectedBottle = bottle
    }

    func presentInfo(of bottle: BottleCollection) {
        presentingInfoOfBottle = bottle
    }
}
BottleManagerを環境変数として使用する為、App内で記述しておきます。
import SwiftUI

@main
struct RealWorldPlacementApp: App {

    @State private var bottleManager = BottleManager()

    var body: some Scene {
        WindowGroup {
            ObjectPlacementView()
        }
        .environment(bottleManager)
    }
}
ObjectPlacementViewについては後ほど説明します。
ボトル選択用のリストを作成
BottleCollectionの各ケースごとにSceneViewWrapperを描画して、横スクロールが行えるボトルのリストを作成しています。
import SwiftUI

struct SelectModelListView: View {

    @Environment(BottleManager.self) var bottleManager

    var body: some View {

        ScrollView(.horizontal) {

            HStack(spacing: 16) {

                Spacer()
                    .frame(width: 16)

                ForEach(BottleCollection.allCases) { bottle in

                    ZStack(alignment: .topTrailing) {

                        SceneViewWrapper(fileName: bottle.fileName,
                                         allowsCameraControl: bottle == bottleManager.selectedBottle)
                        .scaledToFit()
                        .frame(width: 88)
                        .clipShape(RoundedRectangle(cornerRadius: 16))
                        .shadow(radius: 2)
                        .padding()
                        .background {
                            RoundedRectangle(cornerRadius: 12)
                                .fill(Color(uiColor: .lightGray.withAlphaComponent(0.5)))
                        }
                        .onTapGesture {
                            bottleManager.selectBottle(bottle)
                        }
                        .overlay {
                            if bottleManager.selectedBottle == bottle {
                                RoundedRectangle(cornerRadius: 12)
                                    .stroke(lineWidth: 4)
                                    .foregroundStyle(.blue)
                            }
                        }
                    }
                }
                .frame(height: 140)
            }
        }
        .ignoresSafeArea(edges: .leading)
    }
}
SceneViewWrapperをタップすると、bottleManager.selectBottle(_:)で選択したボトルを切り替えています。
また、選択したボトルが分かるように、選択されている場合は青枠を表示し、allowsCameraControlをtrueにしています。
プレビュー

ボトル配置、検出用のARViewを作成
ARViewがタップされた場合に、そのロケーションを取得できるようにaddGestureRecognizerを実行し、delegateを呼び出せるようにしました。
タップを検出できるARView
protocol ARPlacementViewDelegate: AnyObject {
    func arPlacementView(_ arPlacementView: ARPlacementView, didTapAt position: CGPoint)
}

class ARPlacementView: ARView {

    required init(frame: CGRect) {
        super.init(frame: frame)
        addTapGesture()
    }

    required init?(coder: NSCoder) {
        fatalError("init(coder:) has not been implemented")
    }

    weak var delegate: ARPlacementViewDelegate?

    func addTapGesture() {
        let tapGesture = UITapGestureRecognizer(target: self, action: #selector(handleTap(_:)))
        addGestureRecognizer(tapGesture)
    }

    @objc func handleTap(_ recognizer: UITapGestureRecognizer) {
        // タップしたロケーションを取得
        let tapLocation = recognizer.location(in: self)
        delegate?.arPlacementView(self, didTapAt: tapLocation)
    }
}
ARViewContainer
ARViewもSwiftUIではそのまま使用できない為、UIViewRepresentableでARViewを内包したARViewContainerを作成しました。
import SwiftUI
import ARKit
import RealityKit

struct ARViewContainer: UIViewRepresentable {

    @Environment(BottleManager.self) var bottleManager

    func makeUIView(context: Context) -> ARView {
        let arView = ARPlacementView(frame: .zero)
        arView.delegate = context.coordinator

        // 光量を調整
        arView.environment.lighting.intensityExponent = 2

        let configuration = ARWorldTrackingConfiguration()
        // オクルージョンの設定
        configuration.frameSemantics = [.personSegmentationWithDepth]
        configuration.sceneReconstruction = .meshWithClassification
        arView.environment.sceneUnderstanding.options.insert(.occlusion)

        arView.session.run(configuration, options: [.resetTracking, .removeExistingAnchors])
        return arView
    }

    func updateUIView(_ uiView: ARView, context: Context) {
    }
}
makeUIViewはARViewが生成される時に呼ばれる処理で、光量の調整やオクルージョン設定などARViewの設定を行っています。
また、arViewには前述したARPlacementViewを代入しており、タップを検出して任意の処理を実行できるようにdelegateにはcontext.coordinatorを代入しています。
ARViewContainer.Coordinator
Coordinatorの中で、ARPlacementViewDelegateが呼び出された時の処理を記述しています。
extension ARViewContainer {

    func makeCoordinator() -> Coordinator {
        return Coordinator(self)
    }

    class Coordinator: NSObject, ARPlacementViewDelegate {

        let parent: ARViewContainer

        init(_ parent: ARViewContainer) {
            self.parent = parent
        }

        @MainActor
        func arPlacementView(_ arPlacementView: ARPlacementView, didTapAt position: CGPoint) {

            // AR空間上のボトルをタップした場合
            if let entity = arPlacementView.entity(at: position),
               let bottle = BottleCollection(rawValue: entity.modelName) {
                parent.bottleManager.presentInfo(of: bottle)
                return
            }

            // ボトル配置時の処理
            // タップした位置に対応する3D空間上の平面とのレイキャスト結果を取得
            let raycastResults = arPlacementView.raycast(from: position, allowing: .estimatedPlane, alignment: .horizontal)
            guard let firstResult = raycastResults.first else { return }

            // タップ位置をワールド座標系に変換
            let worldPosition = simd_make_float3(firstResult.worldTransform.columns.3)

            let selectedBottle = parent.bottleManager.selectedBottle
            guard let model = try? ModelEntity.load(named: selectedBottle.fileName) else {
                return
            }

            // modelの名前には検索できるようにIDを設定する
            model.name = selectedBottle.id
            // modelのタップを検知できるように衝突形状を適用させる
            model.generateCollisionShapes(recursive: true)
            let anchor = AnchorEntity(world: worldPosition)
            anchor.children.append(model)
            arPlacementView.scene.anchors.append(anchor)
        }
    }
}
AR空間上のボトルをタップした場合
タップされた位置にあるEntityを取得して、そのEntiryに設定したnameから該当のBottleCollectionを生成しています。
画面上にボトル情報を表示する為にpresentInfo(of:)にそのBottleCollectionを渡しています。
if let entity = arPlacementView.entity(at: position),
   let bottle = BottleCollection(rawValue: entity.modelName) {
    parent.bottleManager.presentInfo(of: bottle)
    return
}
ボトル配置時の処理
タップした位置にEntiryが存在しない場合は、3Dモデルの配置処理を実行します。
// タップした位置に対応する3D空間上の平面とのレイキャスト結果を取得
let raycastResults = arPlacementView.raycast(from: position, allowing: .estimatedPlane, alignment: .horizontal)
guard let firstResult = raycastResults.first else { return }

// タップした位置をワールド座標系に変換
let worldPosition = simd_make_float3(firstResult.worldTransform.columns.3)

let selectedBottle = parent.bottleManager.selectedBottle
guard let model = try? ModelEntity.load(named: selectedBottle.fileName) else {
    return
}

// modelの名前で検索できるようにIDを設定する
model.name = selectedBottle.id
// modelのタップを検知できるように衝突形状を適用する
model.generateCollisionShapes(recursive: true)
let anchor = AnchorEntity(world: worldPosition)
anchor.children.append(model)
arPlacementView.scene.anchors.append(anchor)
まずはタップした位置をARView内で使用できるようにワールド座標系に変更しています。
その後、現在選択されているボトルのfileNameから3Dモデルを呼び出し生成しています。model.nameには、タップ時に該当のボトルを検索できるようにselectedBottle.idを指定しています。
また、AR空間上のボトルがタップされたことを検出できるようにmodel.generateCollisionShapes(recursive: true)を実行して衝突判定の行える形状を作成しています。
model.nameを指定した場合
今回のようにModelEntity.load(named:)で生成したモデルに対してmodel.nameで名前を指定した場合、そのEntityの最上部の親の一番最初の子Entityに対して名前が指定されます。
なので、その指定したモデル名を取得する為にエクステンションを作成しました。
extension Entity {

    var modelName: String {

        var topEntity = self

        // 最上位のEntityを取得
        while let parent = topEntity.parent {
            topEntity = parent
        }

        // 最上部のEntiryの子Entiryにmodel.nameが設定されている
        return topEntity.children.first?.name ?? ""
    }
}
ボトルの詳細情報を表示するView
AR空間上のボトルをタップした際に、表示させるボトル情報の詳細画面です。
import SwiftUI
import SceneKit

struct BottleDetailView: View {

    @Environment(\.dismiss) var dismiss
    let bottle: BottleCollection

    var scene: SCNScene {
        return SCNScene(named: bottle.fileName)!
    }

    var sceneSize: (x: Float, y: Float, z: Float) {
        return scene.getCentiMeterSize()
    }

    var body: some View {

        NavigationStack {

            VStack(spacing: 32) {

                sceneView

                VStack(spacing: 16) {
                    nameLabel
                    descriptionLabel
                    sizeLabel
                }
                .padding(.horizontal)

                purchaseButton
            }
            .toolbar {
                ToolbarItem(placement: .cancellationAction) {
                    Button(action: {
                        dismiss()
                    }, label: {
                        Image(systemName: "xmark")
                    })
                    .frame(width: 44, height: 44)
                }
            }
        }
    }

    // MARK: - Components

    private var nameLabel: some View {
        VStack(spacing: 4) {
            Text("名前")
                .font(.title)
                .bold()
                .frame(maxWidth: .infinity, alignment: .leading)

            Text(bottle.information.name)
                .frame(maxWidth: .infinity, alignment: .leading)

            Divider()
        }
    }

    private var sceneView: some View {
        SceneView(scene: scene,
                  options: [
                    .allowsCameraControl,
                    .autoenablesDefaultLighting
                  ])
        .frame(width: 240, height: 240)
        .padding()
        .background {
            RoundedRectangle(cornerRadius: 12)
                .stroke(lineWidth: 4)
                .foregroundStyle(.black)
        }
    }

    private var descriptionLabel: some View {
        VStack(spacing: 4) {
            Text("説明")
                .font(.title)
                .bold()
                .frame(maxWidth: .infinity, alignment: .leading)

            Text(bottle.information.description)
                .frame(maxWidth: .infinity, alignment: .leading)

            Divider()
        }
    }

    private var sizeLabel: some View {
        VStack(spacing: 4) {
            Text("サイズ")
                .font(.title)
                .bold()
                .frame(maxWidth: .infinity, alignment: .leading)

            Text("x: \(String(format: "%.2f", sceneSize.x)) cm\ny: \(String(format: "%.2f", sceneSize.y)) cm\nz: \(String(format: "%.2f", sceneSize.z)) cm")
                .frame(maxWidth: .infinity, alignment: .leading)
            Divider()
        }
    }

    private var purchaseButton: some View {
        Link(destination: bottle.information.url, label: {
            Text("購入する")
                .foregroundStyle(.white)
                .bold()
                .padding()
                .padding(.horizontal)
                .background(Capsule().fill(.tint))
        })
    }
}
今回は購入するボタンを押すことで外部サイトに遷移するようにしています。
プレビュー

アプリのメイン画面の作成
これまで記載してきた画面を組み合わせて、AR空間にボトルを設置でき、AR空間のボトルをタップすると詳細情報が表示される画面を作成します。
import SwiftUI

struct ObjectPlacementView: View {

    @Environment(BottleManager.self) var bottleManager
    @State private var modelListIsPresented = true

    var body: some View {

        @Bindable var bindableBottleManager = bottleManager
        ZStack {
            ARViewContainer()
                .ignoresSafeArea()

            VStack(spacing: 8) {
                Spacer()

                // モデルリストの表示/非表示を切り替えるボタン
                ModelListToggleButton(isPresenting: $modelListIsPresented)
                .frame(maxWidth: .infinity, alignment: .leading)
                .padding(.leading, 32)

                if modelListIsPresented {
                    SelectModelListView()
                }
            }
        }
        // AR空間上のボトルをタップすると、sheetが表示
        .sheet(item: $bindableBottleManager.presentingInfoOfBottle) { bottle in
            BottleDetailView(bottle: bottle)
        }
    }
}
AR空間上のボトルをタップすると、bottleManager.presentingInfoOfBottleに値が代入される為、シートが表示されます。
以上でアプリの完成です。
おわりに
オンラインショップで表示される商品ではサイズ表記があったとしても、なかなかサイズ感がわからなかったり、実際に自分の環境下に設置してみるとイメージと違ったなんてことがあるかもしれませんが、ARと現実の自分の環境を組み合わせることで、ミスマッチしてしまう問題を解決できるかもしれないと感じました。
もっともっと色々な活用方法がありそうなので模索していきたいと思います!