
エンジニア向けのBIツール、QuaryをBigQueryに接続して使ってみた(CLI編)
この記事は公開されてから1年以上経過しています。情報が古い可能性がありますので、ご注意ください。
こんちには。
データアナリティクス事業本部 機械学習チームの中村(nokomoro3)です。
今回は以下の記事の続きです。少なくとも以下の記事の「モデルの追加」までは実施した前提で説明します。
本記事では前回触れられなかった、QuaryのCLIを紹介したいと思います。
CLIの使い方
quaryのコマンドの使い方は以下で確認することができます。
quary -h

# Usage: quary.exe [OPTIONS] <COMMAND>
#
# Commands:
#   init                 Initialize demo project with sample seeds & models inside current directory
#   compile              Validate the project structure and model references without database
#   build                Build and execute the model views/seeds against target database
#   test                 Run defined tests against target database
#   convert-dbt-project  Convert a dbt core project to a quary project and place in the specified path
#   snapshot             Execute snapshots to capture data changes over time
#   generate-sources
#   help                 Print this message or the help of the given subcommand(s)
#
# Options:
#   -p, --project-file <PROJECT_FILE>  Project file location [default: quary.yaml]
#   -e, --env-files <ENV_FILES>        .env file locations to pull env vars from [default: .env]
#   -h, --help                         Print help
#   -V, --version                      Print version
コマンドの詳細は以下のような形です。
- init
- デモプロジェクトを作成
- compile
- データベースを使用しない検証を実行
- build
- データベースに対するviewやseedの構築と実行
- test
- データベースに対して定義されたテストを実行
- convert-dbt-project
- dbtプロジェクトをquaryプロジェクトに変換し、指定されたパスに配置
- snapshot
- スナップショットを実行し、時間の経過に伴うデータの変化をキャプチャ
- generate-sources
- 詳細説明なし
この中で、今回はbuild、testなどを使用してみたいと思います。
準備 - 認証情報のセットアップ
CLIを実行する場合は、前回のVSCode拡張機能と異なり、Google Cloudの認証情報が必要です。
Google Cloudのメニューから「IAMと管理」を選択し、「サービスアカウント」をクリックします。
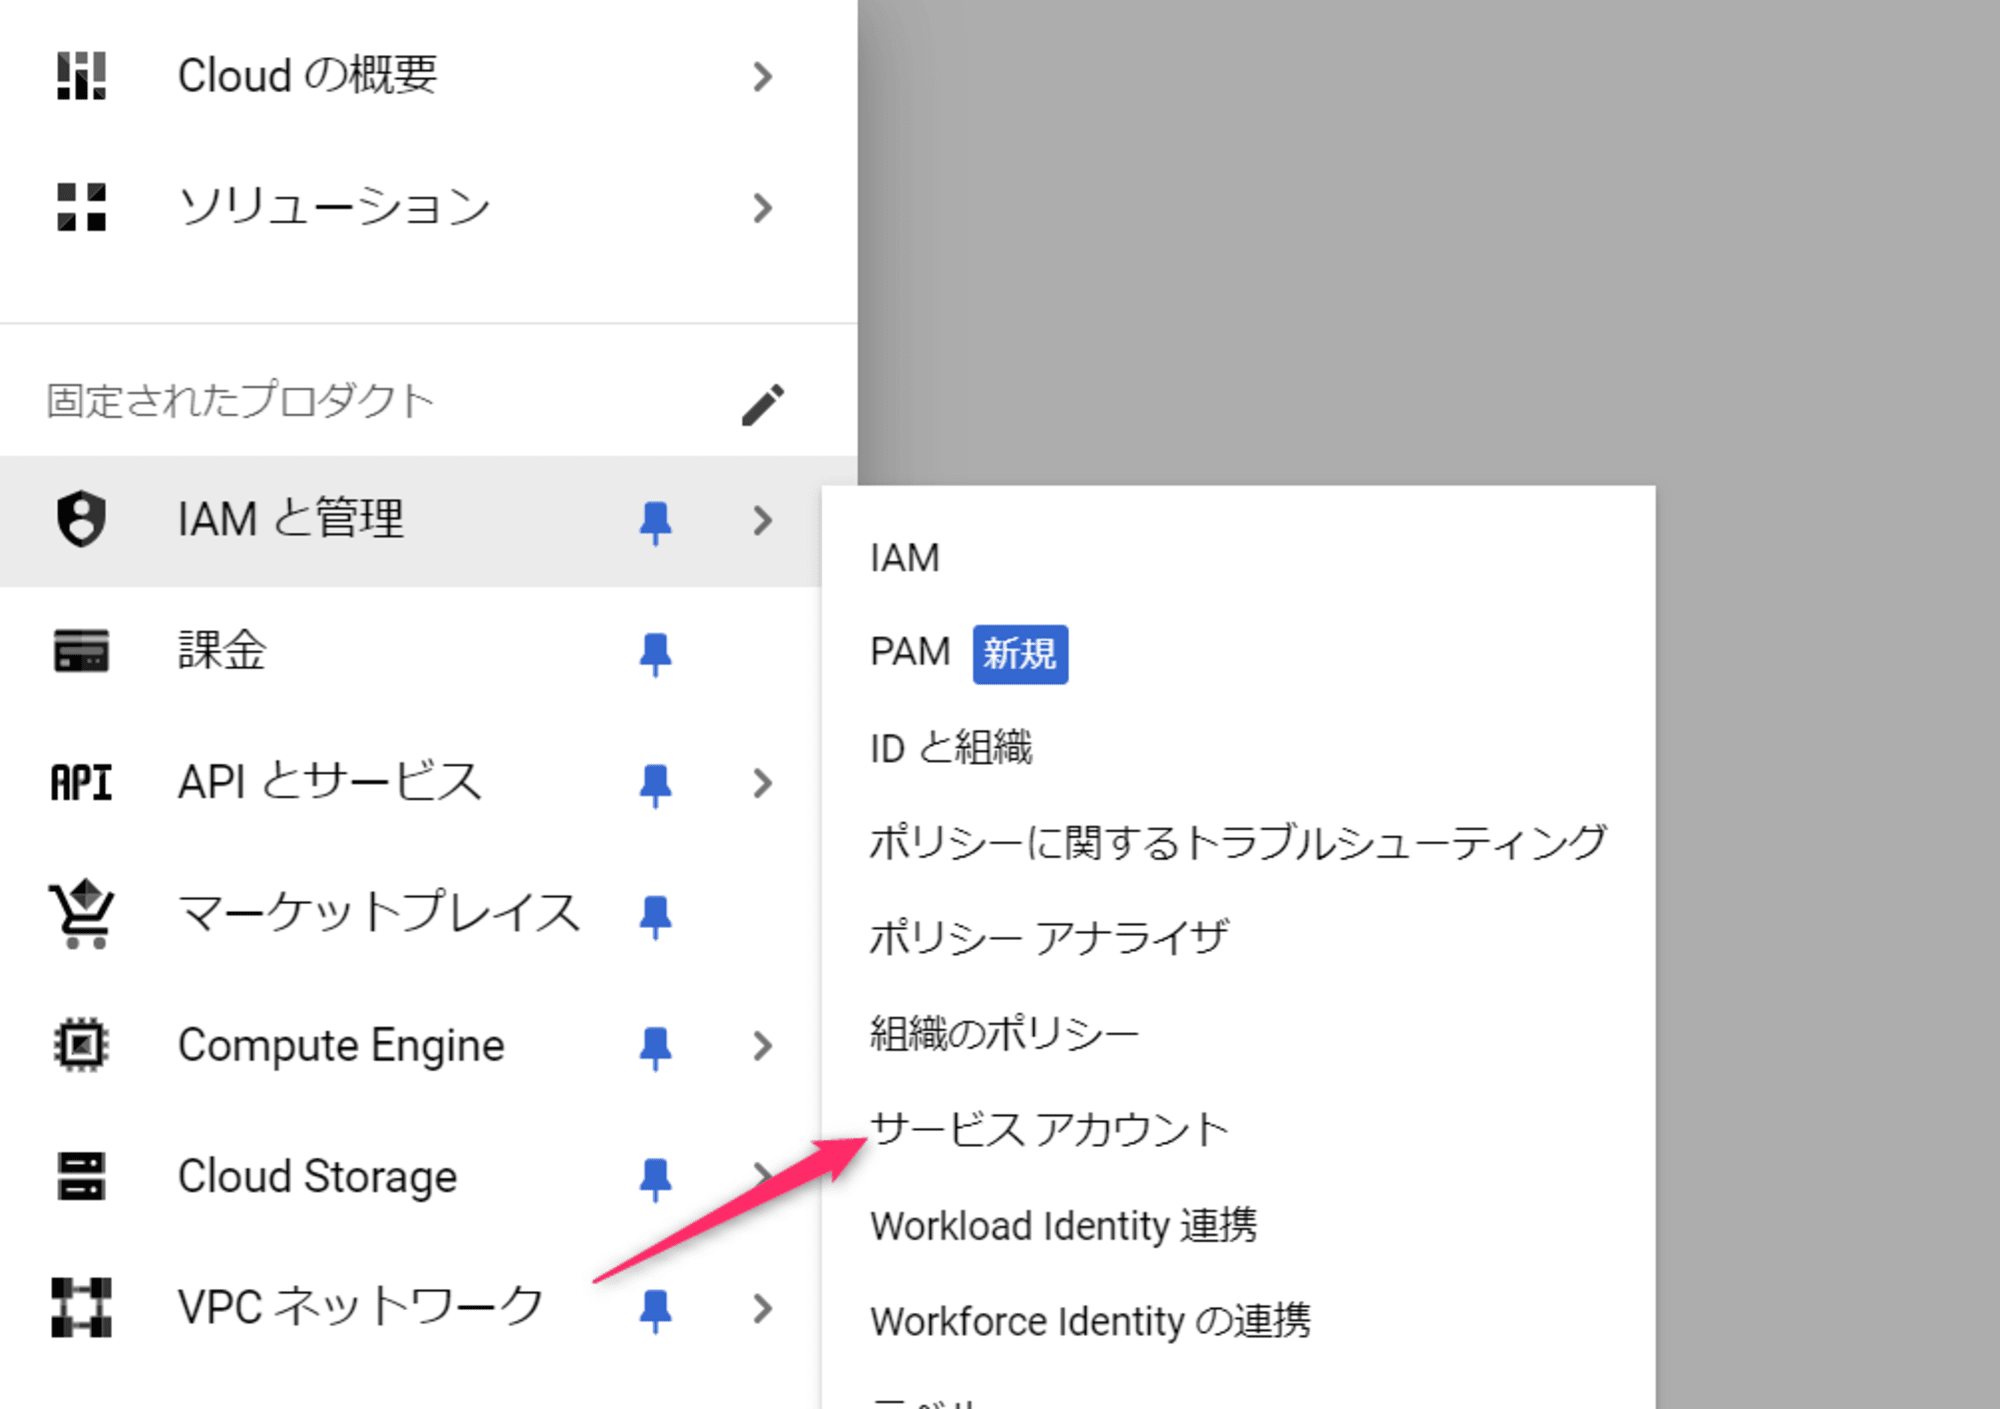
以下から「サービスアカウントを作成」をクリックします。

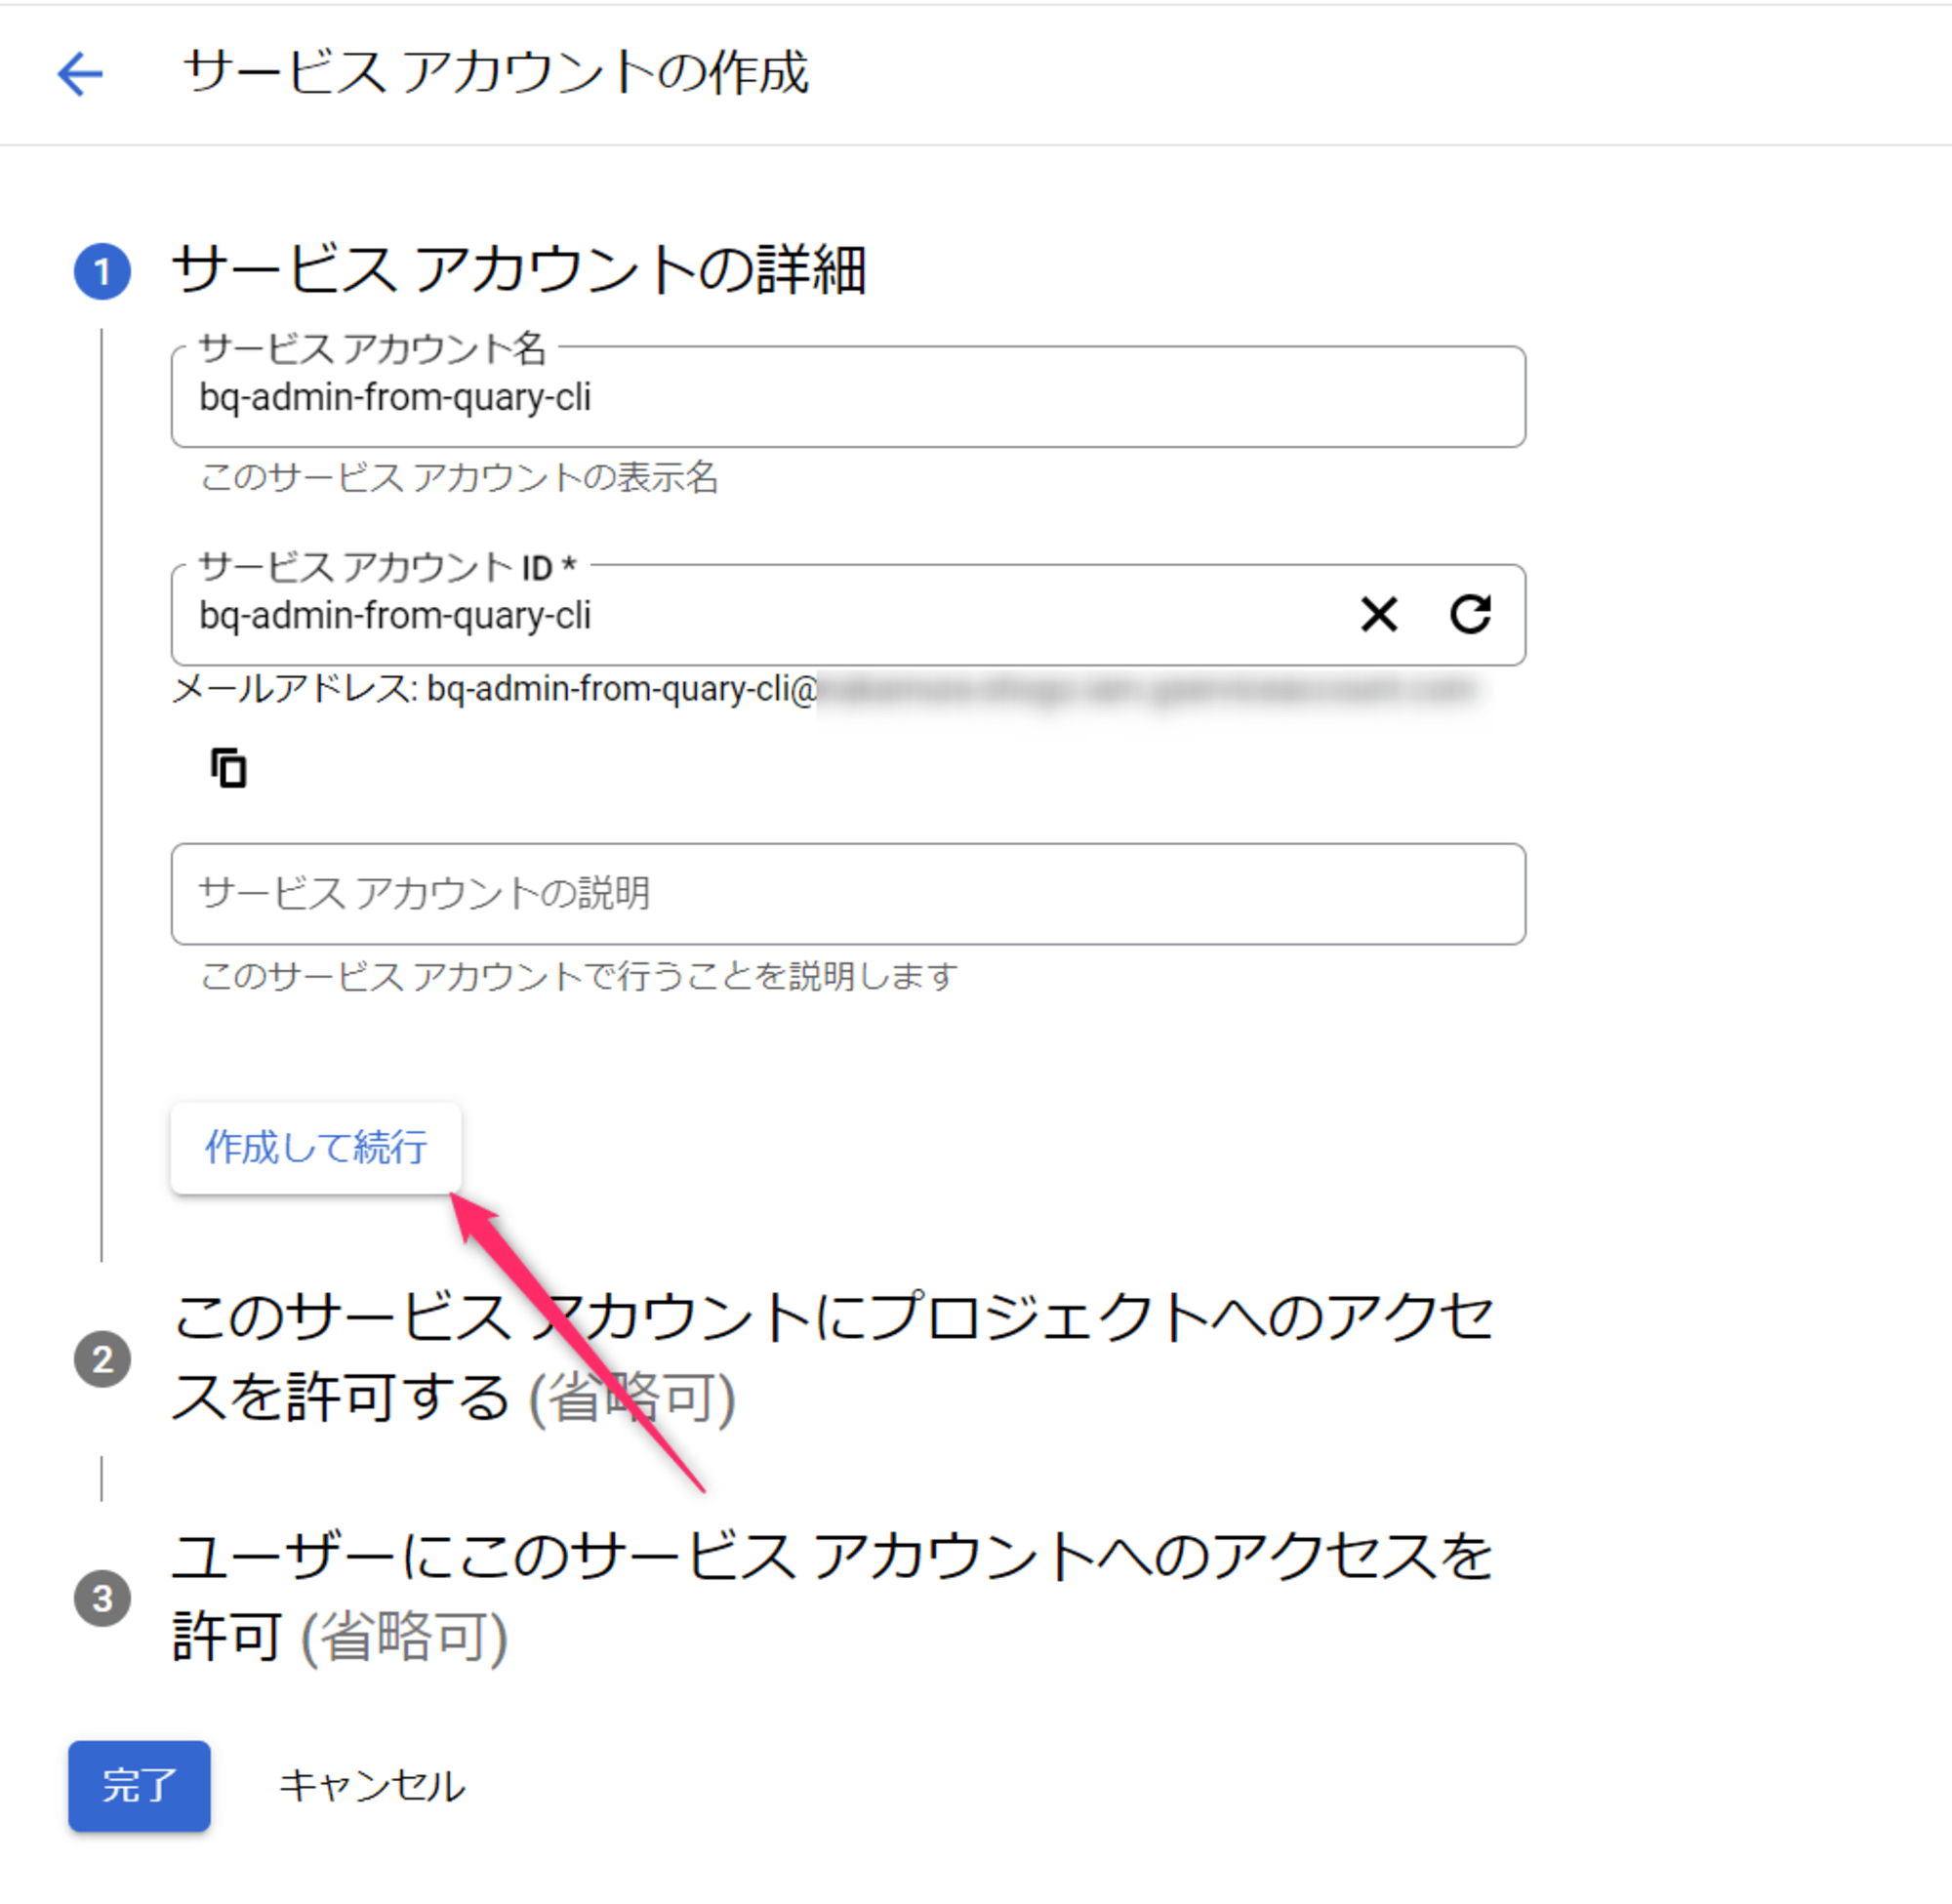
サービスアカウント名を付けて「作成して続行」をクリックします。
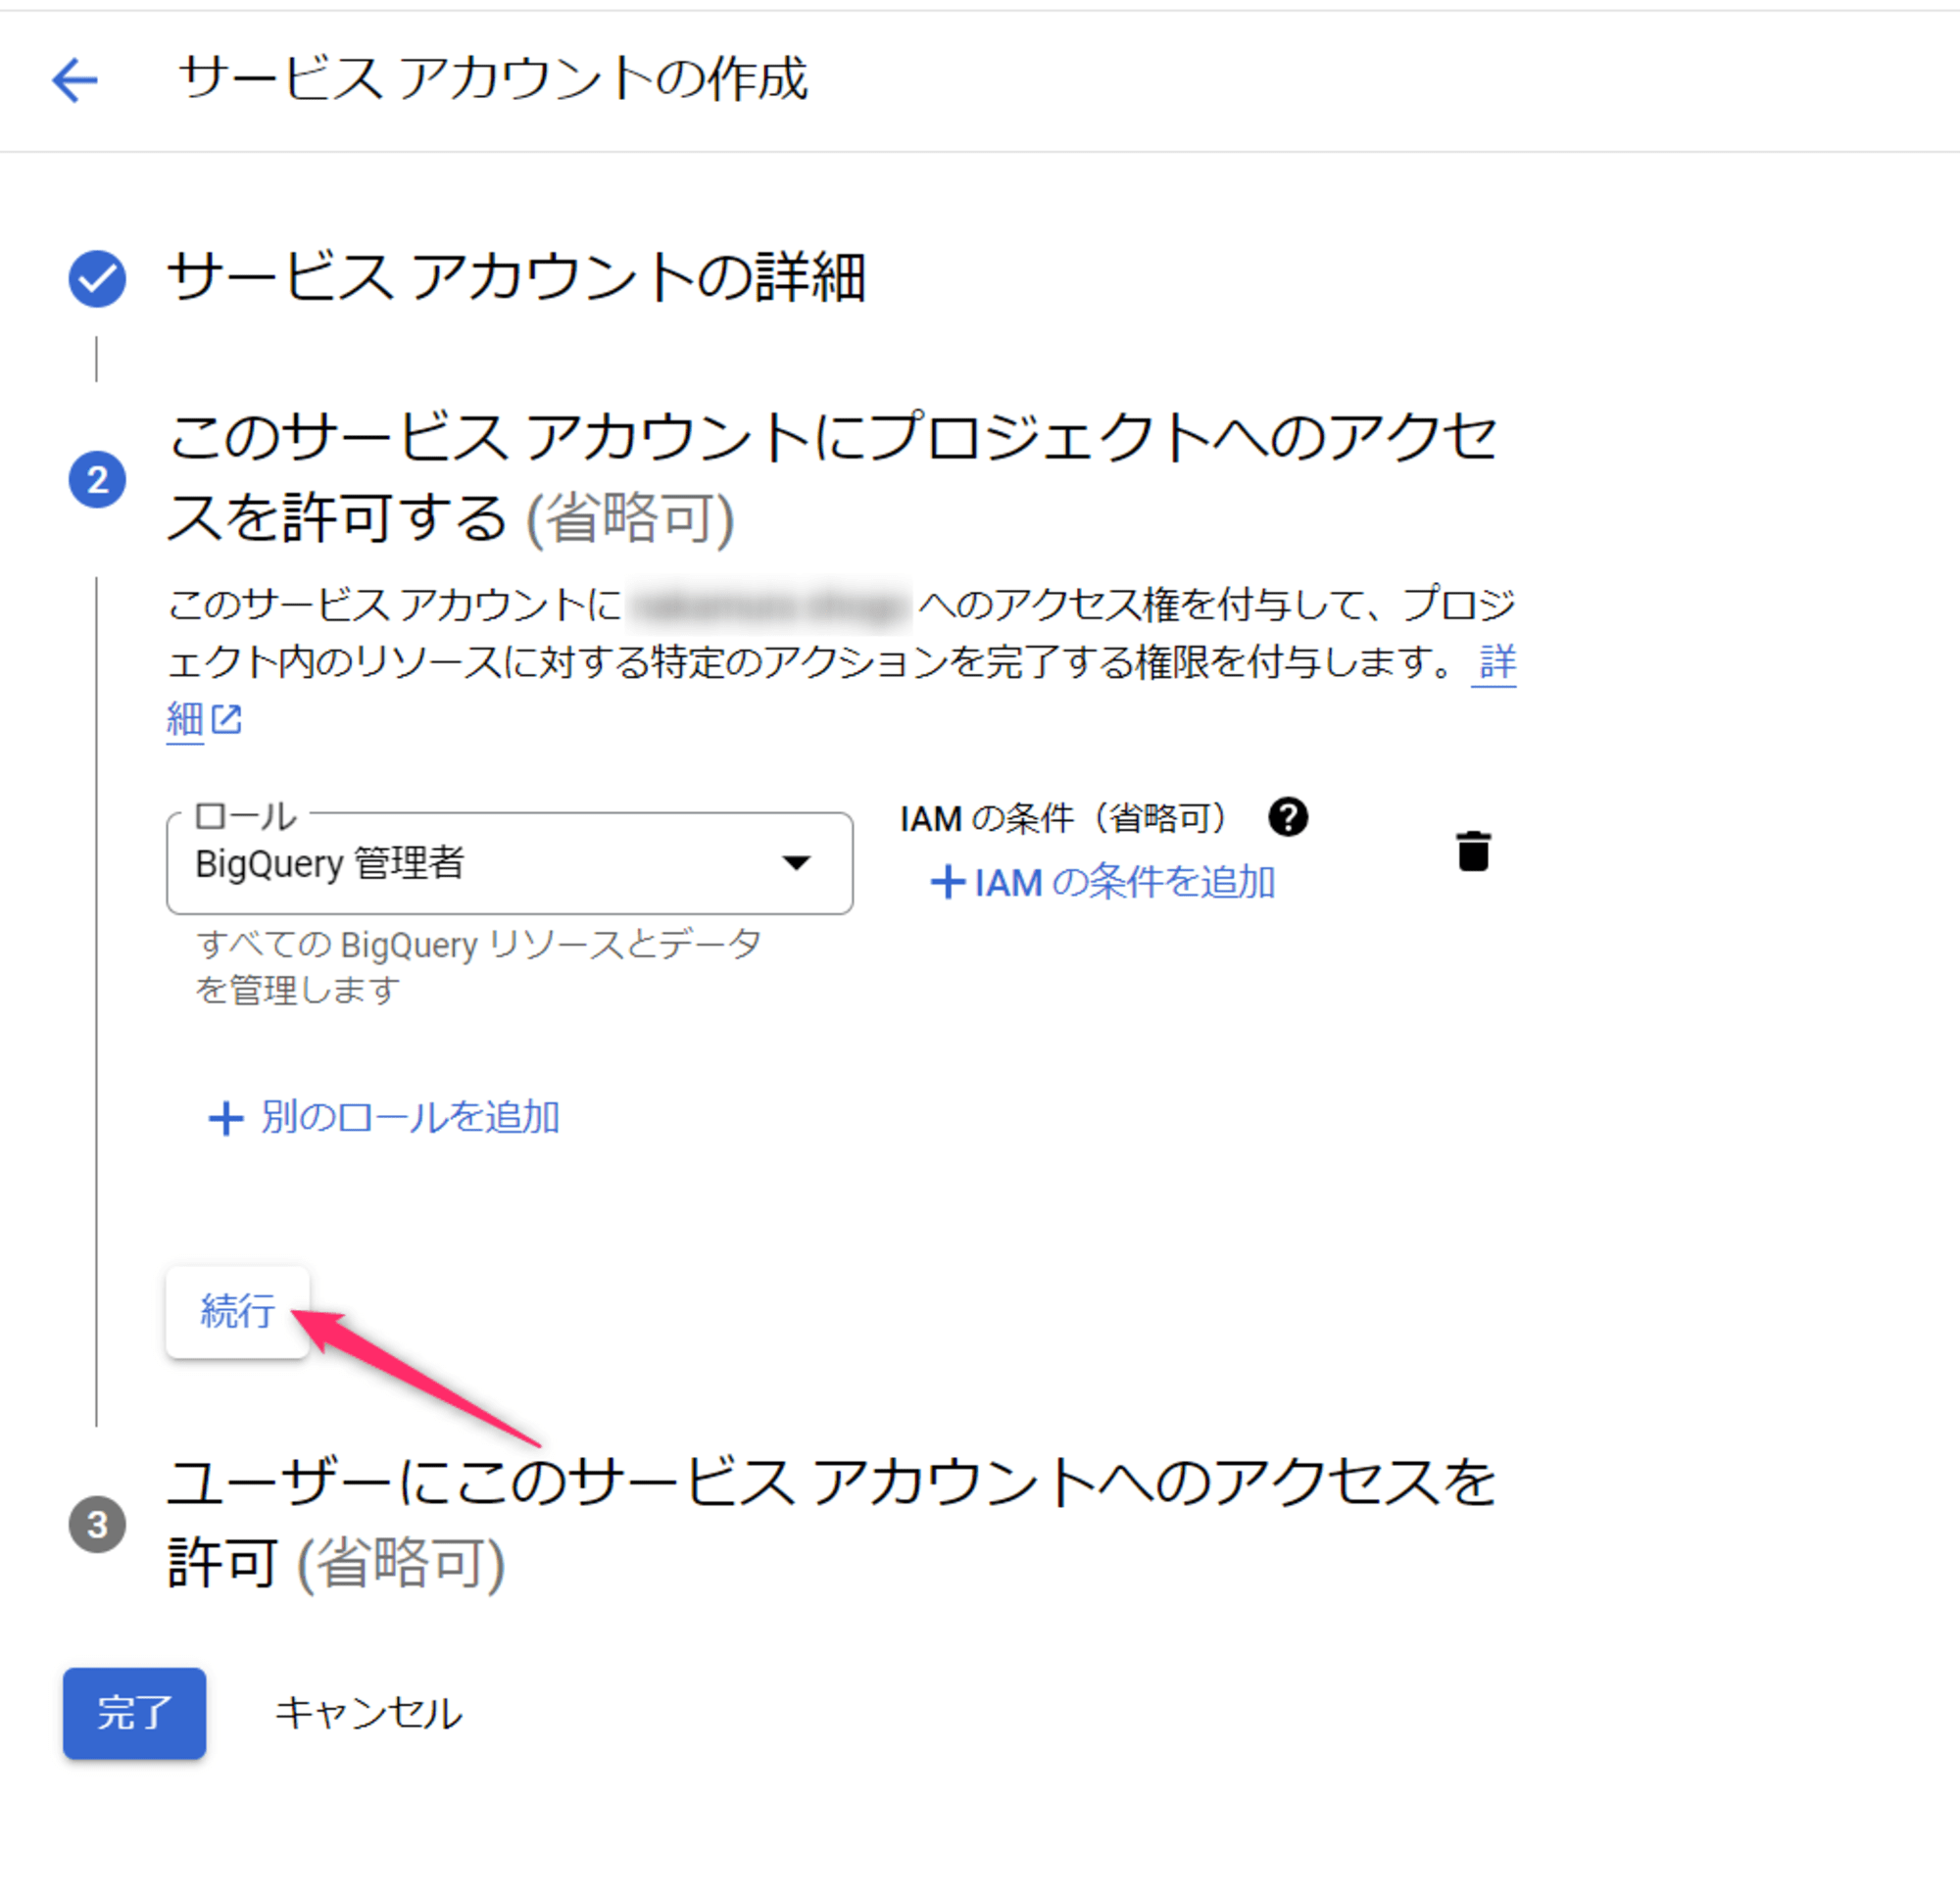
ロールに「BigQuery管理者」を付けて、「続行」をクリックします。
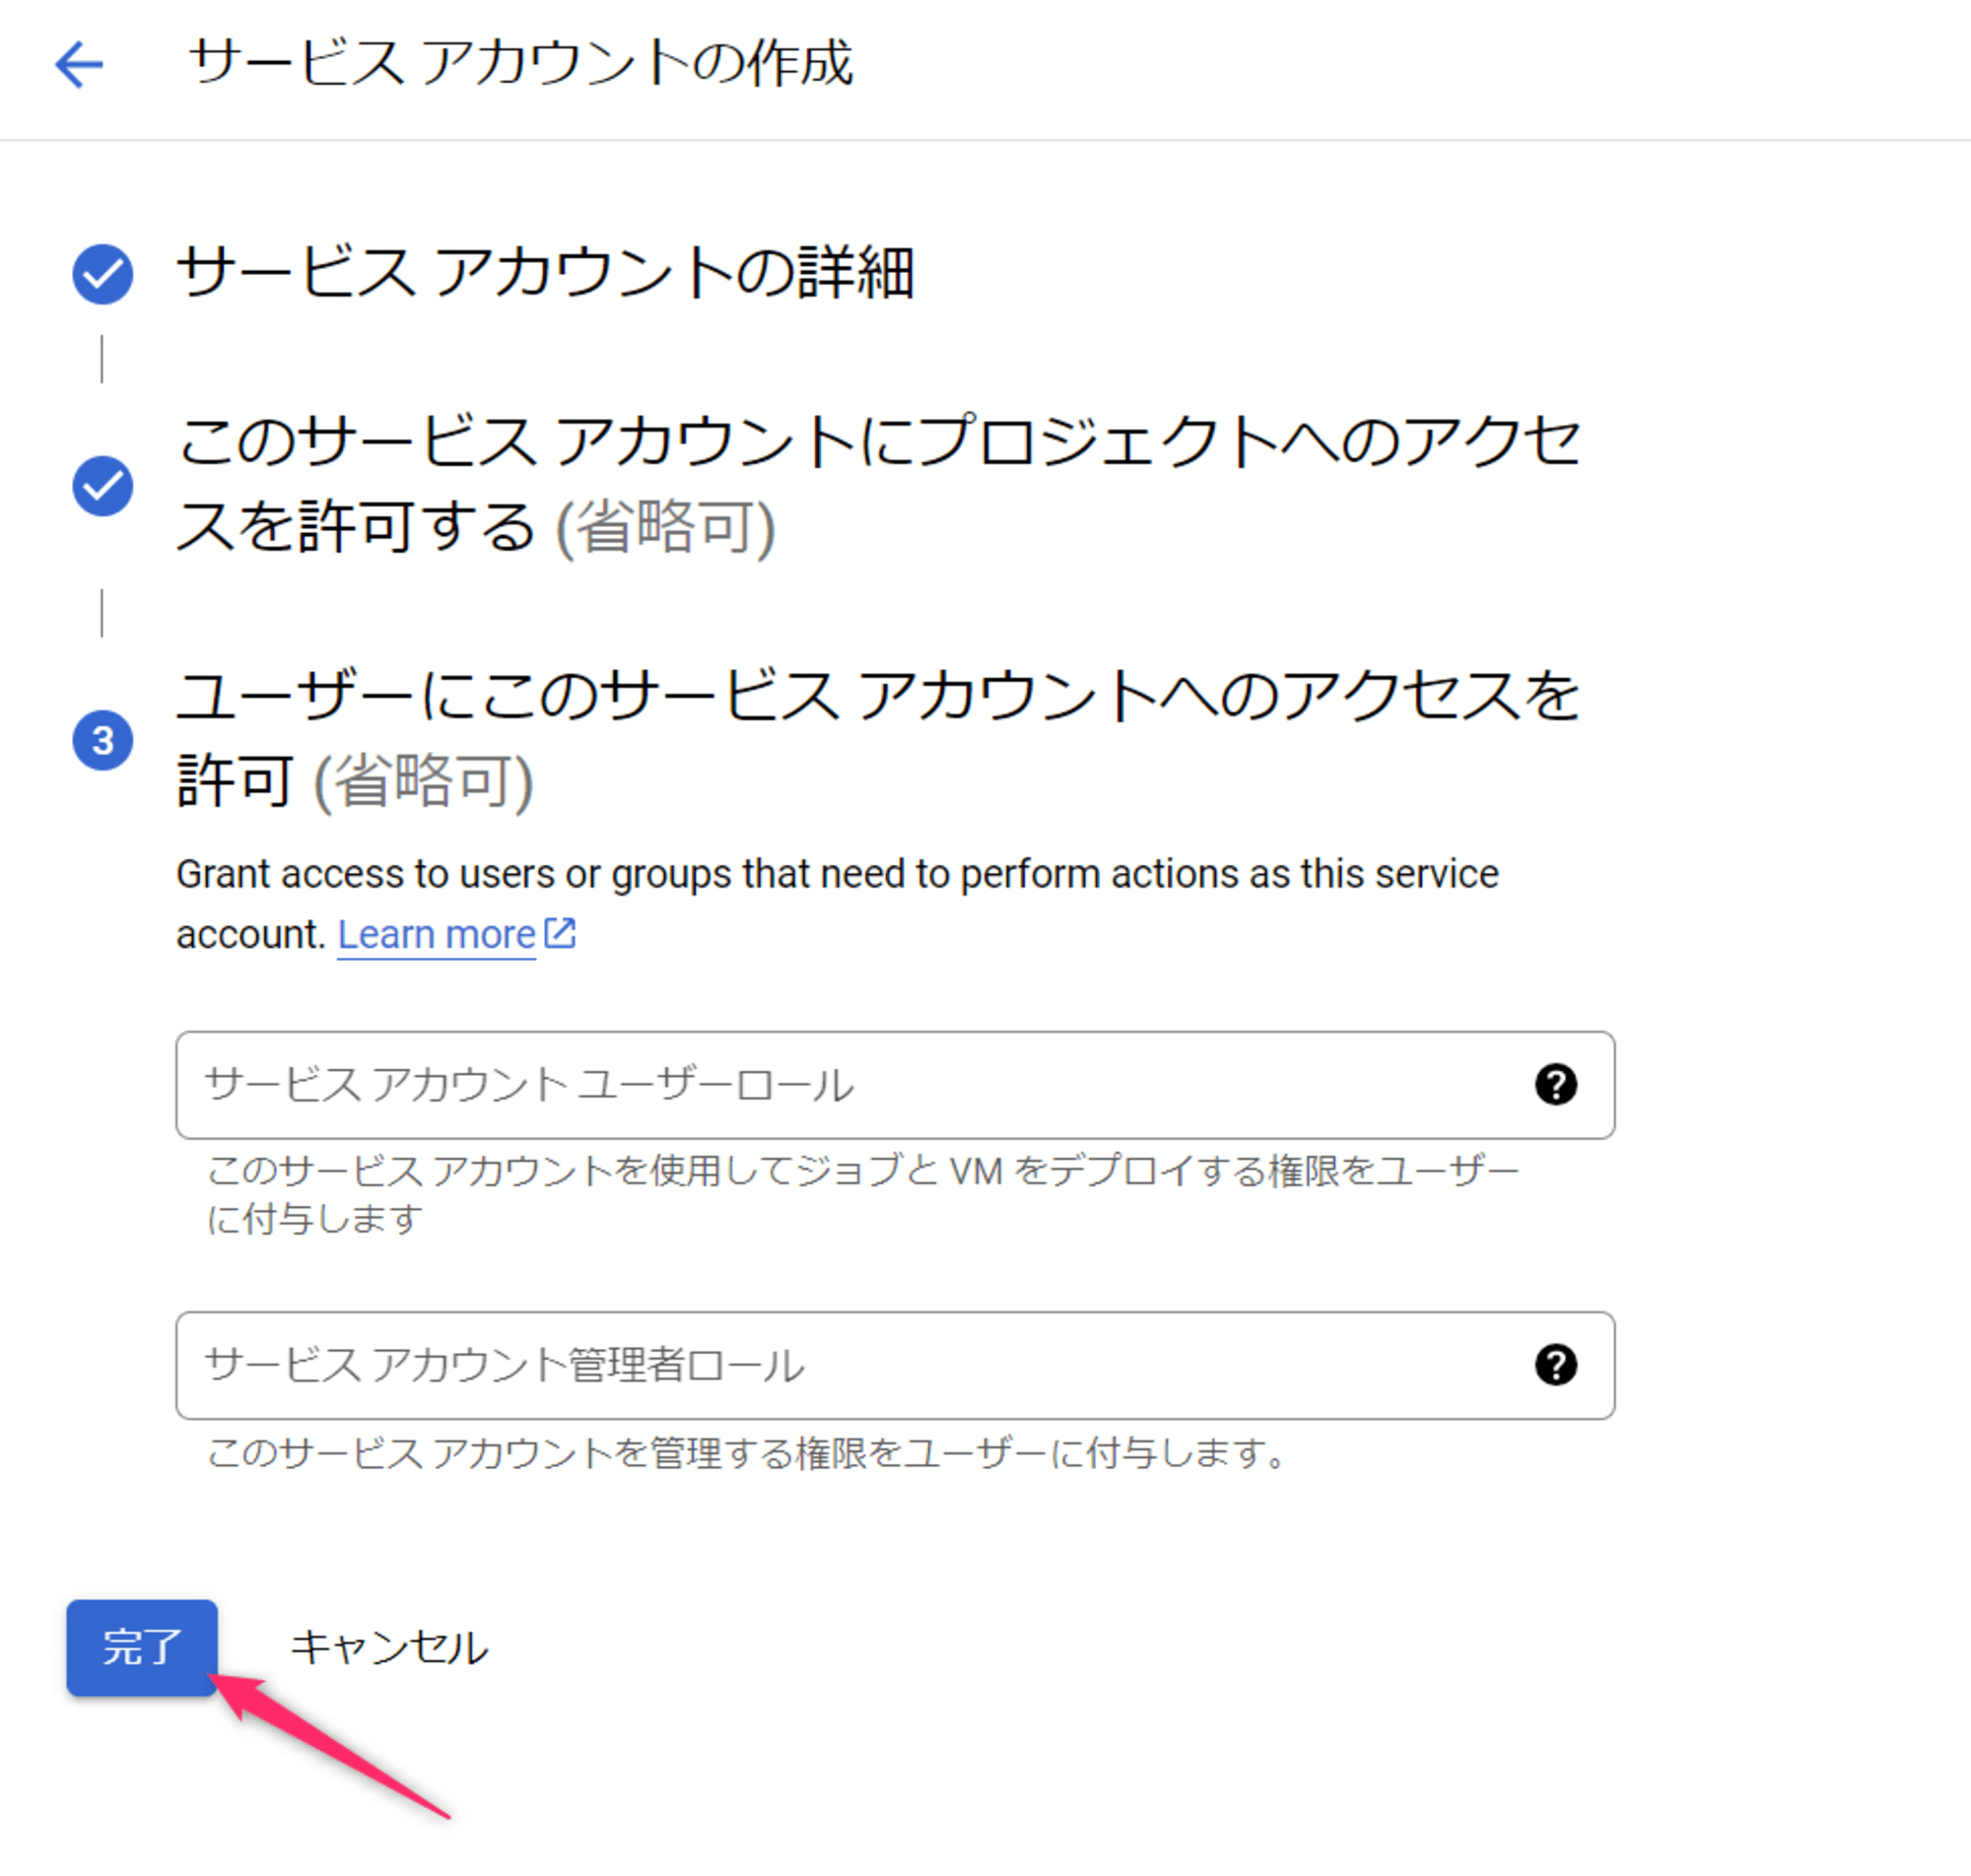
以降は特に何もせず、「完了」をクリックします。
サービスアカウント一覧に戻りますので、作成したサービスアカウントをクリックします。

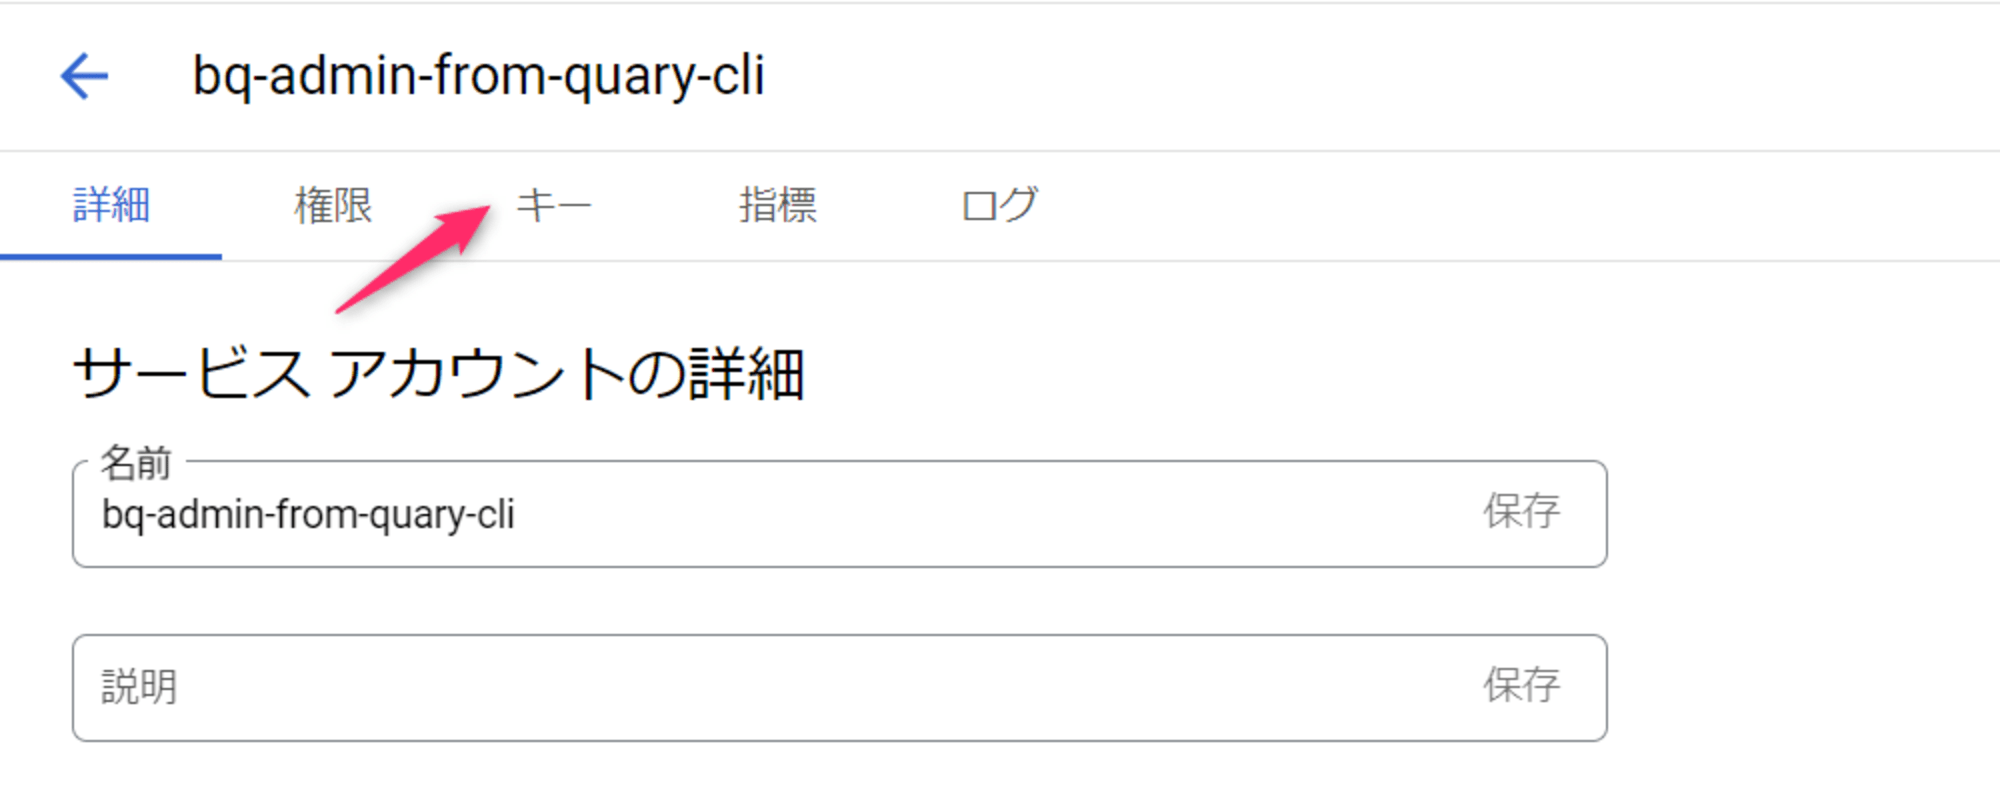
「キー」というタブをクリックします。
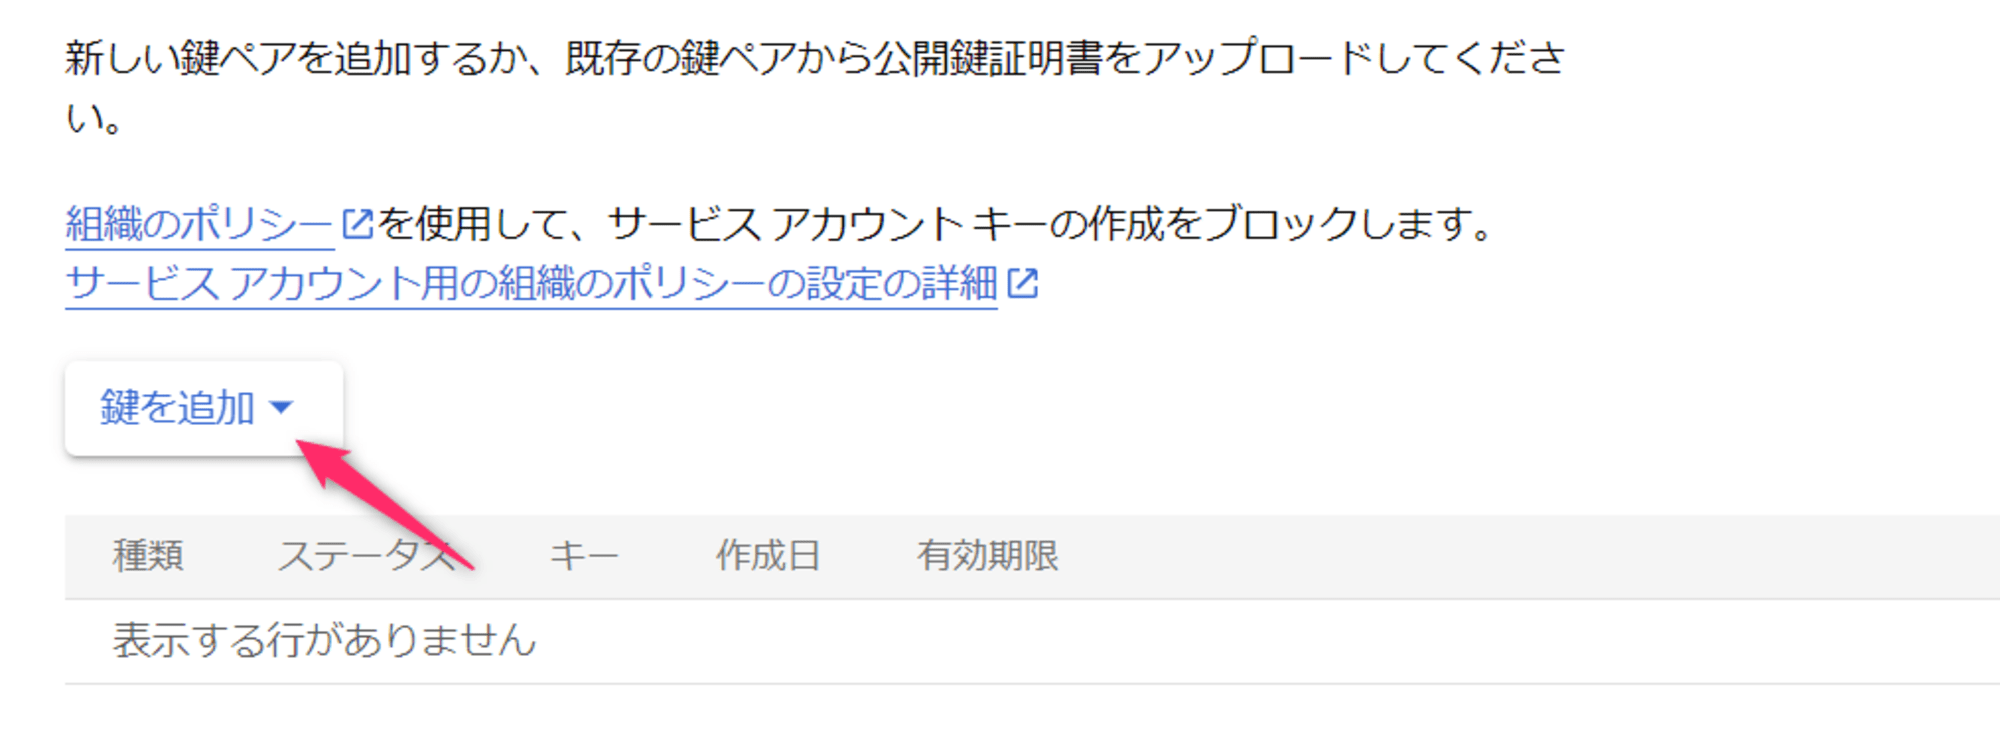
「鍵を追加」をクリックします。
以下のようなダイアログがでますので、「JSON」を選択し、「作成」をクリックします。
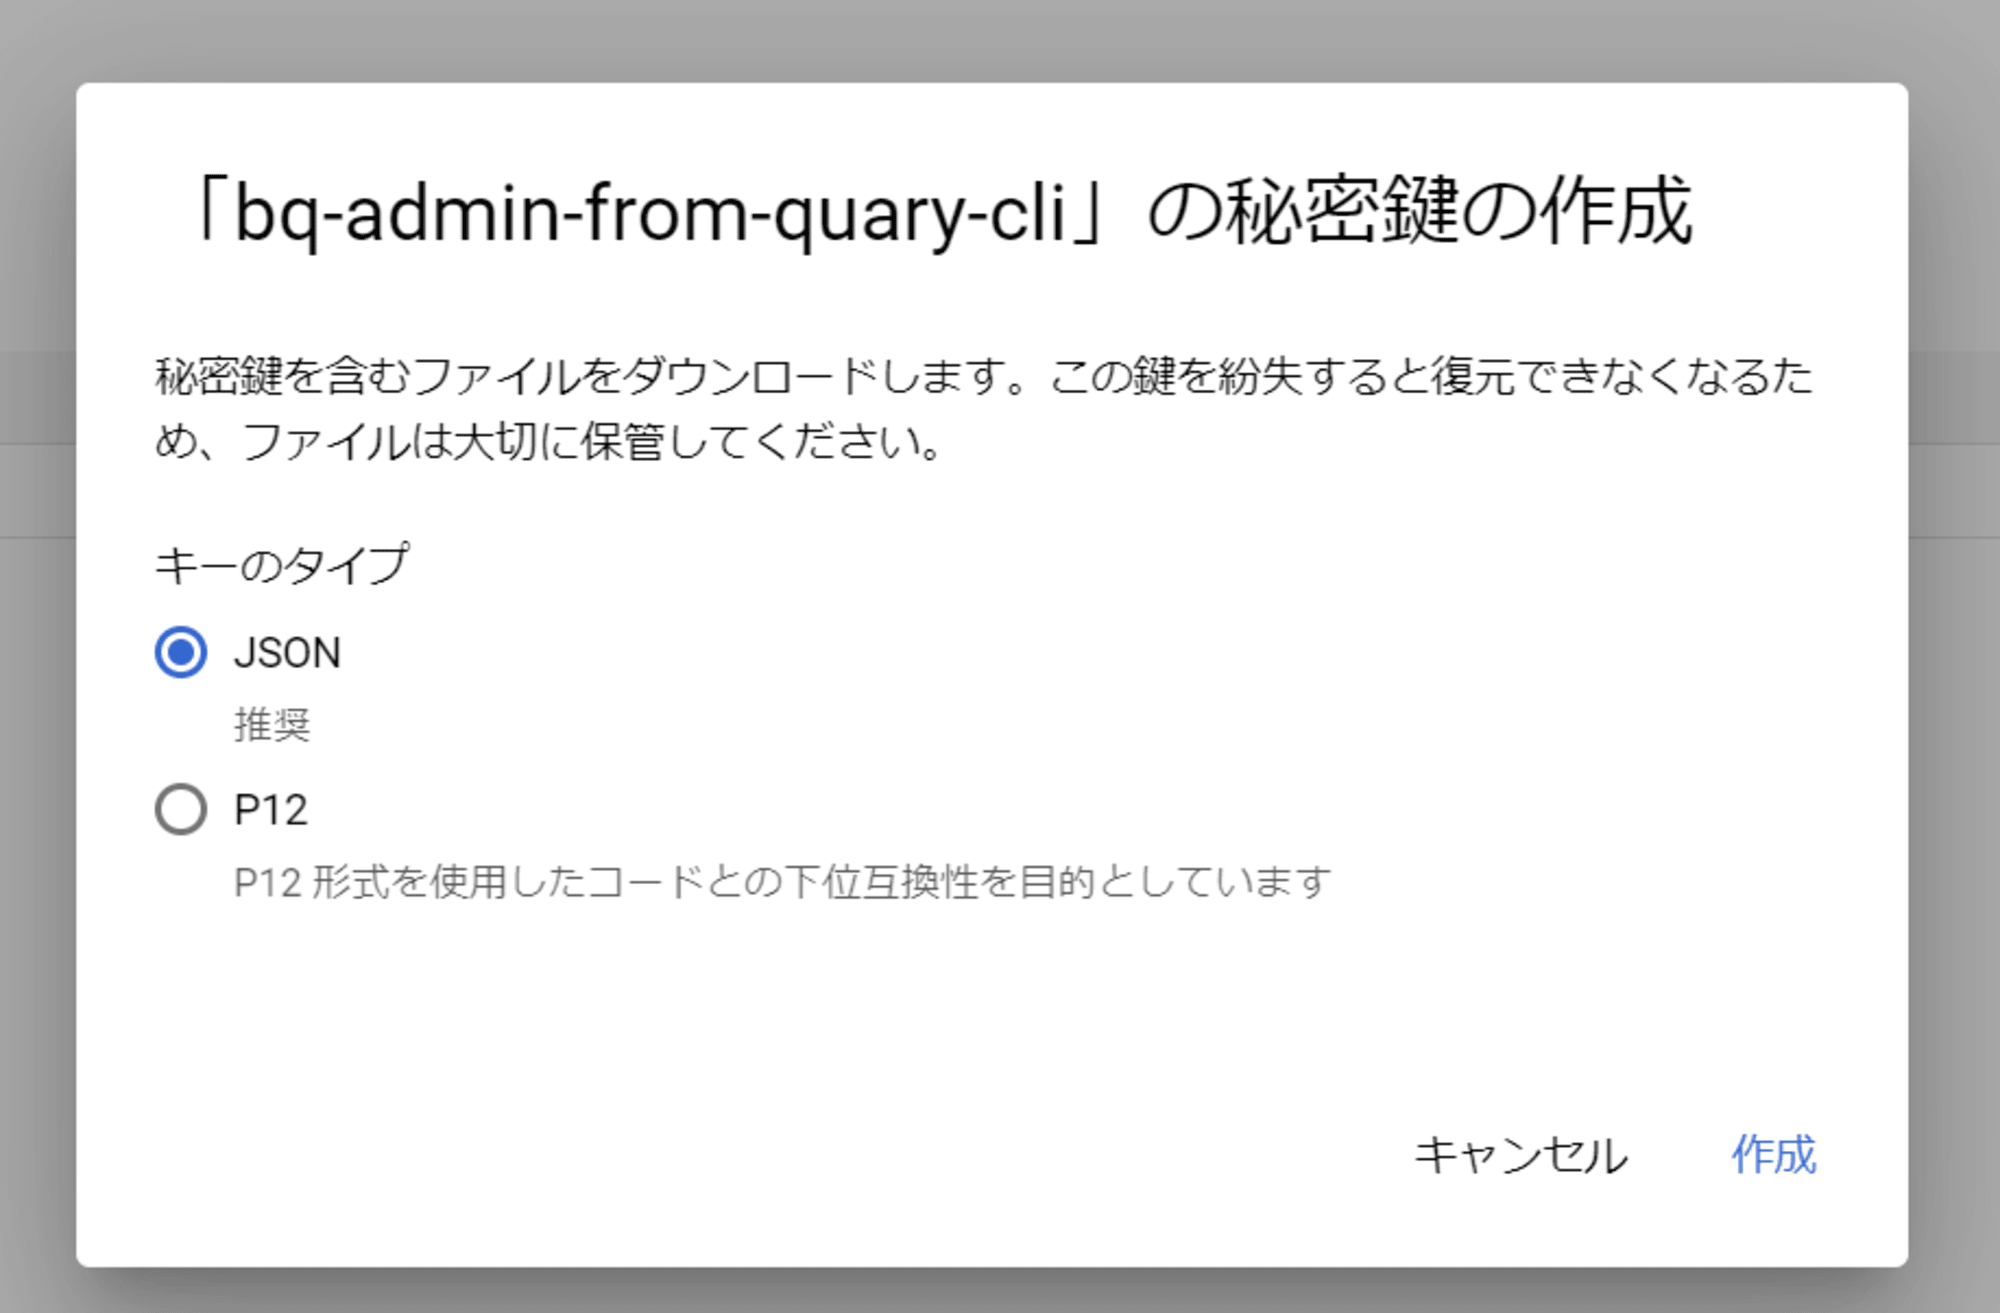
キーファイルがJSONでダウンロードされます。
そちらのファイルをQuaryのプロジェクト直下に配置して、さらに同じ階層に以下のような .env ファイルを作成しておきます。
GOOGLE_APPLICATION_CREDENTIALS="./{キーファイル名}"
こちらでQuaryのコマンド実行時に、認証情報を読み込ませることが可能です。
以上で準備は完了です。
quary build
quary build は作成したモデルファイルに基づいて、データベース(今回はBigQuery)上にViewを作成することができます。
前回、 rating_mean_per_user_selected.sql を作成しましたので、そちらがViewとして作成される形となります。
quary build

#   ========================================       2/2       done
# Created 1 model in the database
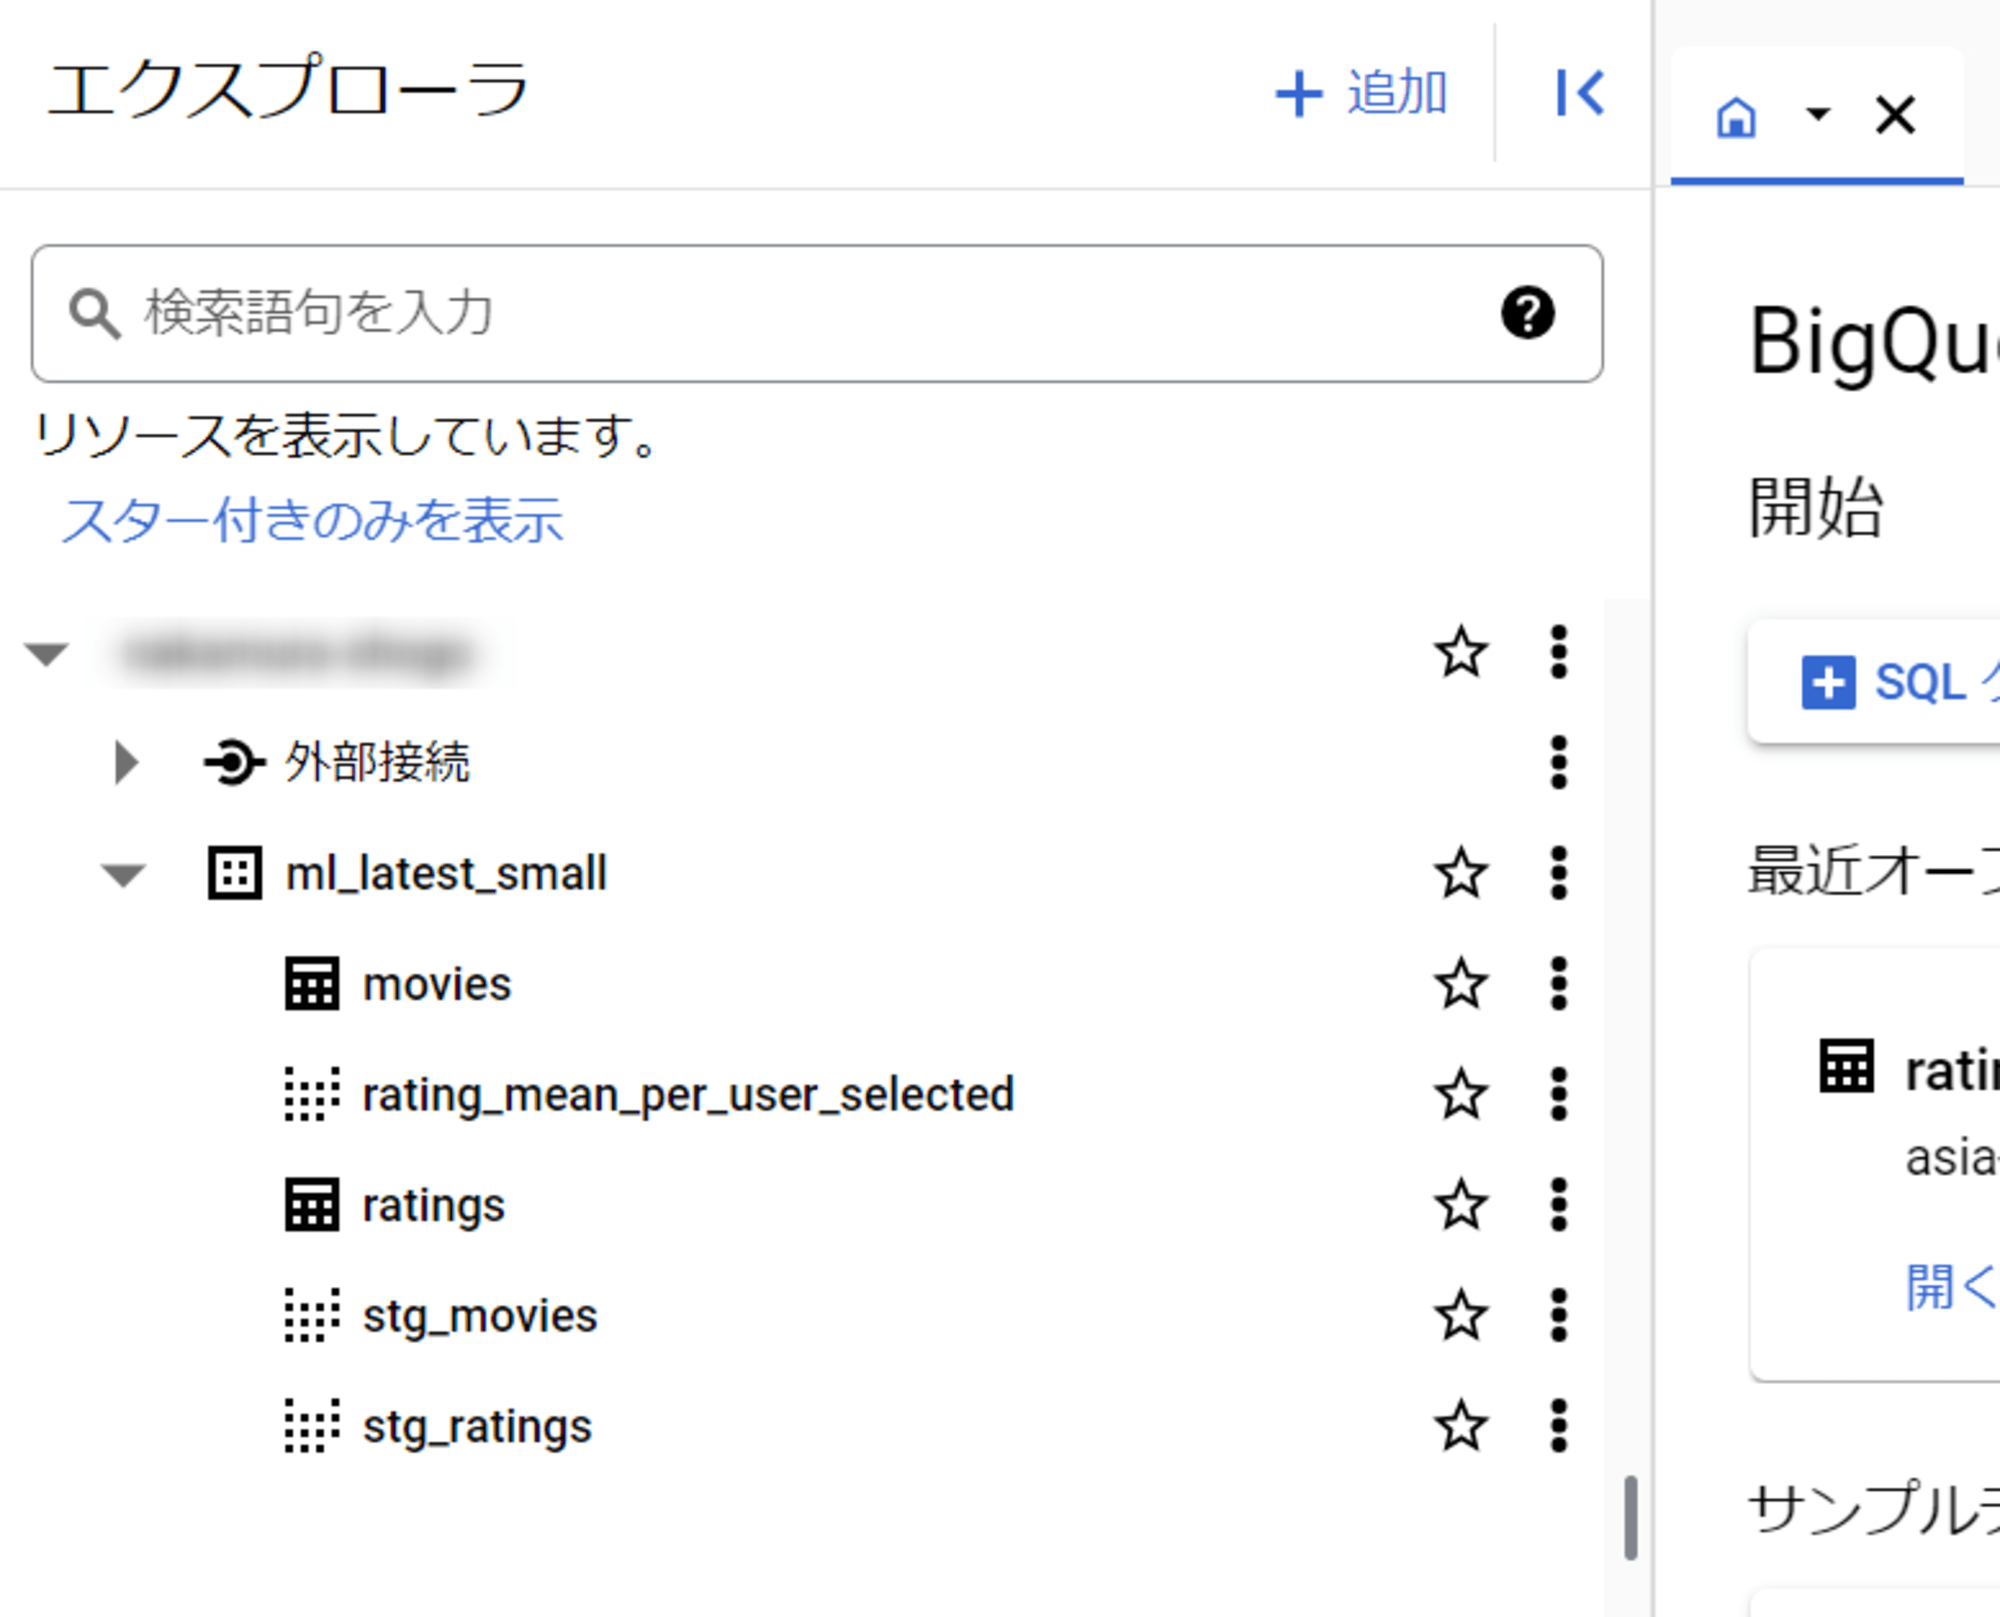
build実行後は、前回作成したモデル rating_mean_per_user_selected がViewとしてBigQuery上でも作成されていることが確認できました。
quary test
quary test は前回 schema.yml 記載したような以下のようなテストを実行するものです。
models:
- name: rating_mean_per_user_selected
  columns:
  - name: rating_mean
    description: rating mean per userId
  - name: userId
    description: user identifier
    tests:
    - type: unique # ここがテスト
実行すると以下のようになります。
$ quary test

# BigQuery { project_id: "{Google Cloudのプロジェクト名}", dataset_id: "ml_latest_small" }
# running tests 1
# all tests (1) were run and passed.
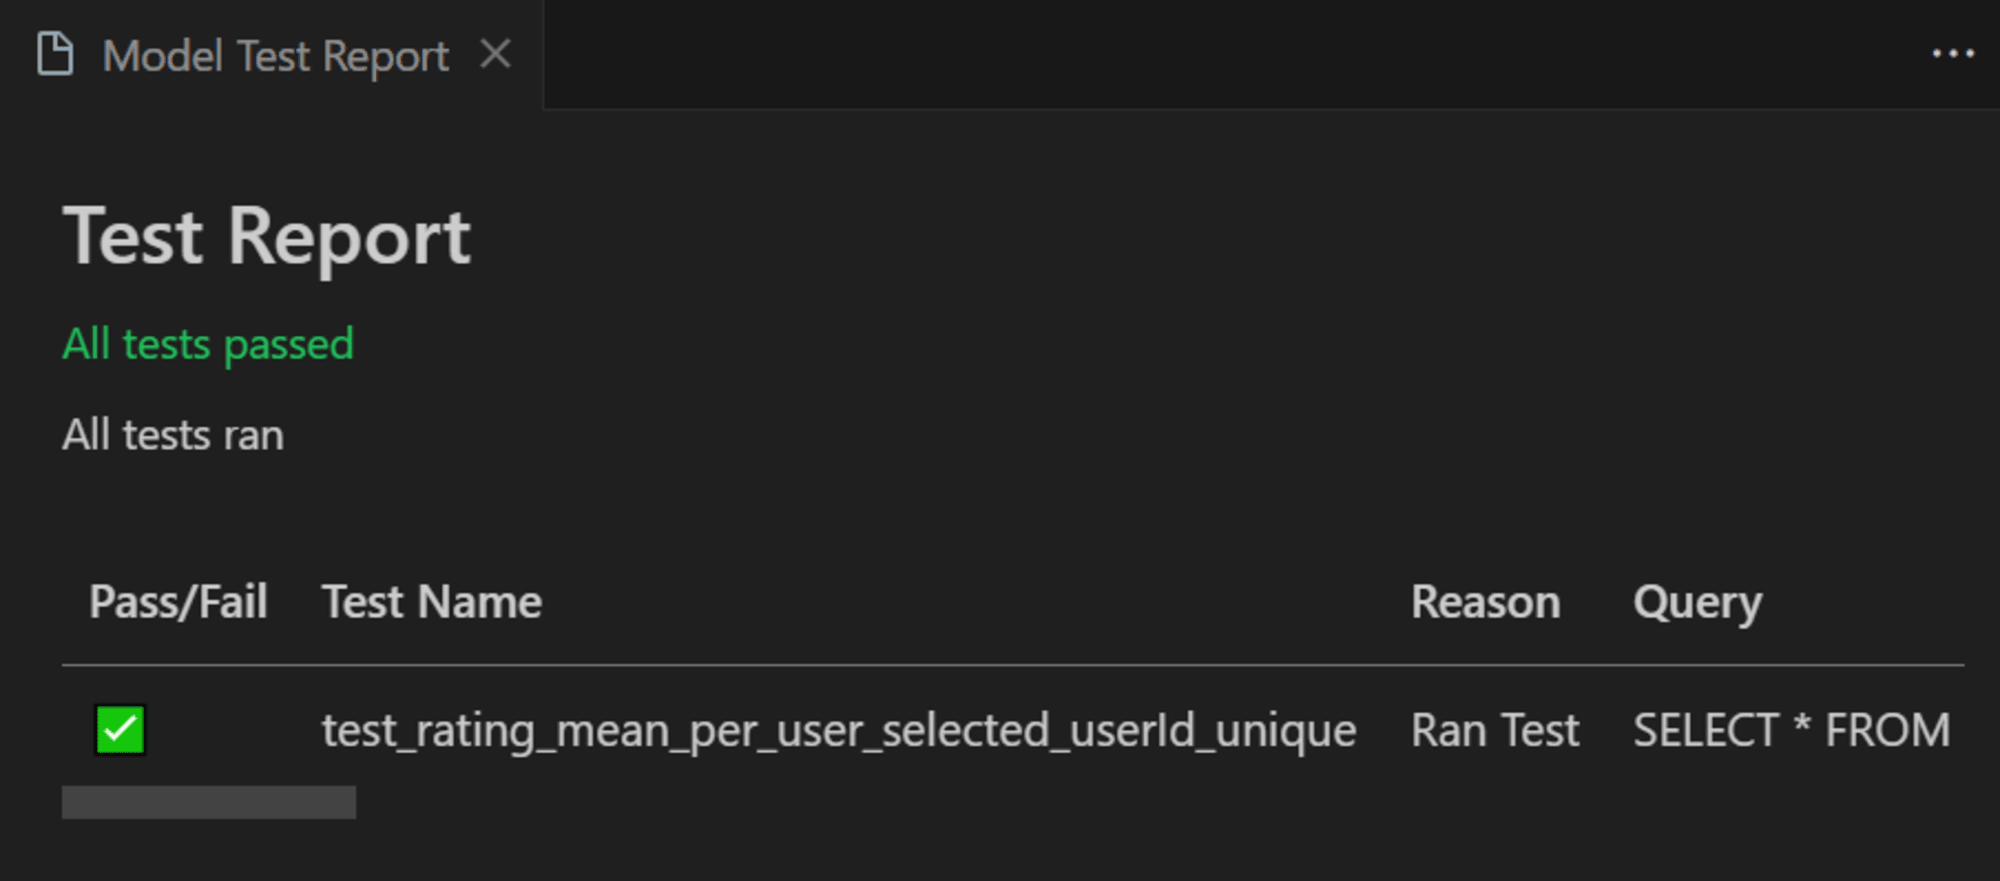
またVSCodeの拡張機能の方で、実行したテストの結果を見ることができます。以下のアイコンをクリックします。

すると、以下のようなModel Test Reportを確認できます。
まとめ
いかがでしたでしょうか。今回はQuaryというエンジニア向けのBIツールを、CLIから試してみました。
今後も情報があればブログにしたいと思います。本記事がご参考になれば幸いです。


