Amplify UIを使ってサインイン/アカウント作成画面をさくっとつくってみた
この記事は公開されてから1年以上経過しています。情報が古い可能性がありますので、ご注意ください。
こんにちは、豊島です。
はじめに
CognitoのManaged LoginやHosted UIのアップデートがきたことでCognitoの使い勝手が向上してきましたね
今回は、Amplify + Cognitoの観点でAmplify UIからConnected componentsのAuthenticatorを使ってサインイン/アカウント作成画面をつくってみました
Amplify UIは、実装に手間がかかる処理を簡素化し、拡張性やカスタマイズ性を重視したUIライブラリです
Connected componentsには、CognitoやS3との連携を想定したライブラリがあり、Amplifyを使ってWebアプリケーションを構築しようとしている方は必見です
準備
- Amplify Gen2の構築(初めて触る方はクイックスタートを参照ください)
- Next.js(Pages Router)
- Cognito
Authenticatorのセットアップ
import "@/styles/app.css"
import outputs from "@/amplify_outputs.json"
import "@aws-amplify/ui-react/styles.css"
+ import { Authenticator } from "@aws-amplify/ui-react"
import { Amplify } from "aws-amplify"
import type { AppProps } from "next/app"

Amplify.configure(outputs)

export default function App({ Component, pageProps }: AppProps) {
  return (
+    <Authenticator>
      <Component {...pageProps} />
+    </Authenticator>
  )
}
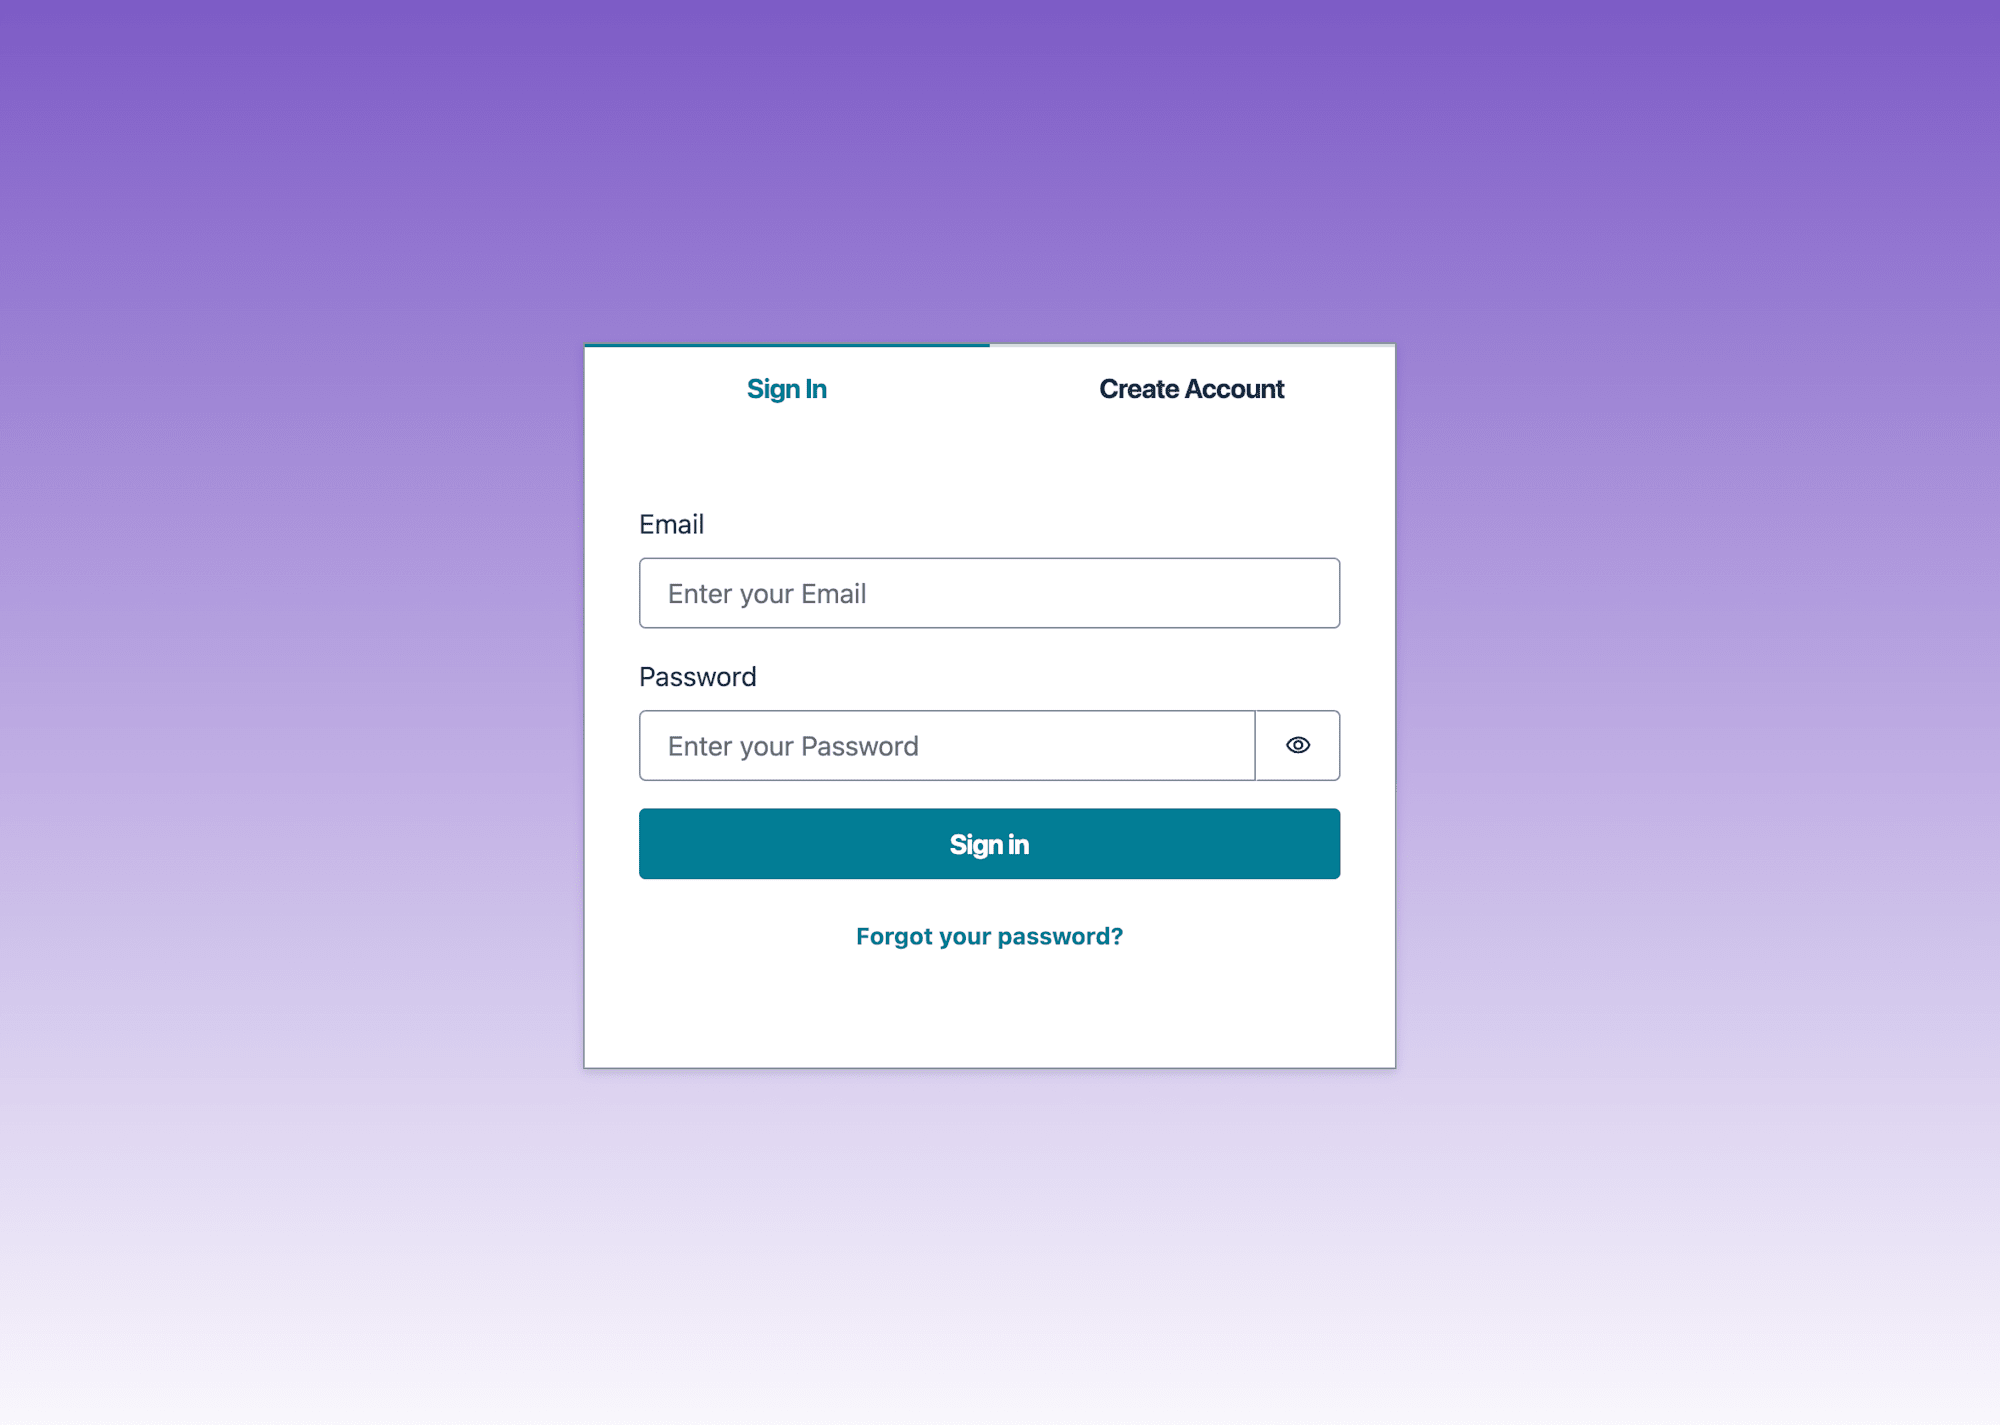
ここまでの数行でサインイン/アカウント作成画面ができました
ロゴを入れてみる
import "@/styles/app.css"
import outputs from "@/amplify_outputs.json"
import { Authenticator, View, useTheme } from "@aws-amplify/ui-react"
import { Amplify } from "aws-amplify"
import type { AppProps } from "next/app"
import "@aws-amplify/ui-react/styles.css"

Amplify.configure(outputs)

+ const customComponents = {
+  Header() {
+    const { tokens } = useTheme()
+
+    return (
+      <View textAlign="center" padding={tokens.space.large}>
+        <img
+          alt="Amplify logo"
+          src="https://docs.amplify.aws/assets/logo-dark.svg"
+        />
+      </View>
+    )
+  }
+}

export default function App({ Component, pageProps }: AppProps) {
  return (
+   <Authenticator components={customComponents}>
      <Component {...pageProps} />
    </Authenticator>
  )
}
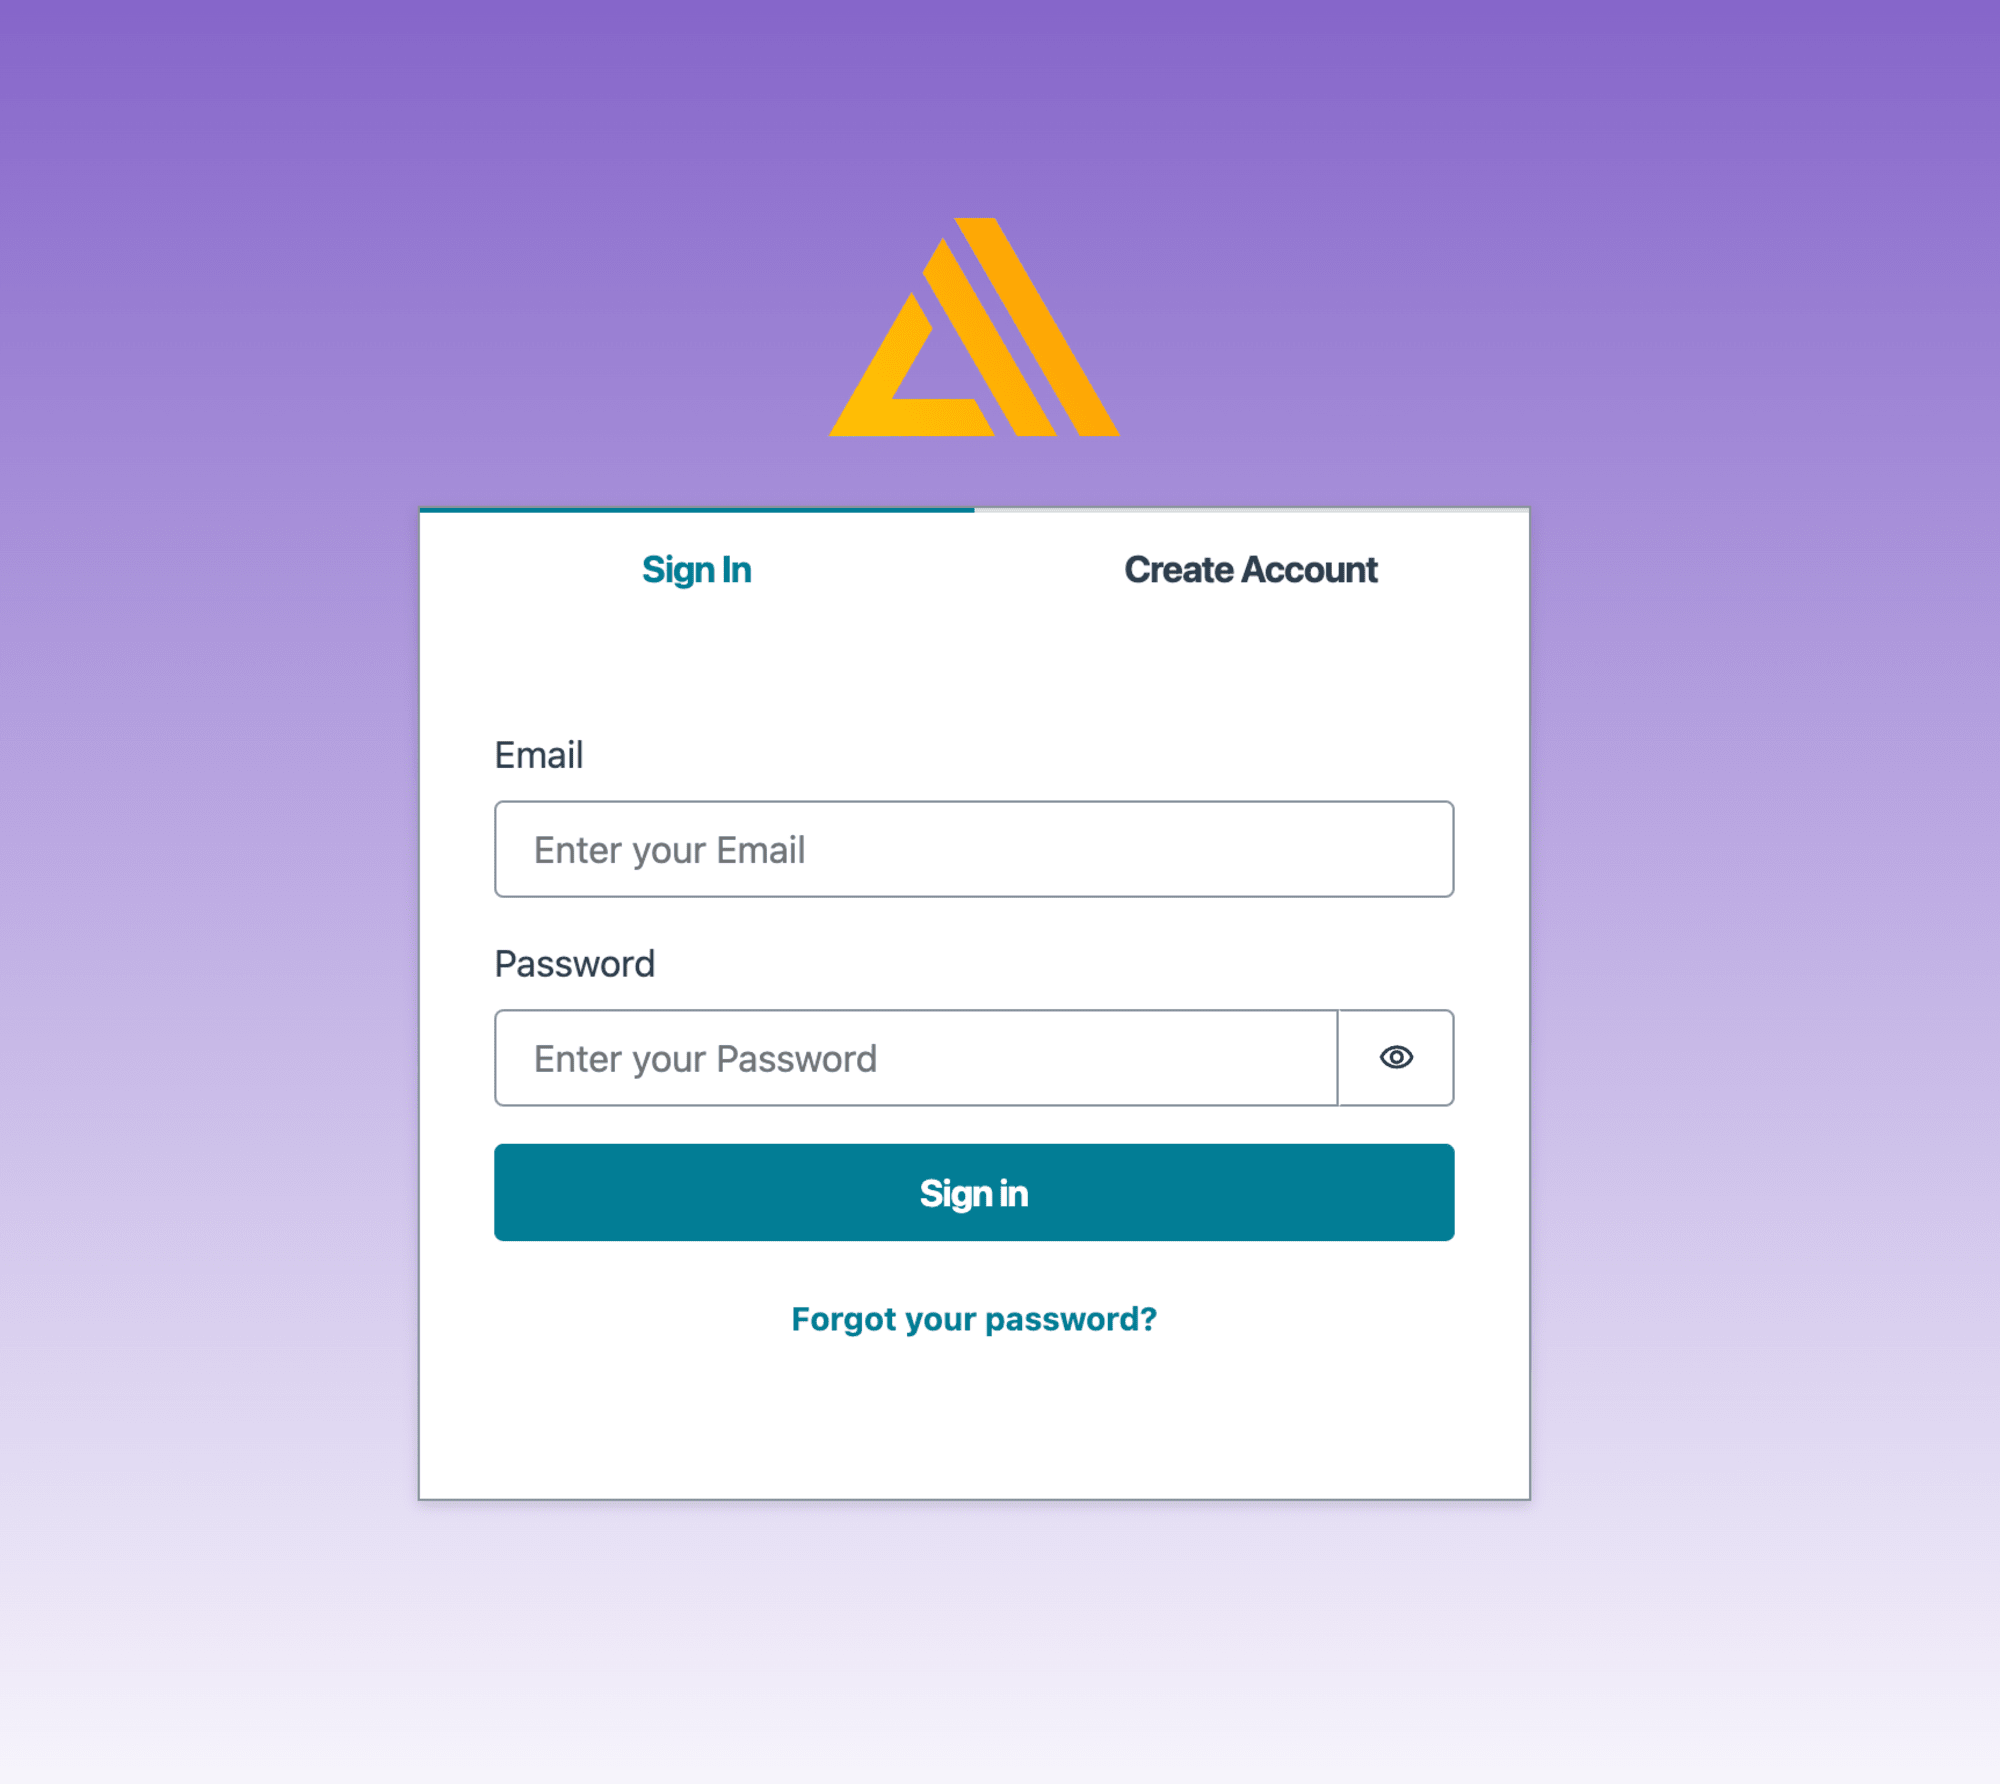
ロゴが入りました
日本語化対応をしてみる
import "@/styles/app.css"
import outputs from "@/amplify_outputs.json"
import { Authenticator, View, useTheme } from "@aws-amplify/ui-react"
import { Amplify } from "aws-amplify"
+ import { I18n } from "aws-amplify/utils"
+ import { translations } from "@aws-amplify/ui-react"
import type { AppProps } from "next/app"
import "@aws-amplify/ui-react/styles.css"

Amplify.configure(outputs)

+ I18n.setLanguage("ja")
+ I18n.putVocabularies(translations)

const uiComponents = {
  Header() {
    const { tokens } = useTheme()

    return (
      <View textAlign="center" padding={tokens.space.large}>
        <img
          alt="Amplify logo"
          src="https://docs.amplify.aws/assets/logo-dark.svg"
        />
      </View>
    )
  }
}

export default function App({ Component, pageProps }: AppProps) {
  return (
    <Authenticator components={uiComponents}>
      <Component {...pageProps} />
    </Authenticator>
  )
}
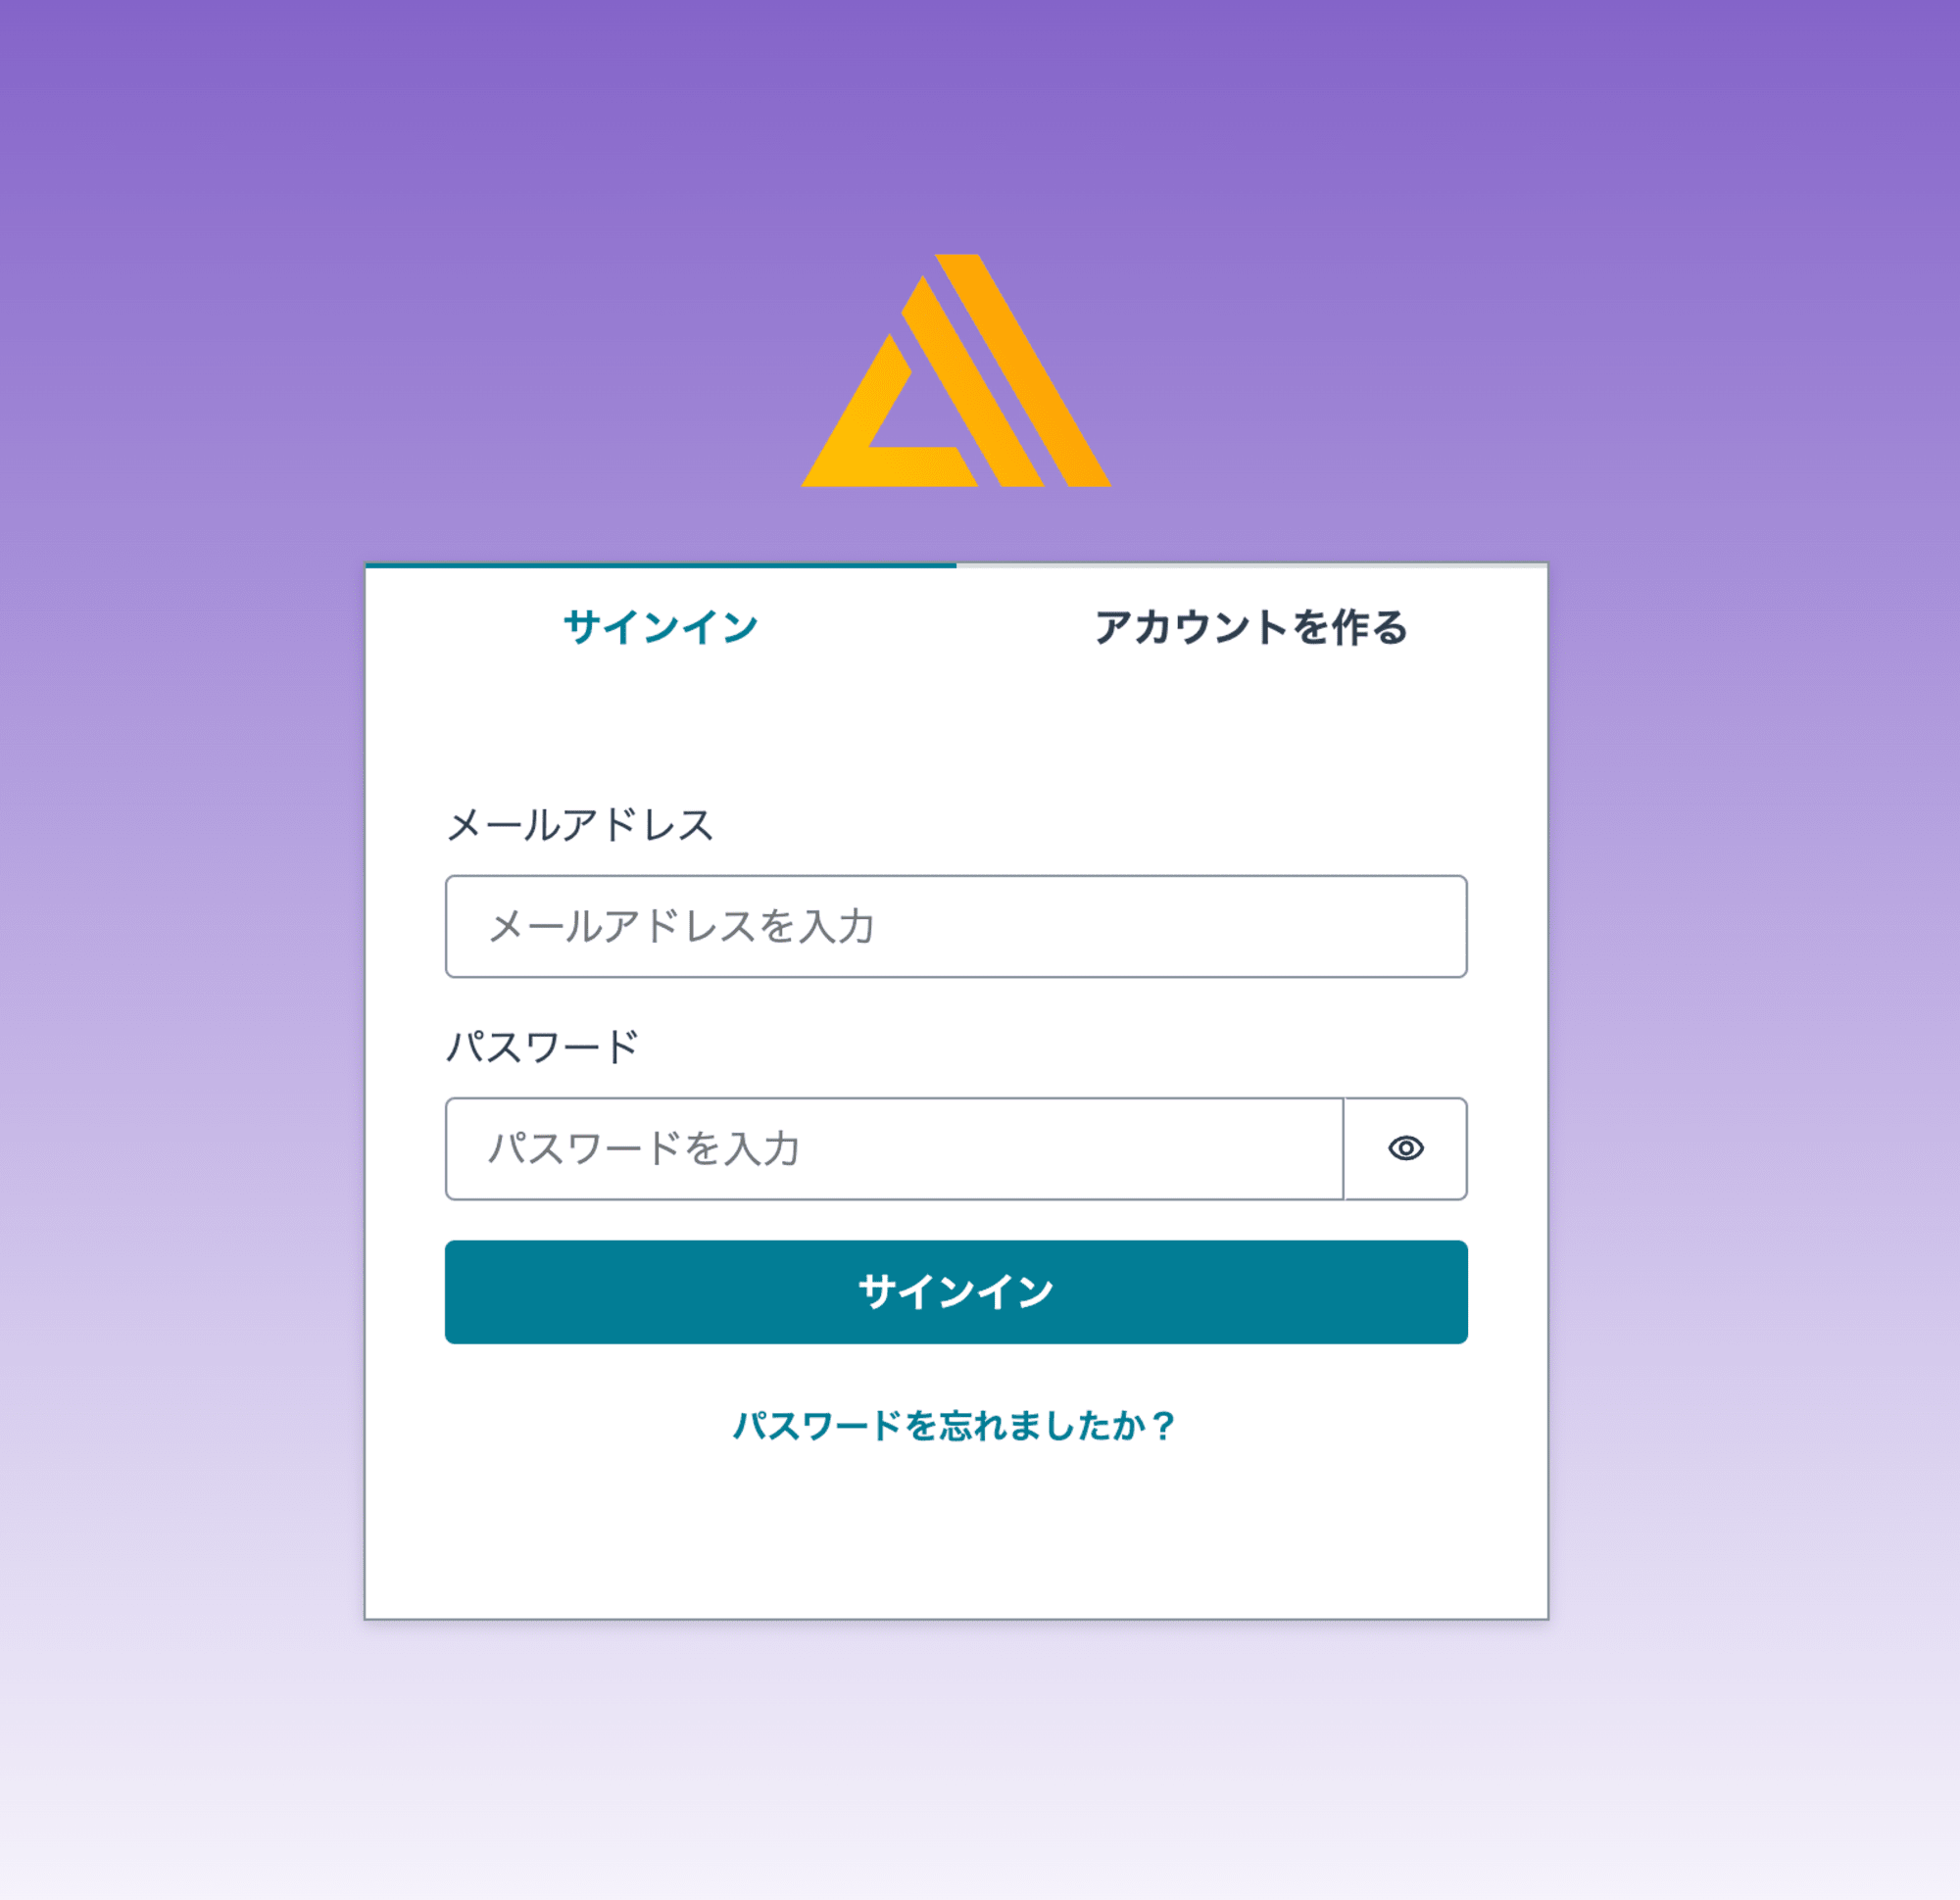
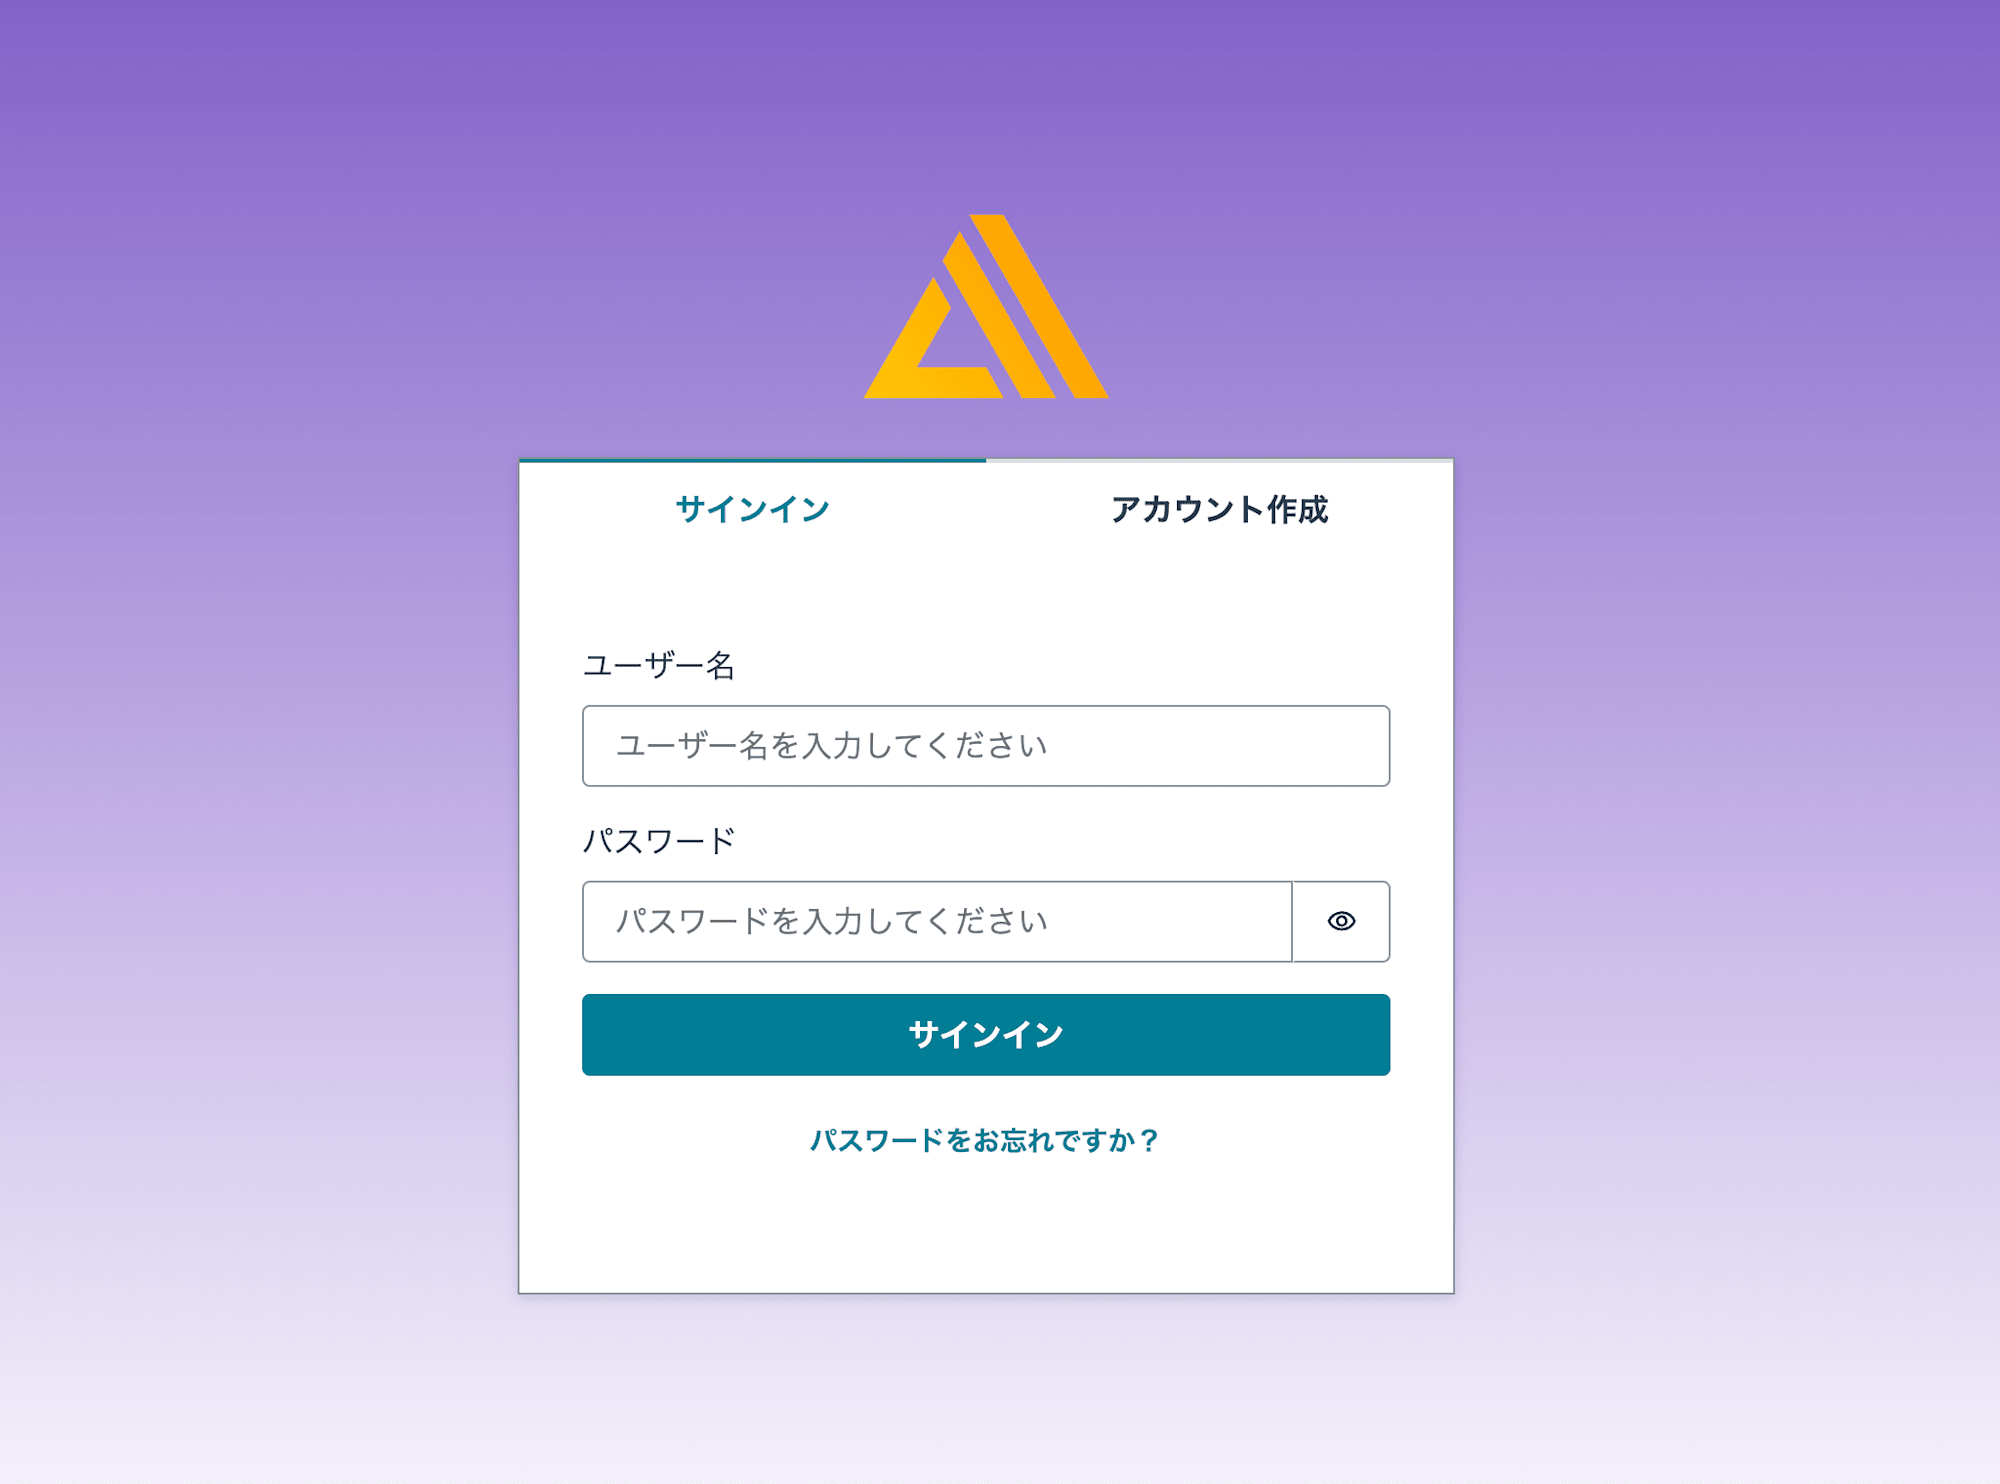
日本語化対応ができました
この状態でも良いと思いますが、細かく修正したい場合は以下のように対応できます
import "@/styles/app.css"
import outputs from "@/amplify_outputs.json"
import { Authenticator, View, useTheme } from "@aws-amplify/ui-react"
import { I18n } from "aws-amplify/utils"
import type { AppProps } from "next/app"
import "@aws-amplify/ui-react/styles.css"
import { Amplify } from "aws-amplify"

Amplify.configure(outputs)

I18n.setLanguage("ja")
+ I18n.putVocabularies({
+  ja: {
+    "Create Account": "アカウント作成",
+    "Sign In": "サインイン",
+    Username: "ユーザー名",
+    "Enter your Username": "ユーザー名を入力してください",
+    Password: "パスワード",
+    "Enter your Password": "パスワードを入力してください",
+    "Sign in": "サインイン",
+    "Forgot your password?": "パスワードをお忘れですか?"
+  }
+})

const uiComponents = {
  Header() {
    const { tokens } = useTheme()

    return (
      <View textAlign="center" padding={tokens.space.large}>
        <img
          alt="Amplify logo"
          src="https://docs.amplify.aws/assets/logo-dark.svg"
        />
      </View>
    )
  }
}

export default function App({ Component, pageProps }: AppProps) {
  return (
    <Authenticator components={uiComponents}>
      <Component {...pageProps} />
    </Authenticator>
  )
}
フォームを増やしてみる
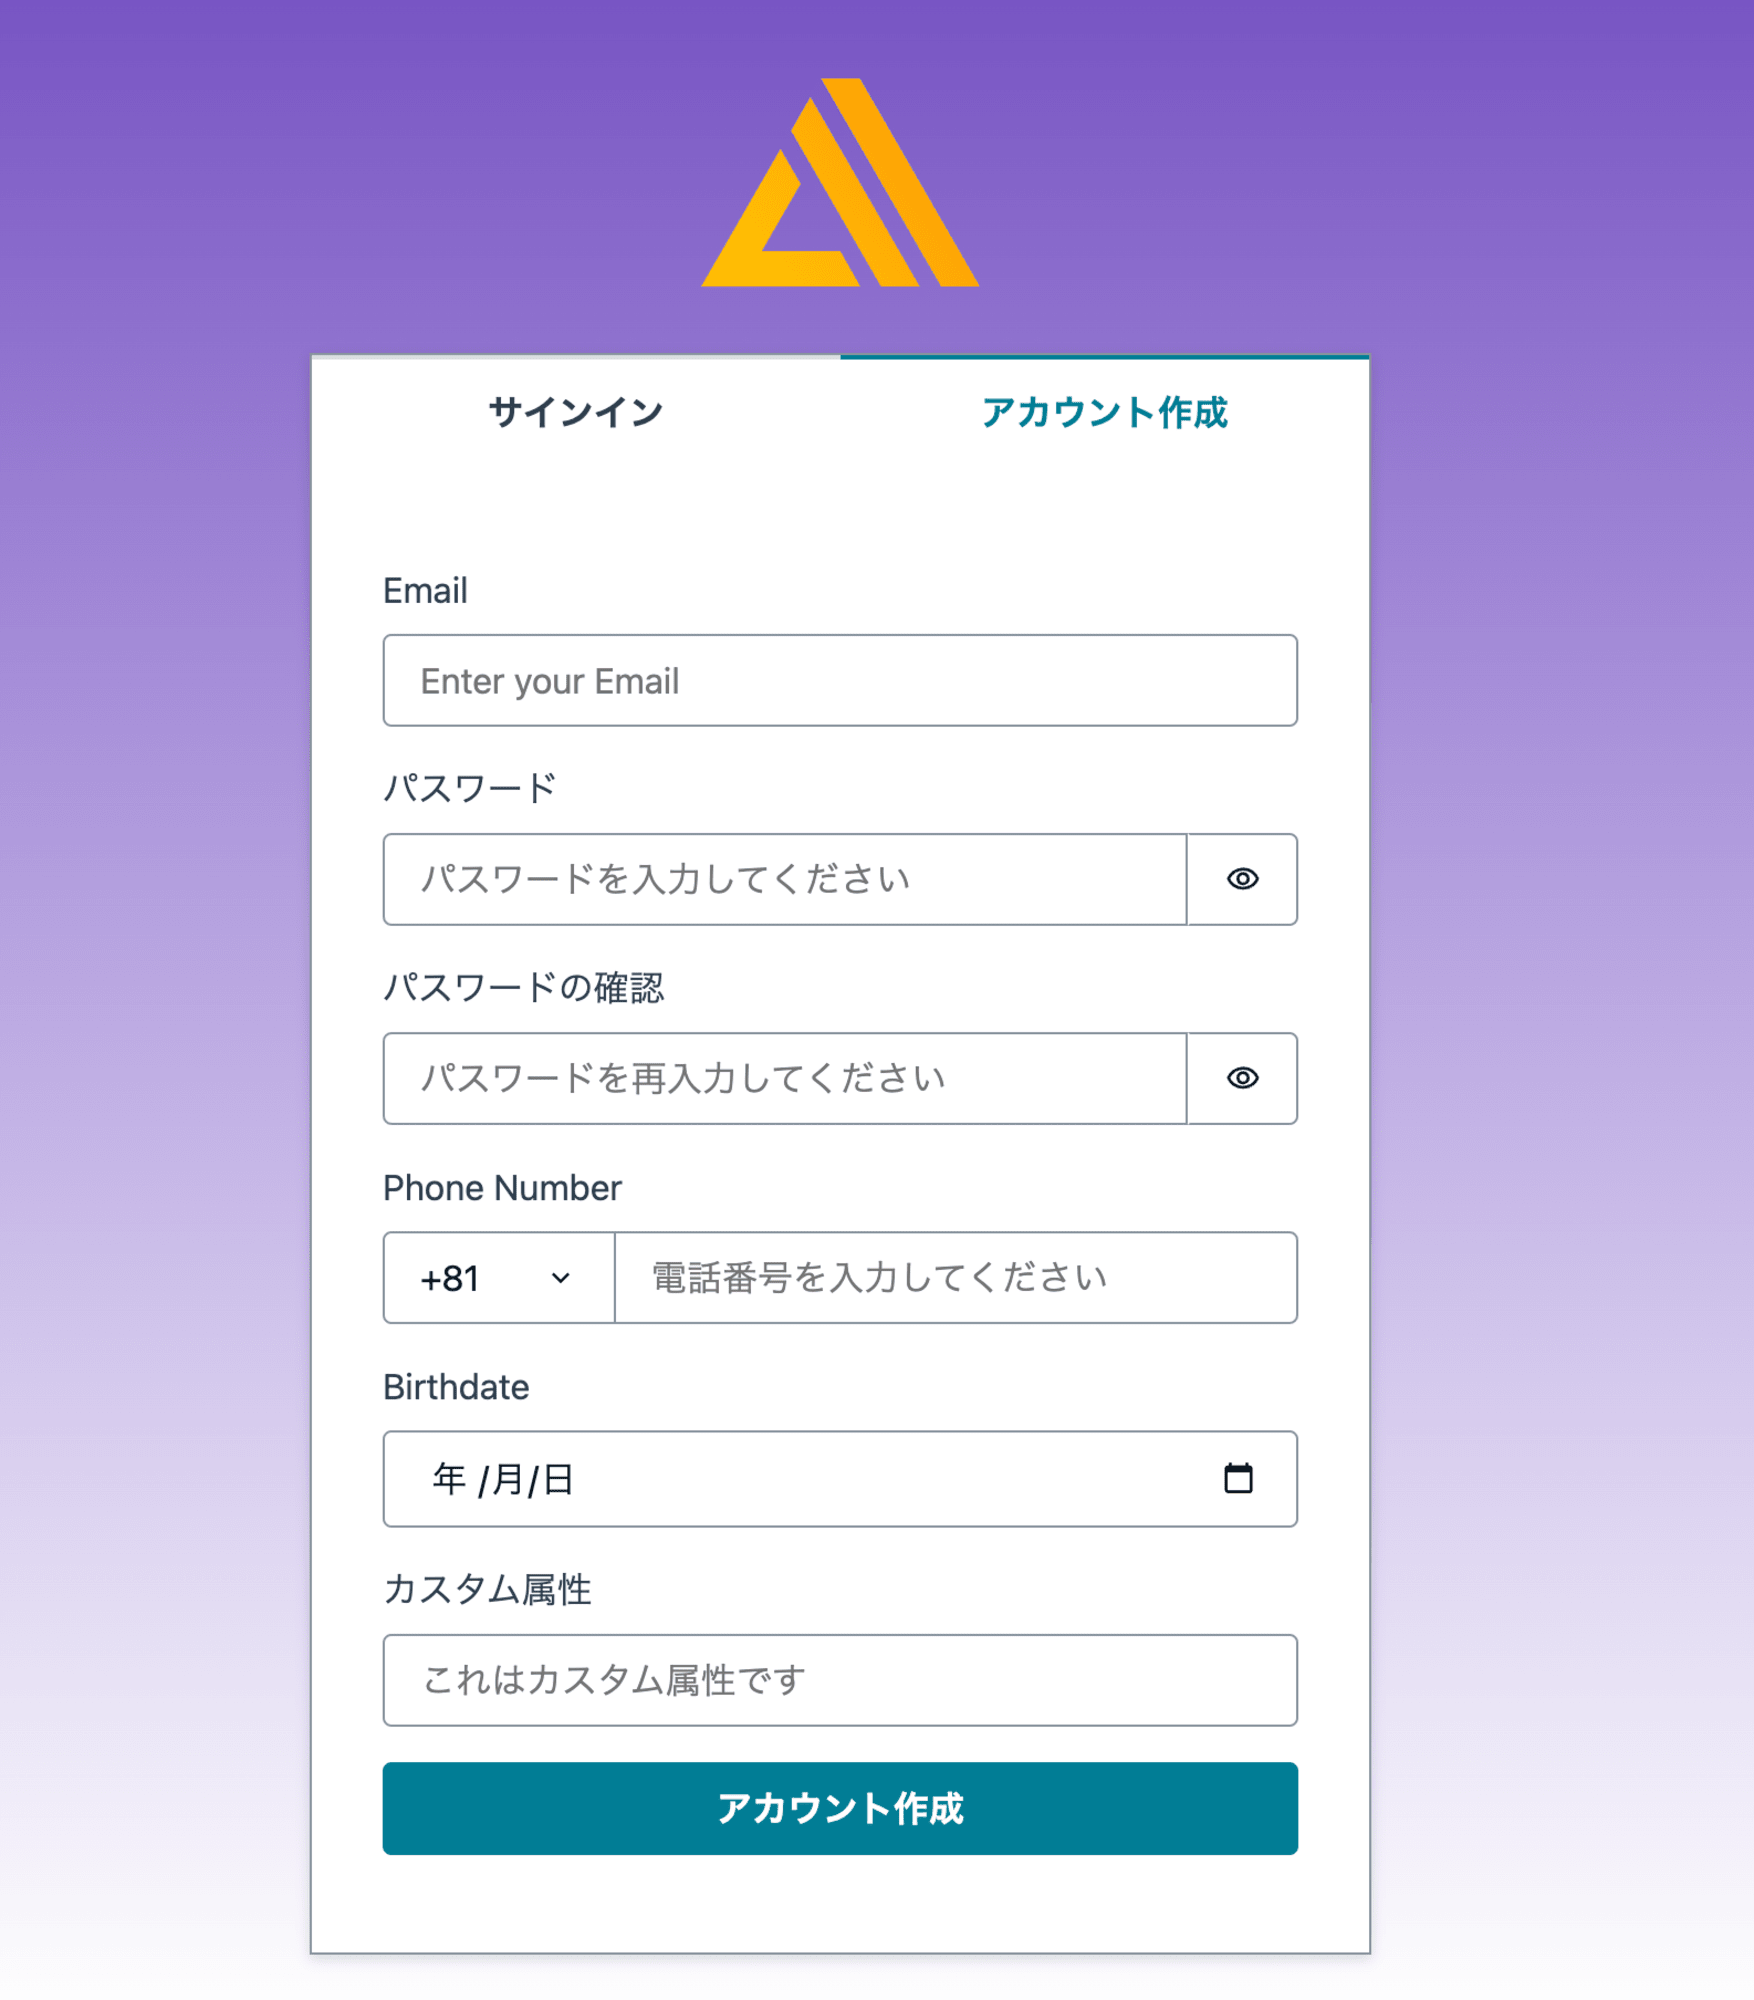
アカウント作成時のフォームを増やしたい場合は下記のように対応できます
phone_numberやbirthdateはCognitoの標準属性で、対応するUIも一緒に実装されます
また事前にCognitoの設定が必要にはなりますが、カスタム属性を追加した例も記載しました
これらはCognito Userのユーザー属性として保存されます
import "@/styles/app.css"
import outputs from "@/amplify_outputs.json"
import {
  Authenticator,
  Placeholder,
  View,
  useTheme
} from "@aws-amplify/ui-react"
import { I18n } from "aws-amplify/utils"
import type { AppProps } from "next/app"
import "@aws-amplify/ui-react/styles.css"
import { Amplify } from "aws-amplify"

Amplify.configure(outputs)

~省略~

const uiComponents = {
  Header() {
    const { tokens } = useTheme()

    return (
      <View textAlign="center" padding={tokens.space.large}>
        <img
          alt="Amplify logo"
          src="https://docs.amplify.aws/assets/logo-dark.svg"
        />
      </View>
    )
  }
}

+ const formFields = {
+   signUp: {
+     phone_number: {
+       placeholder: "電話番号を入力してください",
+       dialCode: "+81",
+     },
+     birthdate: {},
+    "custom:custom_attribute": {
+      placeholder: "これはカスタム属性です",
+      isRequired: true,
+      label: "カスタム属性"
+    }
+   }
+ }

export default function App({ Component, pageProps }: AppProps) {
  return (
    <Authenticator formFields={formFields} components={uiComponents}>
      <Component {...pageProps} />
    </Authenticator>
  )
}
他にもよく見かける規約に同意するといったチェックボックスの追加も可能です
その他の機能(抜粋)
など様々な用途に対応するコンポーネントが用意されています
最後に
今回はAmplify UIを使ってサインイン/アカウント作成画面をさくっと作成してみました。
Amplifyは個人的に好きなサービスのため、他のAmplify UIの機能紹介、Amplify Gen2の紹介もしていきたいと思っています。
どなたかの参考になれば幸いです。

