Spring 5.0 + Kotlin + WebFluxをさくっと動かす
この記事は公開されてから1年以上経過しています。情報が古い可能性がありますので、ご注意ください。
Spring 5.0がWebFluxとKotlinサポートに対応
少し前にSpring5.0がリリースされ、WebFlux(リアクティブプログラミングによるノンブロッキングアプリを開発するためのフレームワーク)やKotlinのサポートが新たに追加されました。
ここでは今後いろいろと試してみるためにも、Spring 5.0をつかったRESTサーバを速攻で構築してみます。
環境
今回使用した動作環境は以下のとおりです。
- OS : MacOS X 10.12.4
- Java : 1.8.0_121-b13
- Gradle : 4.2
プロジェクト作成~動作確認
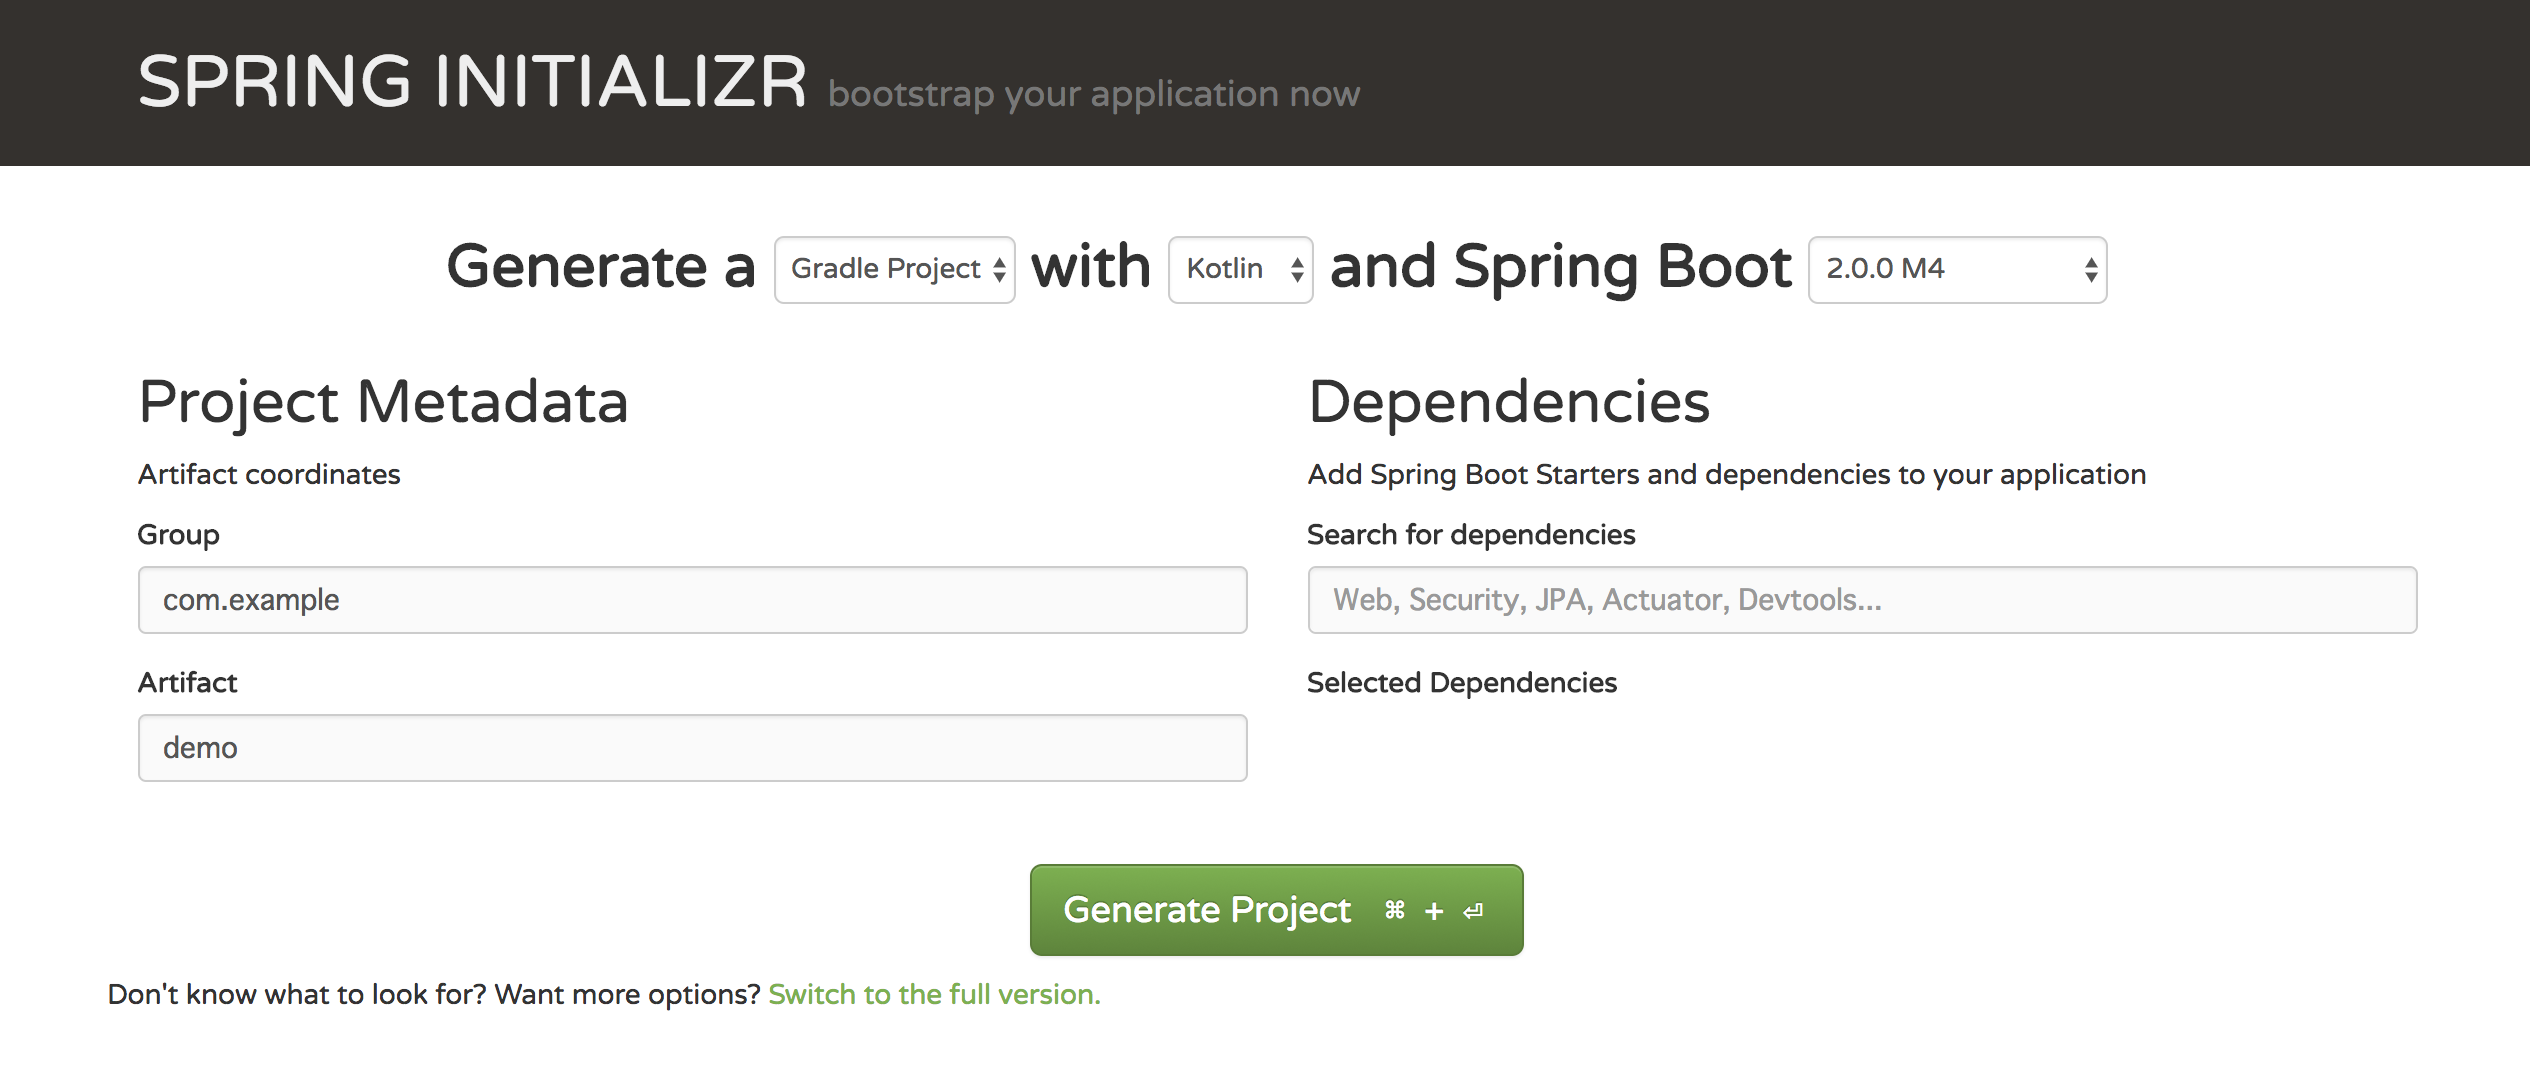
面倒なプロジェクト雛形作成はSpring Initializrを使って作成してしまいましょう。
ここで、Gradle Project,Kotlin,Spring Bootは2.0を選択してGenerate Projectボタンをクリック。

作成したプロジェクトを展開し、build.gradleのdependenciesを下記のように修正します。
dependencies {
    compile('org.springframework.boot:spring-boot-starter')
    compile("org.jetbrains.kotlin:kotlin-stdlib-jre8:${kotlinVersion}")
    compile("org.jetbrains.kotlin:kotlin-reflect:${kotlinVersion}")
    compile group: 'org.springframework.boot', name: 'spring-boot-starter-web', version: '2.0.0.M3'
    compile group: 'org.springframework.boot', name: 'spring-boot-starter-webflux', version: '2.0.0.M3'
    compile group: 'org.springframework', name: 'spring-core', version: '5.0.0.RELEASE'
    compile group: 'org.springframework', name: 'spring-web', version: '5.0.0.RELEASE'
    compile group: 'org.springframework', name: 'spring-context', version: '5.0.0.RELEASE'
    compile group: 'org.springframework', name: 'spring-webmvc', version: '5.0.0.RELEASE'
    compile group: 'com.fasterxml.jackson.core', name: 'jackson-databind', version: '2.9.1'
    compile group: 'com.fasterxml.jackson.core', name: 'jackson-core', version: '2.9.1'
    compile group: 'com.fasterxml.jackson.core', name: 'jackson-annotations', version: '2.9.1'
}
次に、src/main/kotlin/DemoApplication.ktを次のように修正します。
package com.example.demo

import org.springframework.boot.WebApplicationType
import org.springframework.boot.autoconfigure.SpringBootApplication
import org.springframework.boot.builder.SpringApplicationBuilder

@SpringBootApplication
class DemoApplication

fun main(args: Array<String>) {
    SpringApplicationBuilder()
            .sources(DemoApplication::class.java)
            .web(WebApplicationType.REACTIVE)
            .run(*args)
}
WebApplicationType.REACTIVEは、
「アプリはリアクティブアプリケーションとして実行する必要があり、組み込みWebサーバーを起動しますよー」って意味です。
そして、routesパッケージを作成し、Router.ktを作成。
package com.example.demo.router

import com.example.demo.handler.Handler
import org.springframework.context.annotation.Bean
import org.springframework.context.annotation.Configuration
import org.springframework.http.MediaType.APPLICATION_JSON
import org.springframework.web.reactive.function.server.router

@Configuration
class Router(private val handler: Handler) {

    @Bean
    fun apis() = router {
        (accept(APPLICATION_JSON)).nest {
            GET("/", handler::getJson)
        }
    }

}
ルートに対してGETリクエストを送ると、指定したハンドラが結果をかえします。
最後にhandlerパッケージを作成し、Handler.ktを下記のように作成します。
package com.example.demo.handler

import org.springframework.http.MediaType
import org.springframework.stereotype.Component
import org.springframework.web.reactive.function.server.ServerRequest
import org.springframework.web.reactive.function.server.ServerResponse
import reactor.core.publisher.Flux
import reactor.core.publisher.Mono

@Component
class Handler {

    fun getJson(req: ServerRequest): Mono<ServerResponse>  {
        return ServerResponse.ok()
                .contentType(MediaType.APPLICATION_JSON_UTF8)
                .body(Flux.just("{\"message\":\"hello\"}"),String::class.java)
    }
}
Json形式のレスポンスを返します。
ではbootRunでアプリを起動してみましょう。問題なければ20秒くらいでサーバがready状態になります。
% cd path/your/project && ./gradlew bootRun
curlを使ってRESTサーバに対してアクセスしてみます。結果がうけとれればOKです。
% curl -X GET 'http://localhost:8080/' -H 'Content-Type: application/json'

{
  "message": "hello"
}
まとめ
今回はSpring 5.0とkotlinを使ってRESTサーバをつくってみました。
これを元にSpeing 5.0/WebFlux/Kotlinをつかっていろいろ試していきましょう。


