Fastly で仮想待合室サービス NetFUNNEL を設定してみた
ウィスキー、シガー、パイプをこよなく愛する大栗です。
最近は仮想待合室サービスである NetFUNNEL 触っていますが、Fastly でも設定してみました。組み込みは結構簡単です。Cloudflare の時と同じような内容となります。
仮想待合室サービス NetFUNNEL
NetFUNNEL は韓国 STCLab 社が提供する仮想待合室サービスです。韓国市場で圧倒的なシェアを誇っています。詳しくは以下のエントリを参照してください。
やってみる
Cloudflare を使用する場合のエントリとほぼ同じ構成となります。
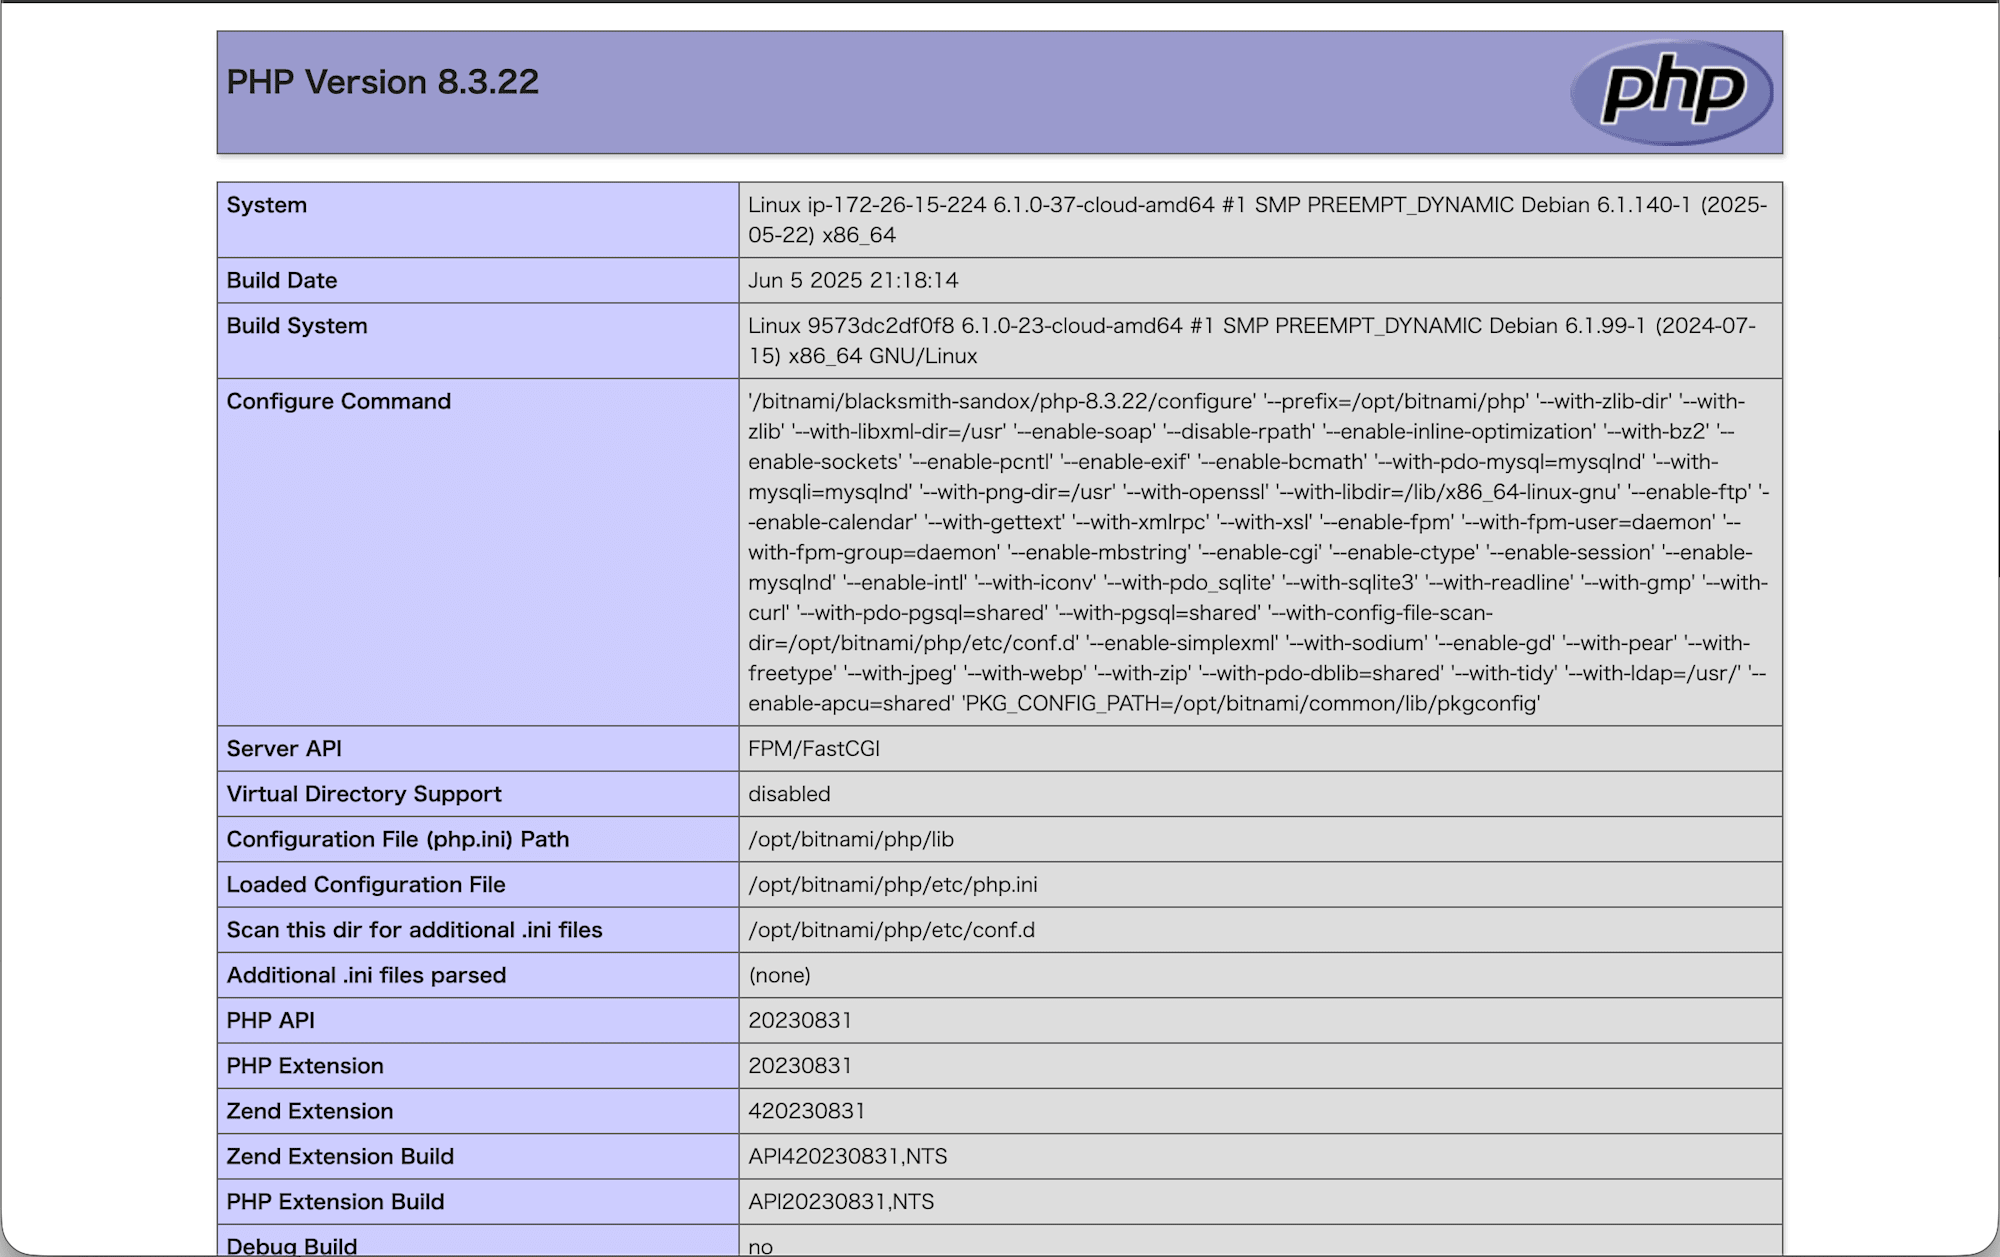
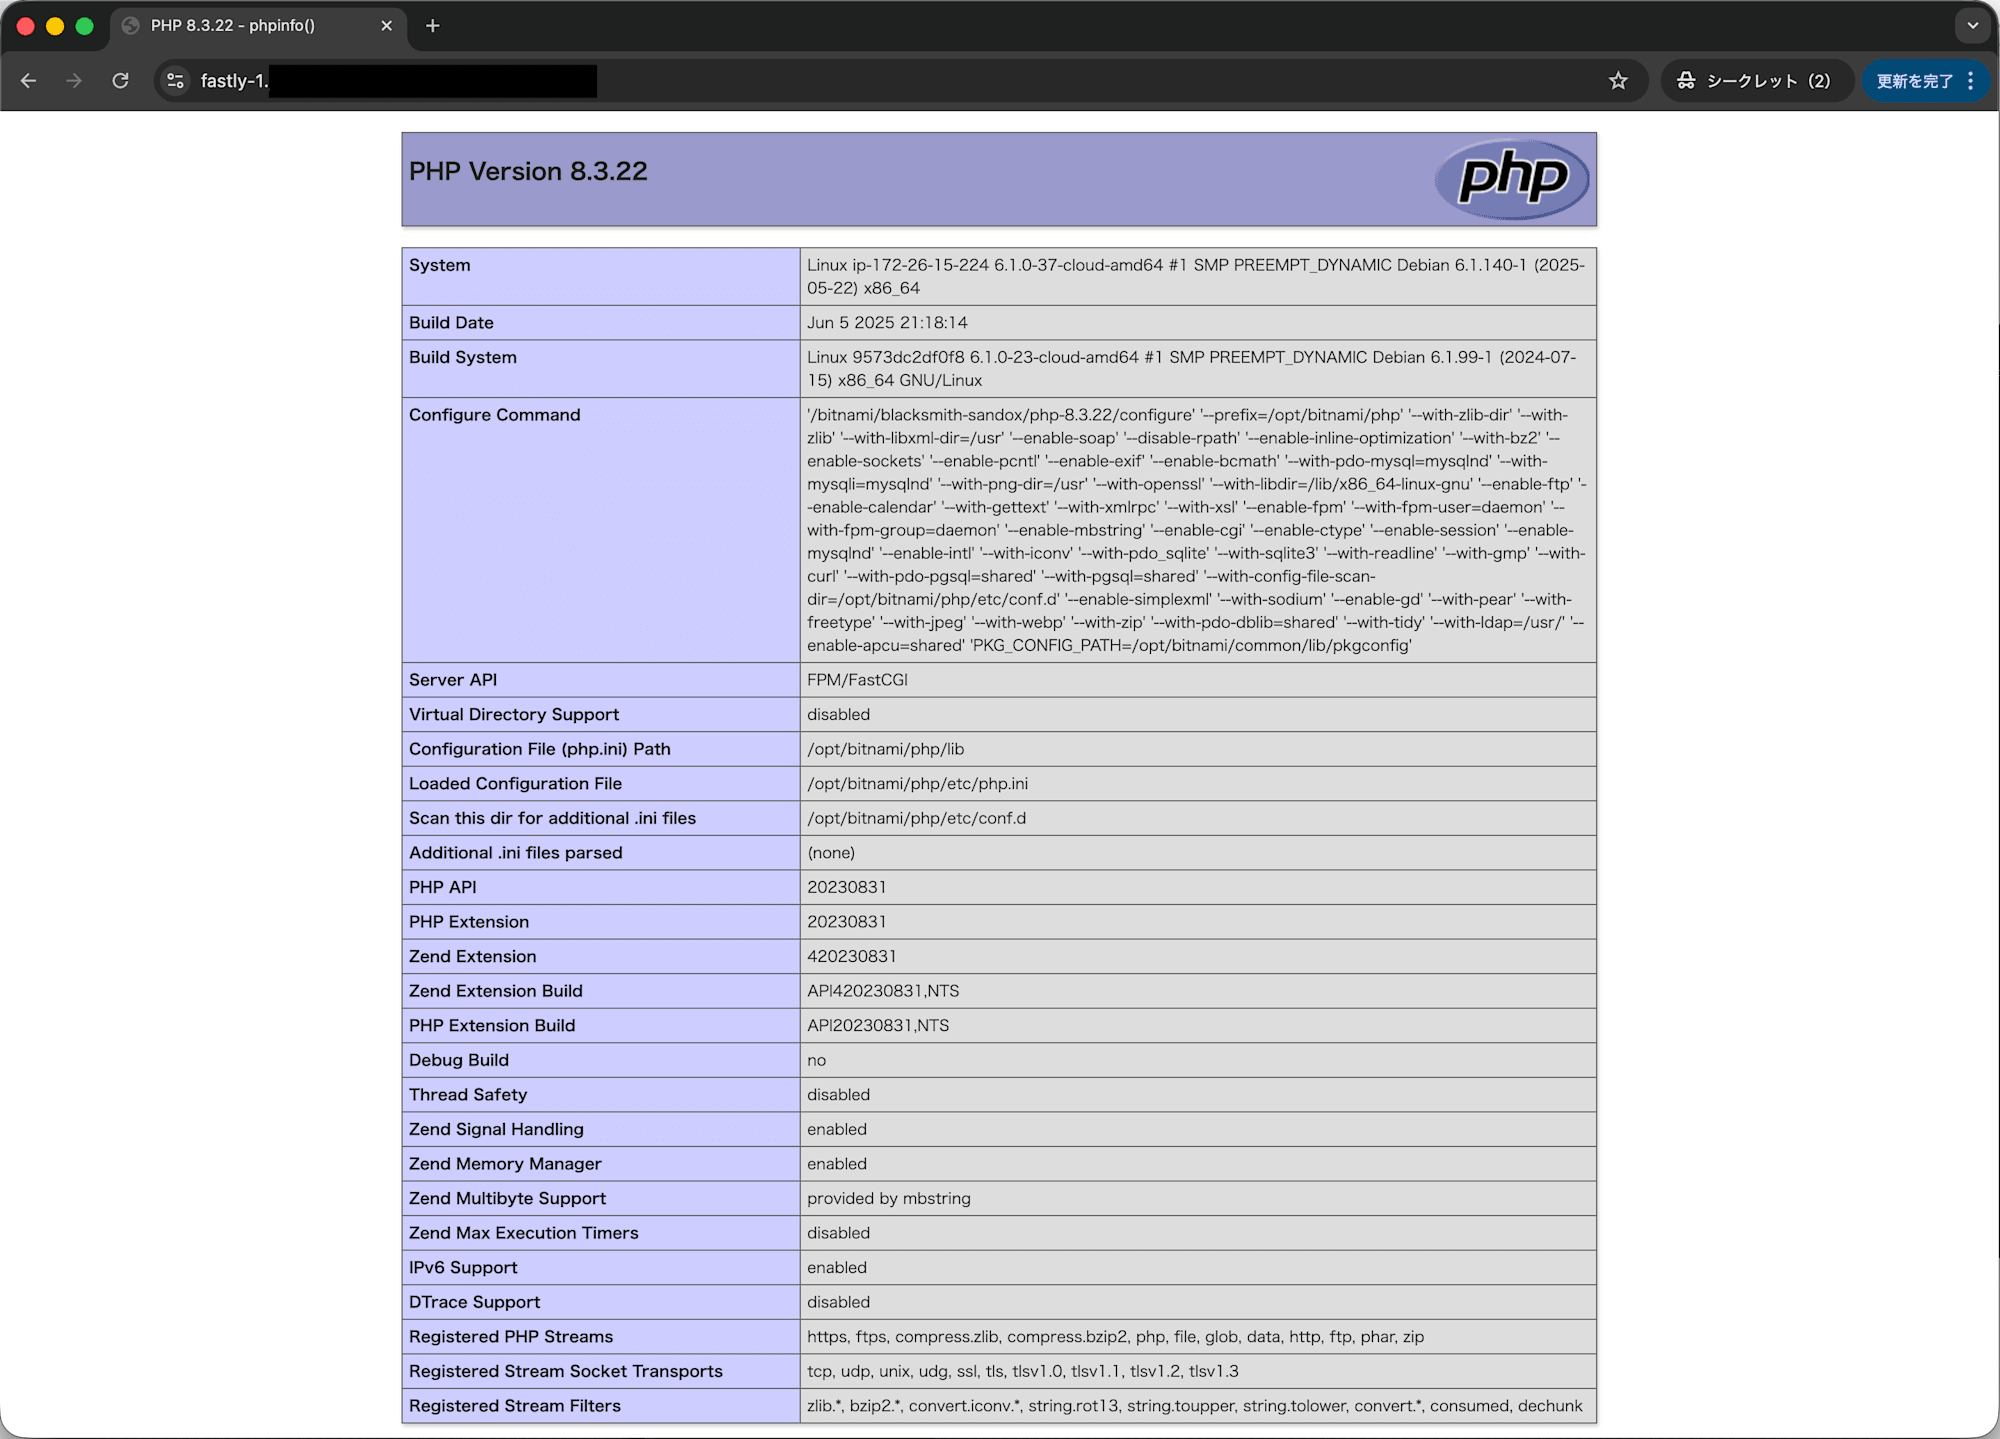
使用するドメインは、Fastly を使用していない状態を前提とします。コンテンツとしては Bitnami の LAMP サーバーで phpinfo() を表示しているだけです。
以下を想定しています。
- 対象ドメイン:fastly-1.example.com
- オリジンサーバー:203.0.113.1
- 制御タイプ:基本制御
- 侵入制御モデル:変動進入型
NetFUNNEL プロジェクト作成
こちらのエントリを元に NetFUNNEL のプロジェクトを作成しておきます。
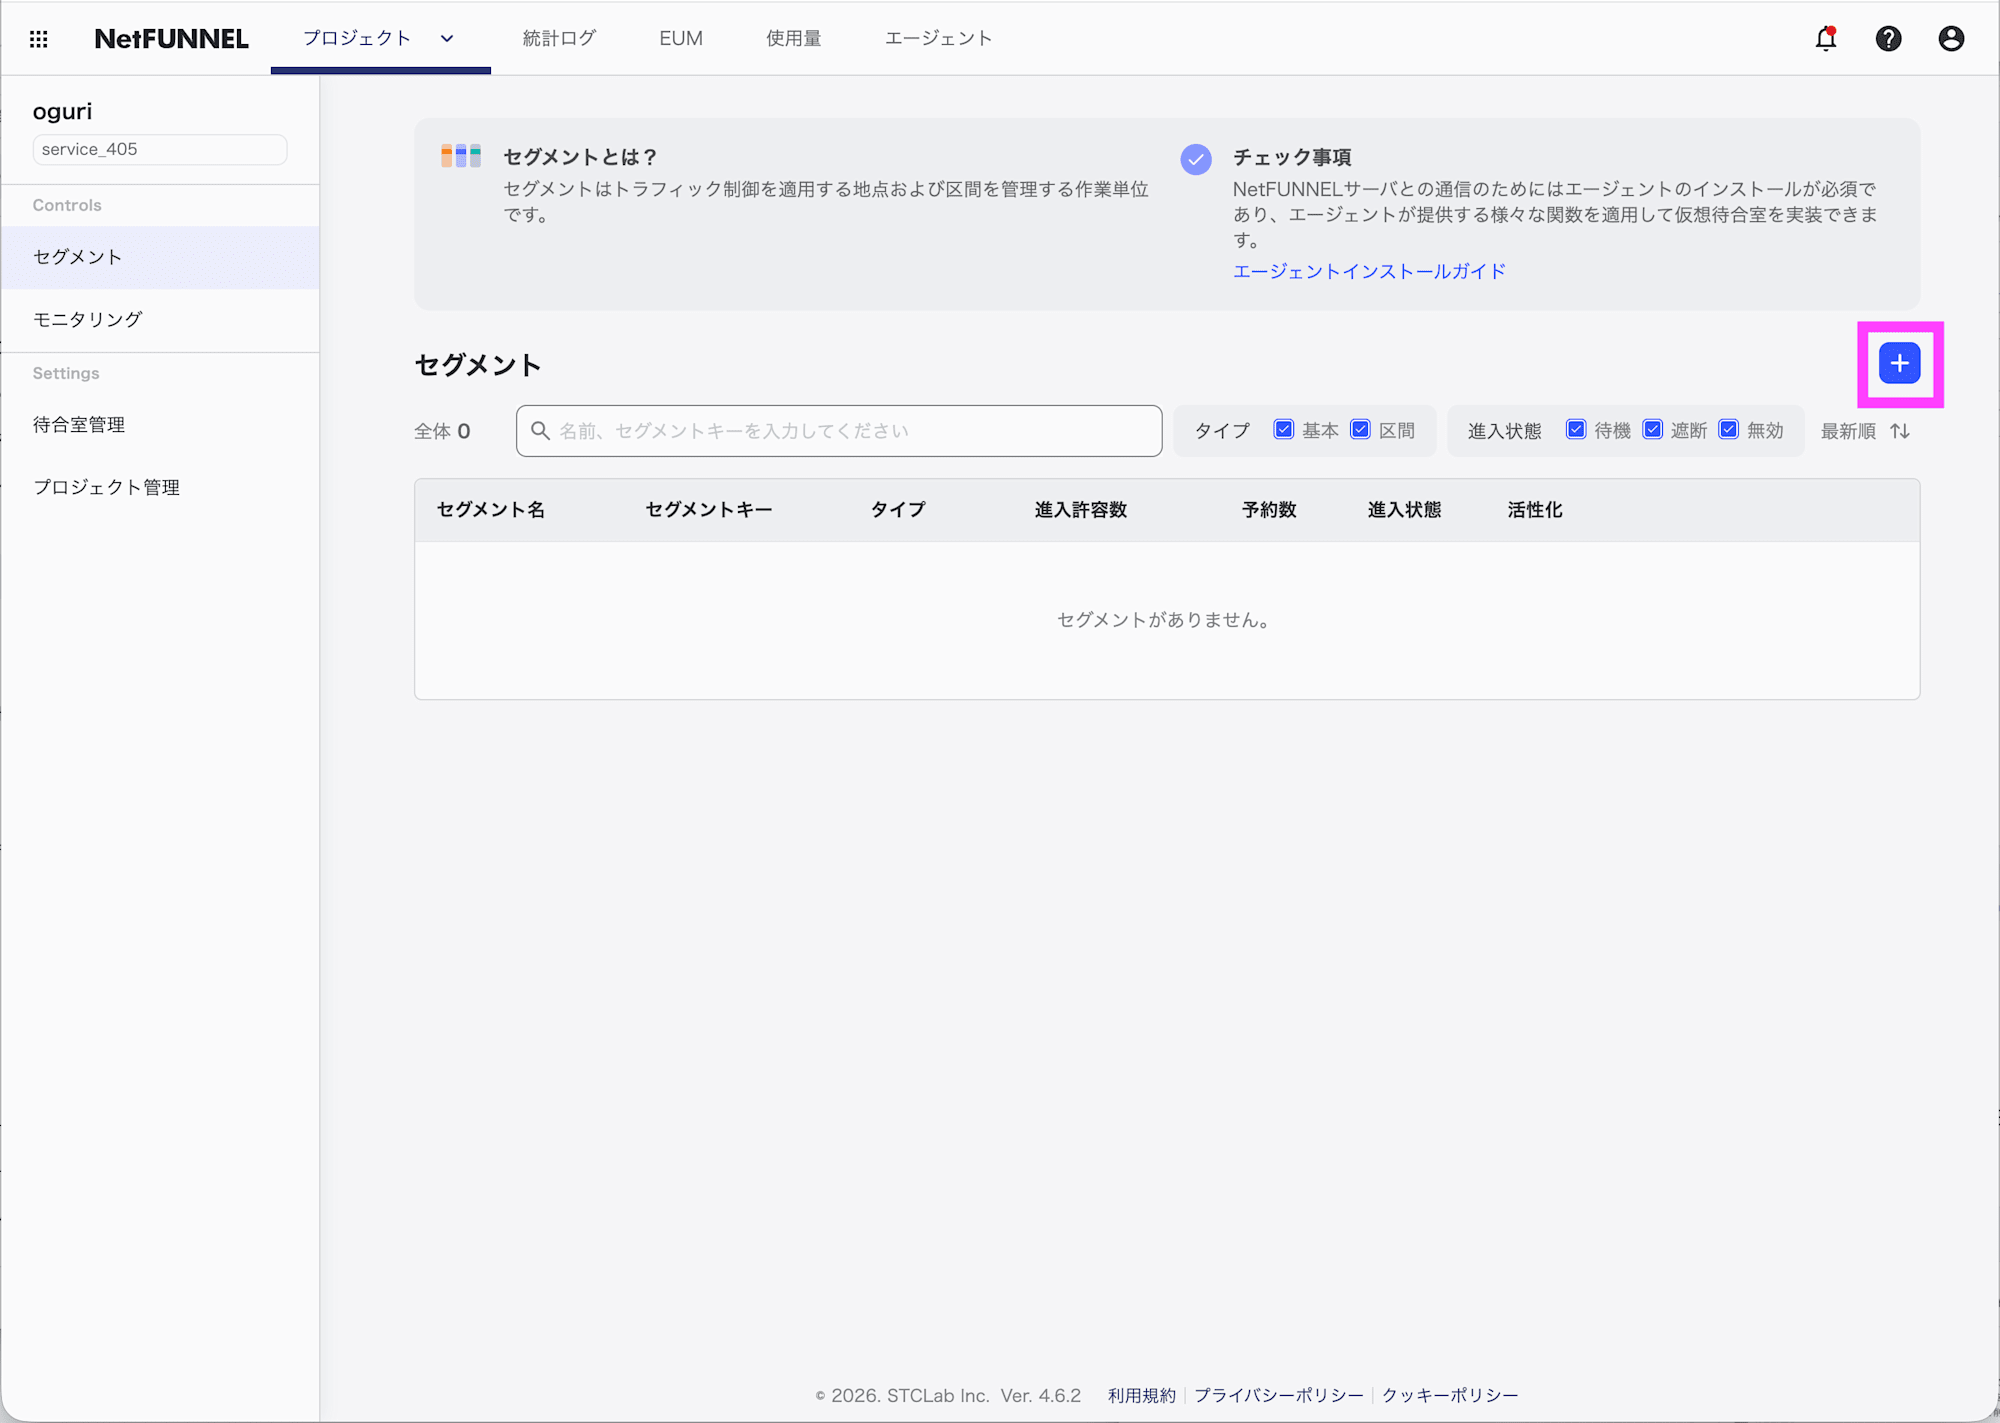
NetFUNNEL セグメント作成
対象プロジェクトの [セグメント] で、+をクリックします。
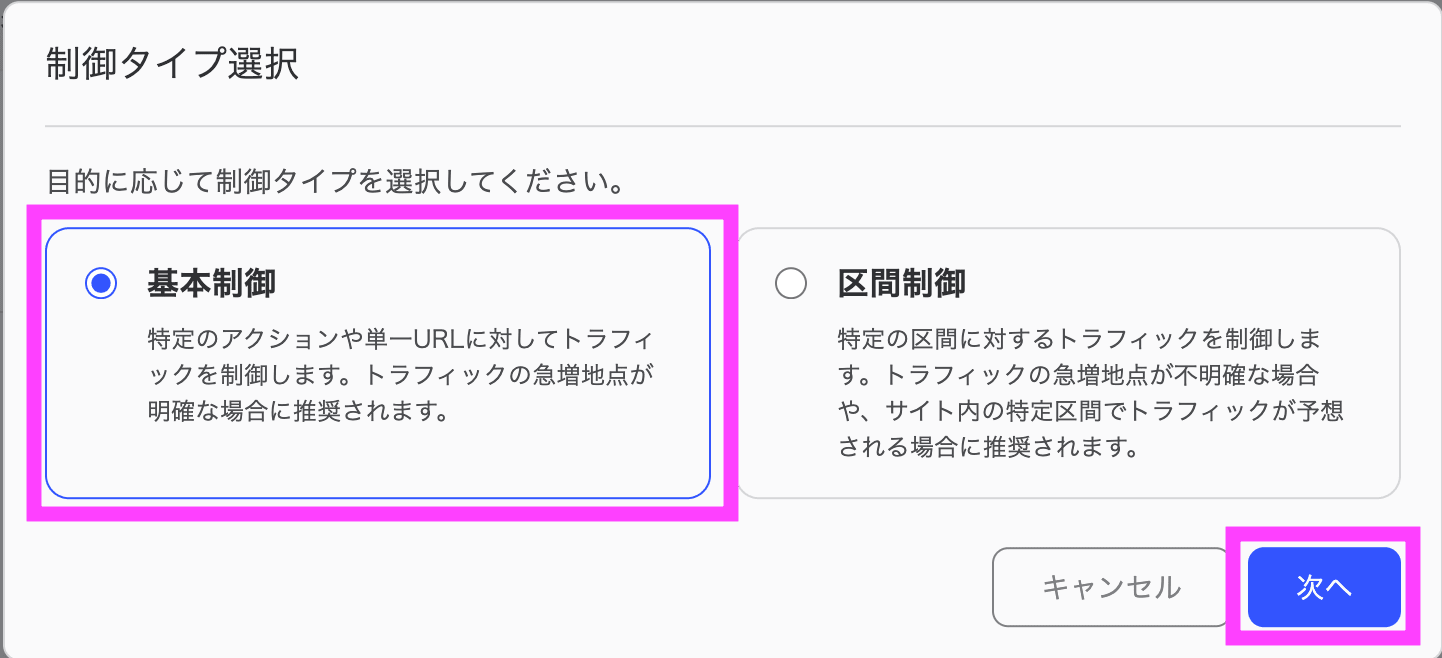
制御タイプを選択します。ここでは基本制御を選択しました。次へをクリックします。
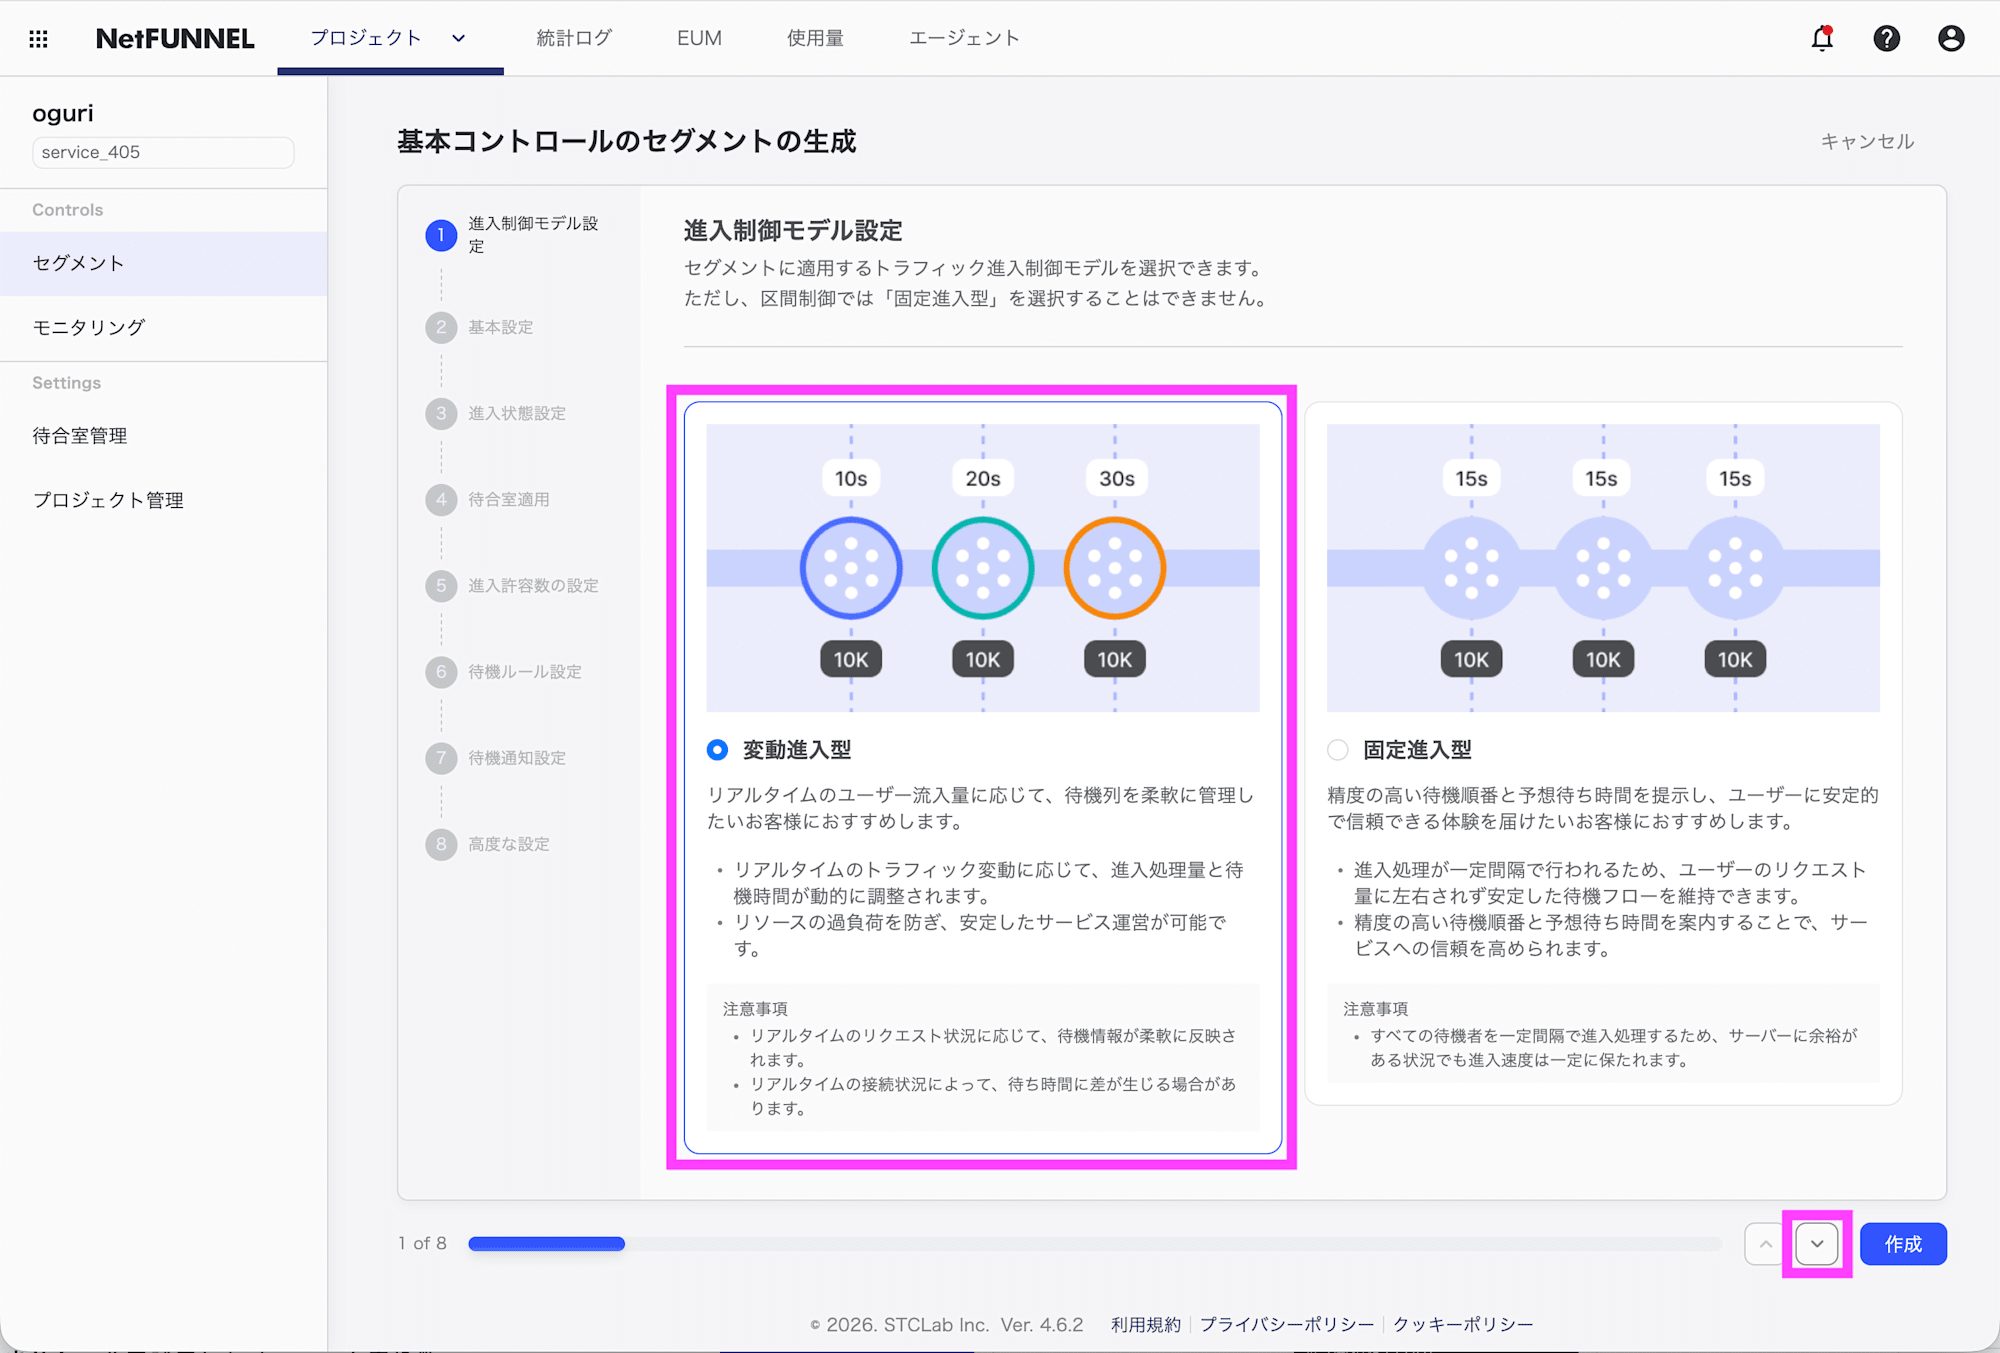
侵入制御モデルを選択します。ここでは変動進入型を選択します。⌄をクリックします。
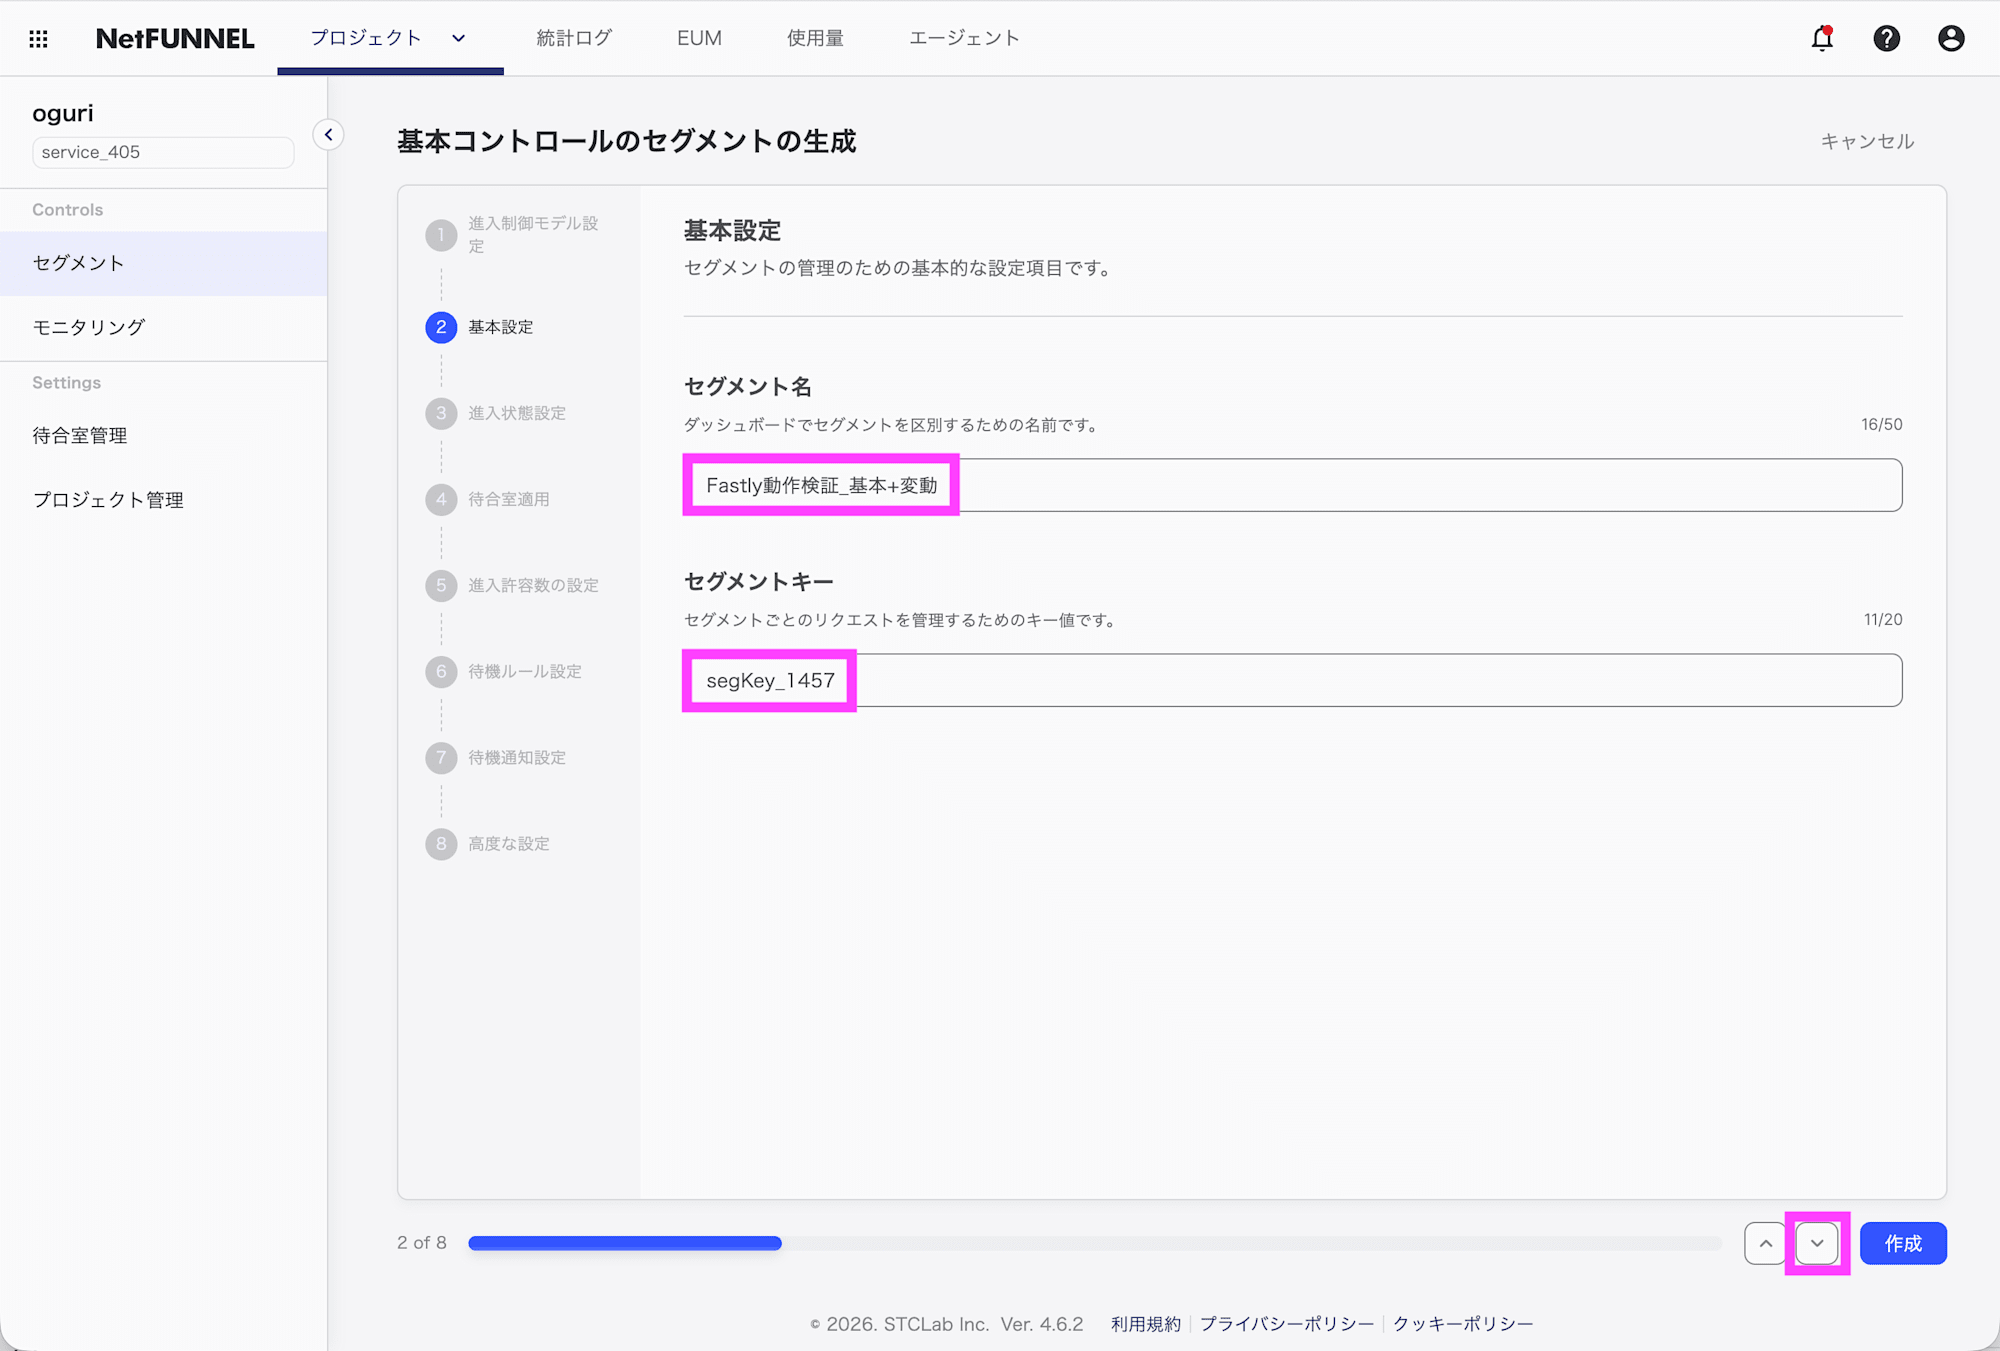
セグメント名とセグメントキーを入力します。⌄をクリックします。
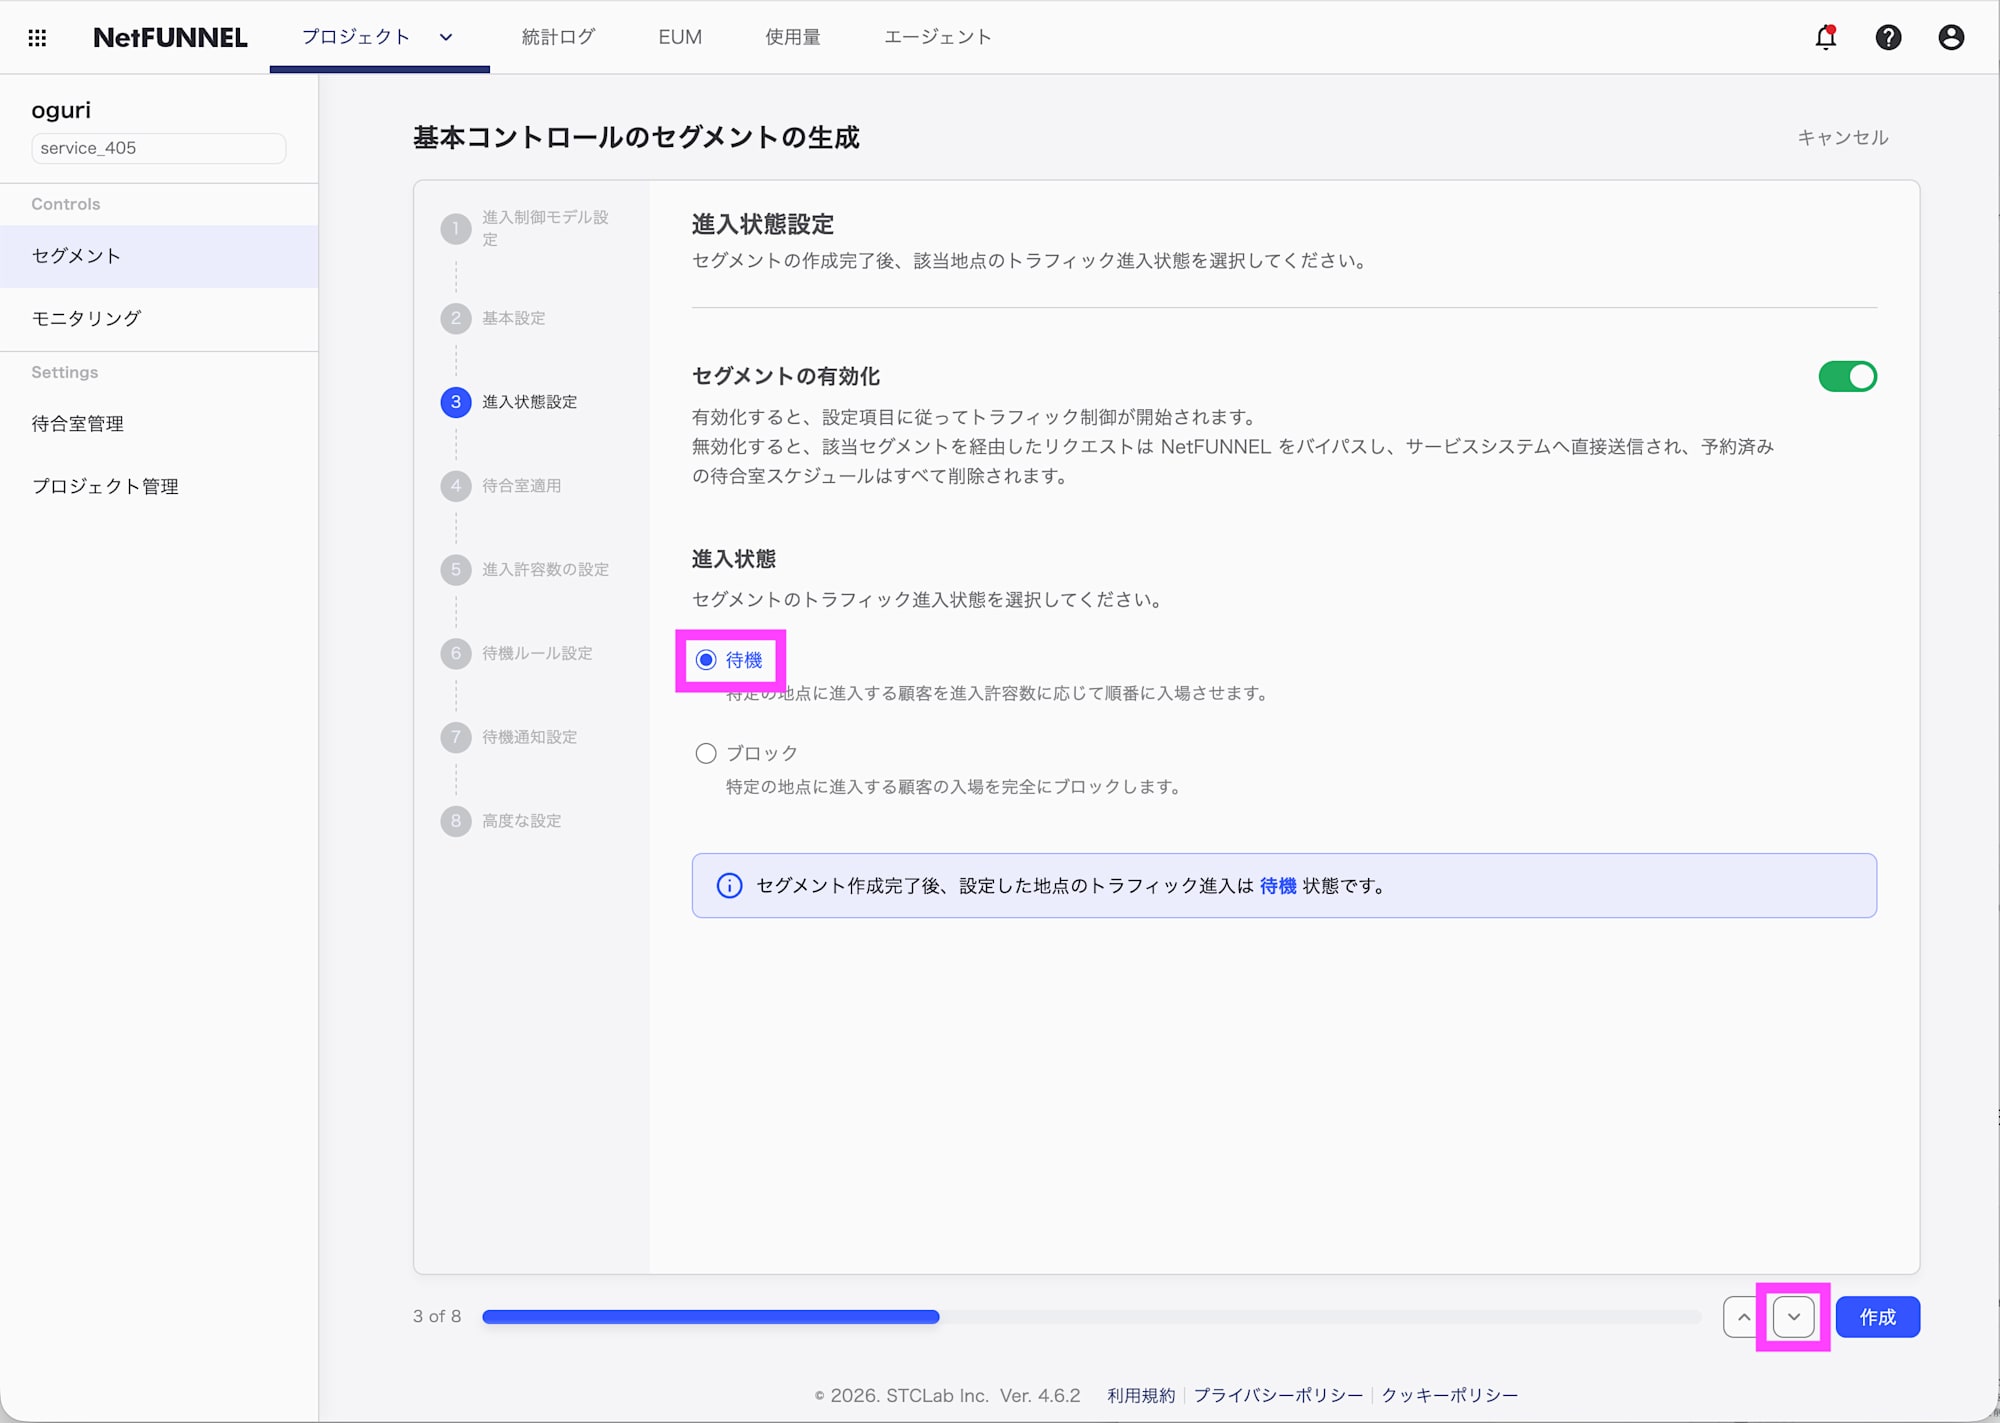
進入状態を選択します。ここでは待機を選択します。ブロックを選択するとブロックルームの画面が表示されます。⌄をクリックします。
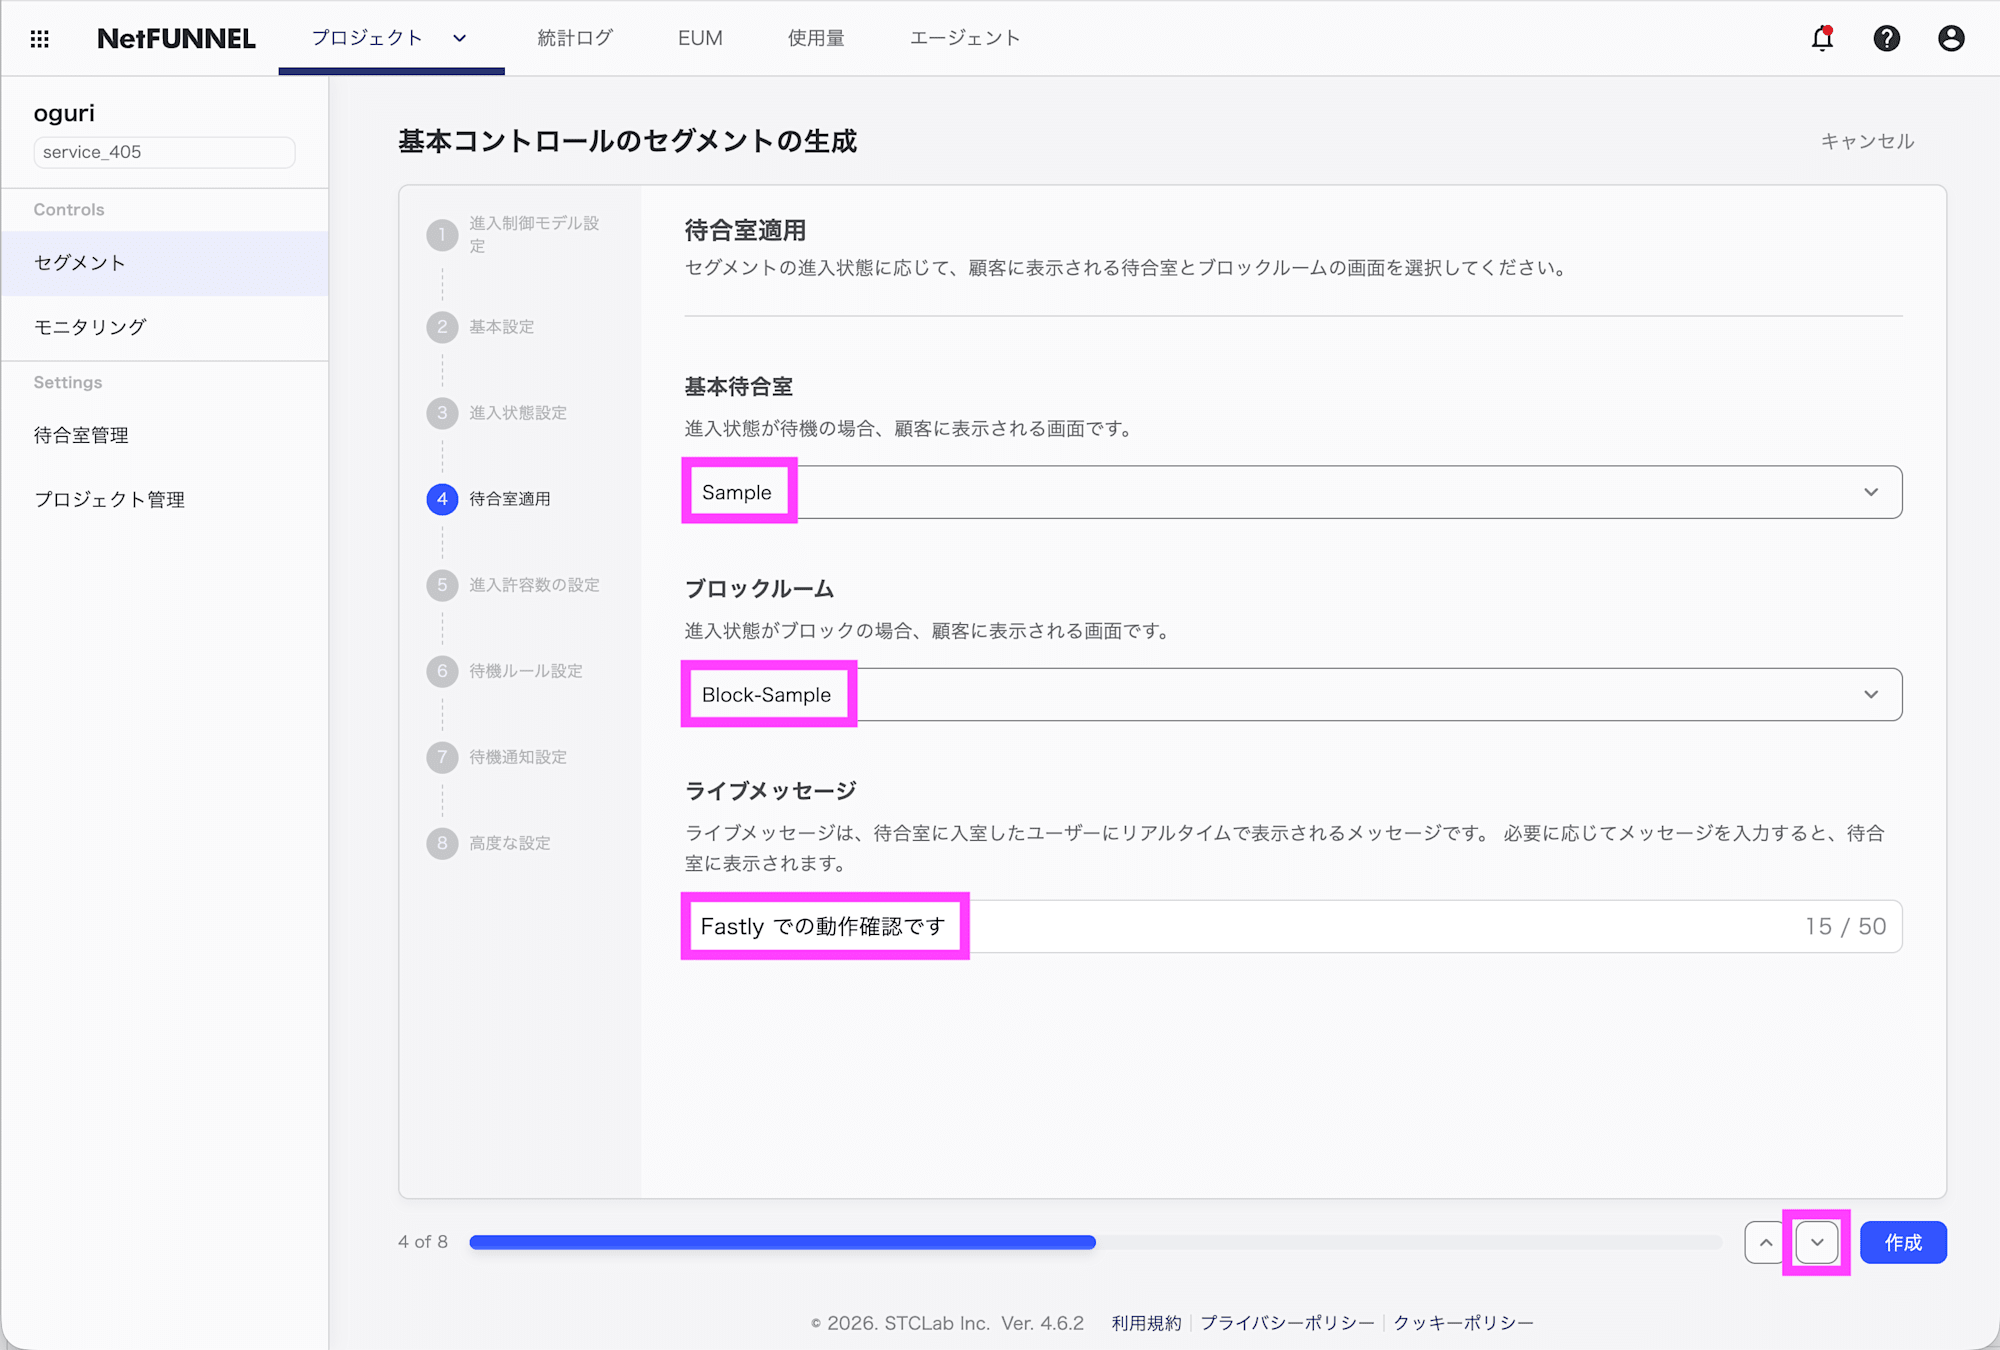
待合室を選択し、ライブメッセージで表示する内容を記述します。ここでは待機室はサンプルのものを選択しています。⌄をクリックします。
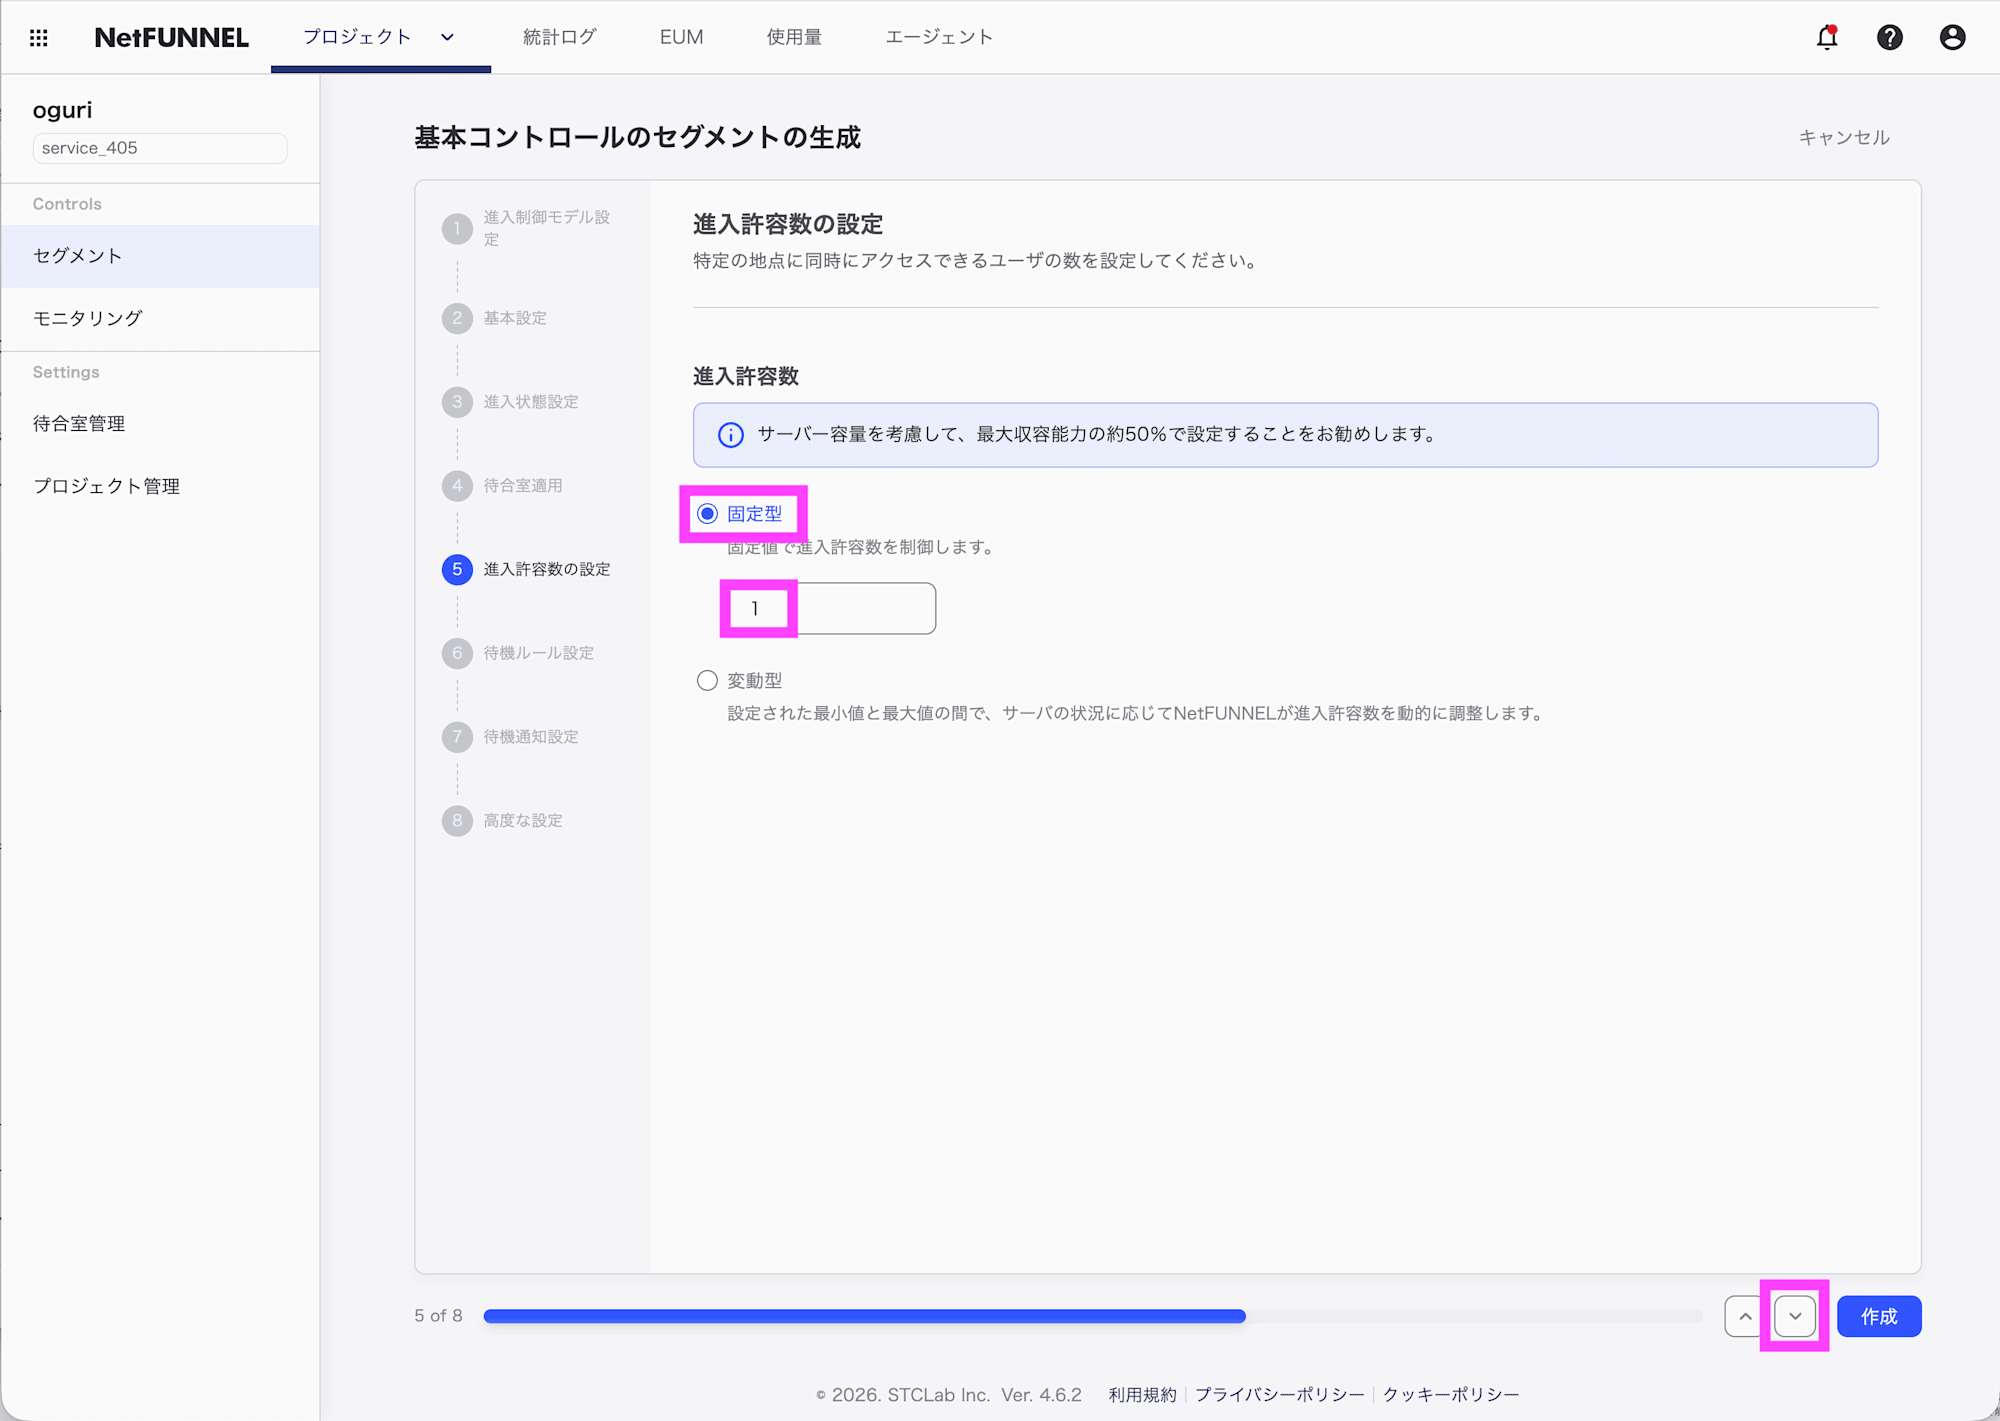
進入許容数を設定します。ここでは固定型で許容数を1にしています。実運用では最大収容能力の約50%で設定することが推奨されています。⌄をクリックします。
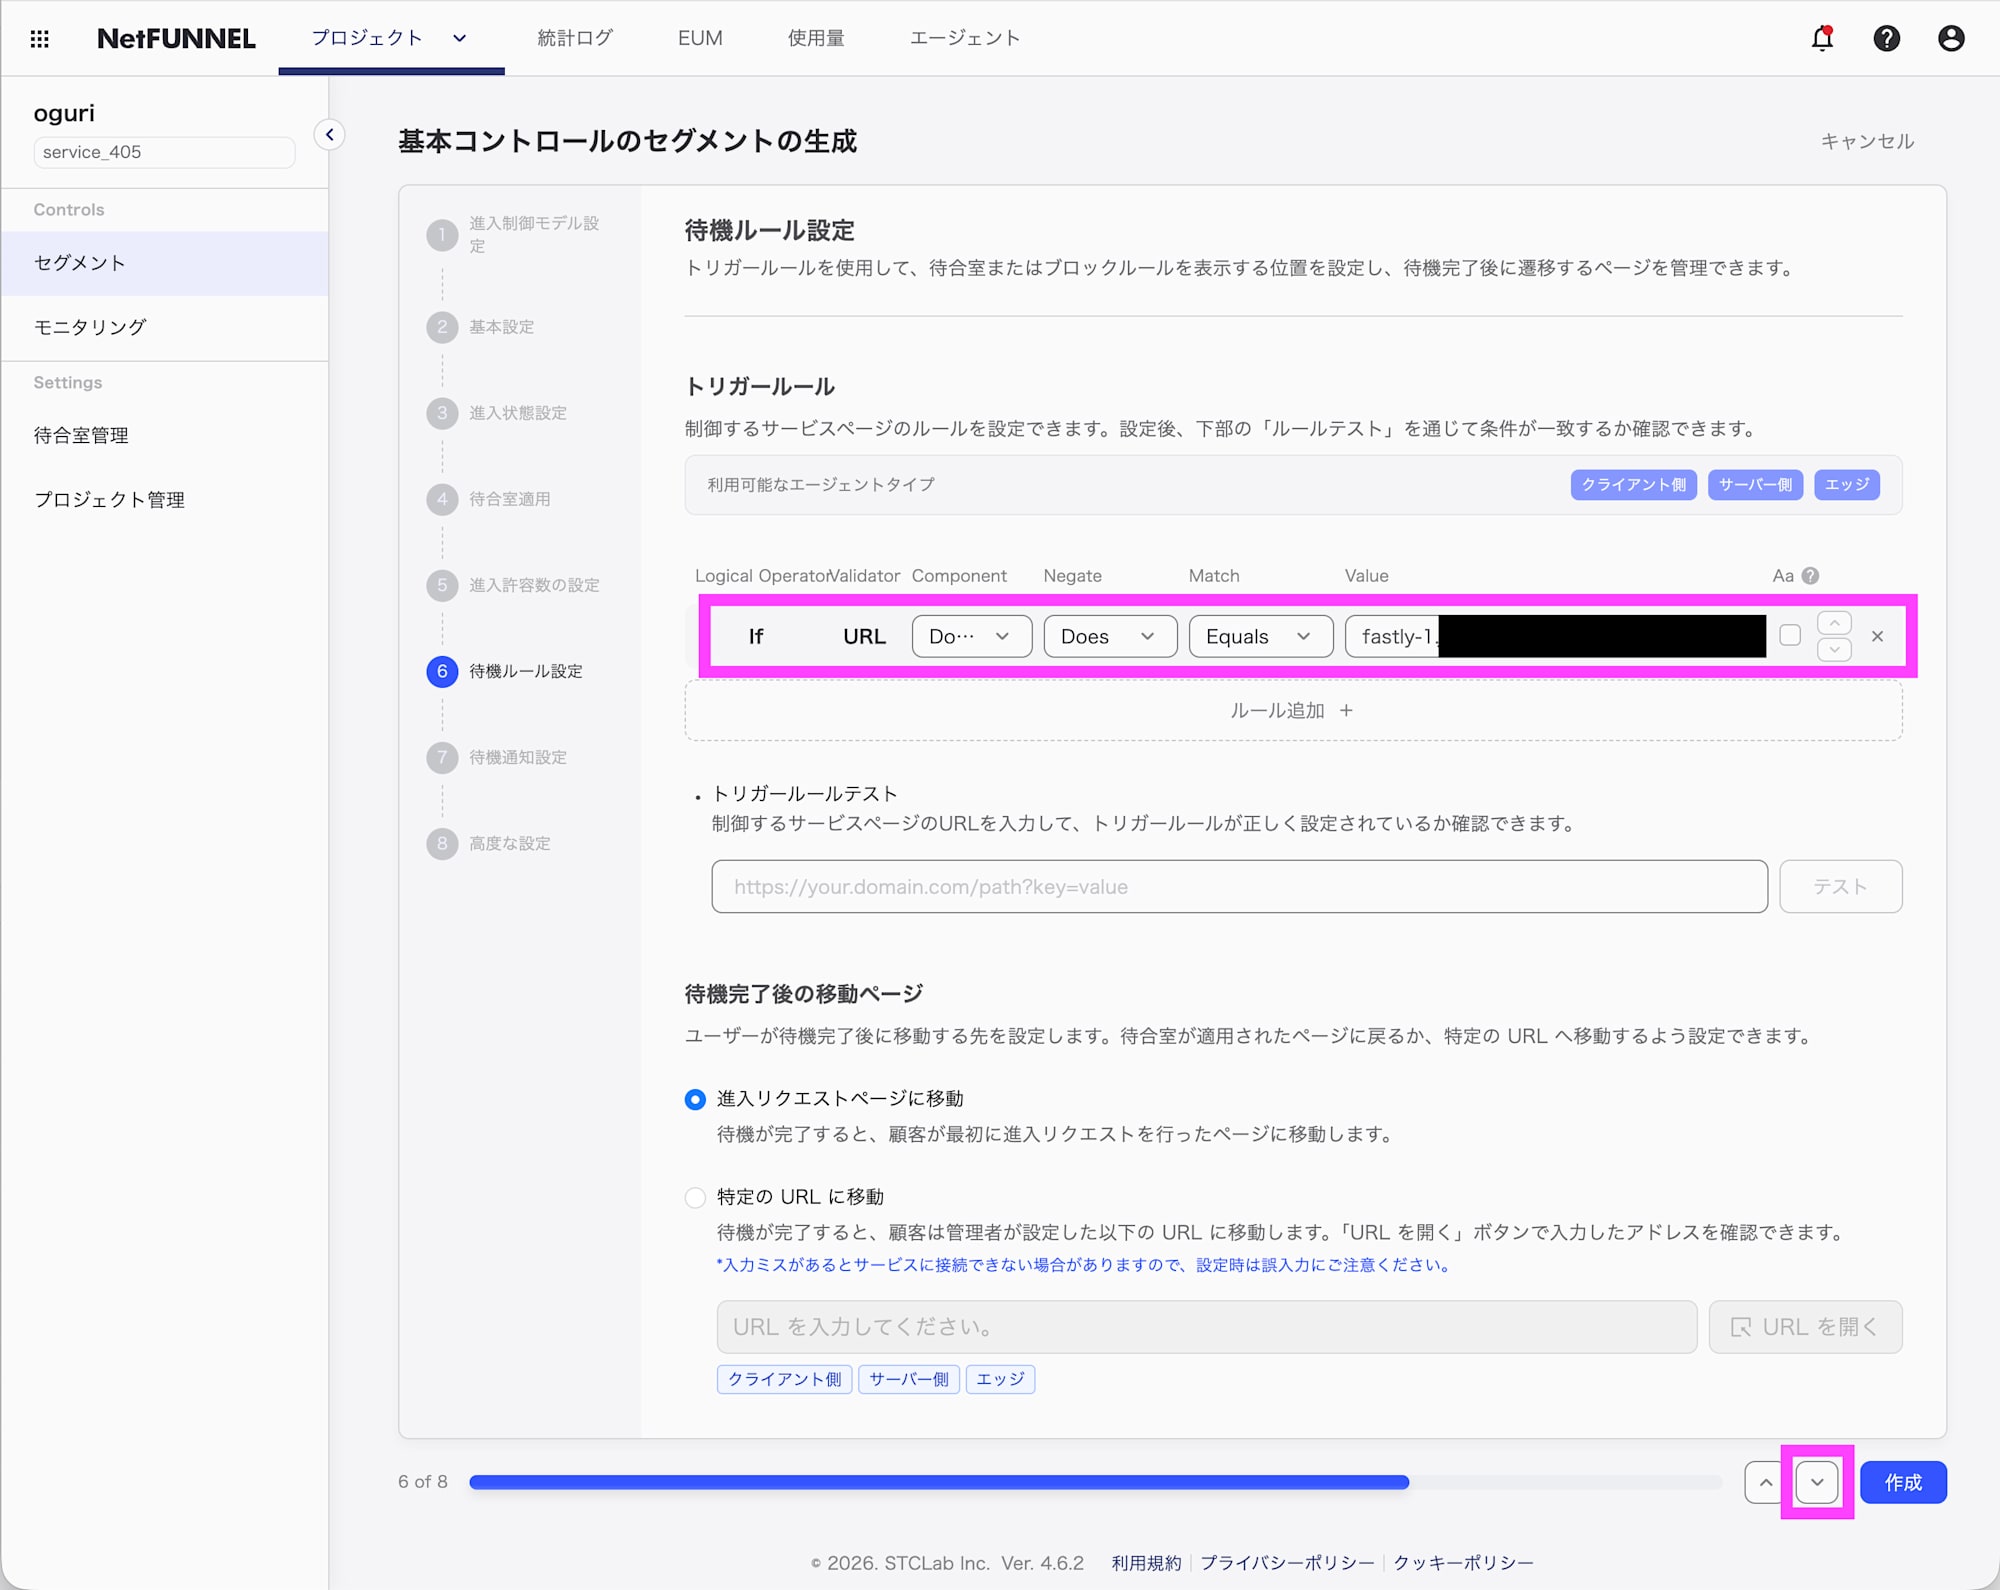
トリガールールで待合室の対象を設定します。ここではドメインで条件を設定しています。必要に応じて、待機完了後に移動するページを変更します。⌄をクリックします。
必要に応じて、待機が発生したときのメール通知の設定を行います。⌄をクリックします。
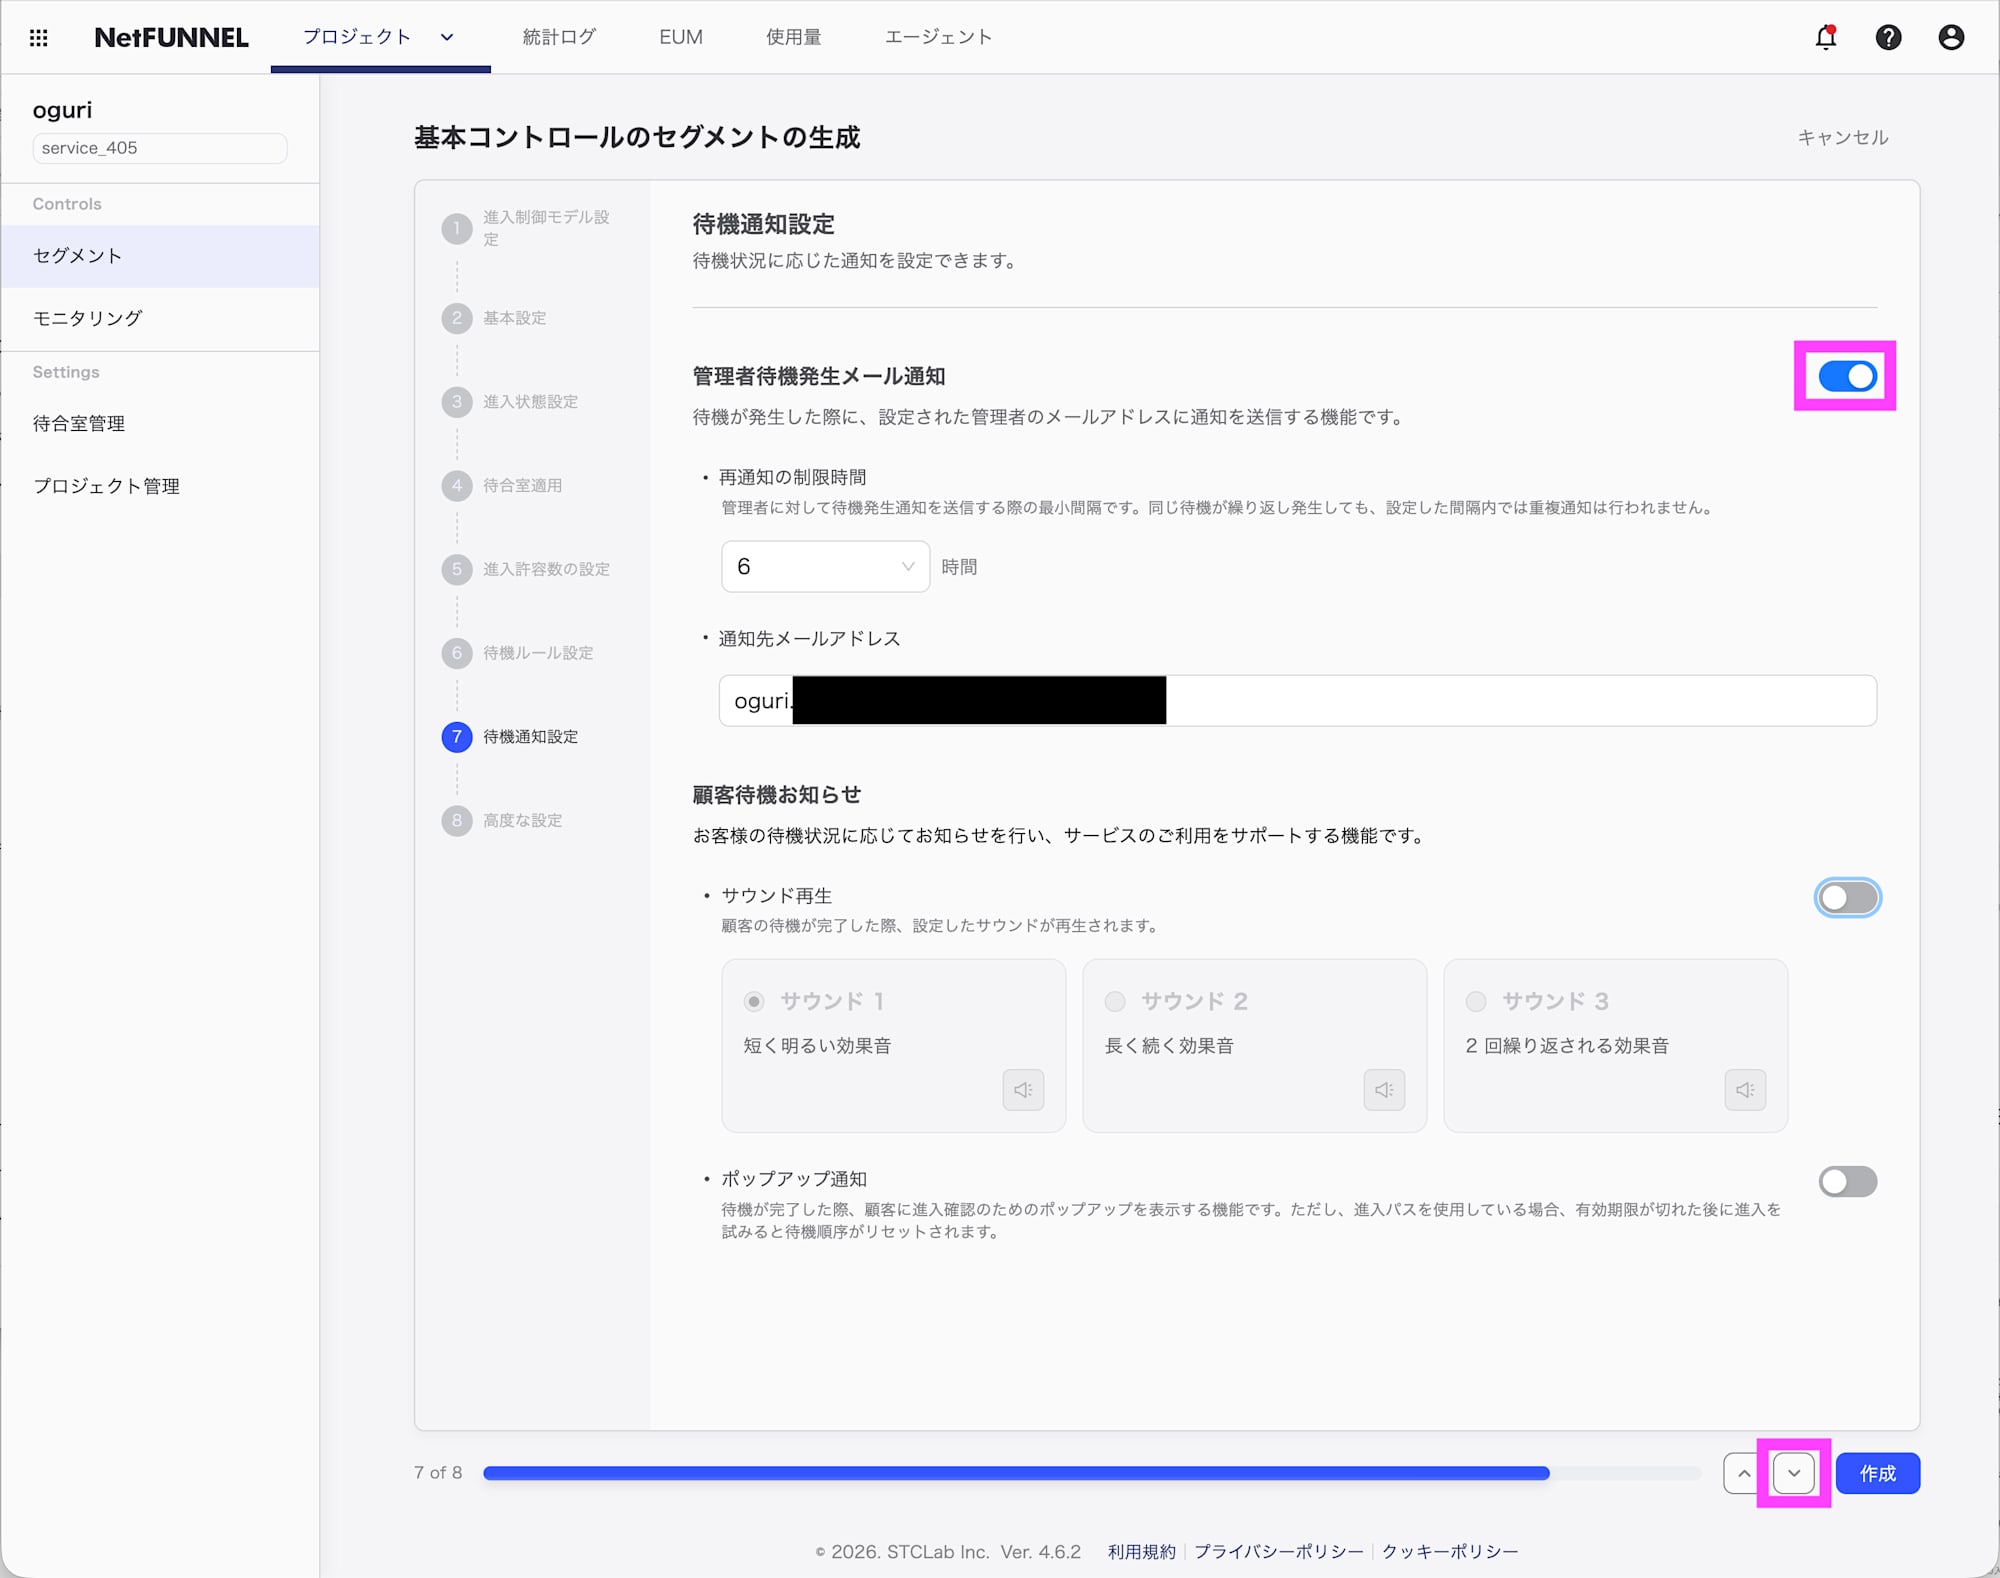
必要に応じて高度な設定を実施します。ここではデフォルトのままです。作成をクリックします。
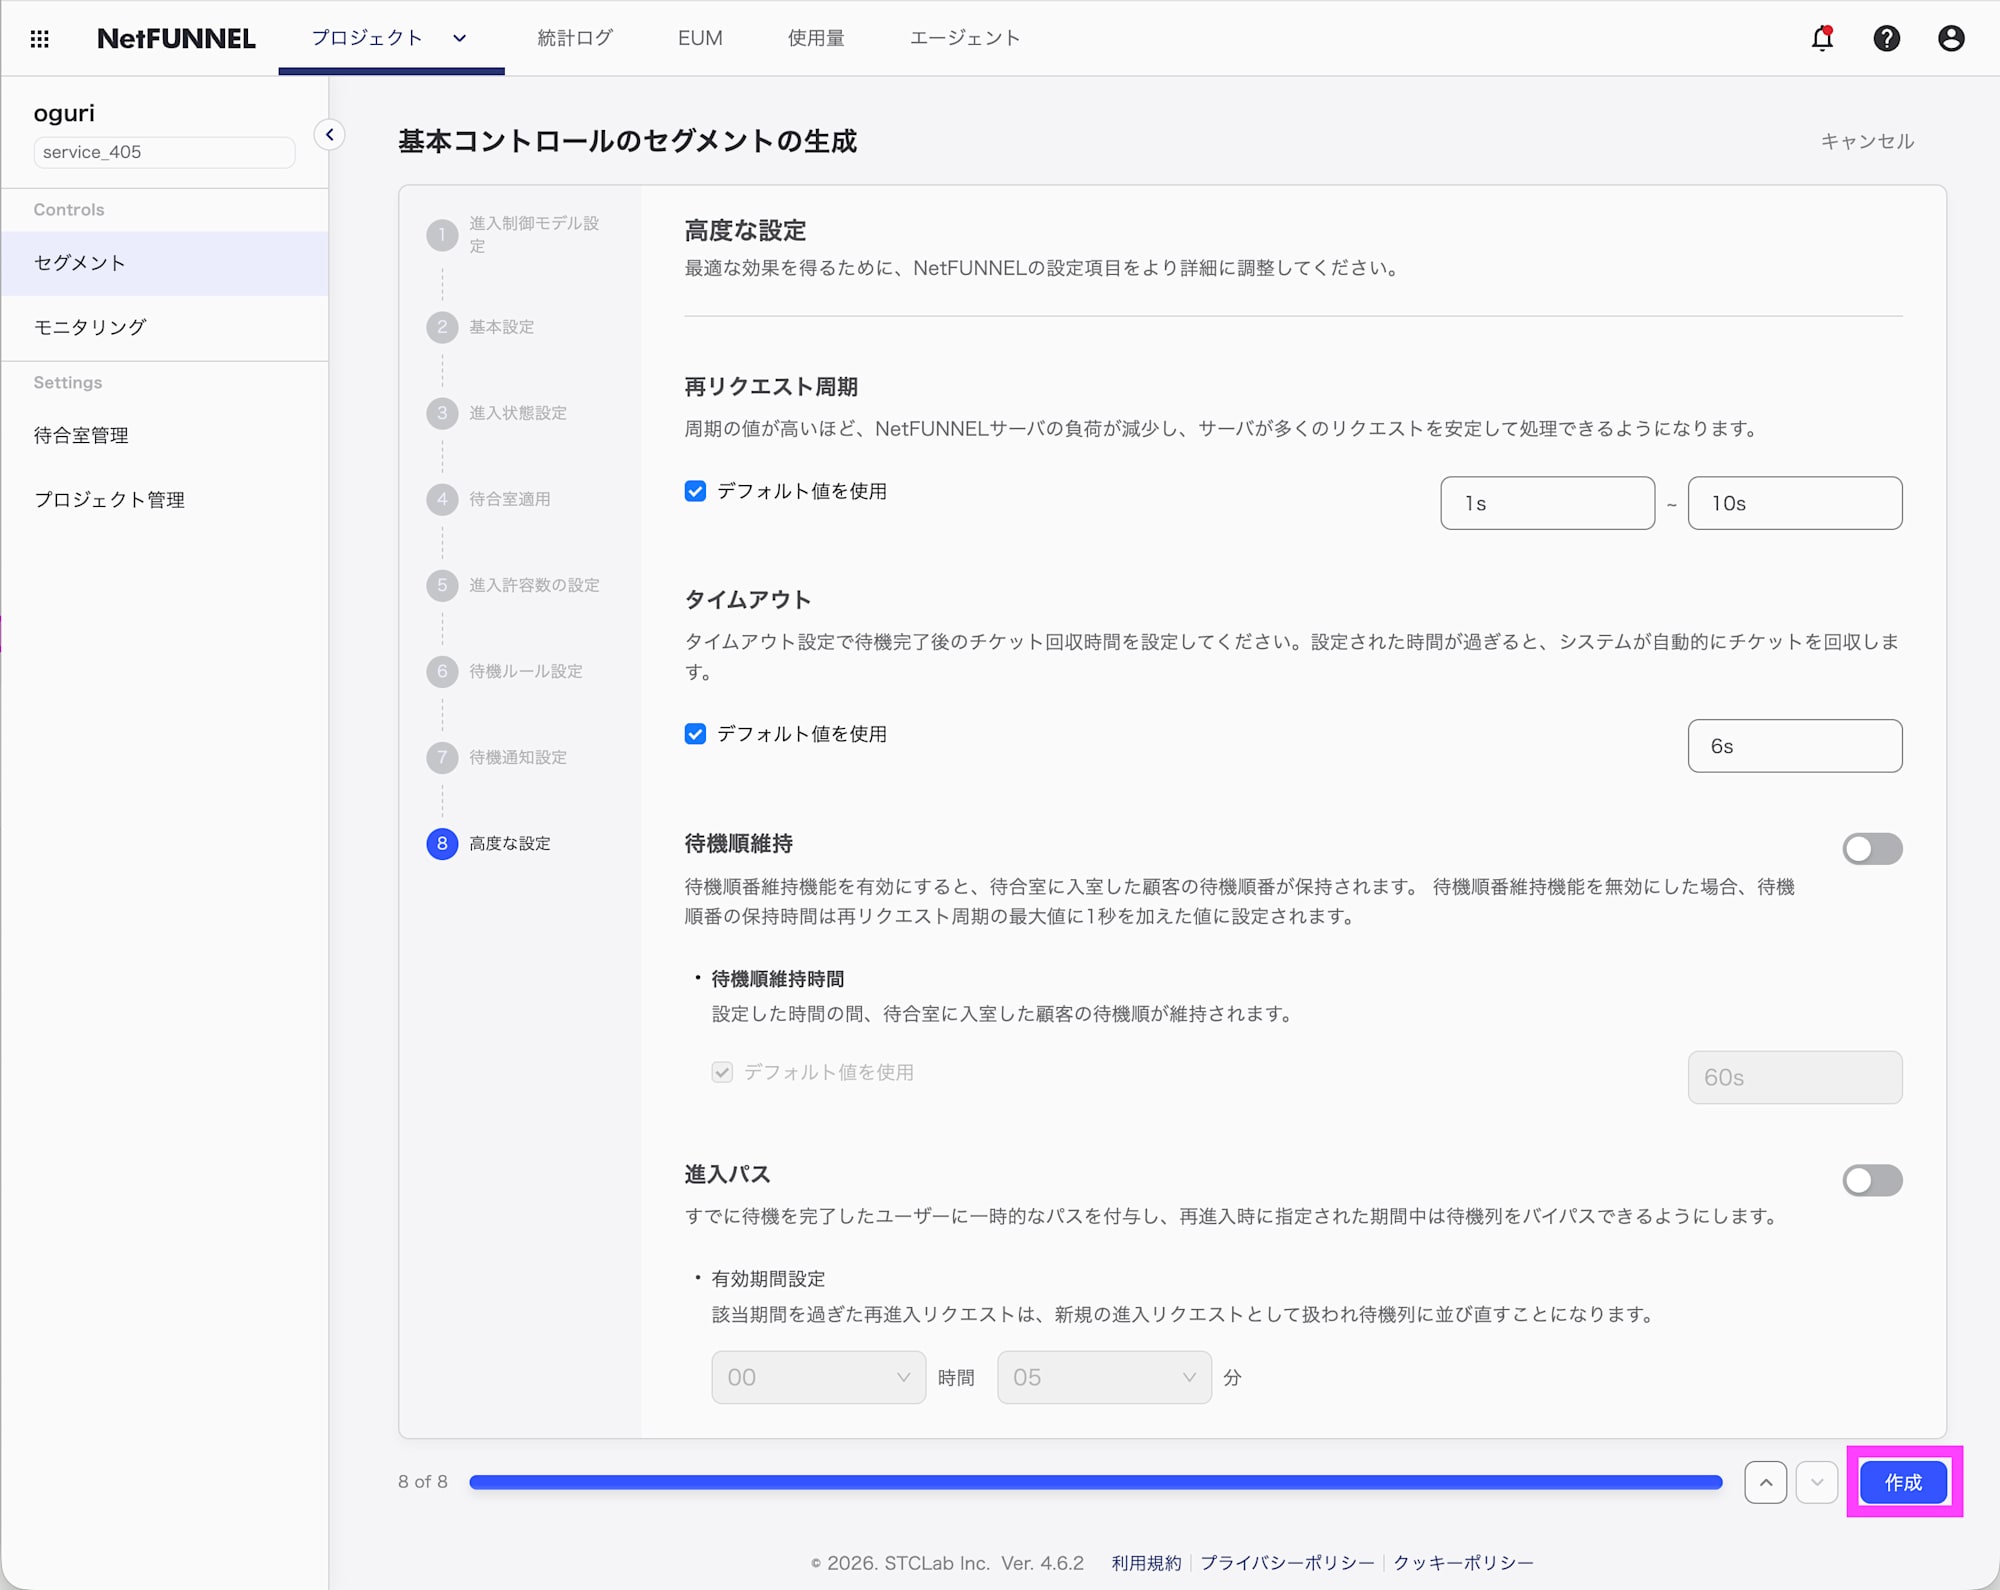
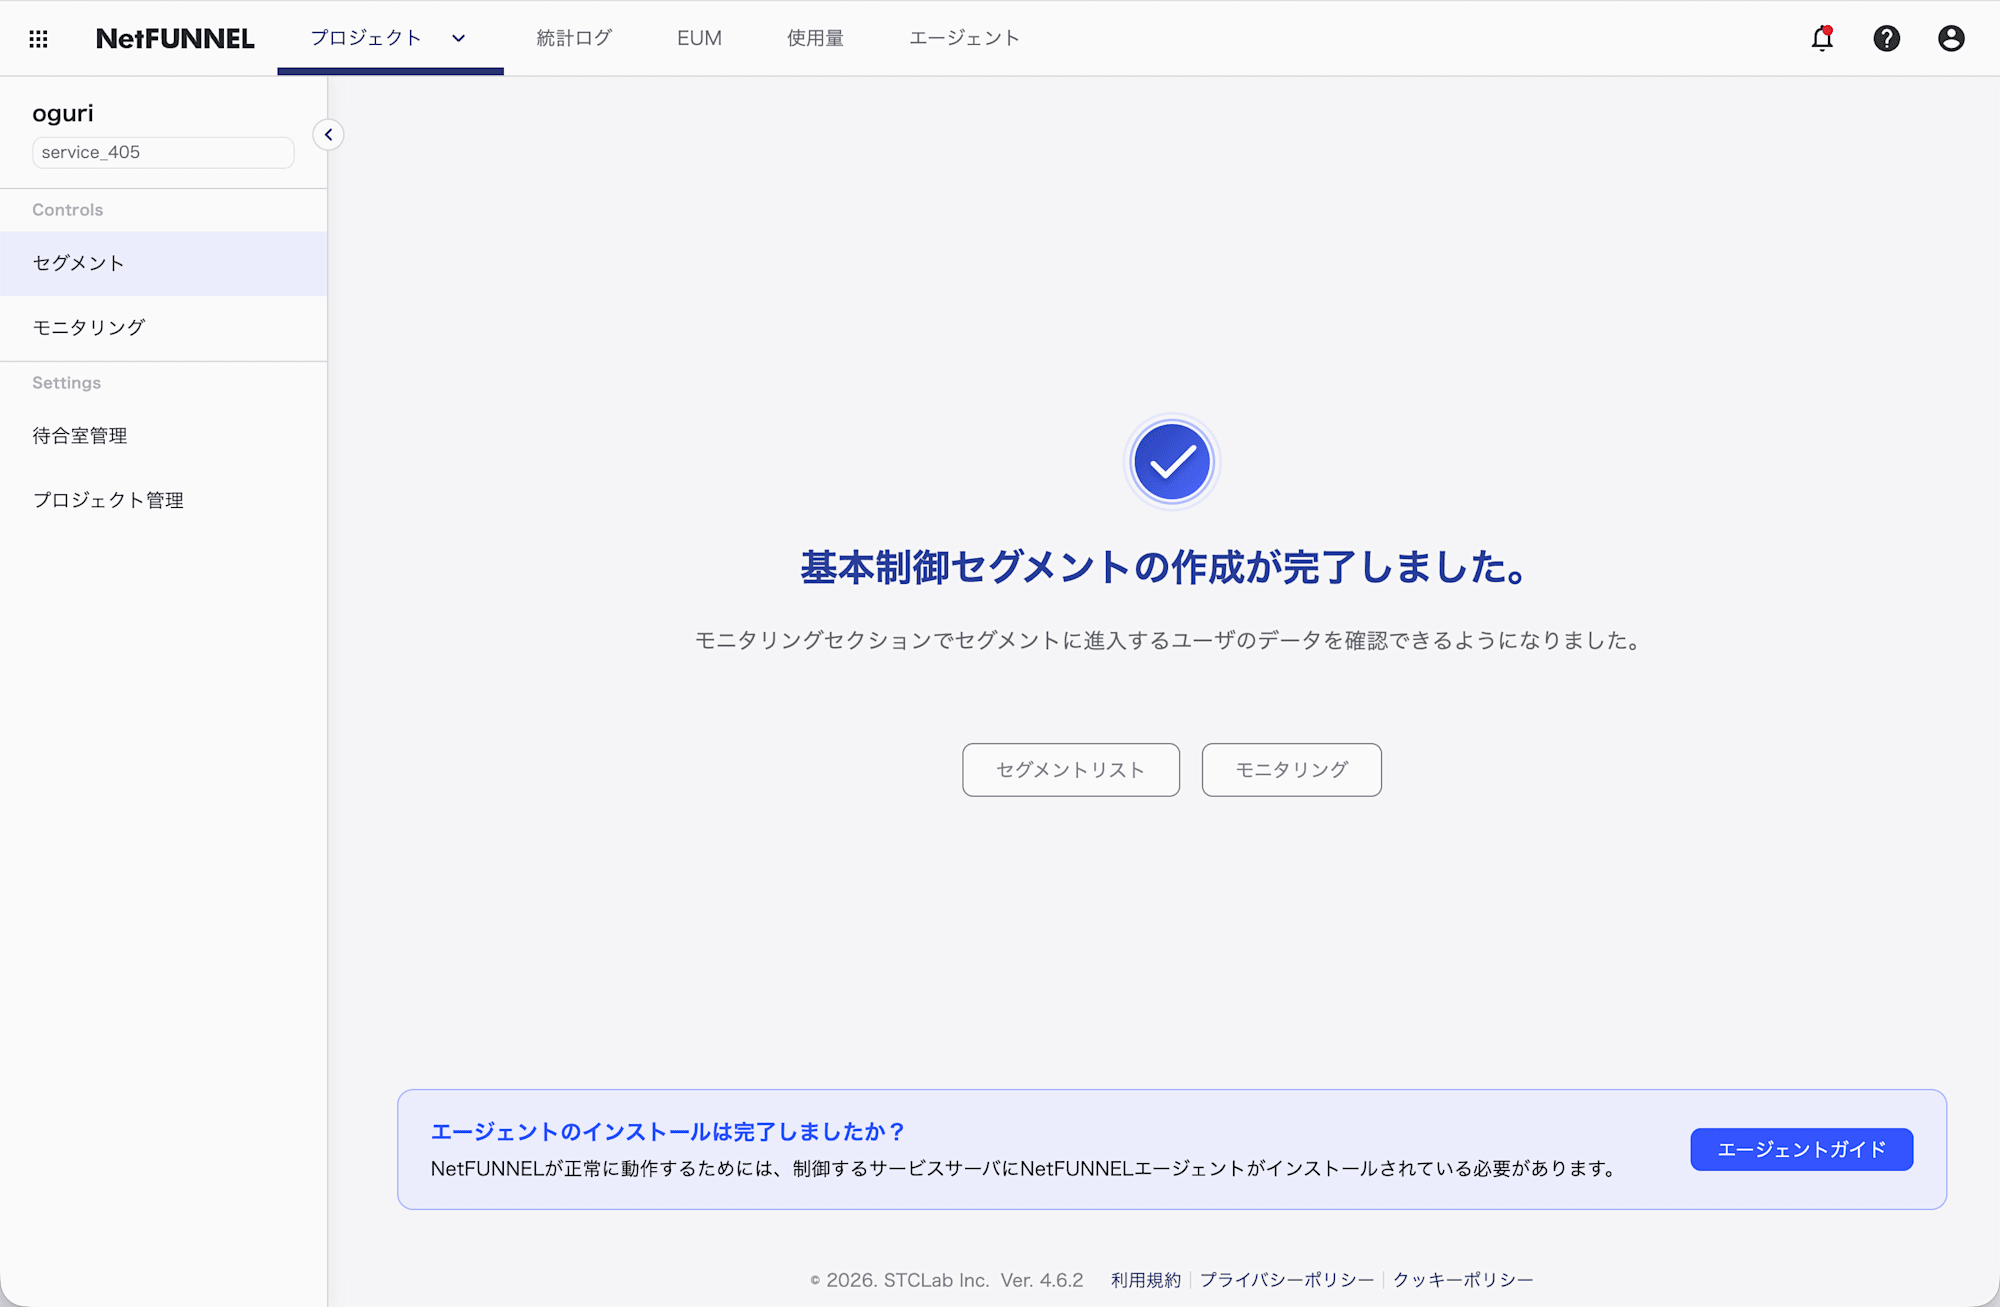
これで基本制御セグメントの設定が完了しました。
Fastly Compute service 作成
Fastly CLI を使用します。インストールしていない場合には、こちらのドキュメントを元にインストールしてください。Compute service を Rust でビルドするために rustup コマンドが必要です。インストールしていない場合には、こちらのドキュメントを元にインストールしてください。
以下のドキュメントを参考に Compute service を作成していきます。
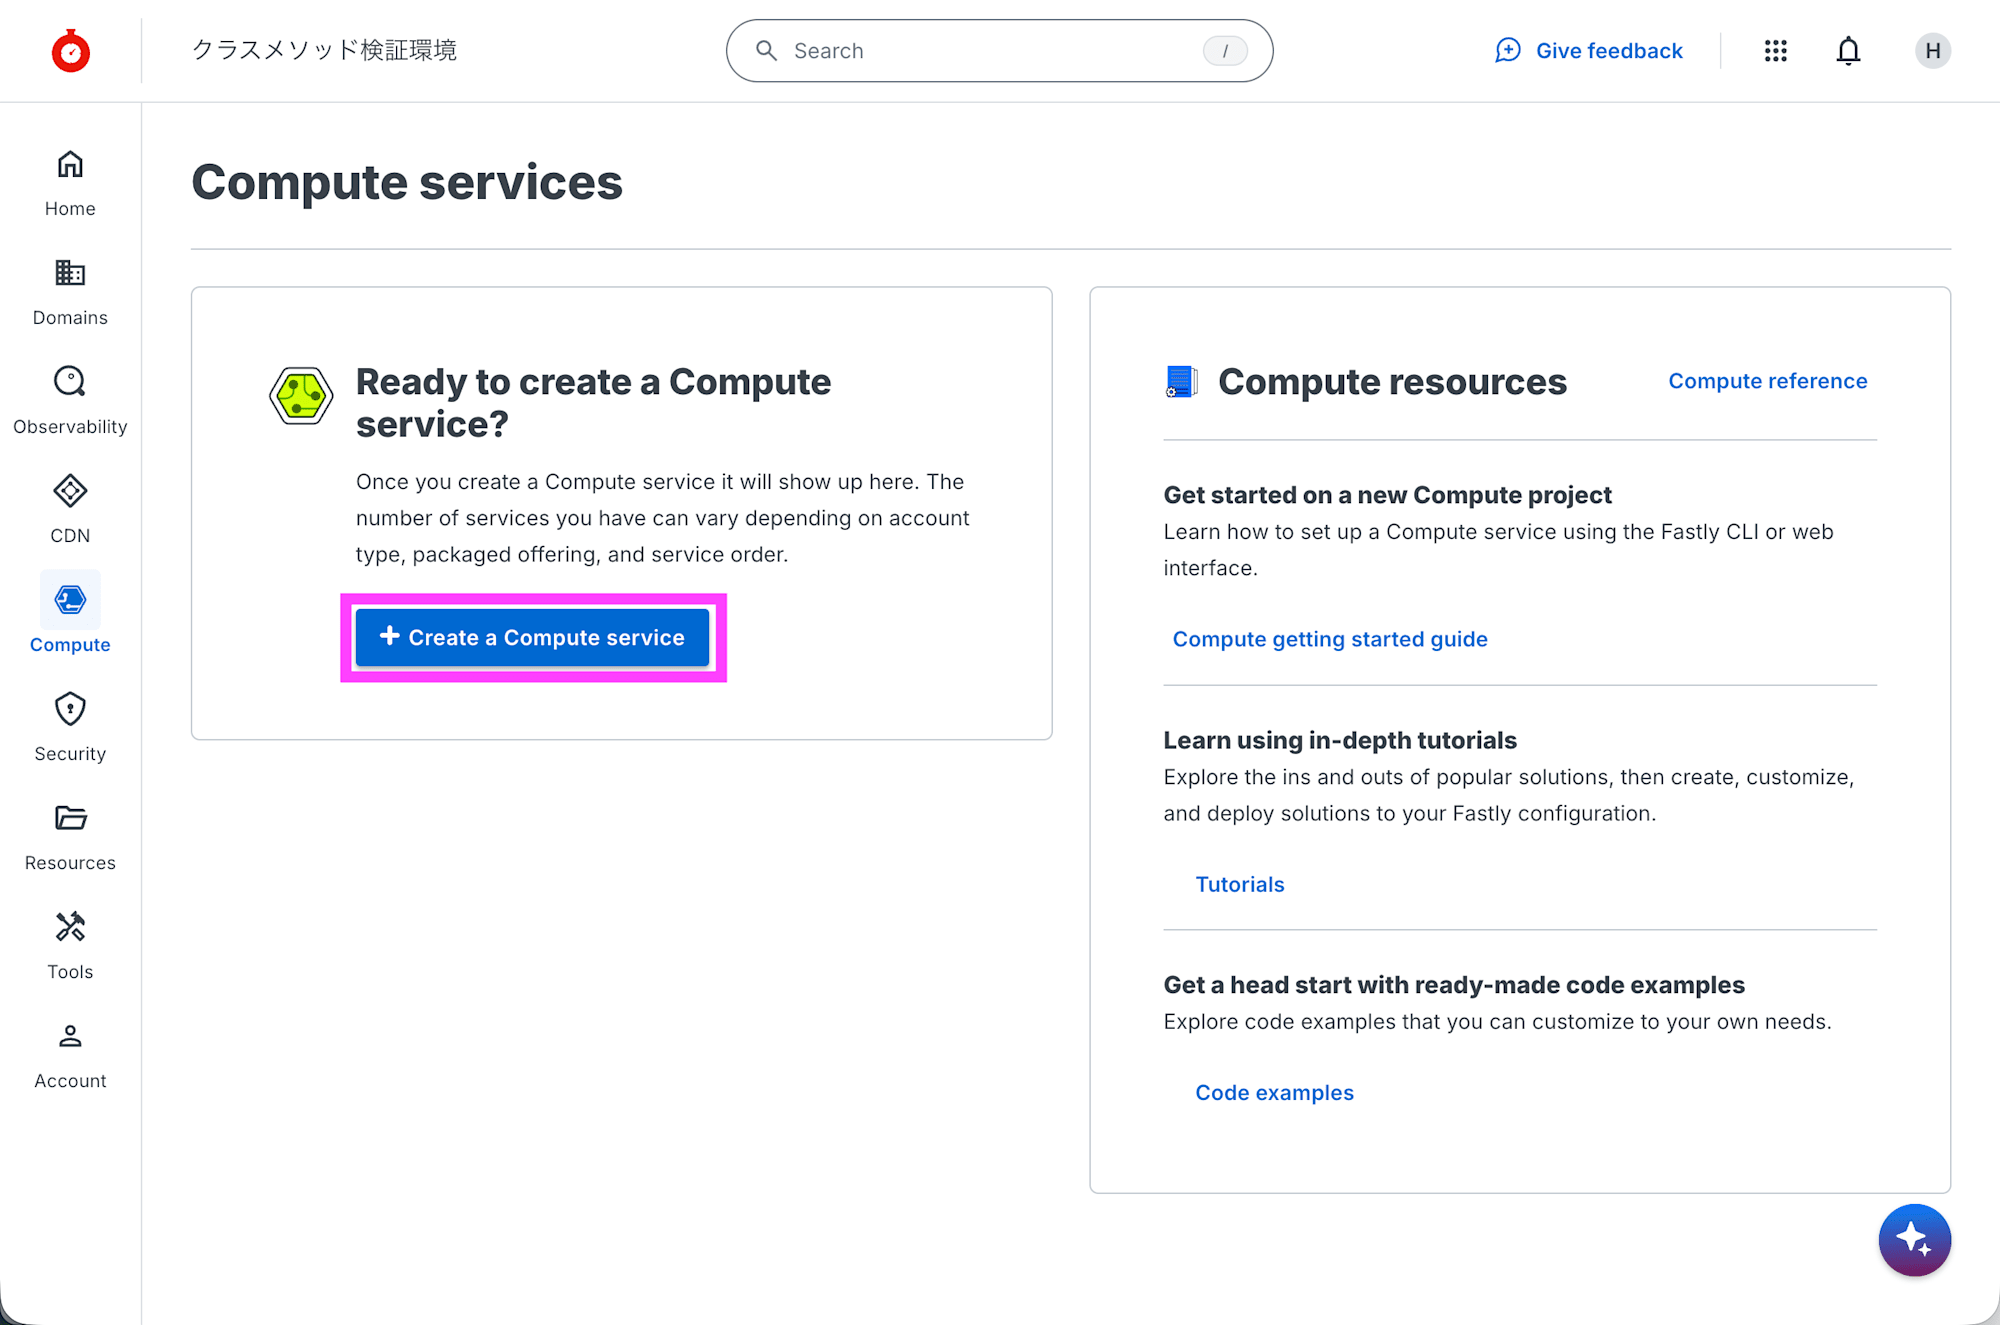
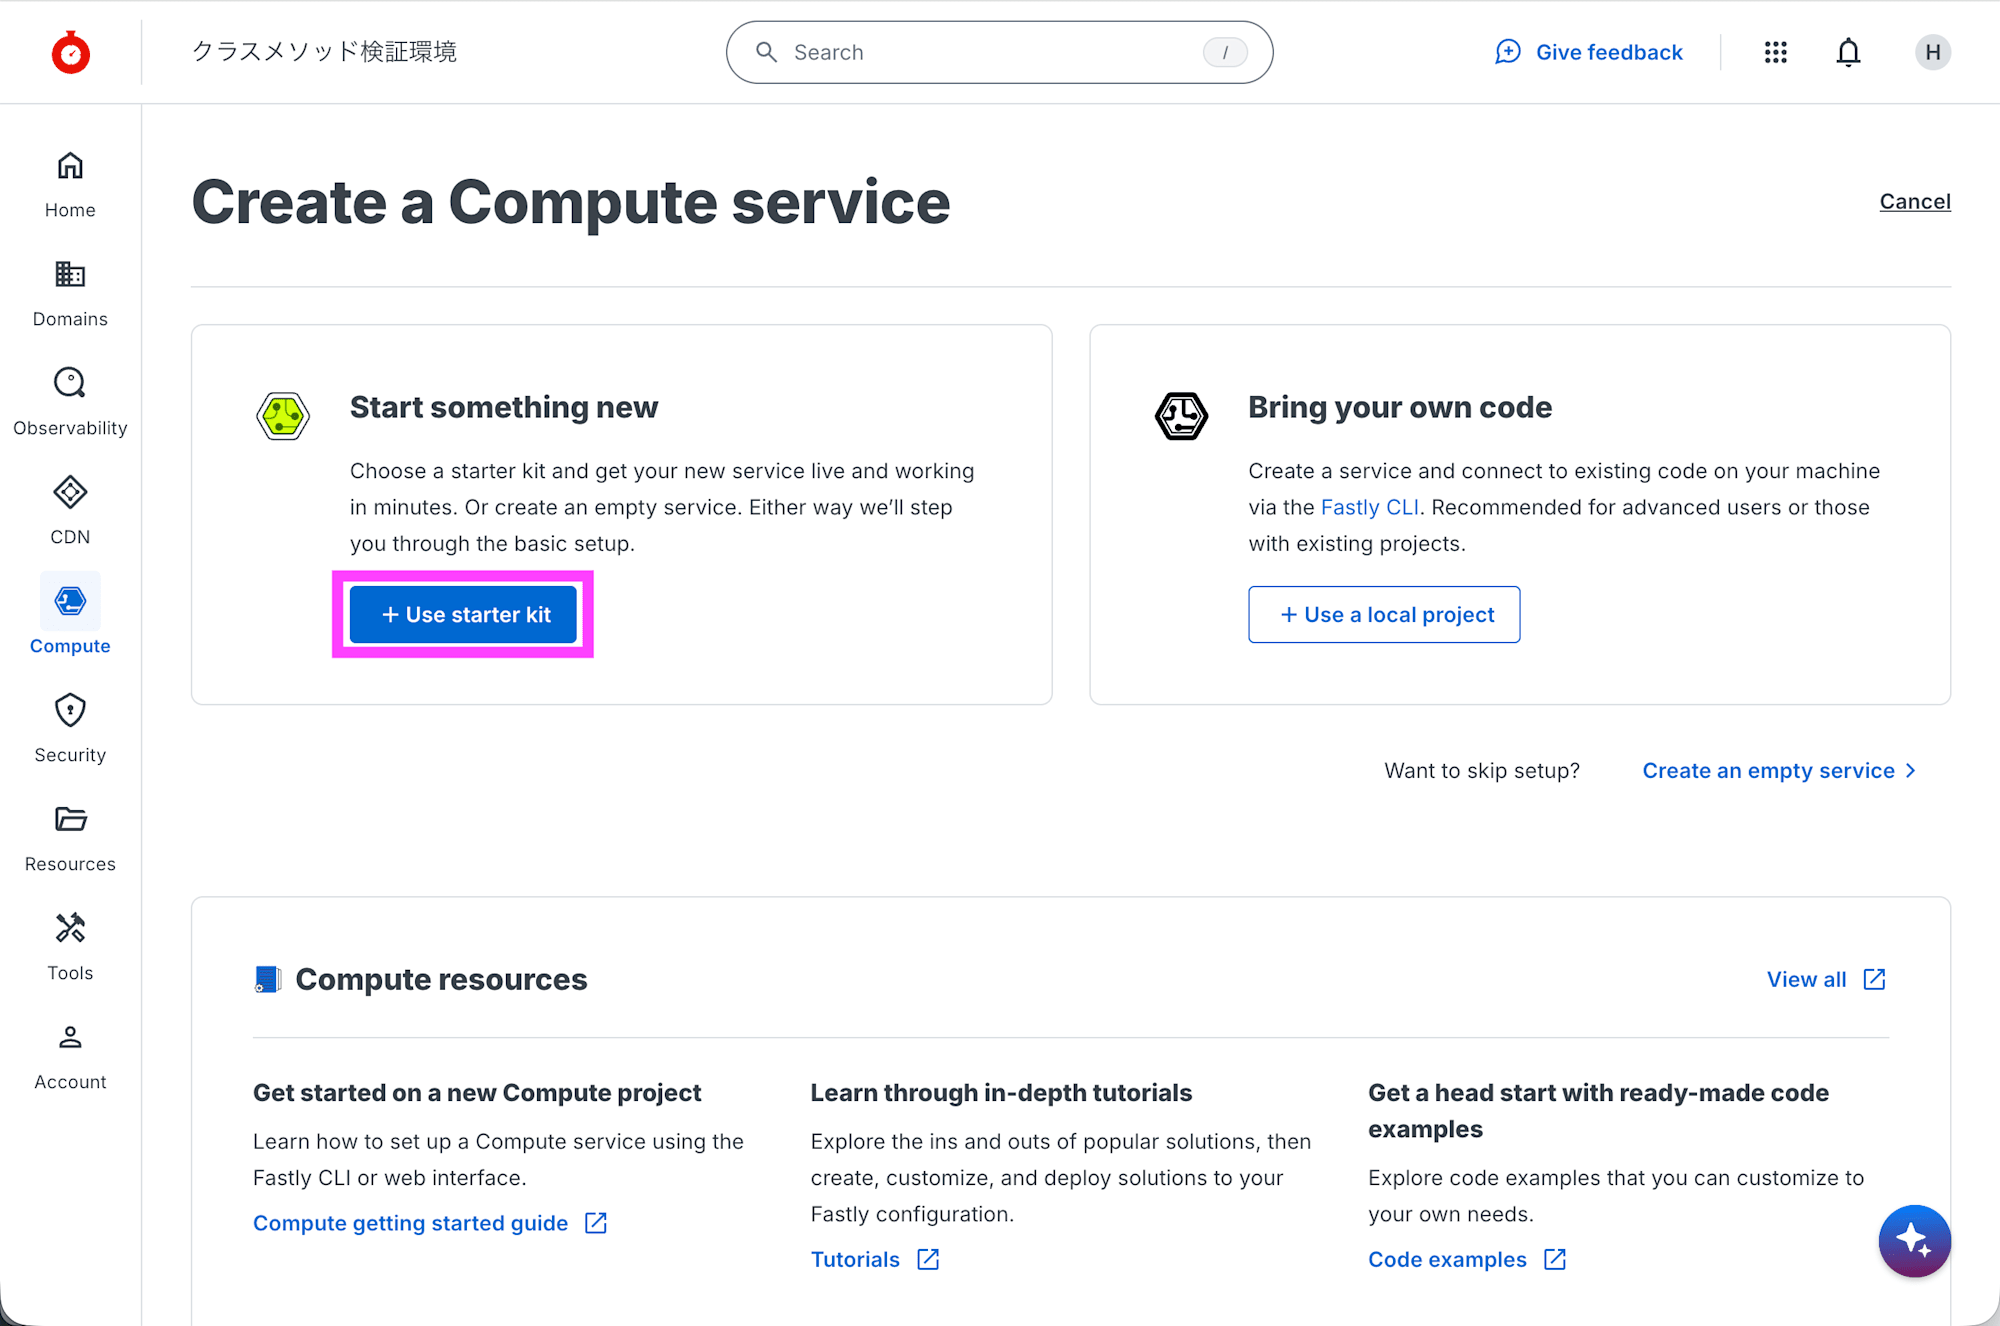
Fastly コントロールパネルで [Compute] - [Compute Services] を開き、+ Create a Compute service をクリックします。
+ Use starter kit をクリックします。
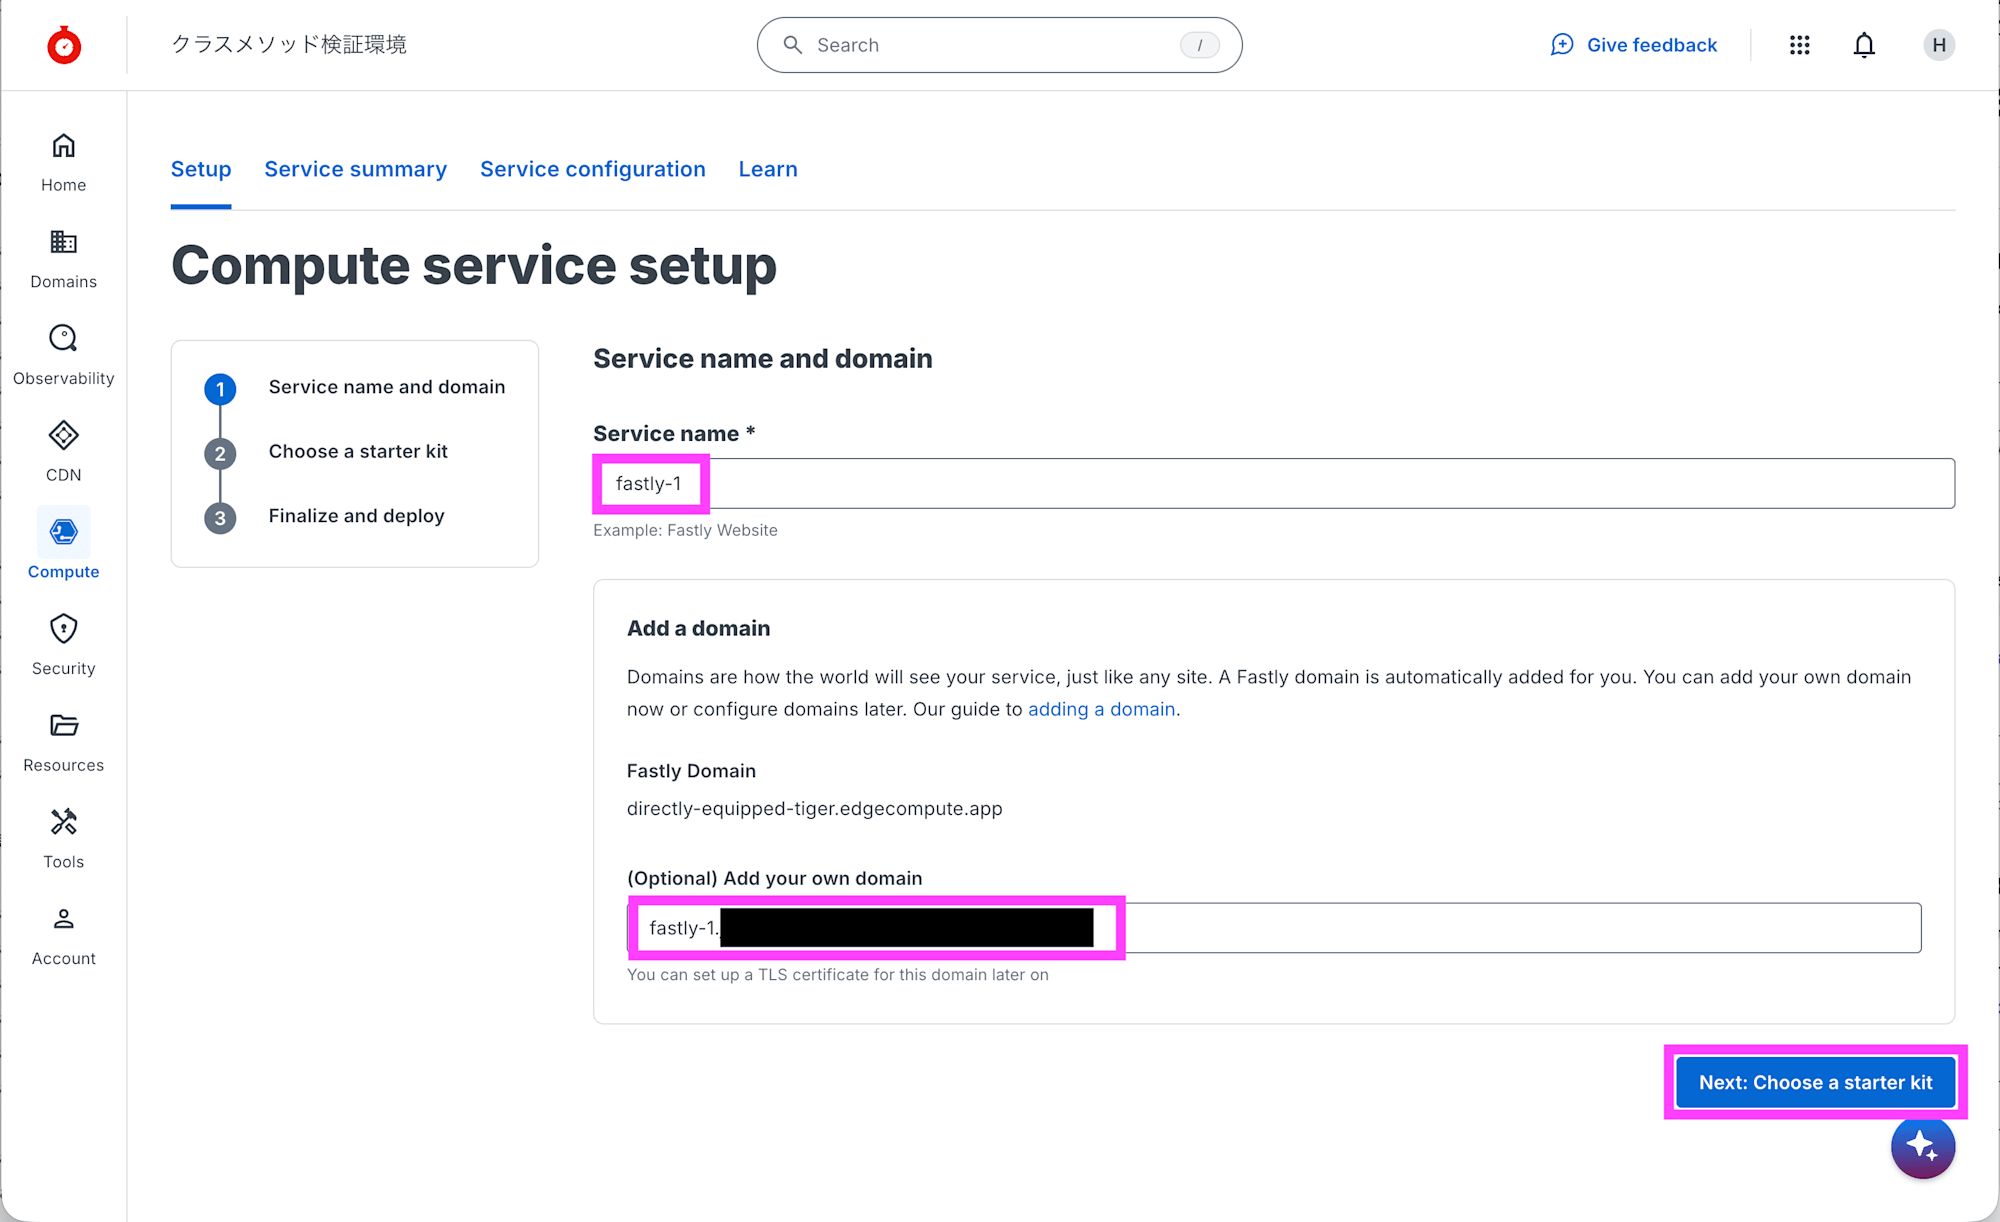
Service name にに2のサービス名を入力します。ここでは fastly-1 を入力しました。Add your own domain にサービスを提供する FQDN を入力します。Next: Choose a starter kit をクリックします。
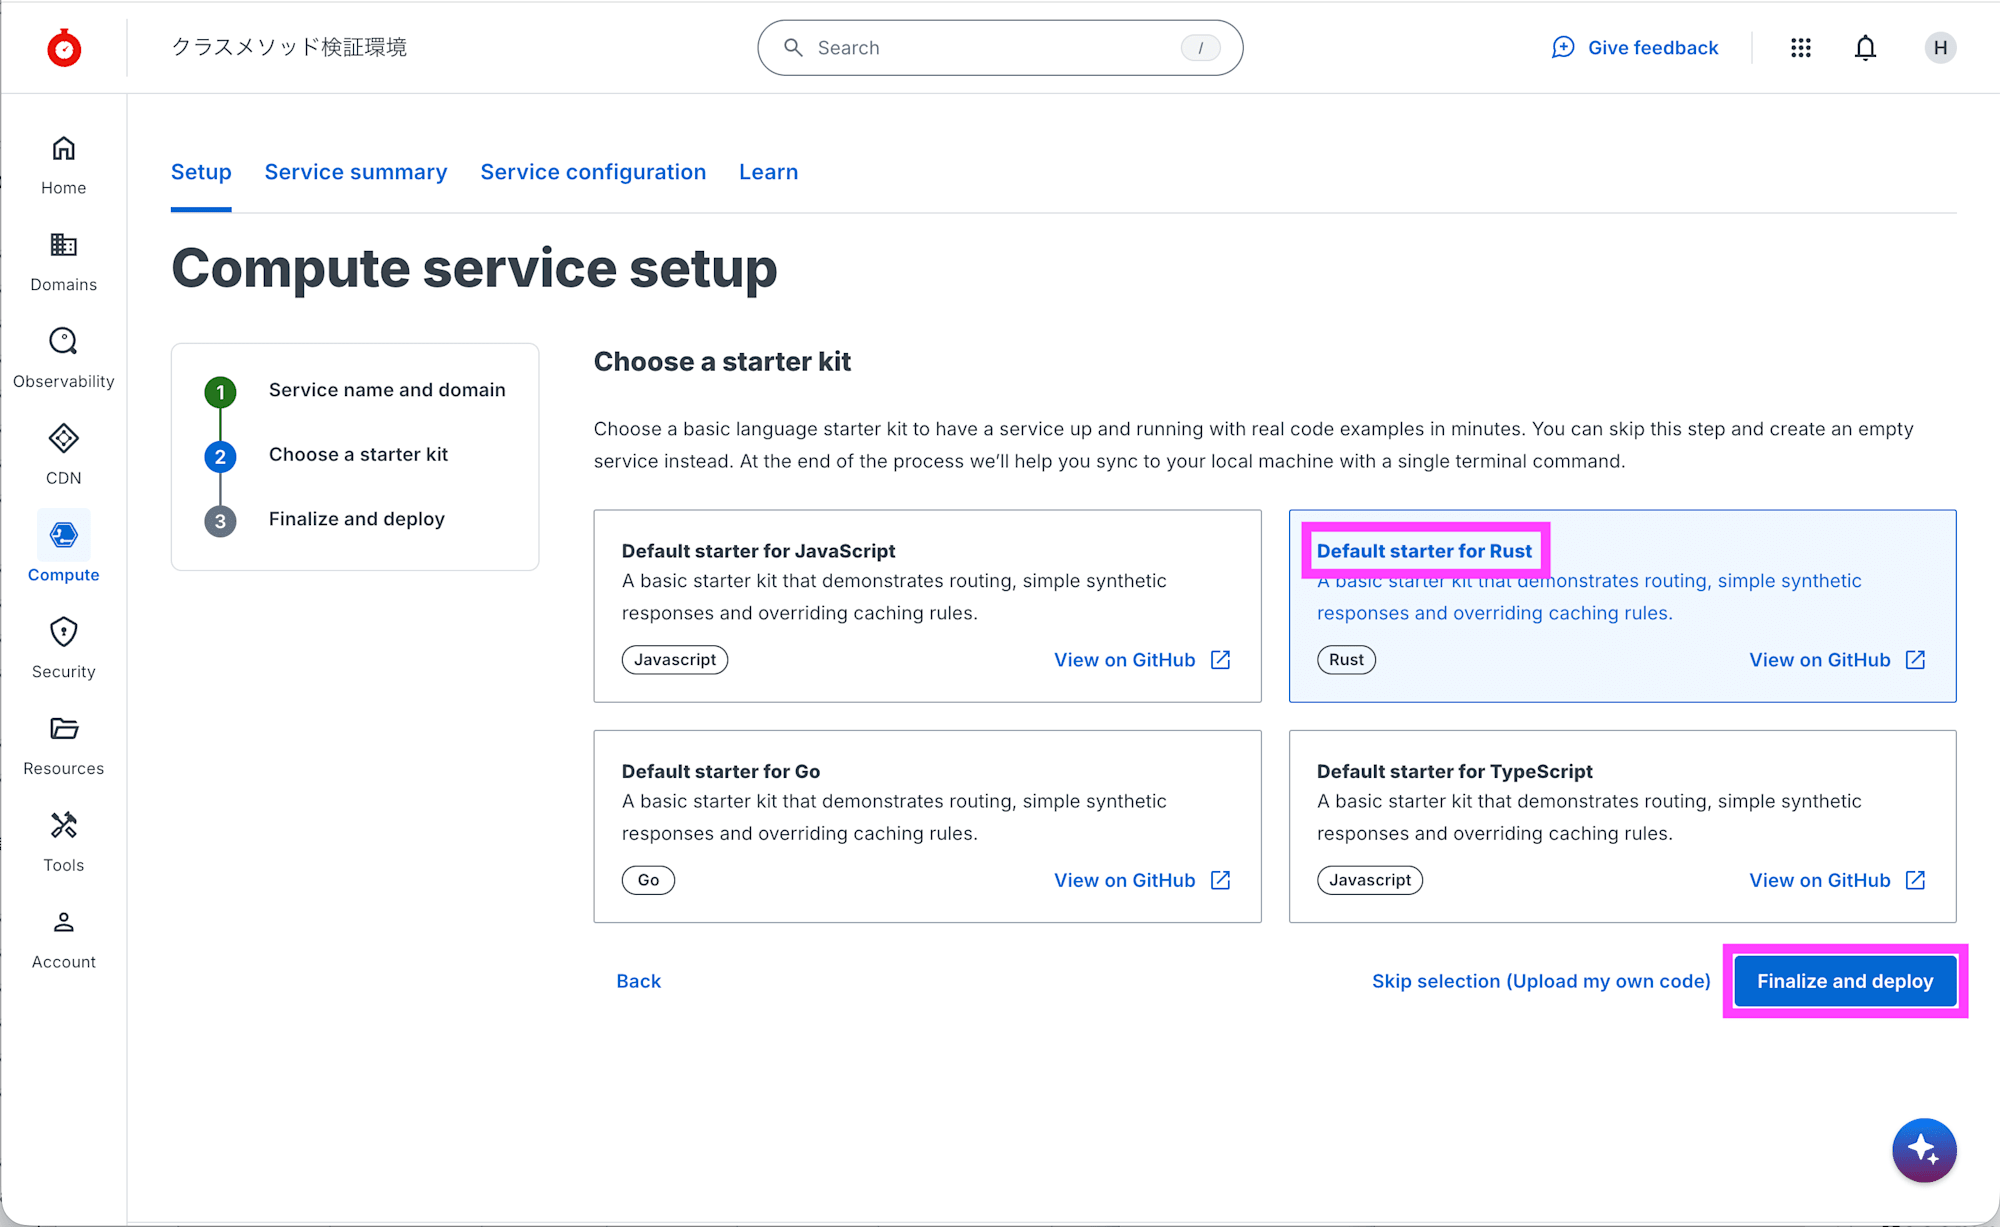
Default starter for Rust を選択して、Finalize and deploy をクリックします。
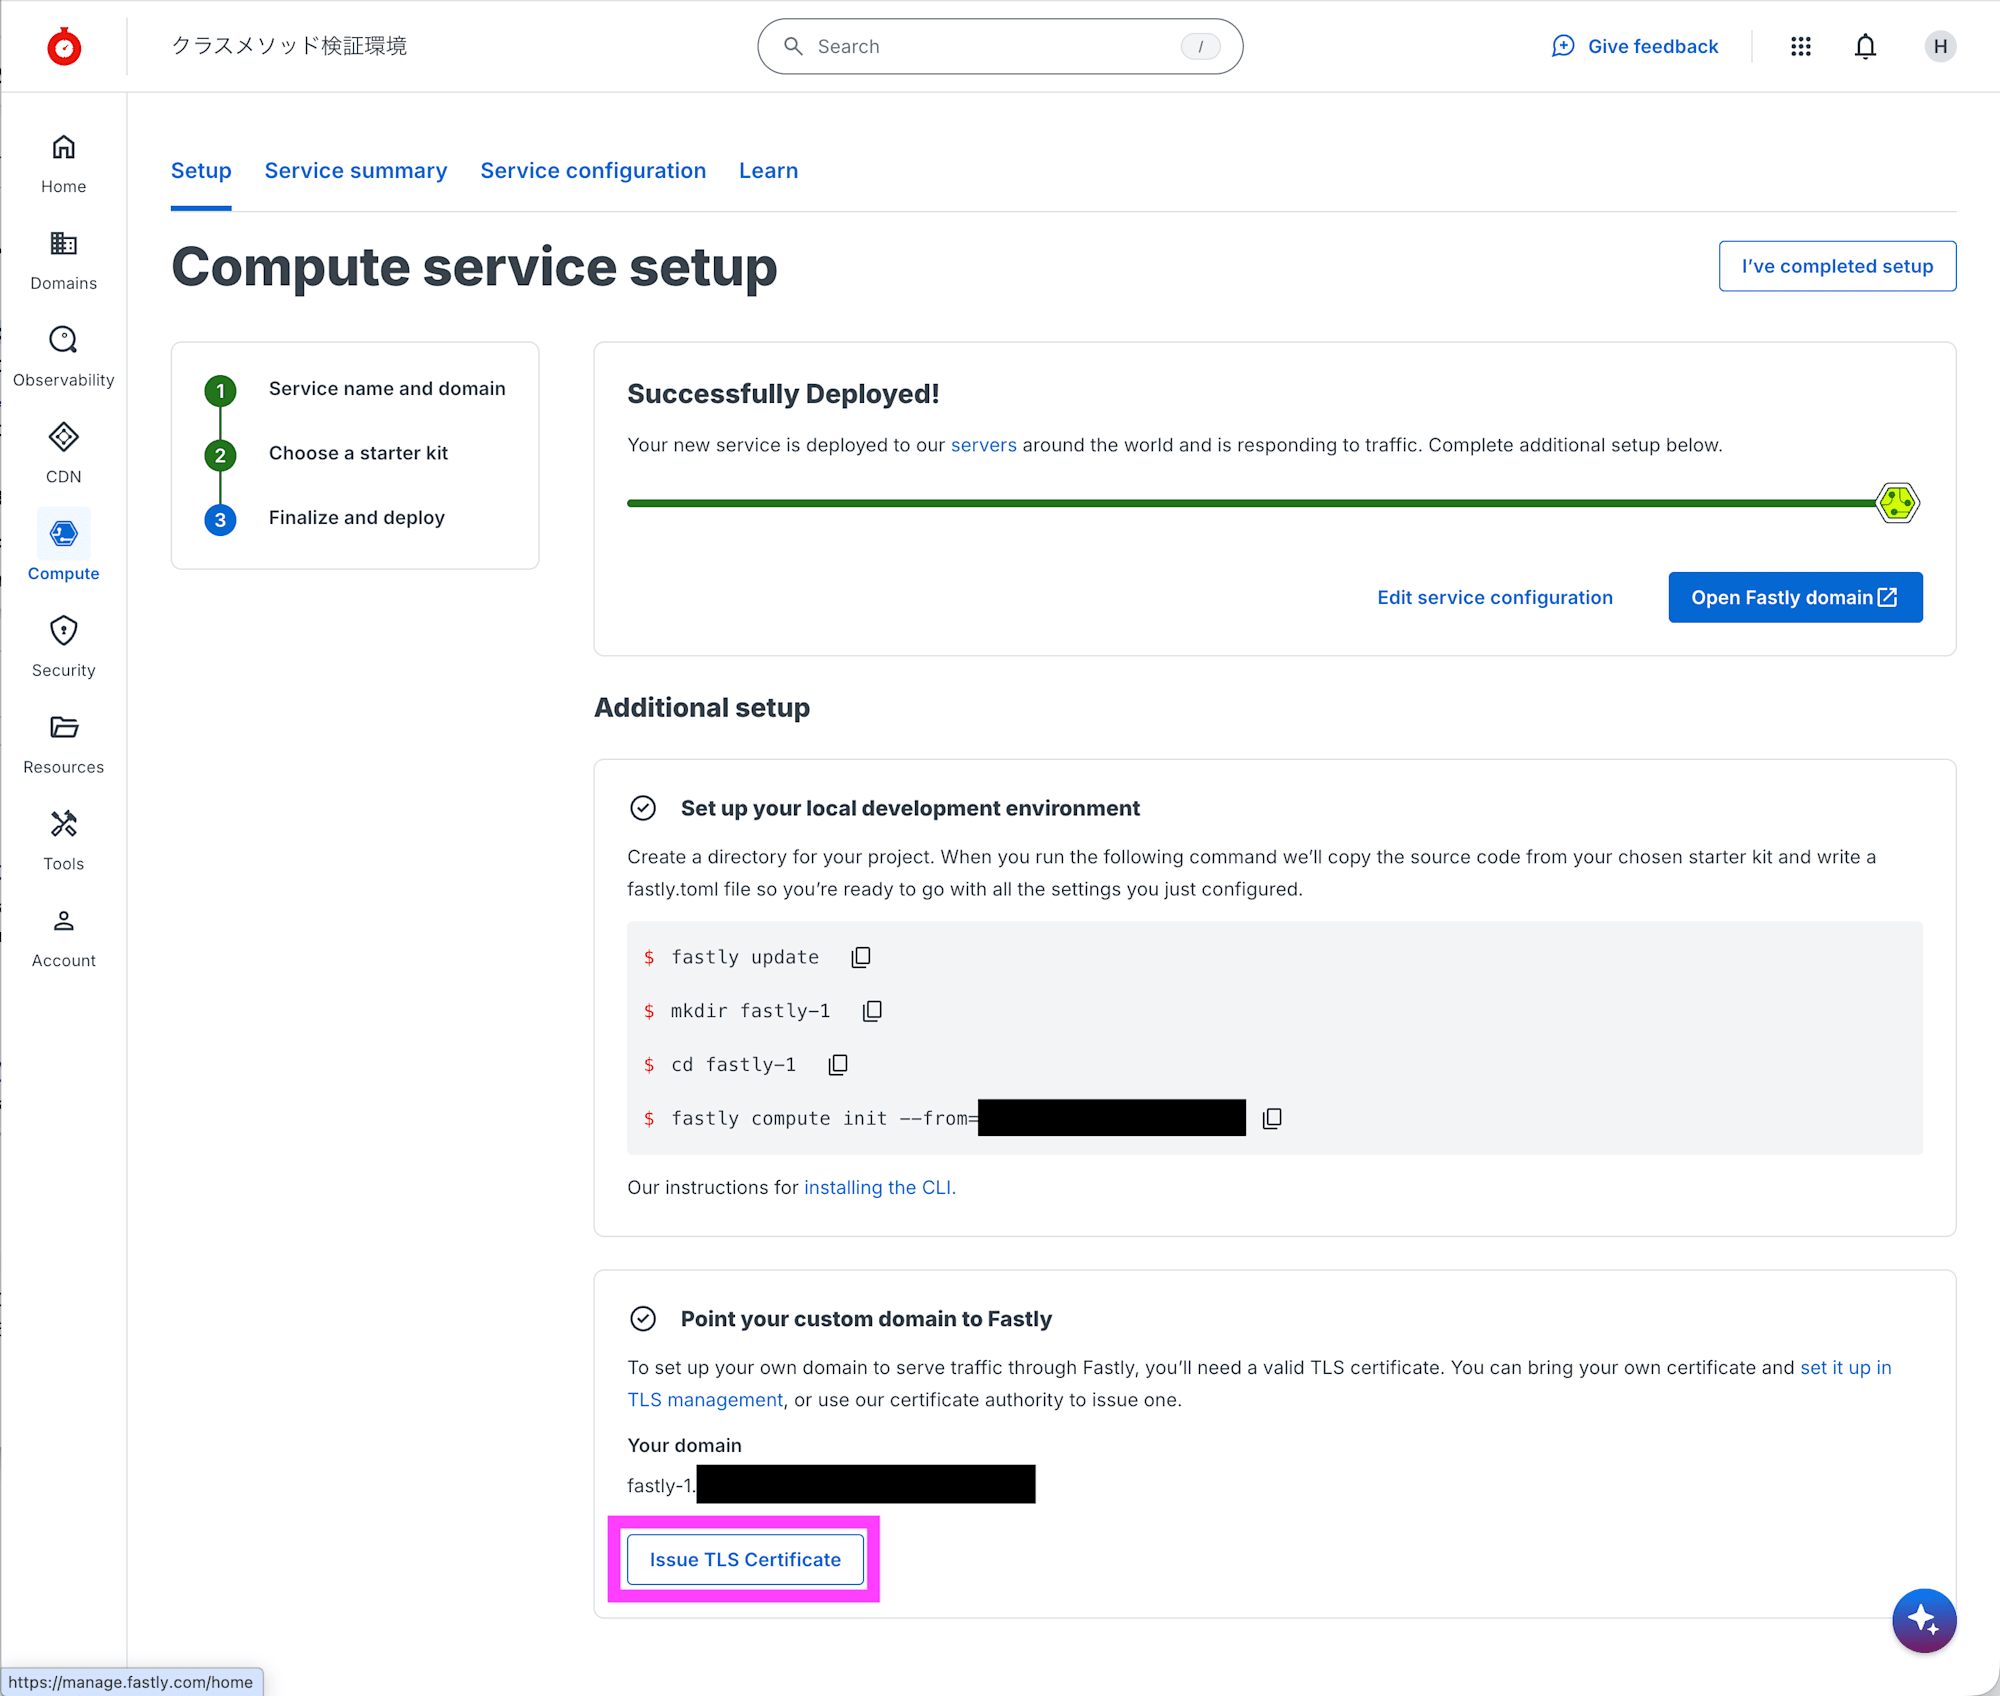
少し待つとデプロイが完了します。完了したら Additional setup の Point your custom domain to Fastly の中の Issue TLS Certificate をクリックします。
ACME の HTTP-01 チャレンジのための CNAME レコードと、サービス提供のための CNAME レコードの情報が提供されるので、管理している DNS サーバーに設定します。
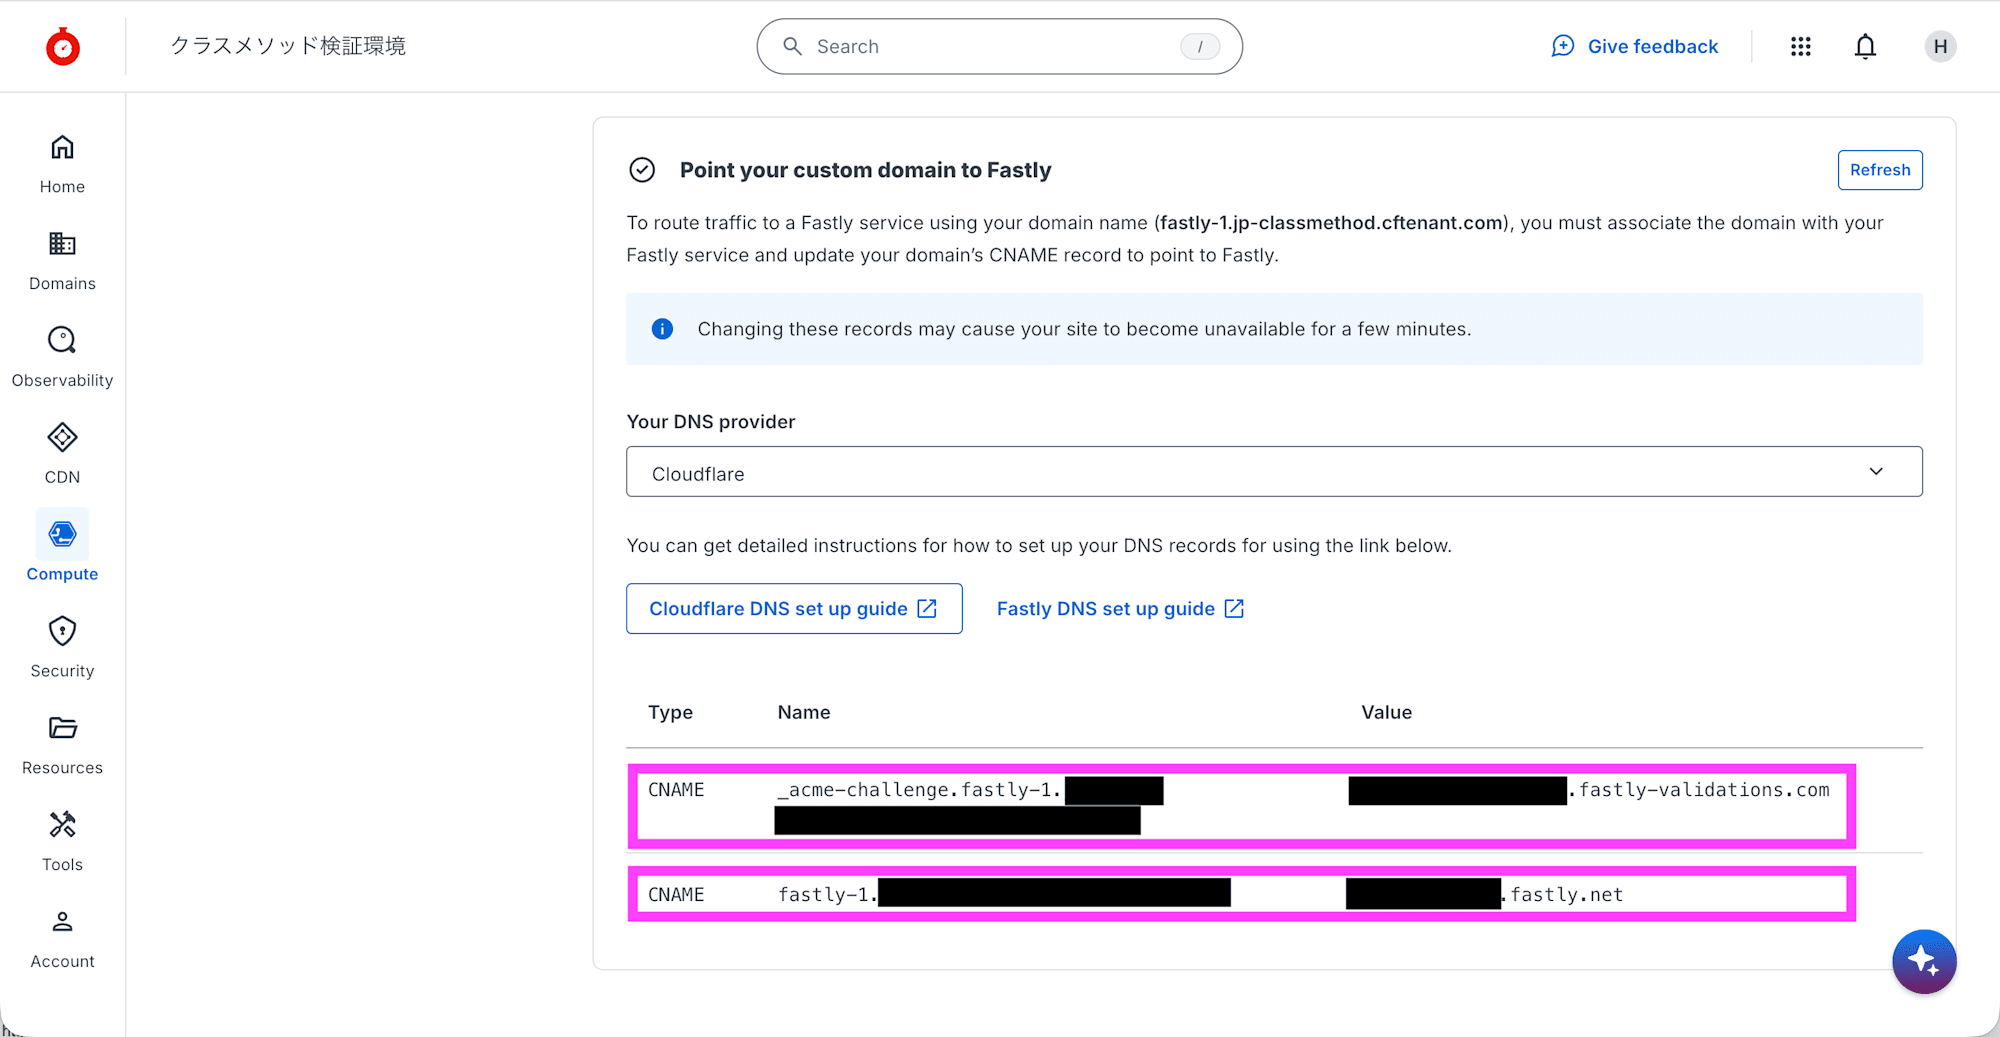
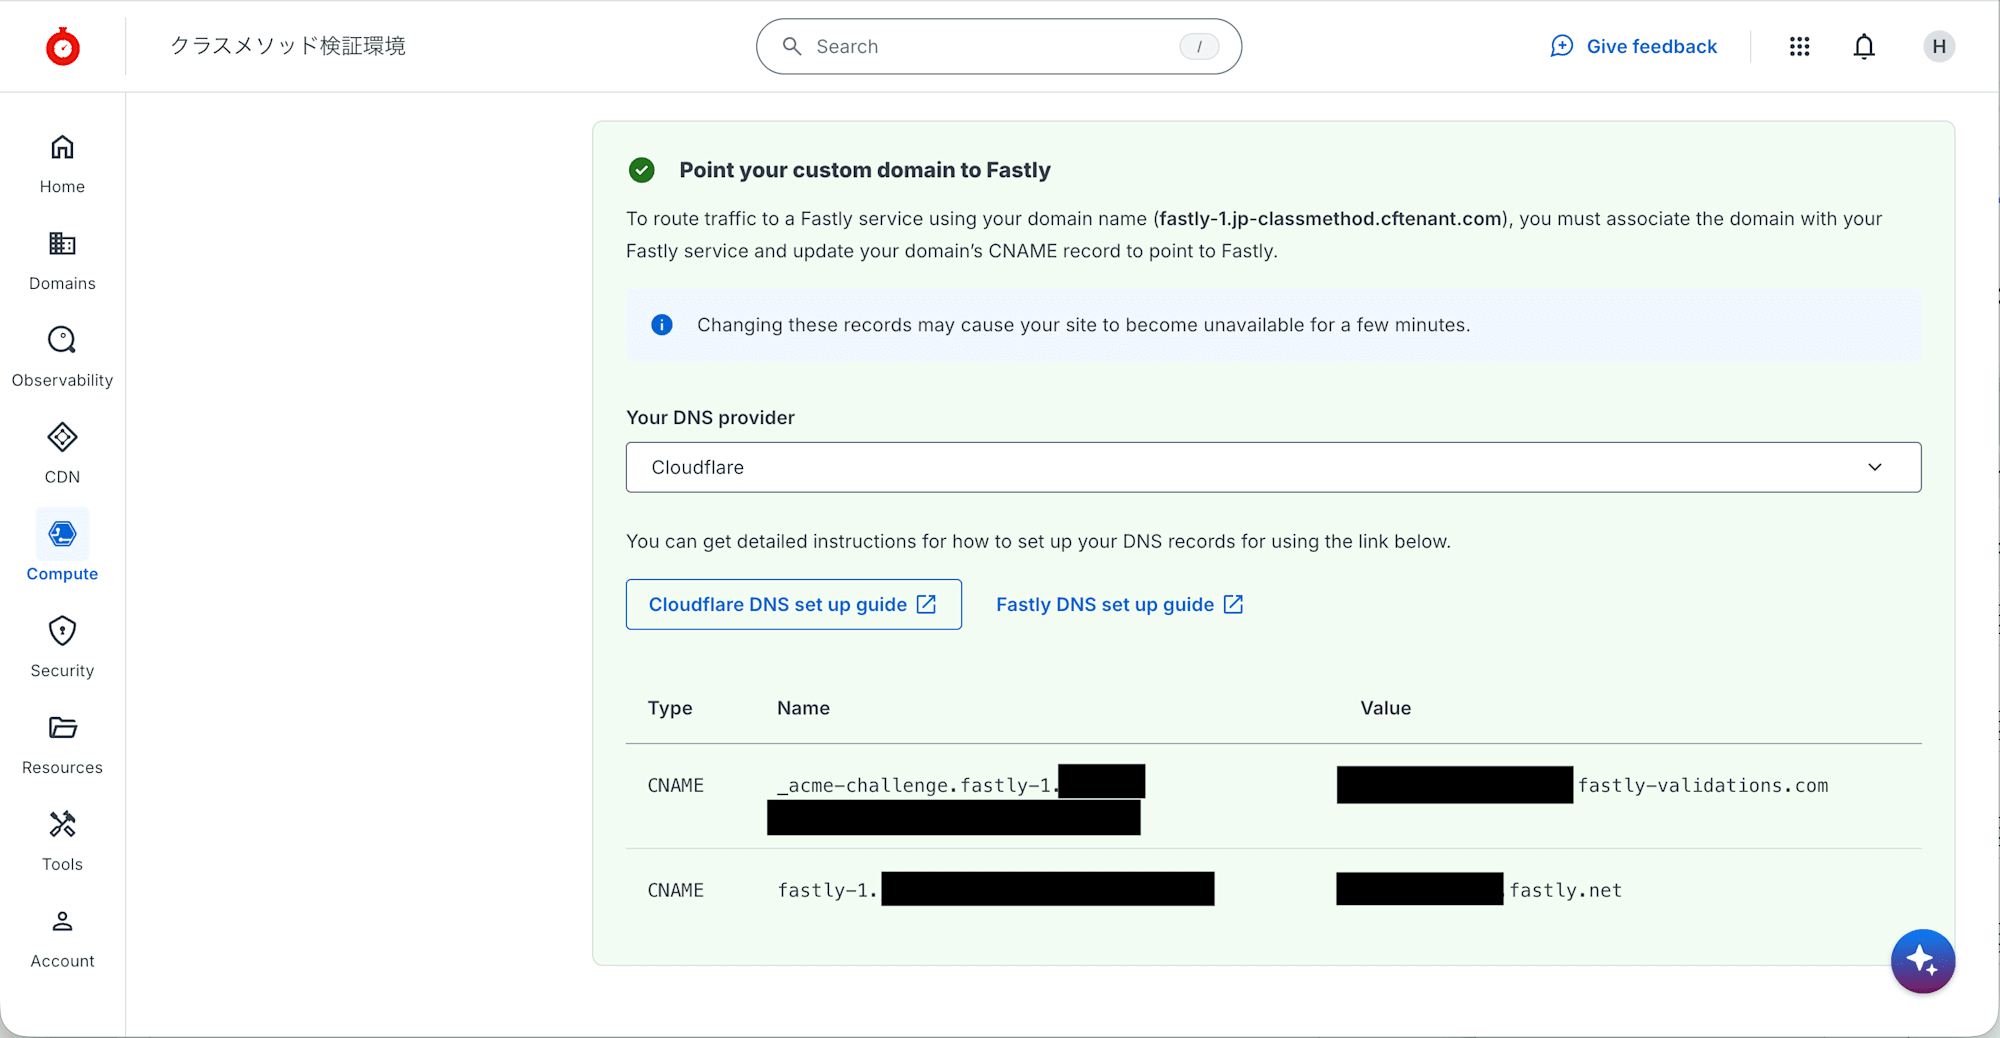
DNS サーバーに登録して、検証されると薄緑色になります。
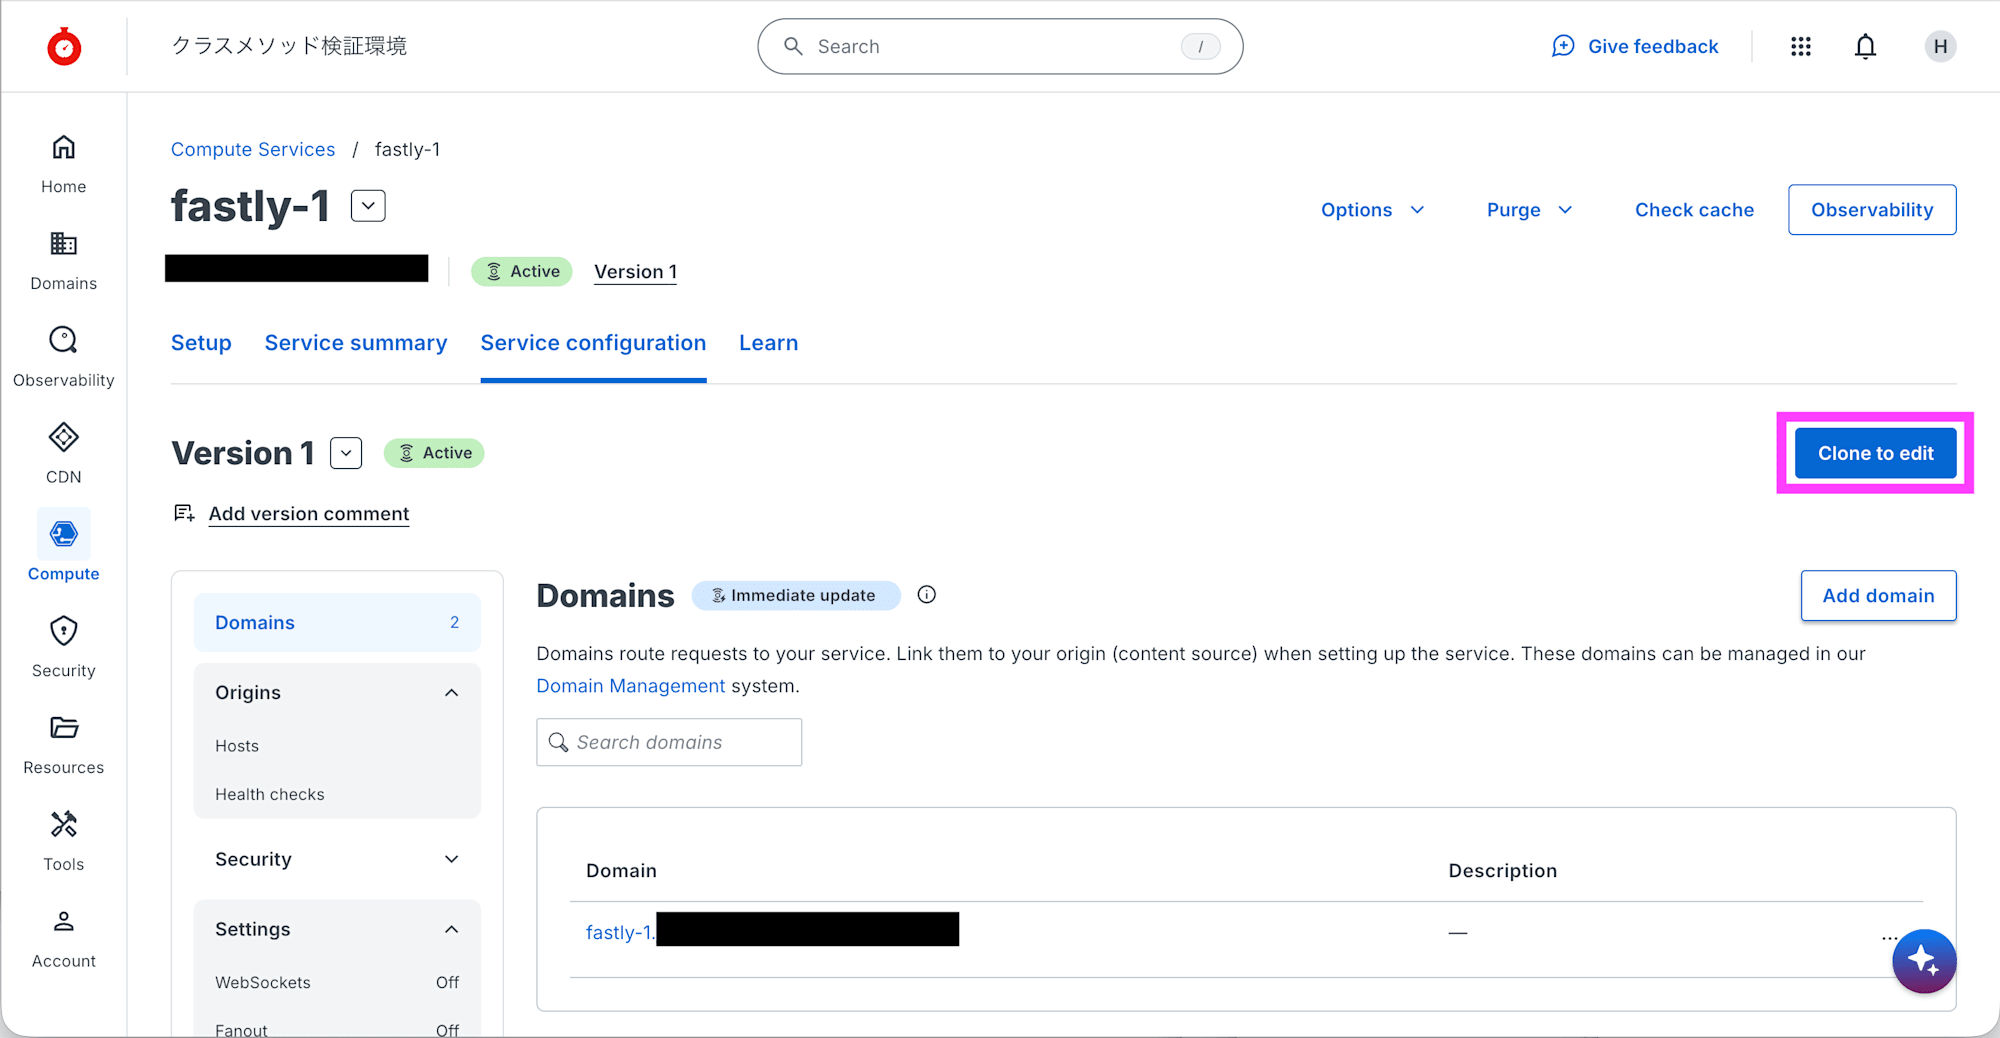
Edit service configuration をクリックします。

Service configuration タブで Clone to edit をクリックします。
[Origins] - [Hosts] を開きます。Hosts で {{client-id}}.netfunnel.stclab.com を入力して Add をクリックします。{{client-id}} は NetFUNNEL コンソールの右上メニューの 統合資格証明 で表示される Client ID を入力します。
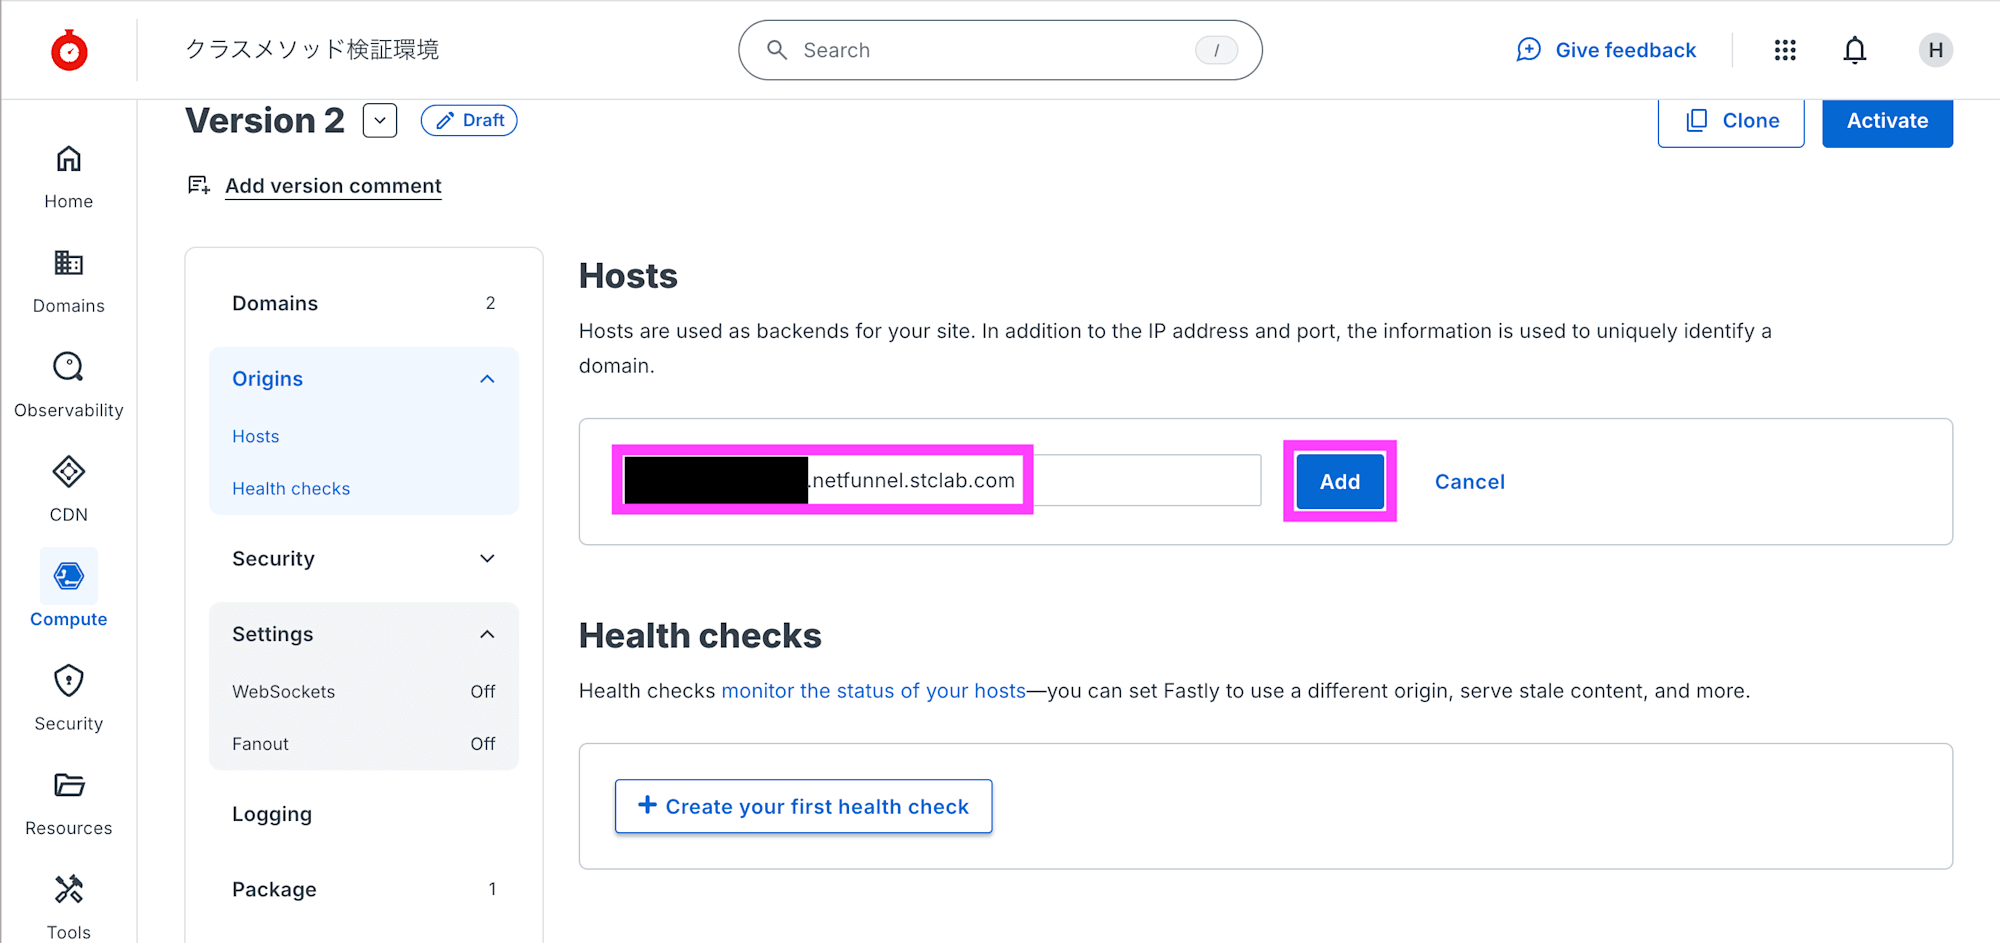
入力した {{client-id}}.netfunnel.stclab.com を編集します。
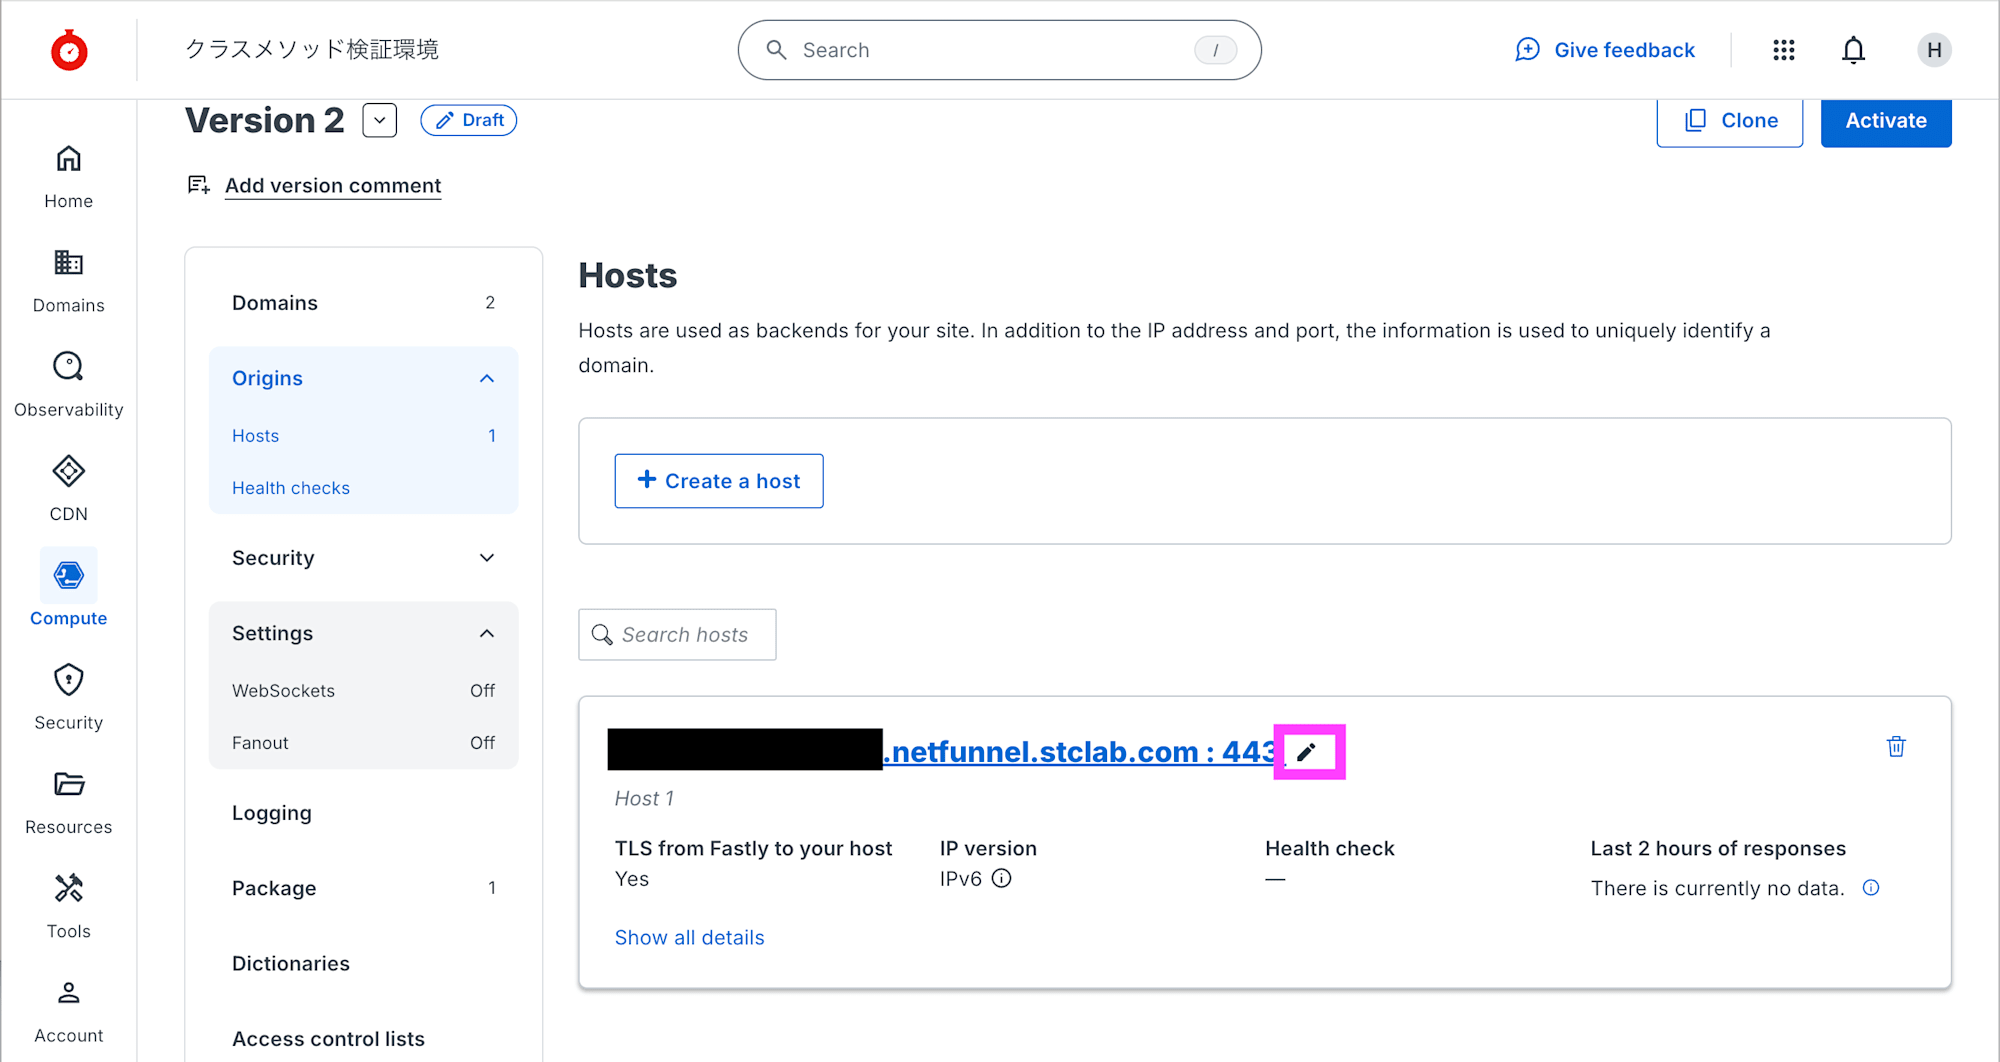
Name を nf_core に変更して Update をクリックします。

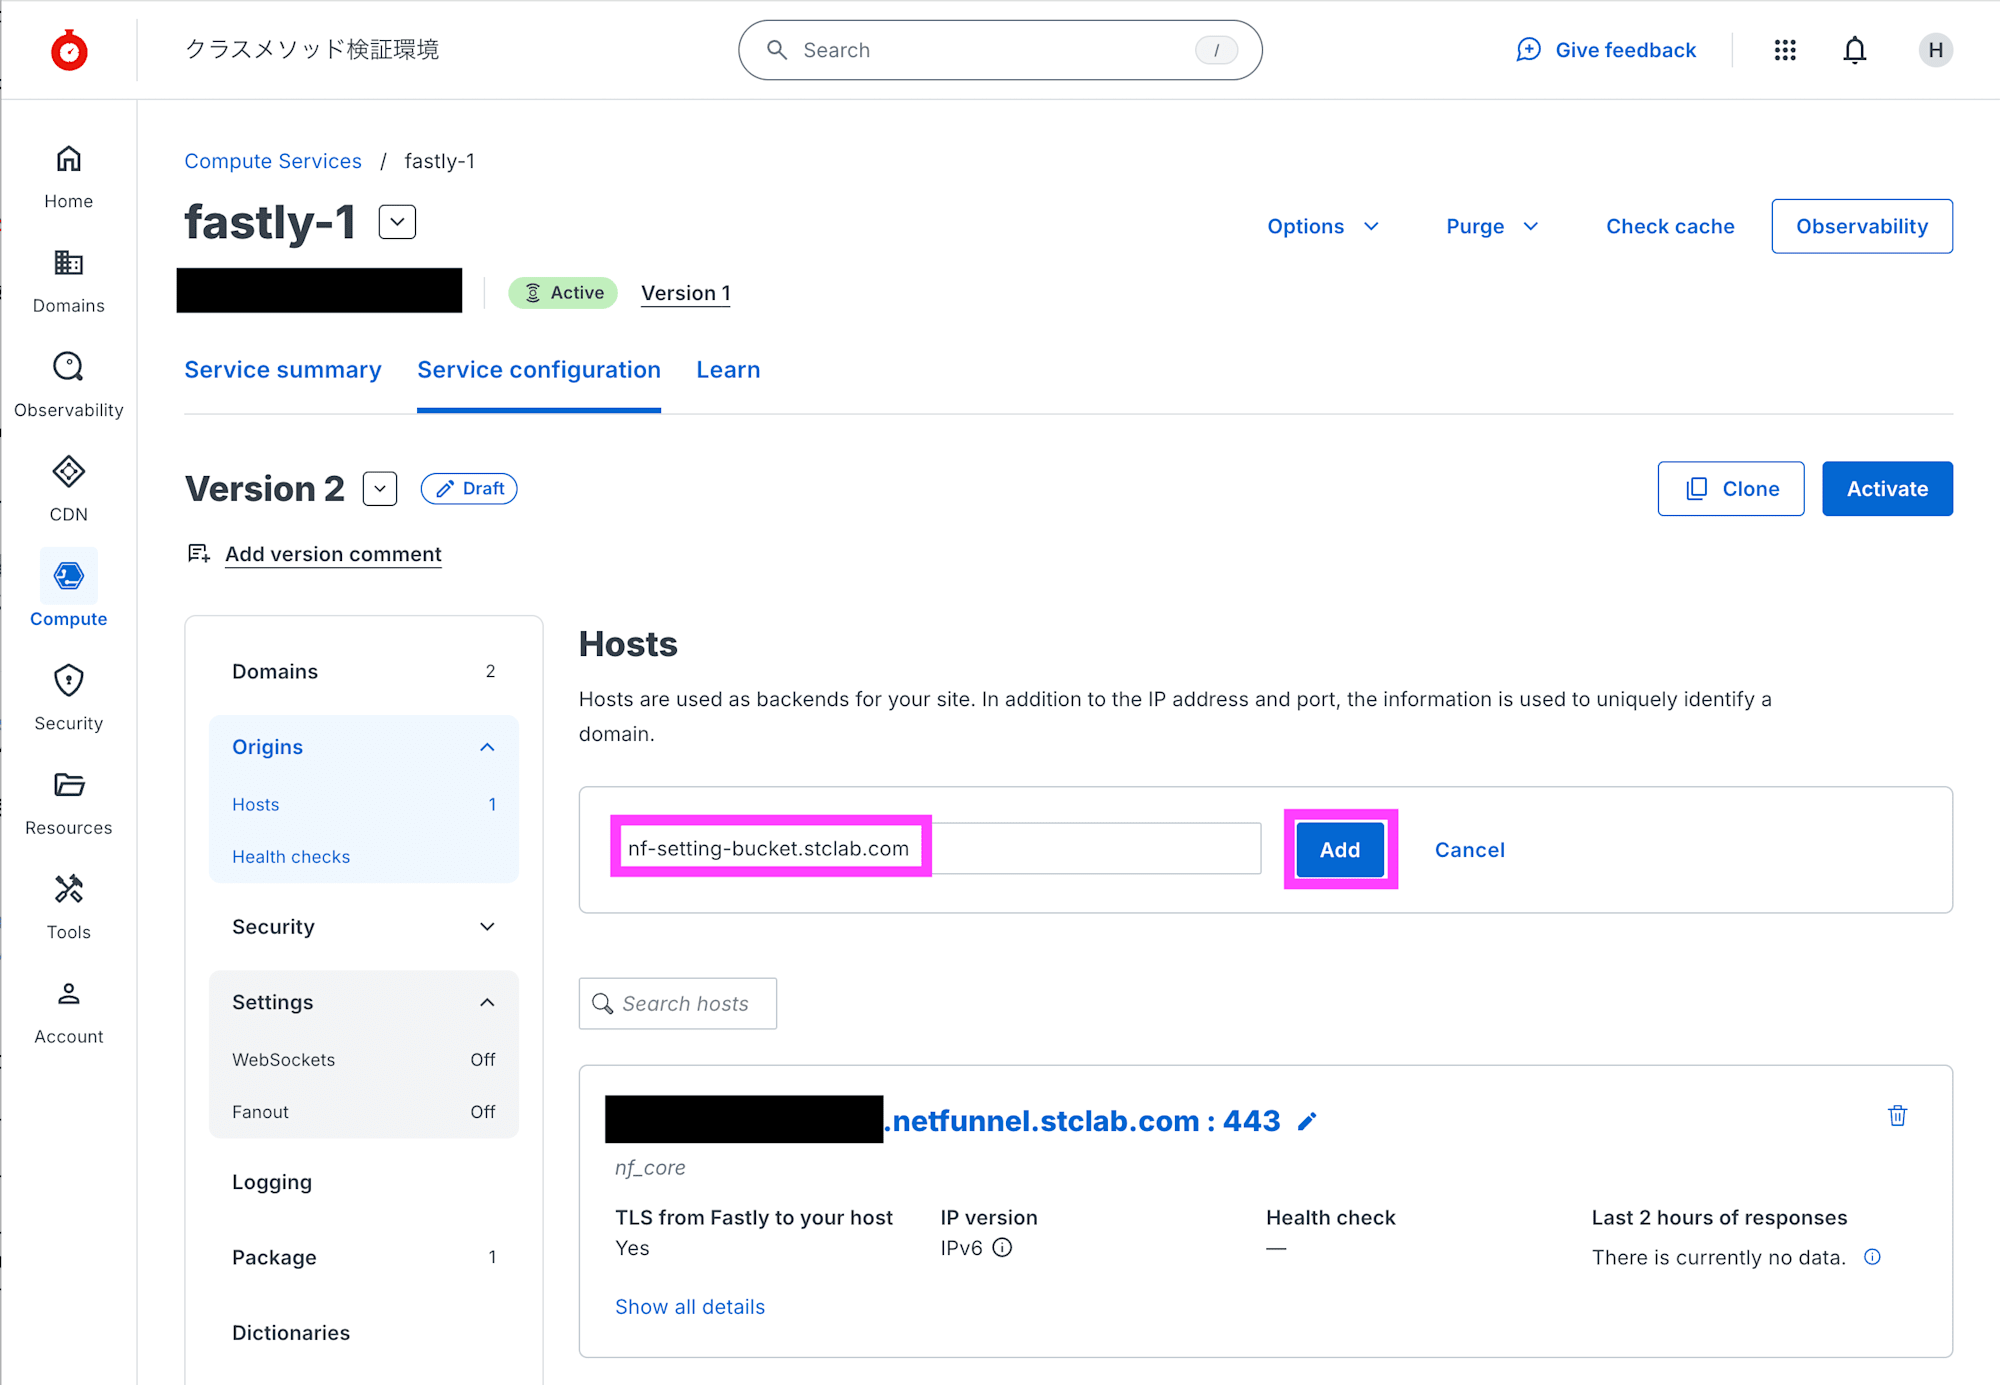
Hosts で + Create a host をクリックして入力欄を表示して、nf-setting-bucket.stclab.com を入力して Add をクリックします。
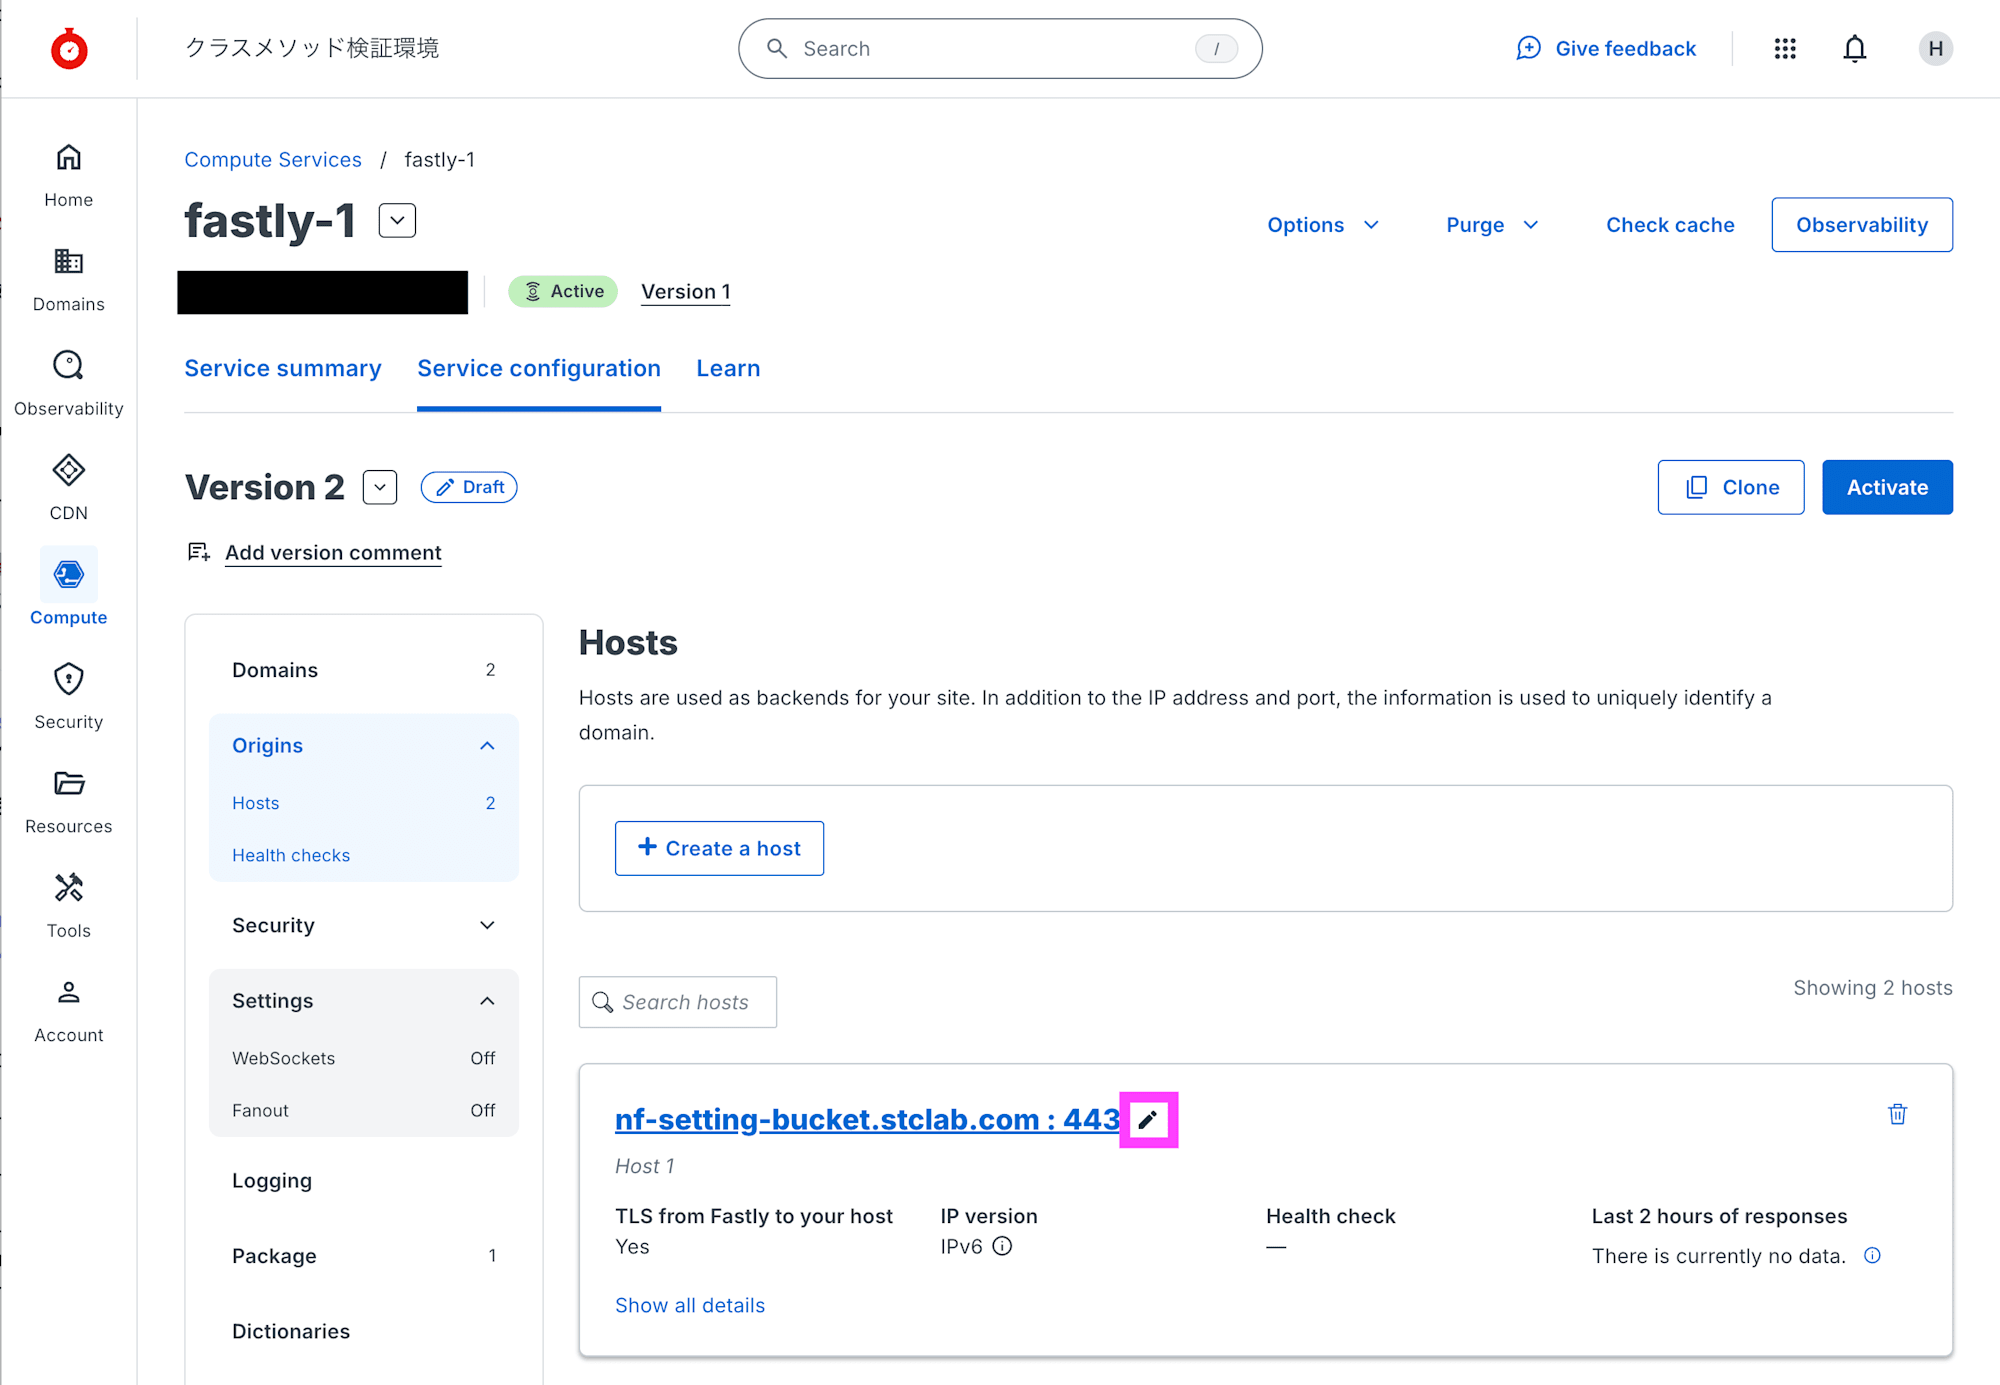
入力した nf-setting-bucket.stclab.com を編集します。
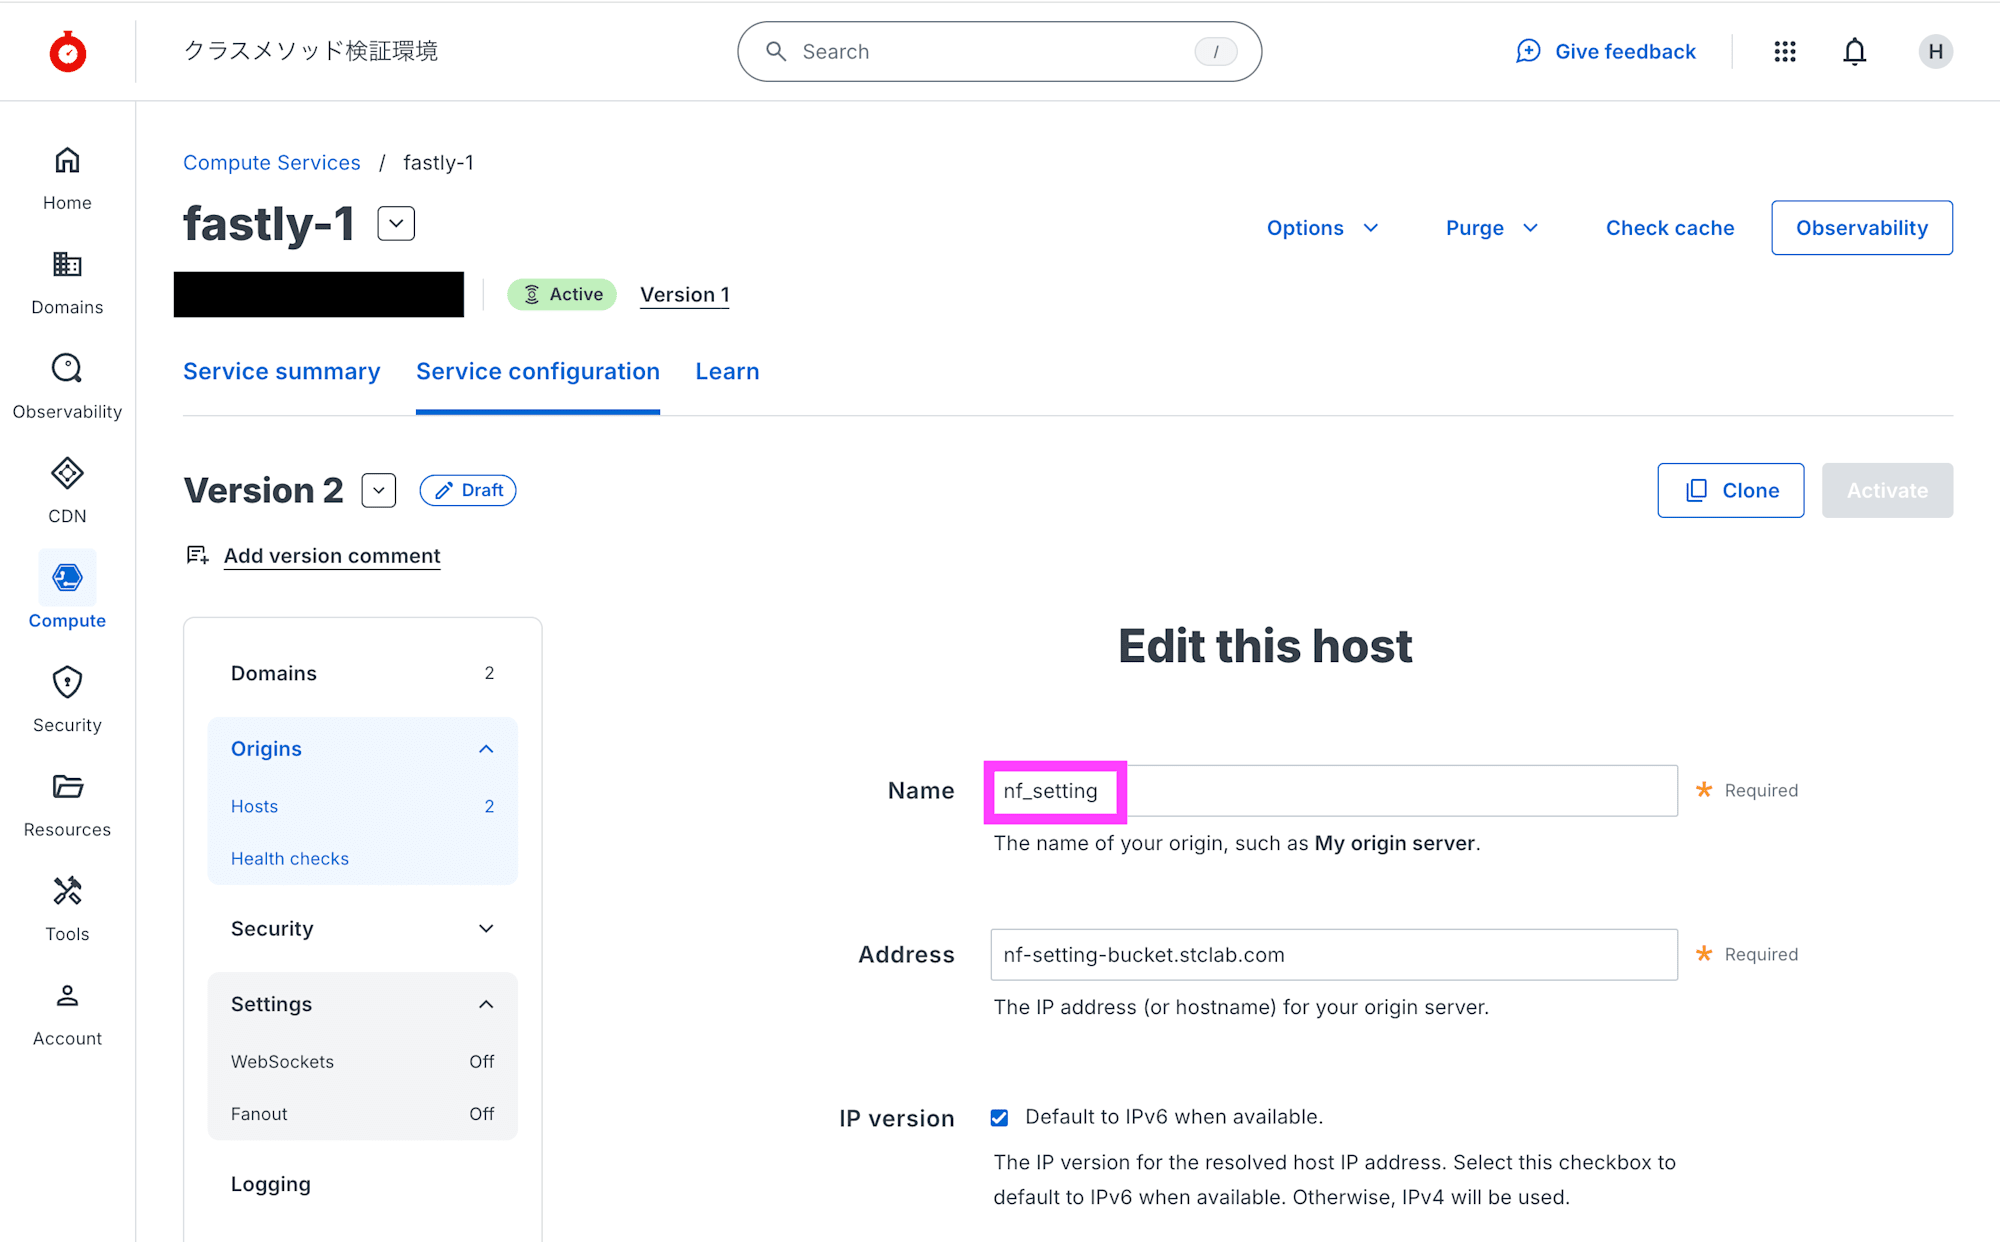
Name を nf_setting に変更して Update をクリックします。
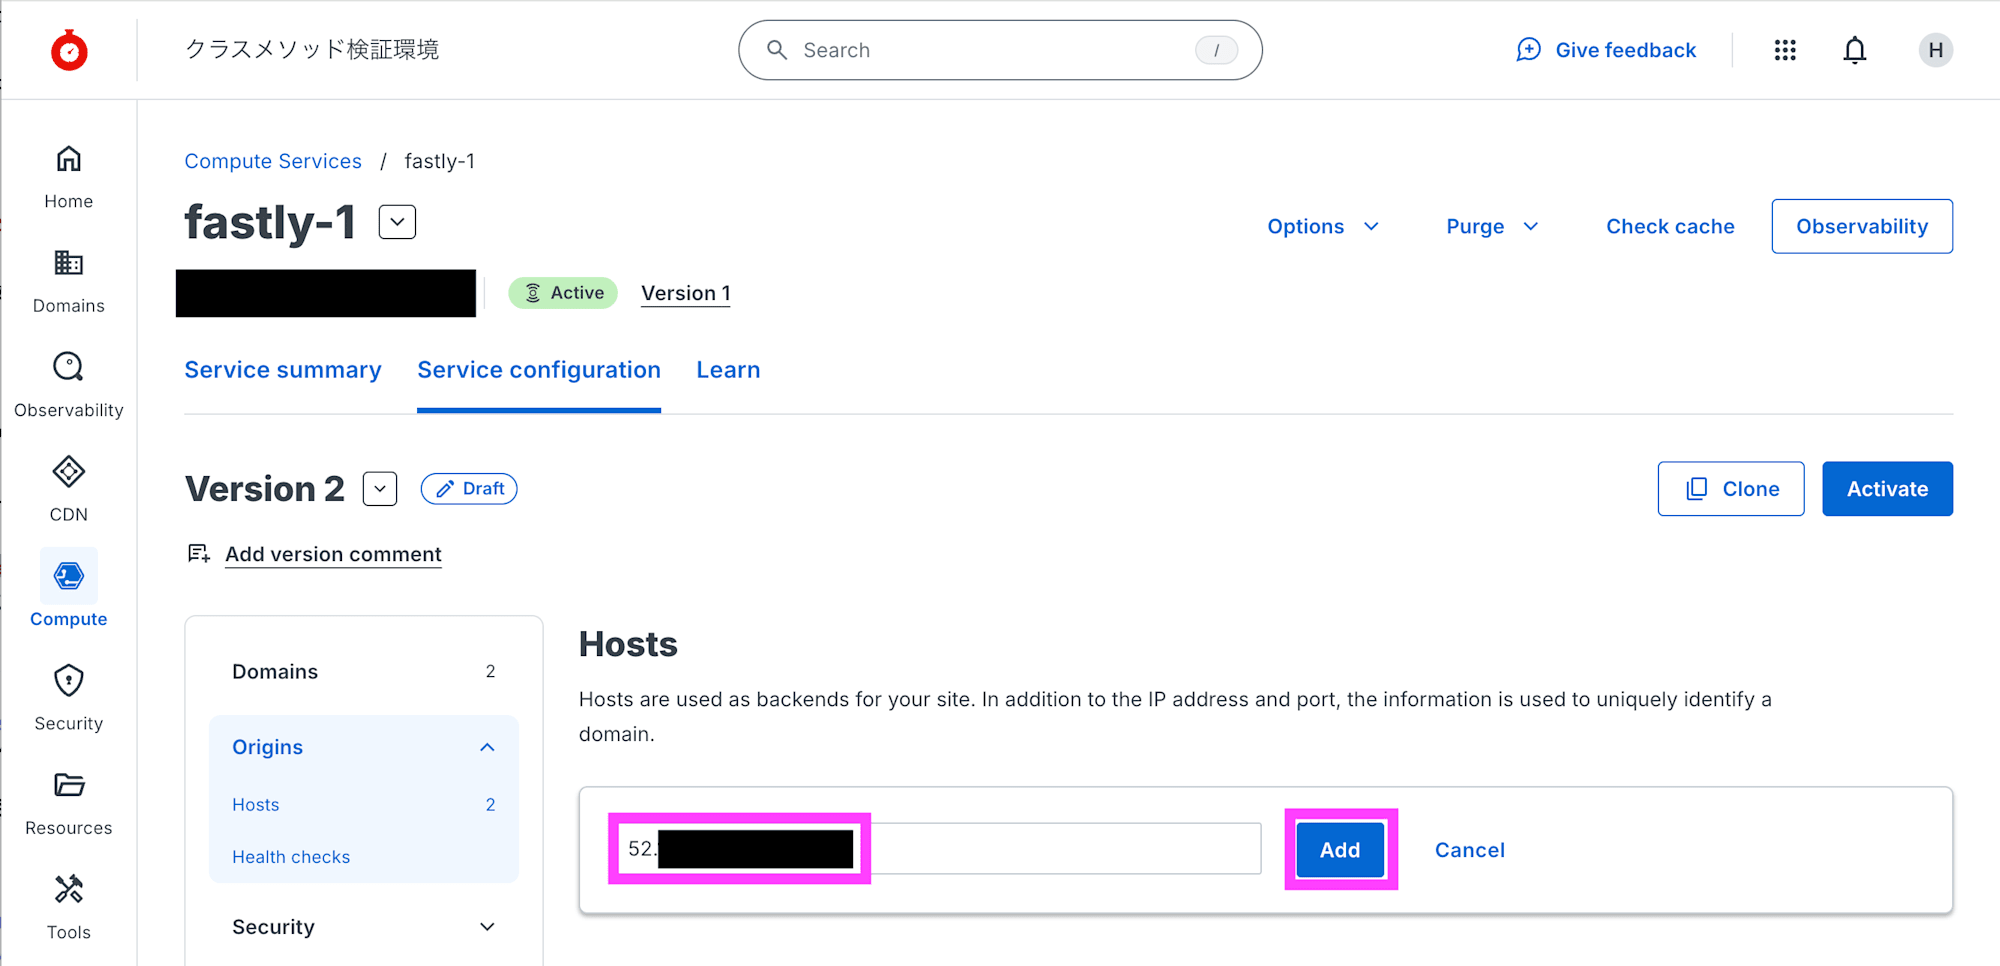
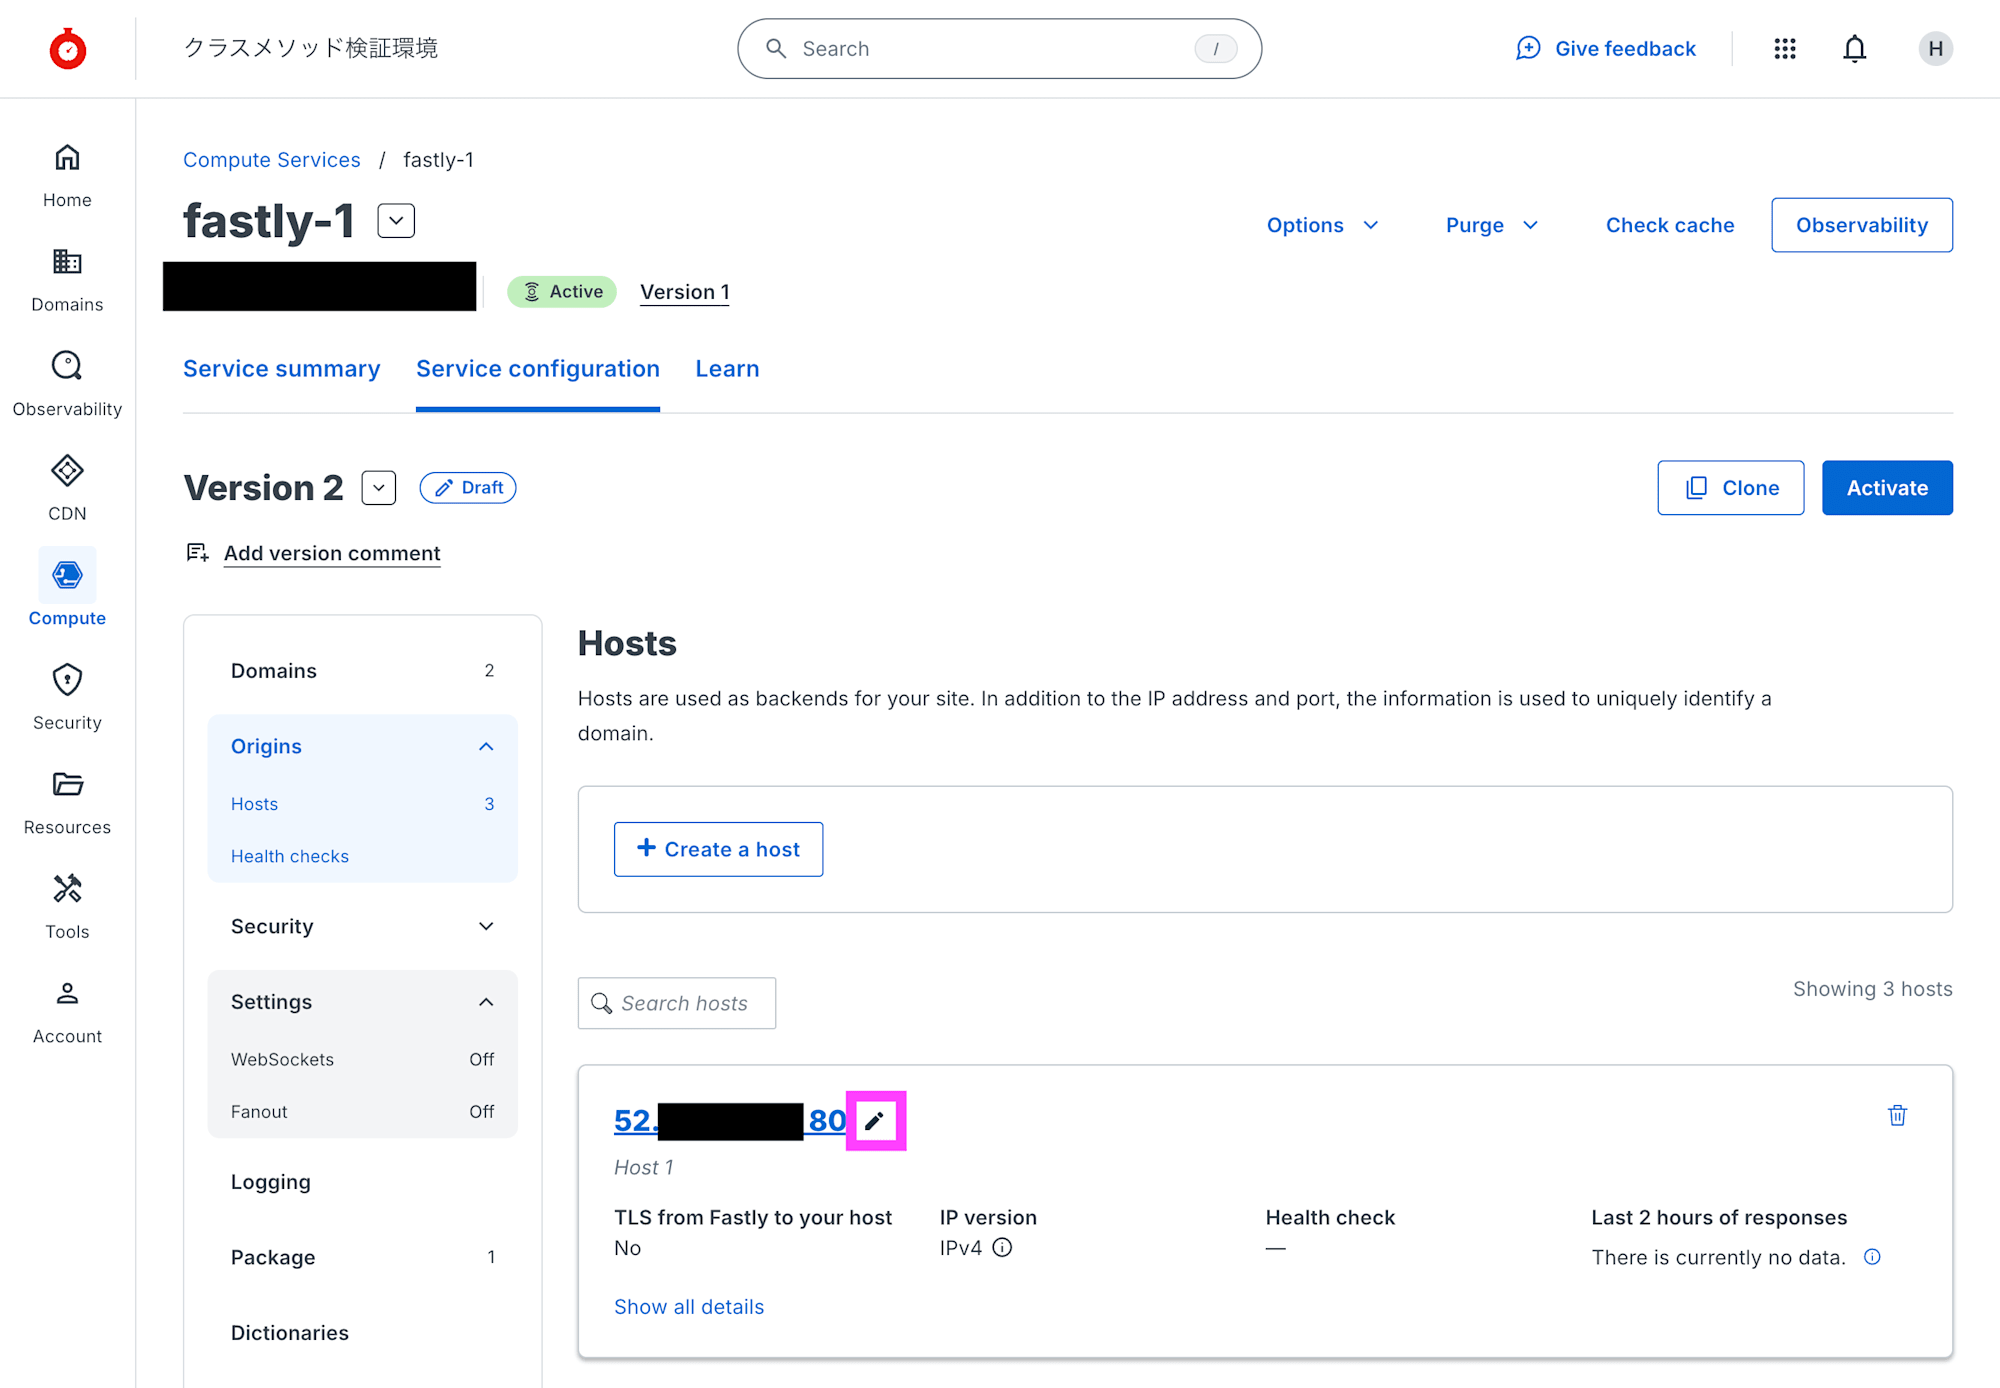
Hosts で + Create a host をクリックして入力欄を表示して、オリジンサーバーの FQDN を入力して Add をクリックします。IP アドレスでの入力も可能です。
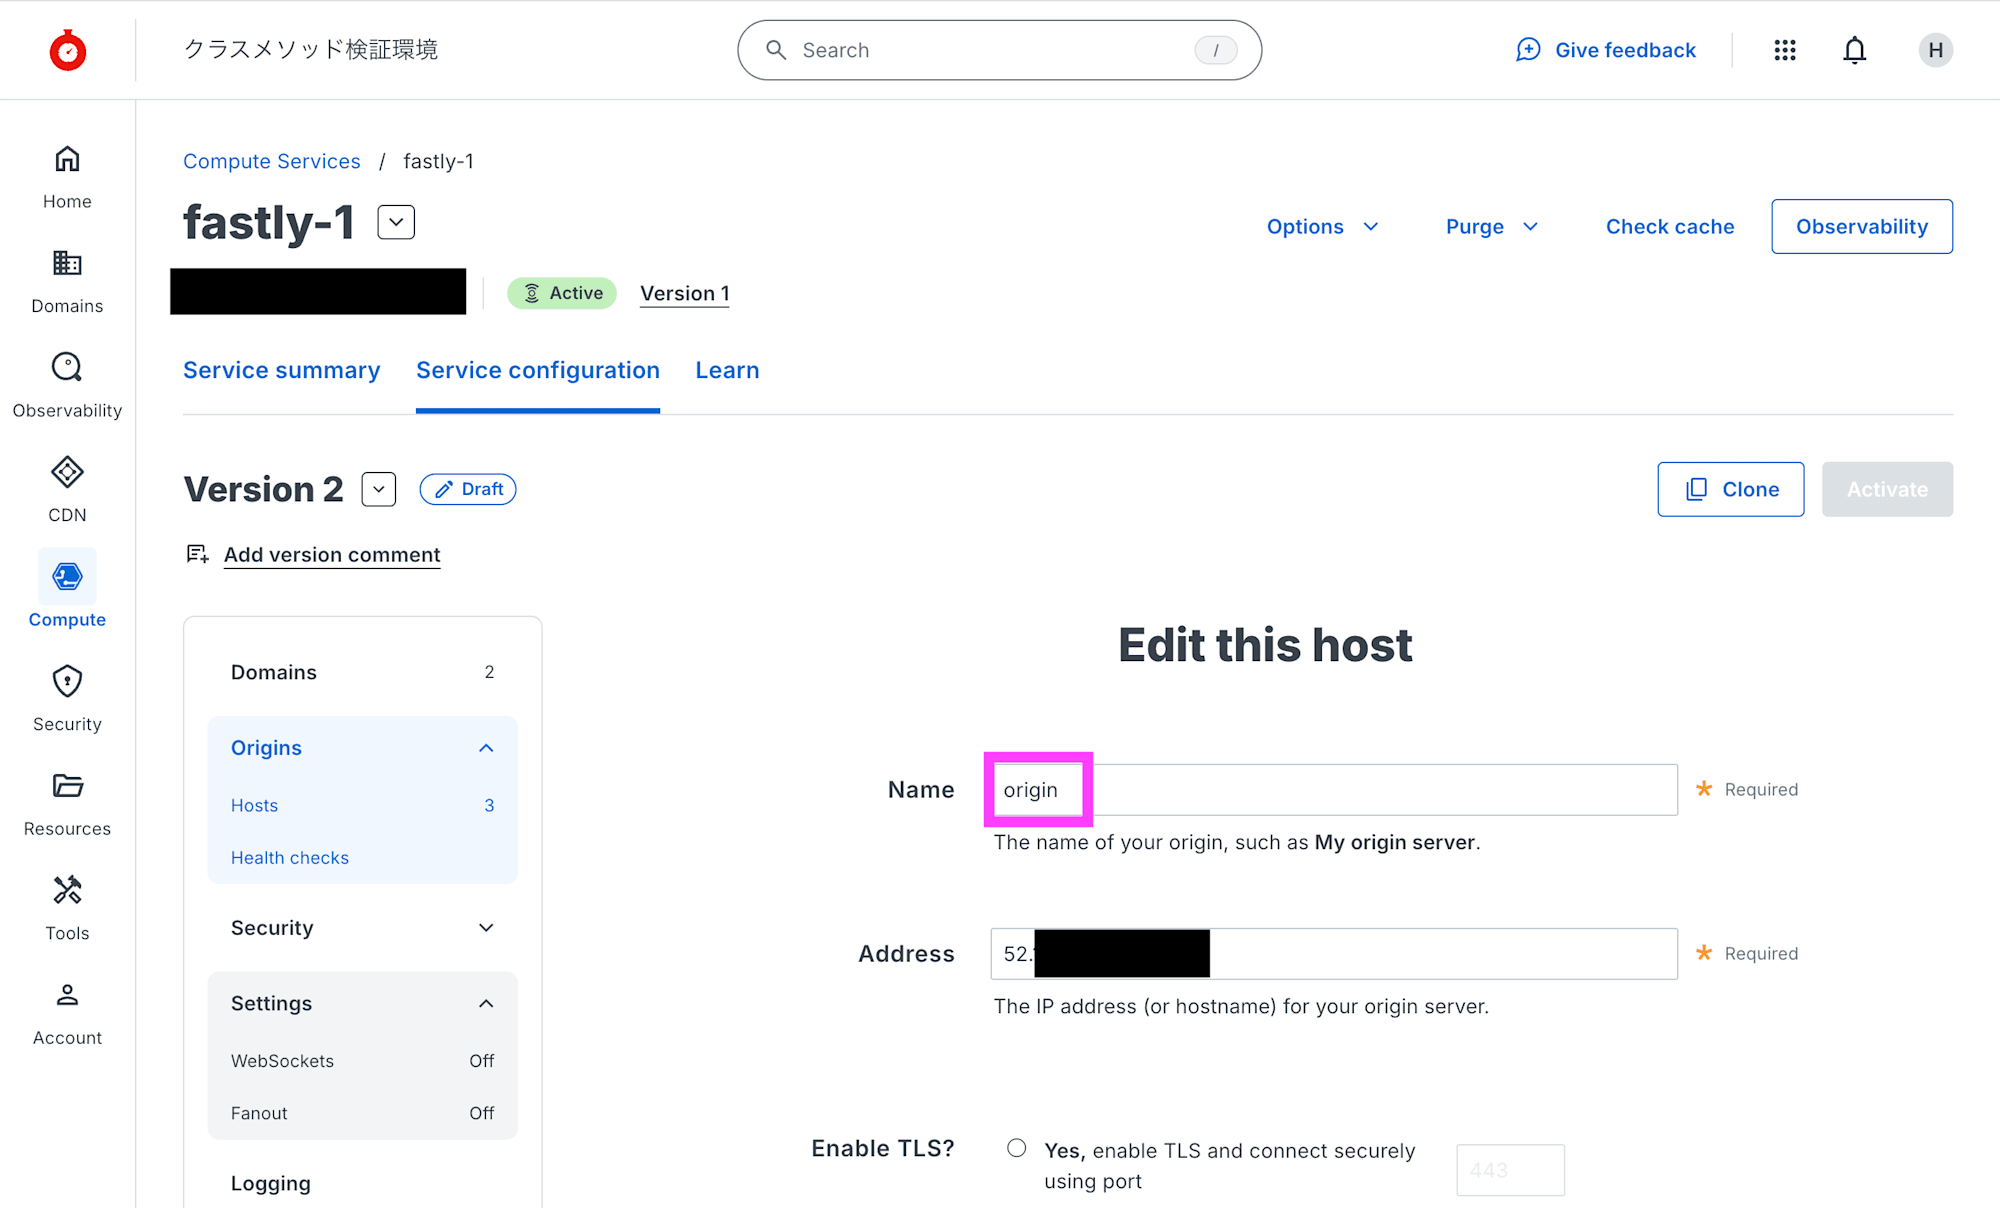
入力したオリジンサーバーの FQDN を編集します。
Name を origin に変更して Update をクリックします。
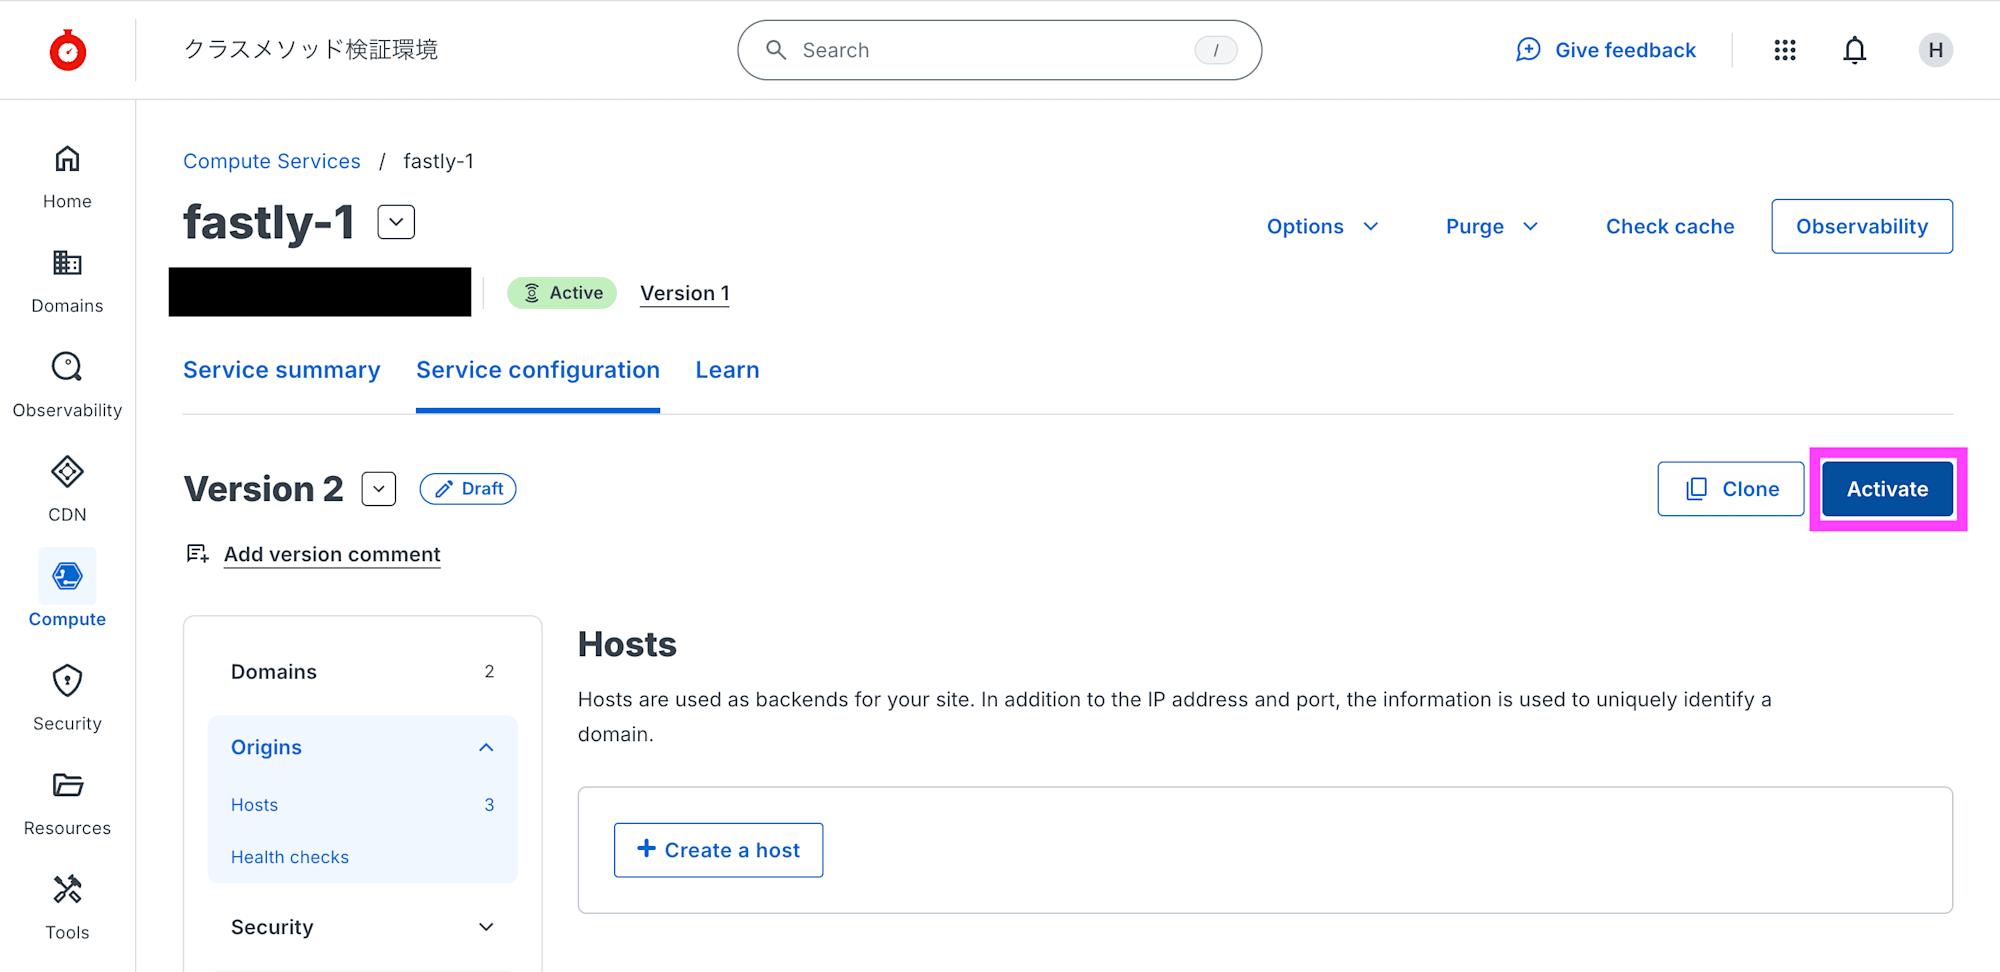
右上の Activate をクリックして設定内容を反映します。
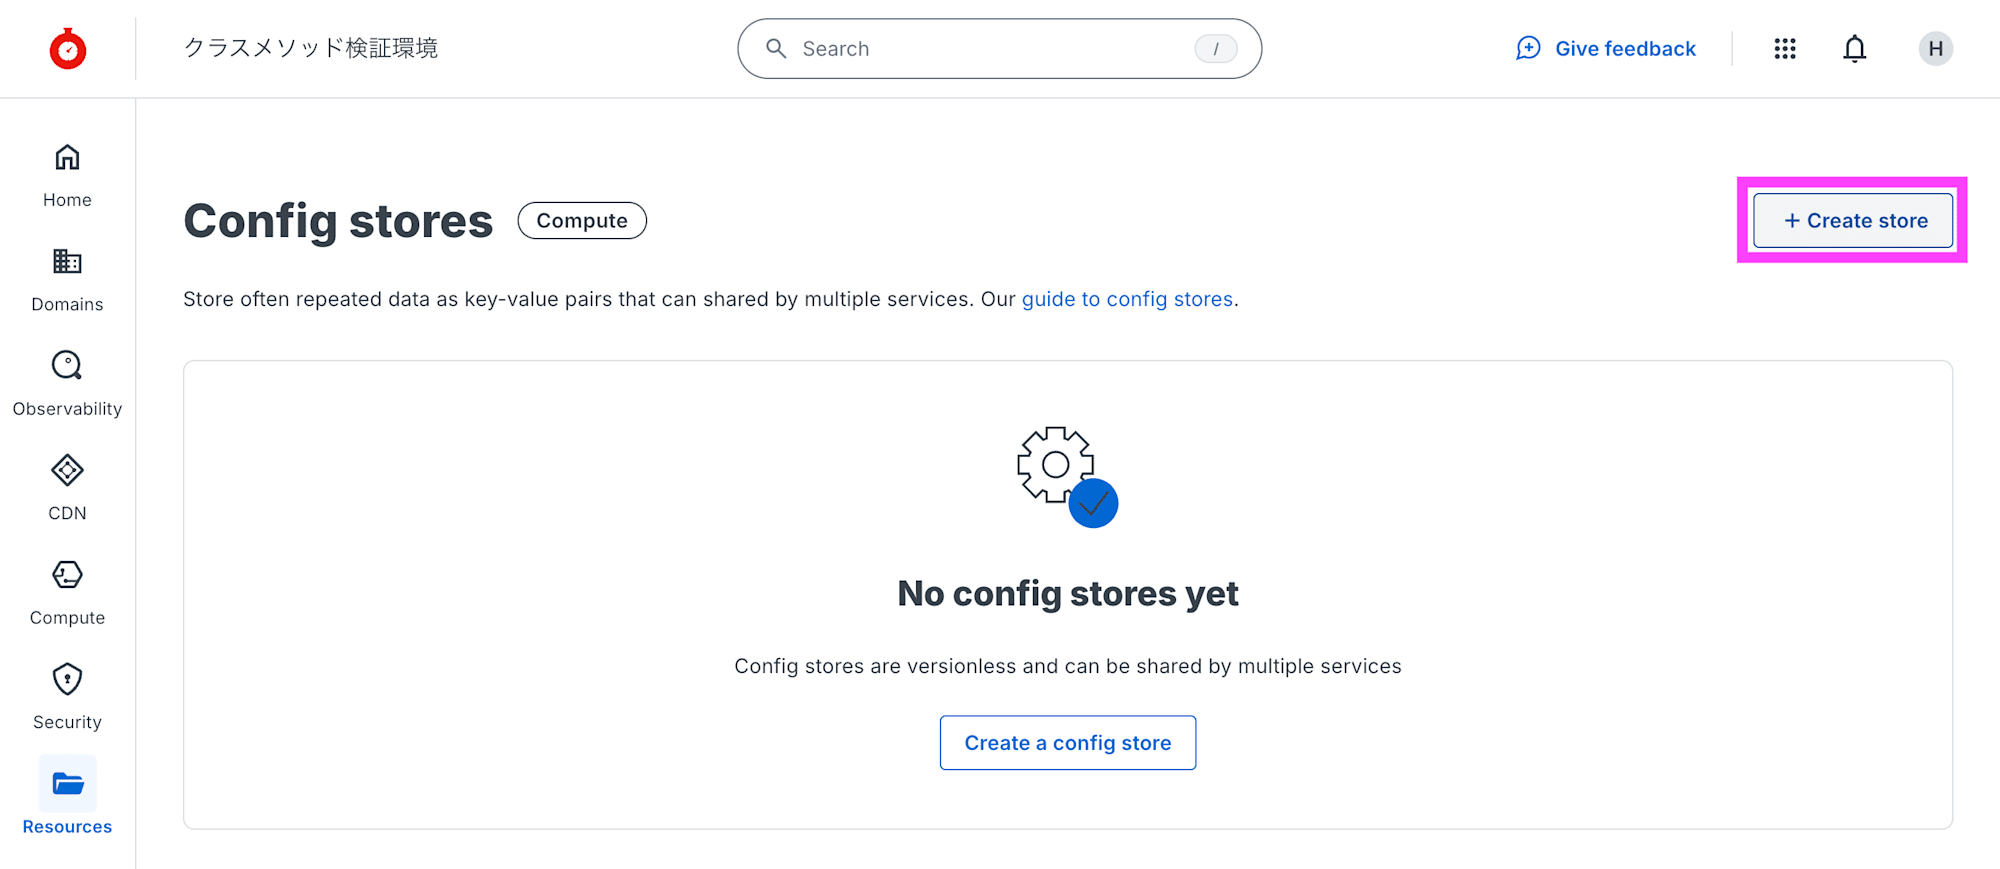
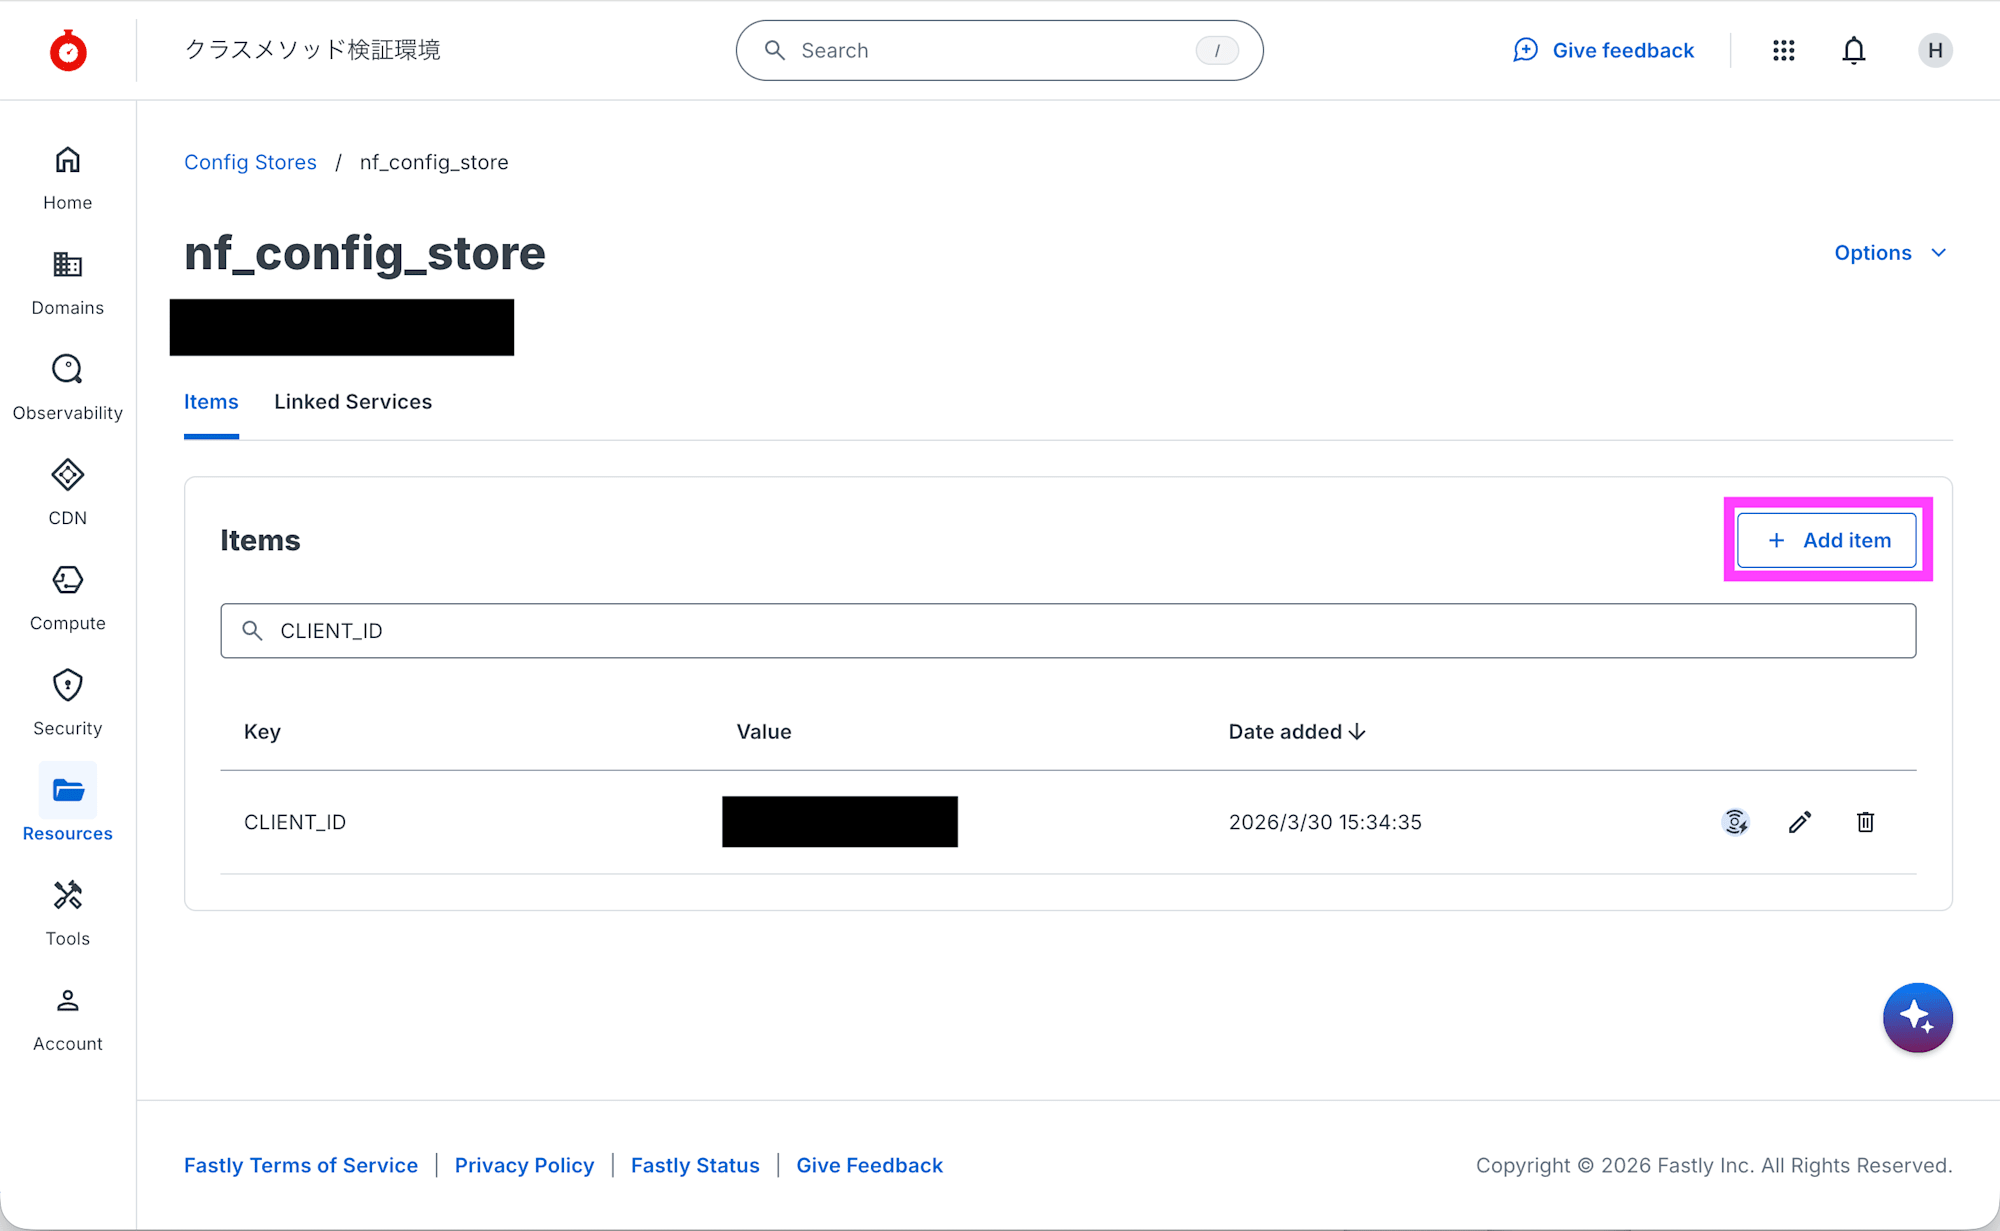
[Resources] - [Config stores] で + Create store をクリックします。
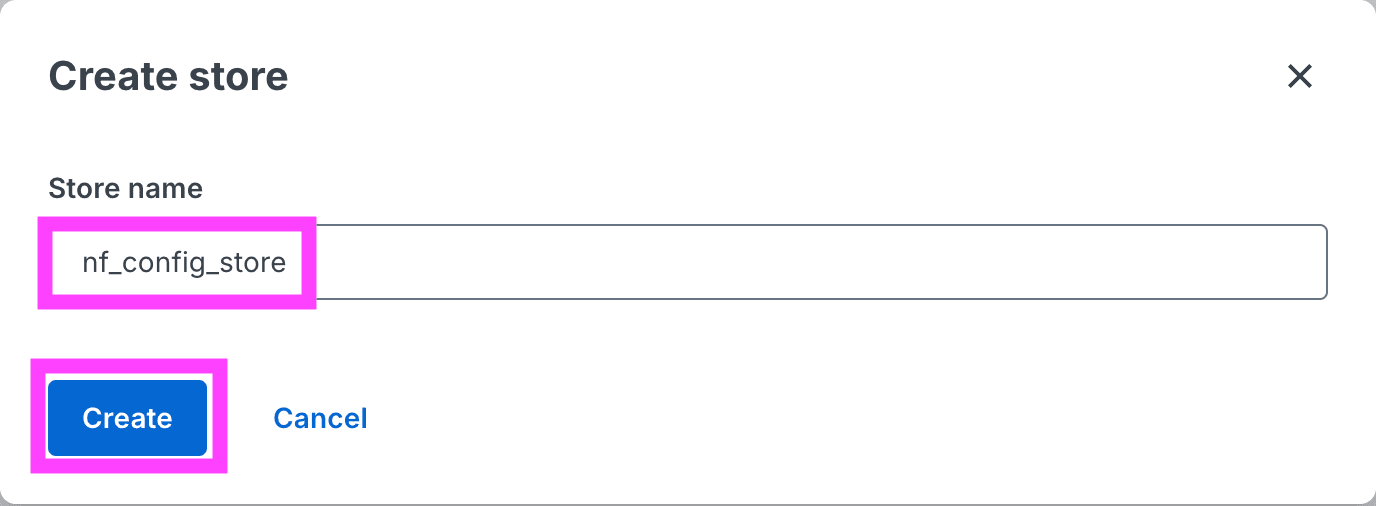
Store name に nf_config_store と入力し、Create をクリックします。
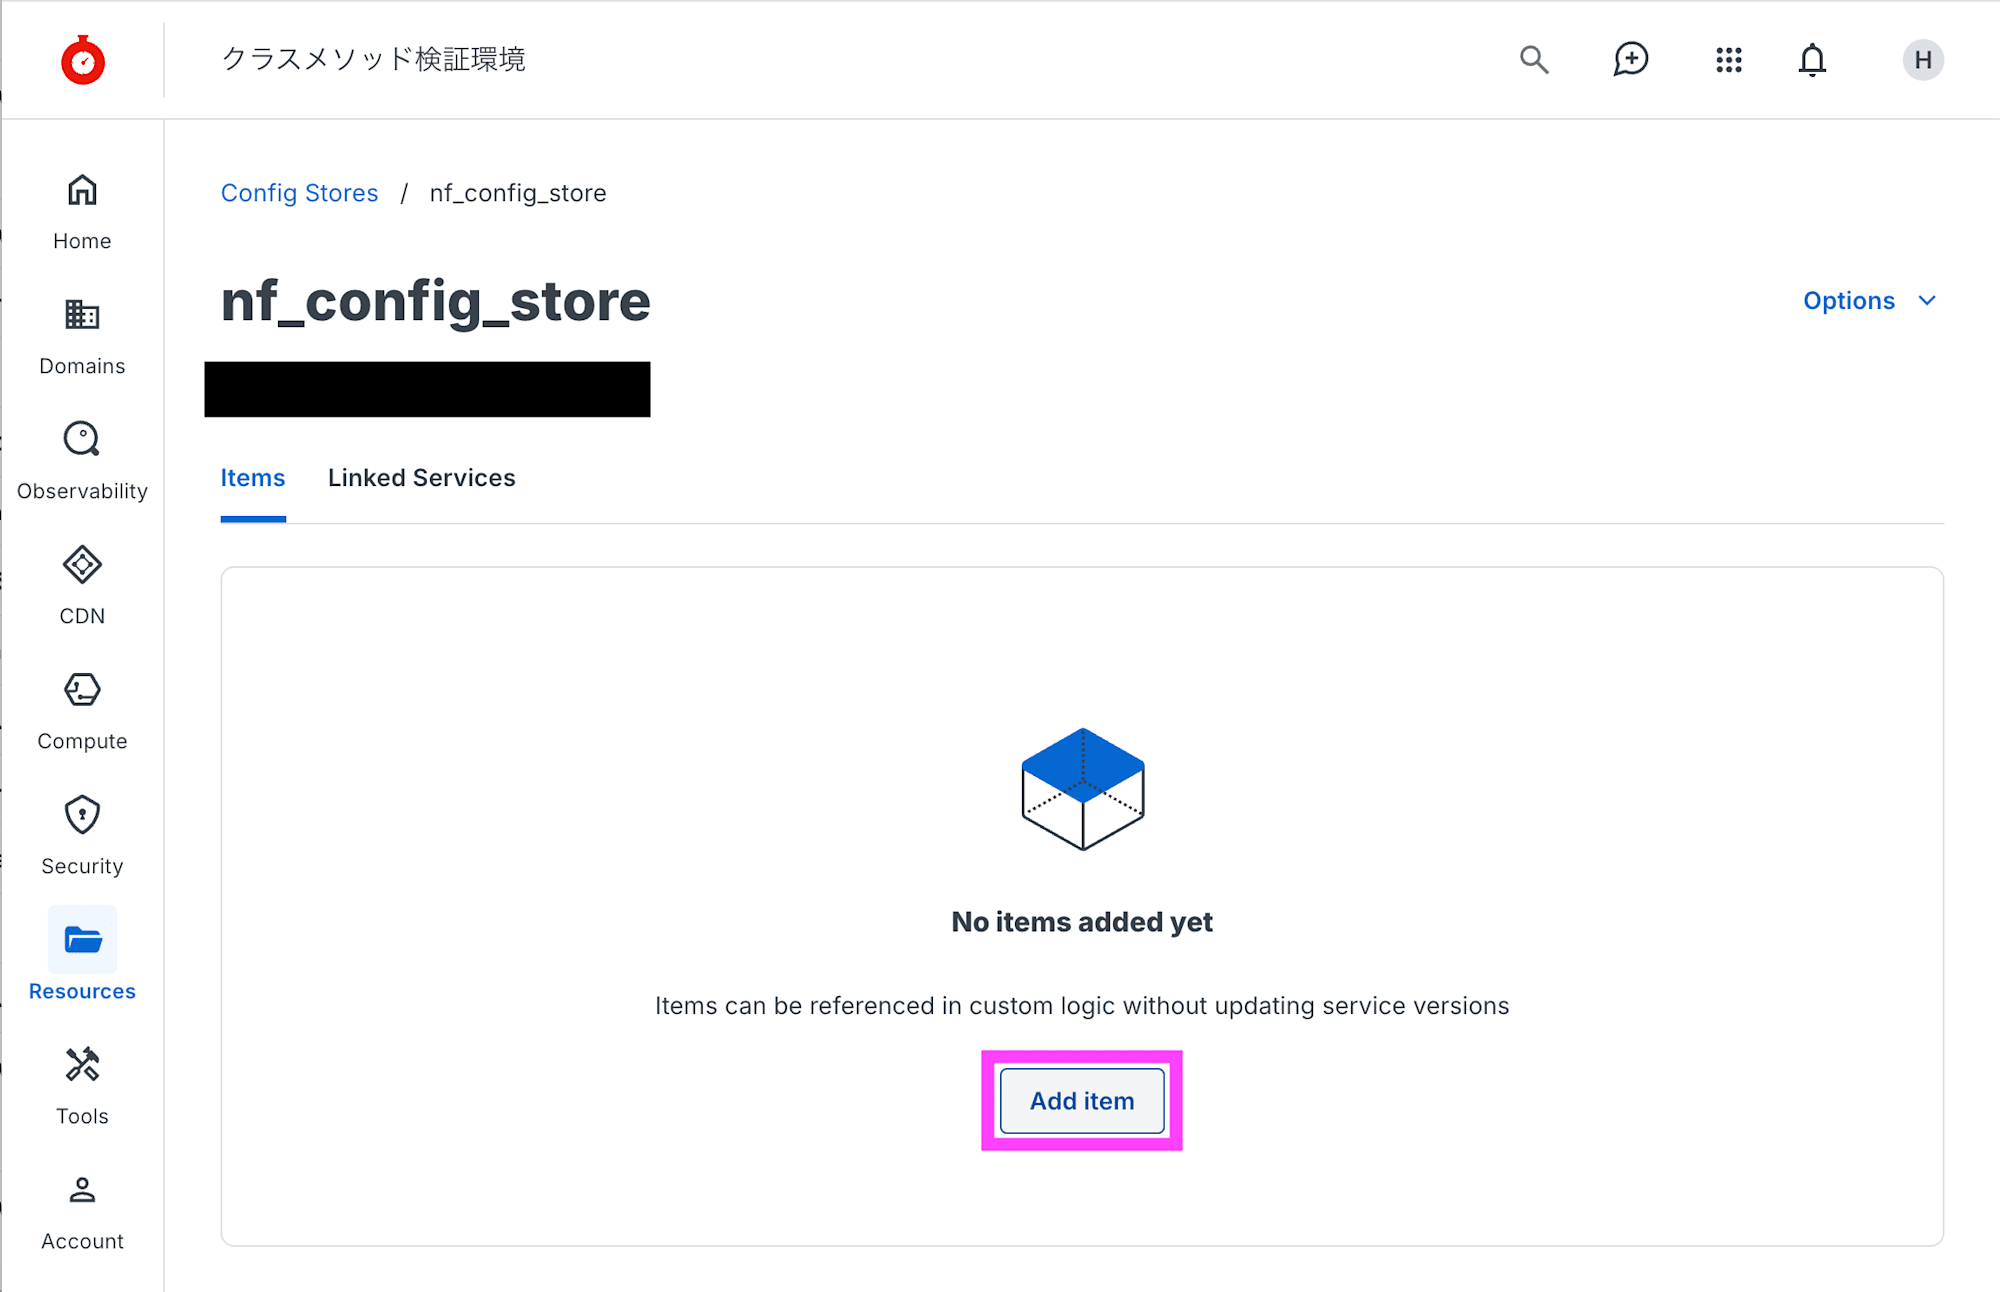
Add item をクリックします。
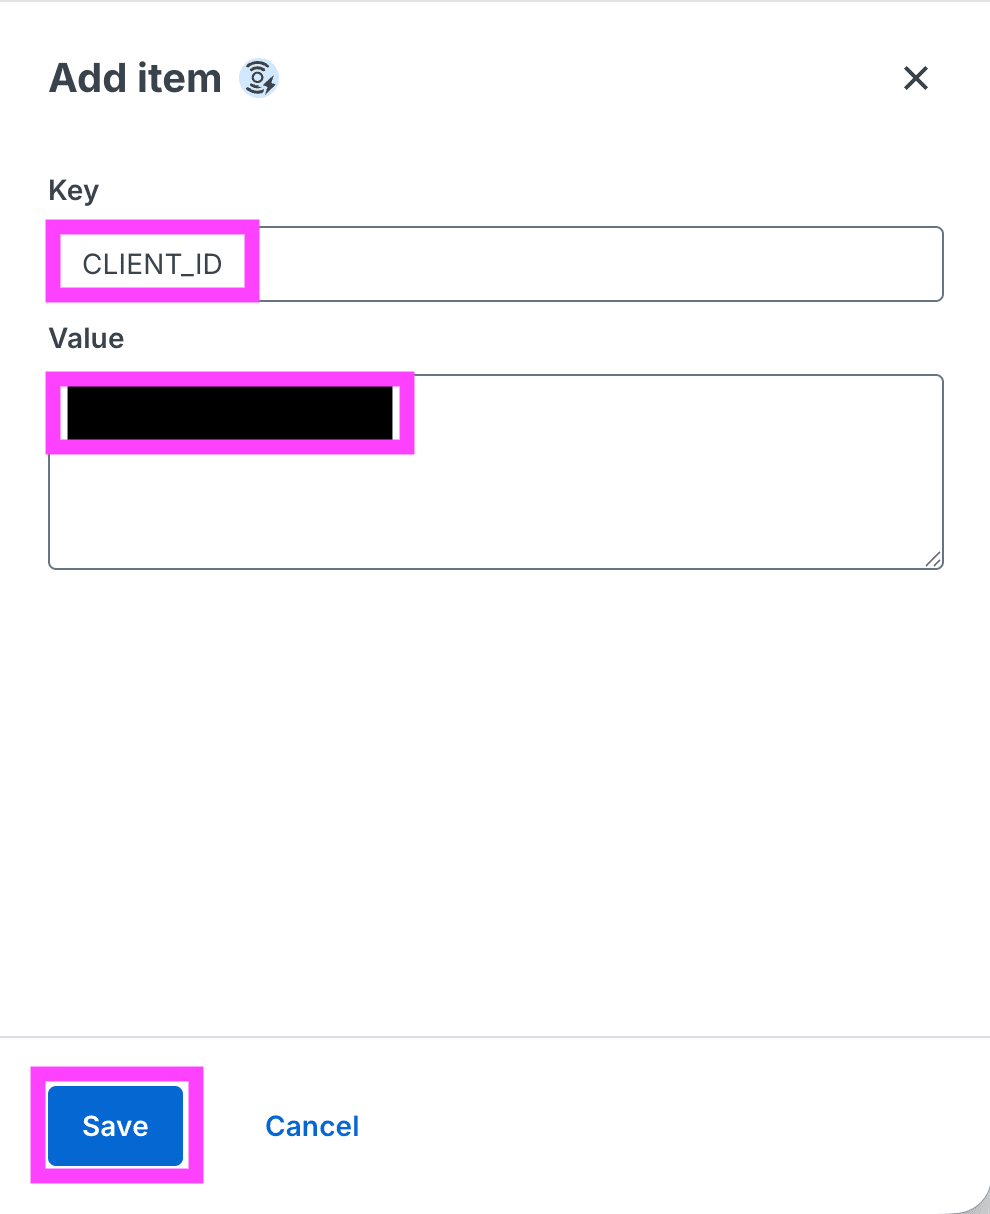
Key に CLIENT_ID、Value に NetFUNNEL の CLIENT ID の値を入力して、Save をクリックします。
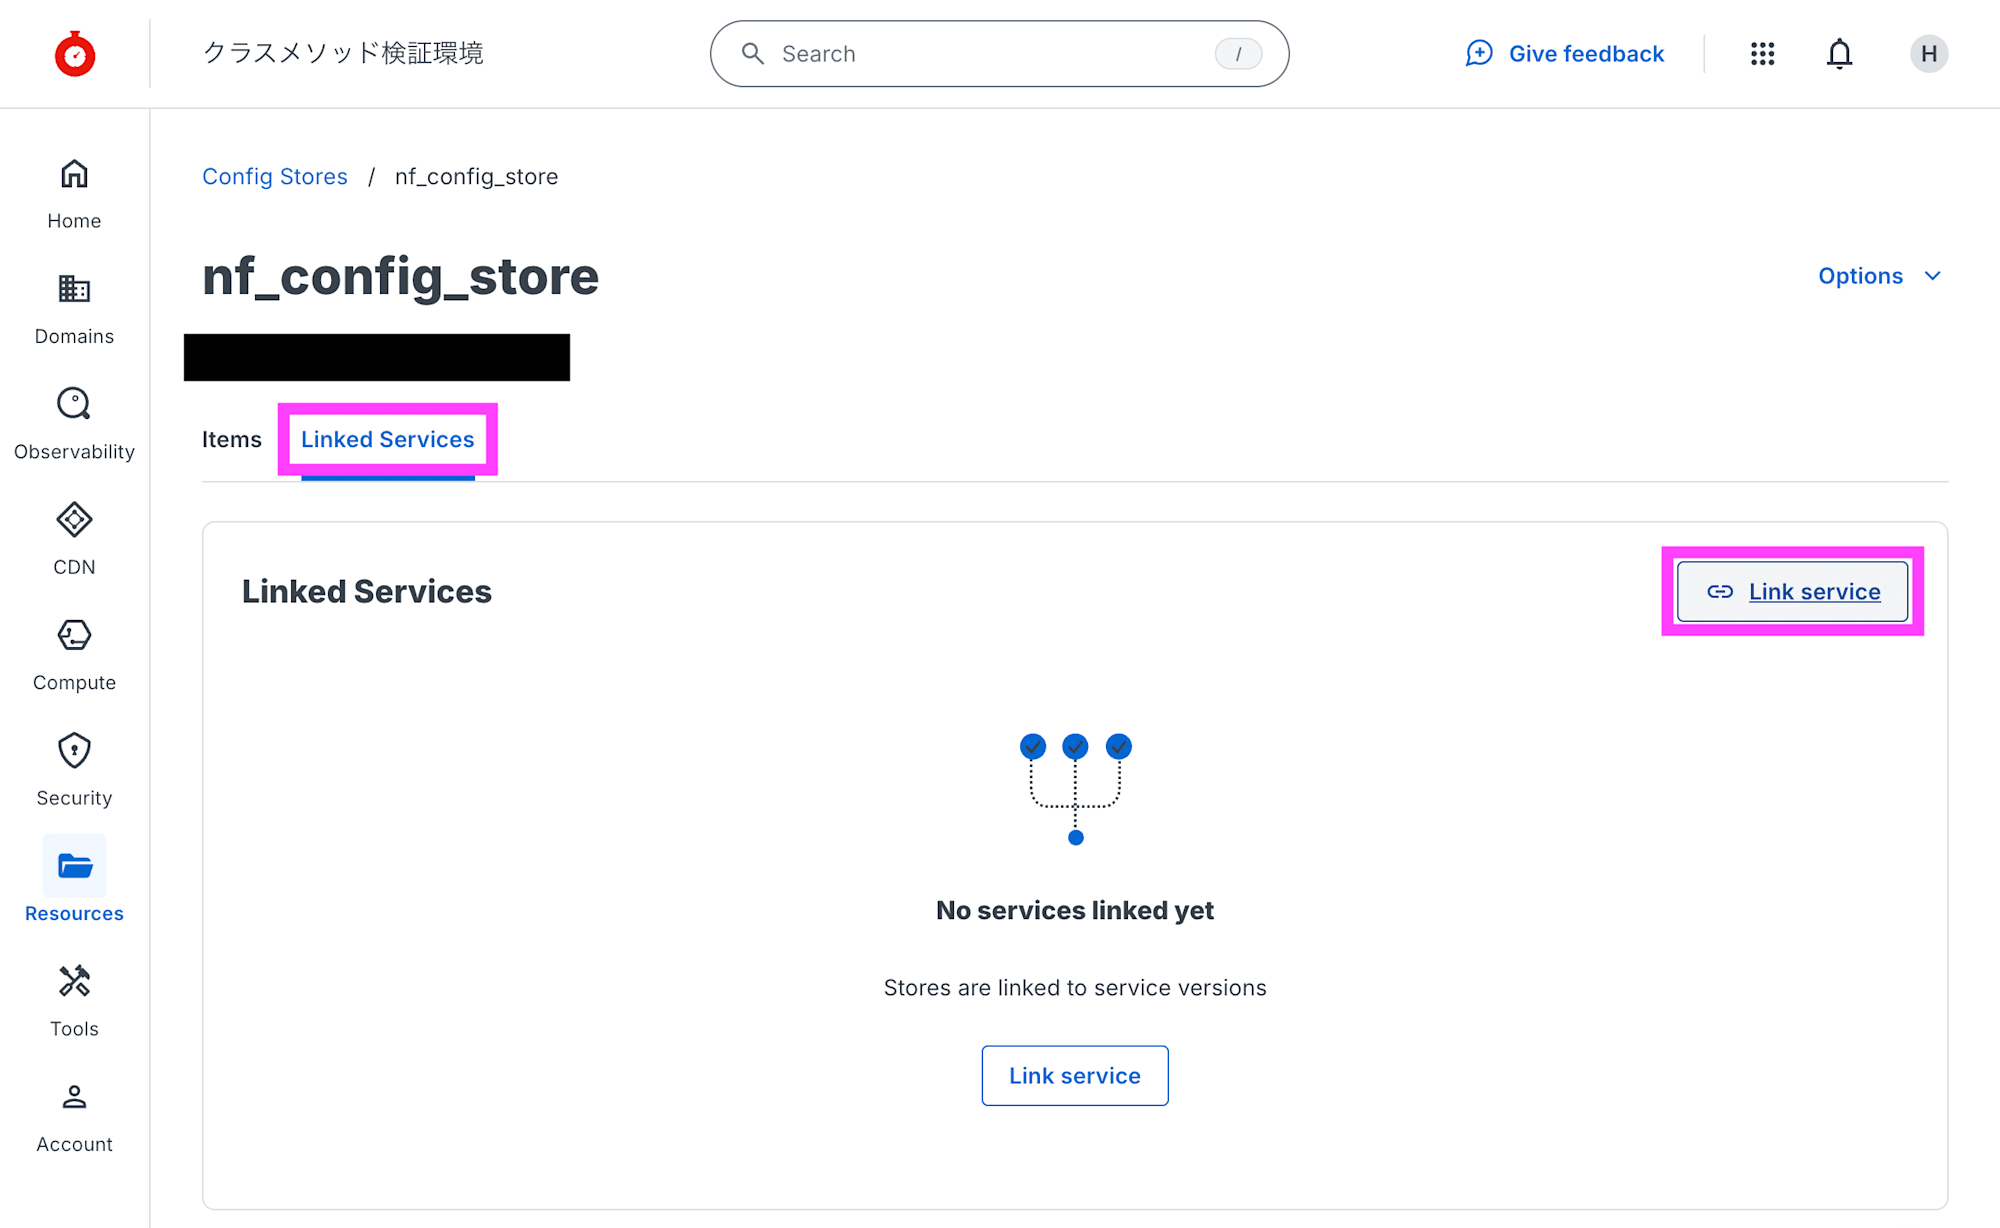
Linked Services タブを選択して、Link service をクリックします。
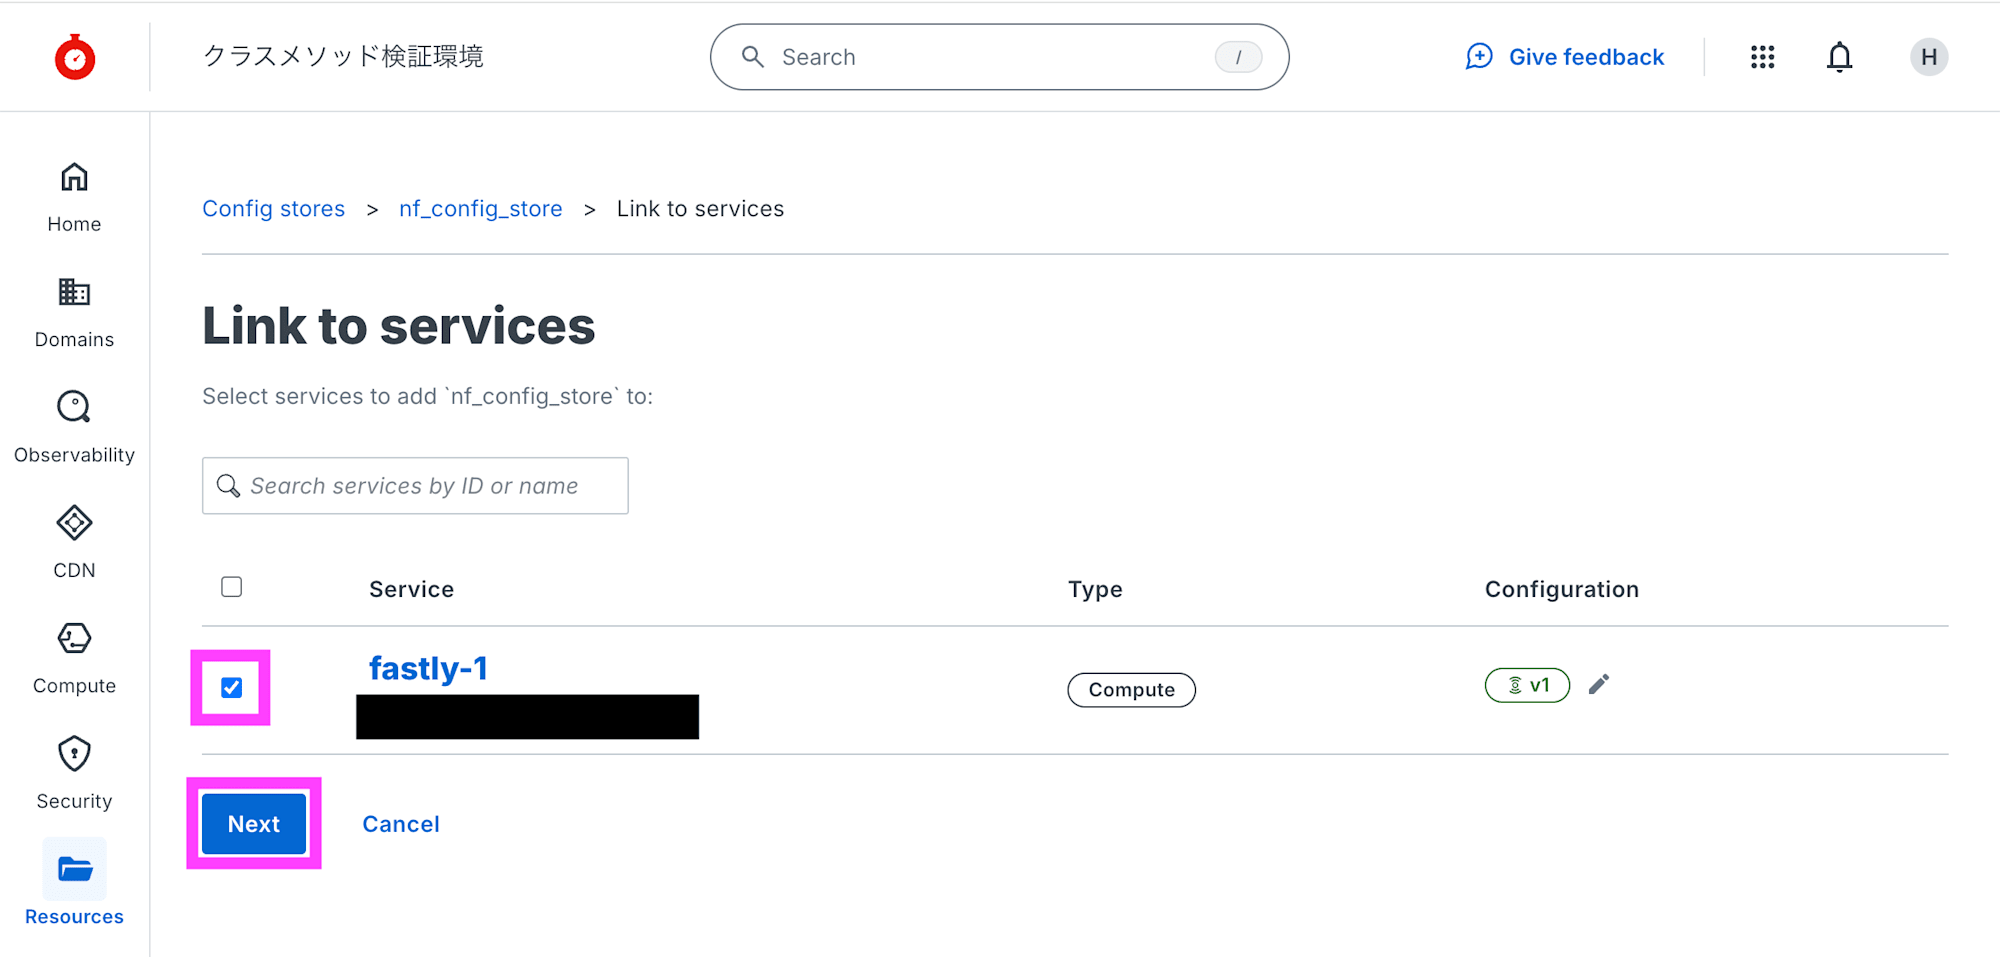
デプロイした Compute service をチェックして、Next をクリックします。
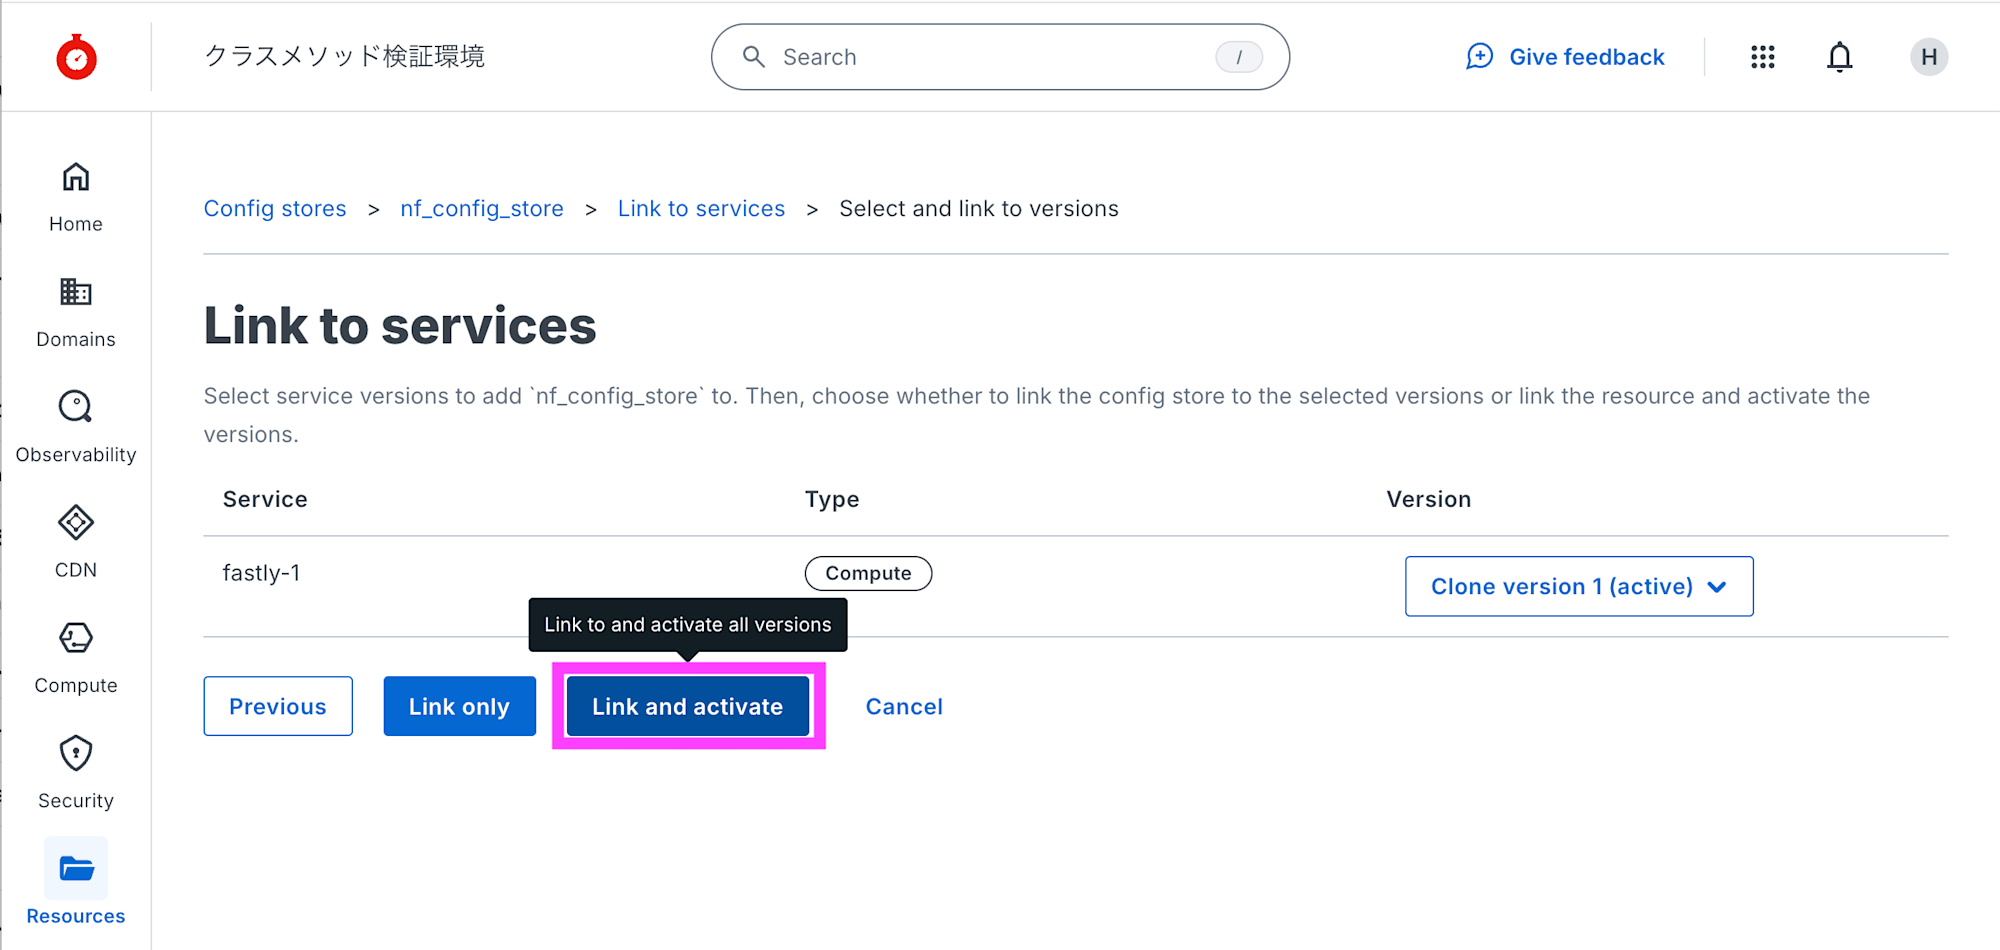
Link and activate をクリックします。
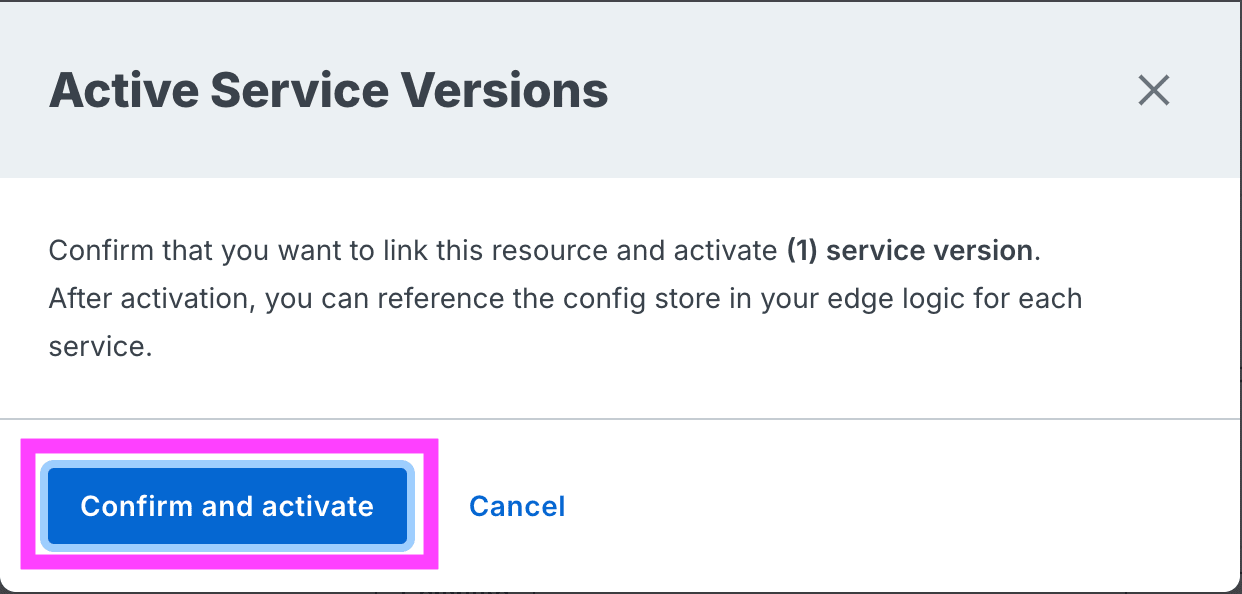
Confirm and activate をクリックします。
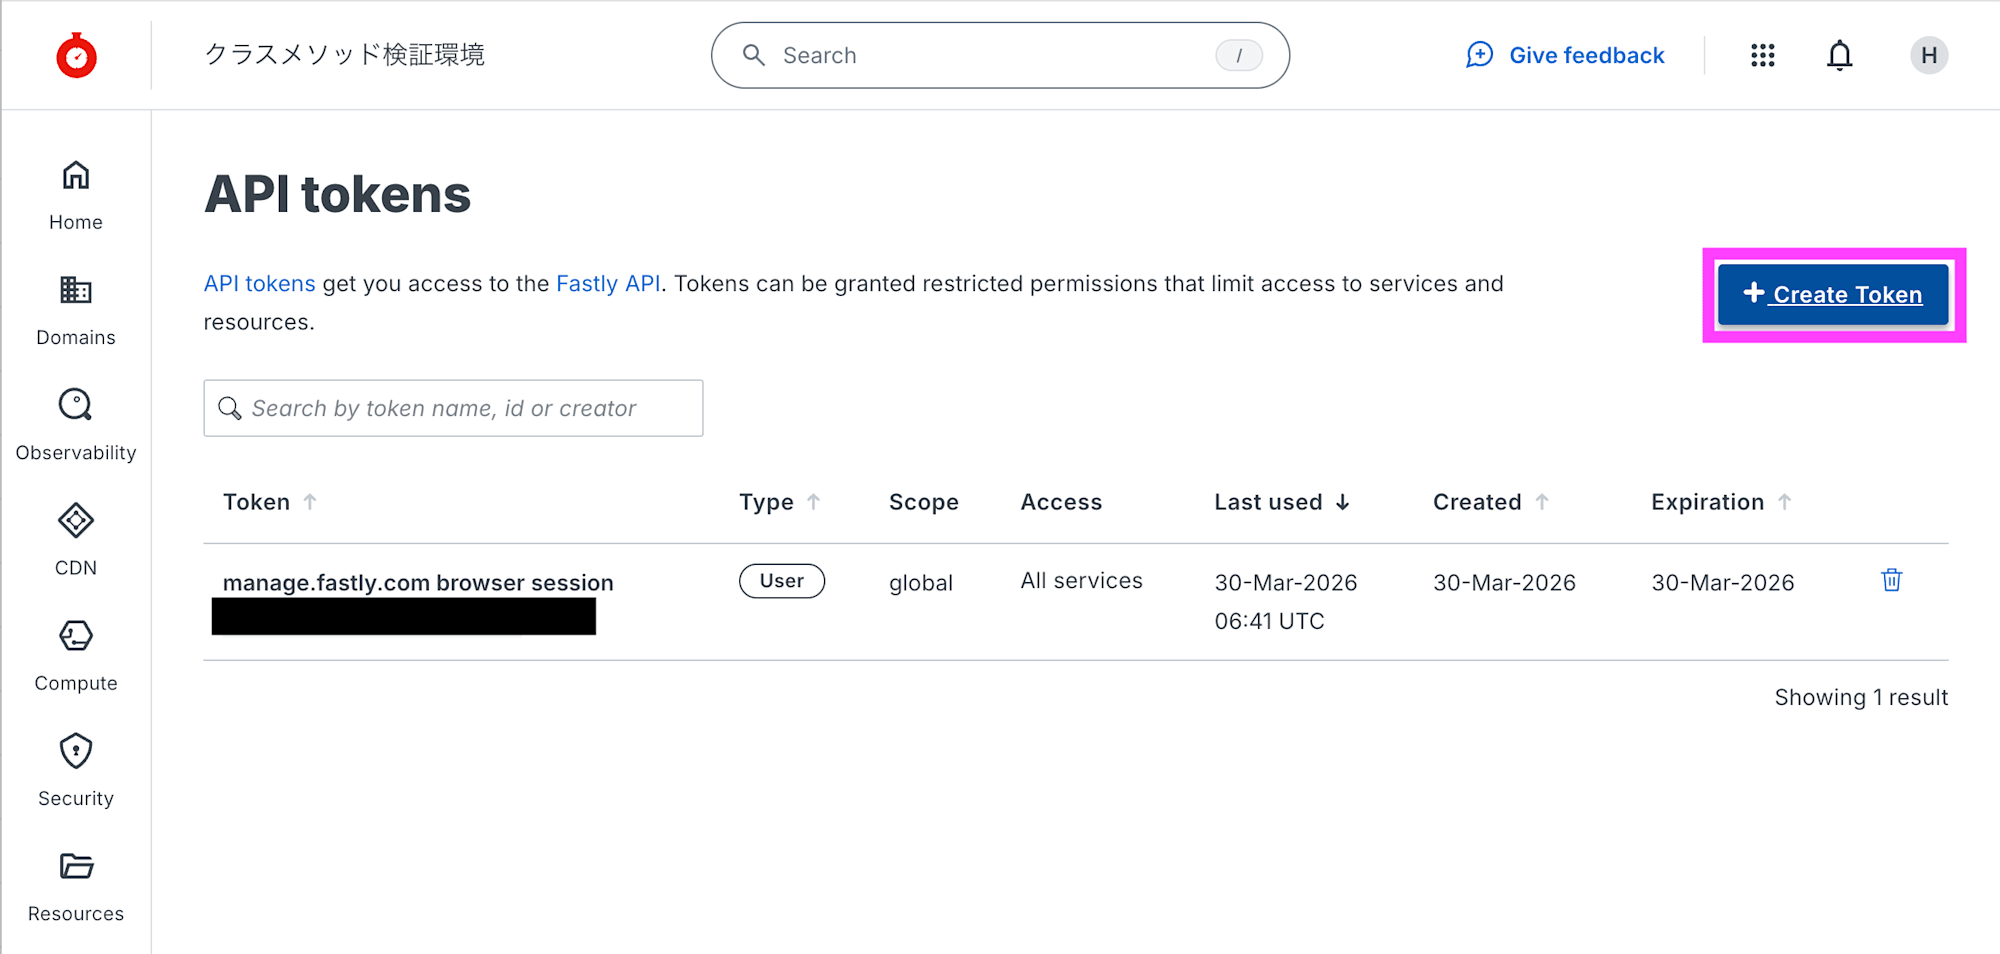
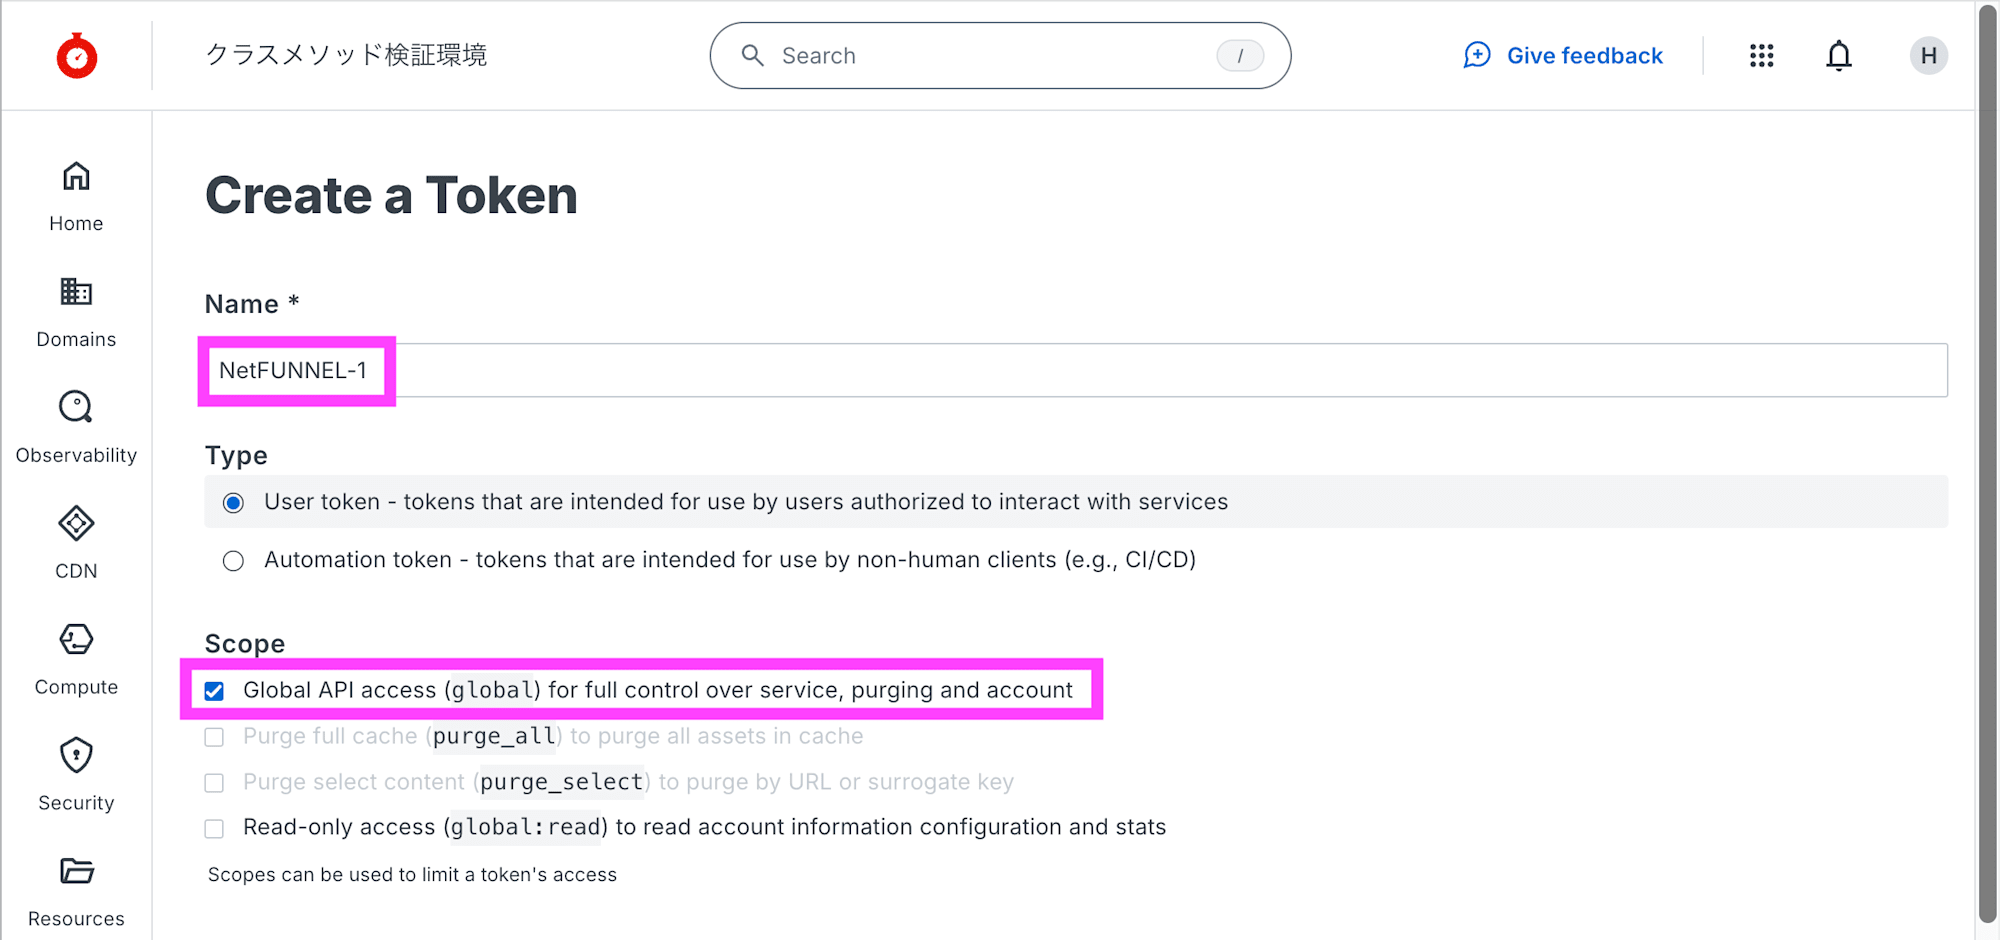
[Account] - [API tokens] - [Personal tokens] を開き、+ Create Token をクリックします。
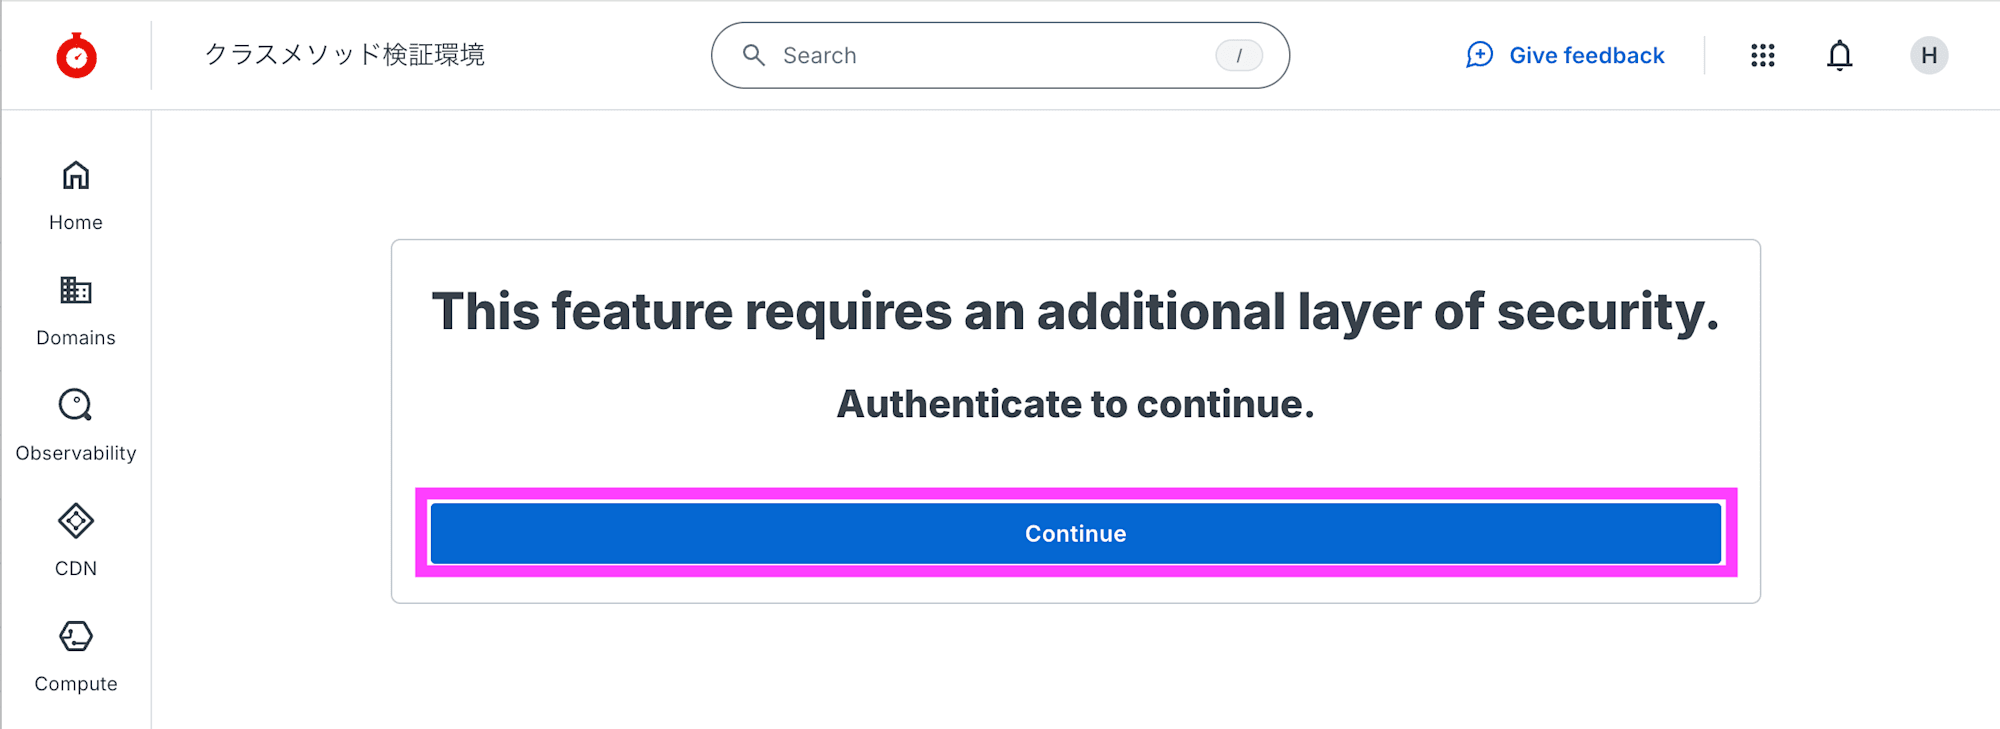
Continue をクリックします。
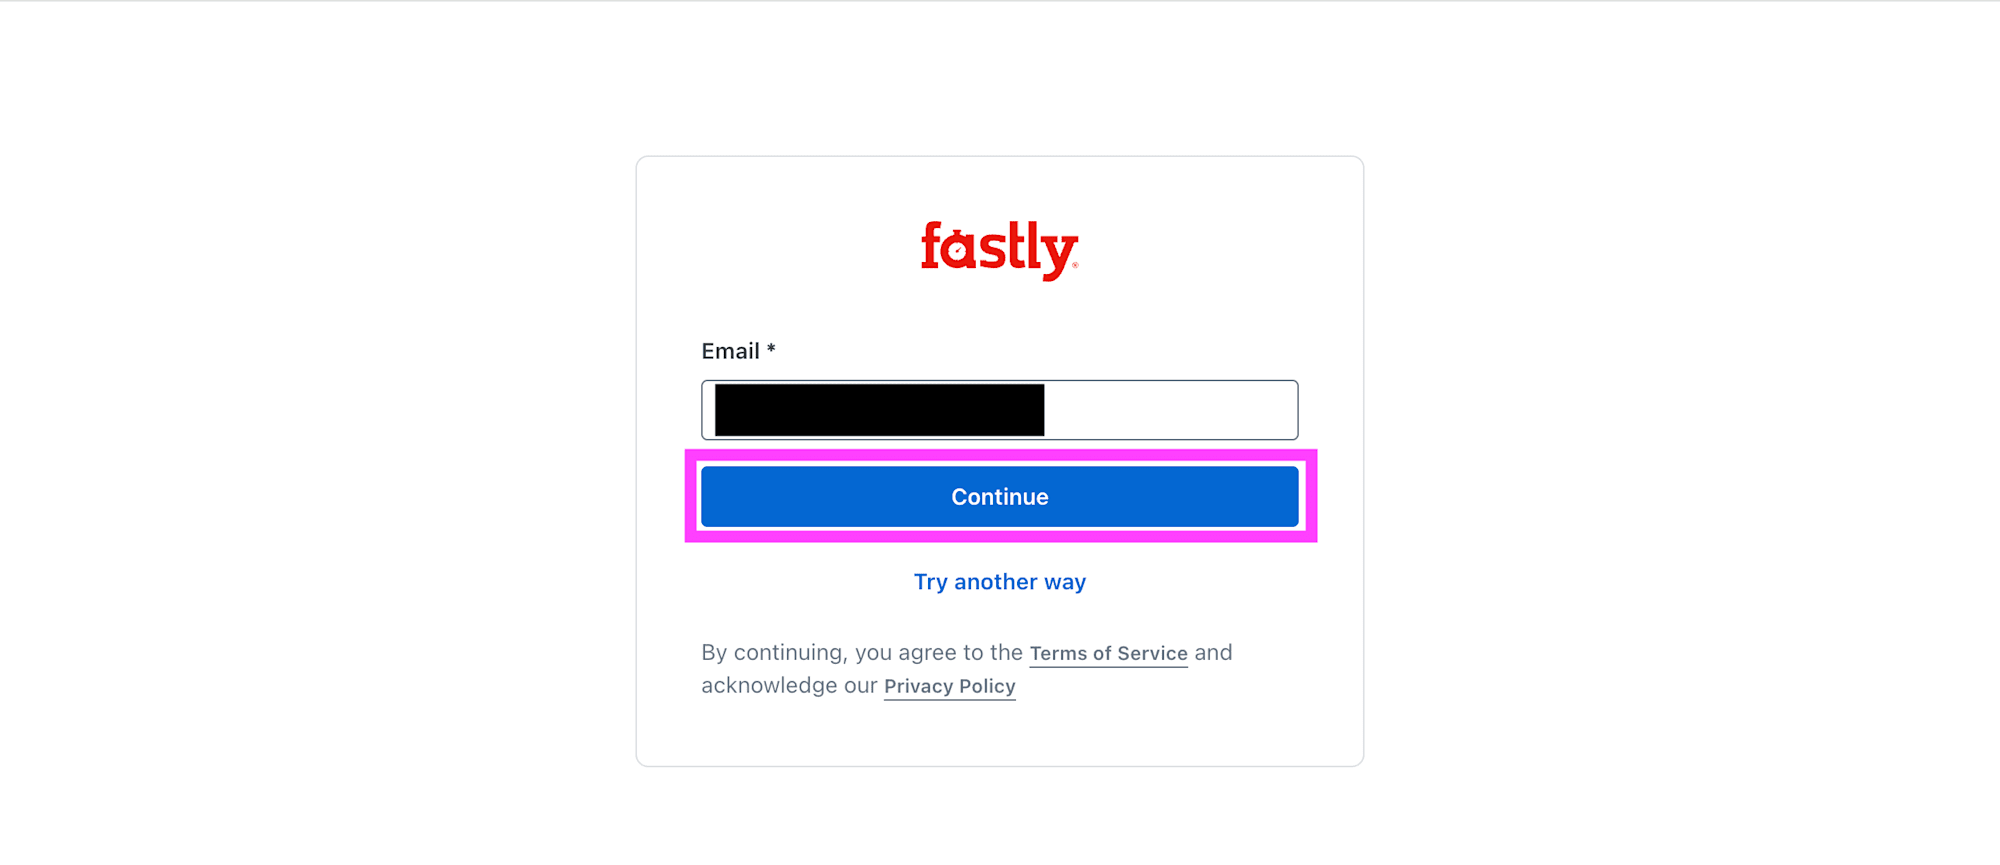
再度ログインします。Email を入力して Continue をクリックします。
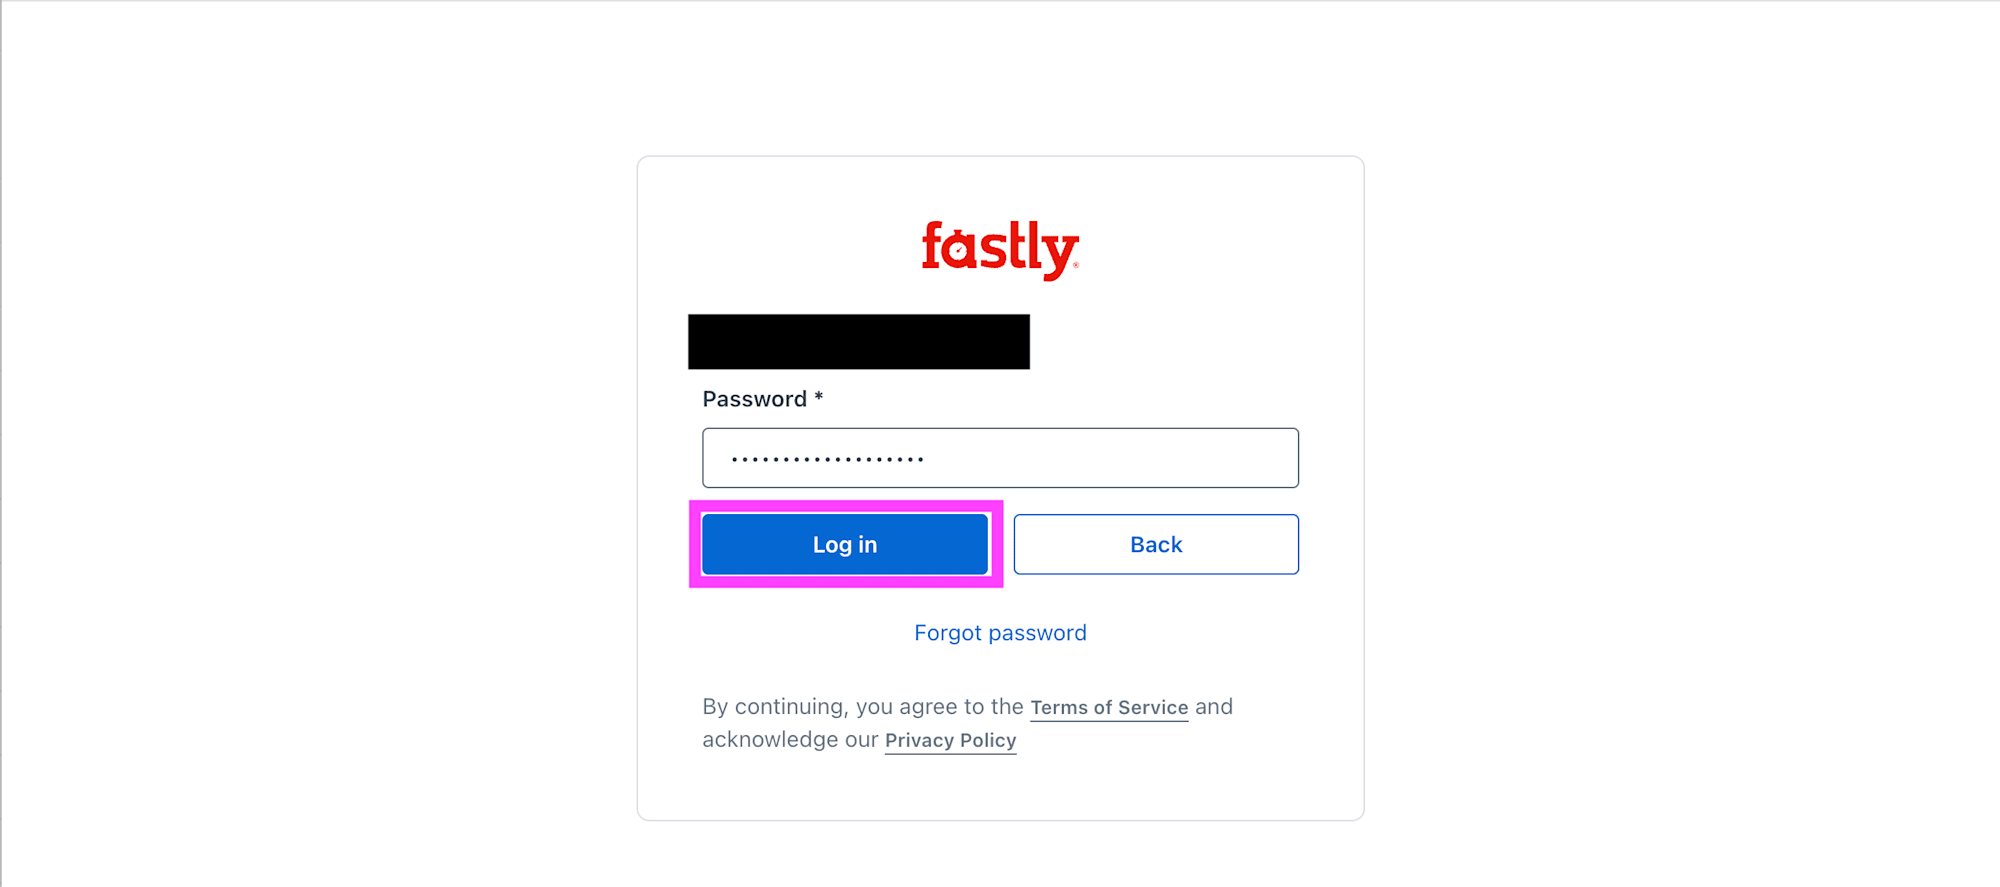
Password を入力して Log in をクリックします。
Name を任意に入力して、Scope で Global API access (global) を選択します。
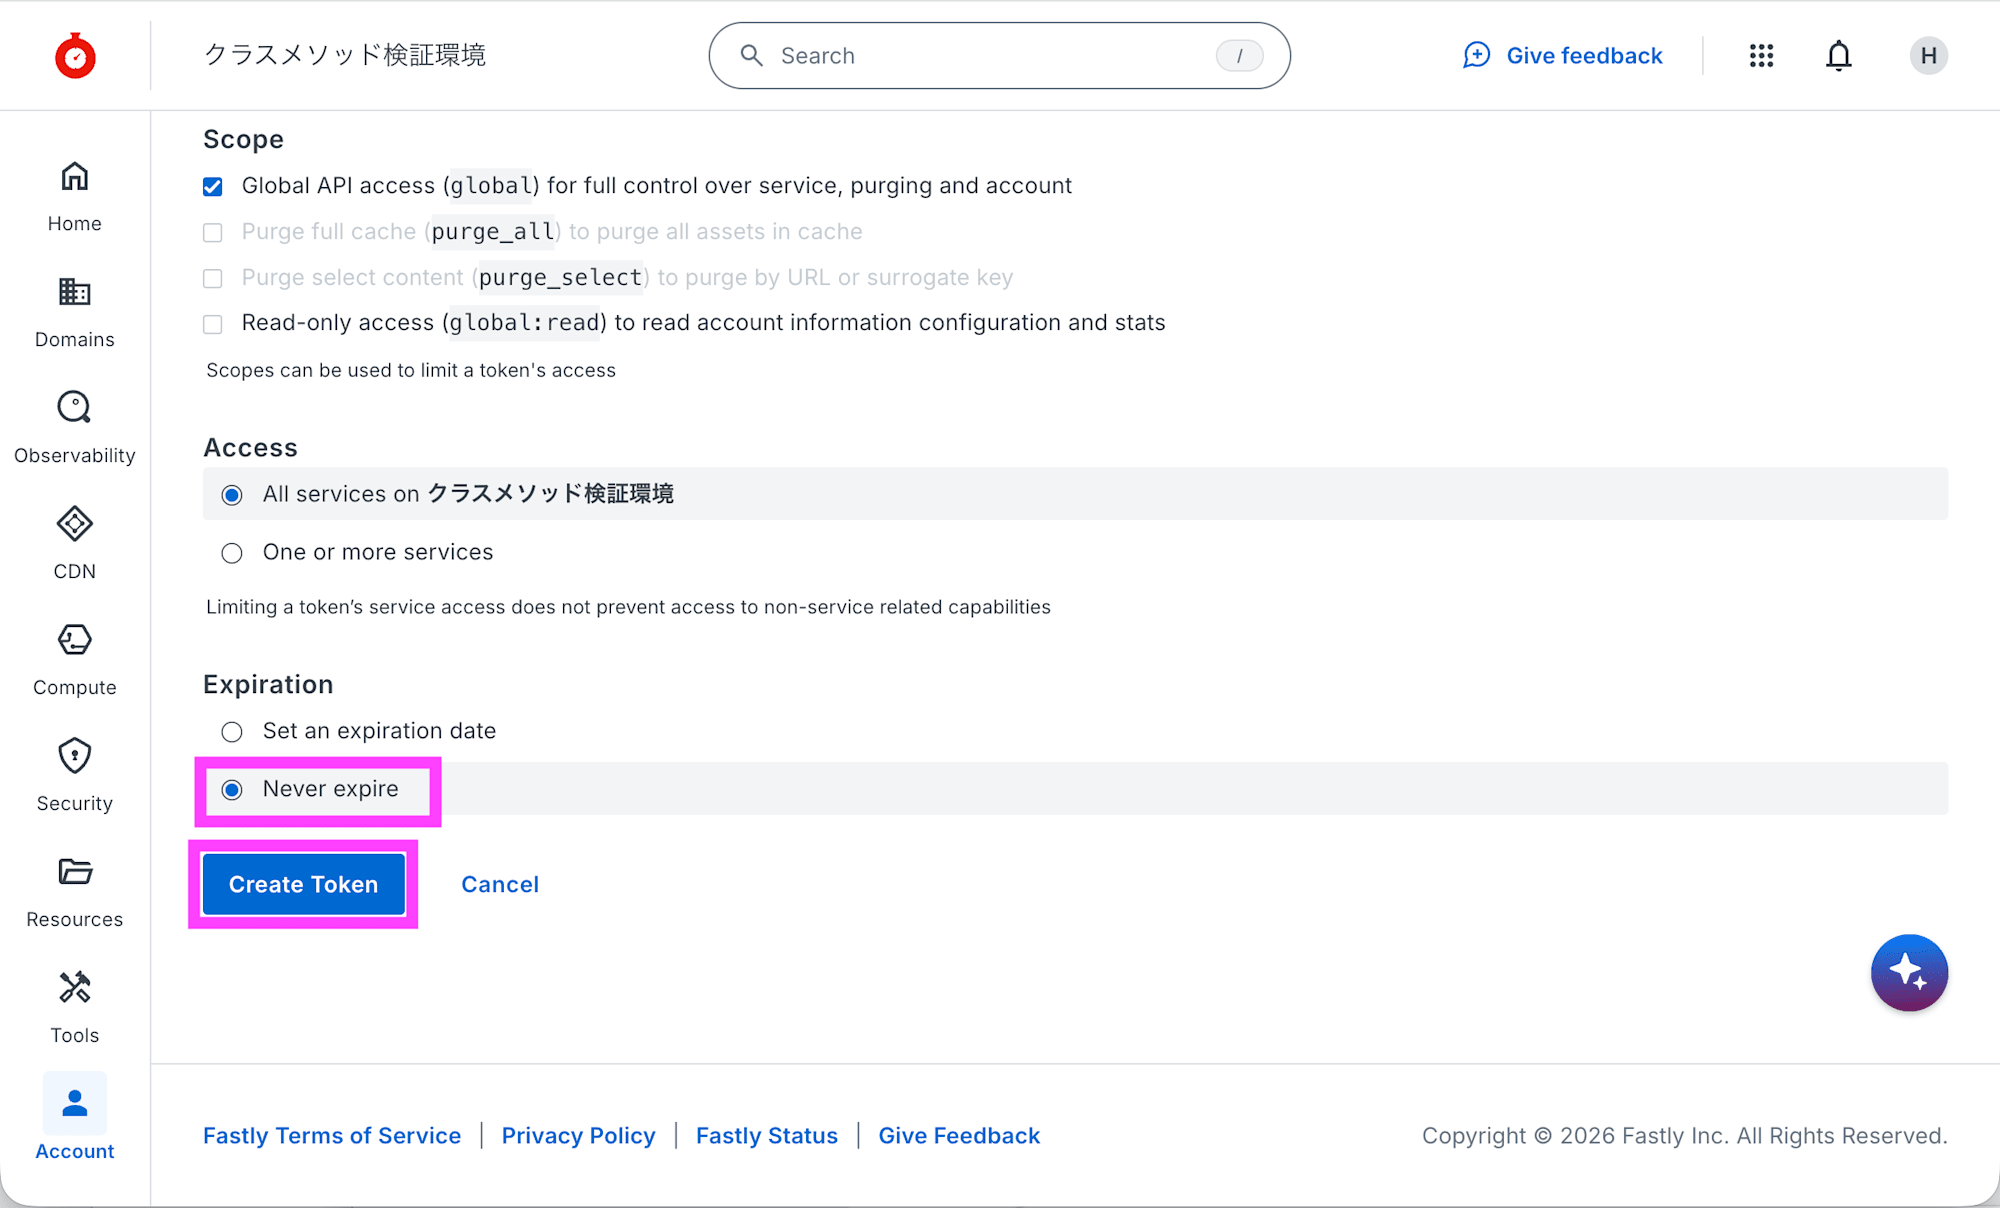
Expiration で Never expire を選択して、Create Token をクリックします。
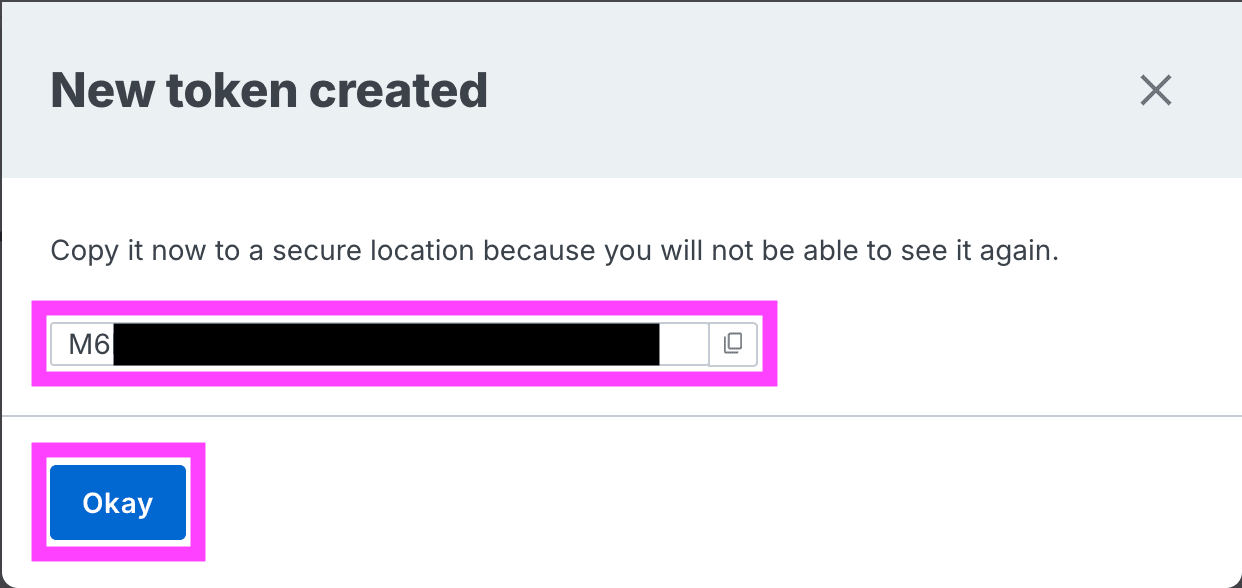
表示された Token をメモして、Okay をクリックします。
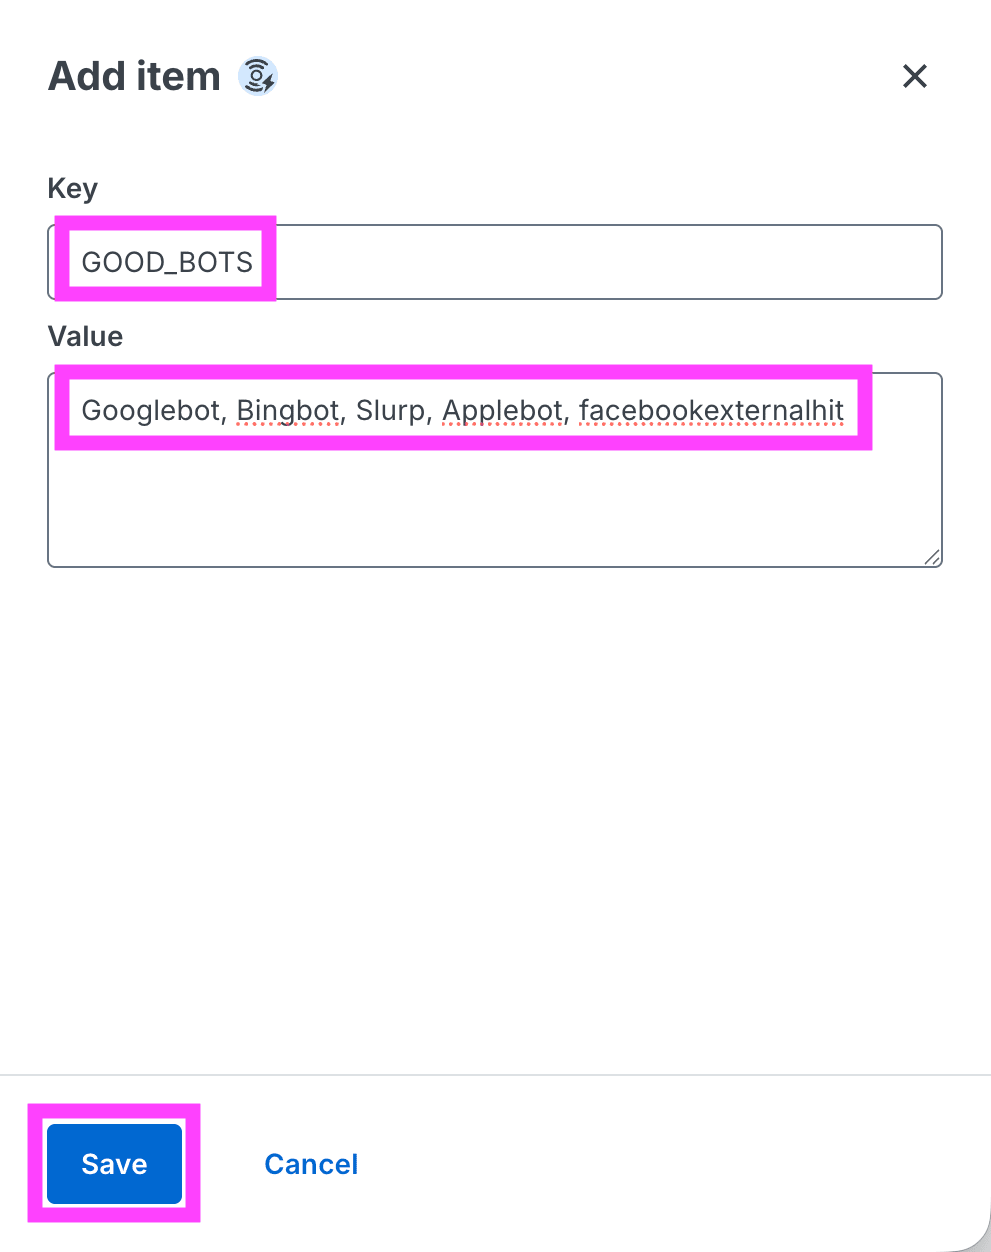
検索などのボットを動作の対象外に設定します。[Resources] - [Config stores] を開き nf_config_store を選択して、Add item をクリックします。
Key に GOOD_BOTS、Value に Googlebot, Bingbot, Slurp, Applebot, facebookexternalhit を入力して、Save をクリックします。この内容は Google、Microsoft、Yahoo、Apple、Facebook のボットを除外した内容です。
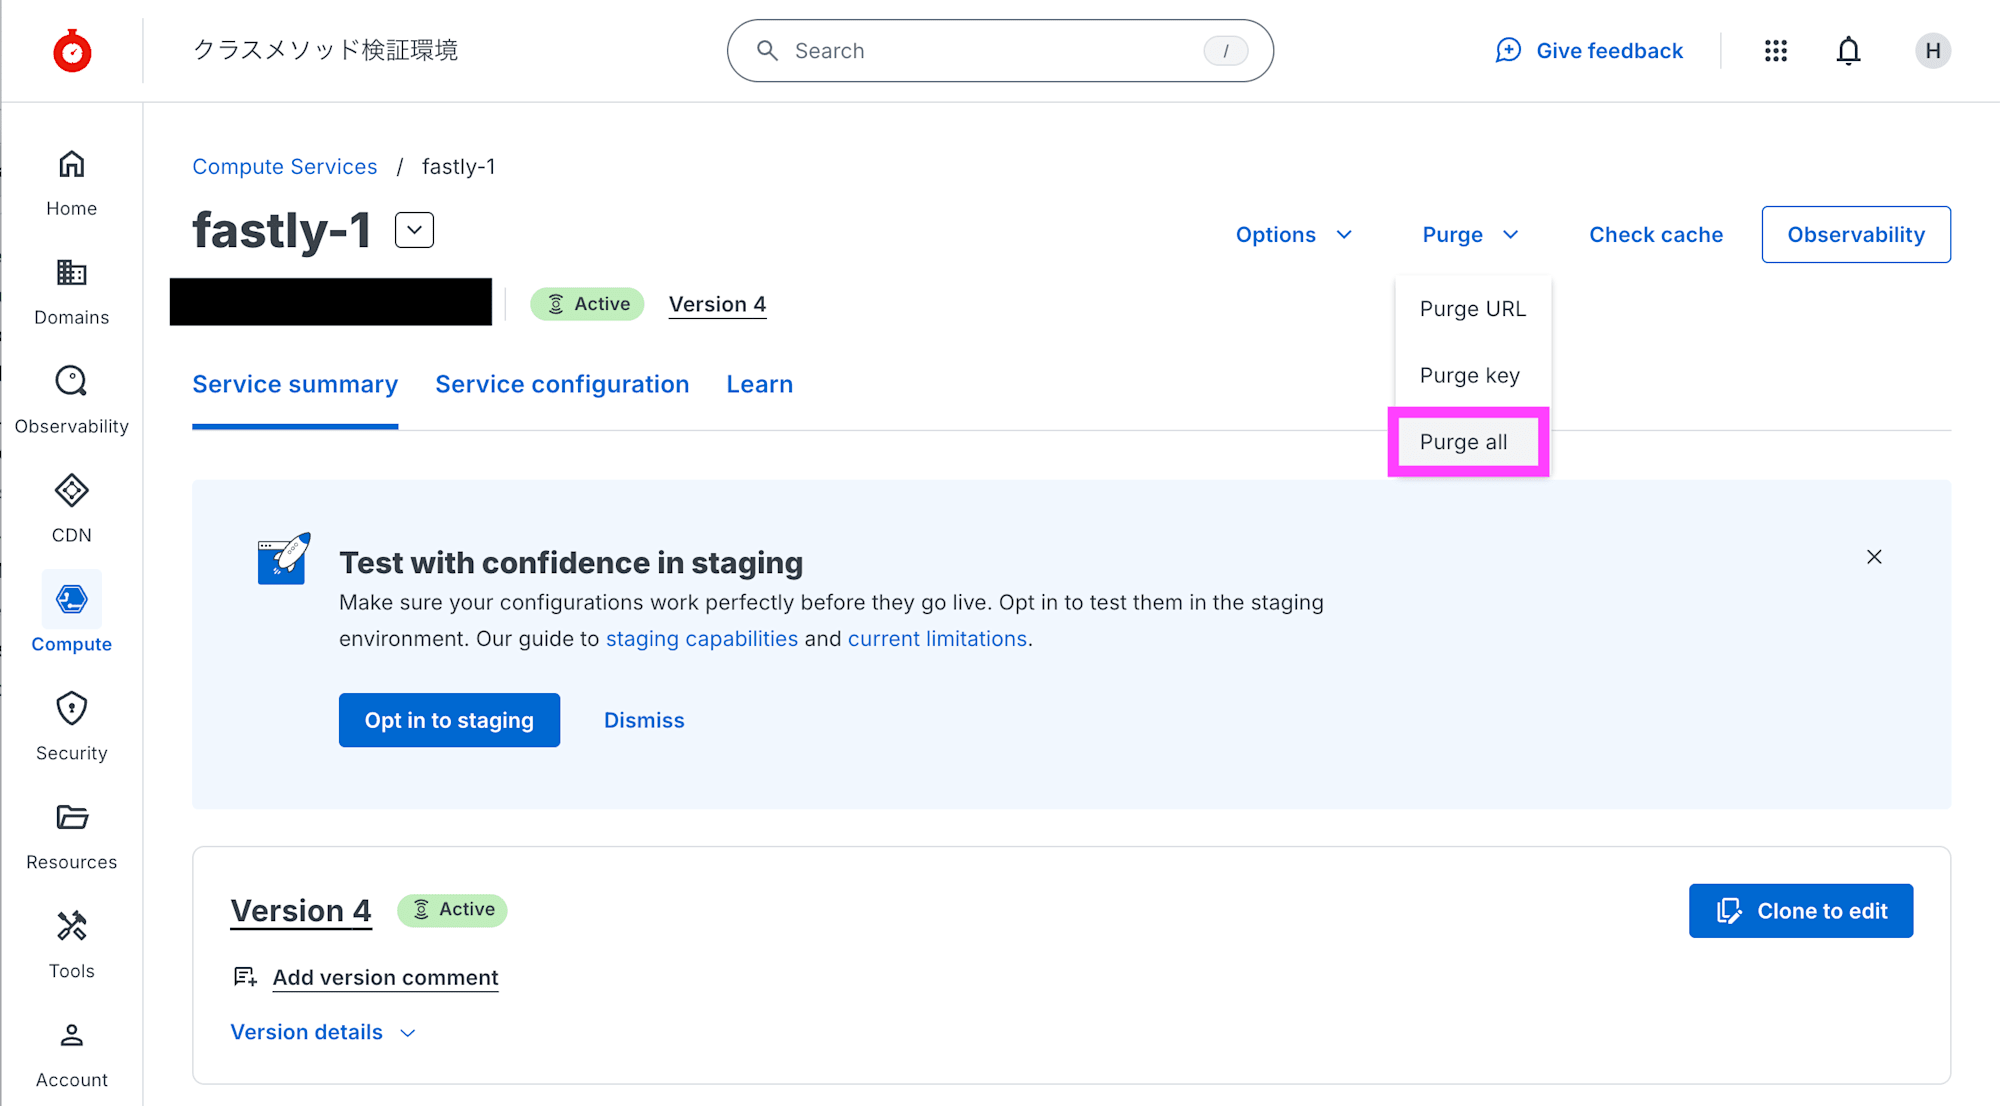
[Compute] - [Compute Services] を開き、デプロイした Compute service をクリックします。右上の Purge メニューを開き Purge all をクリックします。
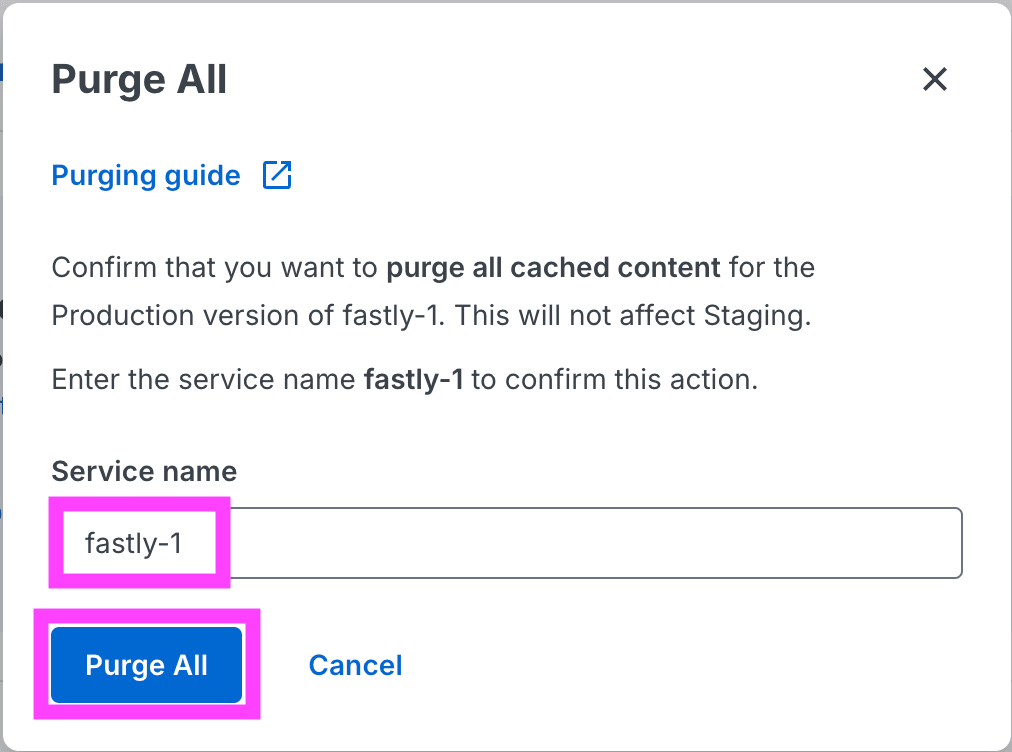
Service name を入力して Purge All をクリックします。
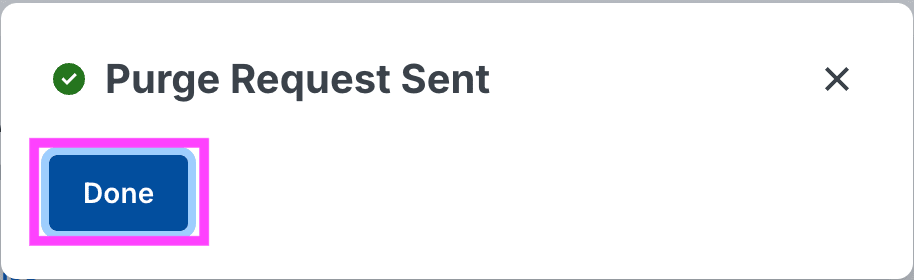
Done をクリックします。
エージェントのデプロイ
Fastly 用のエージェントをダウンロードします。
$ curl -o netfunnel-fastly-agent.tar https://agent-lib.stclab.com/agents/cdn/fastly/netfunnel-fastly-agent-latest.tar
  % Total    % Received % Xferd  Average Speed   Time    Time     Time  Current
                                 Dload  Upload   Total   Spent    Left  Speed
ダウンロードしたファイルを解凍します。
$ tar xvf netfunnel-fastly-agent.tar
x netfunnel-fastly-agent/
x netfunnel-fastly-agent/src/
x netfunnel-fastly-agent/src/api.rs
x netfunnel-fastly-agent/src/config.rs
x netfunnel-fastly-agent/src/constants.rs
x netfunnel-fastly-agent/src/handlers.rs
x netfunnel-fastly-agent/src/main.rs
x netfunnel-fastly-agent/src/types.rs
x netfunnel-fastly-agent/src/utils.rs
x netfunnel-fastly-agent/Cargo.toml
x netfunnel-fastly-agent/rust-toolchain.toml
x netfunnel-fastly-agent/rustfmt.toml
x netfunnel-fastly-agent/fastly.toml
x netfunnel-fastly-agent/bin/
解答したディレクトリに移動します。
$ cd netfunnel-fastly-agent
fastly.toml を編集して、cloned_from と service_id の値に Fastly の Compute service の ID を入力します。
# This file describes a Fastly Compute package. To learn more visit:
# https://www.fastly.com/documentation/reference/compute/fastly-toml

authors = []
cloned_from = "{SERVICE_ID}"
description = "Fastly agent for NetFUNNEL - Rust implementation"
language = "rust"
manifest_version = 3
name = "NetFUNNEL-Fastly-Agent-Rust"
service_id = "{SERVICE_ID}"

[local_server]
Fastly CLI に認証情報を登録します。fastly auth login コマンドを実行して発行した Token を入力します。
$ fastly auth login
An API token can be generated at: https://manage.fastly.com/account/personal/tokens

Paste your API token: SUCCESS: Authenticated as hajime.g86@gmail.com (token stored as "NetFUNNEL-1")
INFO: Token saved to /path/to/fastly/config.toml
ビルドします。
$ fastly compute build
✓ Verifying fastly.toml
✓ Identifying package name
✓ Identifying toolchain
✓ Running [scripts.build]
✓ Creating package archive

SUCCESS: Built package (pkg/NetFUNNEL-Fastly-Agent-Rust.tar.gz)
$ fastly compute deploy
✓ Verifying fastly.toml

✓ Uploading package
✓ Activating service (version 4)

Manage this service at:
        https://manage.fastly.com/configure/services/abcdefghijklmnopqrstuv

View this service at:
        https://directly-equipped-tiger.edgecompute.app

SUCCESS: Deployed package (service abcdefghijklmnopqrstuv, version 4)
サービスの URL にアクセスするとコンテンツが表示されます。
動作確認
実際に動作確認をしてみます。負荷がない状況でアクセスすると通常のコンテンツが表示されます。
NetFUNNEL コンソールのロードテスターで負荷を再現します。
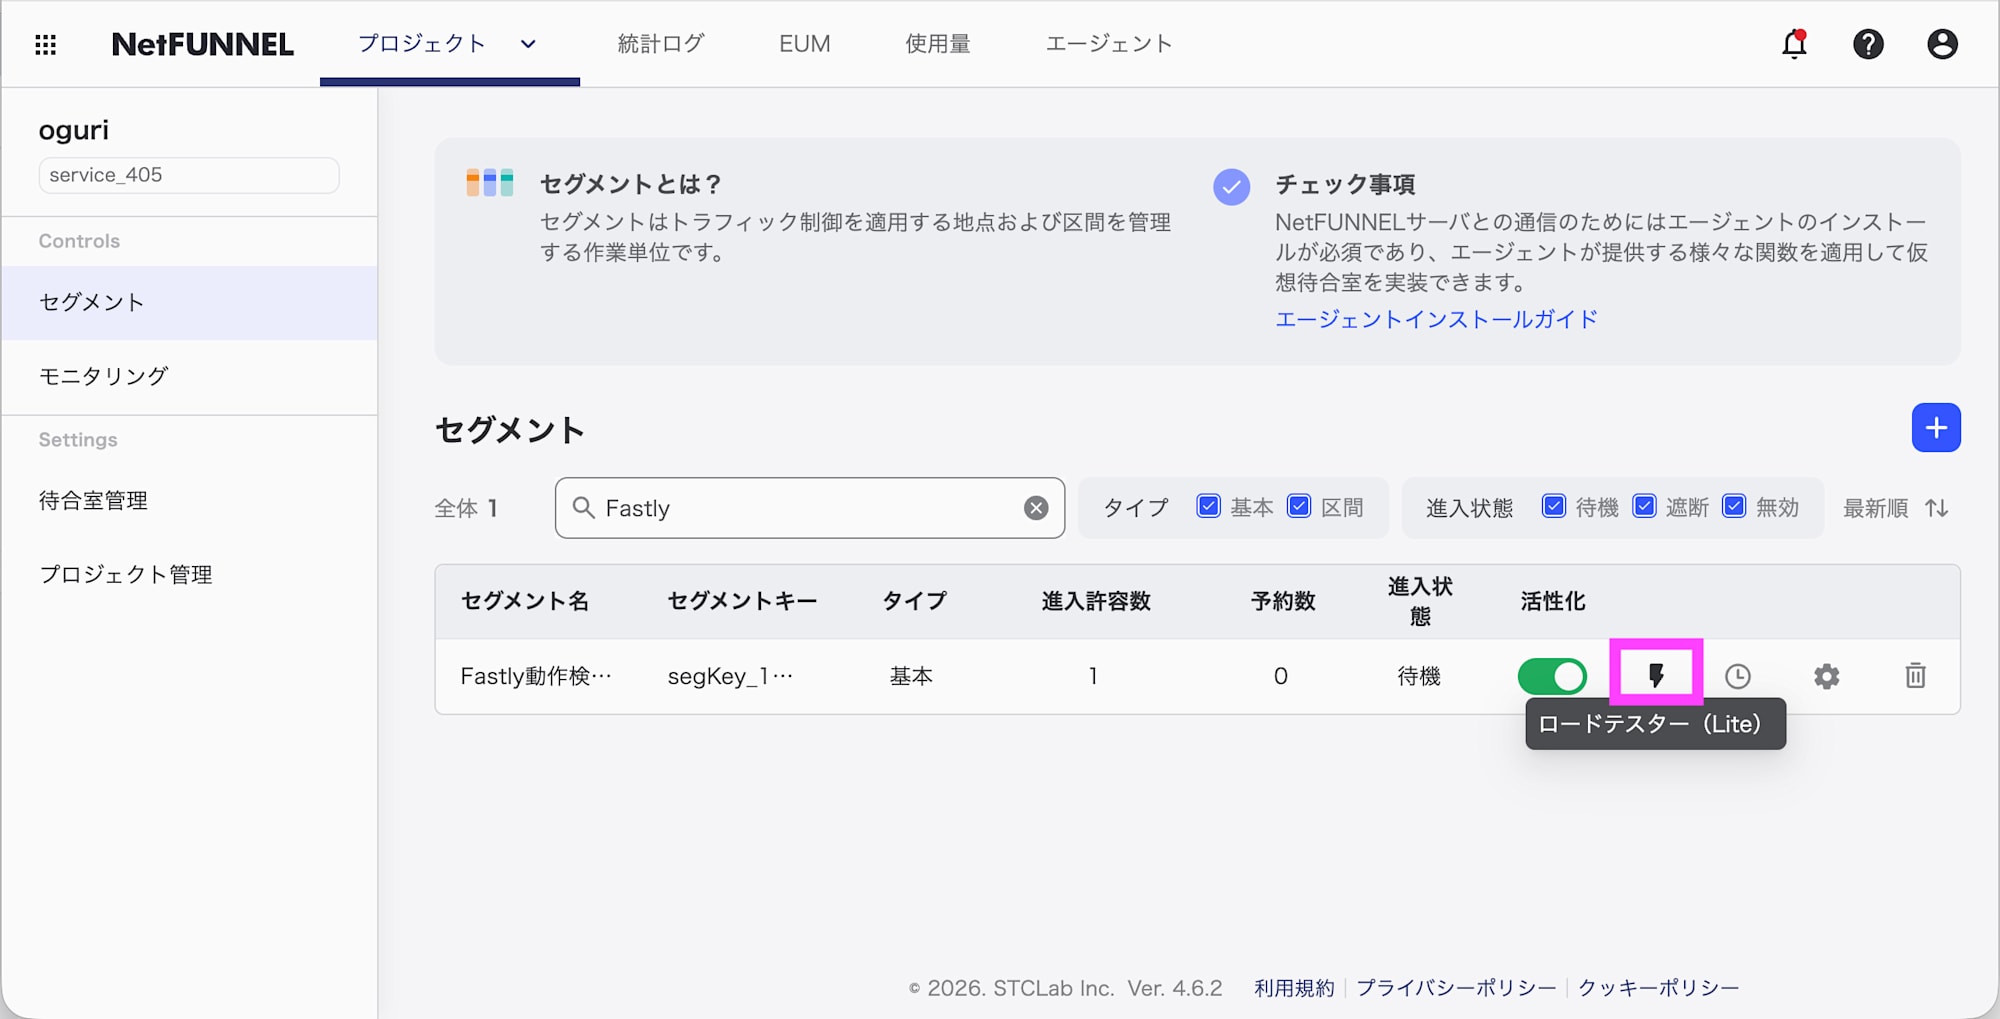
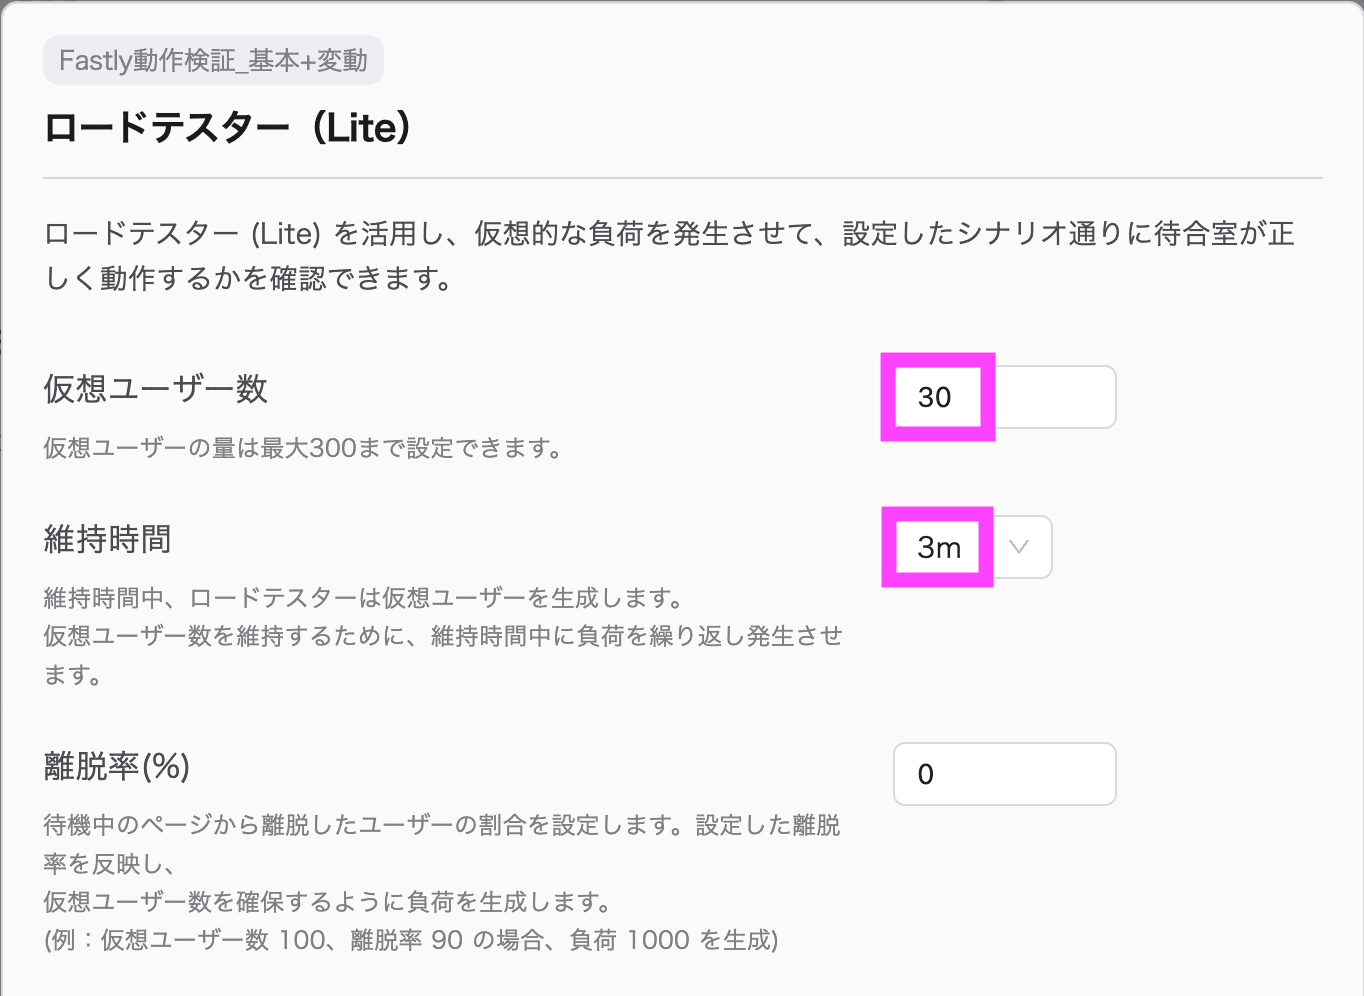
仮想ユーザー数を 30、維持時間を 3m に設定して実行してみます。
負荷がかかっている状態でアクセスすると待機室の画面が表示されます。なお待機室の画面のドメインは agent-lib.stclab.com です。サービスで使用するドメインに変更する場合は、NetFUNNEL サービスチームに希望ドメインを伝え、Config Store 設定で VWR_PAGE_DOMAIN を追加してください。
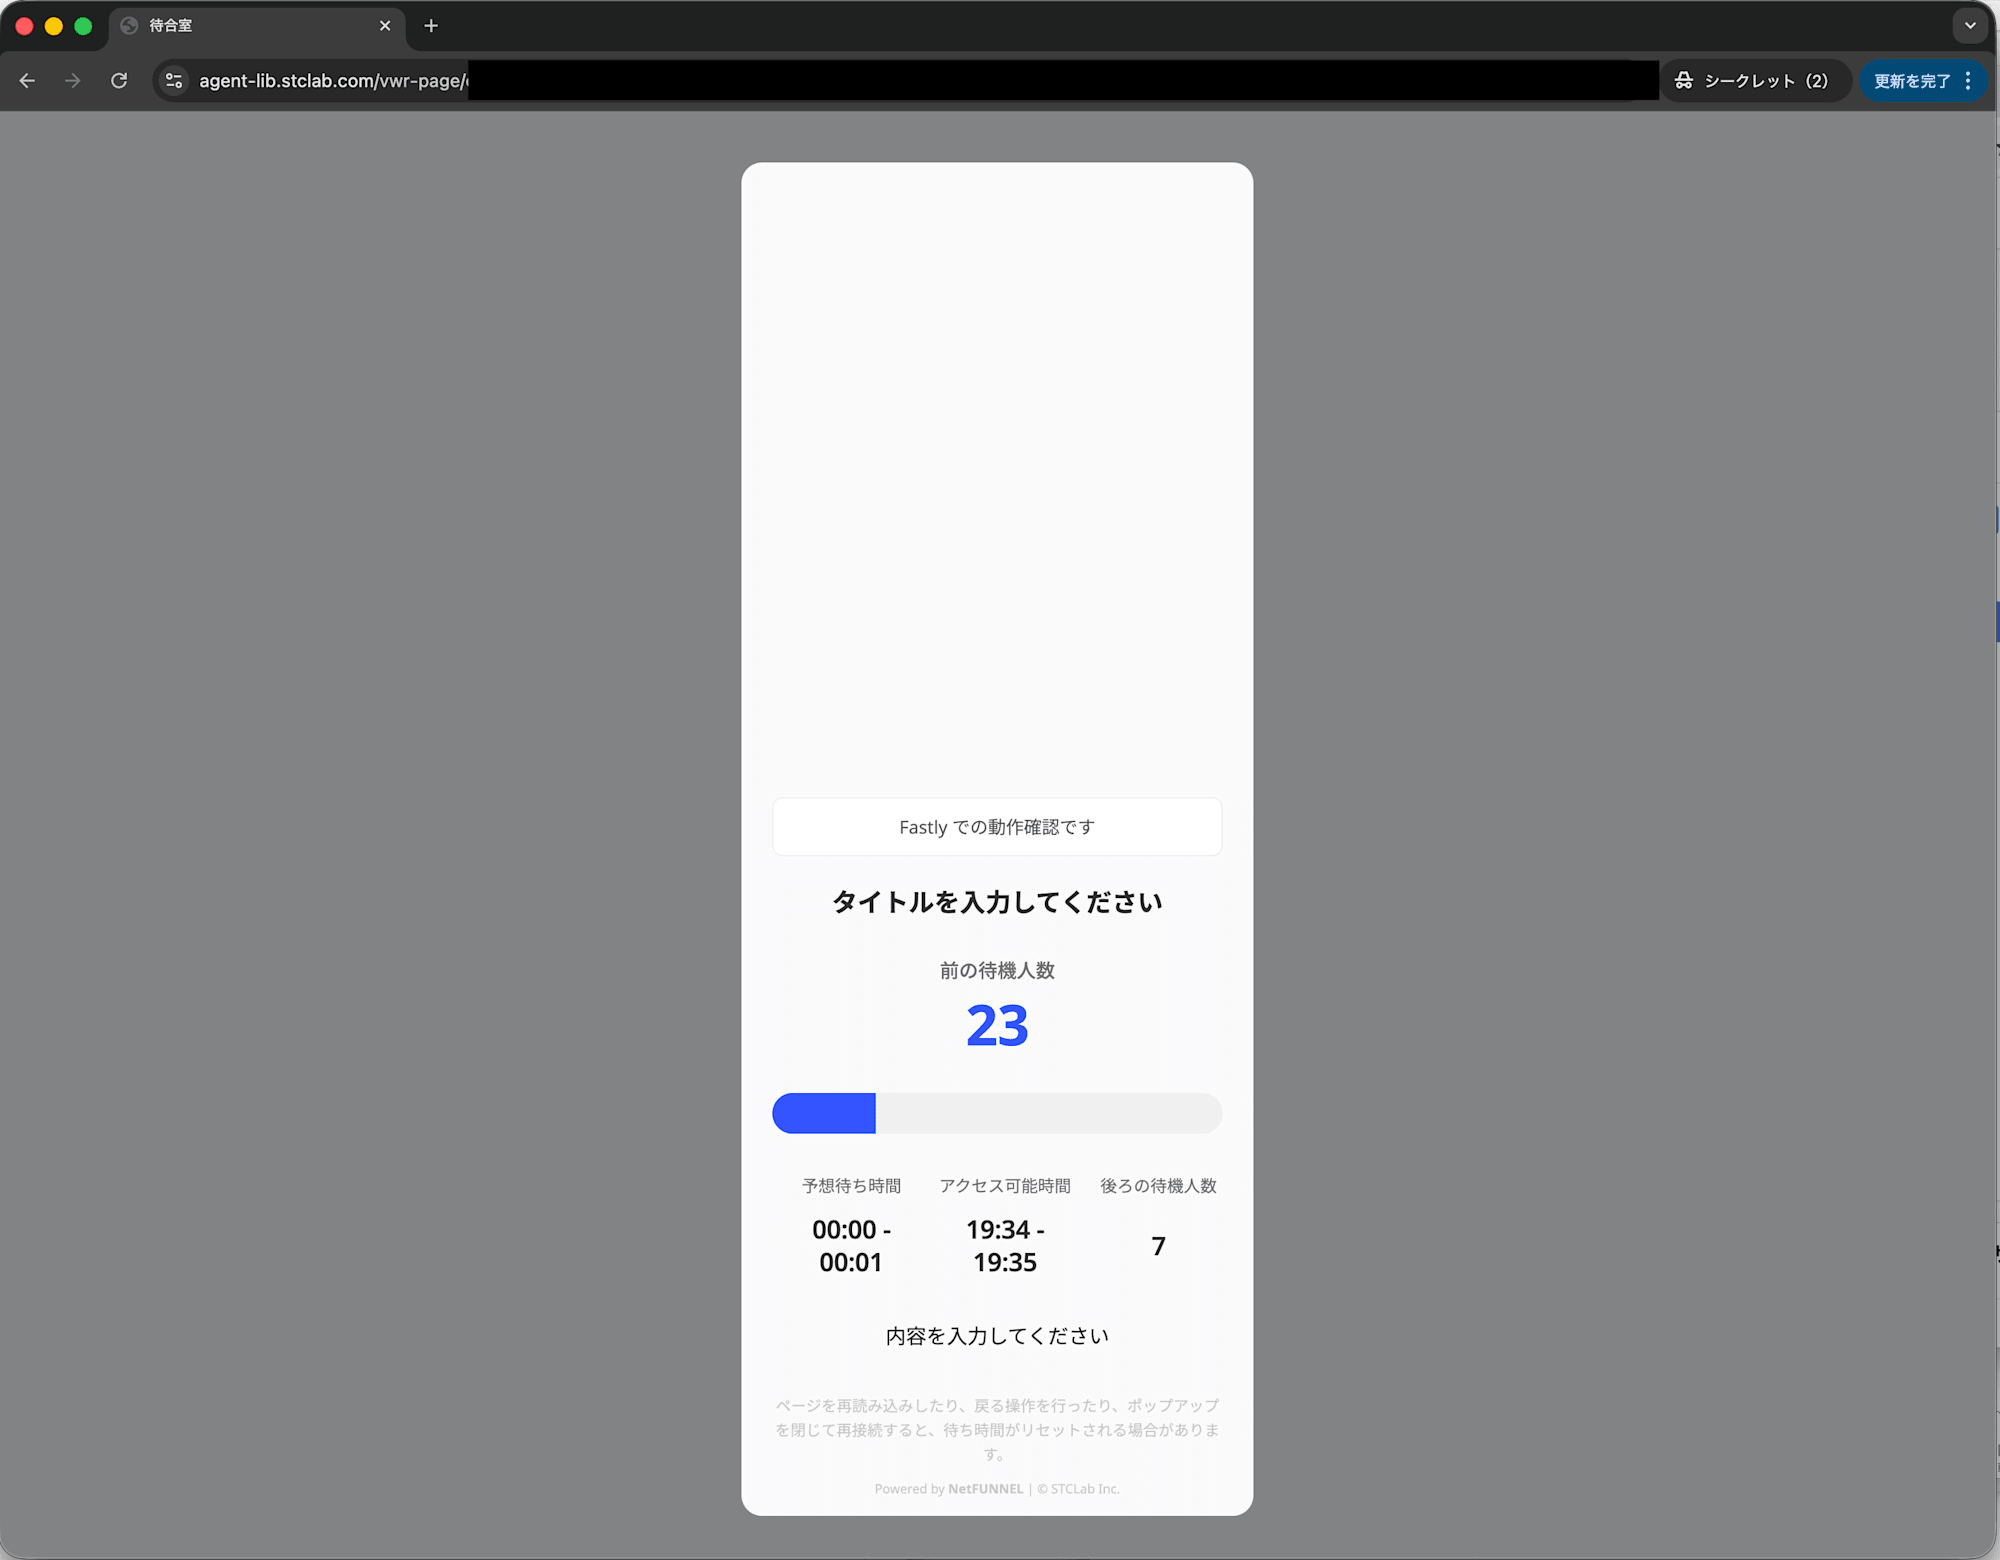
進入許容数を 1 に設定しているため 1 秒毎に待機人数が 1 ずつ減っていきます。1 秒毎に流入が細かく制御されるのは NetFUNNEL の特徴の一つです。リアルタイムに順番が進むのが見えればユーザー体験を損ないにくいのではないかと思います。
最終的に、待機が完了すると元のページに戻りコンテンツが表示されます。
さいごに
Fastly でもアプリケーションに手を加えずに NetFUNNEL を設定することができます。そのため手軽に仮想待機室を導入可能です。CDN を使用して無くても、クライアントやサーバーサイドへの組み込みも可能です。様々なパターンで導入できるので、他のパターンも試してみようと思います。