Variables in Figma Explained!
この記事は公開されてから1年以上経過しています。情報が古い可能性がありますので、ご注意ください。
Introduction.
Variables was launched at the annual Config conference of Figma, to help designers implement themes and tokens into their design systems.
Variables and there updates.

Working on the variables.
- Accessing the Variables Modal:
- Utilize the Variables panel to establish and oversee variables, modes, groups, and collections.
- To clear the canvas selection, either press the "esc" key or click anywhere on the canvas to deselect all items.
- On the right sidebar, locate the section labeled "Local variables," and then click "Open variables.

- Create a Variable:
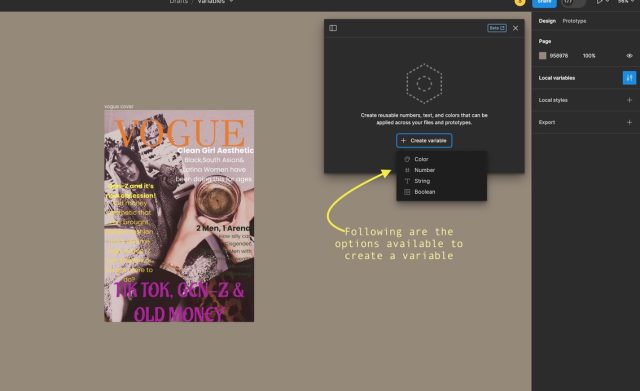
- To make a variable, begin by opening a collection and then clicking on the "Create variable" button.
- From there, pick a variable type from the menu.
- Provide a name for the variable in the first column and assign a value to it in the second column.
- If you want to make a copy of a variable, select one or more variables and press the Shift key along with the Enter key.
- To remove a variable, right-click on it and choose the "Delete variable" option.

- Create an alias:
- You can establish an alias for a variable to connect its value to an existing variable. This method simplifies the management of design updates, especially when dealing with design tokens.
- For instance, imagine you have multiple color variables all pointing to the same color variable. If that color needs modification, you only have to update the source variable instead of manually changing every instance of the color.
- To create an alias for a variable:

-
-
- Open the Variables modal and right-click on a variable's value. Then, choose "Create alias."
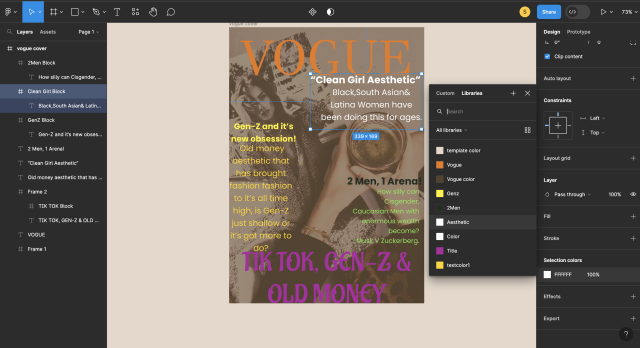
- Head to the Libraries tab and select a variable to create an alias.
- You can either search for a variable by name using the search bar or navigate through enabled libraries.
- To remove an alias, hover over the value field and click on "Detach alias."
- Variables can reference other variables of the same type.
-
- Edit a variable:
- To edit a variable, simply hover over the variable's row and click on the "Edit variable" icon to access its editing modal. In this modal, you have the option to:

-
-
- Alter the variable's name.
- Provide a description to clarify its intended usage.
- Adjust the variable's value.
- Utilize checkboxes to set the variable's scope.
- Insert code syntax.
- Choose to hide the variable, preventing it from being published
-
- Adding a Code Syntax:
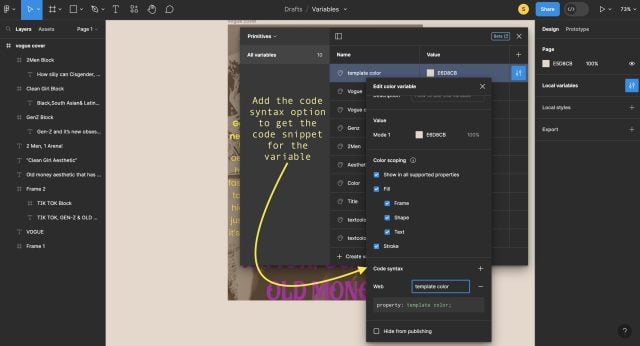
- Code syntax enables you to represent variables in code using valid variable names, ensuring a smooth transition when passing off designs. When you inspect elements in Dev Mode using the variable, the variable's code syntax will be visible in code snippets. Currently, these code snippets are supported in CSS, SwiftUI, and Compose.
-
- You have the flexibility to create a unique name for each platform, including Web, Android, and iOS. This means you can have up to three code syntax variations for a single variable.
-
-
- To include code syntax for a variable:
- In the "Edit variable" modal, navigate to the "Code syntax" section and click on "Add code syntax."
- Select either Web, Android, or iOS from the dropdown menu.
- In the input box, enter the variable name. A preview will display how the variable name will appear in code snippets.
-

Conclusion.
Figma's introduction of variables stands as a significant leap forward in the realm of digital design. These variables equip designers with the necessary resources for crafting designs that are cohesive, efficient, and flexible, all the while promoting improved collaboration and accessibility. Embracing the integration of variables into your design process transcends mere trendiness; it signifies a fundamental transformation that empowers designers to effectively tackle the complexities of contemporary design projects. As the design sector evolves, the inclusion of variables in your arsenal emerges as a prudent choice that will yield enduring benefits for both you and your team.
Thank you for your time I hope this blog was informative. Happy Learning!!!


