AWS Batchの基礎が一通り学べるハンズオン「AWS Batch Deep Dive」やってみた
はじめに
みなさんこんにちは、クラウド事業本部コンサルティング部の浅野です。
私はAWS Batchに触れたことがなく、イメージが掴めていませんでした。そこで良いチュートリアルやハンズオンがないか探していたところ JP Contents Hubに「AWS Batch Deep Dive」といういかにもなハンズオンを見つけました。
「JP Contents Hub」には掲載されているものの、2025年9月現在では日本語には対応していないようでした。
今回はこのハンズオンを実際に行いながら、AWS Batchに関する知識を深めていきたいと思います。
ハンズオンの内容
以下がハンズオンの全項目です。日本語に対応していなかったので日本語翻訳した内容を表示しています。
-
導入
-
Dockerコンテナの構築
- Dockerでコンテナを構築して実行する
- コンテナイメージをAmazon ECRにアップロードする
-
AWS Batchリソースを設定する
- コンピューティング環境をセットアップする
- ジョブキューを設定する
- ジョブ定義を設定する
- バッチ環境の確認
-
バッチジョブを実行する
- 単一のジョブを実行する
- 配列ジョブを実行する
-
マルチノード並列ジョブを実行する
- MNPジョブ用のコンテナを作成する
- ECSタスク実行ロールを作成する
- MNPジョブ定義を作成する
- MNPジョブを実行する
- MNP演習アーティファクトのクリーンアップ
-
依存関係のあるジョブを実行する
-
EC2 スポットでコストを最適化
- EC2 スポットコンピューティング環境とジョブキュー
- EC2 スポットジョブの定義
- EC2 スポットを使用してジョブを実行する
-
次のステップとクリーンアップ
- 次のステップ
- クリーンアップ
内容としてはECRにビルド済みのDockerイメージをアップロードするところから始まり、コンソールからAWS Batchの各リソースを設定したり「マルチノード並列ジョブ」や「依存関係のあるジョブ」など、応用的な使用方法まで手厚くレクチャーしてくれる内容となっています。
全て読み、一つずつ実行した結果、2時間ぐらいかかりましたが、AWS Batchの基礎から応用まで理解できるようになりました。
やってみた
内容が大量であるため今回はピックアップして以下3つの項目を紹介します。
- コンピューティング環境をセットアップする
- ジョブキューを設定する
- 依存関係のあるジョブを実行する
上2つでAWS Batchにおけるジョブ実行のための土台を形成し、実際に「依存関係のあるジョブ」をテーマにジョブを実行する流れまで紹介します。
構成
まず以下が全体で作成するシステムの構成になります。
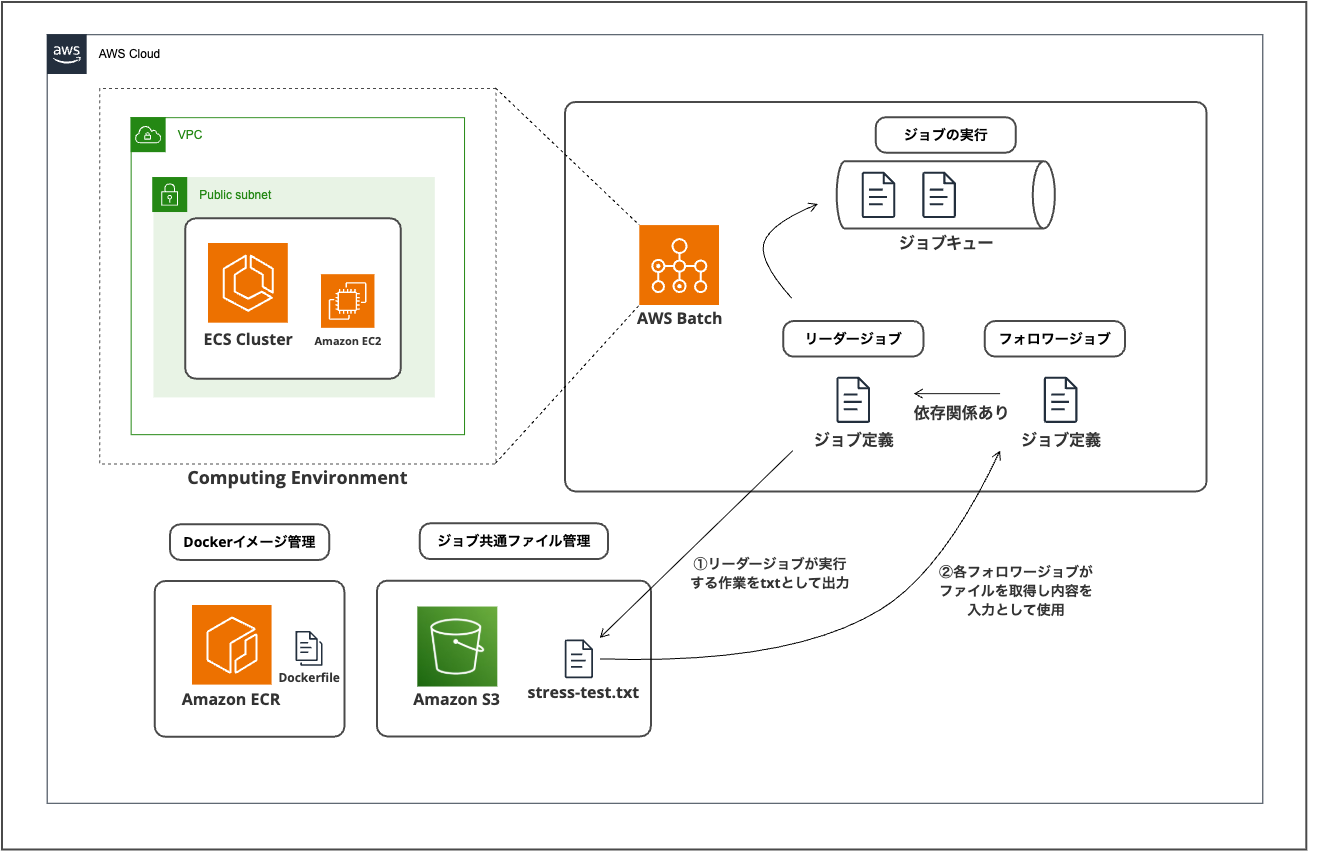
AWS Batchにてジョブを行うコンピューティング環境は「ECS on EC2」,「ECS on Fargate」,「EKS」等が選択できますが、今回はコンピューティング環境として「ECS on EC2」を用意し、ECRに格納したビルド済みDockerイメージを取得して実行することで、ジョブを行う構成の内容でした。
図で表すと複雑に見えますが、今回は「依存関係のあるジョブ」としてリーダージョブとフォロワージョブという2種類のジョブが定義されます。
リーダージョブは後続のフォロワージョブの各入力値を定義するオーケストレーターとしての役割を果たし、フォロワージョブに渡すための入力値をテキストファイルでS3に格納します。
具体的な内容として、フォロワージョブでは「stress-ng」コマンドを用いて環境内のCPUに負荷をかけ、実行情報の統計を取得することがメイン処理になります。リーダージョブによって格納されたS3内のtxtファイルを読み取り、「stress-ng」コマンドに渡す引数をテキストファイルから取得して複数並列で実行していく形式になっています。
それでは早速ハンズオンの内容を紹介します。
① コンピューティング環境を用意する
まずはジョブを動かすコンピューティング環境を用意します。AWS Batchのコンソール画面から全て用意します。
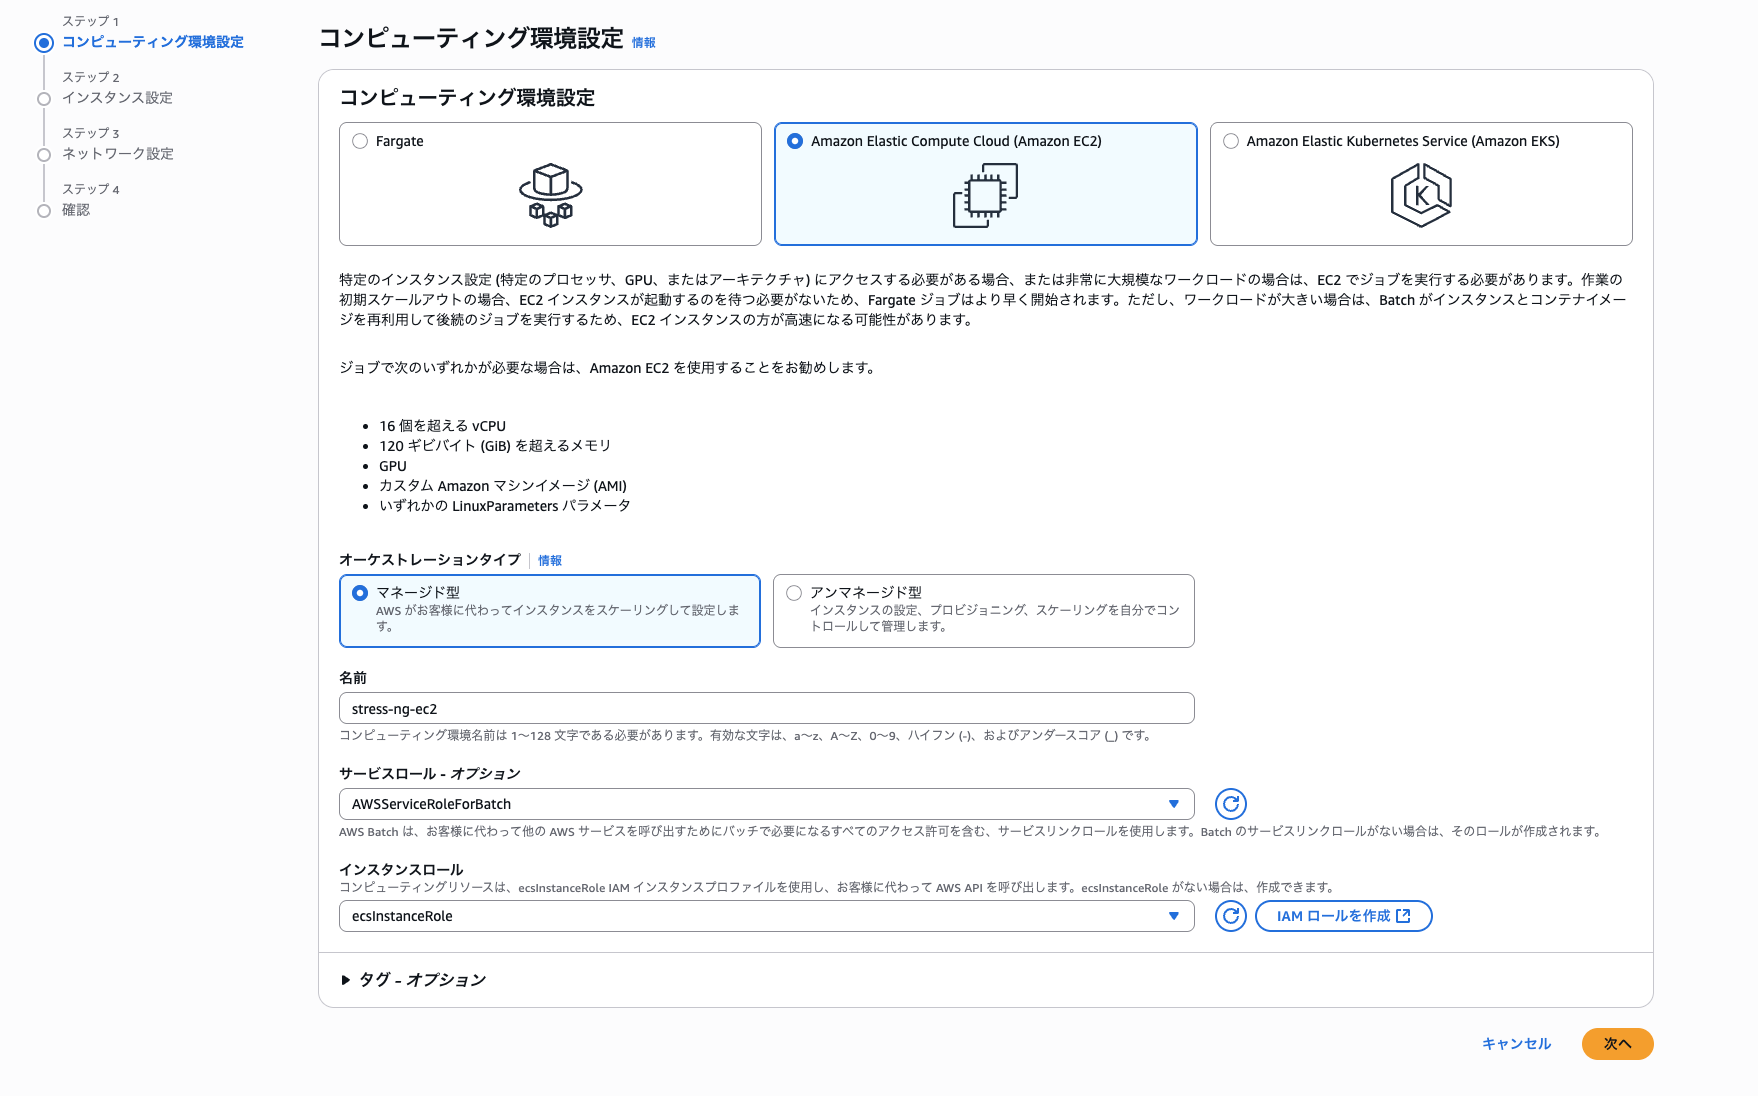
AWS Batchのコンソール画面からサイドバーの「環境」>「環境を作成」を押下し以下の設定を行い、「次へ」を選択します。
- コンピューティング環境: Amazon Elastic Compute Cloud(Amazon EC2)
- オーケストレーションタイプ: マネージド型
- 名前: 「stress-ng-ec2」
- サービスロール: AWSServiceRoleForBatch (デフォルト)
- インスタンスロール: 「ecsInstanceRole」※あらかじめ作成
あらかじめ、ECS on EC2に付与するインスタンスロール「ecsInstanceRole」は作成しておき、以下のマネージドポリシーを付与しています。
- AmazonEC2ContainerServiceforEC2Role
- AmazonSSMManagedInstanceCore
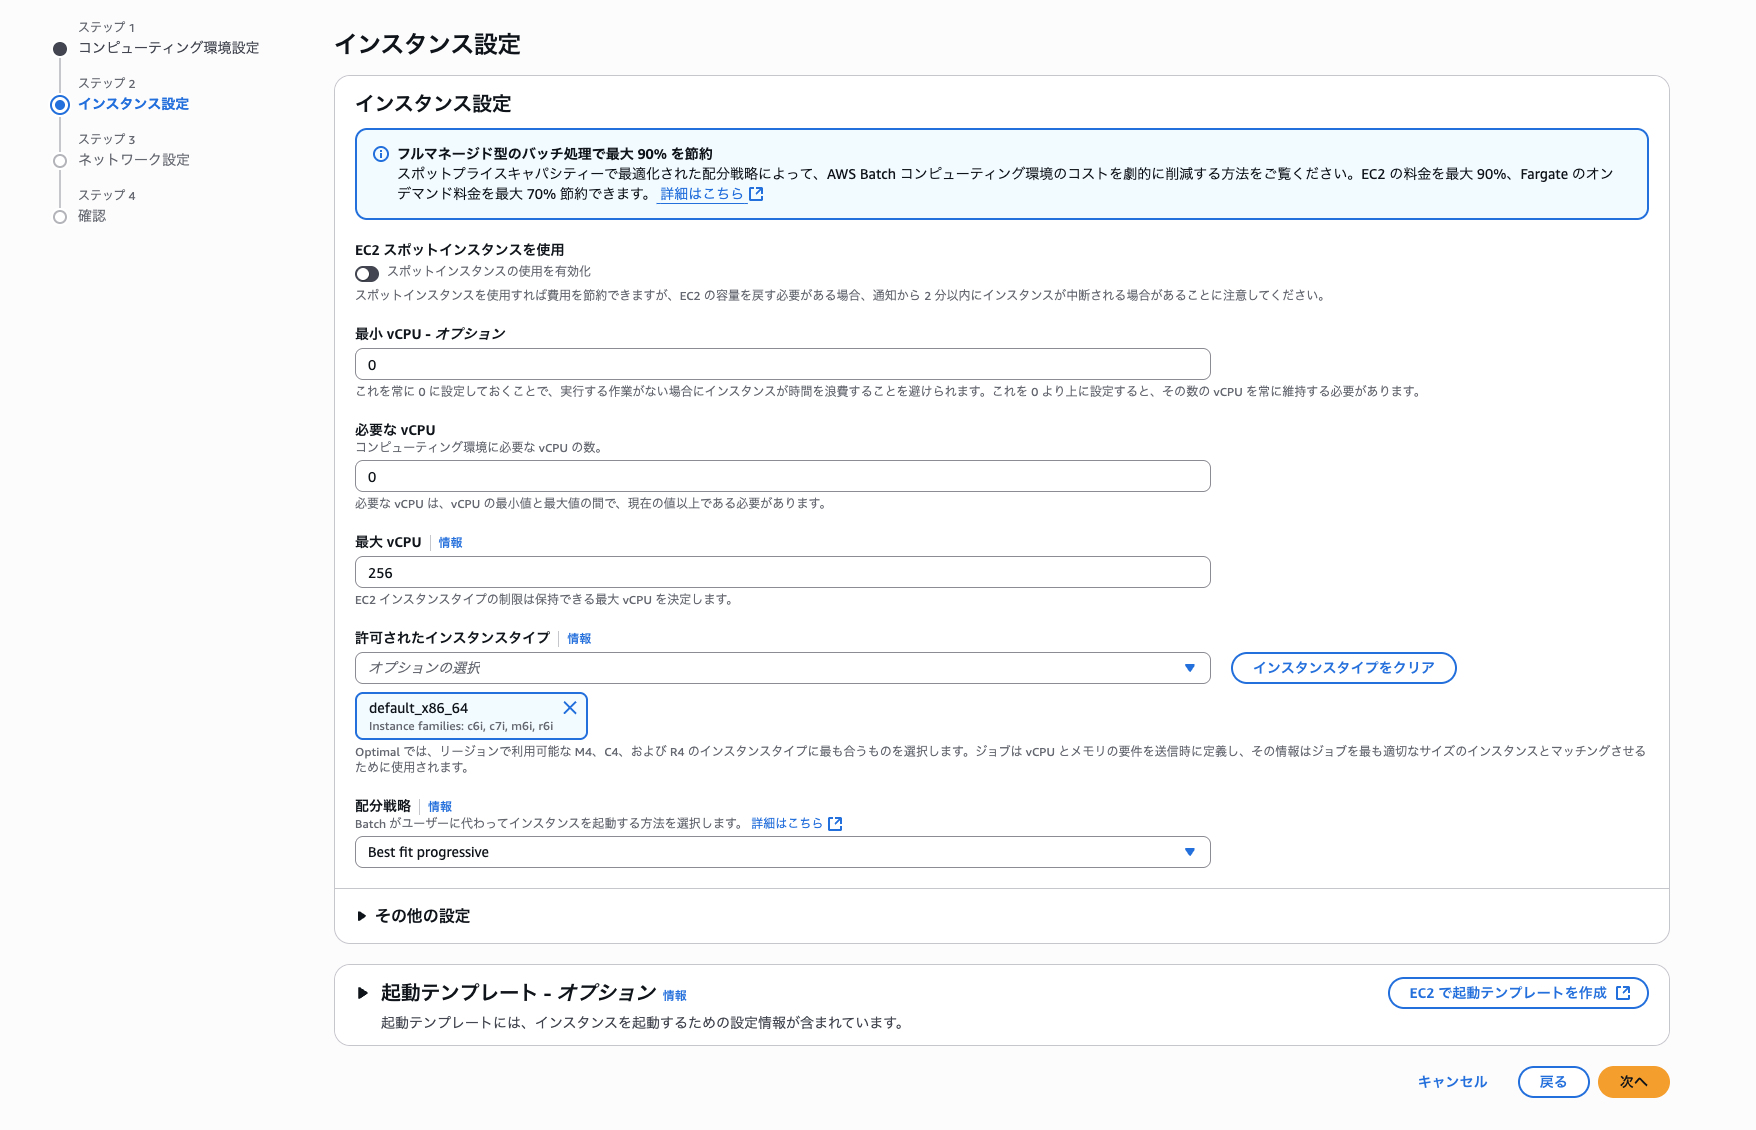
続いて、インスタンスとネットワーク設定に移ります。
インスタンス設定はデフォルトのまま「次へ」を選択
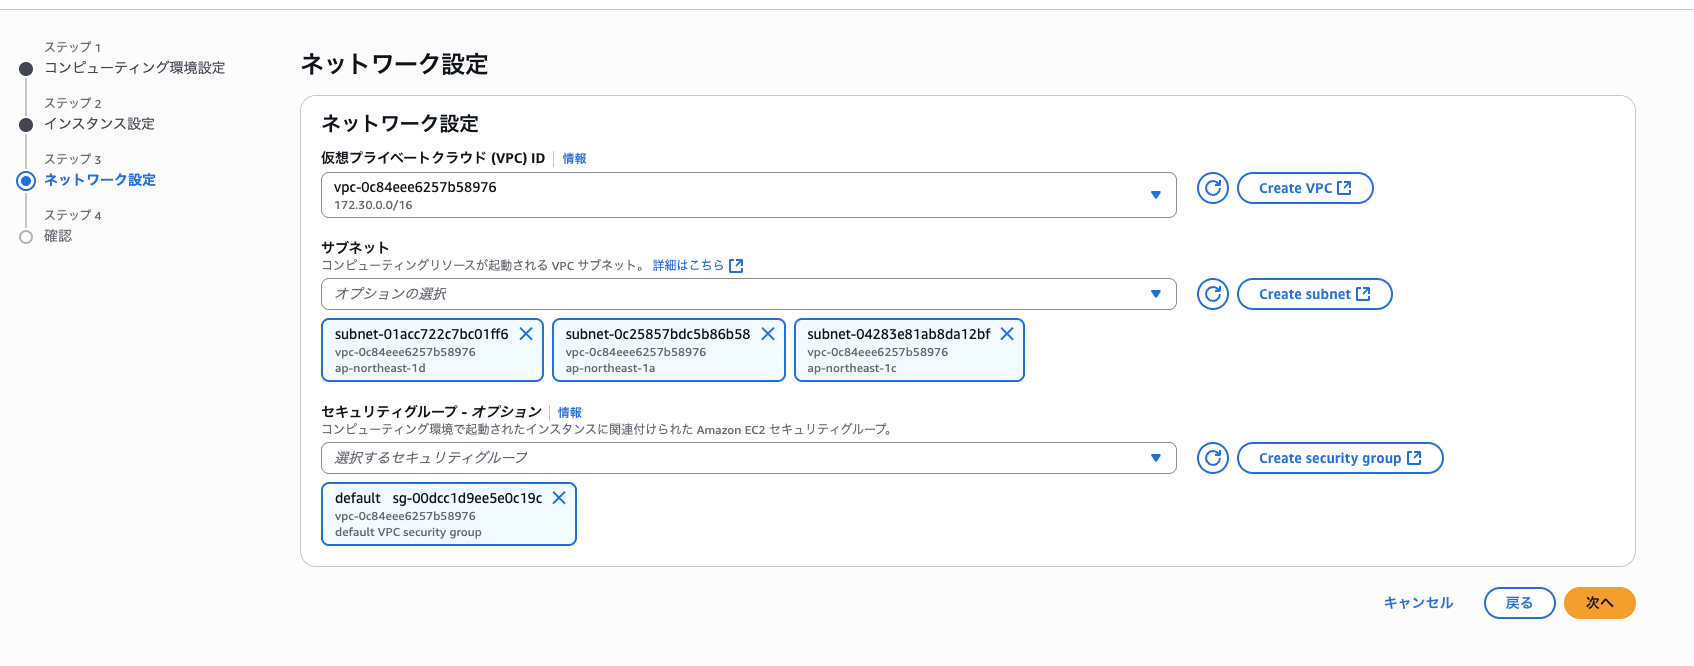
ネットワーク設定ですが、今回はハンズオンのため、東京リージョンのデフォルトVPCを選択し、デフォルトサブネット全てを選択します。セキュリティグループもデフォルトを選択しました。
設定を入力し、作成して以下のように「stress-ng-ec2」環境がステータス「Valid」になっていればOK
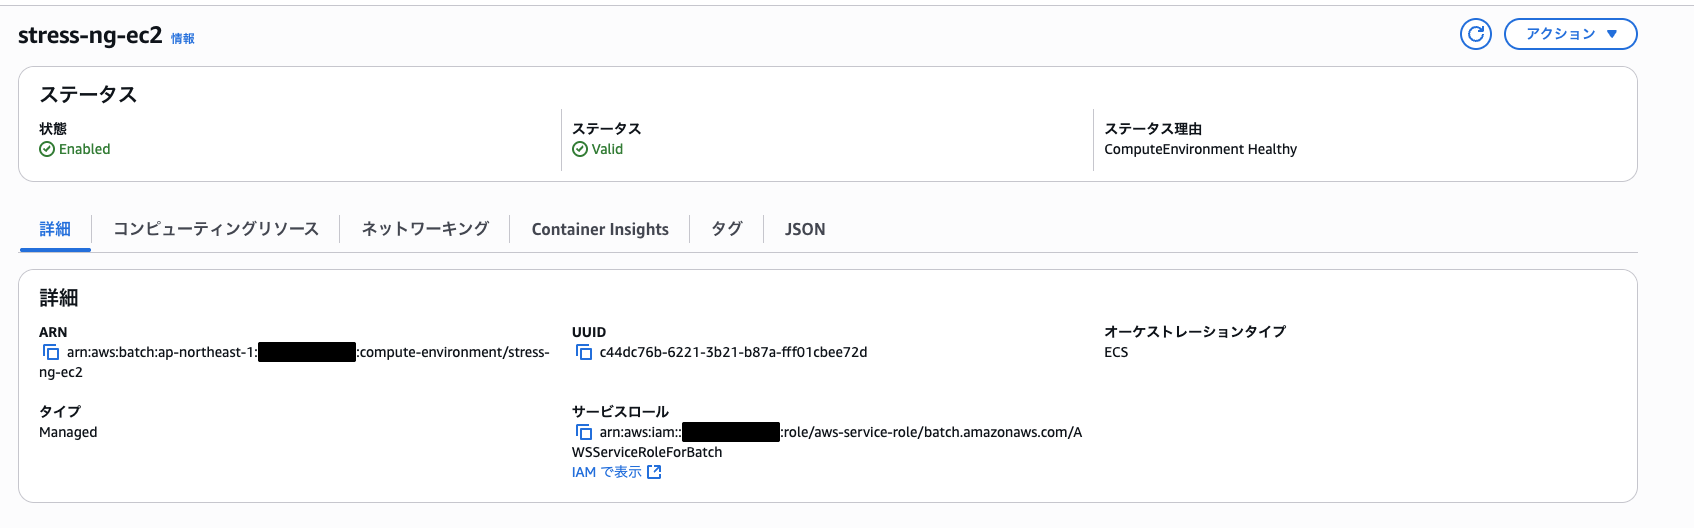
この時点でECSクラスターもできています。

② ジョブキューを用意する
続いてジョブキューを用意します。ジョブをキューに投入することで、スケジューリングポリシーを設定してジョブの実行タイミングの制御などが可能です。
また、ジョブキュー自体に優先度を設定することができ、同じコンピューティング環境に複数のジョブキューが紐づいている場合は、優先度の高いジョブキュー内のジョブから最初にコンピューティング環境にディスパッチできるなどの順序制御が可能になります。
運用の例としてジョブキューを分けることで、優先度の高いジョブはEC2オンデマンドインスタンス環境にディスパッチし、優先度の低いキューはスポットインスタンスを使用するなどの環境分割対応も可能です。
早速作成していきましょう。
サイドバーの「ジョブキュー」> 「作成」を選択し、以下の条件で設定
- オーケストレーションタイプ: Amazon Elastic Compute Cloud
- 名前: stress-ng-queue
- 優先度: 1
- スケジュールポリシー: 設定なし
- 接続されたコンピューティング環境: stress-ng-ec2
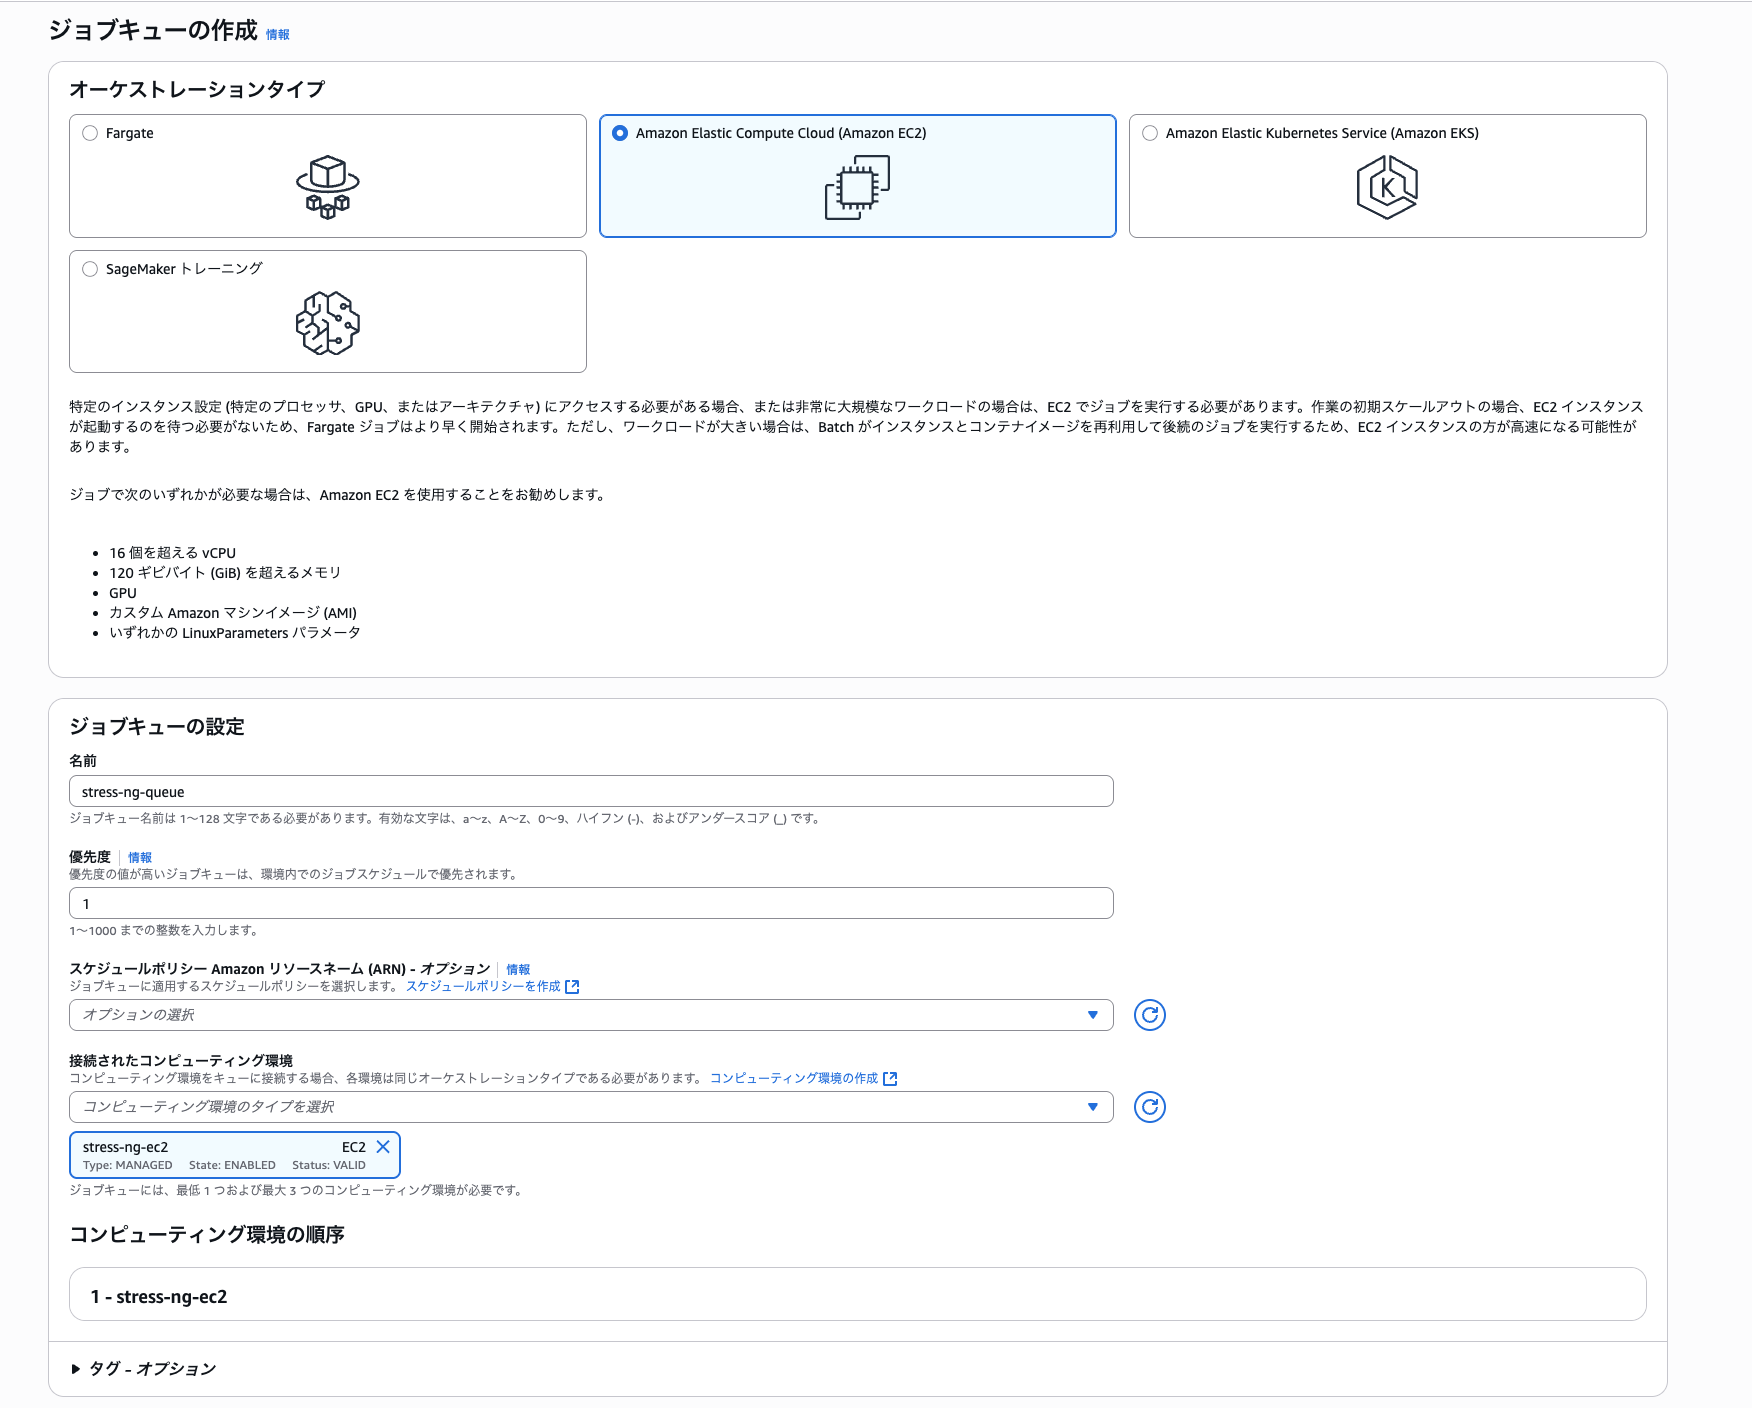
作成を選択し、以下のようにジョブキューが作成されていればOK

③ S3バケットとジョブ実行ロールを作成する
上記手順でジョブを実行するための土台が揃いました。ここから「依存関係のあるジョブ」を実際に作成していきます。スクリプトの中身は全てハンズオンで用意してくれています。
まず、初めにS3バケットとAWS Batchで各ジョブを実行する際の「ジョブロール」を以下のCloudFormation テンプレートで用意しましょう。
cat <<EOF > s3policy.yaml
# Use as follow:
#   aws cloudformation create-stack --stack-name 'BatchWorkshop' \\
#                                   --template-body file://s3policy.yaml \\
#                                   --capabilities "CAPABILITY_IAM"
AWSTemplateFormatVersion: '2010-09-09'
Description: 'Create an S3 bucket and an ECS Task Role to access this bucket
  in order to write configuration data, read command arguments and write output data.'

Metadata:
  'AWS::CloudFormation::Interface':
    ParameterGroups:
    - Label:
        default: 'Parent Stacks'
      Parameters:
      - BucketName
Parameters:
    BucketName:
      Description: 'Optional name of the bucket.'
      Type: String
      Default: ''
Conditions:
  HasBucketName: !Not [!Equals [!Ref BucketName, '']]

Resources:
  # Set up a Role for Batch job execution.
  JobExecutionRole:
    Type: AWS::IAM::Role
    Properties:
      AssumeRolePolicyDocument:
        Version: '2012-10-17'
        Statement:
          - Effect: Allow
            Principal:
              Service:
                - ecs-tasks.amazonaws.com
            Action:
              - sts:AssumeRole
      ManagedPolicyArns:
        - arn:aws:iam::aws:policy/service-role/AmazonECSTaskExecutionRolePolicy

  # Set up an S3 Bucket, Policy and Role for tasks to read/write from/to the output bucket
  Bucket:
    Type: AWS::S3::Bucket
    Properties:
      BucketName: !If [HasBucketName, !Ref BucketName, !Ref 'AWS::NoValue']

  # Set up a Policy that allows access to the S3 Bucket and attach it to the Role.
  BucketPolicy:
    Type: AWS::IAM::Policy
    Properties:
      PolicyName: BucketPolicy
      PolicyDocument:
          Version: 2012-10-17
          Statement:
          - Effect: Allow
            Action:
              - 's3:AbortMultipartUpload'
              - 's3:GetBucketLocation'
              - 's3:GetObject'
              - 's3:ListBucket'
              - 's3:ListBucketMultipartUploads'
              - 's3:PutObject'
            Resource:
              - !Join [ "", [ "arn:aws:s3:::", !Ref 'Bucket' ] ]
              - !Join [ "", [ "arn:aws:s3:::", !Ref 'Bucket' , "/*" ] ]

      Roles:
        - !Ref 'JobExecutionRole'

Outputs:
  JobExecutionRole:
    Description: ECS Task Execution Role for AWS Batch Jobs
    Value: !Ref JobExecutionRole
  Bucket:
    Description: Bucket in which configuration and output will be written
    Value: !Ref Bucket
  BucketPolicy:
    Description: ECS Task Policy for S3 access to S3 Bucket
    Value: !Ref BucketPolicy
EOF
続いて上記スタックをデプロイするためのシェルスクリプトを用意します。
コマンドでスクリプトを用意し、実行権限設定まで完了させます。
cat > cfn-pre-requisites.sh << EOF
#!/bin/bash

STACK_NAME='BatchWorkshop'

# create the stack
echo "1/3 - Create Stack \$STACK_NAME"
aws cloudformation create-stack --stack-name \$STACK_NAME --template-body file://s3policy.yaml --capabilities "CAPABILITY_IAM"

echo "2/3 - Stack \$STACK_NAME being created"
# wait for the stack to be completed
aws cloudformation wait stack-create-complete --stack-name \$STACK_NAME

echo "3/3 - Stack \$STACK_NAME created"
# once done get the role and bucket
export EXECUTION_ROLE=\$(aws cloudformation describe-stacks --stack-name \$STACK_NAME --output text --query 'Stacks[0].Outputs[?OutputKey == \`JobExecutionRole\`].OutputValue')
export STRESS_BUCKET="s3://\$(aws cloudformation describe-stacks --stack-name \$STACK_NAME --output text --query 'Stacks[0].Outputs[?OutputKey == \`Bucket\`].OutputValue')"

echo "Use the following Job Execution Role ID with AWS Batch: \${EXECUTION_ROLE}"
echo "Use the following S3 Bucket for your AWS Batch jobs: \${STRESS_BUCKET}"
EOF
chmod +x cfn-pre-requisites.sh
以下で実行します。
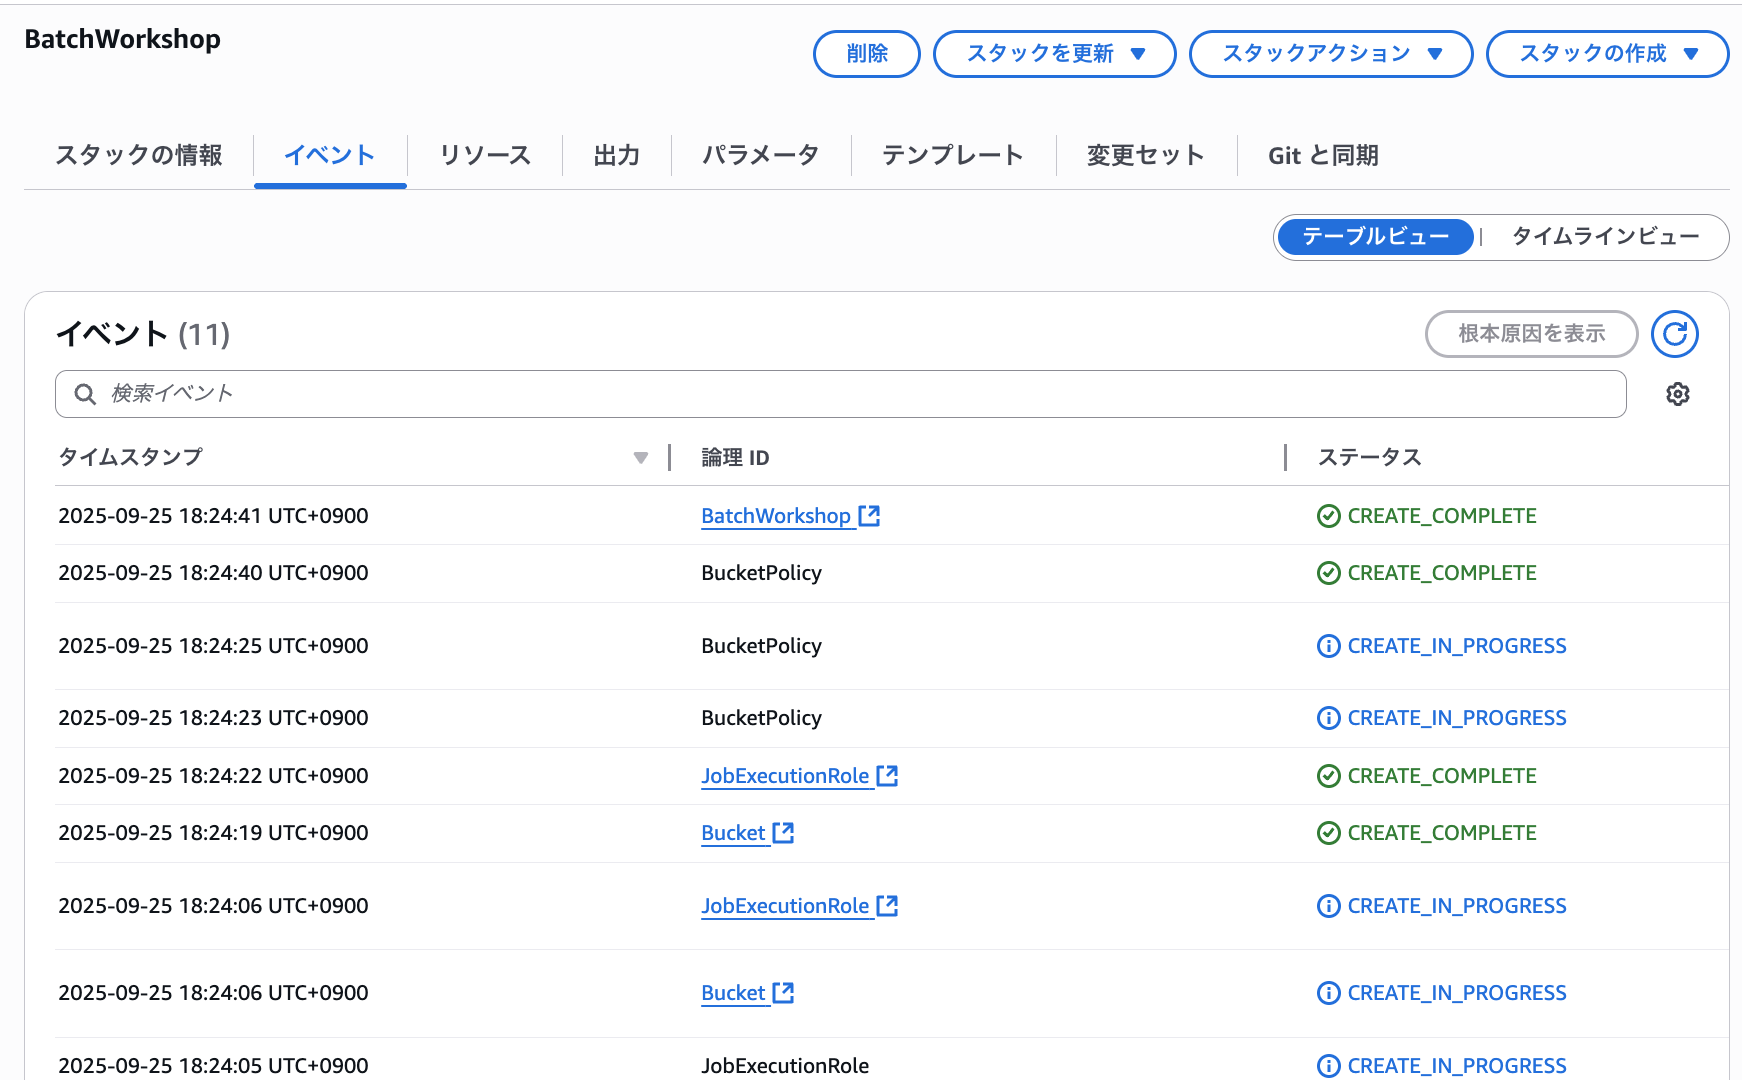
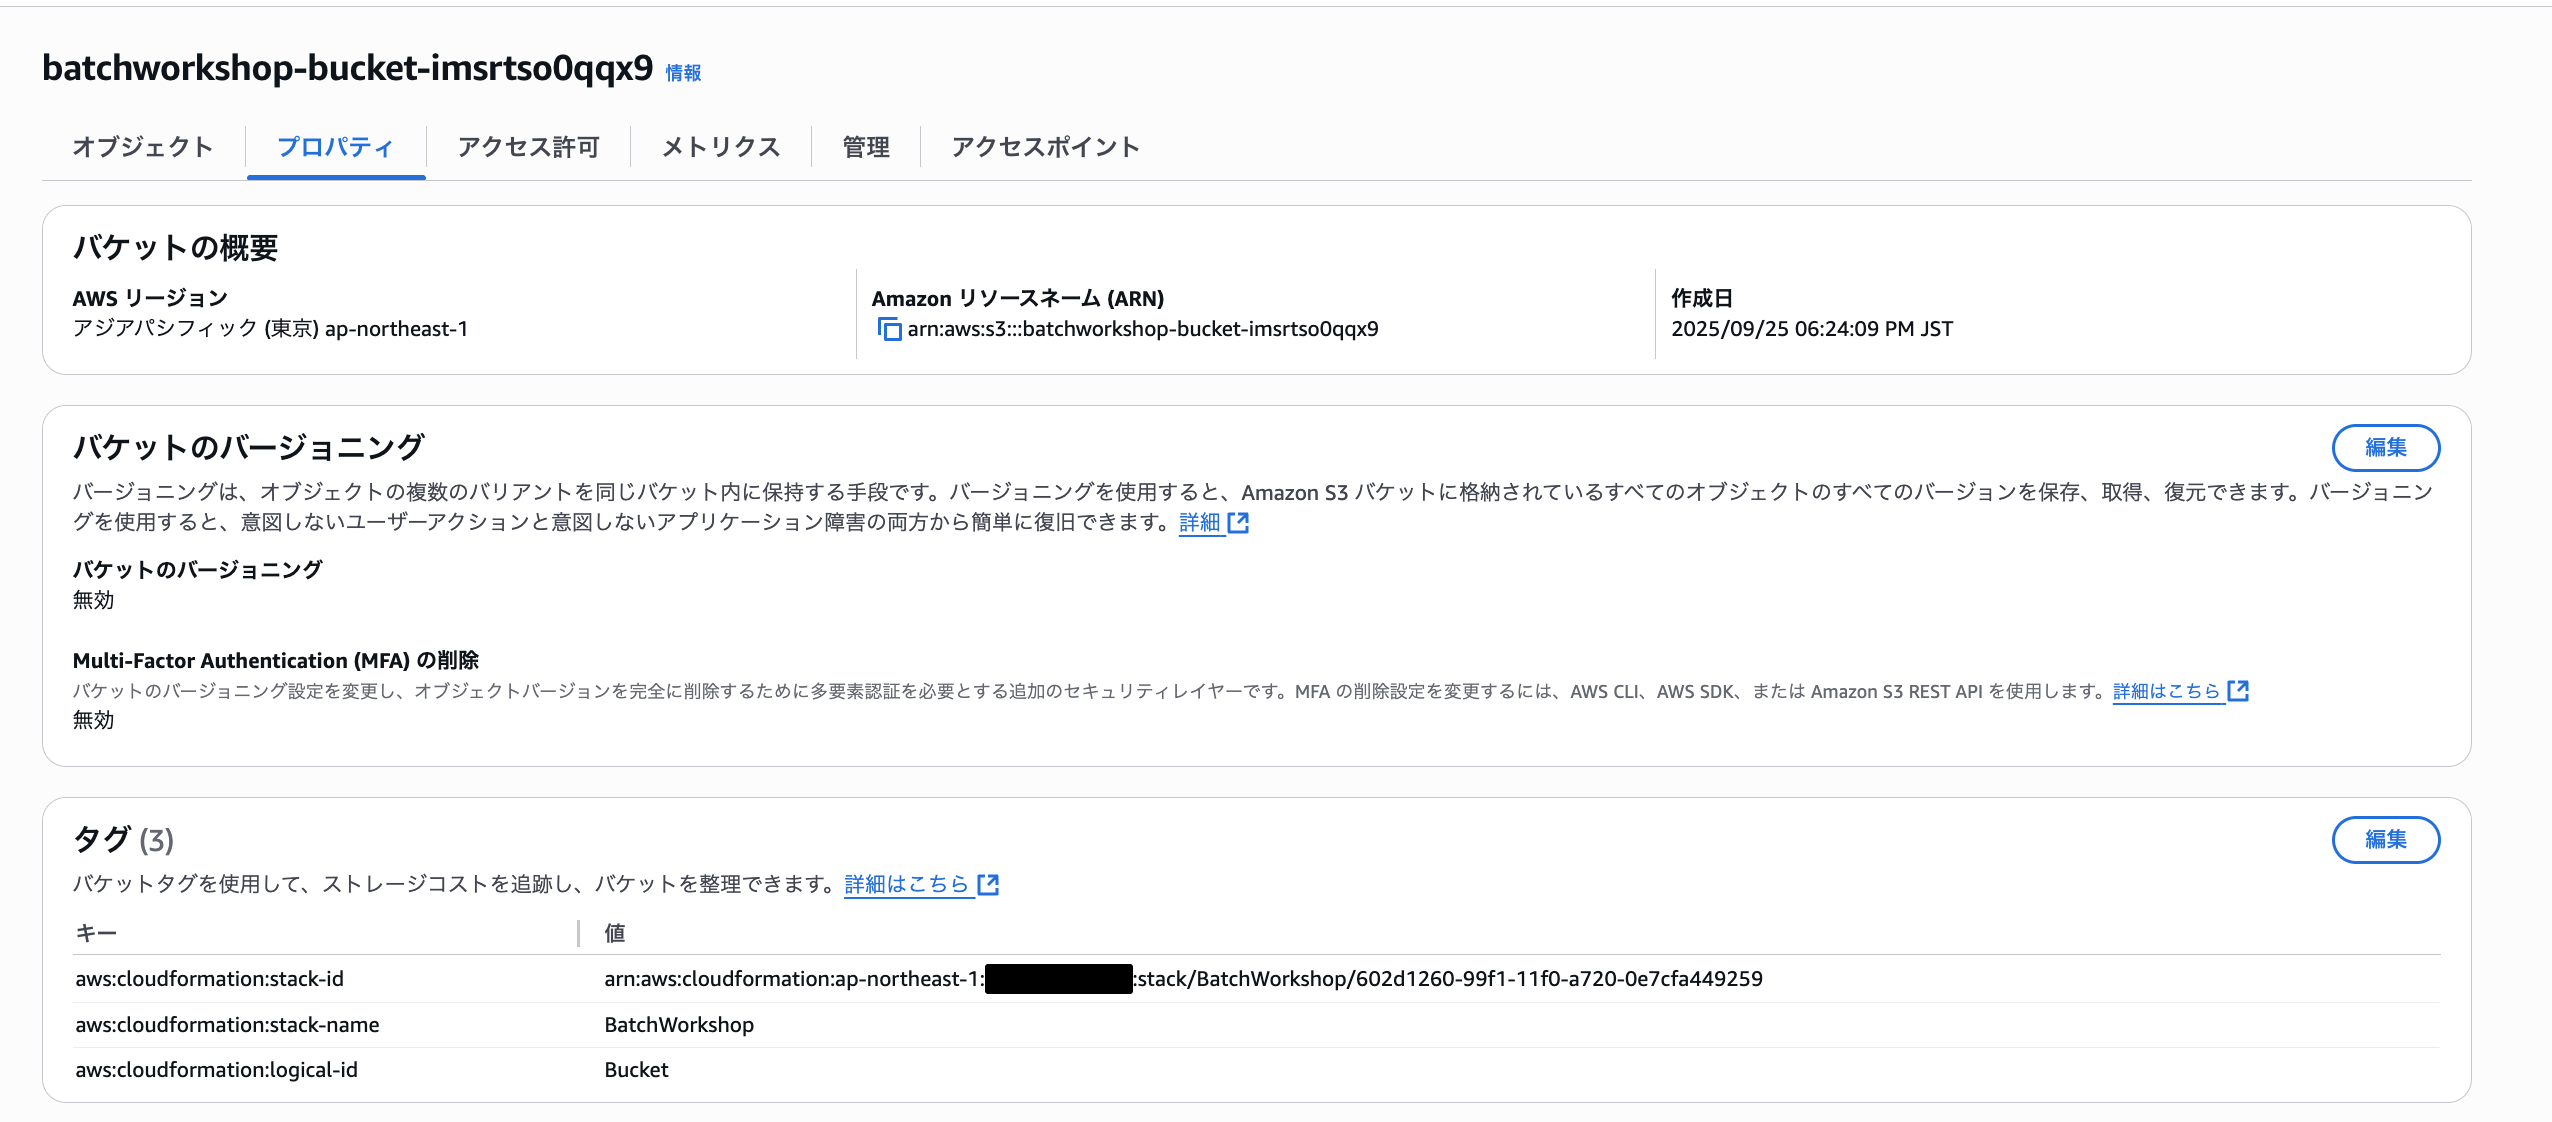
./cfn-pre-requisites.sh
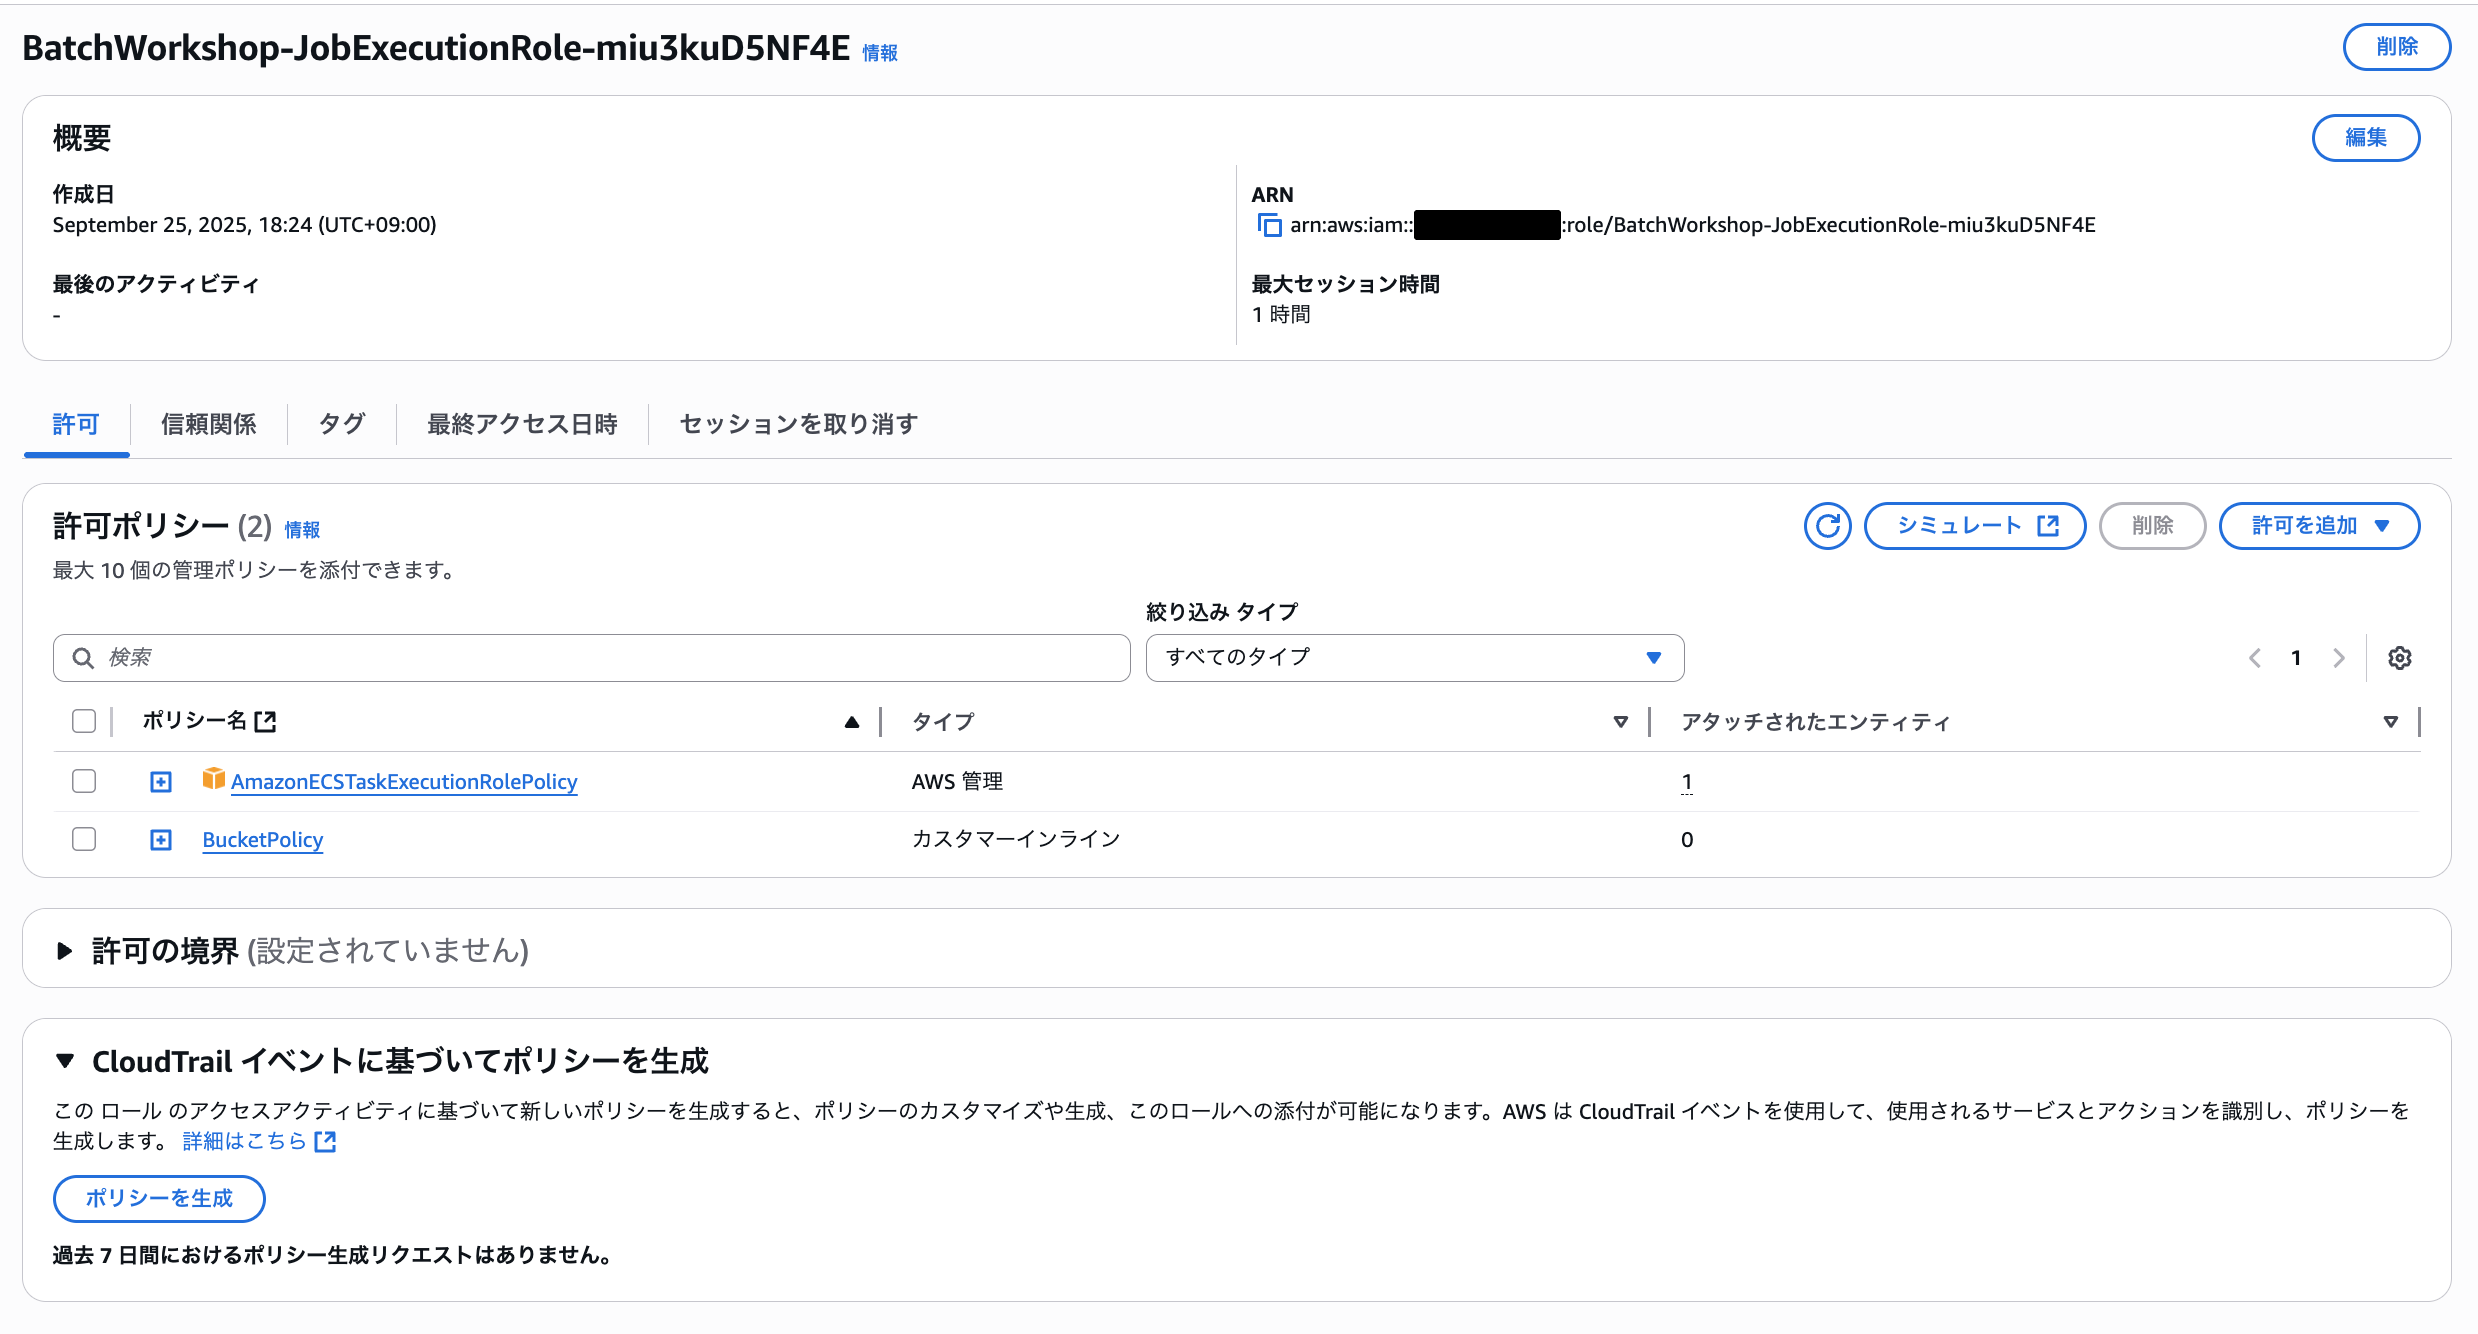
実行すると「BatchWorkShop」というスタックがデプロイされ、以下のようにS3バケットとIAMロールが作成されました。
④ リーダージョブを作成する
まずはリーダージョブに必要なリソース設定を行っていきます。
ハンズオンでは「Cloud Shell」環境で作業していましたが、ローカル環境で適当なディレクトリでも大丈夫です。
まずは、作業ディレクトリの作成を行います。
mkdir ~/dependency/leader
cd ~/dependency/leader
続いて以下のコマンドでDockerfileを用意します。
cat <<EOF > Dockerfile

FROM public.ecr.aws/amazonlinux/amazonlinux:2023
RUN dnf install -y stress-ng awscli-2

### Build mktests.sh
RUN echo \$'#!/bin/bash\n\\
FILE=/stress-tests.txt\n\\
rm \$FILE 2>/dev/null\n\\
COUNT=0\n\\
for II in \`stress-ng --cpu-method which 2>&1\`\n\\
do\n\\
    if [ \$COUNT -gt  5 ]; then\n\\
        echo "--cpu 1 -t 120s --times --cpu-method \$II" >> \$FILE\n\\
    fi\n\\
    COUNT=\`expr \$COUNT + 1\`\n\\
done' >> /mktests.sh
RUN chmod 0744 /mktests.sh

RUN echo \$'#!/bin/bash\n\\
/mktests.sh \n\\
aws s3 ls \${STRESS_BUCKET}/ \n\\
aws s3 cp /mktests.sh \${STRESS_BUCKET}/ --quiet \n\\
aws s3 cp /stress-tests.txt \${STRESS_BUCKET}/ --quiet \n\\
' >> /docker-entrypoint.sh
RUN chmod 0744 /docker-entrypoint.sh
ENTRYPOINT ["/docker-entrypoint.sh"]

EOF
Dockerfileで行なっていることは以下です。
-
Amazon Linux 2023環境で 「AWS CLI v2」と「stress-ng」ライブラリをインストール
-
「stress-tests.txt」に各フォロワージョブの入力として渡すための引数値を「stress-tests」ライブラリで定義されているメソッドの個数分繰り返し処理を用いて入力する「mktests.sh」を用意
-
mktests.sh を実行し「stress-tests.txt」に以下のような「stress-ng」コマンドの引数が「stress-tests.txt」に書き込まれる。この1行毎に各フォロワージョブへの入力となる。
stress-tests.txtのサンプル内容--cpu 1 -t 120s --times --cpu-method ackermann --cpu 1 -t 120s --times --cpu-method bitops --cpu 1 -t 120s --times --cpu-method callfunc --cpu 1 -t 120s --times --cpu-method cdouble --cpu 1 -t 120s --times --cpu-method cfloat --cpu 1 -t 120s --times --cpu-method clongdouble --cpu 1 -t 120s --times --cpu-method correlate . . . -
出力した「stress-tests.txt」と「mktests.sh」を先ほど用意したS3バケットに保存
Dockerfileを作成した後はECRに格納するための以下スクリプトも実行しましょう
ECRにリポジトリを作成するスクリプトを記述して権限設定
cat > ~/bin/create_repo.sh << EOF
#!/bin/bash
echo \${1}
aws ecr create-repository --repository-name \${1}
EOF
chmod +x ~/bin/create_repo.sh
ローカルディレクトリ内のDockerfileに基づいてコンテナを構築し、それを名前付きECRリポジトリにプッシュするスクリプトを記述して権限設定
cat > ~/bin/build_container.sh << EOF
#!/bin/bash
echo \${1}
export AWS_ACCOUNT_ID=\$(aws sts get-caller-identity --output text --query Account)
if [ -n "\$AWS_REGION" ];
then
        AWS_REGION=\$AWS_REGION
 else
        AWS_REGION=\$(aws configure get region)
fi
export AWS_REGION
aws ecr get-login-password --region \${AWS_REGION} | docker login --username AWS --password-stdin \${AWS_ACCOUNT_ID}.dkr.ecr.\${AWS_REGION}.amazonaws.com
docker build -t \${1} .
docker tag \${1}:latest \${AWS_ACCOUNT_ID}.dkr.ecr.\${AWS_REGION}.amazonaws.com/\${1}:latest
docker push \${AWS_ACCOUNT_ID}.dkr.ecr.\${AWS_REGION}.amazonaws.com/\${1}:latest
EOF
chmod +x ~/bin/build_container.sh
以下のコマンドで両スクリプトを実行
~/bin/create_repo.sh stress-ng-leader

~/bin/build_container.sh stress-ng-leader
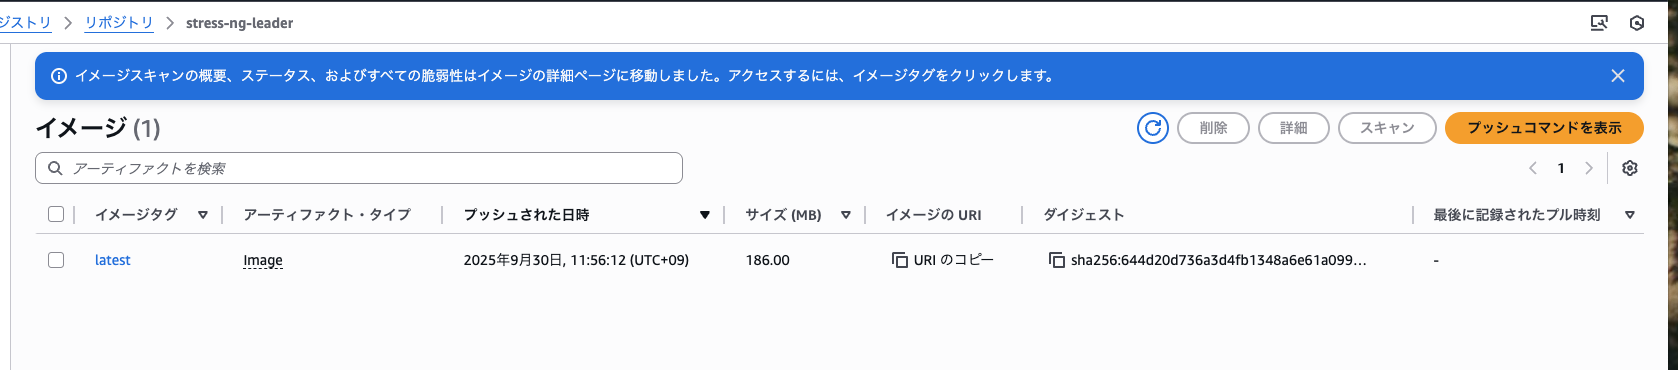
以下のようにリポジトリにビルド済みイメージが格納されていればOK
続いて「ジョブ定義」と言われるジョブのテンプレートを作成します。
実質的な内容はECSのタスク定義ですね。どのDockerイメージを使用するかの設定や、環境変数の設定、ジョブに紐づけるIAMロールの設定やDocker実行時のコマンドのオーバーライド等などジョブ実行時に関する一通りの設定をAWS Batchのリソースとして設定します。
ジョブ定義を作成すると内部でECSタスク実行のためのタスク定義もこ合わせて作成されます。コンソールからも設定できますが、今回はCLIベースで用意していきましょう。
ジョブ定義としてDockerイメージはリーダージョブのリポジトリから、ジョブ実行用のIAMロールは先ほどスタックで作成したIAMロールを設定しています。
export STACK_NAME=BatchWorkshop
export EXECUTION_ROLE="$(aws cloudformation describe-stacks --stack-name $STACK_NAME --output text --query 'Stacks[0].Outputs[?OutputKey == `JobExecutionRole`].OutputValue')"
export EXECUTION_ROLE_ARN=$(aws iam get-role --role-name $EXECUTION_ROLE | jq -r '.Role.Arn')
export LEADER_REPO=$(aws ecr describe-repositories --repository-names stress-ng-leader --output text --query 'repositories[0].[repositoryUri]')
cat > stress-ng-leader-job-definition.json << EOF
{
    "jobDefinitionName": "stress-ng-leader-job-definition",
    "type": "container",
    "containerProperties": {
        "image": "${LEADER_REPO}",
        "vcpus": 1,
        "memory": 1024,
        "jobRoleArn": "${EXECUTION_ROLE_ARN}",
        "executionRoleArn": "${EXECUTION_ROLE_ARN}"
    },
    "retryStrategy": {
        "attempts": 2
    }
}
EOF
aws batch register-job-definition --cli-input-json file://stress-ng-leader-job-definition.json
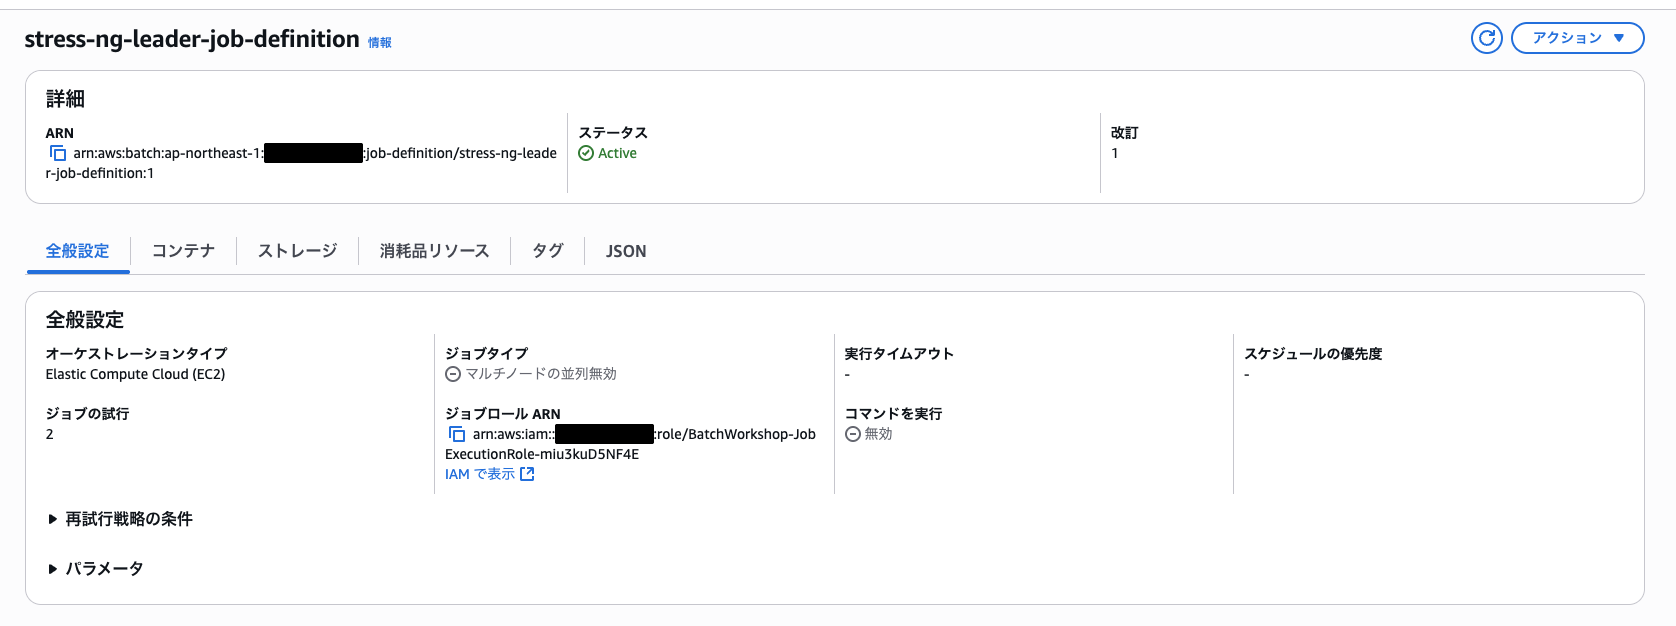
上記スクリプトを実行すると以下のようにリーダージョブの「ジョブ定義」が設定されました。
⑤ リーダージョブを実行する
ここまでくると一通りリーダージョブを実行する準備が整いました。
次のコマンドを実行して、リーダージョブのジョブ実行のためのJSONファイルを作成し、リーダージョブを実行してみましょう。
export STACK_NAME=BatchWorkshop
export STRESS_BUCKET="s3://$(aws cloudformation describe-stacks --stack-name $STACK_NAME --output text --query 'Stacks[0].Outputs[?OutputKey == `Bucket`].OutputValue')"
cat <<EOF > ./stress-ng-leader-job.json
{
    "jobName": "stress-ng-leader",
    "jobQueue": "stress-ng-queue",
    "jobDefinition": "stress-ng-leader-job-definition",
    "containerOverrides": {
        "environment": [
        {
            "name": "STRESS_BUCKET",
            "value": "${STRESS_BUCKET}"
        }]
    }
}
EOF
aws batch submit-job --cli-input-json file://stress-ng-leader-job.json
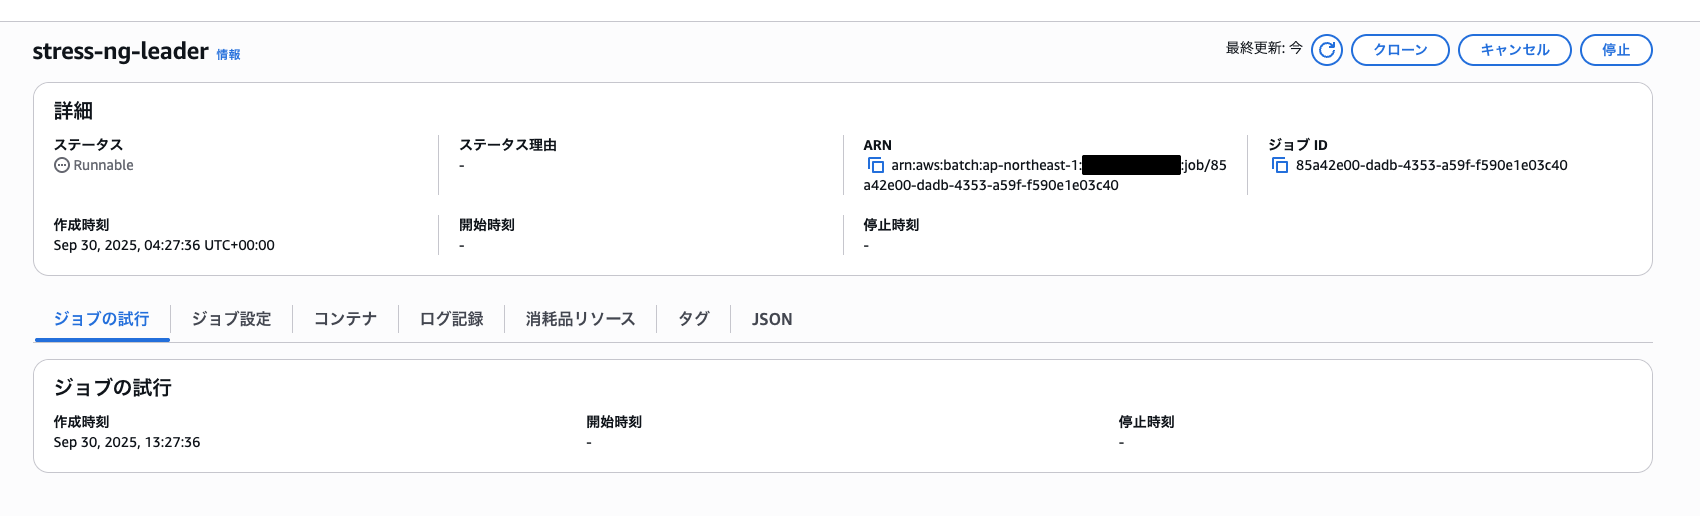
上記を実行すると以下のように結果が出力され、コンソール画面でもジョブが実行されていることが確認できました。
{
    "jobArn": "arn:aws:batch:ap-northeast-1:************:job/85a42e00-dadb-4353-a59f-f590e1e03c40",
    "jobName": "stress-ng-leader",
    "jobId": "85a42e00-dadb-4353-a59f-f590e1e03c40"
}
無事ジョブが成功しS3バケットにスクリプトとテキストファイルが保存されました。

保存された「stress-tests.txt」の内容
--cpu 1 -t 120s --times --cpu-method ackermann
--cpu 1 -t 120s --times --cpu-method apery
--cpu 1 -t 120s --times --cpu-method bitops
--cpu 1 -t 120s --times --cpu-method callfunc
--cpu 1 -t 120s --times --cpu-method cdouble
--cpu 1 -t 120s --times --cpu-method cfloat
--cpu 1 -t 120s --times --cpu-method clongdouble
--cpu 1 -t 120s --times --cpu-method collatz
--cpu 1 -t 120s --times --cpu-method correlate
--cpu 1 -t 120s --times --cpu-method crc16
--cpu 1 -t 120s --times --cpu-method decimal32
--cpu 1 -t 120s --times --cpu-method decimal64
--cpu 1 -t 120s --times --cpu-method decimal128
--cpu 1 -t 120s --times --cpu-method dither
--cpu 1 -t 120s --times --cpu-method div8
--cpu 1 -t 120s --times --cpu-method div16
--cpu 1 -t 120s --times --cpu-method div32
--cpu 1 -t 120s --times --cpu-method div64
--cpu 1 -t 120s --times --cpu-method div128
--cpu 1 -t 120s --times --cpu-method double
--cpu 1 -t 120s --times --cpu-method euler
--cpu 1 -t 120s --times --cpu-method explog
--cpu 1 -t 120s --times --cpu-method factorial
--cpu 1 -t 120s --times --cpu-method fibonacci
--cpu 1 -t 120s --times --cpu-method fft
--cpu 1 -t 120s --times --cpu-method fletcher16
--cpu 1 -t 120s --times --cpu-method float
--cpu 1 -t 120s --times --cpu-method float32
--cpu 1 -t 120s --times --cpu-method float64
--cpu 1 -t 120s --times --cpu-method float80
--cpu 1 -t 120s --times --cpu-method float128
--cpu 1 -t 120s --times --cpu-method floatconversion
--cpu 1 -t 120s --times --cpu-method gamma
--cpu 1 -t 120s --times --cpu-method gcd
--cpu 1 -t 120s --times --cpu-method gray
--cpu 1 -t 120s --times --cpu-method hamming
--cpu 1 -t 120s --times --cpu-method hanoi
--cpu 1 -t 120s --times --cpu-method hyperbolic
--cpu 1 -t 120s --times --cpu-method idct
--cpu 1 -t 120s --times --cpu-method int128
--cpu 1 -t 120s --times --cpu-method int64
--cpu 1 -t 120s --times --cpu-method int32
--cpu 1 -t 120s --times --cpu-method int16
--cpu 1 -t 120s --times --cpu-method int8
--cpu 1 -t 120s --times --cpu-method int128float
--cpu 1 -t 120s --times --cpu-method int128double
--cpu 1 -t 120s --times --cpu-method int128longdouble
--cpu 1 -t 120s --times --cpu-method int128decimal32
--cpu 1 -t 120s --times --cpu-method int128decimal64
--cpu 1 -t 120s --times --cpu-method int128decimal128
--cpu 1 -t 120s --times --cpu-method int64float
--cpu 1 -t 120s --times --cpu-method int64double
--cpu 1 -t 120s --times --cpu-method int64longdouble
--cpu 1 -t 120s --times --cpu-method int32float
--cpu 1 -t 120s --times --cpu-method int32double
--cpu 1 -t 120s --times --cpu-method int32longdouble
--cpu 1 -t 120s --times --cpu-method intconversion
--cpu 1 -t 120s --times --cpu-method ipv4checksum
--cpu 1 -t 120s --times --cpu-method jmp
--cpu 1 -t 120s --times --cpu-method lfsr32
--cpu 1 -t 120s --times --cpu-method ln2
--cpu 1 -t 120s --times --cpu-method logmap
--cpu 1 -t 120s --times --cpu-method longdouble
--cpu 1 -t 120s --times --cpu-method loop
--cpu 1 -t 120s --times --cpu-method matrixprod
--cpu 1 -t 120s --times --cpu-method nsqrt
--cpu 1 -t 120s --times --cpu-method omega
--cpu 1 -t 120s --times --cpu-method parity
--cpu 1 -t 120s --times --cpu-method phi
--cpu 1 -t 120s --times --cpu-method pi
--cpu 1 -t 120s --times --cpu-method prime
--cpu 1 -t 120s --times --cpu-method psi
--cpu 1 -t 120s --times --cpu-method queens
--cpu 1 -t 120s --times --cpu-method rand
--cpu 1 -t 120s --times --cpu-method rand48
--cpu 1 -t 120s --times --cpu-method rgb
--cpu 1 -t 120s --times --cpu-method sieve
--cpu 1 -t 120s --times --cpu-method stats
--cpu 1 -t 120s --times --cpu-method sqrt
--cpu 1 -t 120s --times --cpu-method trig
--cpu 1 -t 120s --times --cpu-method union
--cpu 1 -t 120s --times --cpu-method zeta
⑥ フォロワージョブを作成する
続いてフォロワージョブに関しても同じ流れで設定していきましょう。
作業ディレクトリの作成
mkdir ~/dependency/follower
cd ~/dependency/follower
Dockerfileの作成
cat <<EOF > Dockerfile
FROM public.ecr.aws/amazonlinux/amazonlinux:2023
RUN dnf install -y stress-ng awscli-2

RUN echo $'#!/bin/bash\n\\
aws s3 ls \${STRESS_BUCKET}/ \n\\
aws s3 cp \${STRESS_BUCKET}/stress-tests.txt / --quiet \n\\
STRESS_ARGS=\`sed -n \$((AWS_BATCH_JOB_ARRAY_INDEX + 1))p /stress-tests.txt\` \n\\
echo "Passing the following arguments to stress-ng: \$STRESS_ARGS" \n\\
/usr/bin/stress-ng \${STRESS_ARGS} 2>&1 | aws s3 cp --quiet - \${STRESS_BUCKET}/\${AWS_BATCH_JOB_ID}_\${AWS_BATCH_JOB_ATTEMPT}_\${AWS_BATCH_JOB_ARRAY_INDEX}.txt \n\\
' >> /docker-entrypoint.sh
RUN chmod 0744 /docker-entrypoint.sh
RUN cat /docker-entrypoint.sh
ENTRYPOINT ["/docker-entrypoint.sh"]
EOF
リーダージョブの時と同じスクリプトを使って「stress-ng-follower」リポジトリの作成とビルドイメージの納入
 ~/bin/create_repo.sh stress-ng-follower

 ~/bin/build_container.sh stress-ng-follower
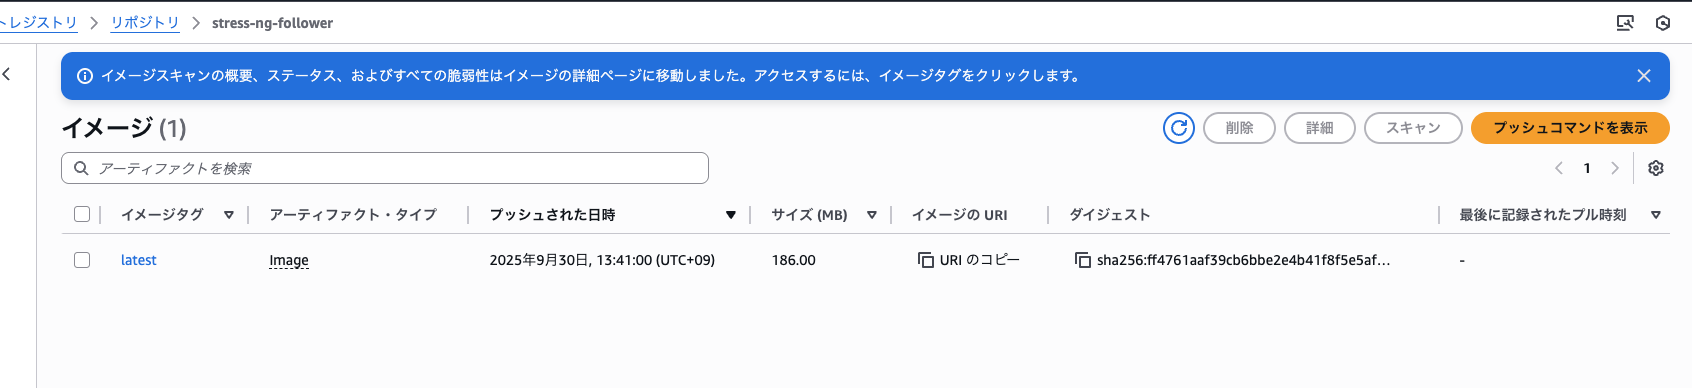
続いて「ジョブ定義」の作成
export STACK_NAME=BatchWorkshop
export EXECUTION_ROLE="$(aws cloudformation describe-stacks --stack-name $STACK_NAME --output text --query 'Stacks[0].Outputs[?OutputKey == `JobExecutionRole`].OutputValue')"
export EXECUTION_ROLE_ARN=$(aws iam get-role --role-name $EXECUTION_ROLE | jq -r '.Role.Arn')
export FOLLOWER_REPO=$(aws ecr describe-repositories --repository-names stress-ng-follower --output text --query 'repositories[0].[repositoryUri]')
cat > stress-ng-follower-job-definition.json << EOF
{
    "jobDefinitionName": "stress-ng-follower-job-definition",
    "type": "container",
    "containerProperties": {
        "image": "${FOLLOWER_REPO}",
        "vcpus": 1,
        "memory": 1024,
        "jobRoleArn": "${EXECUTION_ROLE_ARN}",
        "executionRoleArn": "${EXECUTION_ROLE_ARN}"
    },
    "retryStrategy": {
        "attempts": 2
    }
}
EOF
aws batch register-job-definition --cli-input-json file://stress-ng-follower-job-definition.json
ジョブ定義をもとにジョブを実行するためのJSONファイル作成し実際に実行
export STACK_NAME=BatchWorkshop
export STRESS_BUCKET="s3://$(aws cloudformation describe-stacks --stack-name $STACK_NAME --output text --query 'Stacks[0].Outputs[?OutputKey == `Bucket`].OutputValue')"
cat <<EOF > ./stress-ng-follower-job.json
{
    "jobName": "stress-ng-follower",
    "jobQueue": "stress-ng-queue",
    "arrayProperties": {
        "size": 2
    },
    "jobDefinition": "stress-ng-follower-job-definition",
    "containerOverrides": {
        "environment": [
        {
            "name": "STRESS_BUCKET",
            "value": "${STRESS_BUCKET}"
        }]
    }
}
EOF
aws batch submit-job --cli-input-json file://stress-ng-follower-job.json --array-properties size=7
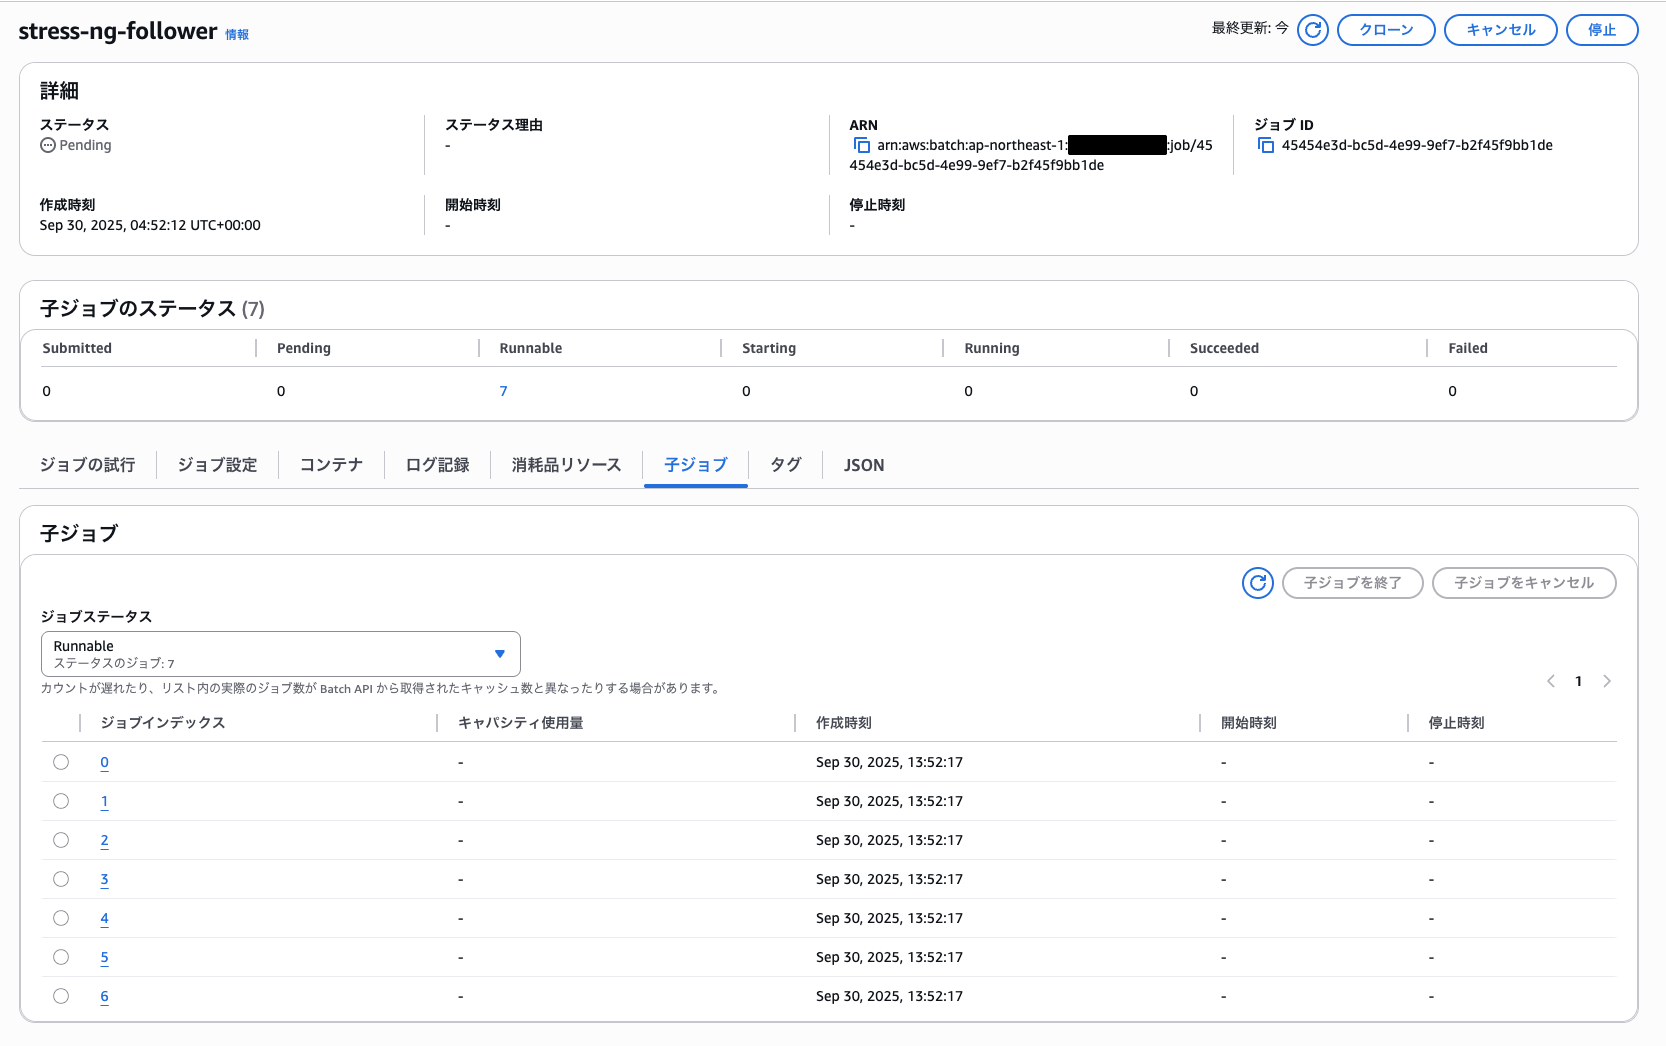
ここで重要なプロパティとして「arrayProperties」が登場します。
パラメータ内の「size」はジョブ配列のサイズを設定するために使用されます。この値を「2」で設定することで2つのフォロワージョブが並列で実行されるようになります。
この値は実行時にコマンドパラメータで上書き可能で、今回は「7」に上書きして実行しています。
コンソール画面を確認すると子ジョブとして7つのジョブが実行されていることが確認できました。
AWS Batchでは特にジョブにログ設定をしない場合は初期で/aws/batch/jobロググループ配下に全てのジョブに関するログが格納されます。
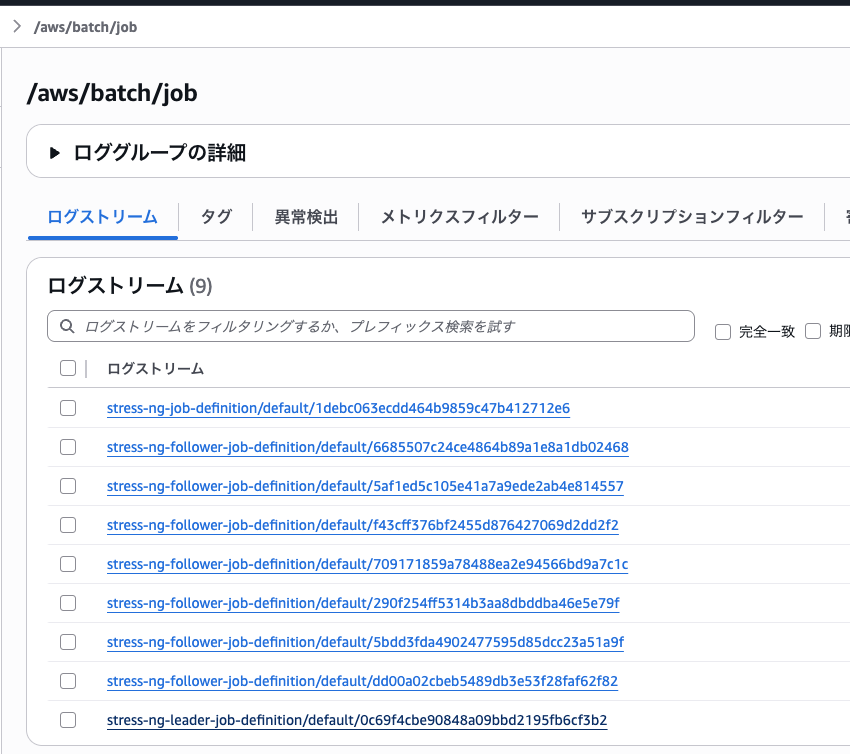
そのうちの一つを確認してみましょう
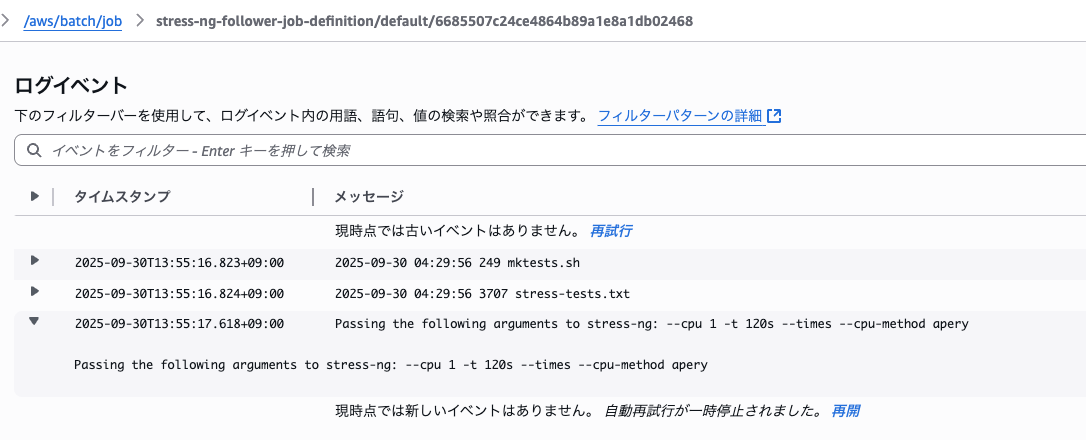
フォロワージョブが入力値を受け取り実行されていることが確認できました。
S3バケットを確認してみると各「stress-ng」コマンドの出力結果が格納されています。
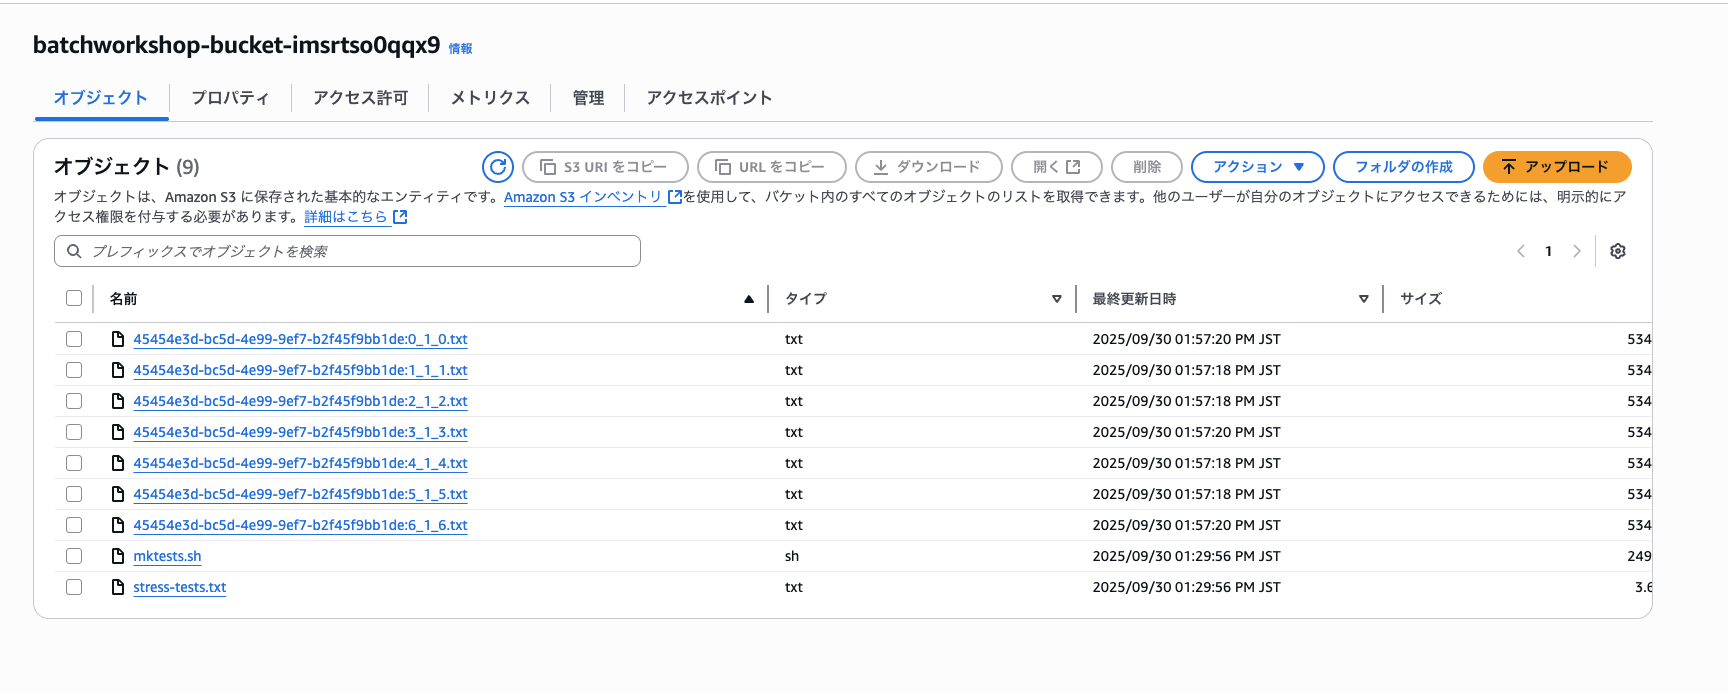
フォロワージョブの出力結果1つ抜粋
stress-ng: info:  [19] setting to a 120 second (2 mins, 0.00 secs) run per stressor
stress-ng: info:  [19] dispatching hogs: 1 cpu
stress-ng: info:  [19] for a 120.01s run time:
stress-ng: info:  [19]     480.05s available CPU time
stress-ng: info:  [19]     119.28s user time   ( 24.85%)
stress-ng: info:  [19]       0.01s system time (  0.00%)
stress-ng: info:  [19]     119.29s total time  ( 24.85%)
stress-ng: info:  [19] load average: 2.77 1.18 0.45
stress-ng: info:  [19] successful run completed in 120.01s (2 mins, 0.01 secs)
ジョブ実行の結果も確認しておきます。
以下のように7つのジョブが「SUCCEEDED」になっており成功していることがわかりました。
aws batch describe-jobs --jobs {FOLLOWER_JOBのID}
{
    "jobs": [
        {
            "jobArn": "arn:aws:batch:ap-northeast-1:***************:job/45454e3d-bc5d-4e99-9ef7-b2f45f9bb1de",
            "jobName": "stress-ng-follower",
            "jobId": "45454e3d-bc5d-4e99-9ef7-b2f45f9bb1de",
            "jobQueue": "arn:aws:batch:ap-northeast-1:***************:job-queue/stress-ng-queue",
            "status": "SUCCEEDED",
            "attempts": [],
            "createdAt": 1759207932821,
            "retryStrategy": {
                "attempts": 2,
                "evaluateOnExit": []
            },
            "dependsOn": [],
            "jobDefinition": "arn:aws:batch:ap-northeast-1:***************:job-definition/stress-ng-follower-job-definition:1",
            "parameters": {},
            "container": {
                "image": "***************.dkr.ecr.ap-northeast-1.amazonaws.com/stress-ng-follower",
                "vcpus": 1,
                "memory": 1024,
                "command": [],
                "jobRoleArn": "arn:aws:iam::***************:role/BatchWorkshop-JobExecutionRole-miu3kuD5NF4E",
                "executionRoleArn": "arn:aws:iam::***************:role/BatchWorkshop-JobExecutionRole-miu3kuD5NF4E",
                "volumes": [],
                "environment": [
                    {
                        "name": "STRESS_BUCKET",
                        "value": "s3://batchworkshop-bucket-imsrtso0qqx9"
                    }
                ],
                "mountPoints": [],
                "ulimits": [],
                "networkInterfaces": [],
                "resourceRequirements": [],
                "secrets": []
            },
            "arrayProperties": {
                "statusSummary": {
                    "STARTING": 0,
                    "FAILED": 0,
                    "RUNNING": 0,
                    "SUCCEEDED": 7,
                    "RUNNABLE": 0,
                    "SUBMITTED": 0,
                    "PENDING": 0
                },
                "size": 7
            },
            "tags": {},
            "platformCapabilities": [],
            "eksAttempts": []
        }
    ]
}
⑦ 依存関係を設定しながらジョブを実行する
先ほどまでは手動でリーダージョブの実行からフォロワージョブの実行と続けてきました。これらは各個別に実行しているだけでジョブ同士に実質的な依存関係はありません。
以下のように実行するとジョブに依存関係をつけながら実行できます。
### Submit the Leader job and determine its jobID.
cd ~/dependency
export LEADER_JOB=$(aws batch submit-job --cli-input-json file://leader/stress-ng-leader-job.json)
echo "${LEADER_JOB}"
export LEADER_JOB_ID=$(echo ${LEADER_JOB} | jq -r '.jobId')
echo "${LEADER_JOB_ID}"
### Submit the Follower array job with a dependency on the Leader jobID.
export FOLLOWER_JOB=$(aws batch submit-job --cli-input-json file://follower/stress-ng-follower-job.json --depends-on jobId="${LEADER_JOB_ID}" --array-properties size=12)
export FOLLOWER_JOB_ID=$(echo ${FOLLOWER_JOB} | jq -r '.jobId')
echo "${FOLLOWER_JOB_ID}"
注目ポイントはここです。
aws batch submit-job --cli-input-json file://follower/stress-ng-follower-job.json --depends-on jobId="${LEADER_JOB_ID}
フォロワージョブを実行するときに--depends-onオプションをつけることで実質的にリーダージョブが成功した時のみフォロワージョブが実行できるように依存関係が設定できます。
フォロワージョブの実行画面を確認すると以下のように依存関係が設定できています。
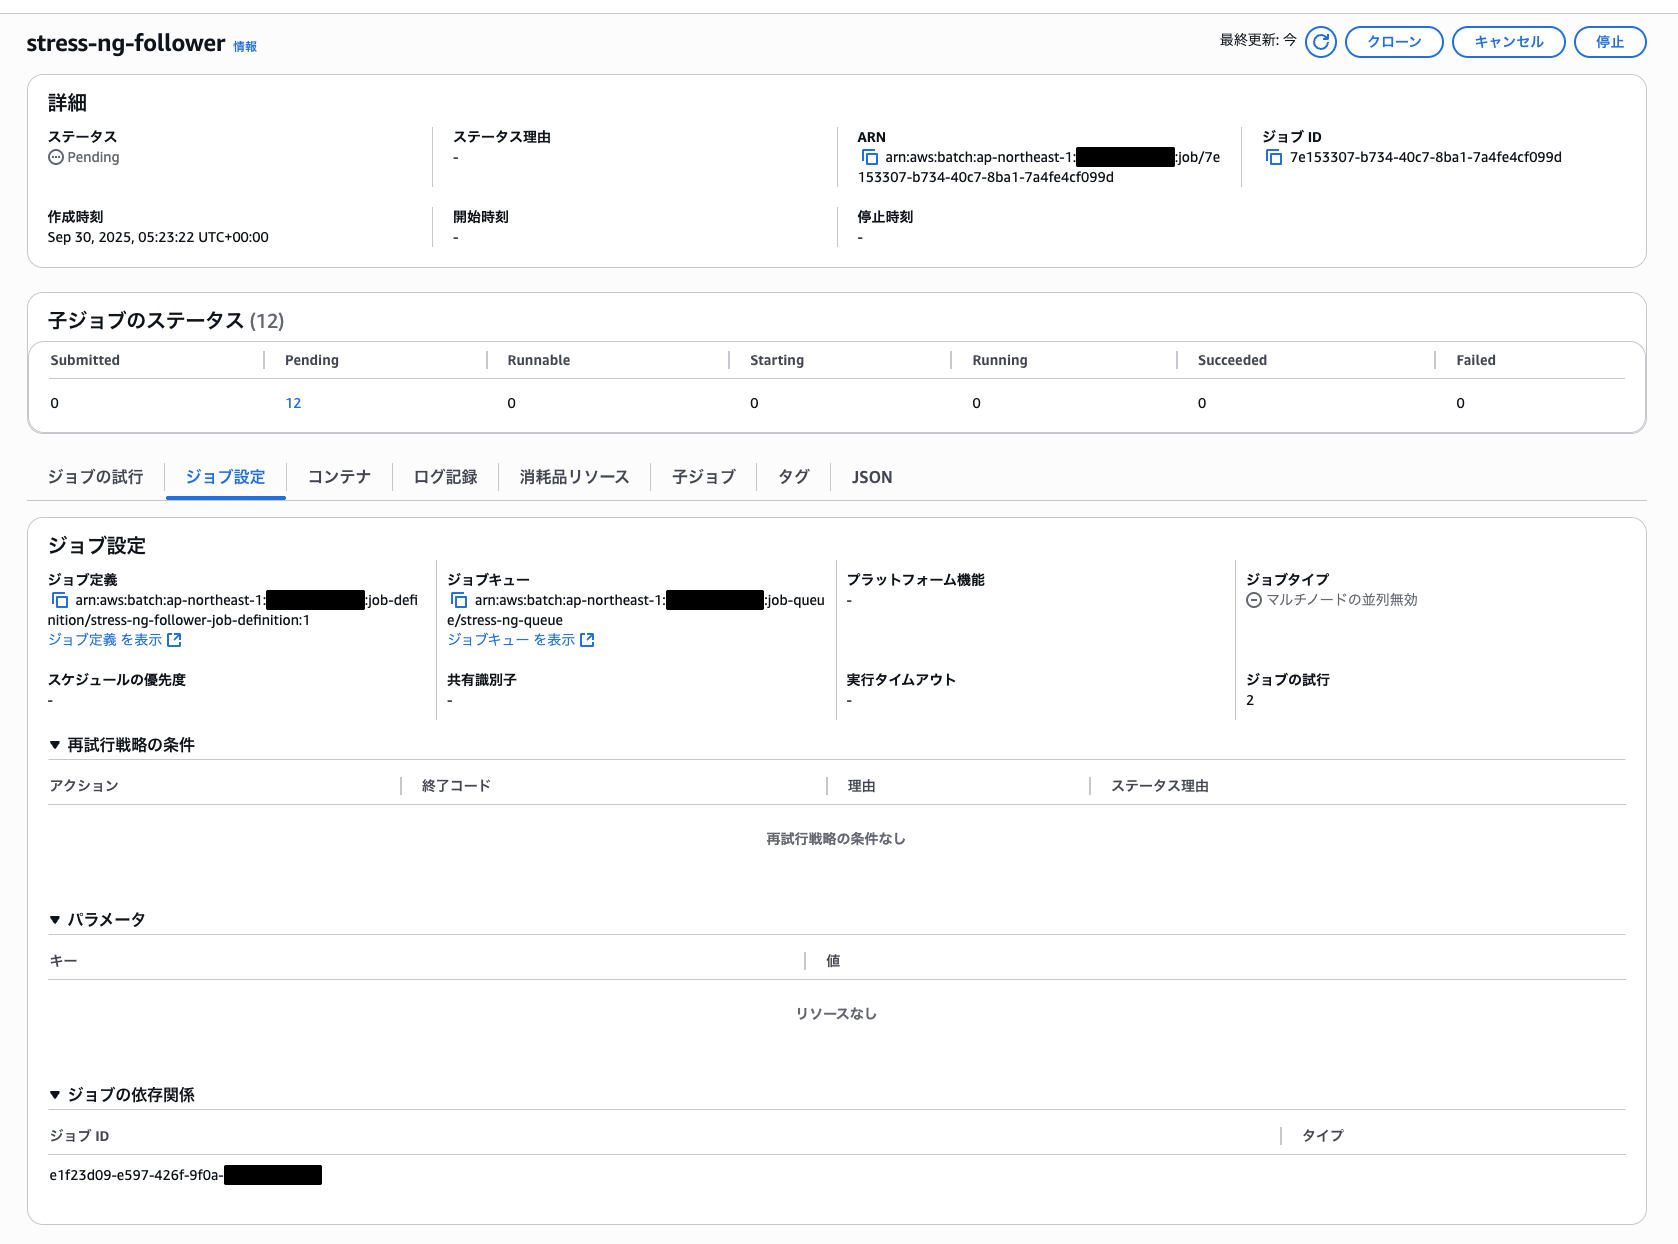
CLIからも確認してみましょう。「dependsOn」にてリーダージョブへ依存関係が設定されていることが確認できました。
aws batch describe-jobs --jobs {FOLLOWER_JOBのID}

{
    "jobs": [
        {
            "jobArn": "arn:aws:batch:ap-northeast-1:***************:job/7e153307-b734-40c7-8ba1-7a4fe4cf099d",
            "jobName": "stress-ng-follower",
            "jobId": "7e153307-b734-40c7-8ba1-7a4fe4cf099d",
            "jobQueue": "arn:aws:batch:ap-northeast-1:***************:job-queue/stress-ng-queue",
            "status": "SUCCEEDED",
            "attempts": [],
            "createdAt": 1759209802446,
            "retryStrategy": {
                "attempts": 2,
                "evaluateOnExit": []
            },
            "dependsOn": [
                {
                    "jobId": "e1f23d09-e597-426f-9f0a-140571357523"
                }
            ],
            "jobDefinition": "arn:aws:batch:ap-northeast-1:***************:job-definition/stress-ng-follower-job-definition:1",
            "parameters": {},
            "container": {
                "image": "***************.dkr.ecr.ap-northeast-1.amazonaws.com/stress-ng-follower",
                "vcpus": 1,
                "memory": 1024,
                "command": [],
                "jobRoleArn": "arn:aws:iam::***************:role/BatchWorkshop-JobExecutionRole-miu3kuD5NF4E",
                "executionRoleArn": "arn:aws:iam::***************:role/BatchWorkshop-JobExecutionRole-miu3kuD5NF4E",
                "volumes": [],
                "environment": [
                    {
                        "name": "STRESS_BUCKET",
                        "value": "s3://batchworkshop-bucket-imsrtso0qqx9"
                    }
                ],
                "mountPoints": [],
                "ulimits": [],
                "networkInterfaces": [],
                "resourceRequirements": [],
                "secrets": []
            },
            "arrayProperties": {
                "statusSummary": {
                    "STARTING": 0,
                    "FAILED": 0,
                    "RUNNING": 0,
                    "SUCCEEDED": 12,
                    "RUNNABLE": 0,
                    "SUBMITTED": 0,
                    "PENDING": 0
                },
                "size": 12
            },
            "tags": {},
            "platformCapabilities": [],
            "eksAttempts": []
        }
    ]
}
以上「依存関係のあるジョブ」のハンズオン内容の紹介でした!
最後に
今回はAWS Batchの公式ハンズオンである「AWS Batch Deep Dive」を実際にやってみました。
なかなかボリュームが多かったですが、基本から応用までしっかりと身につけられ、ためになるハンズオンでした。
今回紹介した部分は一部分に過ぎないのでAWS Batchについて基礎から理解したい人は是非やってみることをお勧めします!今回は以上です。