![[OpenAI DevDay 2025] AgentKitのAgent BuilderとChatKitを使ってみた](https://devio2024-media.developers.io/image/upload/f_auto,q_auto,w_3840/v1759850836/user-gen-eyecatch/mehon4zkrwxal1mdfe9o.png)
[OpenAI DevDay 2025] AgentKitのAgent BuilderとChatKitを使ってみた
はじめに
今回はOpenAI DevDay 2025で紹介された AgentKitを紹介します。AgentKitの概要とともに、実際の画面でどんなことが可能なのかを紹介します。
公式リリース
AgentKitとは
AgentKitは、主に3つの機能が提供され、GUIでAgenticなワークフローを構築しつつUIへの組み込みや組織間連携などができます。
- Agent Builder:GUI上で複数エージェントのワークフロー作成やバージョン管理が可能
- ChatKit:フロントアプリにチャットベースのエージェントを簡単に組み込むキット
- Connect Registry:複数ワークスペースや組織をまたがった製品同士の接続を管理
Connector Registryは一部のAPIやChatGPT Enterpriseなど向けの機能として、現在ベータ版の提供が予定されています。今回はAgent BuilderとChatKitを試してみます。なお、以降の作業はChatGPTのProプラン+API課金で試した結果です。
AgentKit使ってみた
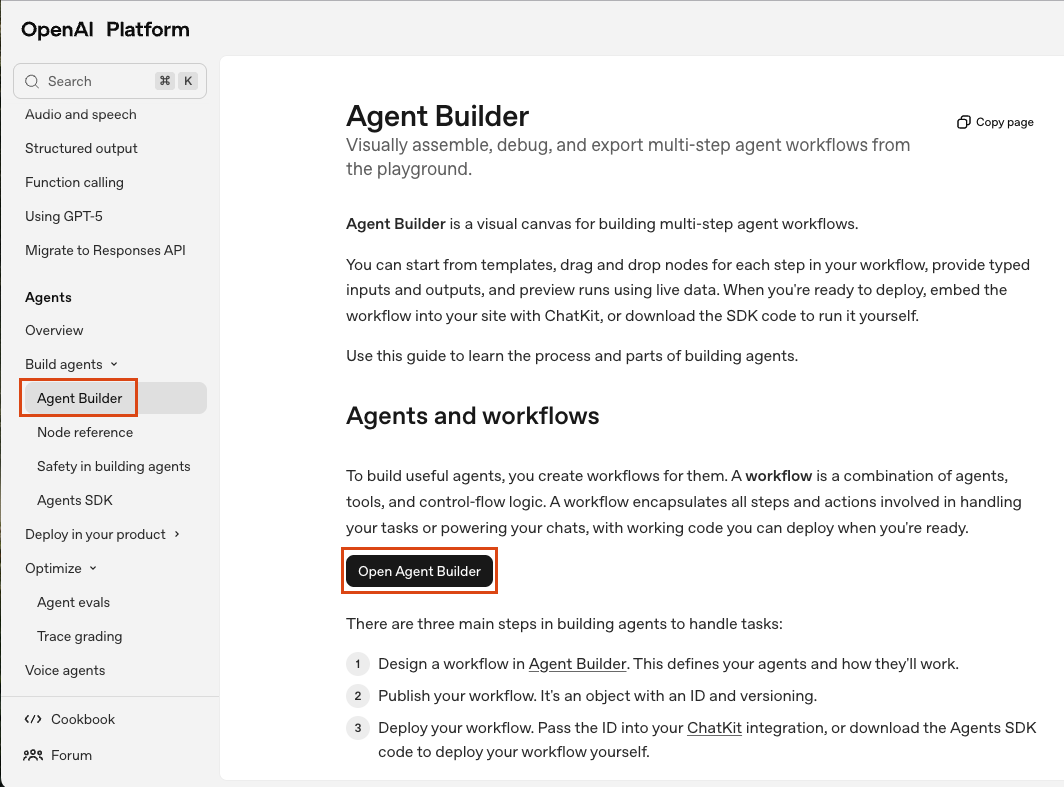
実際に使用するにはOpenAI Platformにログインすると、概要の確認ができます。
「How to build an agent」の部分を読むと、やりたいことに対してAgentKit内の何を使えば、目的を達成できるのかが分かります。
ドキュメントのAgentBuilderのページから「Open Agent Builder」のボタンを押下するとAgent Builderの画面に入ります。これ以降の操作はChatGPT Pro以上の契約が必要です。
Agent Builderを使ってみる
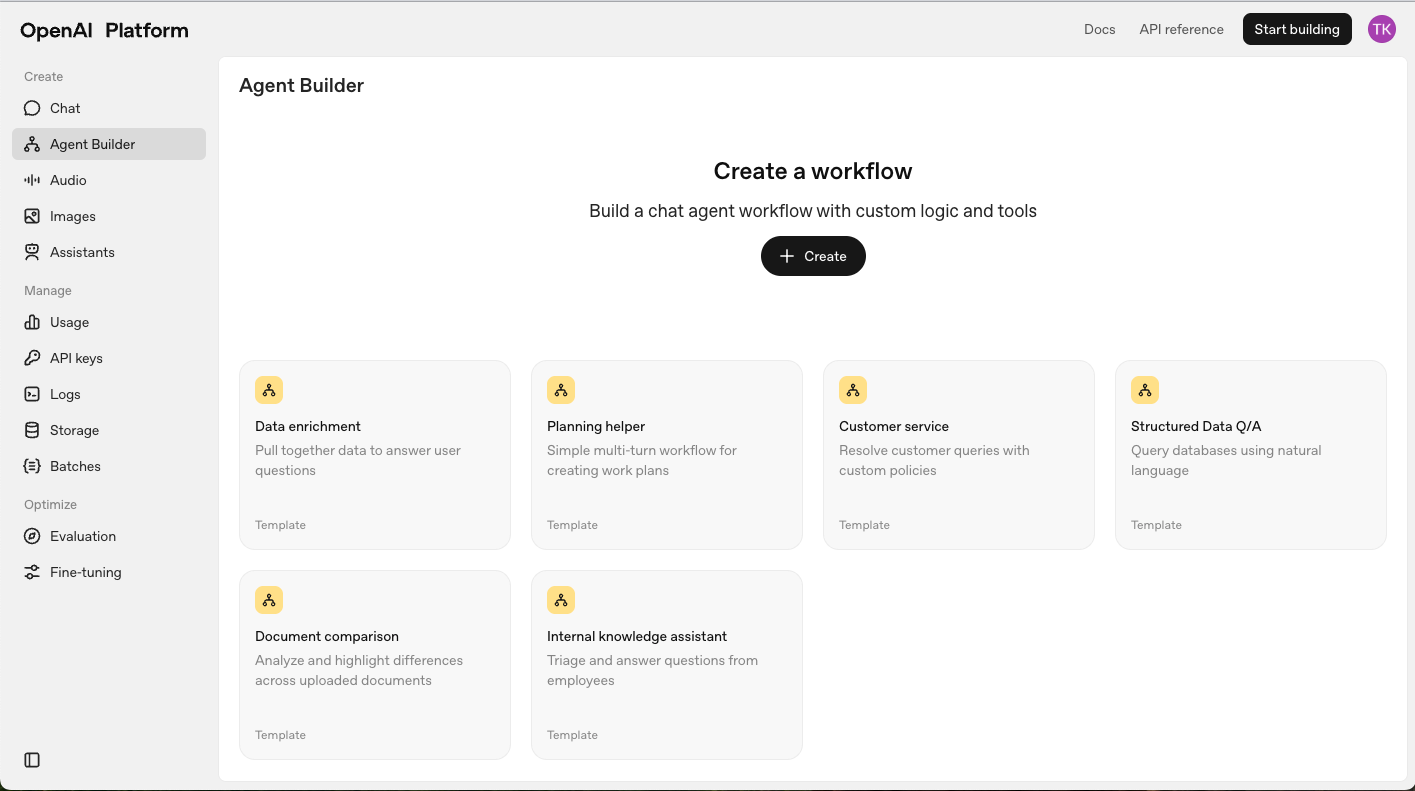
Agent Builderの画面を開くと、データの拡充や作業計画用のワークフロー、文書比較などいくつかのサンプルが表示されます。ここからAgentのワークフローが作成可能です。
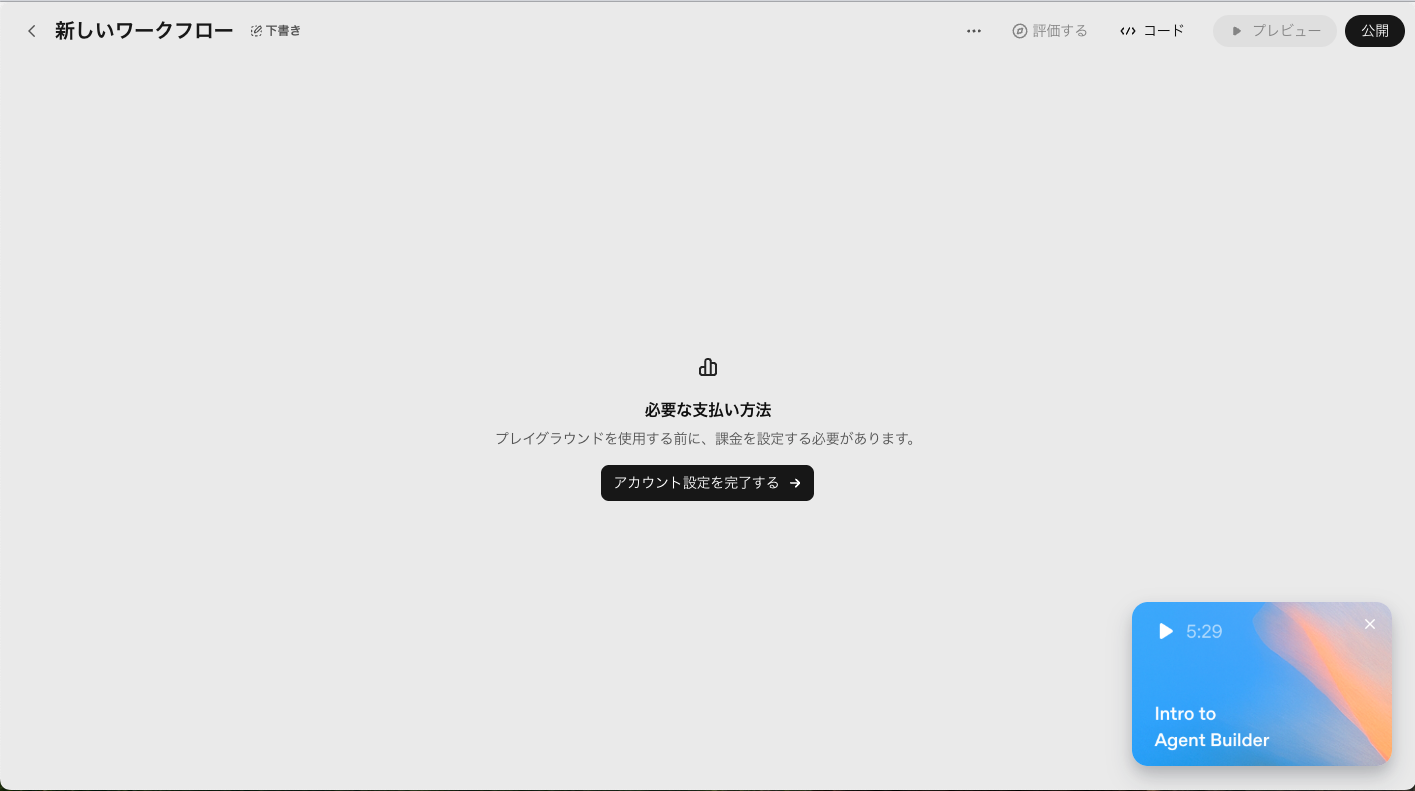
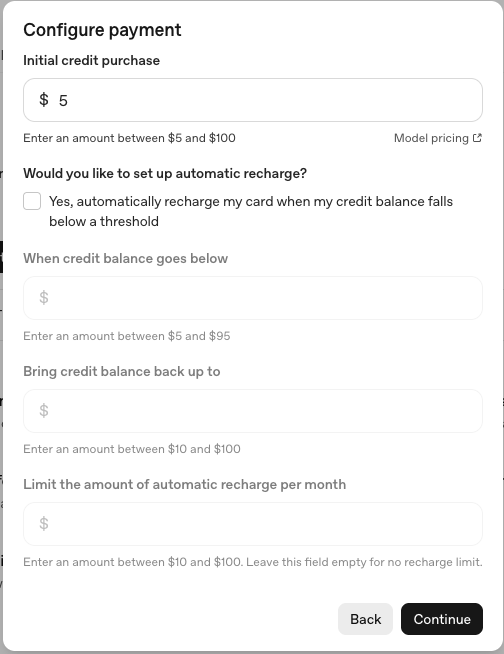
ただし、自分の場合ProプランでAPI Platformへの課金は設定していなかったので支払い設定が必要でした。5ドルのAuto Charge Offで設定します。
元の画面に戻って、Data enrichmentを試しに実行してみます。企業名を渡すとWeb上で検索して、要約した情報を教えてくれるエージェントのワークフローが表示されます。
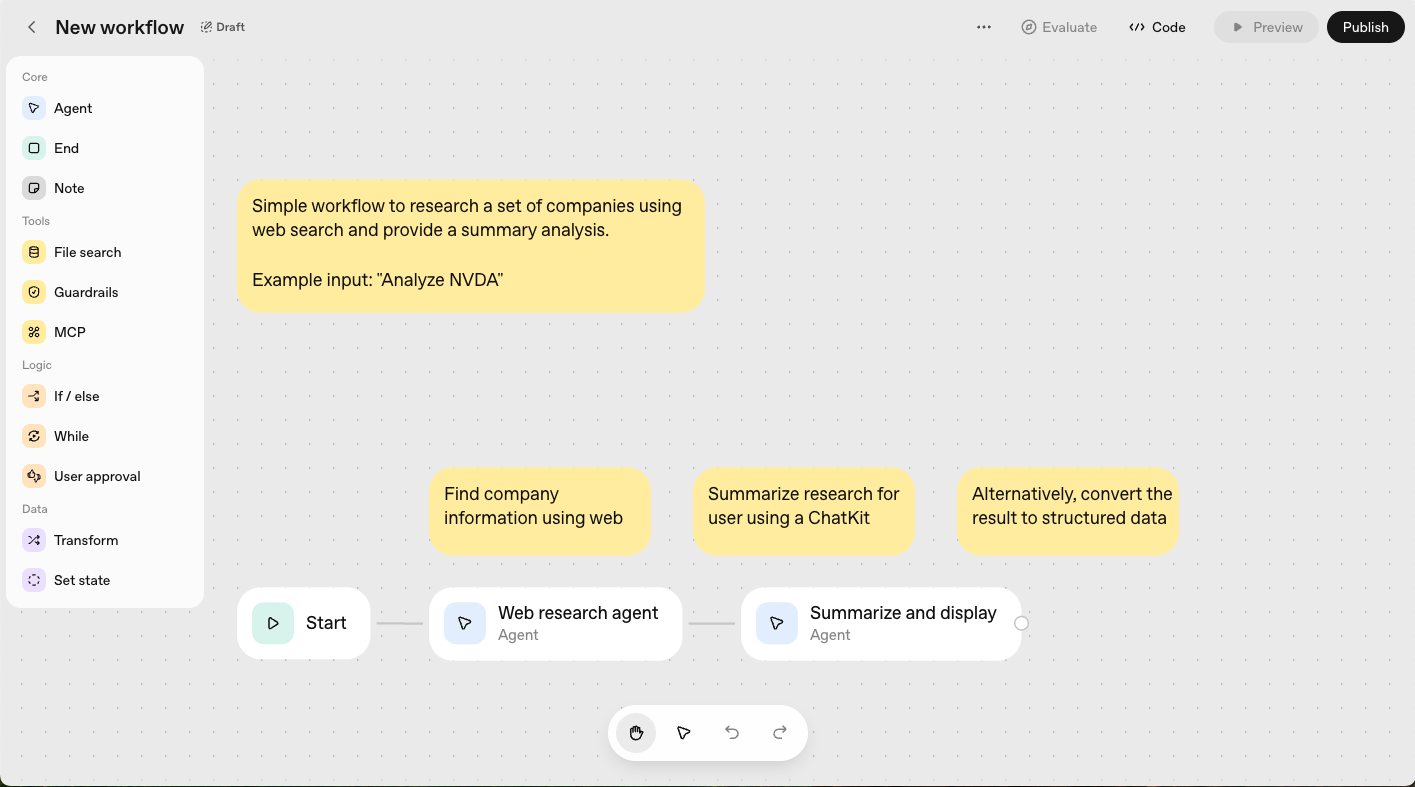
ワークフローのノードには、AgentやOutputを設定するEnd、注釈用のNote、File検索、個人情報やジェイルブレイクへのガードレール、MCP、ロジックとしてWhile、If/Else、ユーザー承認、データ処理としてTransformや入力値への加算など算術演算が可能なものなど多くの機能が揃っています。特にユーザー承認では、ワークフローを継続するかをユーザーに尋ねて止めることもできます。エージェントに計画を立てさせて人間がレビューし、良い計画であれば実行し、悪い計画であれば止めるといった操作も簡単にできそうです。
右上のPublishボタンを押すことで、AIエージェントワークフローが公開され利用可能になります。
右上の</>Codeのボタンを押せば、作成したワークフローを呼び出すためのコードも提供されます。
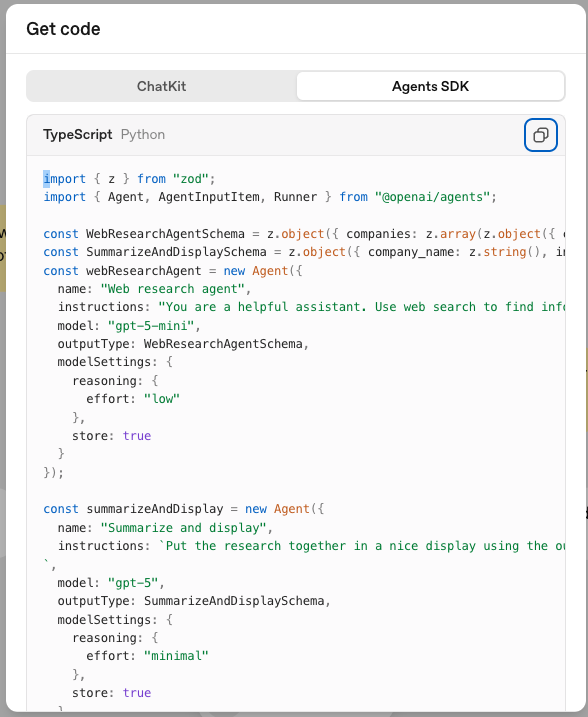
エージェントに設定したモデルや作成したワークフローに割り当てられたIDが表示され、ローカルにコードを移すことでワークフローを実行できます。TypeScriptのコード例を記載します。コードの中にはワークフロー固有のIDが指定されているため、その部分はマスクしています。
import { z } from "zod";
import { Agent, AgentInputItem, Runner } from "@openai/agents";

const WebResearchAgentSchema = z.object({ companies: z.array(z.object({ company_name: z.string(), industry: z.string(), headquarters_location: z.string(), company_size: z.string(), website: z.string(), description: z.string(), founded_year: z.number() })) });
const SummarizeAndDisplaySchema = z.object({ company_name: z.string(), industry: z.string(), headquarters_location: z.string(), company_size: z.string(), website: z.string(), description: z.string(), founded_year: z.number() });
const webResearchAgent = new Agent({
  name: "Web research agent",
  instructions: "You are a helpful assistant. Use web search to find information about the following company I can use in marketing asset based on the underlying topic.",
  model: "gpt-5-mini",
  outputType: WebResearchAgentSchema,
  modelSettings: {
    reasoning: {
      effort: "low"
    },
    store: true
  }
});

const summarizeAndDisplay = new Agent({
  name: "Summarize and display",
  instructions: `Put the research together in a nice display using the output format described.
`,
  model: "gpt-5",
  outputType: SummarizeAndDisplaySchema,
  modelSettings: {
    reasoning: {
      effort: "minimal"
    },
    store: true
  }
});

type WorkflowInput = { input_as_text: string };

// Main code entrypoint
export const runWorkflow = async (workflow: WorkflowInput) => {
  const state = {

  };
  const conversationHistory: AgentInputItem[] = [
    {
      role: "user",
      content: [
        {
          type: "input_text",
          text: workflow.input_as_text
        }
      ]
    }
  ];
  const runner = new Runner({
    traceMetadata: {
      __trace_source__: "agent-builder",
      workflow_id: "<固有のワークフローID>"
    }
  });
  const webResearchAgentResultTemp = await runner.run(
    webResearchAgent,
    [
      ...conversationHistory
    ]
  );
  conversationHistory.push(...webResearchAgentResultTemp.newItems.map((item) => item.rawItem));

  if (!webResearchAgentResultTemp.finalOutput) {
      throw new Error("Agent result is undefined");
  }

  const webResearchAgentResult = {
    output_text: JSON.stringify(webResearchAgentResultTemp.finalOutput),
    output_parsed: webResearchAgentResultTemp.finalOutput
  };
  const summarizeAndDisplayResultTemp = await runner.run(
    summarizeAndDisplay,
    [
      ...conversationHistory
    ]
  );

  if (!summarizeAndDisplayResultTemp.finalOutput) {
      throw new Error("Agent result is undefined");
  }

  const summarizeAndDisplayResult = {
    output_text: JSON.stringify(summarizeAndDisplayResultTemp.finalOutput),
    output_parsed: summarizeAndDisplayResultTemp.finalOutput
  };
}
このままだと実行しても表示はされないので、ソース下部のsummarizeAndDisplayResultの付近を修正しコンソール上に出力されるようにします。
  const summarizeAndDisplayResult = {
    output_text: JSON.stringify(summarizeAndDisplayResultTemp.finalOutput),
    output_parsed: summarizeAndDisplayResultTemp.finalOutput
  };
  console.log("webResearchAgentResult", webResearchAgentResult);
}

// Anthropicについて聞くよう設定、コマンドラインから受け取れば自由に修正可能
runWorkflow({ input_as_text: "Anthropic" });
後は、このファイルに合うようにpackage.jsonを書きます。ついでに.envファイルからOpenAIのAPIキーを読み取れるようにdotenvのパッケージも追加します。
{
  "name": "openai-agent-kit-test",
  "version": "1.0.0",
  "description": "OpenAI Agent Kit test project",
  "type": "module",
  "scripts": {
    "build": "tsc",
    "start": "node agent-builder-test.js"
  },
  "dependencies": {
    "@openai/agents": "^0.1.0",
    "zod": "^3.23.8",
    "dotenv": "^17.2.3"
  },
  "devDependencies": {
    "@types/node": "^22.0.0",
    "typescript": "^5.5.0"
  }
}
tsconfig.jsonも合うように設定します。
{
  "compilerOptions": {
    "target": "ES2022",
    "module": "ESNext",
    "moduleResolution": "bundler",
    "esModuleInterop": true,
    "strict": true,
    "skipLibCheck": true,
    "resolveJsonModule": true,
    "outDir": "./",
    "rootDir": "./"
  },
  "include": ["*.ts"],
  "exclude": ["node_modules"]
}
これで準備は整ったので、TSファイルをトランスパイルし、JSファイルを実行するとエージェントワークフローが呼び出され結果が取得できます。
% npm run build

> openai-agent-kit-test@1.0.0 build
> tsc

% openai-agent-kit-test % npm start

> openai-agent-kit-test@1.0.0 start
> node agent-builder-test.js

webResearchAgentResult {
  output_text: '{"companies":[{"company_name":"Anthropic","industry":"Artificial intelligence / AI research (safety-focused LLMs)","headquarters_location":"San Francisco, California, United States","company_size":"501–1,000 employees (approximate; rapidly growing)","website":"https://www.anthropic.com/","description":"Anthropic is an AI research and safety company that develops large language models and related tools with a focus on robustness, interpretability, and alignment. Known for its Claude family of conversational AI models, Anthropic emphasizes safety-first approaches, red-teaming, and policy/research work intended to reduce risks from advanced AI systems. The company partners with cloud providers and enterprise customers to offer API access and managed deployments of its models.","founded_year":2021}]}',
  output_parsed: { companies: [ [Object] ] }
}
ChatKitの紹介
先程まではコードへの統合のみでしたが、ChatKitでフロントエンドのアプリにワークフローを埋め込むこともできます。ドキュメントから画像を引用すると、ユーザー側のクライアントとなるフロントアプリにChatKitを埋め込めるのでチャットUIの構築が簡単になります。また裏側で開発者がバックエンドサーバーを立ち上げて、フロントはクライアントシークレットをバックエンドから取得するようなコードも定型化して提供されます。
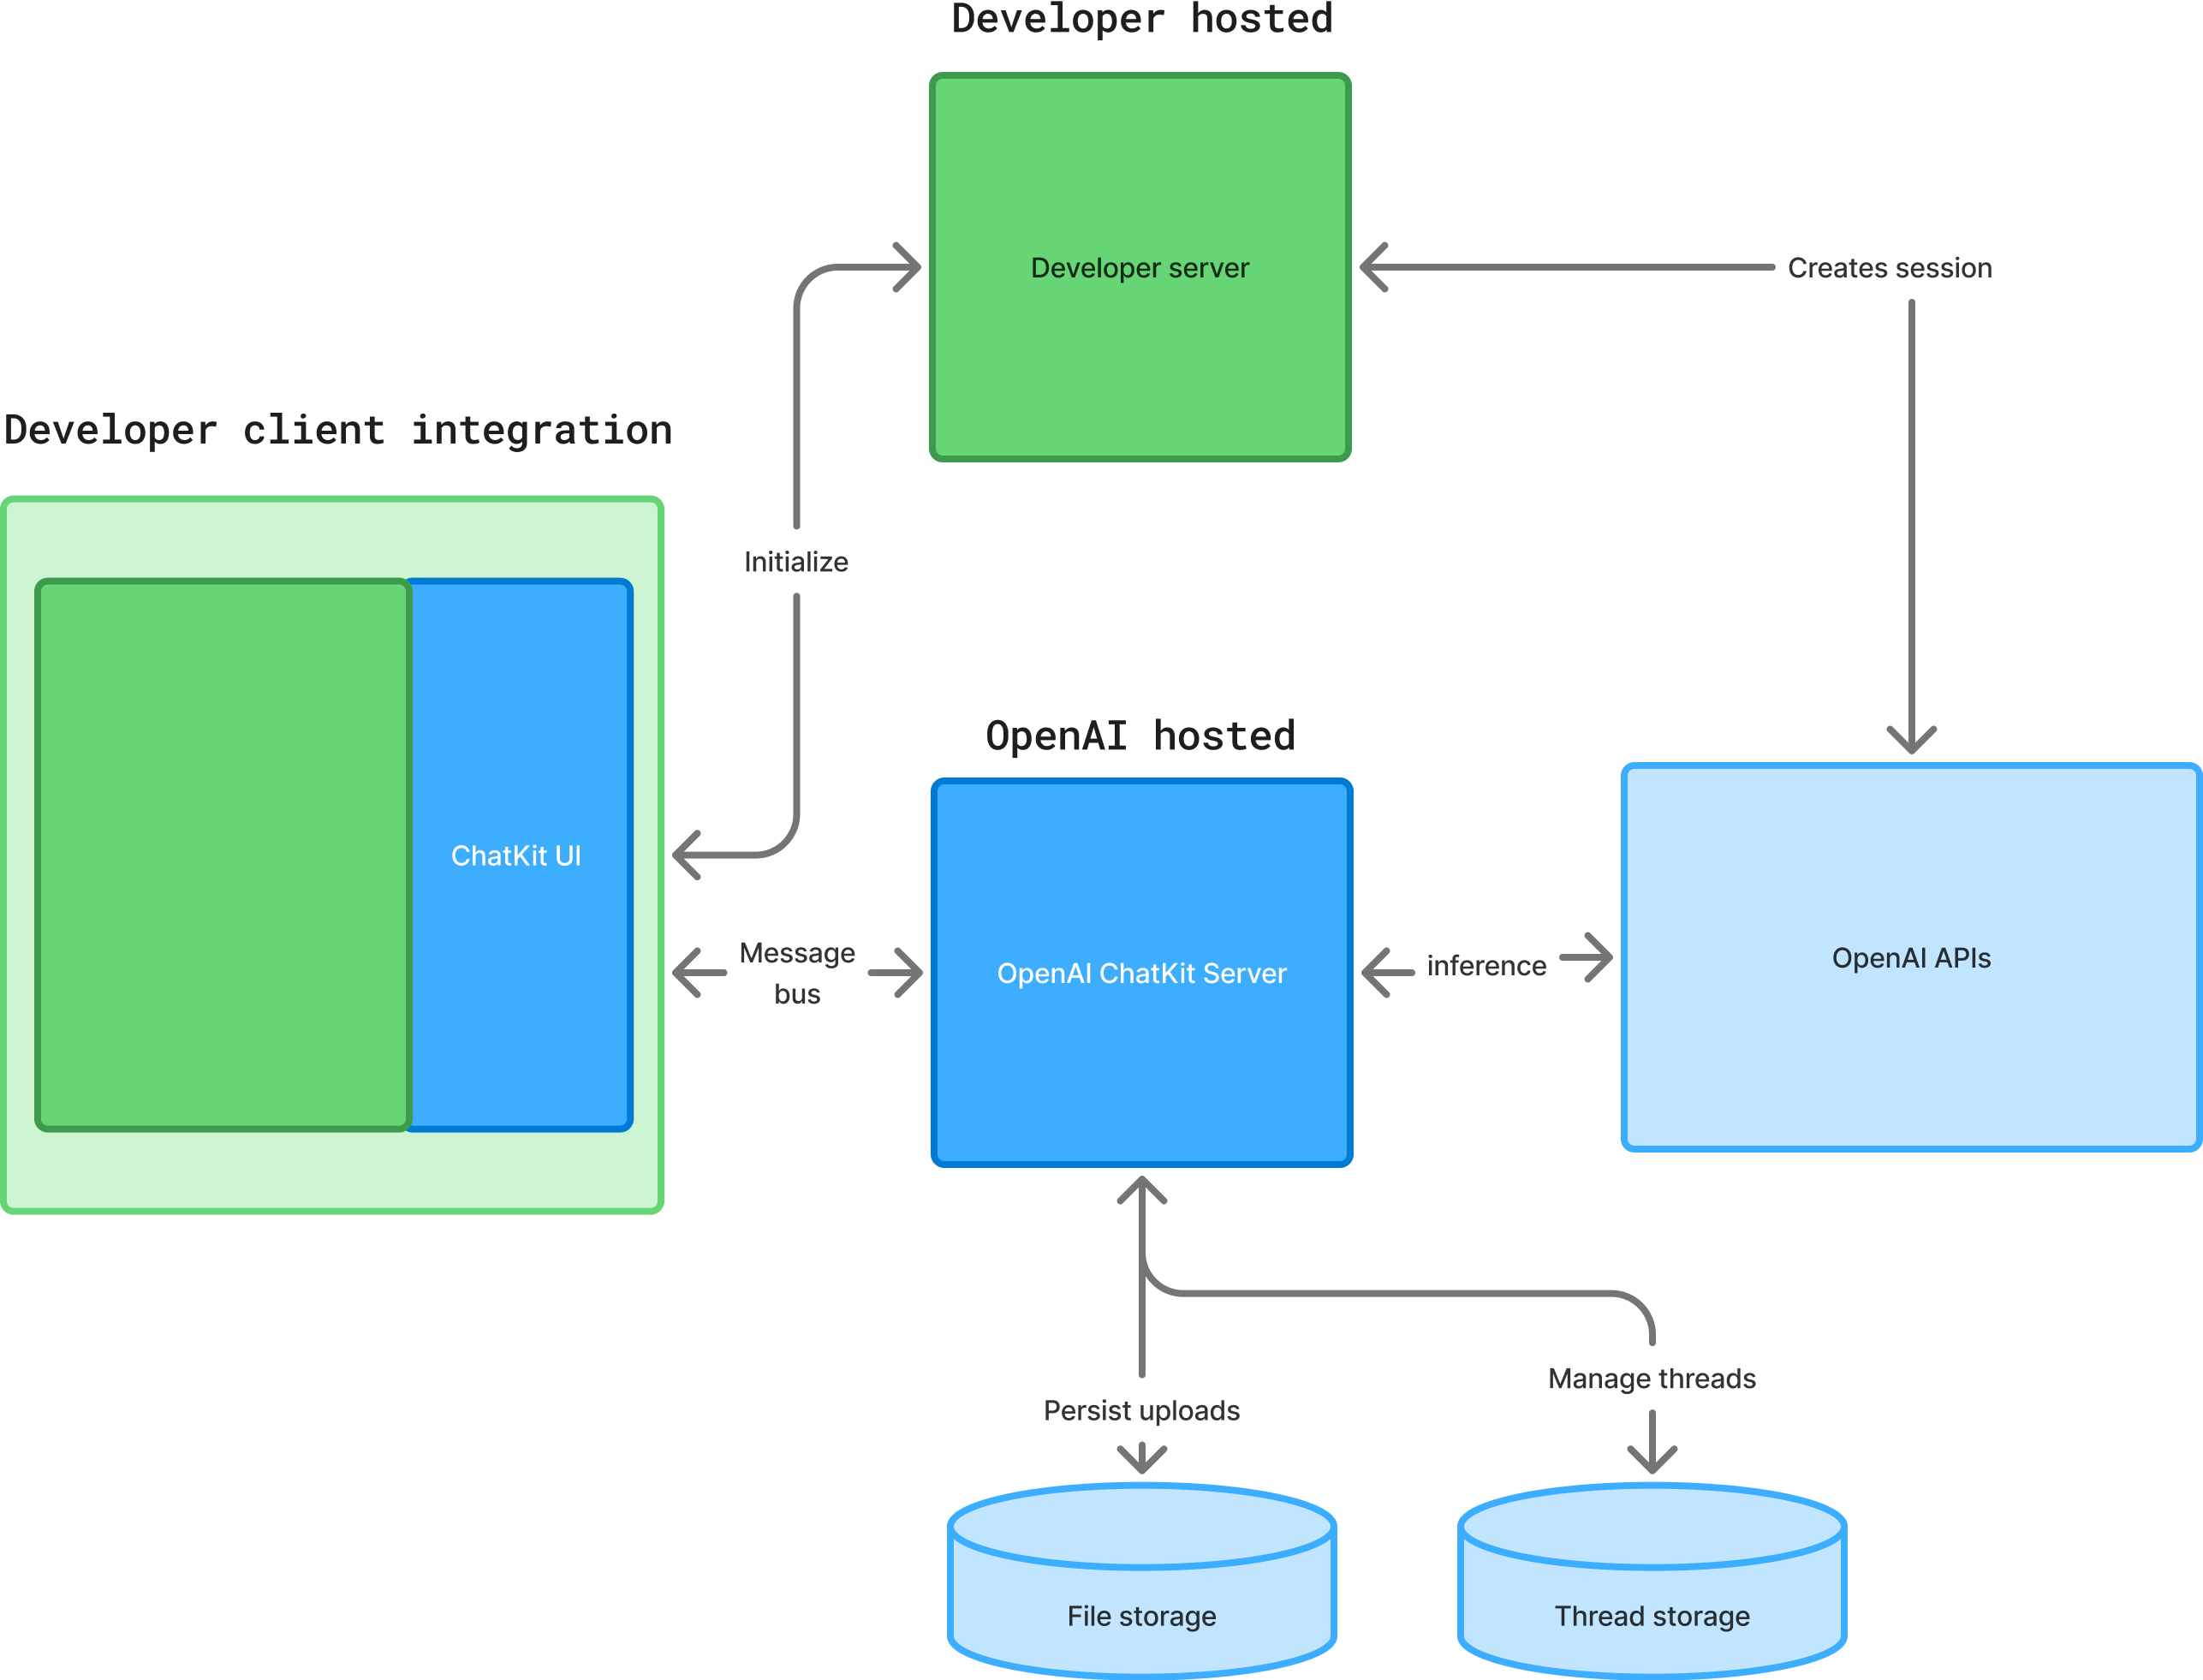
画像引用元:https://platform.openai.com/docs/guides/chatkit#embed-chatkit-in-your-frontend
お試し用のサンプルとして、OpenAIのAPIキーさえあれば試せるサンプルも提供されているため、こちらを試してみました。
書いている通りですが、バックエンドでFastAPIのサーバを立ち上げそこにOpenAIのAPIキーを設定します。
cd backend
uv sync
export OPENAI_API_KEY=sk-proj-...
uv run uvicorn app.main:app --reload --port 8000
ほかのコンソールでフロントアプリを立ち上げます。
cd frontend
npm install
npm run dev
これでhttp://localhost:5173にアクセスすると、チャットUIが表示されます。このようなチャットUIやワークフローへの連携を組み込みやすくなります。
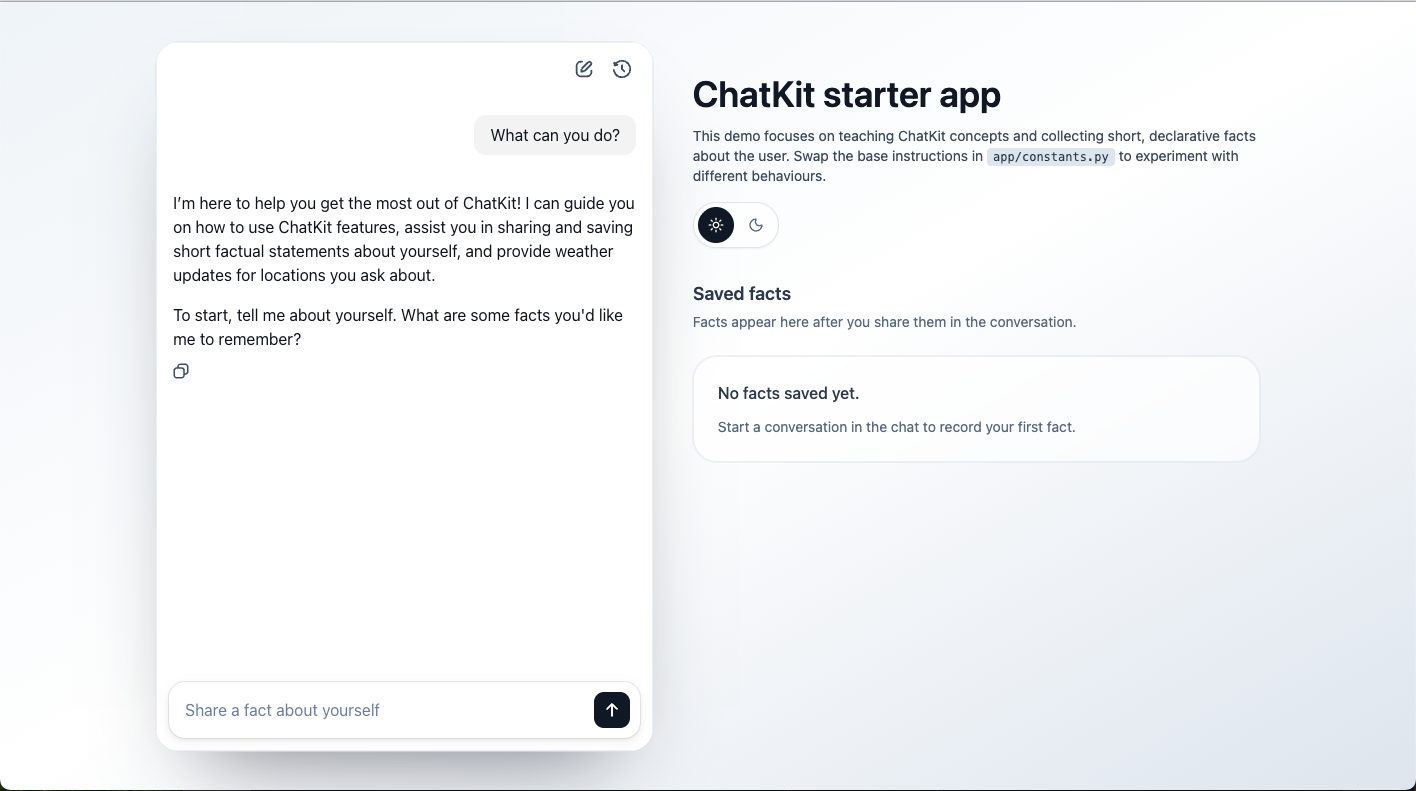
Agent Builder上に構築したワークフローと統合するサンプルアプリも試したのですが、Workflow側の設定が悪いのかまだ上手く動作しなかったのでまた別途ご紹介します。
所感
ほかのDifyやn8nなどのエージェントワークフローや、フロントエンドへのエージェントとのチャット埋め込みなどはそこまで試せてないので浅い所感にはなりますが便利そうには感じました。
特にAgent Builderの方は、画面上での操作性もよく、ワークフロー開発に詳しくない自分でもサンプルコードで簡単に動かせたので、プログラマーにとってはかなり敷居が低く感じます。すでにChatGPTのPro以上を契約済みの方は5ドル程度APIに課金するだけで使えるのでぜひ試してみてください!