
Apps in ChatGPT(Apps SDK)を使って独自のアプリをChatGPT内に組み込んでみた
リテールアプリ共創部のるおんです。
ChatGPTに独自のウィジェットを組み込める「Apps in ChatGPT(Apps SDK)」を使って、以下のようなピザレシピを表示するインタラクティブなアプリを作成してみました。
「ピザのレシピを教えて」とプロンプトを入力するだけでAIがMCPサーバーから該当のアプリを表示してくれます。
今回はOpenAIが提供する公式サンプルコードをベースに、新しいウィジェットを追加する形で実装しています。
本ブログでは、MCPサーバーの実装からReactウィジェットの作成、ビルド、動作確認までを紹介します。
Apps in ChatGPTとは
ChatGPTのチャット画面の中で、会話の流れに応じて外部サービス(アプリ)を対話型で使えるようにする仕組みです。
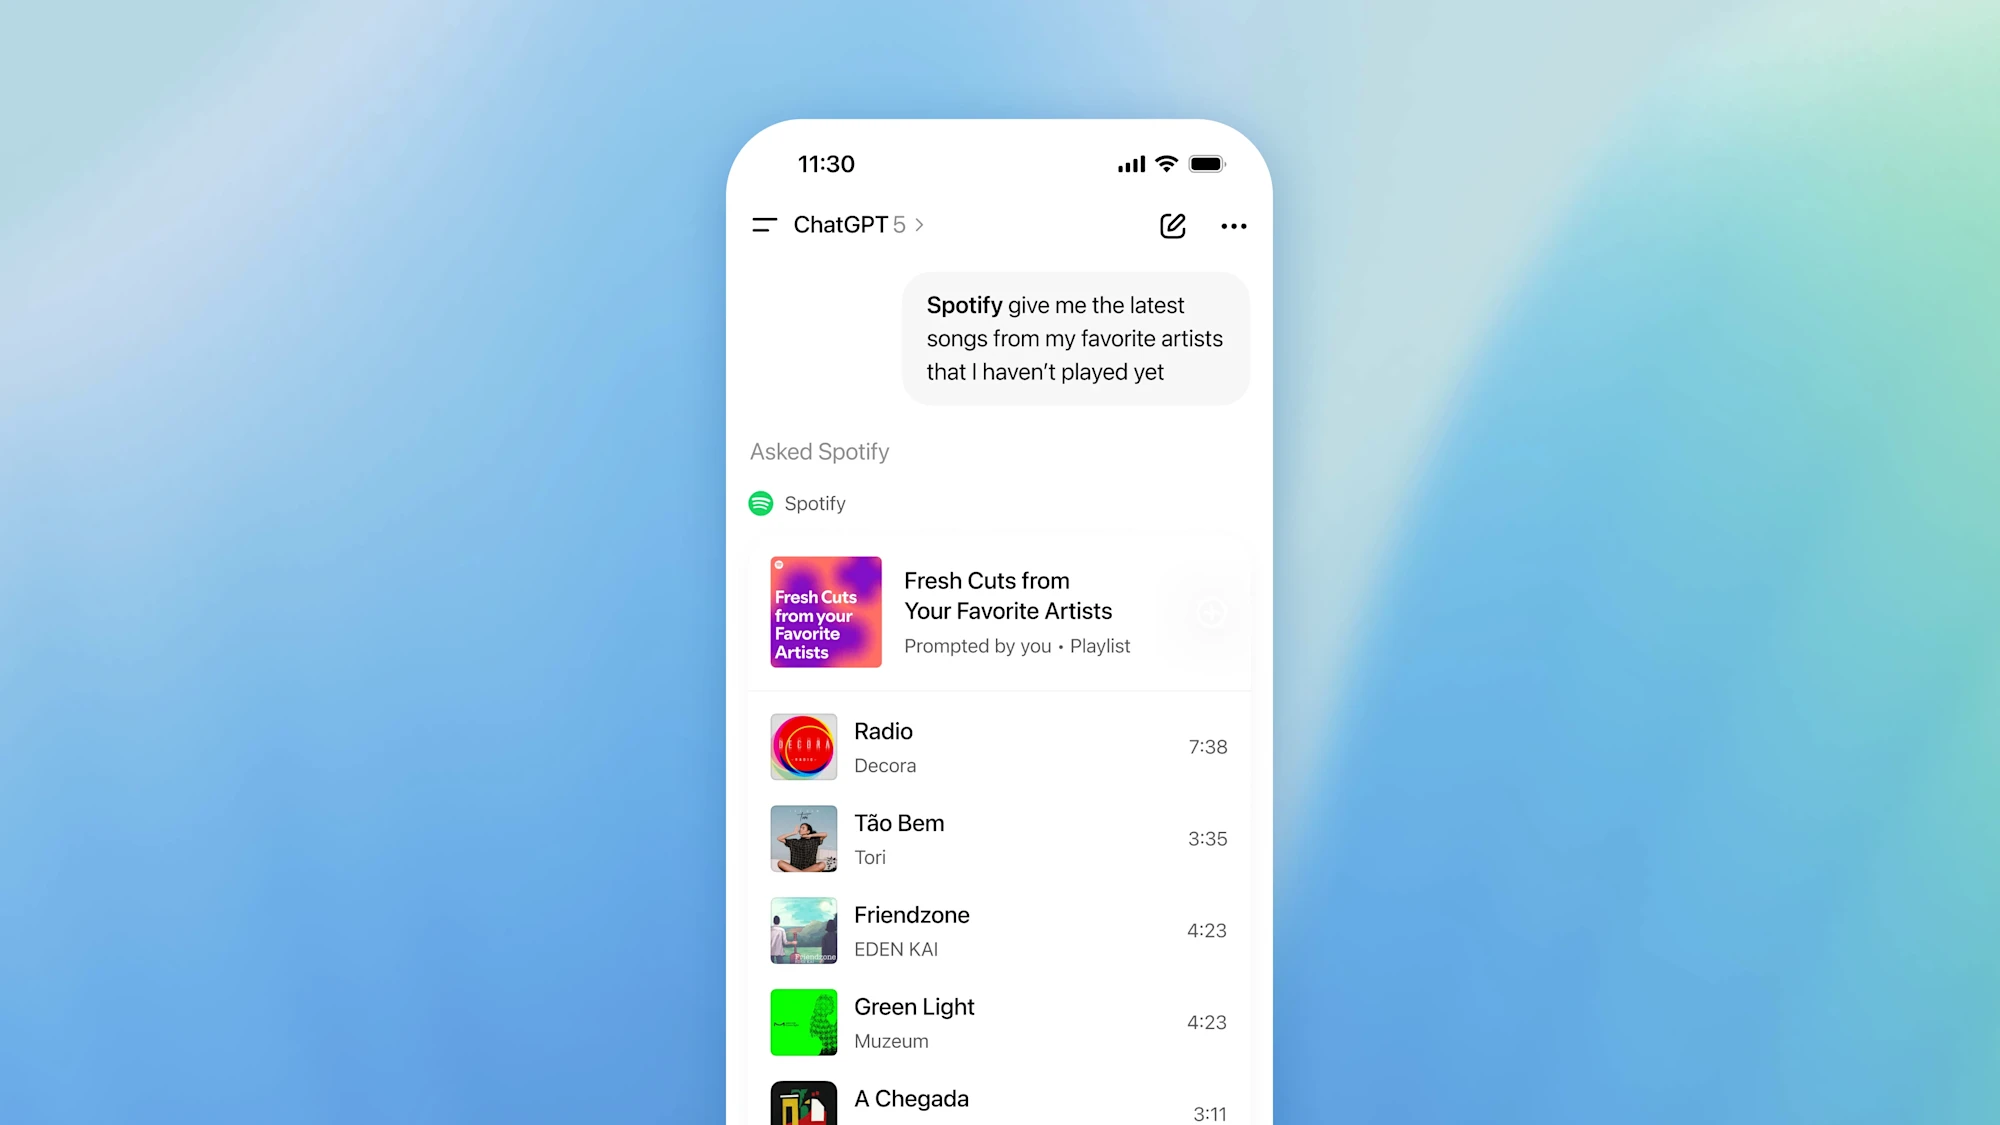
Booking.com、Canva、Coursera、Figma、Expedia、Spotify、Zillowなどは既にサービスを開始しており、ChatGPTの会話の中でこれらのアプリを呼び出すことが可能 になっています。
例えば、以下の画像のようにChatGPT内で「Spotify、お気に入りのアーティストの最新曲で、まだ再生したことのない曲を教えて」 と尋ねるとChatGPTの会話内でアプリが起動して応答してくれます。
このようなApps In ChatGPTは、Apps SDKを使うと 自分たちでも構築することが可能 です。この SDK は Model Context Protocol(MCP) を基盤としており、現在OpenAIからサンプルコードとして提供されています。
このコードを動かしてみると、以下のようなChatGPT上で動く独自のピザ屋の情報を取得できるアプリケーションを構築することができます。
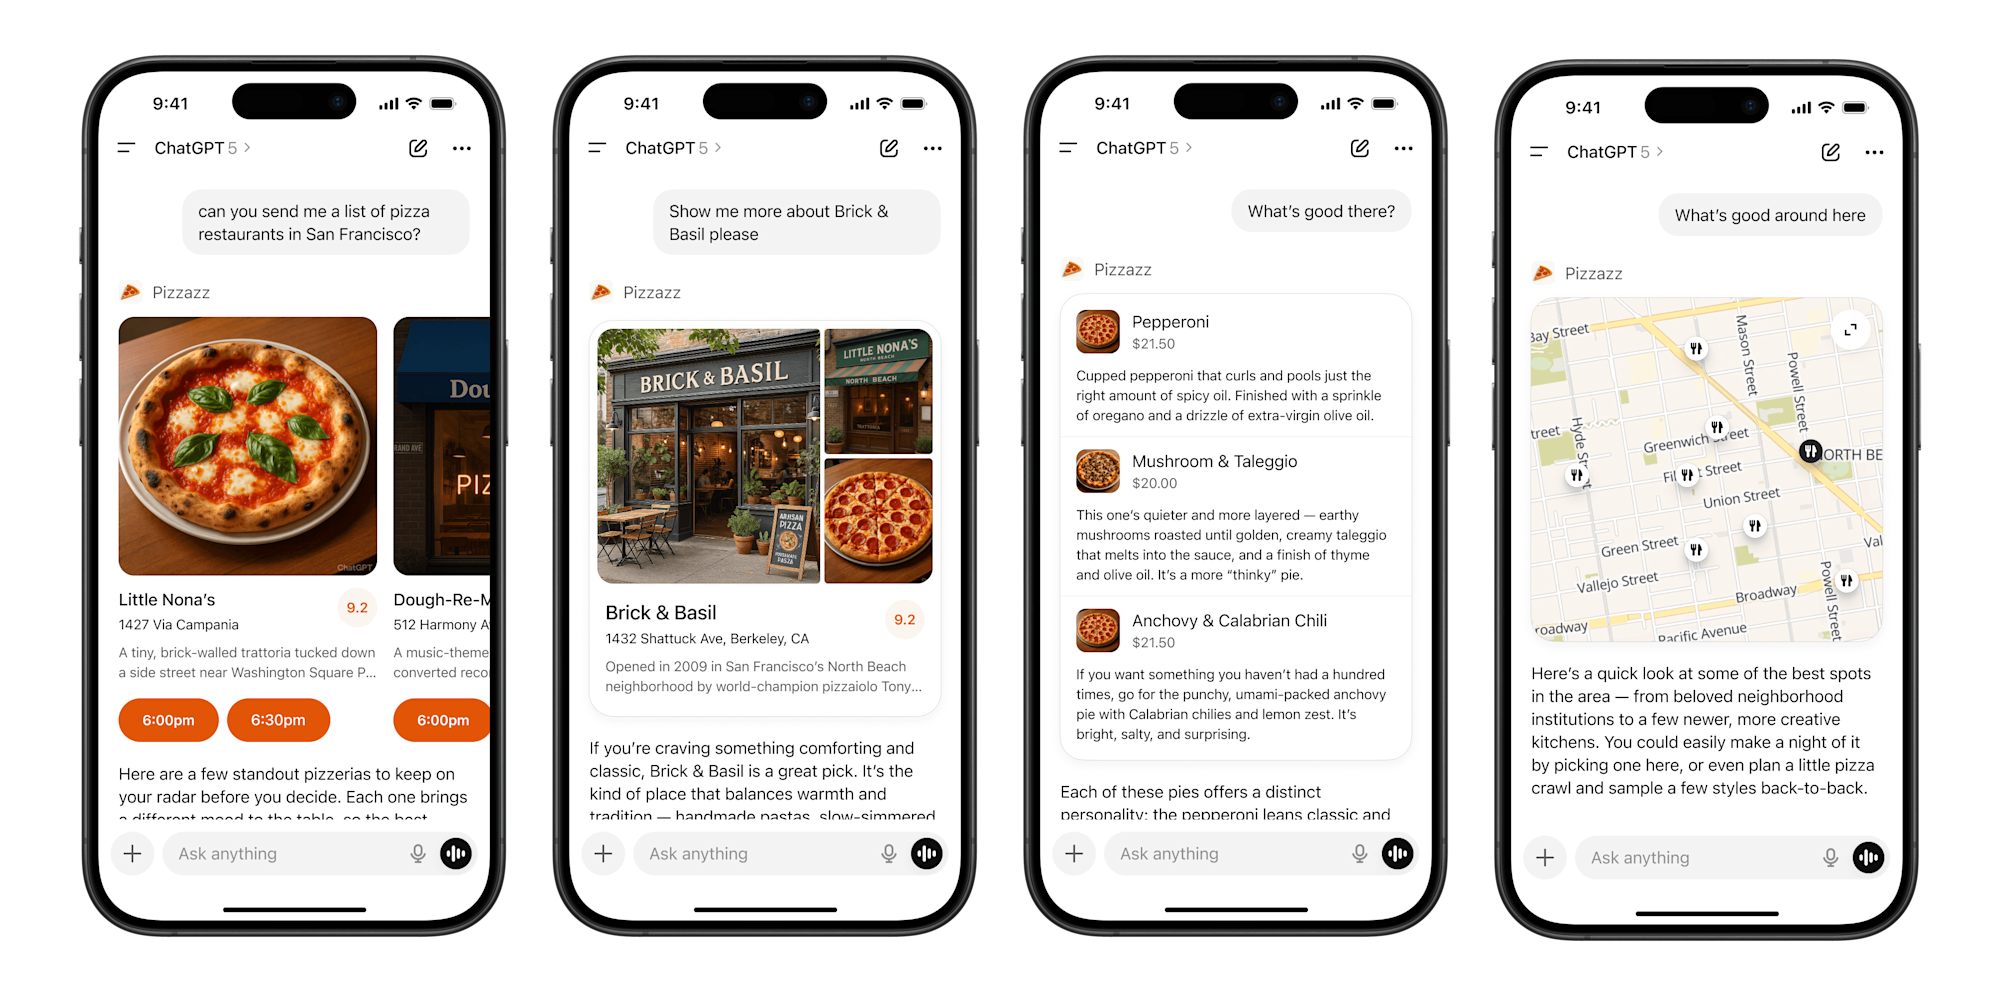
このサンプルコードの動かし方などの説明は他のブログに任せます。
今回やること
サンプルコードには以下の機能が既に存在しています。
- ピザ屋のマップ表示
- ピザのカルーセル表示
- ピザのアルバム表示
- ピザのリスト表示
- ピザのビデオ表示
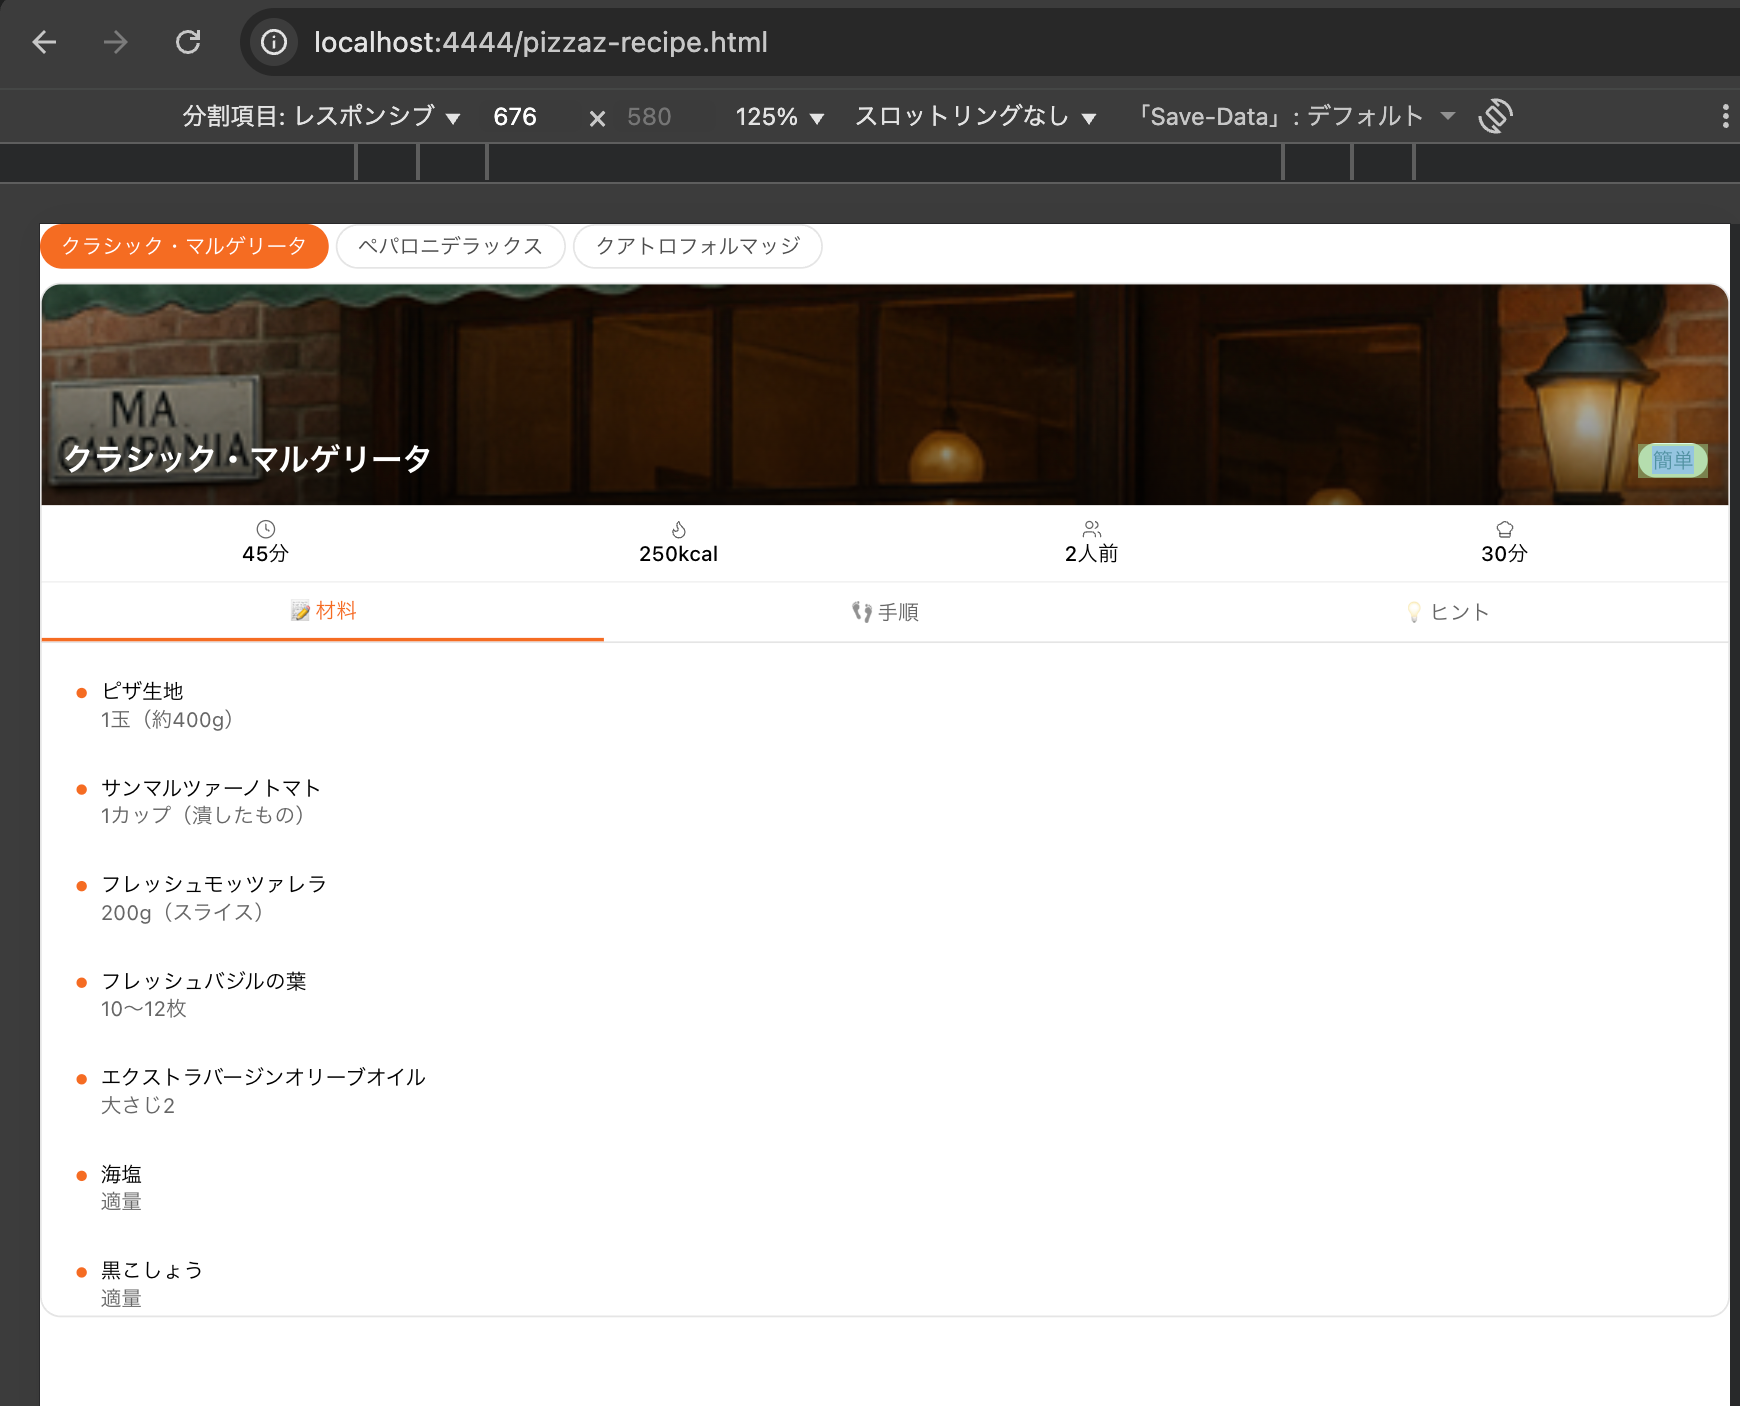
今回は、上のサンプルコードのピザ屋のアプリに、ピザのレシピ画面 を追加します。
機能としては、材料リスト、手順(チェックボックス付き)、プロのヒントをタブ形式で表示します。
簡単な手順
詳しい実装は後ほど紹介しますが、先に簡単に手順だけまとめました。
- データの準備とReactでのUI作成
- Reactコードをビルドしてアセットを生成し、MCPサーバーから参照できるようにする
- MCPサーバーにウィジェット定義の追加
- ChatGPTにアプリとして追加
これにより、ChatGPTの会話内で 材料リスト、ステップバイステップの手順、プロのヒントを含むインタラクティブなピザレシピウィジェットが表示されるようになります。
やってみた
① レシピデータの準備
まず、ピザレシピのデータ構造をmarkers.jsonに追加しました。各レシピには以下の情報を含めています:
- 基本情報:名前、画像、難易度、調理時間、カロリー
- 材料リスト:材料名と分量
- 手順:ステップバイステップの調理手順
- プロのヒント:調理のコツ
{
  "recipes": [
    {
      "id": "classic-margherita",
      "name": "クラシック・マルゲリータ",
      "image": "https://persistent.oaistatic.com/pizzaz/pizzaz-1.png",
      "difficulty": "簡単",
      "prepTime": "30分",
      "cookTime": "15分",
      "totalTime": "45分",
      "servings": 2,
      "calories": 250,
      "ingredients": [
        { "item": "ピザ生地", "amount": "1玉(約400g)" },
        { "item": "サンマルツァーノトマト", "amount": "1カップ(潰したもの)" },
        // ...その他の材料
      ],
      "steps": [
        "オーブンを245°C(475°F)に予熱します...",
        "打ち粉をした台の上で、ピザ生地を直径約30cmに伸ばします...",
        // ...その他の手順
      ],
      "tips": [
        "ピザストーンを使うとクリスピーな生地になります",
        // ...その他のヒント
      ]
    }
    // ...その他のレシピ
  ]
}
② Reactウィジェットの実装
次に、タブ形式のインタラクティブなUIを持つReactコンポーネントを実装しました。
Reactコード
import React from "react";
import { createRoot } from "react-dom/client";
import recipesData from "../pizzaz/markers.json";
import { ChefHat, Clock, Flame, Users, Lightbulb, CheckCircle2, Circle } from "lucide-react";

const TABS = {
  INGREDIENTS: "ingredients",
  STEPS: "steps",
  TIPS: "tips"
};

const DIFFICULTY_COLORS = {
  "簡単": "bg-green-100 text-green-800",
  "中級": "bg-yellow-100 text-yellow-800",
  "上級": "bg-red-100 text-red-800"
};

function RecipeCard({ recipe }) {
  const [activeTab, setActiveTab] = React.useState(TABS.INGREDIENTS);
  const [completedSteps, setCompletedSteps] = React.useState(new Set());

  const toggleStep = (index) => {
    setCompletedSteps(prev => {
      const next = new Set(prev);
      if (next.has(index)) {
        next.delete(index);
      } else {
        next.add(index);
      }
      return next;
    });
  };

  return (
    <div className="antialiased w-full text-black border border-black/10 rounded-xl overflow-hidden bg-white max-h-[600px] flex flex-col">
      {/* Header with image - コンパクト化 */}
      <div className="relative h-32 bg-cover bg-center flex-shrink-0" style={{ backgroundImage: `url(${recipe.image})` }}>
        <div className="absolute inset-0 bg-gradient-to-t from-black/60 to-transparent" />
        <div className="absolute bottom-0 left-0 right-0 p-3 text-white">
          <div className="flex items-center justify-between">
            <h2 className="text-lg font-bold">{recipe.name}</h2>
            <span className={`text-xs px-2 py-0.5 rounded-full ${DIFFICULTY_COLORS[recipe.difficulty]}`}>
              {recipe.difficulty}
            </span>
          </div>
        </div>
      </div>

      {/* Recipe Info Bar - コンパクト化 */}
      <div className="grid grid-cols-4 gap-1 px-3 py-2 border-b border-black/5 text-center text-xs flex-shrink-0">
        <div className="flex flex-col items-center">
          <Clock className="h-3 w-3 text-black/60" strokeWidth={1.5} />
          <span className="font-medium text-xs">{recipe.totalTime}</span>
        </div>
        <div className="flex flex-col items-center">
          <Flame className="h-3 w-3 text-black/60" strokeWidth={1.5} />
          <span className="font-medium text-xs">{recipe.calories}kcal</span>
        </div>
        <div className="flex flex-col items-center">
          <Users className="h-3 w-3 text-black/60" strokeWidth={1.5} />
          <span className="font-medium text-xs">{recipe.servings}人前</span>
        </div>
        <div className="flex flex-col items-center">
          <ChefHat className="h-3 w-3 text-black/60" strokeWidth={1.5} />
          <span className="font-medium text-xs">{recipe.prepTime}</span>
        </div>
      </div>

      {/* Tabs - コンパクト化 */}
      <div className="flex border-b border-black/10 flex-shrink-0">
        <button
          onClick={() => setActiveTab(TABS.INGREDIENTS)}
          className={`flex-1 py-2 text-xs font-medium transition-colors ${
            activeTab === TABS.INGREDIENTS
              ? "text-[#F46C21] border-b-2 border-[#F46C21]"
              : "text-black/60 hover:text-black/80"
          }`}
        >
          📝 材料
        </button>
        <button
          onClick={() => setActiveTab(TABS.STEPS)}
          className={`flex-1 py-2 text-xs font-medium transition-colors ${
            activeTab === TABS.STEPS
              ? "text-[#F46C21] border-b-2 border-[#F46C21]"
              : "text-black/60 hover:text-black/80"
          }`}
        >
          👣 手順
        </button>
        <button
          onClick={() => setActiveTab(TABS.TIPS)}
          className={`flex-1 py-2 text-xs font-medium transition-colors ${
            activeTab === TABS.TIPS
              ? "text-[#F46C21] border-b-2 border-[#F46C21]"
              : "text-black/60 hover:text-black/80"
          }`}
        >
          💡 ヒント
        </button>
      </div>

      {/* Tab Content - スクロール可能に */}
      <div className="p-3 overflow-y-auto flex-1">
        {activeTab === TABS.INGREDIENTS && (
          <div className="space-y-2">
            {recipe.ingredients.map((ingredient, i) => (
              <div
                key={i}
                className="flex items-start gap-2 p-2 rounded-lg hover:bg-black/5 transition-colors"
              >
                <div className="flex-shrink-0 w-1.5 h-1.5 rounded-full bg-[#F46C21] mt-1.5" />
                <div className="flex-1 min-w-0">
                  <div className="font-medium text-xs">{ingredient.item}</div>
                  <div className="text-xs text-black/60">{ingredient.amount}</div>
                </div>
              </div>
            ))}
          </div>
        )}

        {activeTab === TABS.STEPS && (
          <div className="space-y-2">
            {recipe.steps.map((step, i) => {
              const isCompleted = completedSteps.has(i);
              return (
                <div
                  key={i}
                  className="flex gap-2 p-2 rounded-lg hover:bg-black/5 transition-colors cursor-pointer group"
                  onClick={() => toggleStep(i)}
                >
                  <div className="flex-shrink-0 pt-0.5">
                    {isCompleted ? (
                      <CheckCircle2 className="h-4 w-4 text-[#F46C21]" strokeWidth={2} />
                    ) : (
                      <Circle className="h-4 w-4 text-black/30 group-hover:text-black/50" strokeWidth={2} />
                    )}
                  </div>
                  <div className="flex-1 min-w-0">
                    <div className="text-xs font-medium text-black/60 mb-0.5">手順 {i + 1}</div>
                    <div className={`text-xs ${isCompleted ? "line-through text-black/50" : ""}`}>
                      {step}
                    </div>
                  </div>
                </div>
              );
            })}
            {recipe.steps.length > 0 && (
              <div className="mt-3 pt-2 border-t border-black/10 text-center text-xs text-black/60">
                {completedSteps.size} / {recipe.steps.length} 手順完了
              </div>
            )}
          </div>
        )}

        {activeTab === TABS.TIPS && (
          <div className="space-y-2">
            {recipe.tips.map((tip, i) => (
              <div
                key={i}
                className="flex gap-2 p-2 rounded-lg bg-amber-50 border border-amber-200/50"
              >
                <Lightbulb className="h-4 w-4 text-amber-600 flex-shrink-0 mt-0.5" strokeWidth={2} />
                <div className="flex-1 text-xs text-black/80">{tip}</div>
              </div>
            ))}
          </div>
        )}
      </div>
    </div>
  );
}

function App() {
  const recipes = recipesData?.recipes || [];
  const [selectedRecipe, setSelectedRecipe] = React.useState(recipes[0] || null);

  if (recipes.length === 0) {
    return (
      <div className="antialiased w-full text-center py-12 text-black/60">
        レシピが見つかりません。
      </div>
    );
  }

  return (
    <div className="antialiased w-full">
      {/* Recipe Selector - コンパクト化 */}
      {recipes.length > 1 && (
        <div className="mb-2 flex gap-1 overflow-x-auto">
          {recipes.map((recipe) => (
            <button
              key={recipe.id}
              onClick={() => setSelectedRecipe(recipe)}
              className={`flex-shrink-0 px-3 py-1 rounded-full text-xs font-medium transition-colors ${
                selectedRecipe?.id === recipe.id
                  ? "bg-[#F46C21] text-white"
                  : "bg-white text-black/70 border border-black/10 hover:border-[#F46C21]"
              }`}
            >
              {recipe.name}
            </button>
          ))}
        </div>
      )}

      {/* Recipe Card */}
      {selectedRecipe && <RecipeCard recipe={selectedRecipe} />}
    </div>
  );
}

createRoot(document.getElementById("pizzaz-recipe-root")).render(<App />);
CSSコード
/* Custom styles for pizza-recipe widget */
#pizzaz-recipe-root {
  font-family: system-ui, -apple-system, BlinkMacSystemFont, 'Segoe UI', Roboto, sans-serif;
  -webkit-font-smoothing: antialiased;
  -moz-osx-font-smoothing: grayscale;
}

/* Smooth transitions for tabs */
#pizzaz-recipe-root button {
  transition: all 0.2s ease;
}

/* Custom scrollbar for recipe selector */
#pizzaz-recipe-root ::-webkit-scrollbar {
  height: 6px;
}

#pizzaz-recipe-root ::-webkit-scrollbar-track {
  background: rgba(0, 0, 0, 0.05);
  border-radius: 3px;
}

#pizzaz-recipe-root ::-webkit-scrollbar-thumb {
  background: rgba(0, 0, 0, 0.2);
  border-radius: 3px;
}

#pizzaz-recipe-root ::-webkit-scrollbar-thumb:hover {
  background: rgba(0, 0, 0, 0.3);
}
ローカルサーバーを立ち上げることでReactコードが確認可能です。
pnpm run dev
③ ビルドとアセットの追加
本プロジェクトでは各ウィジェット単位でビルドが実行されます。そのため、ビルド対象に新しいウィジェットを追加します。
const targets: string[] = [
  "pizzaz",
  "pizzaz-carousel",
  "pizzaz-list",
  "pizzaz-albums",
  "pizzaz-video",
+  "pizzaz-recipe", // 追加
];
ビルドコマンドを実行してReactウィジェットをビルドします。
pnpm run build
ビルドが成功すると、assetsディレクトリに以下のファイルが生成されます:
assets/pizzaz-recipe-2d2b.jsassets/pizzaz-recipe-2d2b.cssassets/pizzaz-recipe-2d2b.html
④ MCPサーバーへのウィジェット追加
MCPサーバーの設定ファイルに新しいウィジェット定義を追加します。linkタグとscriptタグのsrc属性には、今回起動済みのlocalサーバーのパスを追加します。今回は検証なので簡易的にこのような実装にしていますが、実際にはこれらのアセットファイルをホスティングしてそのuriを指定する必要があります。
const widgets: PizzazWidget[] = [
   {
    id: "pizza-map",
    title: "Show Pizza Map",
    templateUri: "ui://widget/pizza-map.html",
    invoking: "Hand-tossing a map",
    invoked: "Served a fresh map",
    html: `
 <div id="pizzaz-root"></div>
 <link rel="stylesheet" href="https://persistent.oaistatic.com/ecosystem-built-assets/pizzaz-0038.css">
 <script type="module" src="https://persistent.oaistatic.com/ecosystem-built-assets/pizzaz-0038.js"></script>
    `.trim(),
    responseText: "Rendered a pizza map!"
  },
  // ...その他、既存のウィジェット
+  {
+    id: "pizza-recipe",
+    title: "Show Pizza Recipe",
+    templateUri: "ui://widget/pizza-recipe.html",
+    invoking: "Hand-tossing a recipe",
+    invoked: "Served a fresh recipe",
+    html: `
+<div id="pizzaz-recipe-root"></div>
+<link rel="stylesheet" href="http://localhost:4444/assets/pizzaz-recipe-2d2b.css">
+<script type="module" src="http://localhost:4444/assets/pizzaz-recipe-2d2b.js"></script>
+    `.trim(),
+    responseText: "Rendered a pizza recipe!"
+  }
];
ウィジェットはMCPのツールとして自動的に登録され、ChatGPTから呼び出し可能になります。
⑤ MCPサーバーの起動
MCPサーバーを起動し、ngrokで一時的にhttps化してMCPサーバーとして登録できるようにします。
cd pizzaz_server_node
pnpm start
ngrok http 8000
MCPサーバーはポート8000で起動し、ローカル環境で起動済みのhttp://localhost:4444/assets/pizzaz-recipe-2d2b.cssとhttp://localhost:4444/assets/pizzaz-recipe-2d2b.jsを参照してウィジェットを配信します。
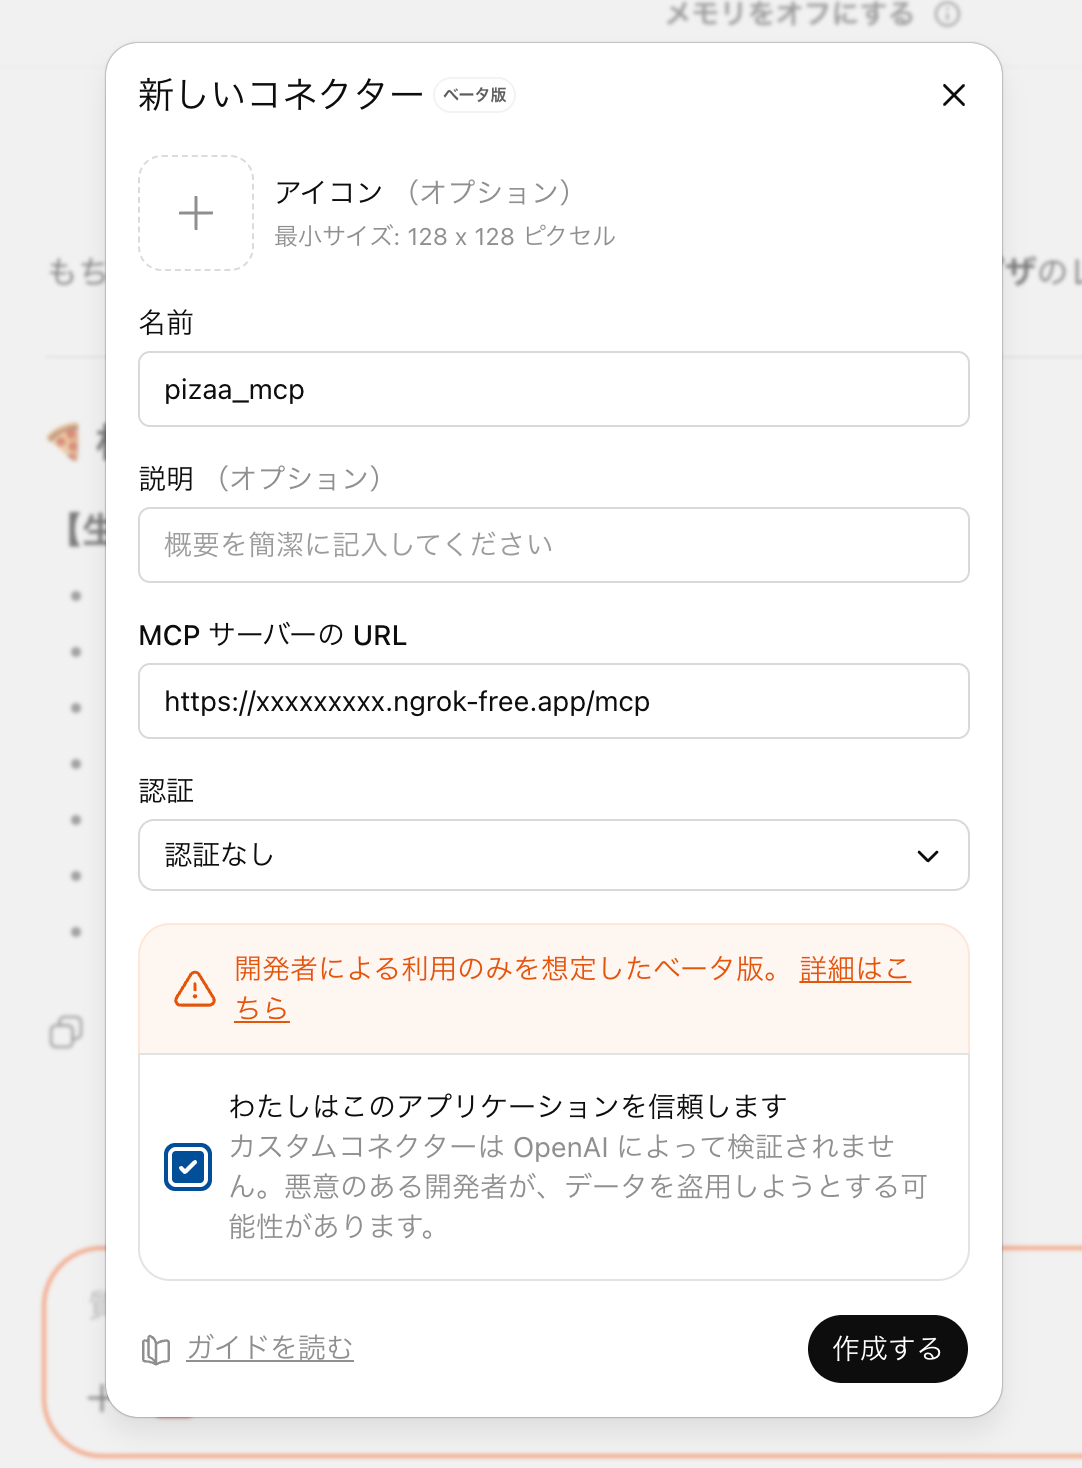
⑦ ChatGPTにアプリとして追加
ngrokが生成した公開URLを使って、ChatGPTの設定(Settings > Connectors)からMCPサーバーを追加できます。アプリを追加するには開発者モードに登録しておく必要があります。
例: https://<custom_endpoint>.ngrok-free.app/mcp
以上で完了です。最後に動作確認をします。
動作確認
「ピザのレシピを教えて」とプロンプトを入力するだけでAIがMCPサーバーから該当のアプリを表示してくれました。
終わりに
Apps SDK(MCP)を使用することで、ChatGPTに独自のアプリを組み込むことができ、会話の中に自然にアプリを組み込むことができました。
今回はサンプルコードをもとに実装したので、MCPサーバーの複雑な実装箇所やopenAIの仕様のための独自の設定などを省くことができました。
一度設定を完了してしまえばReactで普通のwebアプリのように開発することができ、とても良い体験でした。
これまではアプリにAIを組み込むことが多かったですが、Apps SDKの登場でChatGPTにアプリを組み込むという新しい体験と可能性が感じられました。
以上、どなたかの参考になれば幸いです。
参考