
Pix2Pixアルゴリズムを利用して、欠損のある画像を補正する機械学習モデルを作成する
この記事は公開されてから1年以上経過しています。情報が古い可能性がありますので、ご注意ください。
データ事業本部 インテグレーション部 機械学習チームの貞松です。
最近は画像処理に関連するAI/ML課題に関するお問い合わせが増加しており、画像の補正に関する課題もその中に含まれます。
今後に備えて幾つか解決アプローチを模索していたところ、タイトルにあるPix2Pixというアルゴリズムを利用して、入力画像を「有るべき姿」で書き直す(生成する)方法で比較的良好な結果が得られました。
本記事では、Pix2PixのTensorFlow実装を用いて、画像補正用の機械学習モデルを作成する為の一連の手順を順番に解説していきます。
Pix2Pixとは
Pix2Pixは画像から画像への変換問題に対する汎用的なソリューションを目的としたモデルを学習する条件付き敵対的生成ネットワーク(Conditional Generative adversarial network, cGAN)アルゴリズム、あるいはその実装を指します。
入力画像と目的画像をセットにした画像のデータセットを用いてモデルを学習することにより、未知の入力画像を目的に応じた画像に変換して出力することができるようになります。
以下の例は色付きの図形を組み合わせただけの抽象的な画像から、建物の外観の写実的な画像に変換した例です。
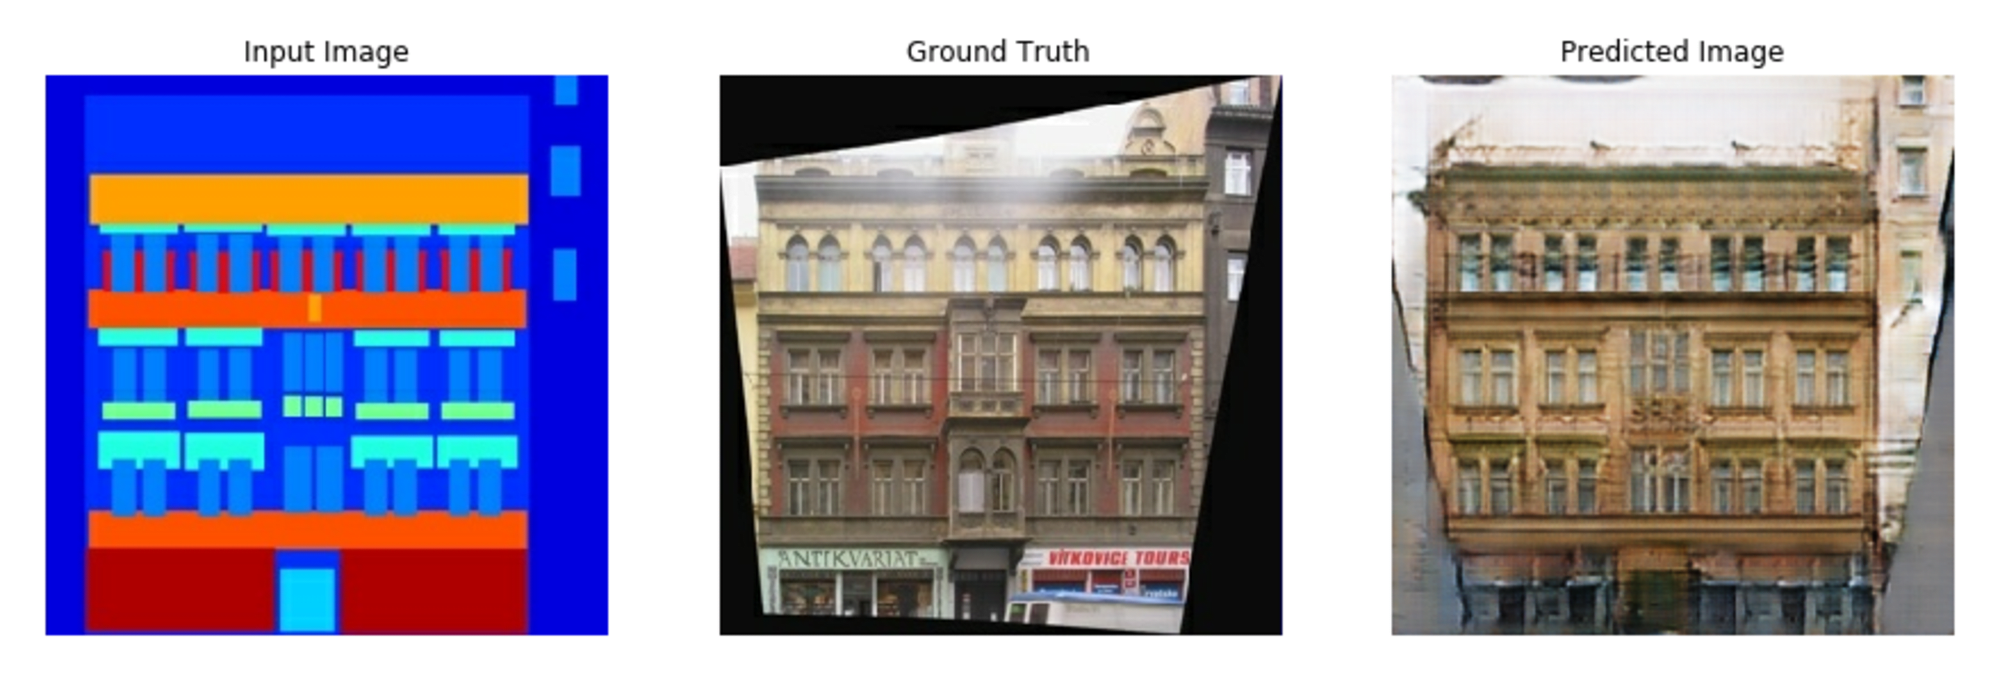
以下、Pix2Pixの特徴を列挙します。
- 入出力
- ソース画像から目標画像へのペアワイズな変換
- アーキテクチャ
- Generator: U-Netの応用
- Discriminator: PatchGANを使用
- ソース画像から目標画像へのペアワイズな変換
- 学習方式
- cGANの損失関数を使用
- L1損失を追加してより安定した学習を実現
- メリット
- ペアデータがあれば様々な画像変換タスクに適用可能
- 高解像度の出力が可能
- エンドツーエンドで学習可能
- 入力画像から直接目標画像を生成するまでの全プロセスを単一のネットワークで学習
- 中間的な特徴表現や変換ステップの設計が不要
- 応用例
- 白黒画像のカラー化
- エッジ画像(線画、輪郭画像)から写実的な画像生成
- 昼間の景色から夜景への変換
詳細は、下記のプロジェクトページやGitHubリポジトリのページをご参照ください。
Pix2PixのTensorFlow実装
オリジナルのPix2PixはPyTorchによる実装ですが、TensorFlowの公式ページにPix2PixのTensorFlow実装が掲載されており、実行可能なJupyter Notebookが用意されています(Google Colab, GitHubリポジトリのページで開く、もしくはローカルにダウンロードが可能)
今回はこのJupyter NotebookをGoogle Colab (Colab Enterprise)上で実行することでモデルを学習、評価していきます。
モデルの学習・テスト用の画像データセットを作成する
TensorFlow実装のPix2Pixでモデルの学習を実行する為には、仕様に沿って学習用の画像データセットを準備する必要があります。
以下、今回使用する画像データとそれを加工して学習用の画像データセットを作成するためのPythonコードについて解説します。
Pix2Pix用学習データセットの仕様
- 入力画像と目的画像ともにサイズは256×256
- 左側を目的画像、右側を入力画像として、2つの画像を連結して512×256の画像とする
- これを学習データとして使用する
- 目的画像と入力画像の左右を間違えやすいので注意
対象とする画像データ
今回は機械的に画像を作りだしたものを使用します。
生成した画像に対して、ランダムに四角形のマスクを掛ける処理を加えることにより、意図的に欠損させた画像も併せて準備します。
機械的に画像を作り出す処理
機械的に画像を作り出す為のPythonコードは以下の通りです。
本来はデータソースとなる画像のサイズが揃っていない可能性が高いので、敢えて256×256ではなく、500×500で画像を生成し、後ほど256×256に変換する処理を実行する想定で進めます。
import random
from PIL import Image, ImageDraw, ImageFilter
import math
import os

random.seed(42)

def create_sun_stamp(width=500, height=500, color='black', variation=0.03):
    image = Image.new('RGB', (width, height), color='white')
    draw = ImageDraw.Draw(image)

    center_x = width // 2 + random.randint(-int(width*variation), int(width*variation))
    center_y = height // 2 + random.randint(-int(height*variation), int(height*variation))

    # 太陽の本体(円)を描画
    sun_radius = min(width, height) // 5 * (1 + random.uniform(-variation, variation))
    draw.ellipse([center_x - sun_radius, center_y - sun_radius,
                  center_x + sun_radius, center_y + sun_radius],
                 fill=color)

    # 光線を描画
    num_rays = random.randint(8, 8)  # ランダムな数の光線
    for i in range(num_rays):
        angle = 2 * math.pi * i / num_rays + random.uniform(-0.1, 0.1)
        ray_length = sun_radius * (1.5 + random.uniform(-variation, variation))

        start_x = center_x + int((sun_radius*0.95) * math.cos(angle))
        start_y = center_y + int((sun_radius*0.95) * math.sin(angle))

        end_x = center_x + int(ray_length * math.cos(angle))
        end_y = center_y + int(ray_length * math.sin(angle))

        # 線の太さを調整(handprintと同様の計算方法)
        ray_width = int(sun_radius / 1.4 * (1 + random.uniform(-variation/2, variation/2)))

        # 光線を描画
        draw.line([start_x, start_y, end_x, end_y], fill=color, width=ray_width)

        # 光線の先端を丸く
        draw.ellipse([end_x - ray_width//2, end_y - ray_width//2,
                      end_x + ray_width//2, end_y + ray_width//2],
                     fill=color)

    # インクの染み出し効果
    for _ in range(2000):
        x = random.randint(0, width-1)
        y = random.randint(0, height-1)
        if image.getpixel((x, y)) == (0, 0, 0):  # 黒色の場合
            for dx in range(-2, 3):
                for dy in range(-2, 3):
                    if 0 <= x+dx < width and 0 <= y+dy < height:
                        if random.random() < 0.3:
                            image.putpixel((x+dx, y+dy), color)

    image = image.filter(ImageFilter.GaussianBlur(radius=1))

    return image

def generate_multiple_sun_stamps(count, width=500, height=500, color='black', output_dir='sun_stamps'):
    if not os.path.exists(output_dir):
        os.makedirs(output_dir)

    for i in range(count):
        sun_stamp = create_sun_stamp(width, height, color)
        filename = f'sun_stamp_{i+1:04d}.png'
        sun_stamp.save(os.path.join(output_dir, filename))
        print(f"Generated {filename}")

def main():
    generate_multiple_sun_stamps(100, color=(0, 0, 0), output_dir='random_sun_stamps')

if __name__ == "__main__":
    main()
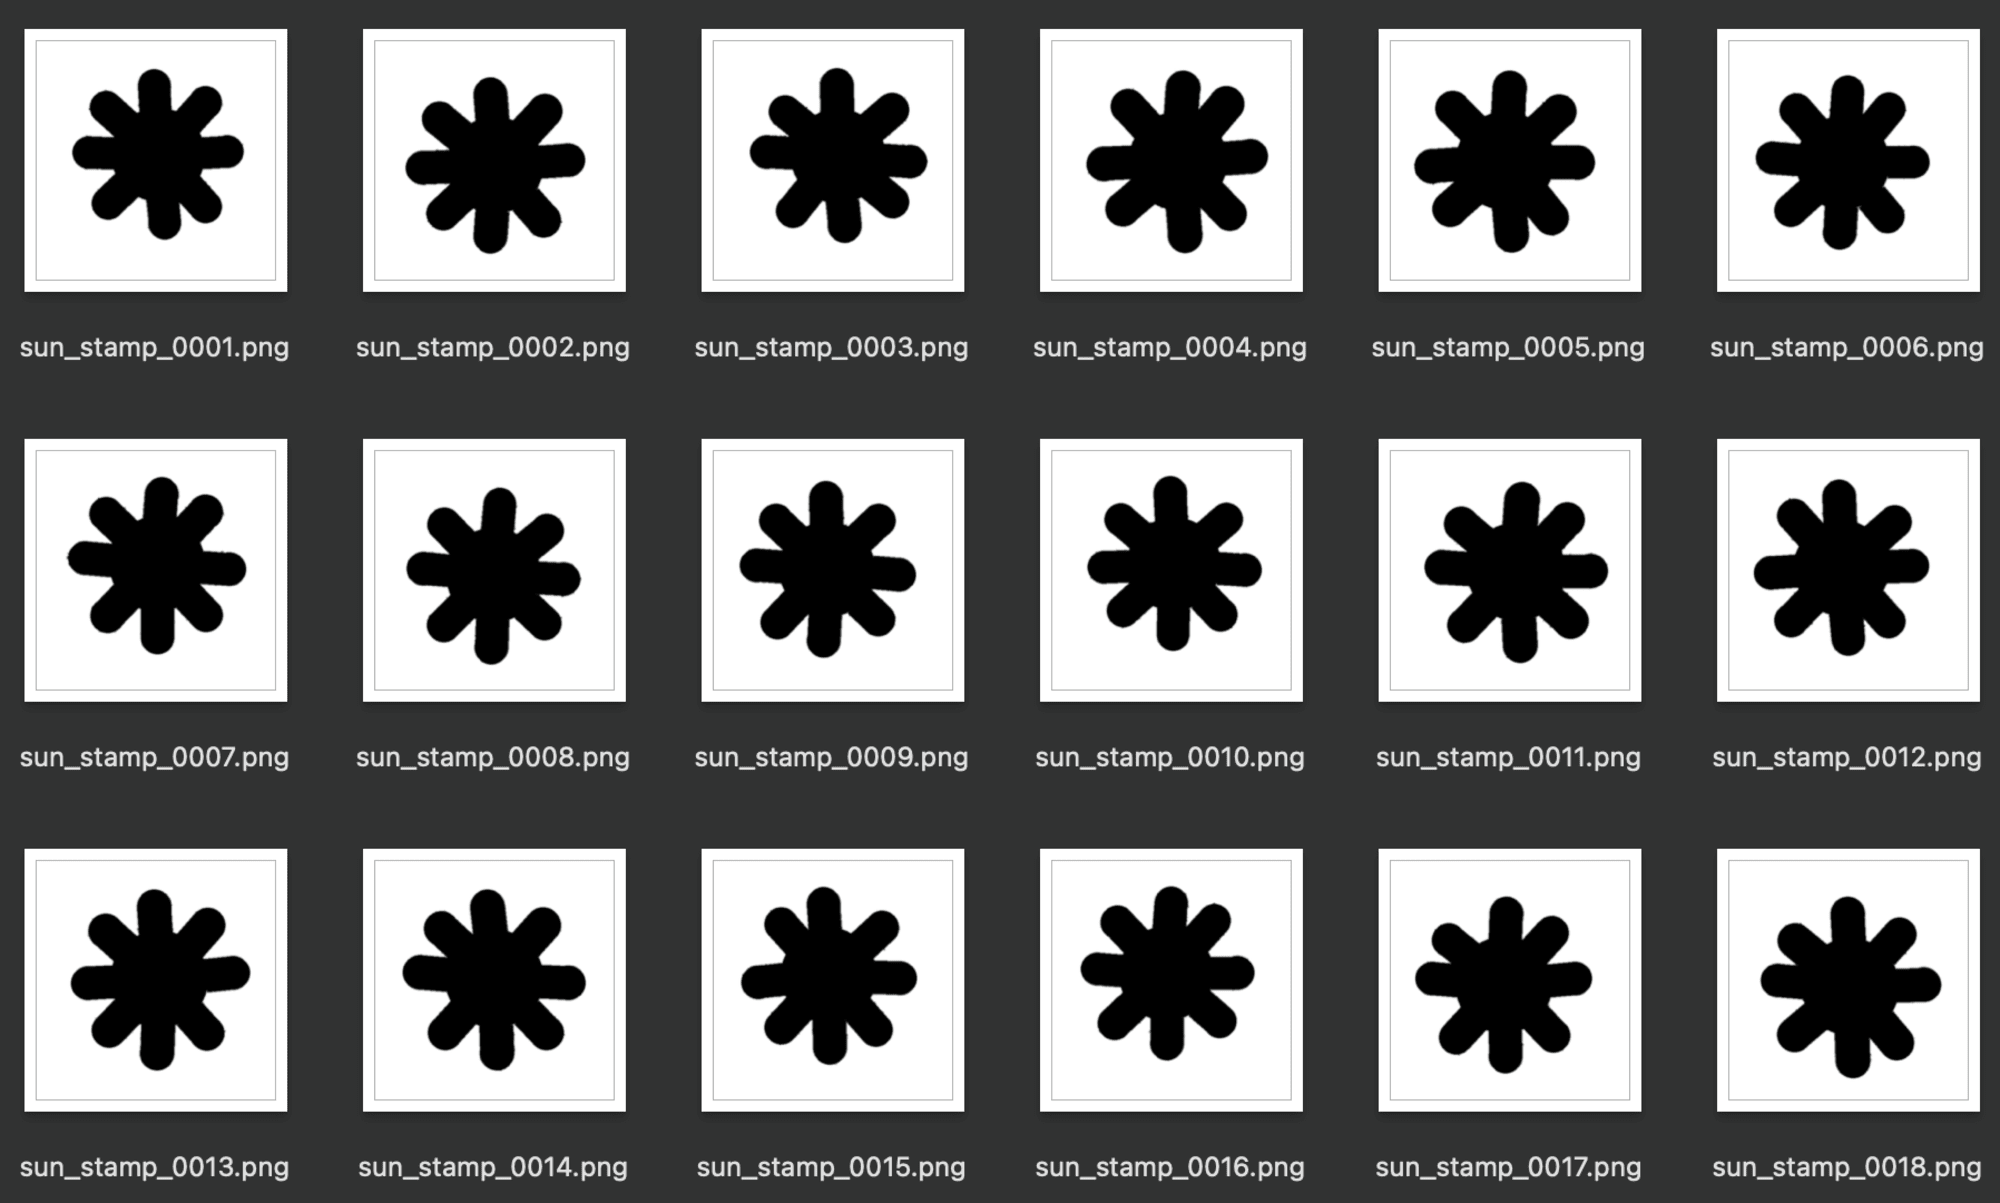
生成結果はこちら↓
生成した画像に対するマスク処理
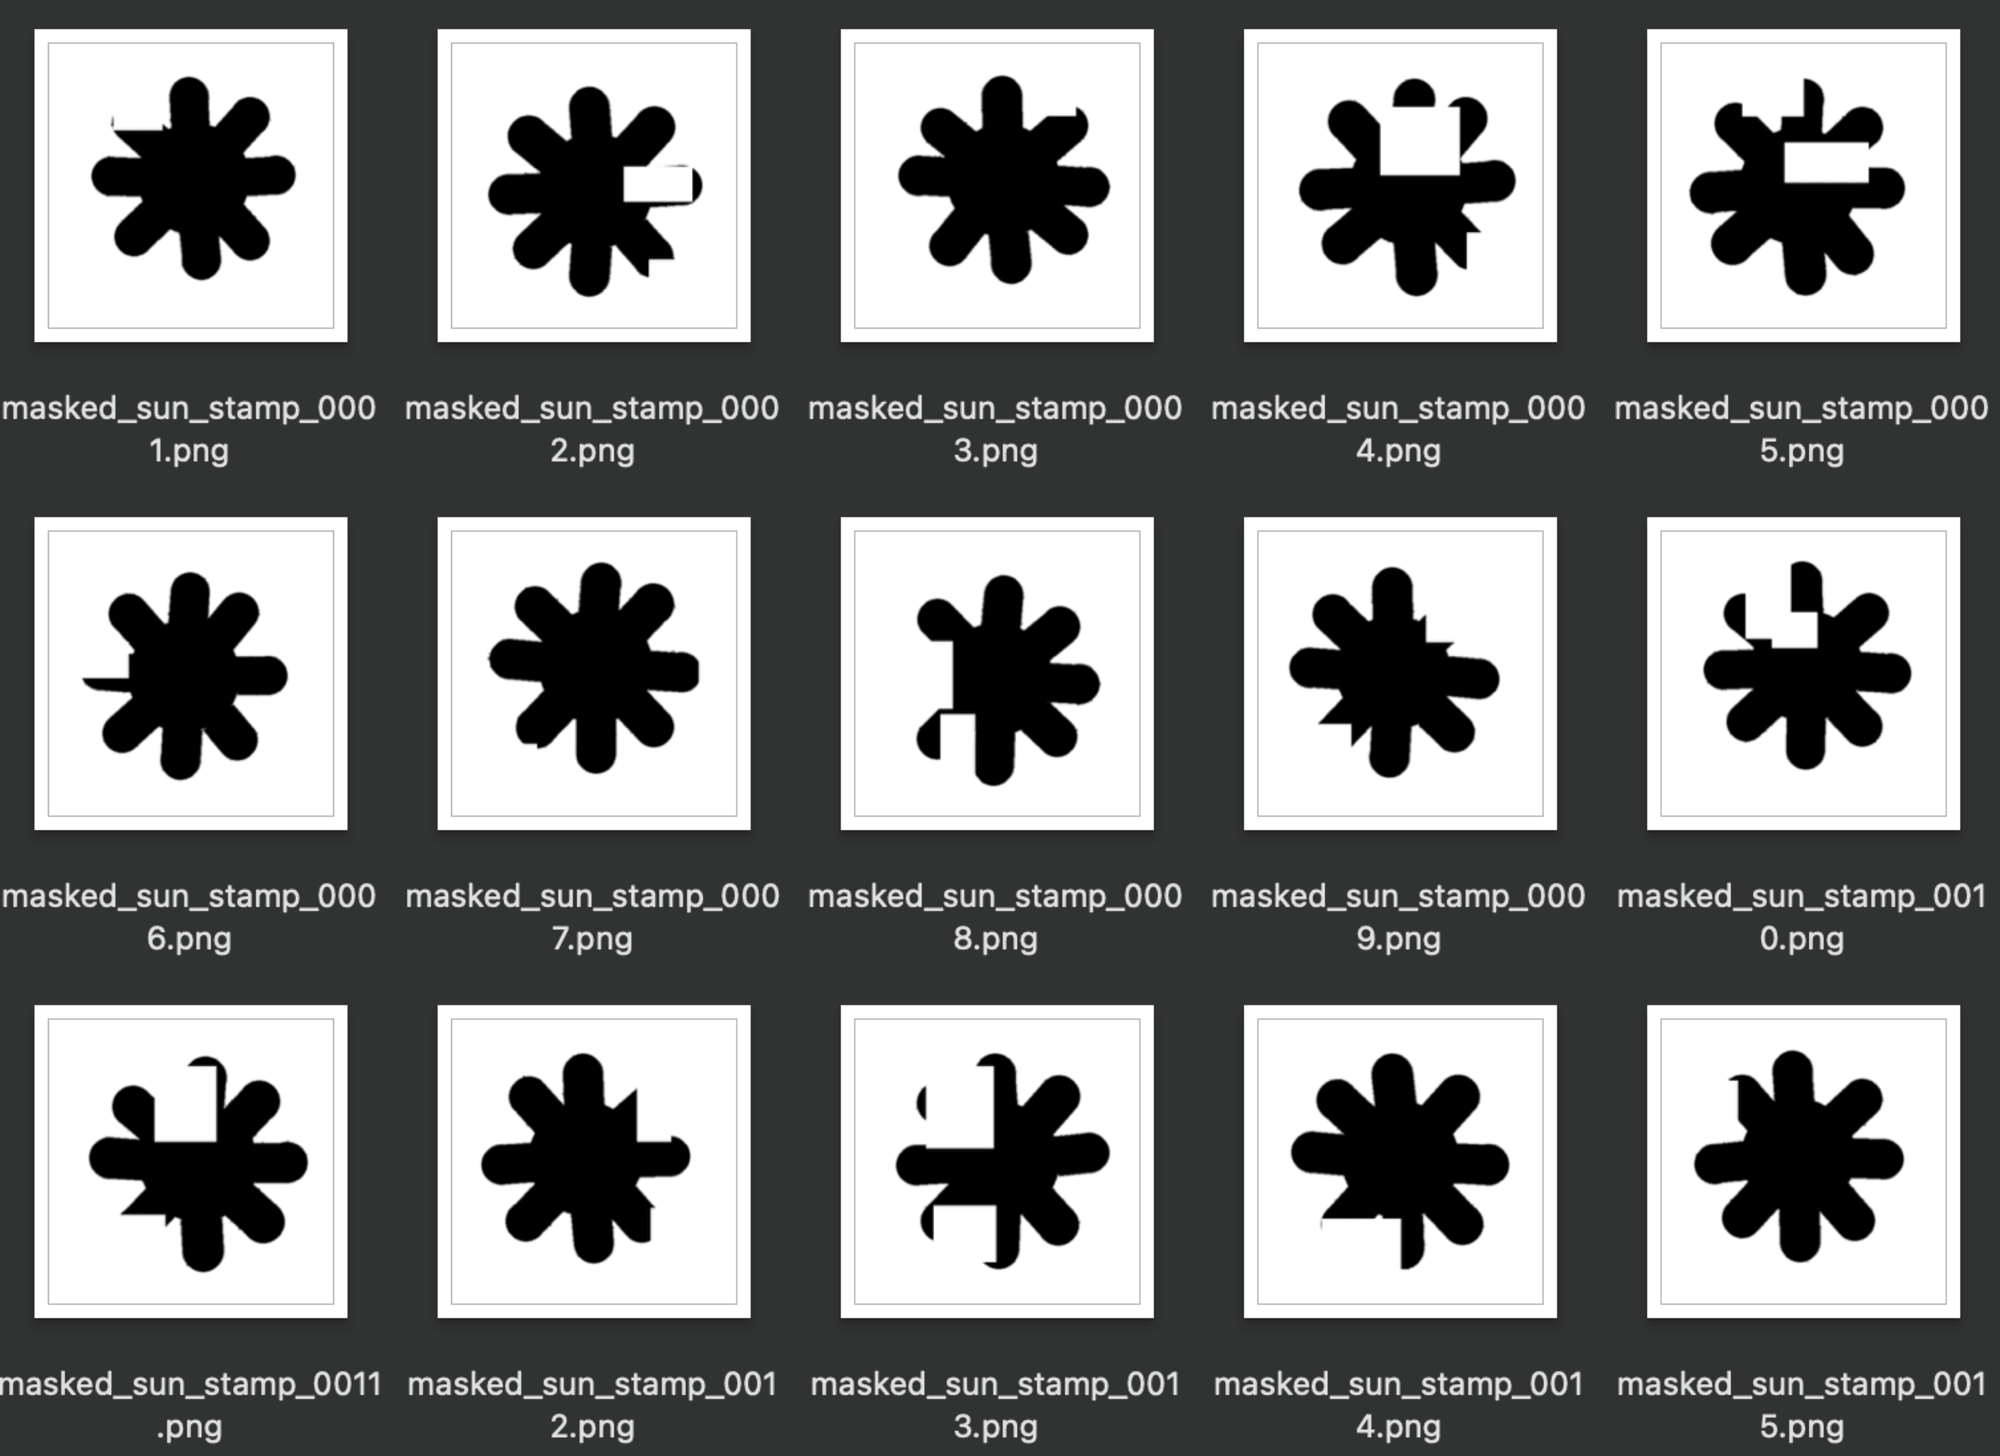
生成された画像に対して、ランダムに四角形のマスクを掛けることにより、あるべき状態に対して欠損のある画像を作り出します。
import os
from PIL import Image, ImageDraw
import random

random.seed(42)

def create_partially_masked_image(image_path, output_path, mask_size_range=(50, 150), num_masks=1):
    # 画像を開く
    with Image.open(image_path) as img:
        # 画像のコピーを作成
        masked_img = img.copy()
        draw = ImageDraw.Draw(masked_img)

        for _ in range(num_masks):
            # ランダムなマスクサイズを選択
            mask_width = random.randint(*mask_size_range)
            mask_height = random.randint(*mask_size_range)

            # ランダムな位置を選択
            x = random.randint(0, img.width - mask_width)
            y = random.randint(0, img.height - mask_height)

            # 白い長方形を描画
            draw.rectangle([x, y, x + mask_width, y + mask_height], fill="white")

        # 処理後の画像を保存
        masked_img.save(output_path)

def process_image_directory(input_dir, output_dir, mask_size_range=(50, 150), num_masks=1):

    # 出力ディレクトリが存在しない場合は作成
    if not os.path.exists(output_dir):
        os.makedirs(output_dir)

    # 入力ディレクトリ内の全画像を処理
    for filename in os.listdir(input_dir):
        if filename.lower().endswith(('.png', '.jpg', '.jpeg', '.bmp', '.gif')):
            input_path = os.path.join(input_dir, filename)
            output_path = os.path.join(output_dir, f"masked_{filename}")
            create_partially_masked_image(input_path, output_path, mask_size_range, num_masks)
            print(f"Processed: {filename}")

def main():

    # 使用例
    input_directory = "./random_sun_stamps"
    output_directory = "./random_sun_stamps_masked"
    process_image_directory(input_directory, output_directory, mask_size_range=(50, 150), num_masks=2)

if __name__ == "__main__":

    main()
処理結果はこちら↓
画像サイズを256×256に変換
生成された全ての画像サイズを256×256に変換する処理を施します。
以下のコードにより、元々のアスペクト比を維持しながらサイズを伸縮し、新たに作り出した真っ白な256×256の領域の真ん中に配置することで、元画像ができるだけ崩れないような処理としています。
import os
from PIL import Image

def resize_image(input_path, output_path, size=(256, 256)):
    with Image.open(input_path) as img:
        # オリジナルの画像のアスペクト比を計算
        aspect_ratio = img.width / img.height

        if aspect_ratio > 1:
            # 横長の画像
            new_width = size[0]
            new_height = int(new_width / aspect_ratio)
        else:
            # 縦長または正方形の画像
            new_height = size[1]
            new_width = int(new_height * aspect_ratio)

        # アスペクト比を保持してリサイズ
        img_resized = img.resize((new_width, new_height), Image.LANCZOS)

        # 新しい画像を作成(背景は白)
        new_img = Image.new("RGB", size, (255, 255, 255))

        # リサイズした画像を中央に配置
        paste_x = (size[0] - new_width) // 2
        paste_y = (size[1] - new_height) // 2
        new_img.paste(img_resized, (paste_x, paste_y))

        # 保存
        new_img.save(output_path)

def process_directory(input_dir, output_dir):
    if not os.path.exists(output_dir):
        os.makedirs(output_dir)

    for filename in os.listdir(input_dir):
        if filename.lower().endswith(('.png', '.jpg', '.jpeg', '.bmp', '.gif')):
            input_path = os.path.join(input_dir, filename)
            output_path = os.path.join(output_dir, filename)
            resize_image(input_path, output_path)
            print(f"Processed: {filename}")

input_directory = "images/resize/inputs"
output_directory = "images/resize/outputs"
process_directory(input_directory, output_directory)
入力画像と目的画像を横に結合して512×256の画像に変換
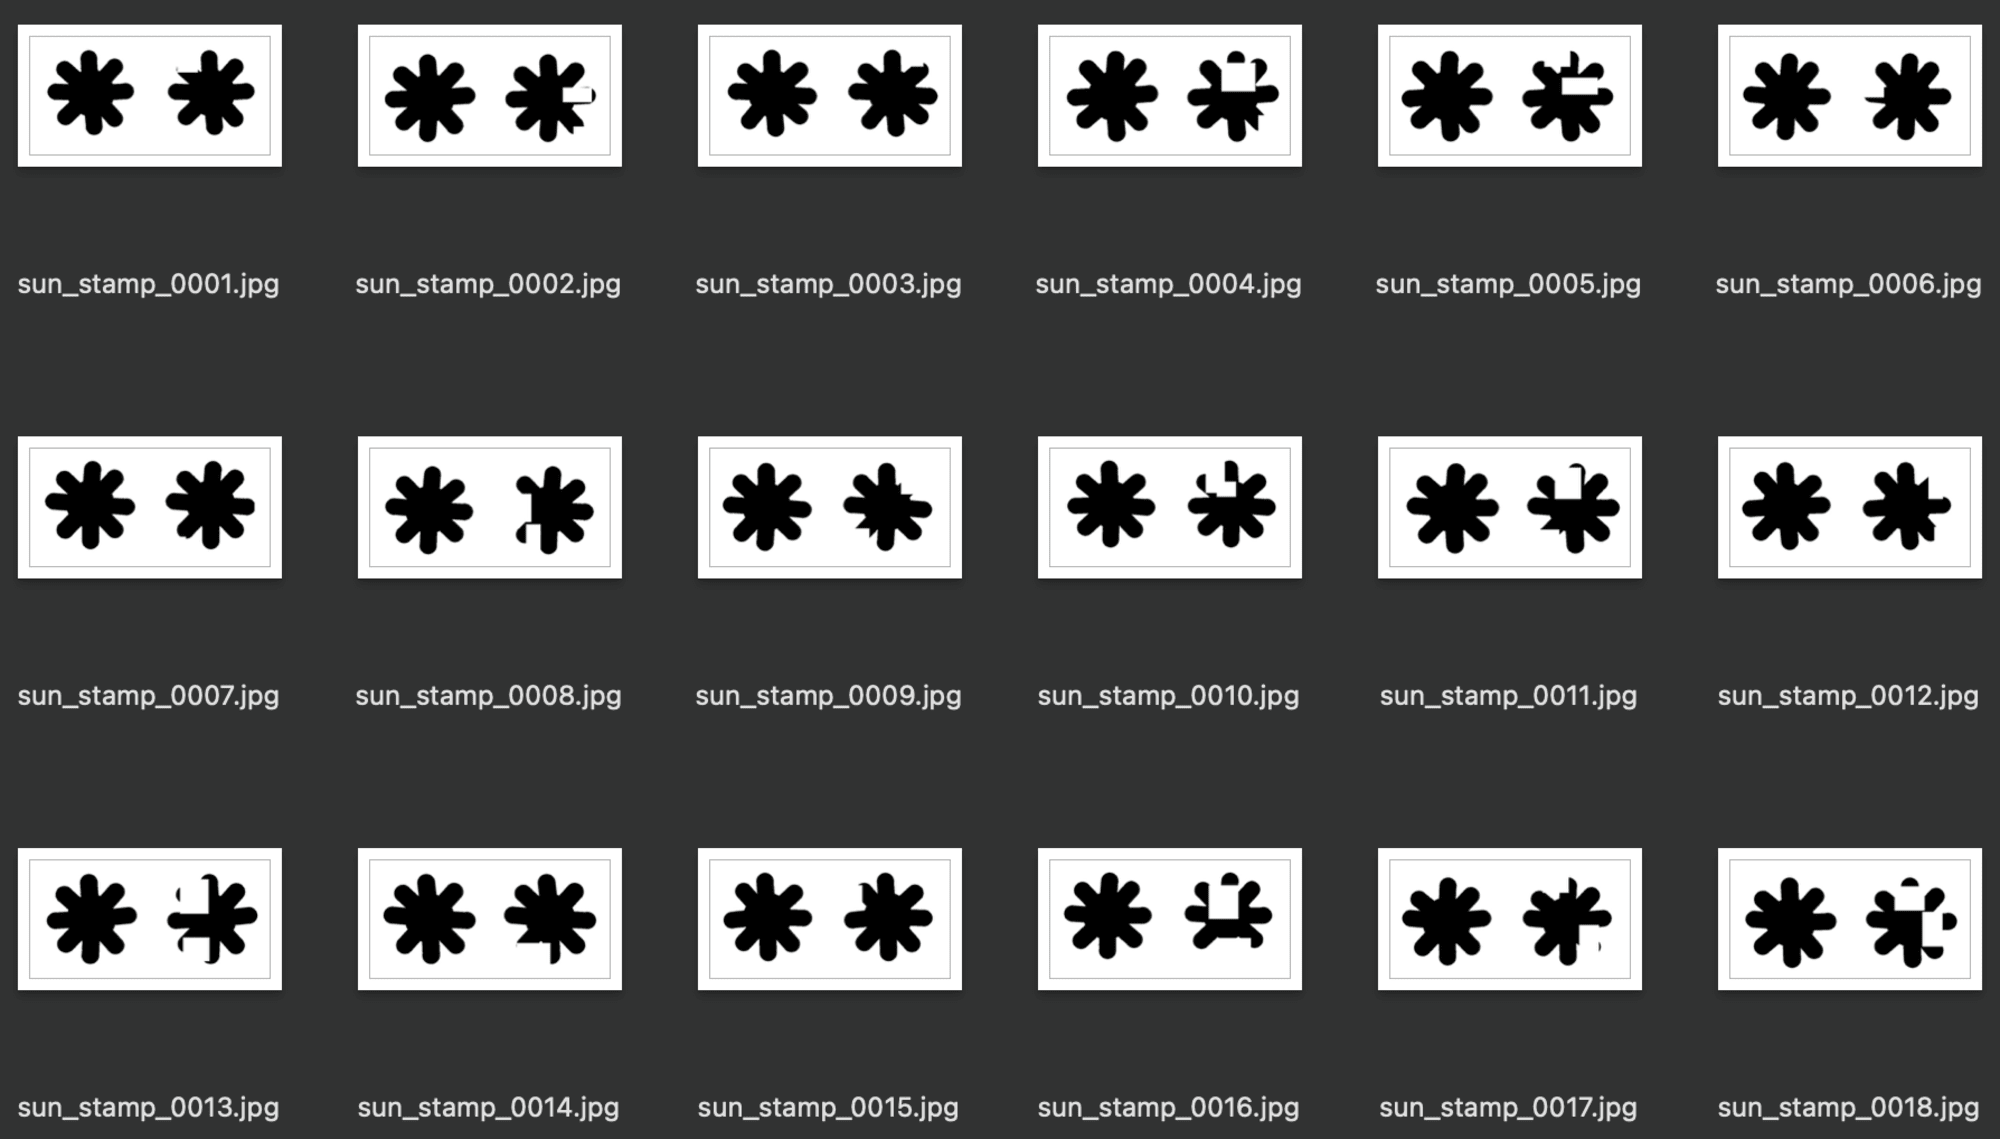
最後に入力画像と目的画像を横に結合して、512×256の画像に変換します。
再三の注意になりますが、左が目的画像、右が入力画像です。
import os
from PIL import Image

def concat_images(folder1, folder2, output_folder):
    # フォルダー内のJPEGファイルをリストアップ
    files1 = sorted([f for f in os.listdir(folder1) if f.lower().endswith('.jpg') or f.lower().endswith('.png', '.jpg', '.jpeg', '.bmp', '.gif')])
    files2 = sorted([f for f in os.listdir(folder2) if f.lower().endswith('.jpg') or f.lower().endswith('.png', '.jpg', '.jpeg', '.bmp', '.gif')])

    # 出力フォルダーが存在しない場合は作成
    if not os.path.exists(output_folder):
        os.makedirs(output_folder)

    # 各ペアの画像を連結
    for i, (file1, file2) in enumerate(zip(files1, files2)):
        # 画像を開く
        img1 = Image.open(os.path.join(folder1, file1))
        img2 = Image.open(os.path.join(folder2, file2))

        # 画像のサイズを確認
        if img1.size != (256, 256) or img2.size != (256, 256):
            print(f"警告: {file1}または{file2}のサイズが256x256ではありません。スキップします。")
            continue

        # 新しい画像を作成
        new_img = Image.new('RGB', (512, 256))

        # 画像を配置
        new_img.paste(img1, (0, 0))
        new_img.paste(img2, (256, 0))

        # 新しい画像を保存(JPEG形式)
        file_name_core = file1[:3]
        output_filename = f"{file_name_core}.jpg"
        new_img.save(os.path.join(output_folder, output_filename))

folder1 = "images/concat/input_a"
folder2 = "images/concat/input_b"
output_folder = "images/concat/output"

concat_images(folder1, folder2, output_folder)
変換結果はこちら↓
Pix2Pixによるモデル学習を実行する
前述で作成したデータセットをColab Enterpriseの環境にアップロードして、実行するNotebook上で配置したディレクトリパスの指定をします。
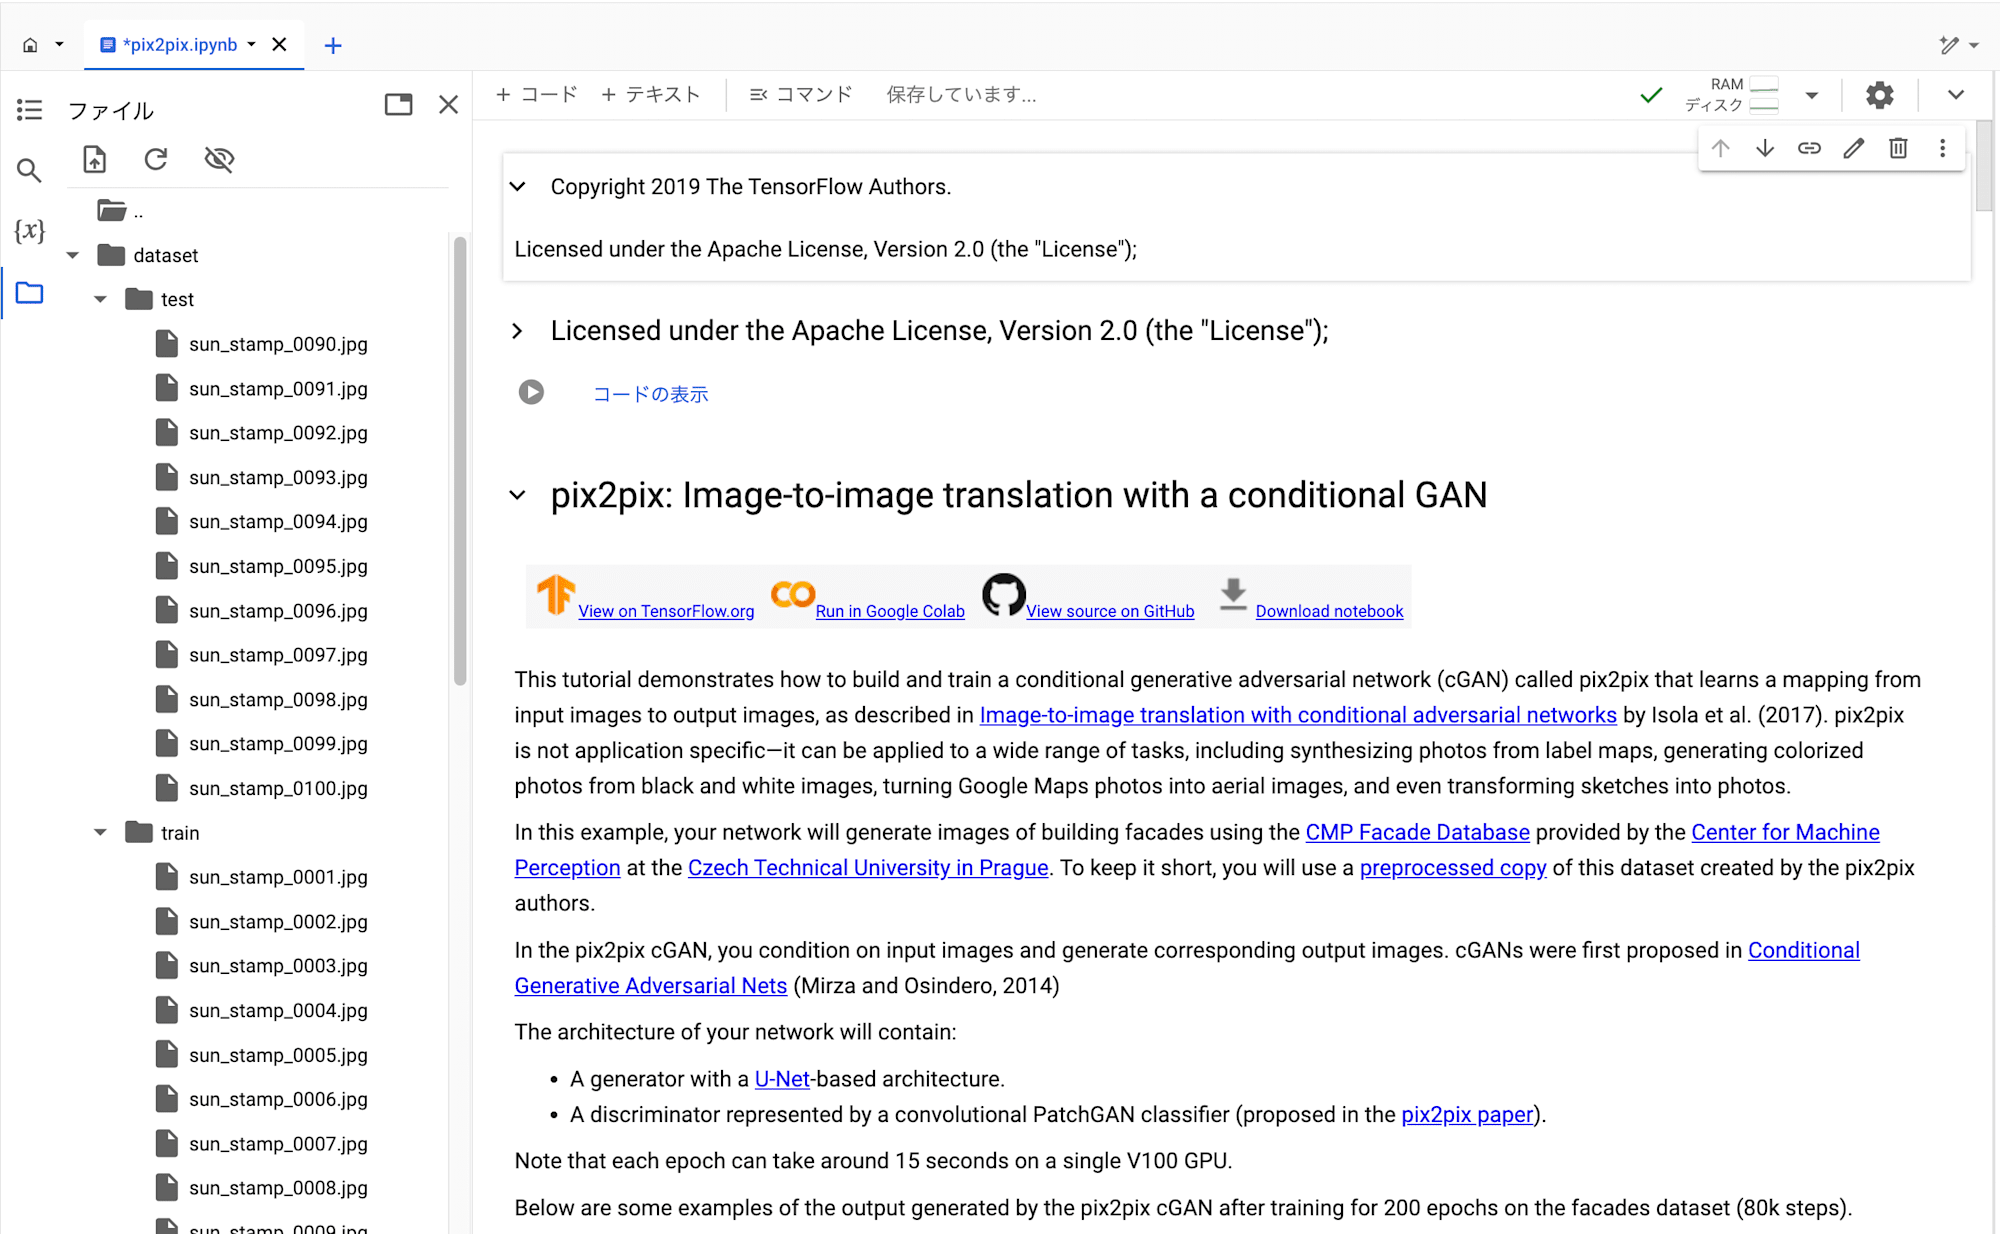
ノートブックの「Build an input pipeline with tf.data」セクションにある下記2つのセルのファイルパスに関する記述をアップロードした画像データに応じて書き換えます。
train_dataset = tf.data.Dataset.list_files('ここを学習用画像データのPATHに書き換える 例: /content/dataset/train/*.jpg')
train_dataset = train_dataset.map(load_image_train,
                                  num_parallel_calls=tf.data.AUTOTUNE)
train_dataset = train_dataset.shuffle(BUFFER_SIZE)
train_dataset = train_dataset.batch(BATCH_SIZE)
try:
  test_dataset = tf.data.Dataset.list_files('ここをテスト用画像データの配置PATHに書き換える 例: /content/dataset/test/*.jpg')
except tf.errors.InvalidArgumentError:
  test_dataset = tf.data.Dataset.list_files('ここを評価用画像データの配置PATHに書き換える(任意) 例: /content/dataset/val/*.jpg')
test_dataset = test_dataset.map(load_image_test)
test_dataset = test_dataset.batch(BATCH_SIZE)
学習済みモデルを評価する
ノートブックを最後まで実行すると、モデルの学習、推論と推論結果の可視化まで行ってくれます。
可視化の処理については、matplotlibのpyplotで描画を行っています。実際の結果を以下に示しつつ、性能を評価します。
左が入力画像、真ん中が正解画像、右がモデルから出力された推論結果画像です。
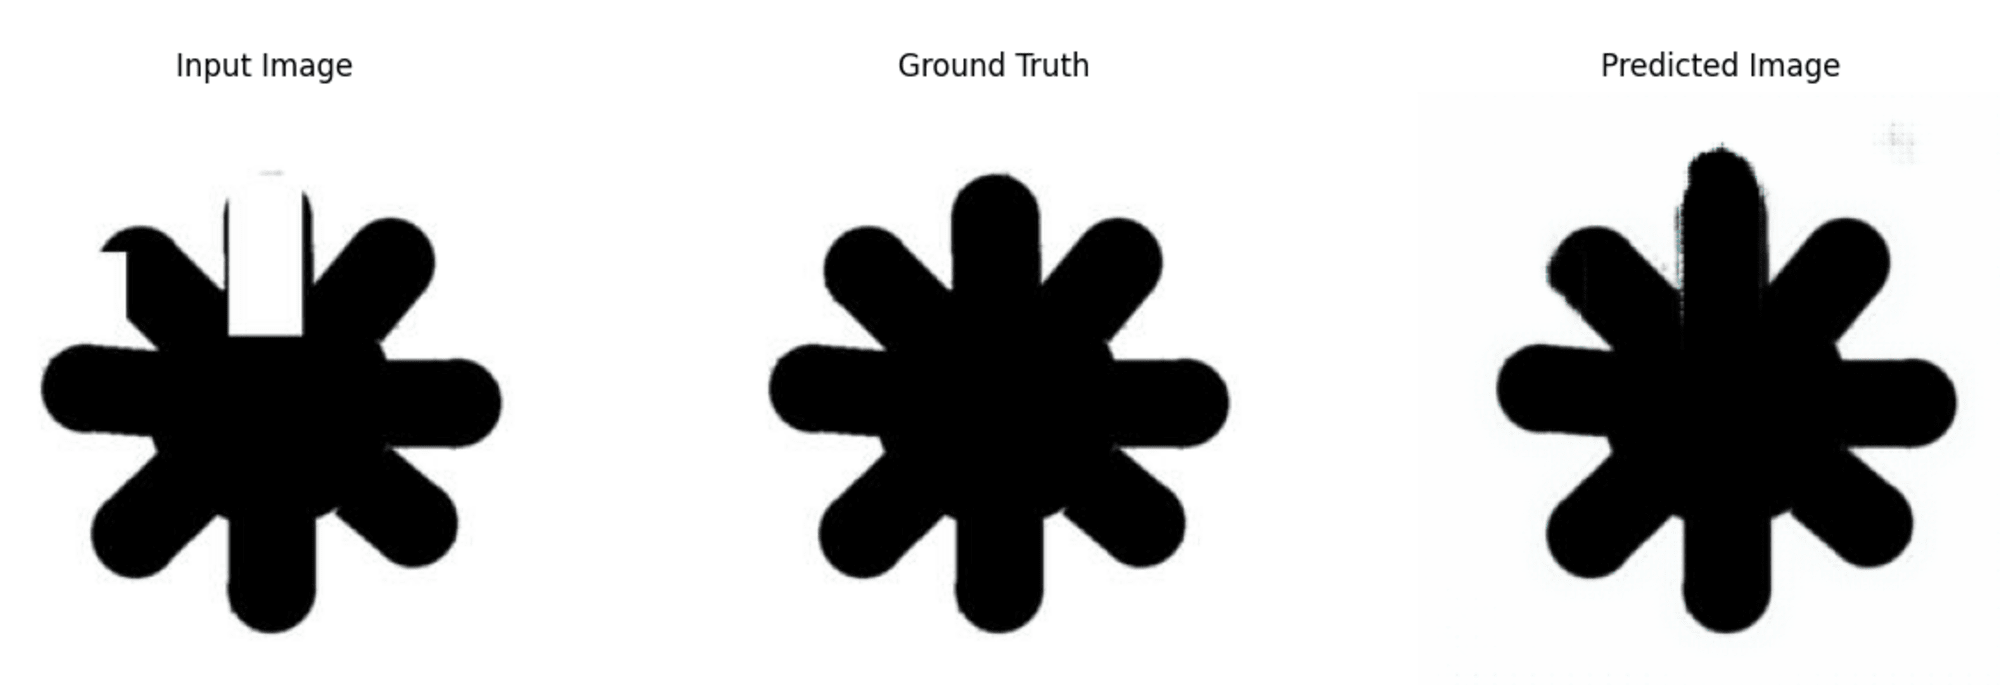
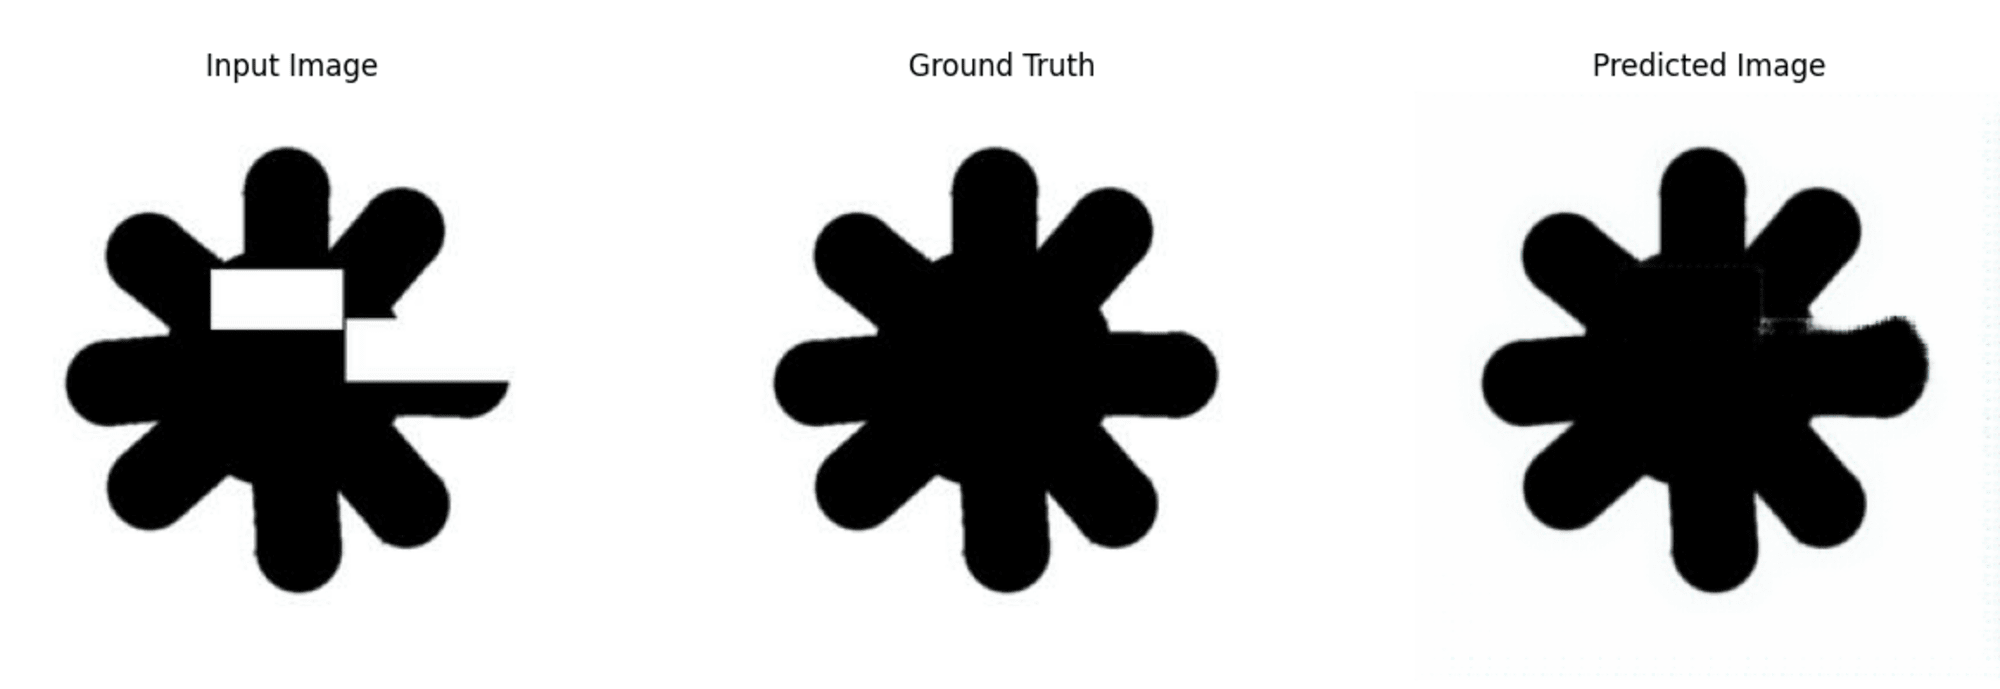
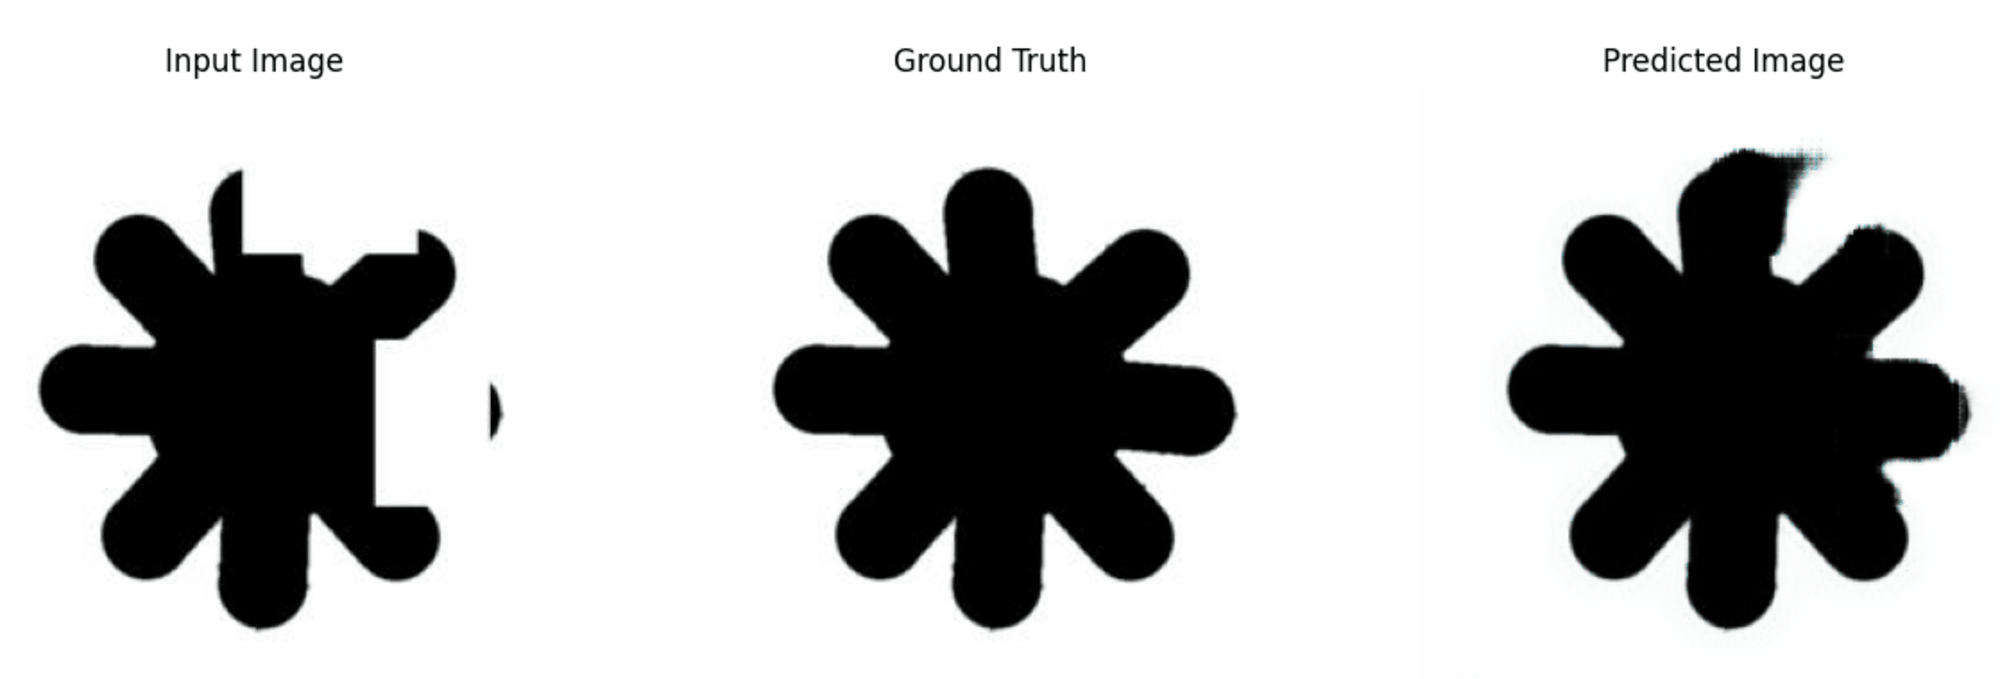
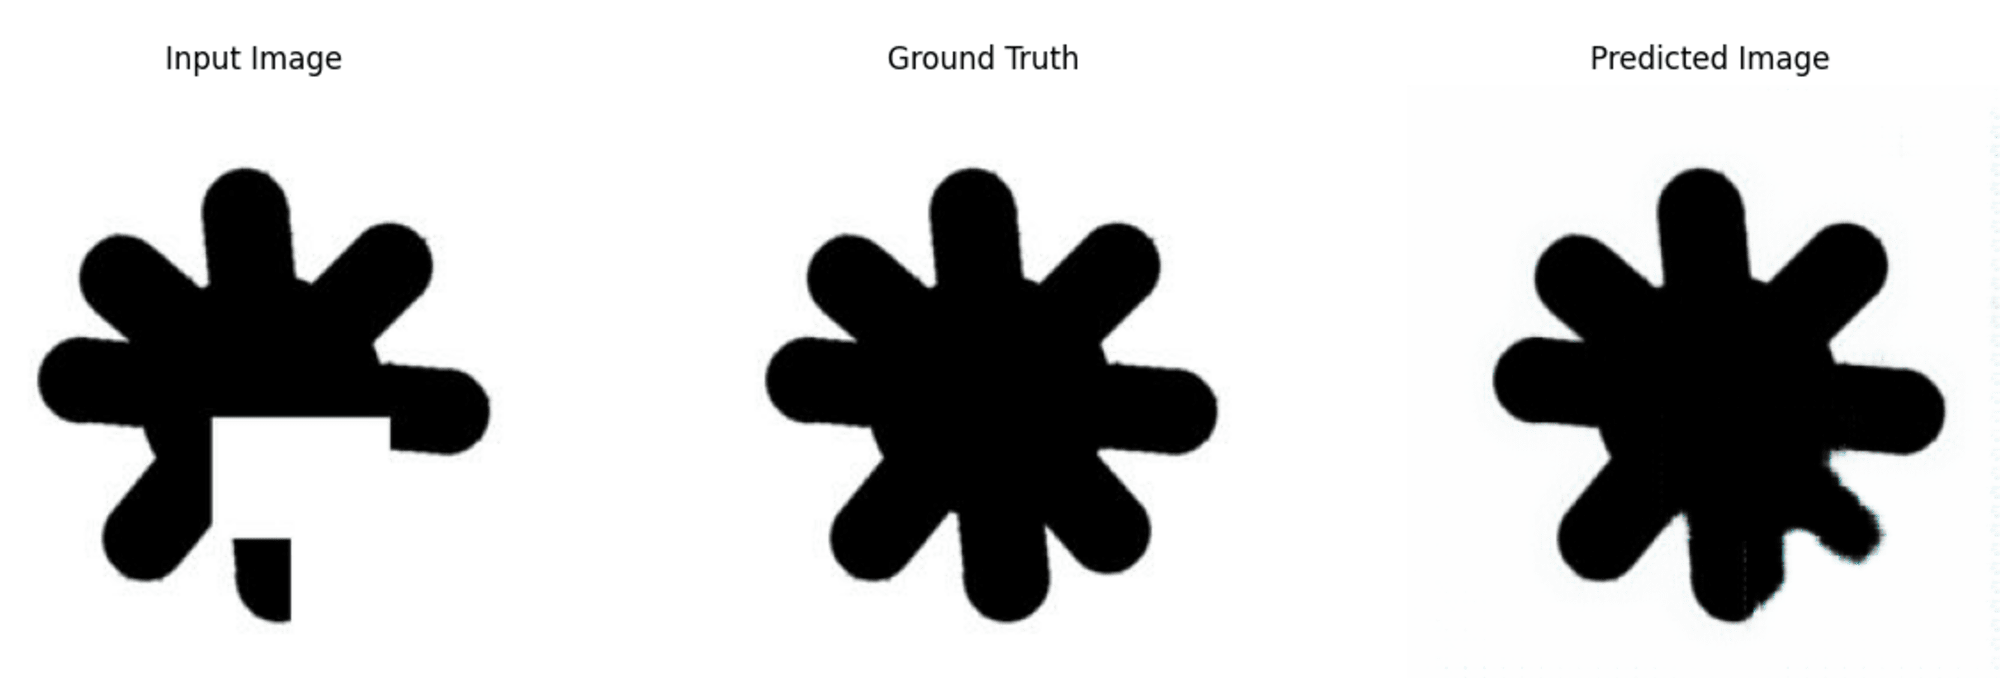
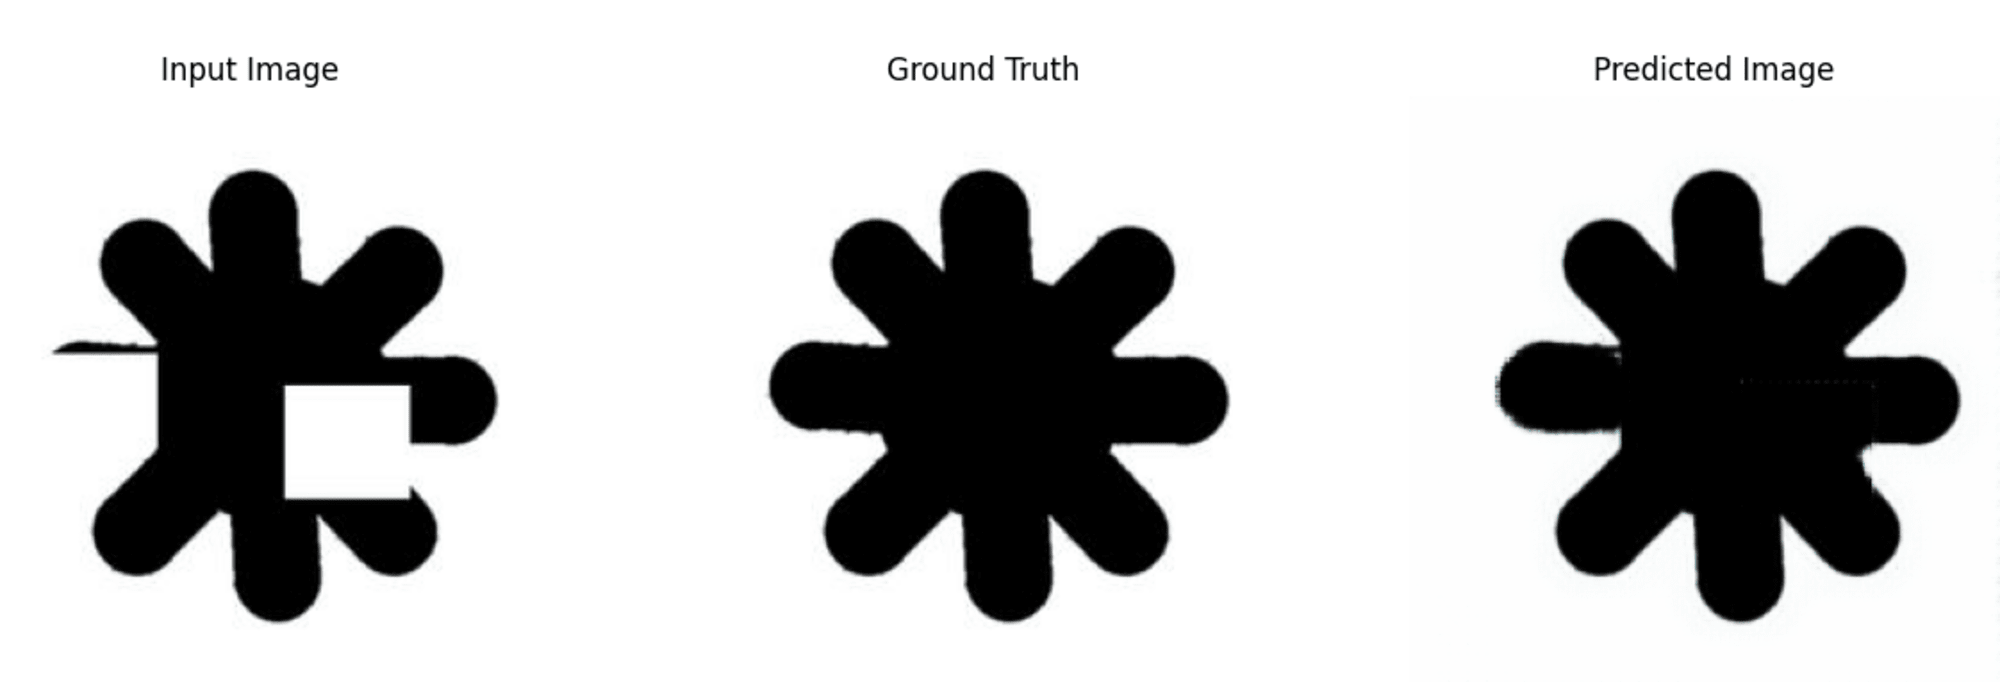
突起部分が完全に失われていたり、くぼみの形状がわからなくなっているものなどは比較的補正が難しそうですが、全体的に期待される正解画像をうまく再現できており、良好な補正性能を示していると言えそうです。
まとめ
本記事では、cGANを利用したPix2Pixアルゴリズムを応用して、欠損のある画像を補正する機械学習モデルを作成する為の手順について順番に解説しました。
データの事前準備に少々手間はかかりますが、特にデータの工夫やパラメータチューニングを実施することなく比較的良好な結果が得られており、実用の可能性を感じることができました。
最近は大規模な基盤モデルによる解決が主流に見えますが、課題に合わせて様々な方策を引き出しとして持っておくことも重要であると感じました。
随分ニッチな課題設定ではありますが、参考になれば幸いです。


