Enhancing Customer Service Efficiency with Macros: Automating Inquiry Responses in Zendesk!
この記事は公開されてから1年以上経過しています。情報が古い可能性がありますので、ご注意ください。
Introduction.
In this blog post, we will guide you through the process of creating a macro in Zendesk. Macros are predefined actions that help automate repetitive tasks, making your customer service more efficient and consistent.
The macro we will create in this tutorial will be used upon completion of an inquiry response. It will display a message "Thank you for your inquiry" in the comment field and set the ticket status to "Resolved".
Macros Explained!
A macro is a prepared response or action that an agent can apply to a ticket . Macros contain actions that can update ticket properties. Admins, and agents in custom roles with permission, can create shared macros to be used by all agents or groups of agents . The maximum number of shared macros per account is 5,000.
Getting Started with Macros!
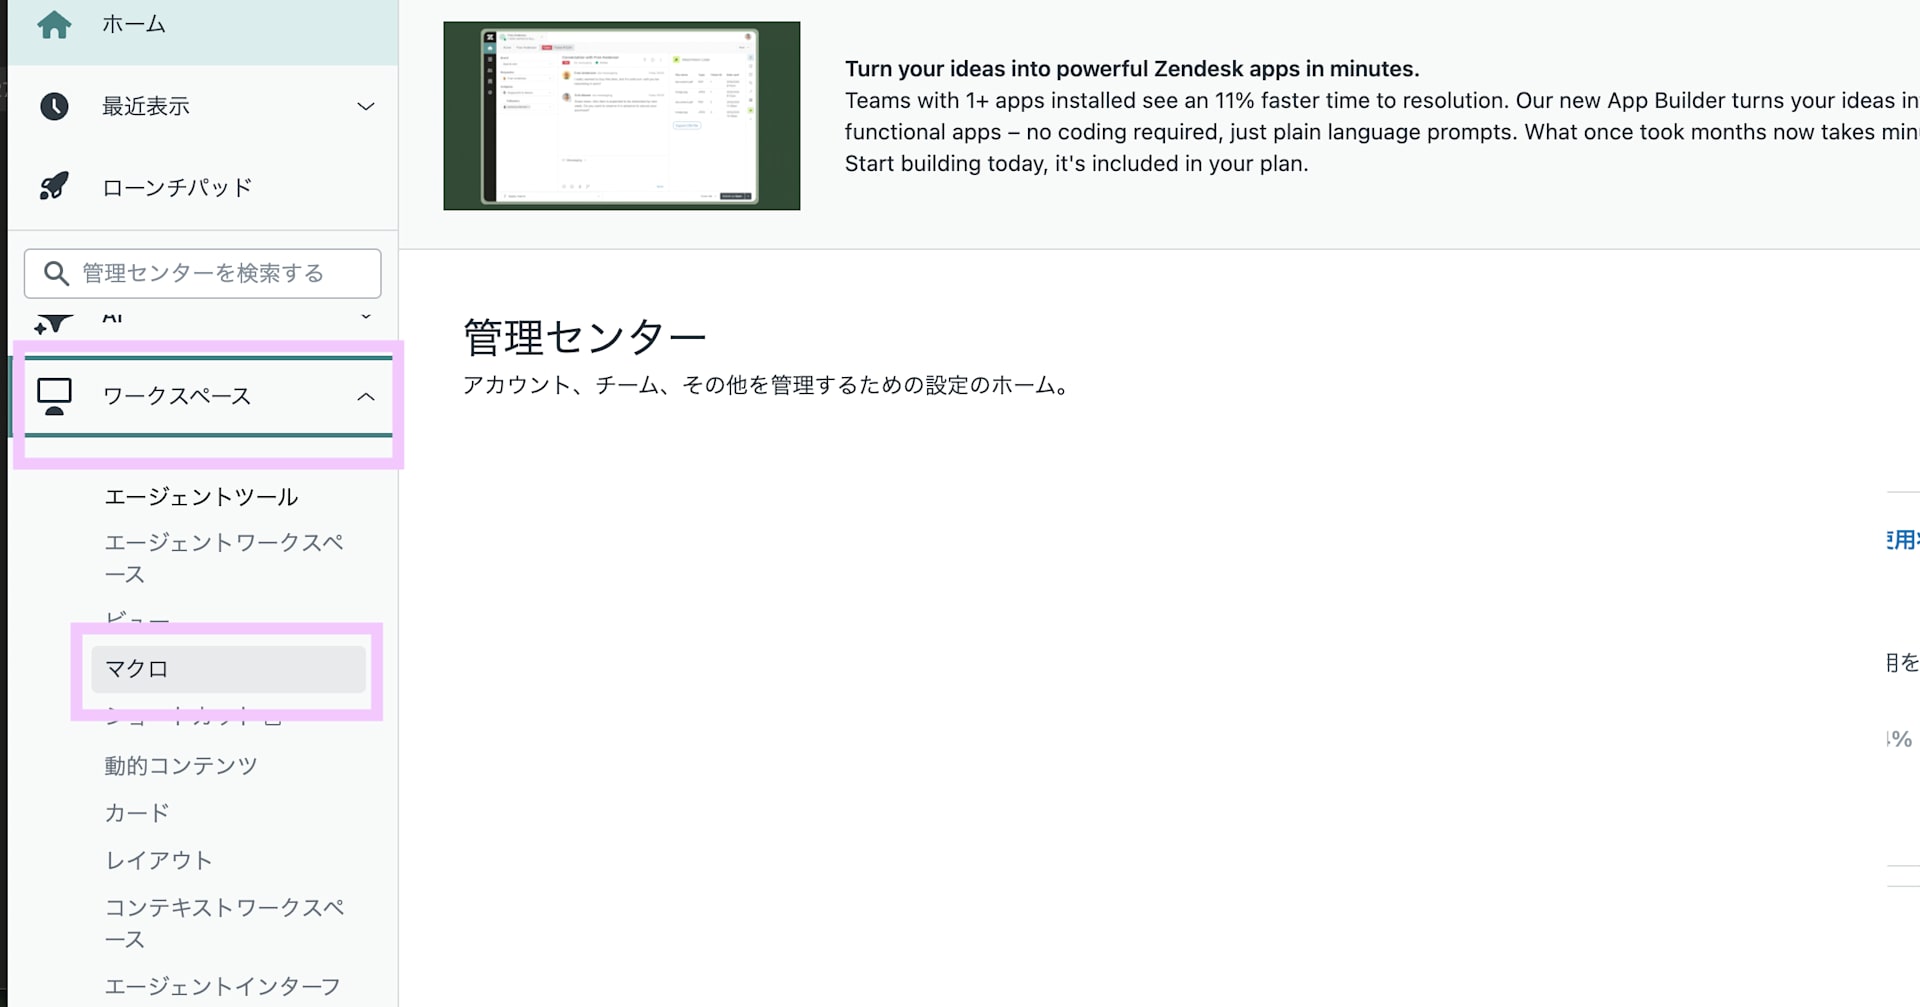
Step 1: Navigating to macros
First, you need to navigate to the Macros section in Zendesk:
- Click on
Admin(the gear icon) in the sidebar. - Under the
Managesection, click onMacros.

Step 2: Creating a New Macro
Now, let's create a new macro:
- Click on
Add Macro.

- In the
Titlefield, enter a name for your macro. This should be something descriptive, like "Thank You and Resolve".

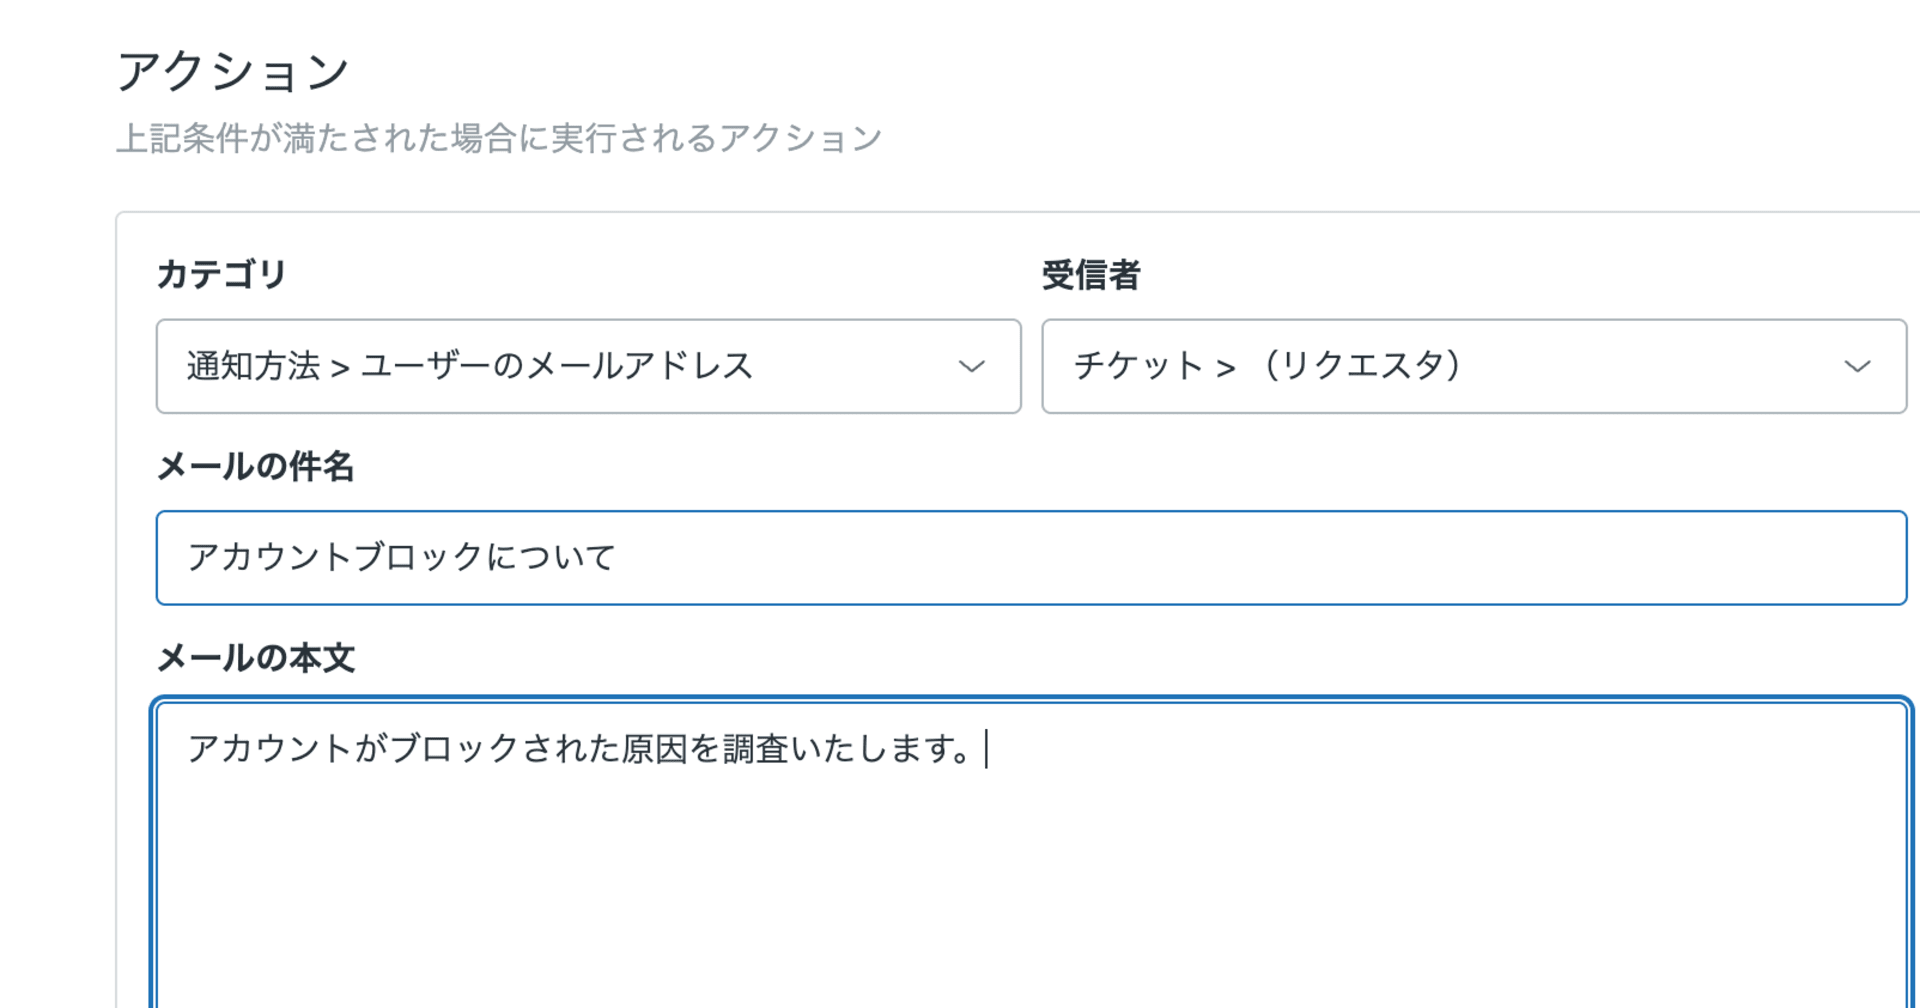
Step 3: Setting Up Macro Actions
Next, we will set up the actions for our macro:
- Under
Actions, click onAdd Action. - In the dropdown menu, select
Comment/description>Set comment/description.

- In the text field that appears, type "Thank you for your inquiry".
- Click on
Add Actionagain. - This time, select
Ticket Status>Set status. - In the dropdown menu that appears, select
Solved. 
Step 4: Saving the Macro
Finally, let's save our macro:
- Click on
Create.

And that's it! You've created a macro that will automatically add a "Thank you for your inquiry" message to the comment field and set the ticket status to "Resolved".
Step 5: Using the Macro
To use the macro, follow these steps:
- Open a ticket.
- Click on
Apply Macro. - Select the "Thank You and Resolve" macro from the list.

- The comment field will be populated with the message, and the status will be set to "Resolved".
- Click
Submitto save the changes.

Conclusion.
Leveraging the power of macros in Zendesk offers numerous benefits for customer service operations. They automate repetitive tasks, freeing up agents' time and reducing the risk of errors. This automation ensures a consistent customer experience as all agents use standardized language and procedures, fostering trust among customers. Efficiency is significantly increased as agents can focus more on resolving complex issues and providing personalized service, rather than spending time on repetitive tasks.This efficiency also leads to improved response times, enhancing customer satisfaction and helping meet Service Level Agreements (SLAs) and other performance metrics. Moreover, macros help standardize processes across the customer service team, enforcing best practices and leading to improved customer satisfaction and better outcomes. In essence, macros in Zendesk are a powerful tool that can streamline your customer service operations, making ticketing processes more efficient and effective.
Happy ticketing!