
【前編】Amazon RDS for MariaDB ワークショップやってみた
2026.05.01
今回は、こちらのワークショップを実施しました。
ざっくりまとめ
所要時間:40 - 50 分
使用するサービス:Amazon RDS for MariaDB、AWS CloudFormation、AWS Systems Manager
本記事は、以下のステップで MariaDB インスタンスに触れていきます。
- 環境構築
- RDS for MariaDB インスタンスに接続
- RDS for MariaDB インスタンスにデータをインポート
環境構築
-
ここから CloudFormation テンプレートをダウンロードします。
-
CloudFormation のコンソール画面を開き、[スタックの作成] を選択します。
-
[テンプレートファイルのアップロード] を選択し、ダウンロードしたファイル
mariadblab.yamlをアップロードします。
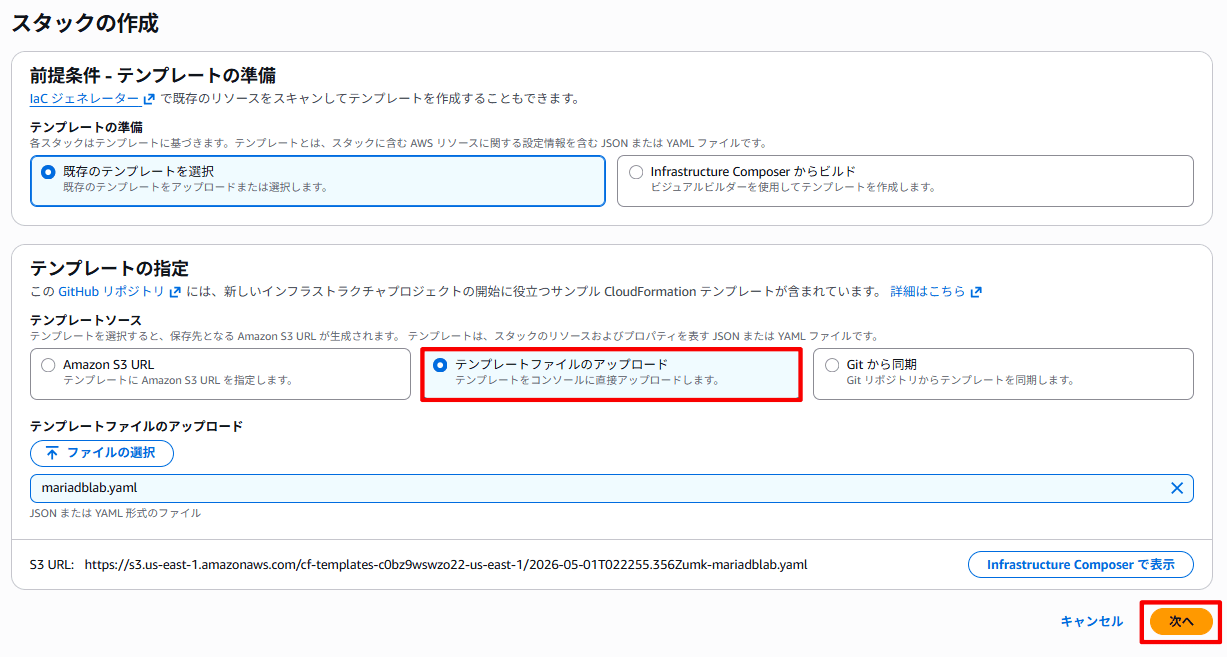
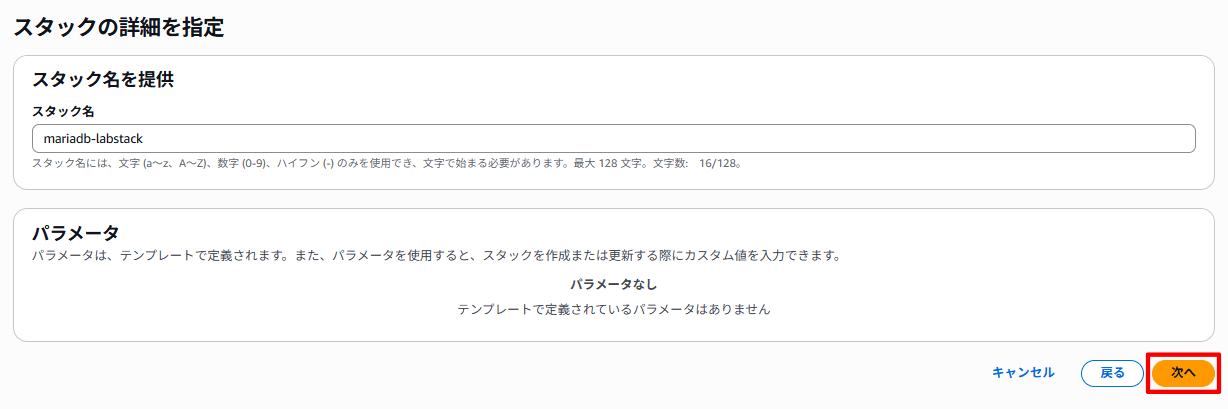
- スタック名「mariadb-labstack」を入力し、[次へ] を選択します。
- スタックオプションはデフォルトのまま、「AWS CloudFormation によって IAM リソースがカスタム名で作成される場合があることを承認します。」にチェックを入れ、[次へ] を選択します。

-
設定を確認し、[送信] を選択します。
-
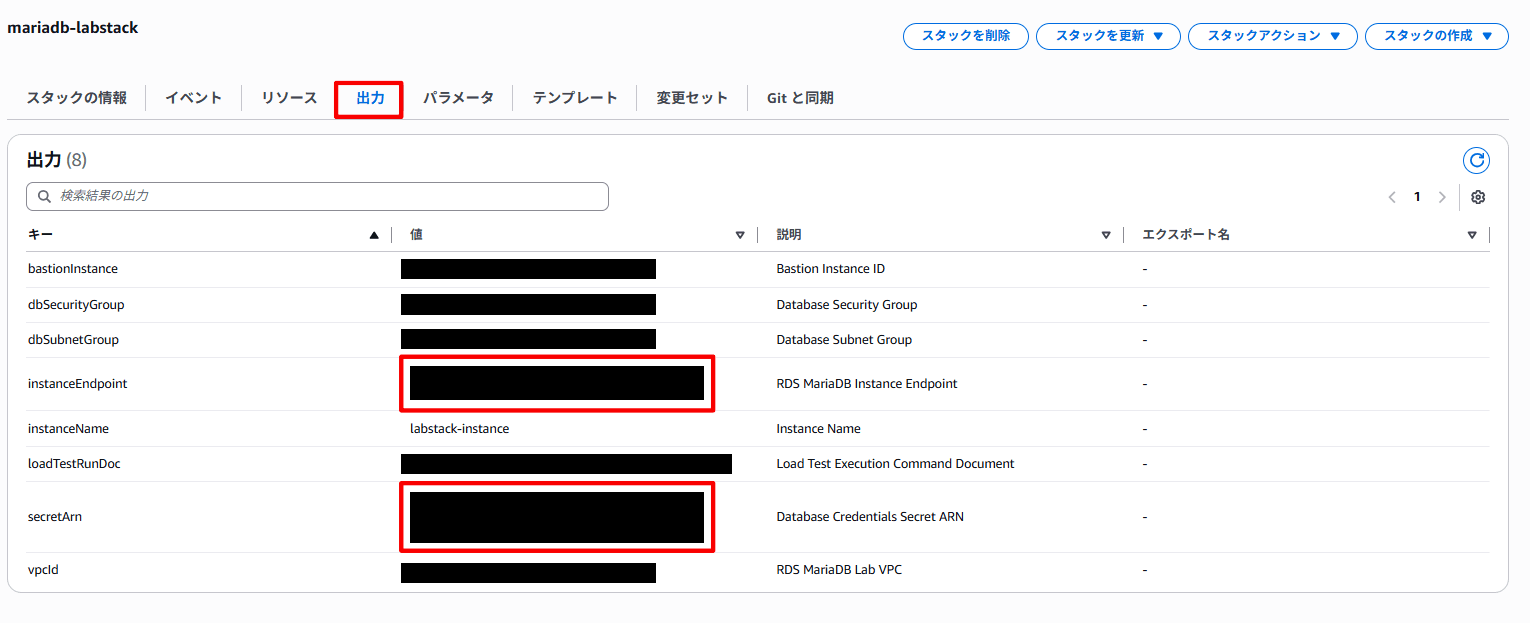
スタックのステータスが [CREATE_COMPLETE] になったら [出力] タブを開き、
instanceEndpointとsecretArnをメモしておきます。
ステップ 1:MariaDB インスタンスに接続
SSM に接続する
-
Systems Manager のコンソール画面を開きます。
-
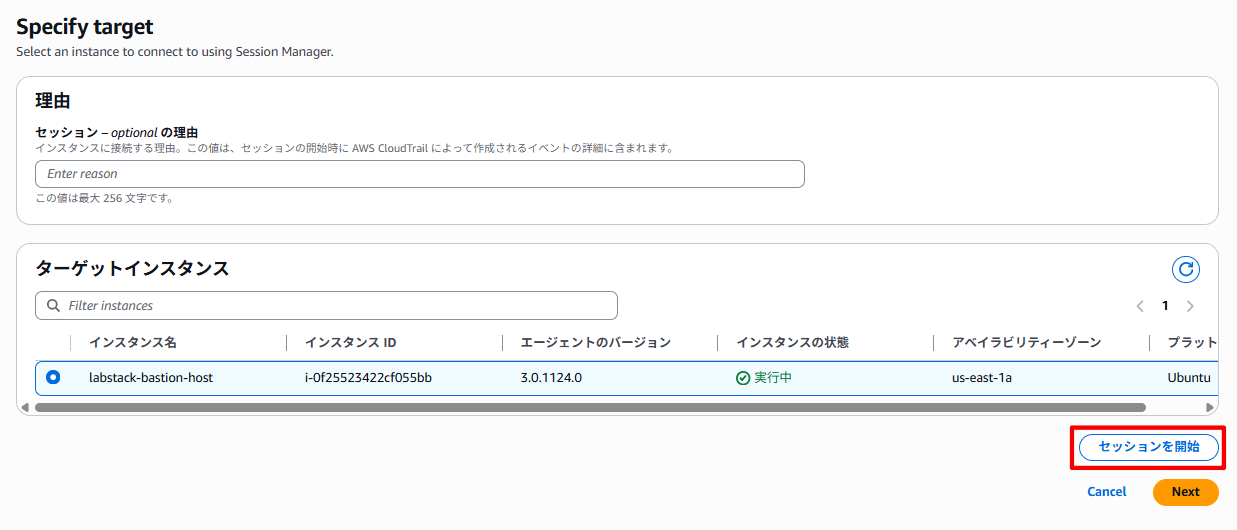
左メニューから「セッションマネージャー」を選択し、[セッションを開始する] を選択します。

- インスタンス名「labstack-bastion-host」を選択し、[セッションを開始] を選択します。
- 以下のコマンドを実行し、
ubuntuユーザーに切り替え、ファイル一覧を表示します。
bash
sudo su -l ubuntu
ls
- 実行すると、以下のファイルが表示されます。
ubuntu@ip-XXX-XXX-XXX-XXX:~$ ls
aws  awscliv2.zip  loadtest.py  proxyfailovertest.sh  samples  sysbench-tpcc
ユーザー名とパスワードの取得
- 以下のコマンドを実行し、ユーザー名とパスワードを環境変数として設定します。
<secretArn> は、先ほど控えておいたsecretArnに置き換えてください。
CREDS=`aws secretsmanager get-secret-value --secret-id <secretArn> | jq -r '.SecretString'`
export DBUSER="`echo $CREDS | jq -r '.username'`"
export DBPASS="`echo $CREDS | jq -r '.password'`"
echo $DBUSER
echo $DBPASS
MariaDB インスタンスに接続する
- 以下のコマンドを実行し、MariaDB インスタンスに接続します。
<name of DB instance> は、先ほど控えておいたinstanceEndpointに置き換えてください。
mysql -h <instance endpoint> -P 3306 -u$DBUSER -p$DBPASS
- 接続に成功すると、以下の出力が表示されます。
ubuntu@ip-XXX-XXX-XXX-XXX:~$ mysql -h <instance endpoint> -P 3306 -u$DBUSER -p$DBPASS
mysql: [Warning] Using a password on the command line interface can be insecure.
Welcome to the MySQL monitor.  Commands end with ; or \g.
Your MySQL connection id is 61
Server version: 5.5.5-10.6.19-MariaDB-log managed by https://aws.amazon.com/rds/

Copyright (c) 2000, 2025, Oracle and/or its affiliates.

Oracle is a registered trademark of Oracle Corporation and/or its
affiliates. Other names may be trademarks of their respective
owners.

Type 'help;' or '\h' for help. Type '\c' to clear the current input statement.

mysql>
- 以下のコマンドを実行し、ログアウトします。
mysql> exit
ステップ 2:データをインポートする
- 以下のコマンドを実行し、
samplesディレクトリに移動し、ファイル一覧を表示します。
bash
cd /home/ubuntu/samples
ls
- 実行すると、以下のファイルが表示されます。
ubuntu@ip-XXX-XXX-XXX-XXX:~/samples$ ls
Changelog      employees_partitioned.sql      load_departments.dump   load_employees.dump  load_salaries3.dump  postgresql        sql_test.sh             test_employees_sha2.sql
README.md      employees_partitioned_5.1.sql  load_dept_emp.dump      load_salaries1.dump  load_titles.dump     sakila            test_employees_md5.sql  test_versions.sh
employees.sql  images                         load_dept_manager.dump  load_salaries2.dump  objects.sql          show_elapsed.sql  test_employees_sha.sql
- 以下のコマンドを実行し、再度 MariaDB インスタンスに接続します。
mysql -h <instance endpoint> -P 3306 -u$DBUSER -p$DBPASS
samplesディレクトリ内のemployees.sqlデータをインポートします。
source employees.sql
- データのインポートが完了すると、以下の出力が表示されます。
+---------------------+
| data_load_time_diff |
+---------------------+
| 00:00:31            |
+---------------------+
1 row in set (0.00 sec)
データを確認する
- 以下のコマンドを実行し、データベースの一覧を表示します。
show databases;
- 実行すると、以下のデータベースが表示されます。
mysql> show databases;
+--------------------+
| Database           |
+--------------------+
| employees          |
| information_schema |
| innodb             |
| mylab              |
| mysql              |
| performance_schema |
| sys                |
+--------------------+
7 rows in set (0.00 sec)
- 以下のコマンドを実行し、
employeesデータベース内のテーブルを確認します。
use employees; show tables;
- 実行すると、以下のテーブルが表示されます。
mysql> use employees; show tables;
Database changed
+----------------------+
| Tables_in_employees  |
+----------------------+
| current_dept_emp     |
| departments          |
| dept_emp             |
| dept_emp_latest_date |
| dept_manager         |
| employees            |
| salaries             |
| titles               |
+----------------------+
8 rows in set (0.01 sec)
- 以下のコマンドを実行し、テーブルの中身を確認します。
SELECT * FROM employees.employees limit 10;
- 実行すると、以下の出力が表示されます。
mysql> SELECT * FROM employees.employees limit 10;
+--------+------------+------------+-----------+--------+------------+
| emp_no | birth_date | first_name | last_name | gender | hire_date  |
+--------+------------+------------+-----------+--------+------------+
|  10001 | 1953-09-02 | Georgi     | Facello   | M      | 1986-06-26 |
|  10002 | 1964-06-02 | Bezalel    | Simmel    | F      | 1985-11-21 |
|  10003 | 1959-12-03 | Parto      | Bamford   | M      | 1986-08-28 |
|  10004 | 1954-05-01 | Chirstian  | Koblick   | M      | 1986-12-01 |
|  10005 | 1955-01-21 | Kyoichi    | Maliniak  | M      | 1989-09-12 |
|  10006 | 1953-04-20 | Anneke     | Preusig   | F      | 1989-06-02 |
|  10007 | 1957-05-23 | Tzvetan    | Zielinski | F      | 1989-02-10 |
|  10008 | 1958-02-19 | Saniya     | Kalloufi  | M      | 1994-09-15 |
|  10009 | 1952-04-19 | Sumant     | Peac      | F      | 1985-02-18 |
|  10010 | 1963-06-01 | Duangkaew  | Piveteau  | F      | 1989-08-24 |
+--------+------------+------------+-----------+--------+------------+
10 rows in set (0.00 sec)
- 以下のコマンドを実行し、
employeesテーブルにレコードを追加します。
INSERT INTO employees.employees (emp_no, birth_date, first_name, last_name, gender, hire_date) VALUES (500000, '1960-03-02', 'Maria', 'Seequel', 'F', '2018-01-01');
- 以下のコマンドを実行し、レコードが正常に追加されていることを確認します。
SELECT * FROM employees.employees WHERE first_name='Maria' AND last_name='Seequel';
- 実行すると、以下の出力が表示されます。
mysql> SELECT * FROM employees.employees WHERE first_name='Maria' AND last_name='Seequel';
+--------+------------+------------+-----------+--------+------------+
| emp_no | birth_date | first_name | last_name | gender | hire_date  |
+--------+------------+------------+-----------+--------+------------+
| 500000 | 1960-03-02 | Maria      | Seequel   | F      | 2018-01-01 |
+--------+------------+------------+-----------+--------+------------+
1 row in set (0.09 sec)
次回
次回は、RDS for MariaDB のさまざまな機能に触れていきます。


