Why does the SSM Run Command fail on my EC2 Windows server?
この記事は公開されてから1年以上経過しています。情報が古い可能性がありますので、ご注意ください。
We have this great post about the steps to aggregate CloudWatch custom metrics of multiple instances using SSM Run Command. As we had an inquiry having problems to configure it and I also found an update, I'm going to follow it up with further details in this article.
How to set up custom metrics of multiple EC2 instances (Windows Server) with Run Command
What's the update?
If you've been using SSM, you might be familiar with the IAM policy called AmazonEC2RoleforSSM, which grants EC2 permissions to use SSM. In the previous post also, this policy is associated with the EC2 instance role.
However, this policy will be deprecated soon and you should instead use AmazonSSMManagedInstanceCore, as stated in the AWS document and the policy's description in the IAM Console. (According to our blog post (Japanese), this new policy seems to have been released around June 2019.)
Summary of the steps
Here I follow up on the steps in the previous post.
Getting Started
- CloudWatch Agent
If you have not installed CloudWatch agent to your target instances, run QuickSetup on SSM Console and check the option, or install it by one of these methods. To install the agent with SSM, the IAM role attached to your instance requires the policy CloudWatchAgentServerPolicy as explained in the document.
- IAM user permission
The IAM user that executes Run Command requires to have the permissions as explained in the document.
Step1. Create Tags for EC2 instances
Add a tag on your EC2 instance so you can run the command to multiple instances at the same time by specifying the tag.
When you run the command on SSM, there are three ways to select target instances. By specifying a tag, all the EC2 instances that have the tag will be the target. If you choose instances manually or choose a resource group, you don't need a tag, so you can skip this step.
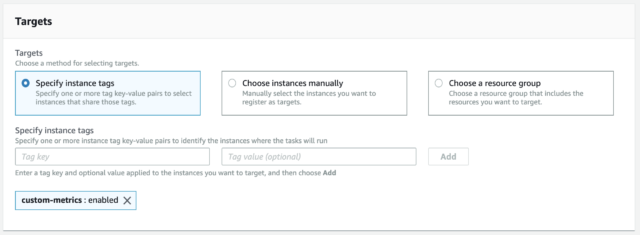
target instances by specifying instance tags
Note that you cannot know which instance becomes the target until you run the command and see the result. For example, when I ran a command with specifying tags and I made a typo in the tag value, the outcome of the command was No Instances In Tag. Though the command was not executed to the instance (because of my typo), the status was still Success.

Succeeded with No Instances In Tag
Step2. Create IAM role
Create an IAM role to use the SSM and execute the command.
If you configured SSM with Quick Setup, you might already have the role for EC2, called AmazonSSMRoleForInstancesQuickSetup. Then you can use it without creating a new role.
As written above, AmazonEC2RoleforSSM is replaced withAmazonSSMManagedInstanceCore. So the policy you need to attach is AmazonSSMManagedInstanceCore, CloudWatchAgentServerPolicy, and a custom policy if you add an output option of S3 bucket when you run the command. Here's the sample custom policy that I tested.
{
    "Version": "2012-10-17",
    "Statement": [
        {
            "Effect": "Allow",
            "Action": [
                "s3:GetObject",
                "s3:PutObject",
                "s3:PutObjectAcl",
                "s3:GetEncryptionConfiguration"
            ],
            "Resource": [
                "arn:aws:s3:::YOUR-BUCKET-NAME/*",
                "arn:aws:s3:::YOUR-BUCKET-NAME"
            ]
        }
    ]
}
Step3. Attach IAM Role for EC2 instances
Again, if you configured SSM with Quick Setup, the role AmazonSSMRoleForInstancesQuickSetup might have been already attached to your instance.
Step4. Execute Run Command
Go to Run Command in the SSM Console, choose the document AWS-ConfigureCloudWatch, set the status "Enabled", specify the custom metrics details in a json format in Properties, and select target EC2 instances.
You can simply copy and paste the sample json in the post, but make sure that the definitions (e.g. the namespace, collected metrics, region etc) are all specified as you wish.
Additionally, you can choose to export the result to S3 bucket or CloudWatch Logs. Remember that you need the policy associated with your EC2 role in order to write to S3. (See Step2)
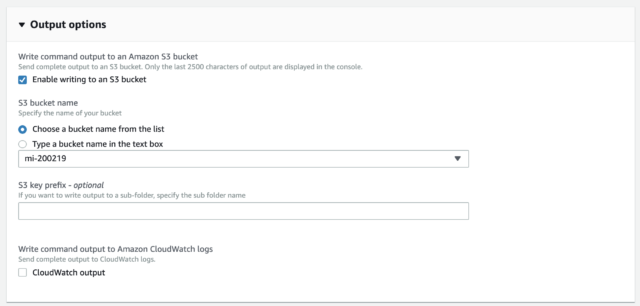
Run Command Output options
If all set correctly, then run the command.
Step5. Check the Custom Metrics
After a few minutes, you'll see the aggregated custom metrics in CloudWatch Metrics.
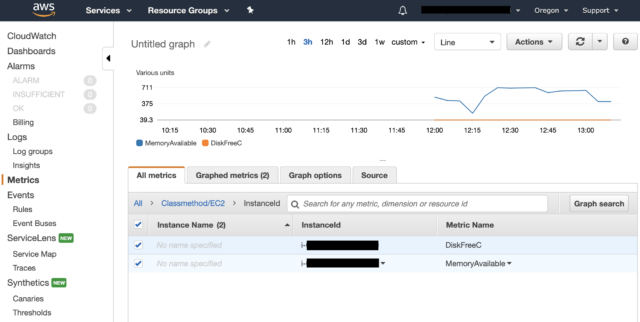
Custom metrics in CloudWatch successfully displayed
Troubleshooting
I set up SSM with Quick Setup, but something is wrong.
If you've done Quick Setup with all default, you'll see two new IAM roles created.
AmazonSSMRoleForInstancesQuickSetup is for EC2 instances to use SSM core functions. It contains AmazonSSMManagedInstanceCore (the policy mentioned above) and should be attached to all instances in the current region unless your EC2 instances have already any IAM role attached. If your instance already has an IAM role, Quick Setup won't change it. You should make sure that the attached role suffices the permission requirements in the document.
AmazonSSMRoleForAutomationAssumeQuickSetup is for SSM to perform actions to your EC2 instances. It's possible to choose an existing role, but you require the service role described in "Details about the Service Role" section in the document, so it's safe to simply choose default here.
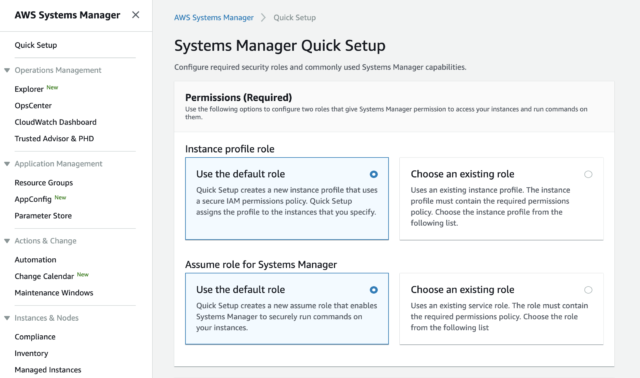
Systems Manager Quick Setup 1
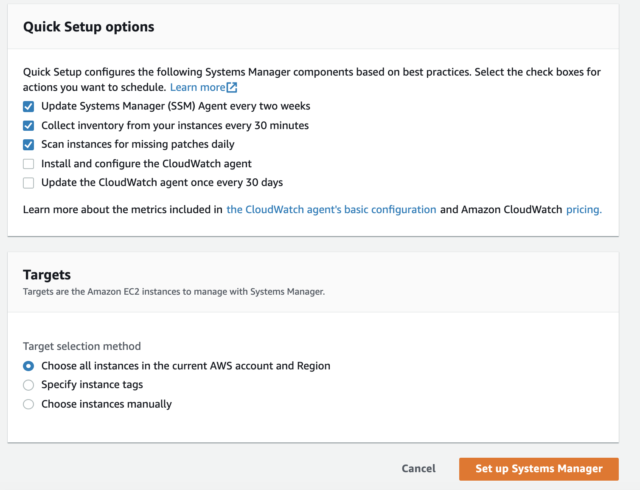
Systems Manager Quick Setup 2
As I wrote in Step2 above, if you either run commands with S3 output options, join EC2 to Microsoft AD, or install/use CloudWatch Agent, you additionally need to attach required policies to the IAM role for EC2.
If you see an error when using SSM initially, it's very likely that the permission is inappropriately configured. Read above carefully and set them straight.
Have you already done the Quick Setup once? Don't worry, you can re-run it again!
The command failed with Access Denied.
You ran command but it failed? Go to the command history, choose the failed command, and click on the name of the target instance. If you see Access Denied in the Detailed Status (and there's no Output), this means the IAM user doesn't have enough permissions to run commands.
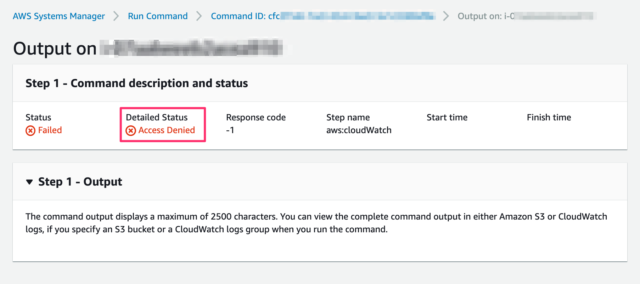
Failed with AccessDenied
You may check this document again and see if the user has the correct permissions. Even if you attached AdministratorAccess policy to the user, any custom policy with Deny statement could prevent those actions. As SSM executes actions on your behalf, you cannot deny access based on the source IP in your IAM policy.
The command succeeded, but I don't see any custom metrics in CloudWatch.
Check the region
This is what happened to me. I made sure all the permissions were correct, but the custom metrics of the namespace "Classmethod/EC2" was not listed in CloudWatch Metrics.
After I examined all the configurations, I noticed that the region specified in the json was different. I tested in eu-west-1 while json declares us-west-2, because I had just copied the sample json in the previous post and hadn't fixed it. I found the metrics were successfully displayed when I switched to us-west-2 region. In case you refer to the sample json, review the contents carefully and update it as you intend.
Install CloudWatch Agent
In case you used SSM's Quick Setup with the default configurations, CloudWatch agent is not installed and configured.
If you go to C:\Program Files\Amazon in your EC2 instance and AmazonCloudWatchAgent doesn't exist, read Get Started and install CloudWatch Agent. Even when the target EC2 doesn't have a CloudWatch Agent, the command will succeed and doesn't show any messages.
I installed CloudWatch Agent using Quick Setup. After a few minutes, Custom Namespace "CWAgent" came up in the CloudWatch Metrics.
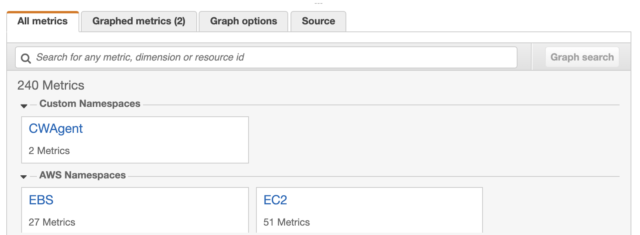
Custom metrics in CloudWatch
If you once succeeded in the command, go to C:\Program Files\Amazon\SSM\Plugins\awsCloudWatch and see if a json file like AWS.EC2.Windows.CloudWatch.json exists. You can see that the file contains the parameters that you specified in the json script, though the format is a bit changed. Then you don't need to run the command again after you install CloudWatch Agent, because it's already successfully configured.
There's no S3 output in my bucket.
Whether or not the command failed to run, you should most certainly see the output when you click on the target instance name in the executed command. Even when you enable the output option and your EC2 role doesn't have enough permissions to do so, the command doesn't show any errors.
Go back to Step2 above, refer to the document and assign the correct permission to access your selected S3 bucket.
Summary
These permissions might be a bit tricky. Review the document and compare it with the configurations in your environment one by one, eventually it'll work like a charm!
I hope this helps somebody's setting up SSM Run Command!


